Download Cellactor
Transcript
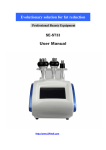
Cellactor THE MOST ADVANCED NON SURGICAL FAT REDUCTION, CELLULITE SMOOTHING AND SKIN TIGHTENING SYSTEM OPERATOR’S MANUAL Serial Number: 00000 Guangzhou HEMS Technology Co., Ltd 1 Copyright © 2013, Guangzhou HEMS Technology Co., Ltd. No part of this manual may be reproduced or copied in any form by any means graphic, electronic or mechanical, including photocopying, typing, or information retrieval systems - without written permission of HEMS Company. System specifications and the information contained in this document are subject to change without notice. All rights reserved. Guangzhou HEMS Technology Co., Ltd., its logo, ESWT™, Cryo Cavitation™, Dermolift RF™, Pixel RF™, Oxygen Peel™, RSWT™, IBelle™, Dermolipo RF™, Lipo Electromagnetic™, Acoustic Wave™, ShockWave™, PEMF™, Cyclone RF™, CrioWave™, Cryolipo™ are the trademarks of HEMS Technology, Ltd. Guangzhou HEMS Technology Co., Ltd Email: [email protected] Office ADD: Rm508A, Chuangzhan Business Building, Rongxi Street, Baiyun Guangzhou, China Tel: +86-20-22847317, 22847318 Fax: +86-20-22847315 Factory ADD: Floor 1-4, No.38 Jiaoxin Village, Shijing Town, Baiyun District, Guangzhou, China Tel: +86-20-61163310 Warning!!! Before attempting to use or operate the system, operator should read this manual and become thoroughly familiar with all its safety requirements and operating procedures. 2 Contents Chapter 1--------------------------------------------Installation Chapter 2 -------------------------------General Precautions and Cautions Chapter 3 -------------------------------------------Operating Instructions Chapter 4 -------------------------------------------After Sale Service Chapter 5 -------------------------------------------Engineering Drawing Chapter 6 -------------------------------------------Technique Data 3 Structure of Cellactor: Chapter 1 Installation Before the System leaving factory, the HEMS Company will do the best to protect the equipment during transportation. System transportation is carried out by third party, not by HEMS Technology Co., Ltd. NOTE Any damage to the packaging or to the system found prior to opening the package should be reported to HEMS Company by photos and to the insurance carrier. Unpack the System The system is delivered in a Honeycomb Box Cut the bandage and open the Box Cover while it is lying horizontally on the floor; Take out the package box of probes and cables; Pull the system out of Box Remove the Foam Brace(Left and Right) and Protection bag Locate the system carefull 4 Equipment List Please carefully check the following illustration showing that the Cellactor System should include: Main Unit Applicators (Fixel RF Therapy, Dermolipo RF80 and RF40) Screws Input Power Cable Fuse Foot Switch Operator’s Manual Applicator Installation 1. PIXEL RF handle for skin treatment, different sizes of tips can use alternately 2. Dermolipo RF80. It is specifically designed to treat the abdomen, buttocks and thighs for the improvement of skin laxity, cellulite, body shaping and circumferential reduction. 3. Dermolipo RF40. It is specifically designed to treat smaller body areas such as the arms, shoulders and knees for the improvement of skin laxity, cellulite, body shaping and circumferential reduction. 5 Chapter 2 General Precautions and Cautions The following precautions, cautions and warnings must be observed for the safe use of the system. Precautions Operator should read this manual thoroughly before attempting to operate the system. Probes must be kept clean at all times. The system is heavy and may cause injury if proper care is not used when moving it. The system is well balanced and is designed to be moved, but should always be moved carefully and slowly. Never pull the system by the probes. Cautions Only after HEMS’ authorization, then may service the system. This includes making internal adjustments to the power supply,Cellactor system, probes, etc. Maintenance performed by the operator must only take place when the system is shut down and disconnected from the electrical power source. Performing maintenance procedures with the system powered-up can be hazardous to the operator and/or destructive to the system. Always turn off the system when it is not in use. Never leave the system in Pause Mode and Start Mode unattended. Never press the Start Softkey unless the probe is safely oriented at a specific and intended target. The probes must always be visually inspected before treating the patient. If any damage is apparent, do not use the probes. Never leave the system turned on, open or unattended during system maintenance. NOTE Please adjust the emitting energy step by step as per the communication with client. Explosion and Fire Hazards The system is not suitable for use in the presence of flammable mixtures with air or oxygen. Do not operate in the presence of volatile solvents such as alcohol, gasoline or other solvents. Do not use any flammable substances such as alcohol or acetone in the preparation of the skin for treatment. If necessary, use soap and water to clean skin before treatment. If alcohol is used to clean and disinfect any probe, allow it to dry thoroughly before operating the system. Flammable materials must be kept at a safe distance from the system. 6 Chapter 3 Operating Instructions Prepare the System for Operation 1. Check the connection of the system and the AC mains power. 2. Ensure that the applicators are connected correctly. Operating the System Turn on the system and the display will be light on. ↓ Enter into Logo interface ↓ 7 Authorization Code interface: The initial password is 000 000 ↓ ↓ 8 Touch each applicator icon and enter into each applicator treatment interface ↓ Enter Into Dermolipo RF80 Treatment Interface 1. Treatment Time icon minute a interval. 2. RF Power icon every 5% a interval. : Touch : Touch and and to set the treatment time, every 1 to set the RF power from 0 to 100%, 9 3. Vacuum Power icon (default 40Pa): Touch and to set the Vacuum power from 0 to 100%(80 Pa), every 5%(1Pa) a interval. (Default is 40Pa) 4. Motorised Rolling Working Modes icon :Touch and to set the Mode 0 to Mode 4. Mode 0: Suction continuously Mode 1: Suction 1 Second and then relax 1 Second Mode 2: Suction 2 Seconds and then relax 1 Second Mode 3: Suction 3 Seconds and then relax 1 Second Mode 4: Suction 4 Seconds and then relax 1 Second 5 RF Frequency icon : Touch 0.8Mhz,2.0Mhz and Mix-Frequency. and to choose the RF frequency: 6. RF Active Time icon : Touch 100ms to 900ms (every 100ms a interval). and to select the active time from 7. RF Rest Time icon : Touch 900ms (every 100ms a interval). and to select the rest time from 100ms to 8. Motorised Rolling Working Modes: : Slimming down fat cells treatment : Smoothing cellulite treatment : Stretch mark treatment : Re-firming the skin treatment Note: When you use RF function, you have to press the foot switch, thus it works. (Suitable For The Operation of All The RF Handles) 10 Enter Into Dermolipo RF40 Treatment Interface 1. Treatment Time icon minute a interval. 2. RF Power icon every 5% a interval. : Touch : Touch and and to set the treatment time, every 1 to set the RF power from 0 to 100%, 3. Vacuum Power icon : Touch and to set the Vacuum power from 0 to 100%(80 Pa), every 5%(1Pa) a interval. (Default is 40Pa) 4. . Motorised Rolling Working Modes icon :Touch and to set the and to set the Mode 0 to Mode 4. Mode 0: Suction continuously Mode 1: Suction 1 Second and then relax 1 Second Mode 2: Suction 2 Second and then relax 1 Second Mode 3: Suction 3 Second and then relax 1 Second Mode 4: Suction 4 Second and then relax 1 Second 5. Motorised Rolling Working Modes icon Mode 1 to Mode 4. 11 :Touch : : Slimming down fat cells treatment : Smoothing cellulite treatment : Stretch mark treatment : Re-firming the skin treatment 6. RF Frequency icon : Touch 0.8Mhz, 2.0Mhz and Mix-Frequency. and 7. RF Active Time icon : Touch and 100ms to 900ms (every 100ms a interval). 8. RF Rest Time icon : Touch 900ms (every 100ms a interval). and 12 to choose the RF frequency: to select the active time from to select the rest time from 100ms to Fractional RF Handle operation interface 1. Treatment time icon 2. RF power icon :Touch : Touch and and to adjust treatment time to adjust RF power from 10% to 100% 3. RF Frequency icon : Touch and to choose the RF frequency: 0.8Mhz, 2.0Mhz and Mix-Frequency. 4. Active icon 100ms to 900ms 5. Rest icon 6. Return icon 7. Start icon 8. Pause icon : Electrophoresis power output time, can be adjusted from : E- power rest time, can be adjusted from 100ms to 900ms : Return to main function operation interface : Sart the treatment : Pause the treatment 13 Enter Into Tools Interface ↓ Touch icon and enter into each function treatment time interface ↓ 14 Touch and enter into modify passcode interface ↓ 15 Treatment Protocols For Body Treatment Areas Cautions! No mode or button except power level control button can be changed when start button is on. Treatment Protocols RF Roller Vacuum Treatment Frequency: 2 Times/Week, 1-30 Min RF Treatment Frequency: 2 Times/Week, 1-20 Min Warning!!! Before press the START button, apply oil (Not Gel or Cream, to avoid blocking when use the vacuum function) over the area to be treated. Slide the probe slowly. Adjust the emitting energy step by step as per the communication with client. For abdomen treatment, must avoid the navel. 16 Chapter 4 After Sale Service Warranty Coverage HEMS warrants defects in materials and workmanship for a period of 1 year from the date of original purchase. HEMS will repair these products at no charge or refurnish the parts if it has any abnormal condition. Exclusions This warranty is void and invalid in case of ; Damage caused by accident, abuse, misuse or misapplication, it will be repaired with repair fee. Damage caused by service performed by anyone who is not technician or qualified by manufacturer. A product or part that has been modified without any permission of manufacturer. A Product that has no serial number. Maintenance HEMS provides lifetime maintenance. Only charge the cost price for replacing the component. NOTE After treatment, keep the power on about 3 minutes to make inner board cooling. Please keep equipment in the shade, avoiding direct lay of light. Don’t drop the equipment & keep it out of any shock. Clean probes after use. Moving the equipment, be careful not to drop applicators. 17 Chapter 5 Engineering Drawing The Engineering Drawing guides to check and repair the system. When the system meets problem, please take the photos and give the feedback to HEMS Technology by email, HEMS will handle the problems as soon as possible. Fuse Replacement Turn off the system and disconnect the power cable from the outlet. Unplug the power cable from the power cable connection port on the service panel. Remove the fuse housing as shown in Figure . Remove the burnt fuses from the housing and replace them with the new ones. Make sure that the fuses fit snugly within the fuse housing. Insert the fuse housing into its receptacle and push it in until it snaps into place. Connect the power cable to the system and to the mains outlet. Turn on the system and verify that it is functioning properly. Caution Make sure that the type and rating of the new and the replaced fuses match. Always replace both fuses at the same time. Filter Cleaning 18 Chapter 6 Technique Data Model Number Display Cellactor 7' Color Touch Screen Power Supply AC110/240V, 50/60HZ Radio Frequency RF Frequency 0.8Mhz, 2.0Mhz and Mix-Frequency Vacuum Range 650 mmHg Shock Wave Therapy Series: 19 Thanks for choosing our product! 20


