1
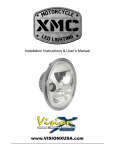
VISION X OPTIMUS SINGLE KIT
MOUNTING INSTALLATION
1)
Determine where the light/lights will be placed
2)
Hold mounting bracket with light to desired mounting surface. Using a marker
or pick tool, mark the bolt hole on the desired mounting surface
3)
Set the light aside. Find the center point of the hole you have marked out and
(M1)
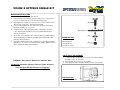
drill out a large enough hole to fit the 5mm bolt [Part M1]
4)
Remove the Mounting Bracket from Light by unscrewing the (2) 5mm Allen
Head Bolts [Part M4], one on each side
5)
Set Bracket down on Desired Mounting Surface, Lining up the Hole in the
(Mounting Bracket)
center of Mounting Bracket with the Hole you just Drilled, Slide 5mm Bolt
[Part M1] through both
6)
7)
On the other side of Mounting Surface slide 5mm Washer [Part M2] and 5mm
(M2)
Nylock Nut [Part M3] onto 5mm Bolt. [Part M1] Tighten Nut [Part M3] & Bolt
MOUNTING KEY
[Part M1] to Desired Tightness
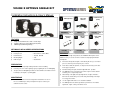
Part (M1) Bolt (5mm)
Hold Light in Mounting Bracket while screwing in the (2) 5mm Allen Head Bolts
Mounting Bracket
[Part M4], one on each side. Use 5mm Allen Key [Part M5] to tighten both 5mm
Part (M2) Washer
Allen Head Bolts [Part M4] to Desired Tightness
Part (M3) Nut (5mm)
(M3)
LIGHT ANGLE ADJUSTMENT
1)
WARNING: Bolts, Nuts, & Washers are Stainless Steel.
Do Not Use Pneumatic or Electric Tools to Tighten & Loosen
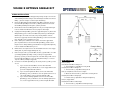
Use the 5mm Allen Key [Part M5] to loosen each of the Allen Head Bolts
[Part M4] on either side of the light.
2)
Adjust the light until you have your desired angle.
3)
Then, tighten the Allen Head bolts [Part M4] to hold the desired position.
or the Hardware Will Permanently Lock Together
(M4)
Adjustment Key
Part (M4) 5mm Locking Bolt
(Mounting Bracket)