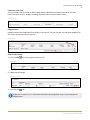
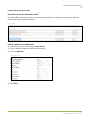
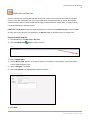
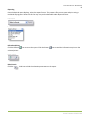
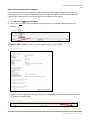
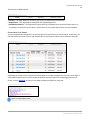
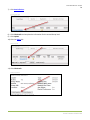
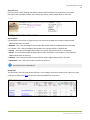
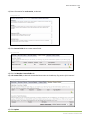
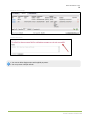
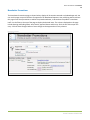
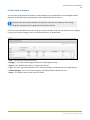
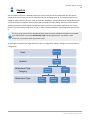
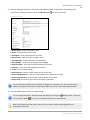
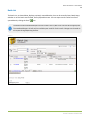
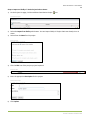
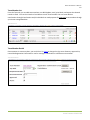
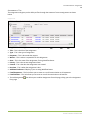
1
Arena User Manual Welcome to Arena, the Power of Community .............................................................................................. 5 Manual Notes ............................................................................................................................................... 6 Arena’s Home Page ....................................................................................................................................... 7 Quick Search ................................................................................................................................................. 8 Membership................................................................................................................................................ 11 White Pages ............................................................................................................................................. 11 Viewing a Record ..................................................................................................................................... 14 Add New Family ....................................................................................................................................... 40 Person Bulk Update.................................................................................................................................. 49 Merge Members ...................................................................................................................................... 51 Me ........................................................................................................................................................... 53 Active Campaigns ..................................................................................................................................... 54 Metrics..................................................................................................................................................... 56 Public Lists and My Lists ........................................................................................................................... 61 Advanced Public Lists and My Lists ........................................................................................................... 72 Reports .................................................................................................................................................... 78 New Background Check (Optional) ........................................................................................................... 84 Family Registration................................................................................................................................... 92 Mailing ................................................................................................................................................... 103 Groups ...................................................................................................................................................... 122 Group Trees ........................................................................................................................................... 122 Add Registration .................................................................................................................................... 139 Areas...................................................................................................................................................... 145 Reports .................................................................................................................................................. 150 Tags........................................................................................................................................................... 151 Personal Tags ......................................................................................................................................... 152 Ministry Tags.......................................................................................................................................... 152 Serving Tags ........................................................................................................................................... 166 Event Tags .............................................................................................................................................. 171 Volunteer Tracking .................................................................................................................................... 198 Add Volunteer ........................................................................................................................................ 198 Serving Tags ........................................................................................................................................... 199 Volunteer Administration ....................................................................................................................... 199 Arena Premium v2012.1.100 Promotions ............................................................................................................................................... 201 New Promotion Request ........................................................................................................................ 201 Public Calendar ...................................................................................................................................... 203 Web Requests ........................................................................................................................................ 204 Bulletin Requests ................................................................................................................................... 205 Newsletter Promotions .......................................................................................................................... 206 All Promotion Requests .......................................................................................................................... 207 Sports........................................................................................................................................................ 208 Clubs ...................................................................................................................................................... 208 Schedule ................................................................................................................................................ 208 Reports .................................................................................................................................................. 209 Communications ....................................................................................................................................... 210 New Communication.............................................................................................................................. 210 Previous ................................................................................................................................................. 215 E-mail Templates.................................................................................................................................... 216 Approving E-mails .................................................................................................................................. 217 Prayer ....................................................................................................................................................... 219 Add a Prayer Request ............................................................................................................................. 220 Approve Requests .................................................................................................................................. 221 Adding and Approving Answers .............................................................................................................. 222 Adding Comments .................................................................................................................................. 223 All Prayer Requests ................................................................................................................................ 224 Reports .................................................................................................................................................. 224 Web Content ............................................................................................................................................. 225 Polls ....................................................................................................................................................... 225 Classifieds .............................................................................................................................................. 227 Newsletter ............................................................................................................................................. 229 Photo Albums ........................................................................................................................................ 235 E-Cards and E-Invitations........................................................................................................................ 237 Podcast Channels: .................................................................................................................................. 240 Check-In .................................................................................................................................................... 247 Kiosks..................................................................................................................................................... 248 Locations................................................................................................................................................ 250 Attendance Type Categories................................................................................................................... 252 Attendance Types .................................................................................................................................. 255 Arena Premium v2012.1.100 Frequency .............................................................................................................................................. 258 Labels..................................................................................................................................................... 259 Occurrences ........................................................................................................................................... 261 Monitor.................................................................................................................................................. 264 Check-In Themes .................................................................................................................................... 266 Check-In Implementation ....................................................................................................................... 267 Contributions ............................................................................................................................................ 284 Fund Management ................................................................................................................................. 284 Contribution List .................................................................................................................................... 286 Batch List ............................................................................................................................................... 291 Repeating Payments .............................................................................................................................. 293 Pledges .................................................................................................................................................. 298 Pledge Quick Entry ................................................................................................................................. 299 Contribution Analysis ............................................................................................................................. 301 Projects .................................................................................................................................................. 302 Contributions Application....................................................................................................................... 305 Contributions Entry (optional) ................................................................................................................ 312 Batch Summary ...................................................................................................................................... 320 Missions .................................................................................................................................................... 326 Mission Details ....................................................................................................................................... 329 Assignments ............................................................................................................................................. 341 Assignment Types .................................................................................................................................. 342 Assignment Entry ................................................................................................................................... 352 Workflow ............................................................................................................................................... 355 Arena Premium v2012.1.100 Arena User Manual – Welcome 5 Welcome to Arena, the Power of Community Arena is a church ministry system designed to empower your people and your ministries. Arena achieves this by: An easy-to-use and centralized method for your members to contribute (financially and physically) to ministries Keeping accessible, accurate, thorough, and integrated member records Organizing records by levels and layers of grouping schemes Tracking members’ physical and spiritual needs and activities Coordinating ministry events through promotions and Arena-managed websites Providing an effective means of personal and mass communication This makes Arena a true ChMS product. It focuses on Communication, Coordination, Connection, and Creativity. Because the Arena philosophy is people oriented, it begins with the end in mind and not let people slip through the cracks. Open the front door wider and close the back door tight. Take advantage of every touch point with a “wow” experience. Arena empowers you to invest more of your time and talent in the calling, less in the managing. Arena puts the power at your fingertips. Our Mission Arena is a brand name of Shelby Systems, Inc. Shelby Systems, Inc. exists to supply the information technology tools needed to help ministries and other organizations around the world thrive. Trademarks: Certain brand names and product names used in this publication are trade names, service marks, trademarks, or registered trademarks of their respective owners. Shelby Systems, Inc. is not affiliated or associated with any product or vendor mentioned in this publication. © 2006, 2007, 2008 Shelby Systems, Inc. Arena Premium v2012.1.100 Arena User Manual – Manual Notes 6 Manual Notes This manual assumes your Arena Administrator has done all the necessary setup and customizing of respective features to fit the needs of your organization. If this manual speaks to a particular feature or function that is not available to you, see your Arena Administrator. Our goal is for the documentation to be a resource for your organization’s staff and volunteers. The Arena Training department is responsible for Arena documentation and we welcome your feedback! Please email your comments and suggestions to [email protected]. Throughout the manual, the two different note types below are used: These notes denote additional information for the end user. These notes denote tips for the end user. Arena Premium v2012.1.100 Arena User Manual – Arena’s Home Page 7 Arena’s Home Page Arena’s home page consists of several navigation bars. Navigation bars are available to all users, but access to specific features may vary by user. Arena Home Page Top Navigation Bar Filter by Campus (optional) Left Navigation Bar Right Navigation Bar Top Navigation – Click “Arena” in the top left corner of this navigation bar to return to the homepage. Left Navigation – Use this navigation bar to access the primary areas in Arena. Feature access may vary by user. Right Navigation – This navigation bar provides user-specific quick links to Tags, Groups and Assignments, using the subscribe option. Arena Premium v2012.1.100 Arena User Manual – Membership 8 Quick Search Quick Search allows you to quickly search for a person’s record by first or last name, any part or combination of the first or last name, or person id. For easy access, this feature is available throughout Arena. Steps to Find a Person’s Record: 1) Go to Quick Search. One Field Quick Search 2) Enter the desired criteria for the record to which you are searching. Typing a single word will search for last name or previous last name. Typing two words with a space will cause the first part to search for first name and the second part to search for last name. When entering a first name, Arena will search by First Name and Nickname. For example, if you are searching for “Robert,” it will also pull up all records with a nickname of “Bob” in the system. Arena accepts wildcards. Use “ %” in replace of several characters and “_” in replace of any single character. For example J%son, %son, and Johns_n. 3) Click the Go button or press Enter on the keyboard. If the criteria you enter match a single record, the record will display. If the criteria you enter match several records, the multi-person results page will display, as shown below. Search Results Arena Premium v2012.1.100 Arena User Manual – Membership 9 The result of your search will list all names that met the criteria specified on the search page. The Search Results page includes: Member Status Campus, if used Gender Age Home Phone Area, if used The Distance from the person’s main/home address to your organization’s address Small Group status (the Small Group icon will display if in a small group) Class Level (used if your organization requires a specified class be attended prior to membership) Serving status (the Serving icon will display if the person has a Serving Tag, E-mail address. Preferred e-mail, if available. Click the e-mail link to send an e-mail using your default e-mail application. Active and Inactive records may display on the Search Results page. Inactive records are shaded in gray. Click the heading of any column to sort by a single column. An Ascending or Descending icon displays to indicate your sort choice. Clicking multiple times will toggle between ascending and descending. When you hover over a name, as shown below, additional information will display in the person pop-up. Displayed fields vary by organization and by user. Person Pop-up Arena Premium v2012.1.100 Arena User Manual – Membership 10 At the bottom of the Search Results page, the page size default is 20 names per page. You can change the page size to display a greater or lesser number of names. To increase or decrease the number of records to display: 1) Enter the number in the Page Size: box. 2) Press Enter on the keyboard or click the Refresh button. This changed view will apply to all other views for this user, until the Page Size is again changed. Page Size S E L E CTI NG R E COR DS You can select records by placing checkmarks in the boxes to the left of their name or select the box to the left on the Name column heading to select all records on the current page. Once you select the names, you can click one of the icons in the bottom right corner of the page. If you select no records, Arena selects all records across all pages. To select specific records, change the page size so all records display to select specific records. Record Selection The Bulk Update icon allows you to update all the selected records through Person Bulk Update. The Merge Member The Envelope icon allows you to send e-mail to the selected names through Arena Communications. The SMS Message The Word below. icon allows you to merge selected records into one record. icon allows you to send an SMS Message to the selected names. icon allows you to mail merge the selected names with an available document, as shown Mail Merge The Excel icon allows you to export the selected names to Excel. Arena Premium v2012.1.100 Arena User Manual – Membership 11 Membership You can use Arena’s Membership features to enter new individuals and families, or modify existing ones. You can view record details, relationships, and activity. You can also run active calling campaigns and reports, manage Background Checks and bulk mailings, and create lists. White Pages Using White Pages, you can search for a record campus, record status and any additional field. A PPL Y C AMPUS OR R E COR D S T AT US You can search by campus, if applicable, and by record status in addition to one advanced search field. Advanced Search Options A DV ANCE D S E AR CH Click Advanced Search to display additional search criteria options. Advanced Search You can use the % and _ wild cards in these fields. By Member Status You can search for a group of people with a specific Member Status. By Member Status Arena Premium v2012.1.100 Arena User Manual – Membership 12 By E-mail You can search for a person by an e-mail address. You can enter any part of the e-mail address or the complete e-mail address. Example: You can enter the domain, as shown below, or a complete email address. By E-mail You can use the % and _ wild cards in these fields. By Phone You can search for a person by entering any part of the phone number or the complete phone number. Example: If you type ‘901’, the search results display any record that contains these values (i.e., 623-901-0000 or 623-590-1423.To search for a specific area code in this example, enter 901%, as shown below. By Phone By Address You can search for a person by any part of the primary address. Example: If you type ‘rose’ in the search field then the results will display people who live on Rose Garden, Rose Circle, or any address with ‘rose’ in it. Make note of abbreviated addresses such as Trc for Trace. By Address By Proximity You can search for people who have a home address located a specified distance from an entered address. Example: If you want a list of people who live within five miles of your organization or a group leader, then type “5” in the Proximity box and type the address of your organization in the address boxes. The results will show anyone who lives within five miles. If you want a list of people who are exactly ten miles, use the column sort options on the results page. By Proximity Arena Premium v2012.1.100 Arena User Manual – Membership 13 By Tags You can search for a group of people by a Ministry, Serving, or Event Tag. Click the ellipsis icon to search and select a Tag. By Tag By Spiritual Gift You can search for a group of people with a specific Spiritual Gift. Options vary by organization. By Spiritual Gift By Birth date You can search for a group of people by entering a birth date using the calendar or by typing in a birth date in MM/DD/YYYY or MM/DD format. By Birth Date By Login ID and By Alternate ID You can search for a group of people with a specific Login ID or Alternate ID. By Login ID and Alternate ID Records that meet the any single search criteria will display on a Search Results page, as shown previously. Click the name from the Search Results page to view a record. Arena Premium v2012.1.100 Arena User Manual – Membership 14 Viewing a Record A person’s record consists of one page with several tabs. Security settings will determine which tabs display for each user. Person Detail Tabs I NDI V I DUAL I NFOR M AT I ON T AB Person Information This section displays demographic and system information for the current person. Only populated fields display when not in edit mode. Personal Information Person ID/Foreign ID (Foreign ID = Shelby Name ID if synchronized with Shelby Systems v5 software) SSN (Encrypts the first 5 digits) Member Status Record Status Campus, if available Staff Member First, Middle, Nick and Last Name Previous Last Name, if applicable Birth Date Age (Listed in years/months/days) Gender Marital Status Anniversary Date (Wedding Anniversary) Medical Info Date Added (to Arena) Date Modified Date Last Verified (Click the Verify link to update to confirm the record is correct. Arena Premium v2012.1.100 Arena User Manual – Membership 15 Family Information This section lists a person’s spouse and/or children, their family role and membership status. Family Information Relationships The Relationship section allows your organization to recognize relationships outside of the immediate family. Relationships If your organization uses Arena Check-In, any Relationship Type containing the phrase "can checkin" (case insensitive, no quotes) will permit this action. If no Relationship Types exist, see your Arena Administrator. Steps to add a Relationship: 1) Click the Edit link for this section. 2) Click the [Select Person…] link to bring up the quick search pop-up window. Adding a Relationship 3) Search for an existing record. 4) Click the box to the left of the name. Person Select 5) Click the Select button. This will populate that name into the Name field in the Relationship section. Arena Premium v2012.1.100 Arena User Manual – Membership 16 6) Select a Relationship from the drop-down list. Selecting a Relationship 7) Click Done. The inverse of this relationship will automatically display on the other person's record. Peer Network This section lists the names of persons, scores, and a trend up icon or trend down icon, which represents the most recent connection trends for the person with other existing records, as shown below. Click View Details… to view all connections to the person. Peer Network scoring is calculated based on the Relationship scale setting in Groups and Tags to which the people belong. Peer Network Contributions Information This section contains default fields used for Contributions. Contribution Information Last Contribution Date—This is the date of the last processed contribution. Contribute Individually—Check this box to indicate if the person contributes individually. Leave blank if contributing with a spouse. Print Statement—Check this box to produce a printed contribution statement. Email Statement—Check this box to e-mail contribution statement. PIN Number—Enter a PIN number (up to 10 characters), to e-mail a Contribution statement. Envelope Number—Click Assign to automatically assign the next sequential envelop number. When initially assigning an envelope number, it has to be set to be included. Once you assign a number, you can uncheck the "Include on Envelope" checkbox. Arena Premium v2012.1.100 Arena User Manual – Membership 17 Check-In This section contains default fields used to record special information for this person you may need during Check-In. Check-In Photo This feature allows you to upload a single photo for this member. The photo sizes must be at least 200 x 200 pixels for the pictures to display properly. Adding a New Photo Updating a Photo Steps to Add a Photo: 1) Click the Update Photo… link. 2) Click the Browse button. 3) Find the photo and click the Upload button to save. Counseling This section allows you to view counseling notes entered on the Counseling tab of the Person Detail page. Counseling Summary Arena identifies records with an active Counseling note with the designated [R]. Counseling Annotation Arena Premium v2012.1.100 Arena User Manual – Membership 18 Phones This area shows the phone numbers for this person and those numbers with SMS available. Phone Information The icon indicates you can send an SMS (Short Message Service). If you click the Communication page opens. icon, a new Steps to Update or Add a Phone Number: 1) Click the Edit link for this section. 2) Enter the phone number in the first field, an extension number in the second field (if applicable), indicate if unlisted or is SMS capable, and select the SMS provider. No formatting is necessary when entering 10digit phone numbers. They will automatically format when you press Tab. You may want to format international numbers. If you select SMS, a provider is required. Edit or Add a Phone Number 3) Select additional options, as needed. If you select and save an unlisted phone number, only users with the rights to view unlisted phone numbers be able to view the number(s). If you select Unlisted, only users with the associated permissions can view these numbers. If you select SMS, Arena will prompt you to select a provider. 4) Click Save. Arena Premium v2012.1.100 Arena User Manual – Membership 19 E-mail Addresses This area shows e-mail addresses for this person. E-mail Addresses The e-mail address at the top of this section is marked as the Preferred. Use the “TOP” link to move any e-mail to the preferred position. E-mails you send using Arena Communications include all active e-mail addresses for the selected individuals. Bulk Email Allowed indicates if e-mail addresses should or should not be included in bulk emails. See New Communications in this manual for more details. Steps to Add or Edit E-mail Addresses: Click Edit for this section. The address in the first position is the preferred email address. Use the TOP icon to move an email address into the first position. Adding E-mails 1) 2) 3) 4) 5) Enter the e-mail address. Enter Notes, if desired. Select “Active” to indicate the e-mail address should be used. Select Allow Bulk Email to indicate if this e-mail address should receive bulk e-mails. Click Save. Arena Premium v2012.1.100 Arena User Manual – Membership 20 Address/Previous Address This area shows the Address for this person, any previous address, and his or her proximity to your organization (as defined by your Organization address). Address Information Click the Map link to open in a new window and allow you to get directions, via Google Maps, starting with the originating address. Click the Get Directions link to get directions, via Google Maps, from this person’s address to the organization, an existing record, a group, a tag or a campus, as shown below. Get Directions Background Section This section displays the information pertaining to a background check for this individual. If permissions allow, you can also access existing background checks reports or initiate a new request. Arena Premium v2012.1.100 Arena User Manual – Membership 21 Activity Section The activity meter level displays the quantitative value which represents the overall health of the person in your organization, with default maximum value being 100. Activity Meter Level The graph shows the activity level of the person over a period of one year. Activity Meter Area Information This section shows the assigned geographical area for this person. To edit, click the Edit link in the top right corner of this section and select the desired area. The person’s address is not required to be within the Area’s boundaries. Area Small Group Information This section shows all Groups where the person is a member, leader or pending registrant. If the person is not in a Small Group then this area will display “Not in a Small Group.” Groups Information Arena Premium v2012.1.100 Arena User Manual – Membership 22 Steps to Add Someone to a Group from the Person Detail Page: 1) Click Edit. 2) Select Show All Groups, if desired. 3) Select Assign Groups... Groups Information 4) Select the Group(s). Group Browser 5) Click OK. Arena will add the record with the group role of Member. Arena Premium v2012.1.100 Arena User Manual – Membership 23 Event Tags This section shows the Event Tags where this person is a registrant. You cannot add or edit registrations directly from this section. You can only add or edit registrations from the Event Tag itself. If the person is not a registrant for any Event, this area will not display. Attended Events Serving Tags, Personal Tags, and Ministry Tags This section displays all tags the individual is a member of and their status. When hovering over a Tag, the tag hierarchy will display. Serving, Personal and Ministry Tags Serving Tags This section shows all the Serving Tags this person is involved and their status. By hovering over any tag, the tag tree displays. Serving Tags Arena Premium v2012.1.100 Arena User Manual – Membership 24 Steps to Add Someone to a Personal, Serving or Ministry Tag from the Person Detail Page: 1) Click Edit for this section. 2) Select Show All, if desired. 3) Select Add Tags… Add Tags 4) Select Tag(s). Selecting a Tag 5) Select Status. 6) Enter a Note, if desired. 7) Click OK. Tag Status and Note Tag Status Arena Premium v2012.1.100 Arena User Manual – Membership 25 Volunteer Information This section shows information needed for this person’s Volunteer eligibility. To edit, click the Edit link in the top right corner of this section. Member Path This section shows key dates and information regarding the person’s member path. To edit these, click the Edit link in the top right corner of this section. Visit Dates This section shows visitation dates for this person. To edit, click the Edit link in the top right corner of this section. Attendance Section The Recent Attendance area displays the last ten Group or Tag occurrences that the person has attended. Check-In Attendance Types that are marked for Weekend Service populate the Attendance Rate graph. Occurrences are records of attendance using Check-In or manually in Tags or Groups. Arena Premium v2012.1.100 Arena User Manual – Membership 26 Notes Section You can add notes to a person’s record from this section. You can view the notes in this section and display the note at the top of the Person Detail page. Note Checked to Display Steps to add a Note: 1) Search and select the record you wish to add a note. 2) Select Add New Note. 3) Enter the desired note, making any additional selections. Notes you check to Display, will display at the top left of the Person Detail page, above the Profile Section as well as in the note section. Displayed notes list in order, with the most recent note entry at the top of the list. Notes you check Private, will only be available to the person who entered the note. You can mark a note to display and private. In this case, only the current user will be able to view the displayed note. If available, you can assign access rights to a specific Security Template to view or edit your Note(s). Permissions for Security Template are pre-determined. 4) Click the save icon. Arena Premium v2012.1.100 Arena User Manual – Membership 27 Personality Section Spiritual Gifts and DISC Profiles are both optional sections. Your organization will determine usage. Personality Section Spiritual Gifts can be set up to show what gifts a person possesses. Clicking on the gift will display a list of the other members possessing the same gift. DISC Profiles use the DISC (Dominance, Influence, Steadiness, and Conscientiousness) profiling personality trait system. Several organizations offer this testing. Arena will track it for you if you choose to implement it. You can select Spiritual Gifts and you can enter DISC results on this page. History Section To view the person history, check the View History box on the right side of the page. This section lists all record activity such as individual information changes, sent e-mail and SMS messages, and changes with Groups and Tags. Each section has a drop-down box to view the last 5,100, or All actions taken with this record. Arena honors security for this section. For example, if a user does not have permission to view a field, the user will not have access in the history section, should the field be changed. History Section Arena Premium v2012.1.100 Arena User Manual – Membership 28 S E CUR IT Y T AB Access to Tabs on the Person Detail Page may vary by user. At the top of the Person Detail page, click the Security tab to display the Security logins for this person. To add any of these ID types, click the associated Add New ID icon and enter the required values. Security Tab Alternate IDs should not start with an “R”, “C”, or “M”, as these are reserved for Check-Out. Arena Premium v2012.1.100 Arena User Manual – Membership 29 P E R SON V I E WS T AB The Person Views tab displays the people who have viewed your record in the top section and the people you have viewed in the bottom section. Person Viewed Tab P R AY ER R E QUE ST S T AB The Prayer Requests tab will display any prayer requests entered for this person. Prayer Requests Click the prayer icon to add a new Prayer Request for this person. You can view Prayers for this person by clicking on the prayer link. Arena Premium v2012.1.100 Arena User Manual – Membership 30 Steps to Add a Prayer: 1) Click on the Add New Prayer Request icon. Add New Prayer Request 2) 3) 4) 5) 6) 7) 8) 9) 10) 11) 12) Enter First and Last Name, if not automatically populated. Enter Email, if not automatically populated. Select a Prayer Category. Check the Request Response box if the requestor would like to receive an email response. Check the Private box if this prayer should only be available to prayer team members who have the permissions to view private prayers. Select a Content Category. This is applicable when entering prayers from the Arena-managed website. Select a Source. This field is to identify the method of obtaining the prayer. Default Status is pending. If you have permission, Approve the prayer. See our Arena Administrator regarding various permission options for prayer. Enter the Expiration Date this prayer request should expire. Renewal option is available. Enter the Prayer Request. Prayer Details 13) Click Save. Arena Premium v2012.1.100 Arena User Manual – Membership 31 C ONT R I BUT I ONS T AB The Contributions tab on the Person Details page displays individual contribution information. The tab is broken into three sections: pledges, repeating payment profiles, and contribution history. Contributions Tab Pledges Section Pledges entered from Pledge Quick Entry display in this section. You can also add, edit and delete pledges from this section. Permissions by user may vary. Pledges Section Steps to Edit a Pledge: 1) Click the Edit icon of the pledge you want to edit. Edit a Pledge 2) Make desired changes Edit Dates or Amount 3) Click the save icon. Pledges are retroactive, so if a contribution falls within the pledge date range it counts towards the pledge amount. Arena Premium v2012.1.100 Arena User Manual – Membership 32 Contribution History This section displays all contribution and online giving history for the person. Contribution History Use the filters to sort the contributions by date range, fund, type, or transaction number. You can use the Reassign Person... to associate a single or multiple contributions to a different person. Repeating Payment Profiles If the person has created any repeating payments through online giving, those payments will show in this section. If permissions allow, you can also add a new Repeating Payment from this page. See Repeating Payments. Repeating Payments Profiles Arena Premium v2012.1.100 Arena User Manual – Membership 33 Steps to Add a Repeating Payment: 1) Click the Add Repeating Payment icon. Repeating Payments 2) Enter personal information. Repeating Payment Contact Information 3) Click Next. Arena Premium v2012.1.100 Arena User Manual – Membership 34 4) Enter Profile Name, select a frequency, a begin date and how long the payments should continue, and enter amounts for each fund. The begin date must be a future date. Repeating Profile Information 5) Select payment method and enter the correlating bank information. 6) Click Next. Arena Premium v2012.1.100 Arena User Manual – Membership 35 7) Confirm Information. 8) Click Finish. The below Confirmation page will display. Repeating Payment Confirmation Arena Premium v2012.1.100 Arena User Manual – Membership 36 C OUNS E L I NG This tab allows users to track confidential information for an existing record. View and edit rights may vary by user. Counseling Tab Steps to Add a Counseling Request: 1) Click the Counseling tab on the Person Detail page. 2) 3) 4) 5) Click the Add New Counsel icon. Select Pastoral Concerns. See your Arena Administrator to customize these options. Enter Summary. Select if the person is aware of the counseling request. Private Case Note 6) Select Create. Arena Premium v2012.1.100 Arena User Manual – Membership 37 Steps for Processing a Counseling Note: 1) Click the Counseling tab on the person detail of the person with a counseling note. 2) Click the counseling note. Counseling Tab 3) Select Edit for any section. Counseling Note Arena Premium v2012.1.100 Arena User Manual – Membership 38 Counseling Notes NOTE: See your Arena Administrator regarding customizing Restrictions and Pastoral Concerns. 4) Assign counselor and change status, as desired. Status Information Contact Person – This is the current user. You cannot change the contact person. Counselor – Select a counselor for this counseling note. Status – Select a status for this counseling note. Done – Clicking this button will return you to the Counseling tab. 5) Click Save. Arena will send an e-mail to the Counselor to notify him or her of the counseling note. Arena Premium v2012.1.100 Arena User Manual – Membership 39 B US I NE S S I NFOR M AT I ON If you setup a record as a business, the person information fields accommodate business information, as shown below. Business Profile Person ID/Foreign ID (Foreign ID = Shelby Systems Name ID if synchronized with Shelby Systems v5 software) Member Status Record Status Campus Name Date Added (to Arena) Date Modified Date Last Verified (Click the Verify link to update when the record was last confirmed to be correct) Arena Premium v2012.1.100 Arena User Manual – Membership 40 Add New Family This page allows you to add new people or businesses to Arena. We recommend you search by name using Quick Search or the White Pages to determine if the person/family or business already exists, to prevent duplication of records. Steps to Add a New Person/Family or Business to Arena: 1) Click Membership Add New Family, or click Add Person/Family from the search results page. Family Members If the icon by the person’s name has a plus not have a plus, it means you are adding a new record. If the icon does it means the record already exists in the database. 2) Click Add New Person to add each family member. Data entry time will be shorter because certain fields such, as address, will propagate to all records. If you are adding a person that already exists in the database to a family, as in the case of marriage, then click Add Existing Person to search and select the person you wish to add. 3) Select title (if desired), enter first name, enter nickname (if applicable), enter middle name (if available) enter last name, select family role, enter birth date (if available), select gender (if available), select marital status (if available) and enter wedding anniversary date (if available) for each family member you are adding. Once you enter information on this tab, click the Next button or the Record/Member Status tab to continue. Arena will enter the Family Name once advancing to the Record/Member Status tub, using the last name of the first person. Arena Premium v2012.1.100 Arena User Manual – Membership 41 4) Make the appropriate selections for record and member status. Record/Member Status Record status will default to Active. You must add a member status or a warning will display. If you select Inactive Record Status, you will need to select a reason. 5) Enter the Main/Home, Business, and Cell phone numbers, and/or E-mail address for each family member, if desired. Enter 10-digit phone numbers without formatting (no spaces, dashes, or parentheses). You can enter international phone numbers with formatting. The main/home phone number will propagate for the rest of the family. Contact Info 6) Press Next to advance to the address tab. Arena Premium v2012.1.100 Arena User Manual – Membership 42 7) Enter the Main/Home Address of the family. For the Main/Home and Family Alternate Address Type, the address entered for the first person will propagate to all family members. If the zip code is unknown, enter the city and state. Click Standardize Addresses and Arena will attempt to standardize, adding the zip+4 zip code, if available. To make entry faster, you can also enter a zip code without entering a city and state. Address Tab with a Domestic Address Address Tab with an International Address 8) Click Finish. Arena will also standardize addresses when you select Finish. Arena Premium v2012.1.100 Arena User Manual – Membership 43 You can also enter alternate addresses for the family or an individual family member. Use the drop-down list in the top right corner to select an address type for the person/family or business. If you enter more than one address, you must select Primary for one address. Alternative Address Primary – Indicates the primary address for the family or individual family member. Override – Indicates when the alternate address should override the primary address. 9) Click Finish. Once you select Finish, either the Person Detail page of the first person entered displays or the Multiple Families at Same Address page displays, as shown below. The latter indicates there are other records in the database with the same address Be sure to also check the Contribute Individually checkbox for each new record. Multiple Families at Same Address Warning Keep in mind, there can be only one adult male and one adult female in each family. Use Relationships to identify other adult family relationships. Arena Premium v2012.1.100 Arena User Manual – Membership 44 Does Arena Identify Duplicate Records? If you enter a new record/family and Arena detects the new record(s) may already exist, a warning text will display above and below the wizard and you will not be able to finish the wizard until the possible duplication issue is resolved. Possible Duplicates Warning To Check for Duplicates: 1) Click the link for the name of Possible Duplicates. The list will give you two options; “Click the Name to Open Their Details” and “Click Edit to Load That Family for Editing.” Possible Duplicate Records 2) Choose to either make changes to the person record from the Person Detail page or open the Edit Family Wizard to make changes to the existing person/family. 3) If there are no duplicate records, check the "I have reviewed all the Possible Duplicates" box. Once checked, you can then finish the wizard. You may also select the Merge Members section of Membership to combine any duplicated records. Arena Premium v2012.1.100 Arena User Manual – Membership 45 Steps to Remove Someone from a Family: 1) Locate the family. 2) From the Person Detail page, select Edit on the Family section. Profile Family Information 3) Click to the right of the name to remove the person from the family. The record is removed from the family but, not removed from Arena. Edit Family Wizard 4) Click Finish. 5) Review both records for any changes such as address or phone number. Arena Premium v2012.1.100 Arena User Manual – Membership 46 C OMMON R E COR D Q UE S T I ONS Does Arena record the information I edit? Yes. Arena adds a note to the person’s history when you edit a person’s information. It will contain the date, time, person and information you edited. History section How do I Add a Person’s Nickname? 1) Look the person up in Arena using the Quick Search. 2) Click on Edit to the right side of Personal Information. 3) Enter the Nickname. Personal Information 4) Click Save. Arena Premium v2012.1.100 Arena User Manual – Membership 47 Steps to Update the Record Status: You can update the records status in the personal information section on the person details page of using the Family Wizard. When changing a record status to inactive (from the Edit Family Wizard or the Person Detail Page) a confirmation dialog box displays. This dialog box alerts the user that the Member's status in associated Tags will also be set to Inactive. If you change the record status from inactive to active, the Tags are not affected. This feature does not affect Groups. 1) On the Person Detail page, click the Edit link of the personal information area or the Family Edit link.. Personal Information Section Edit Family Wizard Record Status Arena Premium v2012.1.100 Arena User Manual – Membership 48 2) Click Save on the Person Detail or Next on the Family Wizard. Arena will display a pop-up to confirm this action. Record Status Change to Inactive from Edit Family Wizard Confirmation Record Status Change to Inactive from Person Detail Confirmation Once you confirm the record status to inactive, Arena will mark the reason using the default option. Individual Information Record Status Arena Premium v2012.1.100 Arena User Manual – Membership 49 Person Bulk Update The bulk update feature will add, remove or update existing information for multiple records. Options may vary by organization. Person Bulk Update If no campaigns exist, the campaigns section will not display on this page. Arena Premium v2012.1.100 Arena User Manual – Membership 50 Steps to Bulk Update Existing Records: 1) Click the Add… link to search and select existing records you want to update. The records will display in order of person id. Person Bulk Update Add 2) Make desired selections. If no campaigns exist, the campaigns section will not display on this page. Membership Details Bulk Update Personal Tags Bulk Update Ministry Tags Bulk Update Serving Tags Bulk Update Once you select a Tag, selecting additional information is optional. Groups Bulk Update 3) Click Update at the bottom of the page. Arena Premium v2012.1.100 Arena User Manual – Membership 51 Merge Members The Merge Members page allows you to combine records using a step-by-step wizard. Arena’s Merge Wizard identifies fields that contain different values. If a field has only one value for that particular attribute, Arena assumes that attribute is the correct one to retain. Steps to Merge Members: 1) Go to Membership Merge Members. 2) Click on the Add People link, as shown below, to use the Person Search pop-up where you can select the records to merge. You can merge as many records as necessary into one record. You can also click the Merge Member icon from a people grid list. Merge Members Click Add People to add more records to this merging instance. If you incorrectly added a record, click Remove. Click Add to add a record. This will remove the record from the merge process. You cannot delete records from this page. The Merge Wizard also displays the number of fields that contain a differing value. 3) Click Next. Arena will display a page for every field where the values differ. After selecting the value to keep for each field, click Next until you have reviewed and selected all fields. Arena Premium v2012.1.100 Arena User Manual – Membership 52 4) On the last page of the wizard, click “Finish” to complete the merge. The merge completes when you click “Finish.” Arena removes the previous duplicate records and the new record will display with a new Person ID number that may affect Security, e-Newsletters, Check-In, etc. You cannot reverse this process. Merge Members Completion Arena Premium v2012.1.100 Arena User Manual – Membership 53 Me The Me page allows the logged-in person to view his or her Person Detail page without having to search by using the Quick or Person Search. Arena verifies the current user based on the Authentication mode. Arena Premium v2012.1.100 Arena User Manual – Membership 54 Active Campaigns See your Arena Administrator if there are no campaigns. The Active Campaigns page will display a list of all current campaigns. Clicking on the hyperlink of a Campaign will open a new window with the next family to contact, as shown below. Active Campaigns Each tab represents a family member, listed by age. On this page, you can update the personal information of each family member, register someone for a small group, add an individual prayer request, initiate an assignment workflow, add campaign notes, email an individual, and select the result of the call. Arena allows several people to work in the same Calling Campaign. The same family will not appear for different Campaign Volunteers simultaneously. Once a family displays, they will not display again in the same campaign for one hour, regardless of the result, and even if the Campaign window is closed without choosing a result (unless the result completes the campaign for that family, in which case the family will not show again in the campaign at all). Arena Premium v2012.1.100 Arena User Manual – Membership 55 When the below screen displays, the volunteer has gone through all the families in the campaign. Campaign Completion If you have no contact with anyone in the campaign, after one hour, those families will display again and the volunteer can attempt to reach the family again. Arena Premium v2012.1.100 Arena User Manual – Membership 56 Metrics The Metrics page is where you can graphically display various Arena data in an area, pie chart, multiline, area stacked, or line graphic. Pie Chart Metric Line Metric Arena Premium v2012.1.100 Arena User Manual – Membership 57 Steps to Add a Metric: 1) Go to Membership Metrics. 2) Click the Add button. Add a Metric 3) Enter a Name for this metric. 4) Click Add. Metric Name 5) Select the Metric from the list. Metric List Arena Premium v2012.1.100 Arena User Manual – Membership 58 6) Select Edit. Editing a Metric 7) Enter the required and desired fields, as shown below. Metric Details Parent Metric—If using child metrics, select the parent metric. Metric Order—Enter 1 if not using child metrics. Graph Type—Select graph type. Metric Title—Enter a title for this metric, to display above the graph. Series Caption—Enter a caption for this metric, to display below the graph. Description—Enter a description for this graph, to display above the graph. Source Summary—Enter a source summary for this metric. Collection Frequency—Select the frequency the data should be collected. Collect Last Date—This is the last date data was collected. Collection SQL Statement—Enter the SQL statement for this metric. Numeric XValues—Check this box if you would like to display the X-axis values for this metric. 8) Click Save. Arena Premium v2012.1.100 Arena User Manual – Membership 59 Steps to Add a Child Metric: 1) Select the Metric to which you would like to add a child metric. 2) Click Add. Adding a Child Metric 3) Enter a Title for this Child Metric. Child Metric Title 4) Click Add. 5) Select the Child Metric. Child Metric 6) Click Edit. Arena Premium v2012.1.100 Arena User Manual – Membership 60 8) Enter the appropriate fields, including the SQL statement for this metric. Metric Details 9) Click Save. Arena Premium v2012.1.100 Arena User Manual – Membership 61 Public Lists and My Lists You can create lists by choosing desired criterion that will result in a list of names who meet the selected criterion. Once the list displays, you can merge records with existing documents or reports, bulk update selected records, send an e-mail or SMS text message to selected records, create labels, or export to Excel®. Lists always display as a columnar report. Public Lists and My Lists function the same except that lists created on the Public Lists page will be available to other Arena users whereas, lists created on the My Lists page are available to the List creator only. Steps to Create a New List: 1) Click Membership Public Lists or My Lists. 2) Click the Add New List icon to create a new one. New List 3) Enter a Report Name. 4) Select a Report Type. Options are Computer Systems, Contribution, Group Report, and Parent Report. Criteria differs by Report Type. 5) Select a Category, if available. 6) Enter a Description that adequately describes this Report. List Name and Description 7) Click Next. Arena Premium v2012.1.100 Arena User Manual – Membership 62 8) Click a Criteria Group to expand the section and select your criteria. Ask yourself, “Who do I want on this list?” The answer to this question will help you select the criteria. Available sections and criteria may vary for your organization. List Criteria You have the option to Save the report at any point in the Wizard process. Arena Premium v2012.1.100 Arena User Manual – Membership 63 Basic Criteria The Basic Criteria tab contains some of the basic personal information. Criteria options may vary for your organization. Basic List Criteria Include Null Values – Includes those who do not meet the selected criteria or the field is blank. You can use the % and_ wildcards in some fields such as, the Last Name as shown above. Arena Premium v2012.1.100 Arena User Manual – Membership 64 Extended Criteria The Extended Criteria tab allows you to search using more individual and family information. Extended List Criteria E-mail Enter any portion of the e-mail address. Birth Date To search on an exact date, put that date in both boxes. To search on a range, enter the earliest date in the first box and the latest date in the second. Birth Month To search on an exact month, put that number in both boxes. To search on a month range, enter the earliest month in the first box and the latest month in the second. If you want a month greater than a number then enter that number in the first box, leaving the second blank. Birth Day To search on an exact day, put that number in both boxes. To search on a day range, enter the low number in the first box and the high number in the second. If you want a day greater than a number then enter that number in the first box, leaving the second blank. Anniversary Date This is a wedding anniversary date. You can place .5 in the Serving Hour box to represent ½ hour. Arena Premium v2012.1.100 Arena User Manual – Membership 65 Advanced Criteria The Extended Criteria tab allows you to search using more demographic information. Advanced List Criteria Date Add – This is the date the record was first added to Arena. Date Modify – The date the record was last modified. Distance From Church – The distance, in miles, that the person lives from the church. Arena will search all addresses that have been geocoded, if your organization subscribes to this service. Arena Premium v2012.1.100 Arena User Manual – Membership 66 Personality Criteria The Personality criterion allows you to search using both types of personality criteria. Personality List Criteria Spiritual Gifts – These options may vary with your organization but will list as check boxes. DISC Scores – You can search by person scores or a combination of scores. To search by an exact number, enter that number in both boxes. To search using a number range, enter the lowest number in the first box and the highest number in the second. If you want a number greater than another number then enter that number in the first box, leaving the second blank. Arena Premium v2012.1.100 Arena User Manual – Membership 67 Small Group Criteria The Small Group Criteria tab allows you to search for people based on the following criteria. Options for this entire section may vary for your organization. Personality List Criteria Role – This is the role of the member in Groups. Small Group Status – You can search by Group Status. You can also search by In a Small Group or Not In a Small Group. Click the + sign to expand and continue selecting or deselecting each group level. Click once to add a check mark in a checkbox to search for people who are in that small group and check all levels under that group. Click twice to change the green check mark to a red to search for people who are not in the selected small group. A blank box indicates you are not using the group as criteria. Using the in Groups and Tags is a useful tool when you need to identify people who are not in a Group, Serving Tag, Ministry Tag, or Event Tag. Arena Premium v2012.1.100 Arena User Manual – Membership 68 Custom Attributes By default, this section is blank. If your organization has created custom attributes, see your Arena Administrator. Tag Criteria This section allows you to search across Serving, Ministry and Event Tags. Tag Criteria Search Click once to add a check mark in a checkbox to search for people who are in the select tag(s) and check all levels under that tag. Click twice to change the green check mark to a red to search for people who are not in the selected tag. A blank box indicates you are not using the tag as criteria. 9) After you have selected all your criteria, click the Next button. Arena Premium v2012.1.100 Arena User Manual – Membership 69 Field Selection Once you have selected the criteria of who you want to have on your list, you will next select which fields to display. Full name, address and e-mail are the fields selected by default. Field Selection This single right-arrow allows you to move Available Fields to Selected Fields. Use the Ctrl key to select multiple fields. The single left-arrow allows you to move Selected Fields to Available Fields. Use the Ctrl key to select multiple fields. The double right-arrows allow you move all Available Fields to Selected Fields. The double left-arrows allow you to move all Selected Fields to Available Fields. If the same field name exists in multiple Attribute Groups, the field name will include the attribute group, such as Member Path-Activity Score, as shown above. 9) Select the fields you would like to display on the final report. 10) Order the selected fields by using the sort 11) Click Next. arrows to the right of the Selected Fields column. Arena Premium v2012.1.100 Arena User Manual – Membership 70 Field Details The field detail page lists the fields that will display on your report. For each field, change the heading name and alignment, as desired. Field Details 12) Click Next. Arena Premium v2012.1.100 Arena User Manual – Membership 71 Sorting Arena allows you to sort by any of the Selected Fields. Default sort options are First Name and Last Name. Sorting 13) Click Add to add other selected fields by which to sort or change the default sort options. 14) Click the Next. Summary From this page, you can run the report now, view the SQL Query or change the report to/from a Public or My List report. If you select “Report is available to everyone”, it will be available on the Public Lists page. If it is not selected it will be available on the My Lists page where only you can view the List. Summary Page The My Lists area only displays lists created by the current user. 15) Click Finish. Arena Premium v2012.1.100 Arena User Manual – Membership 72 Advanced Public Lists and My Lists The Advanced List option allows you to select the Group and Group Criteria as before, but with the addition of AND/OR Boolean logic to use for each selected criterion (control) and the option to group criteria. Advanced List Options Steps to Use Advanced Lists: The below steps outline the process for using Boolean logic for criteria selection. You can use the remaining steps as previously outlined in Public Lists and My Lists of this manual. 1) Select Advanced List. Advanced List Option 2) Click Add Group. Add Criteria Group Arena Premium v2012.1.100 Arena User Manual – Membership 73 3) Click Select criteria from the criteria Group. List Criteria 4) Add a second control or Group. Add Criteria Group 5) Once you add at least two controls, you have the option to select either the AND or OR logic for each criteria. Using And/Or Logic 6) Repeat steps 2 through 4 for every control you would like to include in this report. 7) Once you select all criteria, click Next to continue. Refer to My Lists of this manual for next steps. Arena Premium v2012.1.100 Arena User Manual – Membership 74 Completed Lists On the page of a completed list, all selected fields will display in a columnar format, as shown below. Completed List You can e-mail the selected records by selecting the records and clicking the You can export the selected records to a Word document by selecting the Word You can export the selected records to Excel by selecting the Excel ® icon. ® icon. icon. You can print the report by clicking on the button on the top right. This will print records displayed on the current page. If you have more than one page in your report, change the number in the page size box to accommodate all records. Click the Refresh button, then print. As your staff creates more Lists on either the My List or Public List page, the page will display all Lists, a description of the list, the list Category, the list creator, the date the list was created, the date the list was most recently run, the copy button, the edit button and the delete button. Arena Premium v2012.1.100 Arena User Manual – Membership 75 Steps to merge Selected Records with Available Merge Documents You can choose to merge selected records with any of the available document, including labels. This will run the report to populate the data and sends it to the selected word doc for merging. 1) Click the box of the people to include in the merge. If records you want to include are across multiple pages, change the page size. If you want to include all records across all pages, do not select any boxes. 2) Select a document from the Available Merge Documents drop-down. 3) Click Combine Family Members, if desired. Available Merge Documents 4) Click View. 5) Then Open or Save for the final merge. Arena Premium v2012.1.100 Arena User Manual – Membership 76 Steps to Edit a List: 1) Click the edit icon on the My List or Public List page, or the Edit List Criteria link on the Report page. Editing a List Report Page 2) The List Wizard page will display and you can make the necessary criteria adjustments on every page. A bold criteria section indicates selected criteria, as shown below. Selected Criteria Arena Premium v2012.1.100 Arena User Manual – Membership 77 Steps to Copy a List: 1) From the Public List or My List page, select Copy Report. List Page 2) Rename the Report. 3) Enter Report Notes. Report Details 4) Select Copy. The new report icon indicates the copied List. Copied List 5) Select Edit to modify the copied report. Edit List Arena Premium v2012.1.100 Arena User Manual – Membership 78 Reports There are several preloaded Reports in Arena. Following is a list of the pre-loaded Membership Reports. These Reports are created using Microsoft® Reporting Services. Most reports have Parameters that act as filters. The next sections will list some of the preloaded Membership reports, a brief description, and the available parameters. Membership Reports Active Adults The Active Adult report displays all adults based upon membership status. Active Adults The drop-down list shows all of the options available to limit the output. Options may vary for your organization. Membership Status Parameters Arena Premium v2012.1.100 Arena User Manual – Membership 79 Anniversary These parameters return records limited by the wedding anniversary date and the number of years the couple has been married. Years married calculates from the wedding anniversary date and the system date on your server. You can enter the date in MM/DD/YY or MM/DD/YYY format or click the calendar and End dates. icon to select the Start Anniversary Parameters Birthday These parameters return records limited by date of birth. The start and end dates limit the results by age of the person. A person’s age calculates by using the birth date field and the system date on your server. Birthday Parameters First Time Visitors First time visitors are those who have a date in the First Visit field in the Visit Dates listed on the Person Detail page. Use the parameters to limit the date range for the report. First Time Visitors Parameters Arena Premium v2012.1.100 Arena User Manual – Membership 80 Head of Household This report displays the Head of Household records as they pertain to a selected Member Status. Arena determines head of household by the oldest adult male in a family. If an adult male is not present, the oldest adult female is the head of household. Head of Household Members This report enables you to group records by member status, record status, city or state. Members Parameters Membership Chart by Status This report displays all active records by member status in pie graph. Membership Chart by Status Parameters Arena Premium v2012.1.100 Arena User Manual – Membership 81 NCOA Moved Addresses (Optional) This report displays all records identified by the MOVE Agent. There are no parameters for this report. NCOA Move Addresses Report New Members This report identifies new records based on the date entered. Use the Start Date and End Date to narrow your search. New Members Parameters Personal Activity Meter Use this parameter to select a person’s name from the list and to see a graph of the person’s Personal Activity Meter (Health Meter). Persona Activity Meter Parameters Arena Premium v2012.1.100 Arena User Manual – Membership 82 Report Options There are several options associated with viewing or printing reports. Navigating Through the Pages You can use the single or double arrows to navigate through a multi-page report. Report Navigation Use the First, Previous, Next, and Last page arrows to move between the pages of the report. You can also enter the desired page number manually. The number listed after the box is the total number of pages in the report. Remember, this is the number of pages displayed on the screen, not necessarily printer pages. Zoom Type in or select the percent to increase or decrease the amount of viewable information. Zoom Find/Next Type the information for which you would like to search in this report, and click Find. Arena will highlight the text, when found. Find/Next Arena Premium v2012.1.100 Arena User Manual – Membership 83 Exporting Once the desired report displays, select the export format. This creates a file you can open and print using a multitude of programs. Values for this list may vary and are definable under Report Services. Export Options Print Options Refresh and Print Click the Refresh selected printer. icon to rerun the report. Click the Printer icon to send the information to print on the Refresh and Print Hide Criteria Click the hide icon to hide the selection parameters on the report. Arena Premium v2012.1.100 Arena User Manual – Membership 84 New Background Check (Optional) Your organization can run and manage background checks all in Arena. Steps to Request a Basic Background Check: 1) Go to MembershipNew Background Check, OR select Request New Background Check on the Person Detail Page of the person you would like request a background check. New Background Check Request Background Check Request from Person Detail Page 2) Click Change… to search and select an existing record. Select a Record You can submit Background Checks, even if the SSN field is blank or only partially complete. If no SSN is available, you can use 9 numeric characters (e.g. 423578941) or 11 characters that exactly match the formatn (e.g. ###-##-####). The 9s are only used for Background Check purposes and do not populate the Person Detail information. 3) Select the Background Check Type. Background Check Type Arena Premium v2012.1.100 Arena User Manual – Membership 85 4) Enter required fields. First name, last name, social security number, date of birth and address are required. Background Check Request First Name – Arena will populate this field using the information on this person’s record. Middle Last Name – Arena will populate this field using the information on this person’s record. Last Name – Arena will populate this field using the information on this person’s record. Social Security Number – Arena will populate this field using the information on this person’s record. If the social security number is not available, enter nine numeric characters (e.g. "432531234") or 11 characters that exactly match the pattern of "###-##-####" where each # is a numeric character and the dashes are at proper intervals. Position—The position which the person has requested. Reference Code – This is the code to reconcile with the invoice from the provider. Consent Form is on file - The option that determines which stage of the conset form. Arena Premium v2012.1.100 Arena User Manual – Membership 86 5) Click Submit once you enter all information. If the request needs approval, the Approver receives an e-mail with this request Background Check Confirmation Arena Premium v2012.1.100 Arena User Manual – Membership 87 The Plus option is below with additional Court Check options. Additional fees may apply. Plus Option Arena Premium v2012.1.100 Arena User Manual – Membership 88 Steps to Review All Background Checks: You can view in process and completed background checks on the Background Checks page. 1) Go to MembershipBackground Checks. Background Checks in Process 2) Select the desired filter parameters or use the column header to perform a single-sort to locate the desired background check. 3) Click Apply Filter. Filter parameters will retain for each user. Background Checks in Process Listing Status – You can filter can a single or multiple background check status. Approved – You can filter by approved or rejected background checks. Requested By – You can filter by the background check requestor. Requested On – You can filter by the background check applicant. Arena Premium v2012.1.100 Arena User Manual – Membership 89 Steps to Process Background Check Requests: If your organization has security rights set so that all background check requests require approval prior to processing, the person responsible must either approve or reject the request. Once the background check request is approved Arena will e-mail the requestor with an update to their request. 1) Go to MembershipBackground Checks. 2) Click on the name of the person for whom a background check is requested to open and review the request. Background Checks Requested 3) Approve, Reject or Edit as needed. Users with approval rights can edit all fields. Approve, Reject or Edit Once the request is approved, the background check will be processed by the provider and had the status of Processing, as shown below. Background Check Status Arena Premium v2012.1.100 Arena User Manual – Membership 90 Steps to Approve/Reject Background Checks: 1) To view the Background Check report, click on the person’s name. The status must be “Received.” Background Check List 2) Click on Complete <Clear/Alert> to view the report. This is a link to the report located on PMM’s secured servers. Once the report displays, you can also save it on a local location. Access Background Check Report 3) View the Report. Sample Background Check Report Arena Premium v2012.1.100 Arena User Manual – Membership 91 4) Select Pass or Fail. Select Pass or Fail 5) Once you select Pass or Fail, the below page will display, the status will change to “Completed,” the record will update with the Result of Passed or Failed, and an e-mail will be sent to the requestor with an update to this request. Page Update Background Check View Person Detail Page View Arena Premium v2012.1.100 Arena User Manual – Membership 92 Family Registration The Family Registration application is a Click-Once application, meaning it is a workstation-based application. Below are some of the features and benefits of using this application? Users can access the application from any computer on the network. Each user can have a unique login. Therefore, it is an ideal application to use to allow volunteers to do data entry work for your organization without going through the hassle of setting them up as a new user on your network. The user interface of Family Registrations puts most of the important fields for a record on one page, eliminating the need for data entry personnel to navigate between multiple pages to add or modify a record. The Family Registrations application has a built-in control that prevents data entry personnel from accidently duplicating records. Before using the application, there are some settings you to review. Family Registration Settings: 1) Open Family Registration. 2) Log in. 3) Select the Application Settings icon. Family Registration Application Settings Arena Premium v2012.1.100 Arena User Manual – Membership 93 Family Registration Application Settings Arena Premium v2012.1.100 Arena User Manual – Membership 94 Fingerprint Scanner File location where the images are stored. The name of the scanner. General Allow Check-In – Set this to true to allow users to Check-In saved records. Attribute Groups – Enter the Attribute IDs of the values to make available. Default Campus – If using multiple campuses, set the Campus ID, as desired. Default Member Status – Enter the default member status for each record added. FirstTimeVisit Attribute – Enter the Attribute ID to be applied for each new record. Image Path – Enter the file path for photos. Organization – Enter the Organization value, if not set by default. Prompt for Assigned Cards – Set to True if your organization uses member cards. Search by Security Code – Set to True enables searching for records using security codes. Timeout Minutes – Enter the number of minutes to automatically log off, when application is not used. Group Options Active Groups Only – Set to True to only display active Groups, for Check-In. Category ID – Set the Small Group Category IDs to use for Check-In. Field Security Enabled – Set to True to enable Arena to secure fields, based on Security Roles. Enable Location Filtering Options – Set to True to enable Location filtering for Check-In. Occurrence Type ID – Enter the Occurrence Type ID value, if different from the default. Location Filtering Enable Location Filtering – Set to True if you would like to restrict Family Registration by Location, by work-station. Occurrence Type ID – Set the default Occurrence Type ID for this work-station. System ID – Set the System ID, if different from the default. Printer Set printer options, as desired for hardware and label output. 4) Select OK. The application will restart in order for any application setting changes to take effect. Arena Premium v2012.1.100 Arena User Manual – Membership 95 Steps to Use Family Registration 1) Open Family Registration. 2) Log in. 3) When opening Family Registration for the first time on this work station, you will have the opportunity to save a desktop shortcut. 4) Enter Username and Password. For users who already have an Arena Username and Password, this will be the same. Family Registration User Login 5) Click Login. 6) Select how Arena should flag first time visitors. The First Time Visitor report in Membership will consist of records flagged. First Time Visitors Flag 7) Use the Quick Search fields to first search for the record to be sure it does not already exist. Family Registration Quick Search Arena Premium v2012.1.100 Arena User Manual – Membership 96 8) If the same name already exists, these records will display for you to review. You can select any record for additional information to display in the Person Details window. Family Registration People Search 9) Click Add New Family to enter information for the new person. You can enter children with no adults. 10) Enter the first and last name, and birth date. If you enter a name and birth date that matches an existing record, the below error message will display. New Family with Possible Duplicates 11) Click OK. Arena Premium v2012.1.100 Arena User Manual – Membership 97 12) Click the Possible Duplicates icon to view additional information of the records. Possible Duplicates 13) You can select any record and it will display in Family Registration, or click Close to enter a new record. Possible Duplicate Window 14) Click the “I have reviewed all possible duplicates” box. Confirm Review for Duplicates 15) Click OK to proceed with adding the new record or family. You can enter children without an adult. Arena Premium v2012.1.100 Arena User Manual – Membership 98 Adding a New Person or Family In the New Family page, fill in the first and last name for every family member. Arena allows one adult male and one adult female in a family, so it is important to enter the appropriate name in the corresponding line for the adults of a family. All other persons you add to a family are with the role of “Child”, but you can make changes within their records in the Arena application. Enter a birth date, if available. You must select a gender for each person. Once you enter all family members, scan/swipe a check-in card for the family, the card ID number will show as the Assigned Card number for that family. Click OK when done. Arena Premium v2012.1.100 Arena User Manual – Membership 99 Family Information Person family members will display as separate tabs along the top of the page in chronological order by age. Arena generally considers the oldest adult member of a family the “Head of House”, so the Head of House will be the initial tab. Click on any name to view the specific information about that person. Arena will format 10-digit telephone numbers. Editing the home phone or address of an adult will propagate for all family members. See your Arena Administrator regarding Relationships and the available Member fields. Arena Premium v2012.1.100 Arena User Manual – Membership 100 Assigning a Check-In card Check-In can use a barcode or magnetic stripe card to make it easy to select the correct family. When viewing the Family Information page, simply scan the barcode or swipe the stripe of the card at any time. This will enter the code in the Cards Assigned section. All cards assigned to a person will work for all members of a family. You can have multiple cards, if desired. Click the Unassign Card button to remove a card. Adding a Photo While you can view an image on file for a person, you cannot change the photo at this time. 16) Click Save. If your organization uses cards and you haven’t assigned a card to the new person, the Add Card pup-up will display. Add Card 16) Click Yes, to continue without assigning a card. 17) After saving the record, you will have the option to check him or her Check-In or Add to Group. Check-In Options Arena will format 10-digit phone numbers. You can standardize U.S. addresses without saving the record. If you enter an international address, you do not need to enter the city, state and zip. Arena Premium v2012.1.100 Arena User Manual – Membership 101 18) If you select Check In, you can select the appropriate Attendance Type Occurrence(s). Available Occurrences 19) Click Check In. You can also set the default Attendance Type Occurrence for this person. 20) This pop-up window will also display where the person as is currently Checked In. Currently Checked Into 21) Click Close. Arena Premium v2012.1.100 Arena User Manual – Membership 102 22) If you select Add to Group, you can select the Group Cluster and existing Group. 23) Select User Role and Status. Add Family Member to an Existing Group 24) Click OK. 25) The Group Confirmation will display. Group Confirmation 26) Click OK. Arena Premium v2012.1.100 Arena User Manual – Membership 103 Mailing The Mailing application is a Click Once application that allows the user to run bulk mail presorts for mass mailings, printed contributions statements or emailed contribution statements. A Shelby Mailroom subscription is required for bulk mailings, but not for emailing contribution statements. If launching Mailing from a network workstation, the below window will display. If launching Mailing from a non-network workstation, the below window will display where you can still Contribution statements. Arena Premium v2012.1.100 Arena User Manual – Membership 104 Steps to Manage Mailing Settings: 1) Go to Membership Mailing to open the click-once application. 2) Click Settings. Mailing 3) Edit the Mailing Settings to insure the Organization and Customer ID are correct, if needed. If updated, you will need to restart the application. Application Setting Arena Premium v2012.1.100 Arena User Manual – Membership 105 Steps to Email Contribution Statements: 1) Verify Email Contribution Statement agent is running. 2) Customize Contribution System e-mail. 3) Verify all Mailing Application settings. 4) Verify all recipients have a valid e-mail address. 5) Verify Email Statement and PIN Number fields are complete for each recipient. Contribution Information 6) Open the Mailing application. 7) Select Email Contribution Statement. Arena Mailing 8) Click Next. Arena Premium v2012.1.100 Arena User Manual – Membership 106 9) Select Contacts. You can select all membership or from a previously created lists. Select Email Contacts 10) Click Next. 11) Select Filter Options. Filter Options 12) Click Next. Arena Premium v2012.1.100 Arena User Manual – Membership 107 13) Click Finish. Arena will email statements, based on the Agent schedule. Arena Premium v2012.1.100 Arena User Manual – Membership 108 Steps to Create a Mailing using CASS Certify: You can run a mailing list using either the entire database or an existing list. You must have a minimum of 200 person addresses in order to create a bulk mailing. 1) Open the Mailing application. 2) Select Mass Mailing. Mass Mailing-All Membership 3) Select the records to include in this mailing, either All Membership or an existing List. The option to Skip Sorting allows you to skip the bulk mail presort process. Select Contacts The Mailing application displays Person and Parent Lists only, in alphabetical order, when choosing the recipients from a mailing list. Arena Premium v2012.1.100 Arena User Manual – Membership 109 4) Select your Cass Certify. Certify and Sort Options Run Move Agent – This will update all records based on the most recent Shelby Mailroom DVD update. At least 100 records are required. When you select Run Move Agent, Arena automatically selects Cass Certify. CASS Certify – This will certify all selected addressed, based upon the most recent Shelby Mailroom update. Combine Families – This option will combine individuals living at the same address. Arena offers a CASS Certify option on the Pre-Sort option. When you select the Move Agent, Arena selects CASS Certify automatically. Any number of addresses can be CASS Certified. Arena Premium v2012.1.100 Arena User Manual – Membership 110 5) Once CASS Certify is complete, you can view, print or save the report. CASS Certify Report 6) Click Close to return to the Mailing Wizard. Address Correction Window Arena Premium v2012.1.100 Arena User Manual – Membership 111 7) Select Create New Template, if a template does not exist. The new template will be available for future mailings. Sort Template 8) Enter the permit information for your organization. Permit Information 9) Click Next. Arena Premium v2012.1.100 Arena User Manual – Membership 112 10) Enter the Mailing Permit Information for your organization. Mailing Permit Information 11) Click Settings… to enter the Mailer ID for your organization. Mailer ID Setup 12) Enter a name for this permit. Permit Name 13) Click Finish. Arena Premium v2012.1.100 Arena User Manual – Membership 113 14) Confirm the permit for this mailing. Confirm Permit 15) Click Next. 16) If you did not select skip sorting, select the desired first level sorting option. 17) If desired, select Sorting… for Advanced sorting options. 18) Click Next. Arena Premium v2012.1.100 Arena User Manual – Membership 114 19) Select mailing type. Mailing Types Postnet – This option is for mailings not using barcodes. Basic Intelligent Mail – This option is for mailings. 20) Click Next. 21) Select sort class and piece type. Sort Class and Piece Type 22) Select Mail Piece information. 23) Click Next. Arena Premium v2012.1.100 Arena User Manual – Membership 115 24) Enter Mail Piece information. Mail Piece Information 25) Click Next. 26) Select Mailing and Permit information. Mailing and Permit Information 27) Click Next. Arena Premium v2012.1.100 Arena User Manual – Membership 116 28) Select sorting preparation. Sorting Preparation 29) Click Next. 30) Select Mail Sort Discounts. Mail Sort Discounts 31) Click Next. Arena Premium v2012.1.100 Arena User Manual – Membership 117 32) Select tray layout options. Tray Label Layout 33) Click Finish. Your mailing report displays, as shown below. Arena Premium v2012.1.100 Arena User Manual – Membership 118 Steps to Create Contributions Statements: 1) Open the Mailing application. 2) Select Contributions. Choose Action 3) Click Next. 4) Select Filter options. Filter Options 5) Click Next. Arena Premium v2012.1.100 Arena User Manual – Membership 119 6) Select Certify and Sort options, as desired. Certify and Sort 7) Click Next. 8) Select or create a Template, as desired. Template 9) Click Next. Arena Premium v2012.1.100 Arena User Manual – Membership 120 10) Select Mailing Type. Mailing Type Postnet – This option is for mailings not using barcodes. Basic Intelligent Mail – This option is for mailings requiring barcodes on all mail pieces. 11) Click Next. 12) Select sort class and piece type. Sort Class and Piece Type 13) Click Next. Arena Premium v2012.1.100 Arena User Manual – Membership 121 14) Select Mail Piece information. Mail Piece Information 15) Click Next. 16) Select Mailing and Permit information. Mailing and Permit Information 17) Click Next. Arena Premium v2012.1.100 Arena User Manual – Membership 122 18) Select sorting option. Sorting Preparation 19) Click Next. 20) Select Mail Sort Discounts. Mail Sort Discounts 21) Click Next. Arena Premium v2012.1.100 Arena User Manual – Membership 123 22) Select tray layout options. Tray Label Layout 23) Click Finish. Your mailing report displays, as shown below. Contribution Statements Arena Premium v2012.1.100 Arena User Manual – Groups 122 Groups The Groups section allows you to track, maintain members, and run group related reports. Small Groups generally represent a classroom structure; however, Groups are flexible enough to accommodate nearly anything that uses an organized structure of people such as a group that meets in a gym or in a person’s home. Group Trees Categories Categories separate all the various types of Groups, such as Small Groups, Sport Groups, and Community Groups. This is not to be confused with Group Types, which are specific per Group, but is a larger idea encompassing overall categorization of the Groups setup. Categories divide Groups by having unique Group Structure Trees, Group Roles, and field captions for Group Details, as covered later. Generally, a different tab on the Arena Navigation Bar represents each Category. Group Trees Group Trees represent the different levels and structures for how Groups are organized. When you select the Group Trees, a list will be on the page displaying the top levels of all Group Trees for the Category set for this page, as shown below. The list will also show the Active Status, Leader name, Leader E-mail, total number of Small Groups in that Tree, the total number of Members in those Small Groups, the number of Unassigned Registrants, the number of Pending Registrants, and Notes. There is also a Registrations tab, where you can view and assign Group Registrants. Click Show Treeview to view all Groups in a Tree view, clicking the + to expand the tree. Groups Group Tree view Arena Premium v2012.1.100 Arena User Manual – Groups 123 Group Trees Group Trees are where Parent-Child relationships define levels. Clicking on a level link will display a new list, showing child levels or groups of that level (depending on how many levels are in the Group Tree). As you select each level, the page will show the details for that level: the level Name, Active Status, Leader, Administrator, URL, the Parent Level name, and Type. It will show the same list as the top level for its child levels. Throughout the Group Tree structure, you have the ability send to e-mails to Leaders, Administrative Assistants, Group Members, etc. Group Category E-mails Leaders and Administrators assigned to a Level are considered to be Administrators for all child Levels and Groups beneath their assigned Level. Arena Premium v2012.1.100 Arena User Manual – Groups 124 There are three additional tabs: Group Category Tabs Security – This page allows you the ability set security, by Security Role or by person. Registrations – This page displays unassigned and assigned Registrants. Attendance Summary – This page shows a quick summary of Attendance for the Small Groups that are in this Group Tree below the current level. It allows the user to see which Occurrences a person attended. S UBS CR I BI NG TO A G R OUP You can navigate down through the Tree until you get to the Small Groups, as shown below. At this level, you can subscribe to any Group. Click on the checkbox next to the Group for which you would like to subscribe. Subscribing to a Group Subscribing to a Group causes a hyperlink to be available on the right-navigation bar of Arena’s home page. A subscribed link allows you to see the number of Members and the number of Pending Registrants for the Group. Click the hyperlink on Arena’s home page to display the details for the group. Group Subscription Link on Home Page There is no subscription limit. Arena Premium v2012.1.100 Arena User Manual – Groups 125 S MAL L G R OUPS There are six tabs on the Small Group page, as shown below. Using the available tabs you can e-mail members of the groups, view and process registrants, take attendance, view and print a roster, and upload documents. Small Group Page Members - The list of Group Members will show the member’s name, home phone number, date added to the group, address, proximity (between them and the Location or Leader), E-mail address, Group Role, and Active Status. By selecting the icon, you can change the Role of a group member, and change the active/inactive status. When you make a member inactive, the current date is applied. When the member is made active, the date is removed. See your Arena Administrator regarding Group Role options. Registrations – This tab displays Pending Registrants. You can mark them as accepted or denied as Group Members, providing your Security role permits. Occurrences – This tab allows you to create and view occurrences for this group for attendance tracking. Attendance Summary – This tab will show a quick summary of Attendance for this Group. It allows the user to see which Occurrences a person attended. Roster – This tab shows a directory style Roster of the Group Members. Documents – This tab allows you the ability to upload documents pertinent to this group. Arena Premium v2012.1.100 Arena User Manual – Groups 126 On the Small Group Members page, you can select the edit icon to change the Role of any member or make them inactive in the group. Arena will date stamp when you add someone to the group and when you make someone inactive. Group Members Arena Premium v2012.1.100 Arena User Manual – Groups 127 C R E AT I NG A N E W G R OUP T RE E : Creating a new Group Tree depends on Group Categories, Cluster Types, and Cluster Levels already set up by your Administrator. Once created, the process of creating Group Trees begins from the top of the Group Trees page. Steps to Add a New Group Tree: 1) Click the Add link to create the first Group Tree. If there are any existing Trees, click the Add New (Type) icon. If there is no link or icon, but only a Registrations tab, there are no Cluster Types set up. New Group 2) Click the New Group Collection. New Group Collection 3) Click the Edit Details button on the next page to display the detail area of the New (Group Collection). Edit Group Details Arena Premium v2012.1.100 Arena User Manual – Groups 128 4) Enter the Type Name, set the Leader and Administrator, and enter in the website URL for this level. Based on the default setting, there will be a Type list. If needed, change this Type. The Type determines how many levels this group will have before you can create classes. If you are familiar with Shelby Systems software, you will already know about Levels in relation to Organizations. Also, enter in a description and any notes you wish to place on the Group. Only the Name and Type are required. Group Details 5) Click the Update button when done. 6) Click Add to add a second level to this group. The Type in the previous step determined the numbers of levels for the group tree. Second Group Level Arena Premium v2012.1.100 Arena User Manual – Groups 129 7) Click New Collection. Second Group Level 8) Click Edit Details and complete the information for this second Group level. 9) Click Update. 10) Click the Group link. New Group Link 11) Click Edit Details. Small Group Details Arena Premium v2012.1.100 Arena User Manual – Groups 130 12) Complete the details for this specific group. Group Overview Leader – This is the person who is the leader for this group. Active – Check this box if the group is active. Group Name – Enter a name for this group. Parent – This is the parent group in this group tree. Group URL – This is the URL for this specific group, if applicable. Location – This is where the group meets. Is this group private – Check this box if you wish to not make this group available on your Arenamanaged website. Description – Enter a description, as desired, for this group that will provide website users a description for this group. Schedule – Enter schedule information for this group. Notes – Enter additional notes, as desired. Type – Select the type for this group. Topic – Select the topic for this group. Meeting Day, Start and End Time – Select and enter when this group meets. Arena Premium v2012.1.100 Arena User Manual – Groups 131 Age Range – Select the age range for this group. Marital Preference – Select the martial preference for this group. Maximum Members – Enter the maximum number of members for this group. This number will limit the number of people in this group with a Member status. Once this group has the entered maximum, it will no longer be available on your Arena-managed website for registrants. The default is 20. You can always manually add members directly to a group from the members tab for this group, exceeding the maximum member value. Twitter Login and Password – Enter the Twitter account information for this group, if applicable. Flickr Username – Enter the Flickr user name for this group, if applicable. Group Picture – Upload a group picture, if desired. Custom Fields – If you create Group Custom Fields, they will display on the Group Overview page. Date Modified – Arena will time and date stamp when changes are made to the Group Overview or Custom Fields. 13) Complete Group Custom Fields, as desired. Fields added to a Group are applicable to the details of the Group. Group Custom Fields Field Types: Address – places Street, City, State, and Zip fields on the form. Area – places a list of existing areas on the form in a drop down list format. Checkbox – places a checkbox for each value added in the Value field. Enter the values separated by commas. You can select any or all of the available options. Custom Query – allows a custom query. Date – places a date field with a calendar button. Document – allows a document to be attached. Dropdown List – places a drop-down list populated with each value added in the Value field. Image – this allows users to upload an image. Lookup Type – allow you to select from a list of Lookup fields. Arena Premium v2012.1.100 Arena User Manual – Groups 132 Person – allows you to select an existing record. Phone Number – allows you to enter a telephone number. Radio List – places a radio button for each value added in the Value field. Only one radio button can be selected at a time. Rich Text Field- allows users to enter rich text. Static HTML Content – allows user to enter HTML content. Static HTML Content – any text placed in the Value field is included as static text. Textbox – places a text box on the form. The text box will allow 255 characters. 14) Click Update to save. Add Group Members There are two ways to add Group Members, one is through the Add Registrations link under Groups, and the other method is to add them directly to the Group. To add a member directly, navigate to the Small Group level and click on the Add link above the name filter area or click the Add New Small Group Member icon at the bottom. This will open up the Pop-up Person Search where you can select members to place into the group. If the group has a Leader in the edit details area, he or she will display in the Members section. First Group Member Adding Subsequent Members Arena Premium v2012.1.100 Arena User Manual – Groups 133 Steps to Edit a Group Member: 1) Click on the Edit icon on the right to edit the Role, make a member active or inactive. 2) Click the save icon. When you make a group member inactive, Arena will record the date, as shown below. Editing a Group Member Entering Occurrences An Occurrence is a record of a meeting date. To view and create new Occurrences, click the Occurrences tab on the Small Group page. Steps to Create a New Occurrence: 1) Click on the Add New Occurrence icon. This creates a new single Occurrence, called New Occurrence. Add New Occurrence 2) Click on the New Occurrence to view the occurrence, as shown below. New Occurrence Arena Premium v2012.1.100 Arena User Manual – Groups 134 3) Click Edit Details to customize the Occurrence. Edit Occurrence Details 4) Complete the fields for this Occurrence, as desired. Occurrence Details Arena Premium v2012.1.100 Arena User Manual – Groups 135 Attendance Type -This allows you to associate this Occurrence with an existing Attendance Type, created in Check-In. Name – This is the name of the Occurrence. Location – This is where the Occurrence takes place. Frequency - Allows you to select weekly or every other week. Area - Allows you to associate the Occurrence with an Area, created in Groups. Start/End Dates - Allows you to enter the dates and time of the Occurrence. Check-In Location - You can select a Location, created in Check-In. Check-In Start/End - Allows you to enter the date and time this occurrence should be available, if using Check-In. Membership Required for Check-In - Check if you wish for only members who are already a part of the Group or Tag associated with the Attendance Type to be able to check in. Occurrence Closed - Select if you want to close this Occurrence, not allowing anyone to check in. Head Count - Allows you to enter in a head count for this Occurrence. Head Count overrides any Attendance calculated by the system. Head Count does not affect Check-In Room Ratios. 5) Click Update to save and close the window. 6) Click Apply Filter. 7) Mark attendance, as desired. Arena Premium v2012.1.100 Arena User Manual – Groups 136 Creating Multiple Occurrences To create a series of identical recurring occurrences, click the Generate Multiple Occurrences icon. Multiple Occurrences Attendance Type – This is an Attendance Type created in Check-In. Name – This is the name of the occurrence. This field is required. Location – This is where the occurrence takes place. Frequency - How often this occurrence meets. Options are weekly and bi-weekly. Day of Week – The day of the week the occurrence takes place. Date Range – The period of time for the occurrences. Occurrence Start Time – The start and end time for the occurrences. Check-In Location – The Check-In location, if using Check-In for these occurrences. Check-in Start/End Time – These are the start and end times for the occurrences, if using Check-In. Membership Required for Check-In – Check this box if you want to allow only Members of this Group or Tag to check-in; not for guests. Arena Premium v2012.1.100 Arena User Manual – Groups 137 Adding a Document to a Group or Tag: You can add documents to a small group or tag. In Small Groups, the Documents tab is only available at the Small Group level, as shown below. However, in Tags, the Documents tab is available at all levels in the Tag hierarchy. Group Documents Tab Tag Documents Tab Steps to Add a Document from a Group or Tag: 1) Click the Documents tab for a Group or Tag. 2) Select the Add hyperlink to display the Document Selection dialog box. Documents Tab for Groups and Tags 3) Select a Document Type from the Type drop-down. 4) Enter a document name in the Title field. 5) Click the Choose File link to locate and upload the document. Document Upload If using an HTML5-compliant browser, you can drag-n-drop the file to the Document Selection dialog box. 6) Click Save. Arena Premium v2012.1.100 Arena User Manual – Groups 138 Viewing a Document in Groups or Tags The Document Type will display as a link if Use Type as Title is checked for the chosen Type, otherwise the file name will show as the link. The date the document was attached will show next to the Type. The Title set in the Document Browser will show beneath the link. Click the Edit button to change the attached document, or the Delete button to remove the document. Click the Add link to add more documents. Arena Premium v2012.1.100 Arena User Manual – Groups 139 Add Registration This feature allows you to register someone for a group in a “best fit” method. You can use the Add Registration feature when you are not certain of the Small Group in which to enroll a person. A score value determines the “best fit.” The minimum score and score values are set in Organization Settings under Administration. Based on Group Details, the member provides the criteria for a Group that works for him or her. Putting these values into the Add Registrations page will then determine which Groups most closely match the member’s criteria. If a Group matches close enough by score, the member is placed as a Pending member for that Group. If no Groups meet the minimum score, the member becomes an unassigned Registrant, and you will have to determine where they should go. Steps to Add a Person to a Group using Add Registrations: 1) Go to Groups Add Registration. Add Registration 2) Click the Add… link to search and select for an existing record. 3) Select the group criteria for this person, including the Type of Group from the drop-down. 4) Check do not automatically assign to a small group, as desired. This means that he or she will remain as Unassigned, but are in the proper Group Tree as the Group for which he or she would have been pending. Add Registrations 5) Click Add. Arena Premium v2012.1.100 Arena User Manual – Groups 140 6) Upon completion, Arena will then do one of the following: a) If Arena assigns the registrant, the Group Leader will receive an email alerting him or her of the pending registration. The registrant will also receive and email to confirm their registration. b) If the member is Unassigned, an e-mail is sent to the Leader or Administrator of the Cluster Level to notify him or her of the registrant, for the leader to assign the registrant to a Group. If multiple classes fit the person’s criteria, administrators or leaders have the ability to assign the person to any of the classes. If the Small Group Leader does not have an e-mail address, the Small Group Cluster Leader will receive the e-mail. If the Small Group Leaders and the Small Group Cluster Leaders do not have e-mail addresses, then the e-mail address in the module setting Group Leader E-mail in the Small Group Locator module will get the e-mail request Arena Premium v2012.1.100 Arena User Manual – Groups 141 Processing Registrants All Unassigned and Pending Registrants will display on the Registration page. You cannot directly add Unassigned Registrants to a Group; they have to be a Pending registrant first. Pending Group Registrations Steps to Process Registrations: 1) Click on the Registrations tab of the Group Level to view unassigned. Unassigned Registrant Details 2) Click on the registrant’s name link in the list to show Registrant Details and the list of all groups within the Tree, as shown below. Registrant Details Arena Premium v2012.1.100 Arena User Manual – Groups 142 3) If you are ready to assign the individual to a group, click the radio button to the left of the Group to which you want him or her assigned. 4) Select Assign to Group. Arena will send emails to both the individual and the group leader. Assign Group Steps to Edit the Registration: 1) Click Edit Details from the registration page. Group Registration 2) Select the preferred group or change the selection criteria. Registrant Details 3) Click Update. Arena Premium v2012.1.100 Arena User Manual – Groups 143 Steps to Add a Registration from the Group Page: 1) Select the Registration tab from the Group page. Group Registrations 2) Click the Confirm Registration icon to add the person to the group. Confirm Registration 3) Click OK on the pop-up to confirm adding this person to the group as a Member. Confirm Group Membership Arena Premium v2012.1.100 Arena User Manual – Groups 144 Steps to Reassign a Registrant: 1) From the Registrations tab, click the name of the registrant. Registrant 2) Confirm the group and click Assign to Group. Assign to Group Arena Premium v2012.1.100 Arena User Manual – Groups 145 Areas The Areas section of Arena is for creating and defining map zones where your small groups meet. An area consists of three or more points creating a geometric shape on the map. Area Map You can create points by entering in Latitude and Longitude coordinate values. Any method of finding these values will work, however. Clicking on Areas under Groups will display an Add link to create the first Area, or if an Area already exists, a Map image encompassing all Areas within will show. For example, if one area is in Texas and the other in California, the initial Areas map will show most of the western United States. Below this map, there will be a list of the already created Areas. Arena Premium v2012.1.100 Arena User Manual – Groups 146 Steps to Add a New Area: 1) To add a new Area, click the New Area icon at the bottom of the Area list. 2) Enter the Name, Width and Height (in pixels) of the Area map image, and any notes. Area Details 3) Click the Add New Leader icon to add a person to the Leadership Team of this Area, if applicable. 4) Assign the person an Area Role. Area Leadership Team 5) Click Update 6) Click the Edit to save. icon to change the role. Even though Area maps can overlap, individual maps must be contiguous and solid. You cannot create an Area that has a hole in it, nor can an Area have several parts scattered around. 7) Click the edit icon for the coordinate. New Coordinate 8) Enter the latitude and longitude coordinates for this map point. Editing a Coordinate 9) Click the Save icon. 10) Repeat steps 3 through 7 for all coordinates for this map. 11) Click Update once you enter all coordinates. Arena Premium v2012.1.100 Arena User Manual – Groups 147 A R E A D E T AI L S Once you create a map, opening Area Details shows a small thumbnail of that specific Area, the Area Description, Area member statistics, and a tab bar for Groups, Families, Map, Metrics, and Tools. Area Details Area Statistics Area statistics are a quick, at-a-glance way to see various totals about the number of people whose addresses fall within this Area. Baptized – This is the percentage of active adults with a date value for the Baptized Person Attribute. In a Group – This is the percentage of active adults in the Area enrolled in a Small Group. Serving – This is the percentage of active adults in a Serving Tag with the status of “Connected”. Adults – This is the total number of people whose family role is adult, record status is active, and their address places them in this Area. Children – This is the total number of active children whose address places them in this Area. Households – This is the total number of Families in this Area. Area Statistics uses standardized. Groups Tab This tab shows a list of all Small Groups that are in a set Category and have a Location that is within this Area. Clicking on a Group name link will open the Small Group details for that Group. Arena Premium v2012.1.100 Arena User Manual – Groups 148 Families Tab This tab displays a list of all the Families that are in this Area. Clicking on a Family Head name link will bring up the Person Details page for that person. Area Families Arena identifies Head of Household as follows: Family Role (adult over child) Gender (male over female) Age (eldest) Arena Premium v2012.1.100 Arena User Manual – Groups 149 Map Tab This tab will display a larger version of the Area Map, and place color-coded Pins for the various Membership Status values. Filter by checking or unchecking a pin value or use any of the Filter Criteria below. Map Click View Larger Map to see a full-page version of the map image. Hovering over a pin will display a pop-up with person or group information Metrics Tab You can add Metrics to this Area. See your Arena Administrator for additional information. Tools Tab You can make Reports available on this tab. Reports are created using Microsoft Reporting Services. Area Tools Arena Premium v2012.1.100 Arena User Manual – Groups 150 Reports The Reports area for Groups has functionality identical to the Reports section in Membership. The two default reports allow you to print a roster for more than one Group or more than one Tag. You can also use these reports in conjunction with the Attendance Upload module, where by you can upload attendance using a bard code scanner. Groups Reports Steps to run a Roster Report: 1) Select a report. 2) Select the parameters, as desired. 3) Click View Report. Roster Report Parameters The report will display the Group or Tag, the Leader (if a Group), the Meeting Date, the Meeting Time and each member of that Group or Tag. See your Arena Administrator regarding additional reports. Tag Roster Report Arena Premium v2012.1.100 Arena User Manual – Tags 151 Tags Tags are another way to group records together. Personal, Ministry, Serving and Event Tags are designed for specific uses, although you may choose to tailor a tag in order to meet the needs of your organization. Personal Tags are only visible to the current user and allows you to track people such as lunch contacts, personal accountability partners, and relationships specific to you. Ministry Tags allows you to track people and their relationship to your organization’s ministries, such as, Bible study participants, church committees, and other ministry-specific groups. Serving Tags allows you to track volunteers and prospective volunteers for your organization’s ministries. You can also track volunteer qualifications and/or training. Event Tags allows you track church-wide and ministry-specific events and classes, including on-line registration. Ministry, Serving and Event Tags are visible only to the user who creates the tag. The Security tab by default for each Tag allows you to set security so other users can view and edit the Tag. Arena Premium v2012.1.100 Arena User Manual – Tags 152 Personal Tags Personal Tags and Ministry Tags functions the same, with exception of Security settings. Only the user who creates Personal Tags can access it. Through security settings, other users can access Ministry Tags. Please refer to the Ministry Tag section of this manual for more details. Ministry Tags You can use Ministry tags internally to track individuals as they relate to your organization’s ministries. Examples of ministry tags are Church Committees, Board of Elders, church staff, etc. Steps to Create a Personal or Ministry Tag: 1) Go to Tags Ministry Tags. 2) If you do not have any existing tags, click the Add link as shown below. If you have existing tags, click the Add New Personal Tag icon in the lower left corner. Add New Ministry Tag Arena Premium v2012.1.100 Arena User Manual – Tags 153 3) 4) 5) 6) 7) 8) In the Overview box, enter a Name for this tag. Select Campus, if you are using Campus. Enter Default Start and End Time, if desired. Click the Change... hyperlink to change from the current user. Adjust the Relationships scales, as desired. Enter Internal Notes for this Tag, as desired. Tag Overview Arena Premium v2012.1.100 Arena User Manual – Tags 154 9) Select the Custom Fields tab to create custom fields. These Custom Fields will be available for other Tags. 10) For Custom Fields, Click the Edit icon to customize the field. 11) Enter or select desired information for this custom field name. Adding a Custom Field 12) Click the Add Custom Field icon to add a single field or select one of the options in the Custom Field Modules drop-down to add a multiple fields. See your Arena Administrator regarding Custom Field Modules. Field Types: Address – places Street, City, State, and Zip fields on the form. Area – places a list of existing areas on the form in a drop down list format. Checkbox – places a checkbox for each value added in the Value field. Enter the values separated by commas. You can select any or all of the available options. Custom Query – allows a custom query. Date – places a date field with a calendar button. Document – allows a user to upload a document. Dropdown List – places a drop-down list populated with each value added in the Value field. Image – this allows users to upload an image. Lookup Type – allow you to select from a list of Lookup fields. Person – allows you to select an existing record. Phone Number – allows you to enter a telephone number. Radio List – places a radio button for each value added in the Value field. Users can select only one option. Rich Text Field- allows users to enter rich text. Static HTML Content – allows user to enter HTML content. Static HTML Content – any text placed in the Value field is included as static text. Textbox – places a text box on the form. The text box will allow 255 characters. Arena Premium v2012.1.100 Arena User Manual – Tags 155 13) Click Member Custom Fields tab, if you would like to create custom fields for each tag member. Tag Member Custom Fields 14) Click Update. 15) Repeat steps 10 through 13 for all custom fields. 16) On the Members tab, click the Add Person tag. icon to search and select existing records to add to the new Arena Premium v2012.1.100 Arena User Manual – Tags 156 17) Once people records are in a tag, you can click his or her name to view personal information, update any custom field, view or add an activity. Tag Member Details 18) Once you create a tag, like Groups, you can print a list of members, take attendance, view the roster and upload documents. Arena Premium v2012.1.100 Arena User Manual – Tags 157 Relationships You can set up peer networks using owner-to-member and member-to-member relationships, as shown below. Once you move a relationship scale from the weak position, Arena will calculate a numerical value that represents the strength of the relationship. The scores will show on the person details page in the Peer Networks section as seen in the Membership→Me section of this manual. Peer Tag Relationships Tag Security Tab The Security tab is available in the Ministry, Serving, and Event tags. Personal tags are only viewable by the person who set up the tag; therefore, security does not apply. The Security tab of the tag allows you to set specific permissions for people or Security Roles. This can allow another person to view the information in the tag, but restrict ability to edit the tag itself or the members of the tag. Be sure you always have a user in this list with at least View and Edit Security permissions, as removing all users with View permissions from this list will cause this to be a ‘lost’ tag that no one can view. Removing all users’ Edit Security permissions will prevent you from making any further changes to the security of this tag. Child tags inherit the security permissions of their Parent tag. Users with permissions to specific Event Tags can view the Promotions associated with those Event Tags through the View Promotions button within the Tags. The ability to edit a tag is bundled with the ability to delete the tag as well. Arena Premium v2012.1.100 Arena User Manual – Tags 158 Occurrences Tab You can use Occurrences to track attendance and meeting dates just like Group Occurrences. See Occurrences in the Groups section of this manual. Attendance Summary Tab This tab displays a summary of Occurrences for all people in the Tag or Group. You can filter by first name, last name, a date range, gender, and attendee status. Click Apply Filter to view the results. You may also select members from the grid to bulk update, e-mail, print labels in Word or export to Excel. If no members are selected all will be included in the selected function. Available options may vary. Attendance Summary Tab From the Attendance Summary page, you can select individuals to export to Excel or Word, or for Bulk Update or a New Communication. Arena Premium v2012.1.100 Arena User Manual – Tags 159 Tag Roster The Roster tab that is available on Small Groups is also available on Ministry, Personal, and Serving Tags. From this tab, you can sort the results by Last Name, First Name or Date Added. Tag Roster Print Roster The Print Members option in Tags allows you to print a Roster with Bar Codes for each member. Print Members Arena Premium v2012.1.100 Arena User Manual – Tags 160 Steps to Edit the Tag Security: 1) Go to the respective Tag. 2) Click the link to the appropriate tag. 3) Click the Security tab. Security Tab 4) Select a Security Role from the Available Roles drop-down and select Add Role, or click the Add Person… to search and select an existing Record. 5) Make the desired access selections in the Access Allowed area. View – This access allows users to the view the tag. Edit – This access allows users to edit the tag details. Edit People – This access allows users the ability to edit people in the tag. 6) Click Update. Arena Premium v2012.1.100 Arena User Manual – Tags 161 C OMMON T AG Q UE S T I ONS Steps to Subscribe to a Tag You can subscribe to a Tag by checking the Checkbox next to any Tag. Tag subscriptions will place the Tag on your home page along with the numbers of Pending Registrations, Critical Registrants (for Serving Tags only), and Total number of Connected members, as shown below. Subscribing to Tags Home Page Tag Subscriptions Arena Premium v2012.1.100 Arena User Manual – Tags 162 Steps to Make a Tag Inactive: By default, new tags are active. The light bulb icon in the Active column indicates that the tag is active. Tags are active by default upon creation. De-selecting the Active Only box will display all tags. Tag Status 1) Go to Tag you want to make inactivate. 2) Click the Edit Details button. 3) Uncheck the Active checkbox. 4) Click the Update button to save. Arena Premium v2012.1.100 Arena User Manual – Tags 163 Steps to Delete a Tag: 1) Go to the respective Tag tree and click through the tag tree until the desired tag displays on the tag list page. You can delete a tag only at the lowest level of the tag tree. 2) Click the Delete icon that is in the same row as the tag you want to delete. A notice will pop up indicating that you are deleting the tag and removing the members from this tag. 3) Click OK to confirm that you want to delete the tag. Steps to Make a Person Inactive in a Tag: 1) Go to respective Tag and locate the person. 2) Click the person’s name. 3) Click <Tag> Tag Details. 1) In the Status drop-down, select Inactive. 2) Click Update. Arena Premium v2012.1.100 Arena User Manual – Tags 164 Steps to E-mail Tag Members: 1) Select the respective Tag. 2) Select the records for which you would like to e-mail. If you select none, all records across all pages will be included. 3) Click the e-mail icon at the bottom right corner of the Members tab. See the Communications section of this manual for specific steps. Steps to Create Mailing Labels for Tag Members: 1) Select the respective Tag. 2) Select the records for which you would like to create labels. If you select none, all across all pages will be included. 3) Click on the Word icon at the bottom right corner of the Members tab. 4) Select Person Labels from the Merge Document pop-up drop-down. Merge Document Pop-up 5) Click Update to complete the merge. Steps to Export Tag Member Information to a Spreadsheet: 1) Select the respective Tag. 2) Select the records for which you would like to export. If you select none, all across all pages will be included. 3) Click on the Excel icon at the bottom right corner of the Members tab. 4) A window will display, giving you the option to open or save the spreadsheet. Arena Premium v2012.1.100 Arena User Manual – Tags 165 Steps to Change the Parent of a Tag: 1) Select the Tag. 2) Click Edit Details. 3) Click the button. 4) Select the Tag Type from the Filter drop-down. Tag Filter 5) Select the new Parent Tag. Tag List 6) Click OK. 7) Click Update. If moving to the top level of a non-Personal Tag, the user must have module edit rights. Arena Premium v2012.1.100 Arena User Manual – Tags 166 Serving Tags You can use Serving tags to track prospects and volunteers who serve in a ministry area, such as guest service workers and children’s ministry volunteers. Steps for setting up a new Serving Tag: 1) Go to Tags Serving Tags. 2) Click the Add link if this is the first Serving tag in your system or click the Add New Serving Tag the bottom right-hand corner if you have existing tags. 3) On the Overview tab, enter a name. 4) Select campus, if applicable. 5) Enter start and end time, if applicable. 6) Change owner, if applicable. 7) Adjust relationship strength, as desired. icon on New Serving Tag Overview 8) Click the Serving Criteria tab. Arena Premium v2012.1.100 Arena User Manual – Tags 167 9) Enter and select criteria, as desired. Serving Tag Criteria Display to Public – Select this box if you would like to display this serving opportunity on your Arenamanaged website. Category Level – Select this box for this tag to be a category on your Arena-managed website such as, Guest Services with Greeters as a sub-level tag. Critical Need – Select this box to denote if this tag is a critical need. If selected, the tag will display on the initial Serving Opportunities page of your Arena-managed website. Default Hours/Week – Enter the number of hours per week required for this serving opportunity. Volunteers Needed – Enter the number of volunteers needed for this opportunity. Once this tag has this number of volunteers with a connected status, it will no longer be available on your Arena-managed website. Weekly Commitment, Timeframe, Classification, Content Category, and Duration are criterion that allows website users to search a select a serving opportunity. These options will vary. See your Arena Administrator regarding customization for your organization. You must select a Content Category for the serving opportunity to be available on your Arena-managed website for registration purposes. 10) Select the Serving Details tab. Arena Premium v2012.1.100 Arena User Manual – Tags 168 11) Enter information for each section, as desired. Serving Details Tab 12) Click Custom Fields tab to create custom fields. Tag Custom Fields 13) Click the Member Custom Fields tab. 14) Add custom fields, as desired. See detailed instructions in the Ministry Tag section of this manual. Serving Tag Member Custom Fields 15) Click Update. Arena Premium v2012.1.100 Arena User Manual – Tags 169 Steps to Add and Existing Record as a Registrant to a Serving Tag: 1) 2) 3) 4) 5) Click Add Volunteer under Volunteer Tracking. Click the Add… link to search and select for the existing record. Select the Source, in how the person learned of the volunteer opportunity. Click the Choose… link to search and select a Serving tag. Enter Comments, as desired. Add Volunteer Page 6) Click Add. Arena will add the person to the tag, with the default status of In Process. Arena Premium v2012.1.100 Arena User Manual – Tags 170 Tag Sorting On the tag page, you can sort by any single column. Click a column heading to sort in ascending or descending order. Column Sorting Tag Filters On the Tag Members tab, you can filter members by status. Options vary by tags and specific status options may vary for your organization. Serving Tag Filter No Contact - This is the default status applied to new prospects. You should contact the prospect within one week. Once you make contact, you can change the status to ‘In Process’ or whatever is the next step in your organization’s process. In Process - This status applies to contacted prospects; their response is pending. Background Check Pending - This status is used for prospects who have committed to serve, but must have a background check approved before starting to serve. Unable to Serve - This status is for prospects that are not able to serve in the ministry for which they originally volunteered. When changing the status to ‘Unable to Serve’ you must provide a reason. The volunteer coordinator will review these prospects and remove them. No Response - This status is for prospects who do not respond to your efforts to contact them. Already Serving - This status applies to prospects who tell you that they are already serving when you contact them. Be sure to record where the prospect is serving in the reason field. The volunteer coordinator will review these prospects and remove them. Place Elsewhere - This status is if the prospect wishes to serve in a different area. Connected - This is the default status for a person, once you place him or her in the serving tag. Inactive - This status applies to a person who is part of the ministry but for some reason is not currently participating. For example, if there is a volunteer on your team who is taking a month’s vacation, change him to inactive. When the person returns update him back to active. Arena Premium v2012.1.100 Arena User Manual – Tags 171 Event Tags You can use Event tags to track people who sign up for an event like a conference or a class. Event tags differ from other tags because they have a specific begin and end date and can process payments. They also allow Sub-Events such as a conference with individual classes. The following instructions provide you with the steps for Events with Sub-Events. Considerations when using Sub-Events: Each sub-event has its own name, start time, end time, etc. Custom Fields are only available for a parent, not for the sub-events. Each sub-event can also have its own costs, fees, and discounts. The user will make one payment for multiple events when registering. Sub-events cannot have sub-events. You can create only one level of sub-events. Considerations when using RSVP Events: Payments are accepted. Discounts are not available. Sub-events are not available. Arena Premium v2012.1.100 Arena User Manual – Tags 172 Steps to Create an Event Tag: 1) Go to Tags Event Tags. 2) Click the Add link if this is the first event tag in Arena. If Tags already exist then click the Add New Event Tag icon. 3) Enter the event details on the Event Details tab. New Event Tag Details Name – This is the name for the event. If this event has classes, they will likely be sub-events. Active – Indicates this event is an active event. RSVP Event – Check this box if you would like to allow users to register multiple people without requiring data to be entered for each person. This option is available for Event Tags with no Sub-Events. Parent – This is the parent of this event tag. If this is the top-level tag, Events will be the Parent. Sub-events Enabled – Check this box to create sub-events. ONLY top-level events can have sub-events. Sub-events cannot have sub-events. Sub-events Type – Lets you specify what type of sub-events should be available for this event. Options are: o Required (user must choose at least one sub-event) Consider this option if the parent event is just used to group events together. o Optional (sub-events are optional) Owner – By default, the person creating the event will be the owner. To change the owner, click Select. Peer Relationships – Set the relationship strength, as desired. Arena Premium v2012.1.100 Arena User Manual – Tags 173 Event Type – This is a filter on your organization’s Arena managed website. Resourced – Use this feature to a schedule and resources set up in MinistrEspace. Use this option if your organization has an account with MinistrEspace. Start and End Dates – These are the dates for the actual event. Location – This is the location of the event. Projected Attendance – This is the number of people you are expecting. The number of registrants can be limited on the Registration Details tab under Registration. Display this event on a person’s detail page ONLY if they actually ATTEND this event – If you select this box and take attendance, this event will display on the Person Detail page for the registrant. Summary – This is the event summary displayed on your organization’s Arena managed website. Event Details- This is the details of the event displayed on your organization’s Arena managed website. 4) If using MinistrEspace, select the Page Picker to select an existing event in MinistrEspace. Resourced Page Picker 5) Select an event from the pop-up. You can also use the filter and date field filters to search for the desired event. This pop-up displays approved MinistrEspace events. MinistrEspace Event Pop-up Arena Premium v2012.1.100 Arena User Manual – Tags 174 6) Click OK to return to Event Details. 7) Arena will populate date fields using the MinistrEspace dates. Resourced Details 8) There will now be a new MinistEspace Resource Summary tab for this Event. Select the Event Link to access MinistrEspace page. If you change the dates of an event in MinistrEspace, use the page picker to reselect the event in order for changes to take effect. 9) Click Update or Cancel to continue creating this event. Arena Premium v2012.1.100 Arena User Manual – Tags 175 10) Click the Public Calendar Details tab, as shown below, and fill in the fields as needed. New Event Tag Public Calendar Details Contact Name, Phone and E-mail – This is the contact information displayed on the page for this event on your organization’s Arena managed website. External Link – If used, this link will be the web page redirect to the proper URL used for registration for this event. Visibility – Select Public if the event should be available on your organization’s Arena managed website. Primary Ministry – This determines the page on your organization’s Arena managed website where this event will display. Alternate Ministry – By selecting any other of these options, this event can be available on other Arena managed website pages. Along with a future Occurrence, the Event must be approved in order to display on the website. Arena Premium v2012.1.100 Arena User Manual – Tags 176 11) Click the Registration tab and check the Enabled box to display options for Online Registration. Edit Registration security is required to view and edit the Registrations tabs. Child tags of a Parent with Edit Registration permissions will also have Edit Registration permissions enabled for the same user. See Tag Security in this manual for more information. New Event Tag Registration Details Enabled: This enables the six Registration tabs. Registration Start and End Dates: These are the dates and times the event should be available on-line for registrations. Limit Registrations: The maximum number of registrations allowed. If using “Allow Multiple Registrants…,” Arena lists only the open slots. Example: If three slots are available and the user would like to register four, only three will be available in the drop-down. Allow Multiple Registrants: The maximum number of people who can register together. Allow Anonymous: To allow persons to register without having to login. This option will create a registration, as an anonymous registration and add the registrants into the database as records. Arena Premium v2012.1.100 Arena User Manual – Tags 177 12) Click the Fields sub-tab, as shown below, to select the fields to use for on-line registration for this event. New Event Tag Registration Fields Use – Check these boxes for fields you want to be on the event registration form. Required — Check these boxes for fields that are required to complete on the event registration form. Auto Fill — Check these boxes for events where a login is required. The fields will populate, using data from existing records. This option applies to events behind a login on the Arena-managed website. Show on Summary—Check these boxes for fields you want to display on the registration summary page. Order – Change the numbers in the order column to change the display order on the registration page. Arena Premium v2012.1.100 Arena User Manual – Tags 178 7) To add a Registration Custom Field, select the New Custom Field icon, and then click the Edit Custom Field icon. Fill in the required fields as needed. To change the order or Custom Fields use the button. arrow Custom Fields Title – This is the name of the Custom Field. Title Location – You can select the location for the fields, which are left, right, top, or bottom. Type – You can select the type of field. The options are: o Address – this field gives users the ability to enter an address. o Area – this field enables you to select an available area. You can create Areas in Groups. o Checkbox – this field enables you the ability to create a multi-select list of options for users. o Custom Query – this field enables you the ability to enter a custom query. o Date – this field allows users to enter a date. o Document –this field enables users the ability to attach a document. You must create at least one Document Type for this field to be available. o Dropdown List – this field enables you the ability to create a drop-down list of options for users to select. o Image – this field enables users the ability to upload an image. o Lookup Type – this field enables you the ability to select an existing drop-down from Lookups. o Person – this field enables users the ability to search for a single existing record. Person Page ID is “7”. o Phone Number – this field enables users the ability to enter a 10-digit telephone number with the option to enter an extension. o Radio List – this field enables you the ability to create a single-select radio list of option for users. o Rich Text Field- this fields enables you the ability to enter rich text. o Static HTML Content – this field enables you the ability to enter HTML content. o Static HTML Content – this field enables you the ability to enter static text. o Textbox – this field enables users the ability to enter text. Rows – This option, used when field type is textbox, enables word wrapping for the number of entered rows. Pixels Wide – This option, used when field type is textbox, enables you to enter a value that represents the width of the field box. Value(s) – Depending on the Field Type, you may be required to enter a value for the choices presented. Field Types that require this are checkbox, radio, drop-down, and static. These values are comma delimited for multiple values. Arena Premium v2012.1.100 Arena User Manual – Tags 179 Visible – Check this box to make the field visible (both internally and externally). Required – Check this box for fields that are required to select or complete. Read Only – Check this box for view only fields. This will make the field display as a disabled field (grayed out). Enable Auto-Fill – Check this box for the field to auto-populate, using Arena data. This option is applicable when users must login first. Show on List – Check this box for fields to display on the confirmation page of event registration. To enter a new Custom Field Module, select the Module/control from the drop-down list in the Custom Field Modules area and click the Add button. Your Arena Administrator can create these modules. Custom Field Modules To remove a Custom Field or Custom Field Module, click the Remove you want to remove. button next to the field/module 10) Click the Communication tab. Arena Premium v2012.1.100 Arena User Manual – Tags 180 11) Click the Enabled checkbox and complete the required information for each e-mail option. Event Communications Registration Confirmation – Enter a subject and text to send an e-mail to each person who registers for the event, confirming his or her registration. Event Reminders – Enter a subject and text to send an e-mail to each registrant, reminding him or her of the event. You can send up to two reminder e-mails. E-Tickets – Select an available e-ticket, as desired. Notify Owner – Check this box if the event tag owner would like to receive e-mail notification when someone registers for the event online. Arena Premium v2012.1.100 Arena User Manual – Tags 181 12) Click the Payments & Fees tab. A Payment Gateway account is required. See your Arena Administrator for more information. 13) Click the Enabled checkbox. 14) Click the Add New Fee icon in the Event Costs and Additional Fees sections to add fees for this event, as desired. 15) Click the Edit Fee icon to enter the fee information. If using sub-events: Only one "discount code" text box displays, but each sub-event can have its own discount code. You can use the same text for the discount code on sub-events but assign different discount percentages or discount amounts. Sub-events do not require payments or fees. To allow registration without payment, set the due date for a future date. To require payment, set the date due to the current or past date. 16) Select Payment Gateway(s). You can select one payment gateway for credit card payments, and a second for ACH payments. New Event Tag Registration Payments & Fees 17) Click the Discounts tab to create specific discounts for the event and fill in the required fields as shown below. You can enter percentages, including 100% or dollar value discounts. Percentage discounts apply before dollar discounts. Arena Premium v2012.1.100 Arena User Manual – Tags 182 New Event Tag Registration Discounts Group Discount – This discount will reduce the price for every group member. Early Bird Discount – This discount offers a price reduction before a specific date. Discount Codes – Use this additional discount for custom discounts like scholarships, staff or testing. Max Allowed controls how many times to use the specified discount code, regardless of the number of registrants. The Limited checkbox tells Arena how many times to limit use of the Discount Code, based on the Max Allowed number. However, it only will limit the number of times to use the code on the external site. If the Limited checkbox is unchecked, you can enter the discount code as many times as you like. Each registrant can use one discount code. Early Bird Discounts end the morning of the end date. For example, if the discount ends July 1 st, enter July 2nd as the end date. 18) Click the Advanced tab to choose what labels the system will use when someone registers for the event, as shown below. If you are using sub-events, only custom fields from the parent Tag event display. Advanced Event Tag Label Setup Arena Premium v2012.1.100 Arena User Manual – Tags 183 19) Select the Custom Fields tab to add fields for Tag members. When using sub-events, you can set Custom Fields for the Sub-Events on the Sub-Event page. 20) If using the optional Registration Steps tab, add all 5 steps. (Futures updates will allow you to select only the steps needed for your event configuration). 21) Click Update. 22) Click Promote This Event button, if you would like to create a separate promotion. View Promotion If you have access to a specific Event Tag, you will also have access to the associated Promotion. 23) If you would like to allow on-line registration, you will need to create a future occurrence. If a future Occurrence is not created, the below pop-up will display. Event Occurrence Arena Premium v2012.1.100 Arena User Manual – Tags 184 24) Click OK to proceed with adding an occurrence. 25) Click the Occurrence tab. 26) Click the Add New Occurrence icon. New Event Occurrence 27) Click the New Occurrence hyperlink New Occurrence 28) Click Edit Details. 29) Make the appropriate changes and entries for this occurrence. Events listed on your Arena-managed website must have a future start date such as, the first day of the event. See Occurrences in Groups for explanation of each field. Edit Details 30) Click Update. Arena Premium v2012.1.100 Arena User Manual – Tags 185 Steps to Add a Registration to an Event Tag: 1) From the page of the specific Tag, click the Registrations tab. 2) Click the Add New Registration link to search and select an existing record. 3) Click the name of the registration. 4) Make the appropriate entries for this registration or add other registrants for this registration. Registrants – Use this tab to display all registrants for this single registration. You also delete existing registrants or add more registrants for this registration. For example, to register two children by a parent, add the parent on the Registration tab which will add them as a Registrant . Then click the parent's registration. Add the children and remove the parent. Now you are ready to proceed with any other adjustments for each registrant. Payments – Use this tab to enter payments for each registrant for this registration. Options may vary. Communications - Use this tab to send the registration e-mail to the registering person. Cost Details – Use this tab to display the payment details for each registrant. Arena Premium v2012.1.100 Arena User Manual – Tags 186 Steps to Add an Existing Record to a Sub-event Tag: 1) Select the Registrants tab of the Event Tag (not Sub-Event). 2) Select the name of the Registrant. 3) Select the Sub-Events for this person. 4) Update. Arena Premium v2012.1.100 Arena User Manual – Tags 187 Steps to Export Event Transactions: 1) From the Event Transactions tab, use the Filter fields to filter any transactions. 2) Click Export GL File… button. Any transactions that display on the screen are batched for export. Event Transactions Tab 3) Enter appropriate General Ledger information. To use the export button, you will need to first create a General Ledger Export page using the Event General Ledger Export popup. 4) Click Export. Arena Premium v2012.1.100 Arena User Manual – Tags 188 5) You are now ready to import transactions into Shelby v.5. 6) On the Event Tag Transactions tab, all exported transactions are marked as exported. You can run the general ledger export multiple times for the same event. Use the filter to exclude previously exported transactions. 7) Click the Export GL File… Arena Premium v2012.1.100 Arena User Manual – Tags 189 8) From the General Ledger Export page, complete all desired fields. 9) Click Export. 10) Save the GLTRN200.txt file in the ssv5.dat folder. Arena Premium v2012.1.100 Arena User Manual – Tags 190 11) The below confirmation window will display and you are ready to import the GLTRN200.txt file into Shelby v.5. Arena Premium v2012.1.100 Arena User Manual – Tags 191 Steps to Manually add a Payment for a Registrant: 1) Go to the Registration tab for this Event. Event Registrations 2) Click the name of the person to whom you want to make a manual payment. Registration 3) Click the Payments tab. Payments Tab 4) Click Add link. Add Payment 5) Enter appropriate payment information. Arena Premium v2012.1.100 Arena User Manual – Tags 192 7) Select which payment the amount should be applied. Event Payments Post Transaction posts the transaction to the payment processor, if you make the payment manually. 8) Click Update. Arena Premium v2012.1.100 Arena User Manual – Tags 193 Steps to Update Event Tag Registrants, if not using sub-events: 1) From the Event Registrant tab, click the name. Event Registrant Details 2) Make changes, as desired for the registrant. Steps to Apply a Refund You can apply refund to exported transactions. 1) Go to the desired Event Tag. 2) Select the Registration Tab. Event Registrations 3) Select the Registration of whom you would like to apply a refund. Event Registrations Arena Premium v2012.1.100 Arena User Manual – Tags 194 4) Select the Payments tab. Event Registration 5) Select the Transaction Date. Transaction Date Arena Premium v2012.1.100 Arena User Manual – Tags 195 6) Select Refund. Event Refund 7) Click OK to confirm the Refund. Refund Confirmation Arena Premium v2012.1.100 Arena User Manual – Tags 196 Refund confirmation message Refund on Payments Tab You cannot delete Registrations with applied payments. You can process multiple refunds. Arena Premium v2012.1.100 Arena User Manual – Tags 197 Steps to Resend an E-mail to a Registrant 1) Select the Registration tab of the Event Tag. 2) Select the name of the Registration. 3) Select the Communications tab. 4) Click the Resend button. Resend Event Email Arena Premium v2012.1.100 Arena User Manual – Volunteer Tracking 198 Volunteer Tracking Arena’s Volunteer Tracking provides the tools to monitor and maintain your entire volunteer ministry. Arena assigns volunteers to a serving tag according to their preferences by using the Add a Volunteer page and a Serving Opportunities tool available on your Arena-managed website. You can directly assign volunteers to a specific position by adding their name to a Serving Tag. You can also view all of your volunteers, regardless of the serving tag, under the Administration area of Volunteer Tracking. Add Volunteer Use the Add a Volunteer page to add a person, according to their serving preferences. Adding a person through this page will place him or her in a serving tag with a pending status. Steps to Add a Volunteer: 1) Click on Volunteer Tracking Add Volunteer. 2) In the Persons area, click the Add… link to search and select for an existing record. Add a Volunteer 3) Select the Source of the volunteer by using the drop-down list, for example: Contact Card, Phone Call, or Web Response. 4) Click the Choose…. link to select the Serving tag(s) of interest. 5) Enter comments, as desired. 6) Click Add. When you submit the request, Arena places the volunteer on the selected Serving Tag(s) with a “Pending” status. Then you can view the record in the Volunteer Tracking Volunteer Administration area. The process is complete when someone at the organization contacts this potential volunteer and then updates the record as shown in Administration below. Your Arena Administrator can configure e-mails to send to people responsible for these positions. Arena Premium v2012.1.100 Arena User Manual – Volunteer Tracking 199 Serving Tags The Volunteer Tracking Serving Tags link is a redirect to the Tags Serving Tags area. See Chapter 4 – Tags for more information on Serving Tags. Volunteer Administration The Administration page displays information needed to process Volunteers and place them in a specific Serving Tag or status. Volunteer Administration Steps to Update a Volunteer: 1) Under Volunteer Tracking Administration, select the record you wish to edit by clicking the person’s name. This page will display the relevant Personal Information, Contact Information, Address Information, the dates associated with this Volunteer application, the Serving Tag details and any notes added during its creation. This page also lists all of the person’s activities such as joining or leaving a Service Tag. 2) To make changes to this record, click the Edit link to open the Serving Tag Details area as shown below. On this page you can edit the person’s Source, Status within the tag, the Reason for this status, the number of Hours per Week he is active in this tag, indicate if he has met all Prerequisites for this tag, change his Serving Tag membership using the Move To drop-down, and add serving Notes. After completing this page, click the Save link to save the entry. Serving Tag Details Arena Premium v2012.1.100 Arena User Manual – Volunteer Tracking 200 Status Flag The colored flag next to a Serving Tag registrant name indicates the registrant’s status. Note that only members who are under the In Process or No Contact status will show one of these flags. Status Flags Status Description - Green Record has been modified in the last week. - Yellow Record has not been modified in over a week. - Red Record has not been modified in over 4 weeks. Arena Premium v2012.1.100 Arena User Manual – Promotions 201 Promotions Promotions are upcoming events or announcements that Arena users want published, on your organization’s Arena-managed website, as an entry within your organization’s bulletin, or on your organization’s newsletter or E-zine. Your Arena Administrator can implement an approval process so that supervisors have to approve requests made by Arena users before publication. For more information on the setup of your website, and/or HTML newsletters, please refer to the Arena Administrator manual. New Promotion Request The New Promotion Request page is used to submit promotions and their details for review by an administrator or director, who will approve it for use in your organization’s Arena-managed website, organization bulletin, or newsletter/E-zine. Steps to Submit a New Promotion Request: 1) Go to Promotions New Promotion Request, as shown below. 2) Complete all applicable fields. New Promotion Request Arena Premium v2012.1.100 Arena User Manual – Promotions 202 3) 4) 5) 6) Title – Enter a title for this promotion such as brief description of the event or a tagline for the event. Priority – The Priority determines which promotions to display on the Arena-managed web site and in what order, on a scale of 0 to 99 (0-99 is lowest to highest). Contact Name, Phone and Email – Click the Change… link to select from existing records or enter the values for each field. If using with an Event Tag, this will typically be the same as the Event contact for an Event Tag. Event – If this is a promotion for a specific Event Tag, select the Event from the drop-down list. If this is not an Event Tag promotion, leave this set to none. To view the details of an Event Tag, click the View button to select from all active Event Tags. Event Tags can be associated with one Promotion. Primary Ministry – Select a Primary Ministry for this event from the drop-down to determine where to display the promotion of your Arena-managed website. Alternate Ministry – If applicable, select alternate ministries to determine additional areas to display the promotion of your Arena-managed website. The Primary Ministry will indicate the primary instance of the promotions module/control on your organization’s Arena-managed webpage that this promotion will display on, while Alternate Ministries will indicate any other instances of the promotions module/control that will display this promotion if there is an empty spot available. Priority – Use this field to manage the display order on the website. Select the Web tab. a) Check the Promote on Web checkbox to promote on your Arena-managed website. b) Enter promotion Date Range. c) Enter Web Summary to display a brief description on the thumbnail display on your Arena-managed Website, on the “Get More Info” link on the web promotion. d) If desired, use the External Link field if you are using a third party for your registrations. Select the Bulletin tab. a) Select a bulletin date for your promotion. b) Enter a summary for the event. c) Select applicable options. Select the Newsletter tab. a) Check the Promote on Newsletter checkbox. b) Enter a date range. c) Check Use Web Summary, if applicable, or enter the newsletter summary. Click the Save button to save the event promotion request. Arena Premium v2012.1.100 Arena User Manual – Promotions 203 Public Calendar The Public Calendar page, as shown below, displays all up-coming or on-going Promotions, according to their dates, which is useful as a quick reference for the approval process. Use the filters at the top of the page to display the desired items. The list will display the First Occurrence, Last Occurrence, Tier Level, Ministry (Topic Area), Details, Approved, and Priority. The Details column will list the Promotions with the title as a link to the Promotion page. Click the Save Changes button to save any changes in the Approved or Priority columns. Public Calendar Arena Premium v2012.1.100 Arena User Manual – Promotions 204 Web Requests The Web Request page, shown below, displays all Promotions entered with the Promote on Web option selected on the Web tab. This is a quick reference for approval of all web promotions. Use the filters at the top of the page to display the desired items. Web requests display below the filters with the relevant information. The Web Request page displays Starting and Ending Dates, Area, Details, Home Page option, Approval Status and Priority. Click the title link to open the entry. Click the Save Changes button to save changes to the Approved or Priority columns. Web Requests Arena Premium v2012.1.100 Arena User Manual – Promotions 205 Bulletin Requests The Bulletin Requests page, as shown below, displays all Promotions entered with a Bulletin request item on the Bulletin tab. You can use this page as a quick reference for approval of all Bulletin Requests. Your publishing staff should use this page to see what promotions should be included on a bulletin, as Arena does not publish a bulletin itself. Note that this view will only show Requests for publishing dates that have not occurred yet. To view previous Bulletin Requests you will need to open the person promotion itself under Promotions All Promotion Requests. Use the filters at the top of the page to display the desired items. The columns displayed on this page include Date, Area, Details, Approval Status, Priority and Published status. You can click the title link to open the entry. Click the Save Changes button to save your changes to the Approved, Priority, and Published columns. Bulletin Requests Arena Premium v2012.1.100 Arena User Manual – Promotions 206 Newsletter Promotions The Newsletter Promotions page, as shown below, displays all Promotions entered on the Newsletter tab. You can use this page as a quick reference for approval of all Newsletter Requests. Your publishing staff should use this page to see what promotions to add to the printed newsletter, as Arena does not publish a newsletter itself. Use the filters at the top of the page to display the desired items. The columns displayed on this page include Starting and Ending Dates, Area, Details, Approval Status and Priority. Click the title link to open the entry. Click the Save Changes button to save changes to the Approved or Priority columns. Newsletter Promotions Arena Premium v2012.1.100 Arena User Manual – Promotions 207 All Promotion Requests The All Promotion Requests page, as shown below, provides an overview of all Promotions. This is a reference point for all promotions and is where you can delete outdated promotions from the system. Clicking on the title link for a promotion opens it for maintenance or approval. You can add Promotions by selecting the Add New Promotion icon or clicking the Add link in the Filter area, or remove it by selecting the Delete in the appropriate row. icon All Promotion Requests Promotion Approvals When promotions you approve promotions, Arena will stamp the promotion with the name of the current approver, the date and time of the approval. Promotion Approval Arena Premium v2012.1.100 Arena User Manual – Sports 208 Sports You can use the Sports section to create, manage, and track the various Athletic Teams managed by your organization. Arena has the ability to organize Teams by Division, League, or any other form of categorization necessary. For ease of use, Sports is structured the same as Groups, in that it uses various Levels in a Parent to Child relationship to define Tree Structure (or, in this case, Team Structure), but with some differences in terminology. The Sports section also allows for tracking of Games and Scores, Play Schedules, Seasons, Team Rosters, Players and Coaches, and Team Statistics. You can maintain the various Sport Groups under the Clubs tab in Navigation. Clubs Clubs is where the structure is set for the Sport Teams. Adding and maintaining the Levels in the Sport Group Trees is the same as Small Groups. Typically, the largest difference will be in the field names, since these relate to Sport topics. Please refer to the Groups section of this manual for help with Group Trees and Small Groups (Teams). Schedule Clicking on the Schedule link will display the Game List, as shown below. Field locations, game dates, and game times display in this list. Use the drop-down list filters at the top of the page, to filter by season, date, division or team. Schedule List Arena Premium v2012.1.100 Arena User Manual – Sports 209 Steps to Add a Game: 1) Click the New Game icon to add a future game (or a past game). The page will refresh with a new entry at the bottom of the list. 2) Enter the date, time, choose the Location, Home Team, Score, Visiting Team, Visiting Team score, and the Status of the game. The status allows you to create games that have not occurred yet. 3) Click Update to save, Cancel to go back without saving, or Delete to remove this game. Steps to Edit a Game: 1) To edit a game, click the Edit Game icon next to the desired game. 2) Using the drop-down lists, choose the appropriate values for this game. 3) Click the Update icon to save the updated information. Reports The Reports area has identical functionality to the Reports in Membership. See Reports in under the Membership section of this manual for information on using custom reports and the Reports section of the Arena Reference Guide for information on creating and deploying custom reports, or visit http://community.arenachms.com/ for more information. Arena Premium v2012.1.100 Arena User Manual – Communications 210 Communications Use the pages in this section to send email communications, access previous emails, and create communication templates. Optionally, you can send SMS communications, manage thresholds, Global Threshold is available to require approvals for e-mail and SMS communications. See your Arena Administrator for more information. New Communication Steps to Create a New Communication: 1) Go to Communications New Communication. 2) Click on the Add… hyperlink to add recipients. This will open the Pop-up Person Search window to search and select current records. 3) Select a Template, if available. See Templates in this manual for more information. 4) In the From and From Email fields, enter applicable information if different from the current user. 5) Enter Reply to Email address, if different from the current user. 6) Click Attachments to add files to this communication. This brings up a pop-up window that allows you to browse and attach as many files as you choose. Click the Close button once you attach all the files. 7) Leaving the Add to History box selected to add this communication to the Person Detail history section of each recipient. New Communication 8) Type your e-mail message in this window. Your e-mail will display to the recipient in the same format that you enter it here. To use the available Merge Fields you can either copy/paste the fields from the Merge Fields section above the HTML window or use the Merge Fields drop-down in the HTML window. Arena Premium v2012.1.100 Arena User Manual – Communications 211 Editor Window Use the ##NickName## merge field code will use the Nick Name, if available, or First Name if no Nick Name is available. 9) Beneath the HTML Message window, a Text Message box is where you can enter the same message in Plain Text format for those receipts who receive plain text emails. Text Message Arena Premium v2012.1.100 Arena User Manual – Communications 212 10) Once you are ready to send, select the appropriate option. E-mail Options Now – Click this button to send the e-mail to all recipients for whom you have e-mail addresses. In the future – Click this button to schedule delivery of this e-mail for a future date and time. Check here if this is a bulk email message – Select this box to provide recipient the option to unsubscribe to emails. Send Test – Click this button to send the e-mail to the e-mail address in the “From Email” field. Save as Draft – Click this button save the e-mail for later access on the previous page. When sending an e-mail or SMS communication, if a recipient does not have an active email or identified SMSenabled phone number on his or her record, Arena will display the below window. From this window, you can merge those names with an available Word document, such as labels. Word Merge Option for E-mail and SMS Communications Arena Premium v2012.1.100 Arena User Manual – Communications 213 Steps for Sending SMS via E-mail (optional): 1) Enter the 10-digit phone number (found on the Individual Information tab of Person’s Detail page), select the provider from the Person Detail page. SMS from the Person Detail Page 2) You can now select the SMS icon from the Person Detail Page of the grid results in a List, Group, Tag or Mission Trip. Person Detail SMS Grid Results a. Arena Premium v2012.1.100 Arena User Manual – Communications 214 3) Now you are ready to enter your message in the SMS Message box. New Communication The counter will show how many characters have been entered, although the number of characters are not limited due to some cell providers sending multiple texts if 160 characters are exceeded. Arena Premium v2012.1.100 Arena User Manual – Communications 215 Previous Click on Communications Previous to view the content, history, and status of previously sent e-mails. This will display the previously sent e-mails of the current user login by default, but will display all users’ previously sent e-mails by checking the Show Everybody’s Communications checkbox. From this view you can see the Date the e-mail was created, who Created the e-mail, the Sender’s Name, the Sender’s E-mail address, the Subject, the Medium used (SMS, E-mail, or Mail), Recipients and Successful e-mails. Previous Communications When you send e-mails to addresses that are no longer valid, Arena sends a “bounce back” e-mail message to the sender. If your Arena E-mail Cleanup agent is running then Arena can process this message by inactivating the person’s rejected address and placing a note on the address that it is invalid. Arena Premium v2012.1.100 Arena User Manual – Communications 216 E-mail Templates E-mail Templates are for use in the Communications area of the internal application. Create e-mail templates for bulk e-mails you send on a regular basis and needs quickly accessed. Steps to Create a New E-mail Template: You can create new e-mail templates from within the Communications area of the navigation. 1) Go to CommunicationsTemplates 2) Click the Add New (Template) 3) Complete all applicable fields. icon. Communications Template To – Click the Add… hyperlink to add existing records. You can add multiple records. You can also use this as a cc field for e-mail communications. Template Name – Enter a name for this template. From – Enter a name for the sender, if desired. From E-mail – Enter an e-mail address for the send, if desired. Reply to E-mail – Enter the reply e-mail address. Subject – Enter a subject for this template, if desired. HTML Message – Using the full HTML tools, format this template, as desired. 4) Click the Save button to save the template for use in future communications. 5) Now go to Communications>New Communication and your template will display as an available template option. Arena Premium v2012.1.100 Arena User Manual – Communications 217 Approving E-mails If applicable, your Arena Administrator can add a page to allow designated users to approve Communications that exceed the threshold. Users with approval rights can view, approve, and reject the e-mails that exceed the threshold. Steps to Approve E-mails, If Applicable: 1) Click the “Approvers” page. Approver’s Page 2) Click on the E-mail to review. Review E-mails 3) After reviewing the e-mail, you can either approve or reject the e-mail. Arena will send an e-mail notification to the requestor. If rejected, the reason will be included in the e-mail. Process E-mail Rejected with a reason Rejected without a reason Arena Premium v2012.1.100 Arena User Manual – Communications 218 If an e-mail Communication includes members with no e-mail address, you will have the option to create labels for these members. Label option Arena tracks E-mail, SMS and Mail Communications on the Previous Communications page. Previous Communication Arena Premium v2012.1.100 Arena User Manual – Prayer 219 Prayer Arena tracks all aspects of Prayer Requests with an approval process for each step, including prayer requests entered from your website, responses to the original requestor, and a record of answers and comments. Due to the sensitive nature of a prayer request, and the nature of the communication between the organization family and requestor, we have integrated an approval process for any information associated with the request. We understand each organization has its own process for handling prayer requests, including assigning specific personnel to handle certain tasks. In the following example, we assume different people are involved at each step. Example: Staff member A manually enters a prayer request. Staff member B reviews and approves the request as valid. Staff member C enters answers for approved prayer requests. Staff member D enters comments for approved requests. If the entry person does not have the security rights to approve the request, it is marked with a “Needs Approval” status. You can access these prayers only on the Approve Requests page. This is also the case if the user enters the prayer request via the Arena-managed website. The person responsible for approving requests can open the Approve Requests page, open the desired request, and determine whether to approve the request so it can move to the next step. If the request is valid and you enter all necessary information, the approver can check the Approved checkbox and click the Save button. The system will save the request and return a “The Prayer Request has been saved!” message. The prayer team can then pray for the request. They may type in answers or comments. When someone adds a comment or answer to the Prayer Request, the approver must re-approve the entry by going to the appropriate page (Approve Answers or Approve Comments). Once a request is entered into Arena, it is always accessible (with the appropriate security role) from the All Prayer Requests page regardless of the status. Arena Premium v2012.1.100 Arena User Manual – Prayer 220 Add a Prayer Request Steps to Create a New Prayer Request: 1) Click on the Add a Prayer Request link to display the page shown below. Complete the information on this page. Add Prayer Request First Name - Enter the First Name of the person requesting prayer, if the person is not in Arena. Last Name - Enter the Last Name of the person requesting prayer, if the person is not in Arena. E-mail - Enter the E-mail address of the person requesting prayer. Prayer Category – Click the drop-down list to select the category for this request. Request Response – Check this box if the requestor would like to receive an e-mail response to his or her prayer request. Private – Select this option if this prayer request is to be available to only those whom have access to private prayer requests. Person - Click the Change… link to enter a prayer request for a person in Arena. Content Category - Click the drop-down list to select a category for the content. When a member enters a prayer from the Arena-managed website, the Content Category identifies the location on the Arenamanaged website. Source - Click the drop-down list to select a source for the request. Status – You can select Expired when a prayer is no longer active. Approved - This box is checked when the initial request is approved and is ready to be sent to the prayer ministry for prayer. Expiration Date – Enter the date the prayer should expire. Request – Enter the prayer in this field. Answer – Enter the prayer answer in this field. Arena will send a system email to the prayer requester, when Request Response is checked, containing the answer. 2) Click the Save button, or the Save & Clear button to save this request and enter another. Arena Premium v2012.1.100 Arena User Manual – Prayer 221 Approve Requests Prayer Requests display on the Approve Prayer Requests page after entry. Clicking the Approve Requests link displays the page below, listing all requests that require approval. You may use the drop-down list filters at the top to filter the requests displayed. Approve Prayer Requests From this page, you can open person requests by clicking on the name link of the requestor. You may also select multiple requests by placing a checkmark next to each item you wish to approve and then selecting Approve Selected link. Arena Premium v2012.1.100 Arena User Manual – Prayer 222 Adding and Approving Answers You can record answers by opening the prayer request and entering the answer in the Answer field. Click the Save button to save. Prayer Request Answers Approve Answers Once you record an answer to a request, it displays on the Approve Answers page. Clicking on the Approve Answers link will display the page below listing all requests that have had answers recorded requiring approval. You may use the drop-down list filters to limit the requests displayed. Approve Prayer Request Answers From this page, you can open person requests by clicking on the name link of the requestor. You may also approve multiple requests by placing checkmarks next to each entry needing approval and clicking the Approve Selected link. Arena Premium v2012.1.100 Arena User Manual – Prayer 223 Adding Comments You can add comments to an entry by opening the prayer request and clicking the Add link under Activity, or if there are existing comments, by clicking the Add New Comment icon. Enter the comment and select that the comment is Approved (you must have the appropriate security role to do this), or that the requestor has been Notified. Click the Update icon to save. Prayer Request Comments Approve Comments All comments added to a prayer request require approval, otherwise, comments are never published and users without approval rights will not see the comments. Comments display on the Approve Comments page. Clicking on the Approve Comments link displays the page below, which lists all requests with new comments needing approval. Use the drop-down list filters to limit the requests displayed. Approve Prayer Request Comments From this page, you can open person requests by clicking on the name link of the requestor. You may also approve multiple requests by placing checkmarks next to each entry needing approval and clicking the Approve Selected link. Arena Premium v2012.1.100 Arena User Manual – Prayer 224 All Prayer Requests This page will display all prayer requests regardless of their status. You may approve requests or delete requests from this page. Use the drop-down list filters to limit the requests to display. All Prayer Requests From the All Prayer Requests page, you can: Filter by name, status, sources, content category, prayer category, dates, public and private prayers. Approve selected prayers. Add a new prayer request. Reports The Reports area has identical functionality to the Reports section in Membership. No default reports for Prayer Requests are included in the default Arena installation, however any custom reports deployed to the Arena/Prayer folder of your Report Services will display here. See Reports in under the Membership section of this manual for information on using custom reports and the Reports section of the Arena Reference Guide for information on creating and deploying custom reports, or visit http://community.arenachms.com/ for more information. Arena Premium v2012.1.100 Arena User Manual – Web Content 225 Web Content You can create and maintain Polls, Classified Ads, Newsletters, Photo Albums, E-Cards, and E-Invitations in the Web Content section. Since the interaction of these features is almost completely done on the Arenamanaged website, the result is that the content is largely generated by the Membership base, for the Membership base. Web Content then becomes a useful set of tools to not only communicate with your Membership base more effectively, but also get the Organization more involved with the local community, help the Membership base get involved with the Organization, with each other, and the community. This section of the Arena End User Manual will only cover the Arena application part of the Web Content features. For help in getting these features onto the Arena-managed website, please refer to the Arena Administrator Manual. Polls Polls, when placed on the Arena-managed website pages, create a feature that enabling members to answer survey style questions, allowing the Organization to learn the opinions of their Membership base. You can also place Polls on internal Arena pages so that staff users are included. Clicking on Polls under Web Content will bring up the list of currently created Polls. This list will show the Active Status, Poll Question, Category, the Modify Answers link, the number of responses, and the number of answers. Steps to create a New Poll 1) Click the Add New Poll icon. A new entry titled New Poll Question is added to the list. 2) Click the Edit icon to modify this poll. This will open the options within the list, as shown below. Editing Polls 3) Check if this Poll will be Active. 4) Enter the desired question. 5) Choose the Category in which this poll will display. 6) Click Update to save, Cancel to go back without saving, or Delete to remove this Poll. 7) Click the Modify Answers link to add new Poll Answers or modify existing Answers. This will open the Answer List, showing the Poll Answer, the number of Responses, and arrows for ordering the answers. Arena Premium v2012.1.100 Arena User Manual – Web Content 226 Steps to add a Poll Answer: 1) Click the Add New Poll Answer icon to enter a new answer, as shown below. If you already know how many answers you want and what they will be, click Add New Poll Answer until you have the desired number. There will be several answers entitled New Answer. 2) Click the Edit this Poll Answer responses manually. 3) Enter the Answer value. icon to edit the answer. Click the icon to enter the number of 4) Click the Update icon to save. 5) Repeat the last four steps for each choice you will offer for an answer. 6) Click the icon to drop and drop the field to the desired position. The poll will list the possible answers in the order listed here. Click on the Return to polls link when finished to return to the Poll list. Arena Premium v2012.1.100 Arena User Manual – Web Content 227 Classifieds The Classifieds feature has two main types, Classified and Business Directory. These will have separate sections on the Arena-managed website. Users can submit classified ads and business directory listings. Once approved, the classifieds ads and directory listings are available on the Arena-managed website. Users submit classified entries from the Arena-managed website. You manage the Classifieds section under Web Content. Clicking on Classifieds displays a list of all Classifieds, as shown below. This list will show the Ad Title, the Author of the Ad, the Classified Category, the Content Category, the date Last Modified, the Approval status, and if the Ad has Expired. Use the filter options at the top to choose exactly what Classified Ads to show. Classified Ads Arena Premium v2012.1.100 Arena User Manual – Web Content 228 Steps to process a submitted Classified: 1) Clicking on the Title Name link will open the classified submission. 2) Review and edit, as desired. Classified Details Title – This is the title of the ad; this will display as the Classified Ad entry. Text - This is the description of the item. Classified Category - Click the drop-down list to choose the Category in which the item will display. Content Category - Click on the drop-down list to choose in which content area the ad will display. Phone – This is the phone number of the person listing the advertisement. E-mail – This is the e-mail address of the person listing the advertisement. Expire Date – This is the date on which the ad will expire and no longer display. Approved – Select this box to approve the item. Picture - Click the Browse button to select a picture to upload so that it will display in the ad along with the text. 3) Click the Approved box. 4) Click the Save button when finished. Arena Premium v2012.1.100 Arena User Manual – Web Content 229 Newsletter The Newsletters features are for placing news and information on your Arena-managed website, enabling user the ability to subscribe. A Newsletter consists of Volumes, which in turn contains Articles and the Authors of said articles. You have the flexibility to structure the newsletter to fit your organization. For example, you can choose to publish one Newsletter with a yearly Volume, or a new Volume every month with several Articles or and a weekly Newsletter. Steps to Create a Newsletter: Each Newsletter is comprised of a Volume number, Author and Articles. The first step is to create your Newsletter. 1) Click on the Add New Newsletter icon to create a Newsletter. 2) Enter the appropriate information for this newsletter. Newsletter Settings Name – This is the name of the Newsletter. Summary – Enter a summary for the Newsletter. Publish Point – This is the URL of the website to publish the Newsletter. Subscription Link – If you wish to have a link within the Newsletter where a reader can subscribe, enter the URL for the page link. Archive Link - This optional link is to a website URL where past issues of the Newsletter are available. Unsubscribe Link – This URL leads to a website where current Newsletter subscribers can cancel their subscriptions. This will be included in the Newsletter E-mail. Logo – Click the Browse button to choose a Logo Image and click Upload to use it for this Newsletter. Editor – Click on the Change… link to assign or change an editor to this Newsletter. This will open the Person Pop-up Search, where you can choose a person. If there is no editor, the check box is disabled. From Name – Enter the name of the sender of the newsletter. From Email – Enter the e-mail address of the send of the newsletter. 3) Click the Save button when finished. 4) Click on the Newsletter Name link to open the Newsletter Details and view the Volume and Author Lists. Arena Premium v2012.1.100 Arena User Manual – Web Content 230 N E W SL ET TE R V OL U ME S The Volume List will show the Publication Date, Volume Name, the number of Articles, Publications Status, Sent (via E-mail) status, the number of Reads, and a Preview Link for each Volume created within the Newsletter selected, as shown below. Newsletter Volume List Steps to create a Newsletter Volume: 1) Click the Add New Volume [new volume]. Click on the Edit 2) Complete all fields, as desired. icon to add a new volume or issue. This will create a new entry named icon to open the Volume Details. Volume Details Name - Enter the name of this Volume. Notes - Enter any additional description needed to identify this issue. Promotion Summary – You can enter a summary for the promotion, if this Volume will be Promoted on the website. Publication Date - This is the date the finished issue is placed on the web. This will default to the Volume created date. Sent Status - This is a system-generated field that shows the date the newsletter was sent (if it was), or it shows Not Sent. Published - Check this box to indicate you have published this Volume on the Arena-managed website. Promotion Image - Click the Browse… button to locate an image for the promotion of this Volume. 3) Click the Save button when finished. Arena Premium v2012.1.100 Arena User Manual – Web Content 231 N E W SL ET TE R A UT H OR Before you create Articles, you will need to add at least one author. Below the Newsletter Volumes is the Author List that includes information about each author. Newsletter Author List Steps to create a Newsletter Author: 1) Click the Add New Author icon. This will create an author named [new author]. 2) Click the Edit icon to open the author page. The information you enter here will display on your organization’s Arena-managed website for the Author information in the Article. Author Details First Name - Enter the first name of the Author. Last Name - Enter the last name of the Author. E-mail - Enter the e-mail address for the Author. Bio - Enter the biographical information for the Author. Source - Click the drop-down list for the source of the Author. See your Arena Administrator to edit Sources. Author Image - Click the Browse… button to locate an image for the Author. Click Upload to add it to the Author entry. 3) Click Save. Arena Premium v2012.1.100 Arena User Manual – Web Content 232 N E W SL ET TE R A RT ICL E S The last part of the Newsletter features is where you create Art. The Article List page displays the Article Name, Average Score, the number of times Read, a thumbnail for the Summary and Article images, Summary Word Count, and the Text Word Count. Volume Article List Steps to Create a New Article: Click on the Add New Article Click on the Edit icon. This will create an entry named [new article]. icon to set up the actual information in the article, as shown below. Article Details Arena Premium v2012.1.100 Arena User Manual – Web Content 233 Title - Enter the title of the article. Summary - Enter a concise overview of the article that will display as the link to the article on the Arenamanaged website. Copyright Info - Enter the details concerning copyright information relating to this article. Copyright Owner - Select the owner of the copyright from the drop-down list. You can customize options in the Newsletter Copyright Owner Lookup. Article Type - Select if this Article will be a Feature Article or a Body Article. A Featured Article will show in the Volume Summary, and a Body Article will only display when users view the full Volume. Author - Click the drop-down list to select the author of the article. You can create the authors in the Newsletter Authors section. Article Full Text - Enter the full article in this field, using RAD editor functions as desired. Summary Image - Click the Browse… button to associate a photo with a group of articles that are in the same category. Click the Upload button to include it in the article. Article Image - Click the Browse… button to associate a photo with this specific article. Click the Upload button to include it in the article. Click Save when you are finished. Arena Premium v2012.1.100 Arena User Manual – Web Content 234 Steps to Add a Newsletter Subscriber: 1) Go to the Newsletter page. 2) Click the number in the Subscriber Count column. 3) Click the Add Newsletter Subscription link. 4) Enter in the first name, last name and e-mail address. 5) Click the Update icon. Arena does not add people entered on this page. Arena Premium v2012.1.100 Arena User Manual – Web Content 235 Photo Albums The Photo Albums section of Web Content is where you can keep track of and organize the pictures related to your ministry. You can group Photos into categories to make finding Photos easier. You can add Photo Categories to other Categories, meaning that you can structure your Photos to fit the needs of your organization. Clicking on Photo Albums will show the top Photo Category, which is All Photos, any Photo Categories set up under All Photos, and any loose Photos not under a child Category. Steps to Add a Category: 1) Click the Add Category button. This will display the Category Details page, as shown below. 2) Complete fields and upload category photo, as desired. Category Title - Enter the title for this Photo Category. Category Description - Describe the type of photos included in this Photo Category. Category Icon Image - Click the Browse… button to associate an image with this Photo Category. 3) Click the Save. Now you are ready to add photos to this category. 4) Click on the Category Title or the Category Icon to open the Category and view Child Categories and any Photos under this Photo Category. Click the Delete icon Click the Edit icon to remove this Category and any child Categories and Photos within. to change the details of the Category. Arena Premium v2012.1.100 Arena User Manual – Web Content 236 Steps to Add a Photo: 1) Click the Add Photo button. 2) Complete fields and upload a photo. Photo Title – Enter title for the photo. Photo Description – Enter a description to help identify this photo. Photo Image – Click the Browse… button to locate the photo. 3) Click Save. Arena Premium v2012.1.100 Arena User Manual – Web Content 237 E-Cards and E-Invitations You can create E-Cards and E-Invitations to make available on your organization’s Arena-managed website. Examples are Get Well cards, Congratulations cards, and Birthday party invitations. Since the E-Card and E-Invite, templates are set up the same with the exception of one setting change, for the purposes of this guide we will only look at E-Cards. Click on E-Cards under Web Content will bring up the list of created E-Cards. This list shows the Title, Category, Format, Type, Content Category, and an Active Status indicator, as shown below. E-Card List Title – This is the title of the card or invite. Category – This is the E-Card Category defined in E-Card Category Lookup. Format – This identifies if the cad is in image or flash format. Type – This is the type of card defined in the E-Card Type Lookup. E-Card and E-Invite are defaults types. Content Category – This is the Content Category, and defines where to display the card. Active – This makes a card or invite active or inactive. Arena Premium v2012.1.100 Arena User Manual – Web Content 238 Steps to Create an E-Card: 1) Click Create a New E-Card. When a Card does exist, click the Add New E-Card icon on the lower right to create an additional E-card. Either will open the E-Card Details page to set up the Card, as shown below. 2) Enter the appropriate fields or make the appropriate selections for your E-Card or E-Invite. E-Card Details Title - Enter a Title for the Card. Max Message Size – Change the message size, as desired. The default value is 250 characters. Content Category - Choose a Content Category for this Card. You can leave it blank. Format – Choose a format. Choose a Card Format for the image type. By default, Image (.jpg files) and Flash (.swf files) already exist. Card Size – Select a card size. The Standard 600x300 pixels is the default value. Card Type - This is what determines if this card as an E-Card or an E-Invite. Card Category - This allows you to sort your cards into different Categories, such as Birthday, Holiday, Get Well, etc. Start Date – This is the starting date for the Card to be Active and therefore available for use on the Arena-managed website. End Date – This is the date the Card will become inactive. If the current date is outside of this date range, then this card will not show on the website. Card Source Image File – This is the actual image for the Card. Click the Browse button to choose a file, and click Upload to add the image to the database. Arena Premium v2012.1.100 Arena User Manual – Web Content 239 Card Preview Image File - This can be the same as the Source Image or not. This allows you to have different size images, like a Thumbnail for the Category List module/control on the website and a larger image for the actual card. Supporting Text - This is the text that shows on this card, regardless of the actual message copy. This can be a scripture passage, an inspirational quote, or your own well wishes. 3) Click Save when finished. Arena Premium v2012.1.100 Arena User Manual – Web Content 240 Podcast Channels: The first step in hosting podcasts from within Arena is to set up podcasting or RSS channels. Podcast/RSS channels by default are setup under the Web Content Podcast Channels Arena Premium v2012.1.100 Arena User Manual – Web Content 241 Steps to Add a Podcast Channel: 1) Click the Add New Channel icon. 2) On the Details tab, enter all appropriate information for this channel. New Podcast Channel Title – User provided title to display for this channel. SubTitle – User provided subtitle to display for this channel. Link – Enter the Link for this channel. Author – This is the author of the channel. Contact – This is the contact name of the channel. Contact Email – This is the e-mail address of the channel’s contact. Copyright – This is the copyright information to display for this channel. Language – This is the language description to display for this channel. Category(s) – This is a list of categories for this channel (a comma-separated list). Keywords(s) – This is a list of keywords for this channel (a comma-separated). Content Category – Select the desired Content Category lookup to associate with this channel. Active – Check this box to activate this channel. Explicit – Select the description of the type of content to host on this channel. Context Aware – Check this box if this channel should location aware. Arena Premium v2012.1.100 Arena User Manual – Web Content 242 Description – User provided description of this channel. Website Image – You can upload an image to display for this feed channel on your public website. Podcast Image – Input a URL for publicly hosted image, used for podcasting from this channel. 3) Click the Enclosure Types Tab. Enclosure Types Publish – Check this box to select which Feed Formats to allow as enclosures for this channel (This example allows both Audio and Video). Feed URL – Enter the URL of a public site that offers forwarding services to abstract the feed URL (FeedBurner is an example of such a service). This is available if the select Feed Format was set up for "Public Format", Arena allows you to point to the URL. 4) Click the Feed Authors Tab. Use this tab to input the authors of the individual feeds for within this channel. Authors added are available for selection when creating the individual podcast items. Feed Authors 5) Click Update. Arena Premium v2012.1.100 Arena User Manual – Web Content 243 Once you create a podcast channel, you can add topics beneath the channel. Topics are simply containers that are used to group podcast items together for better organization of your podcasts. A list of topics created for a particular channel will display in a small window at the bottom of the Channel Details page, as shown below. Feed Format Topics Arena Premium v2012.1.100 Arena User Manual – Web Content 244 Steps to Create a New Topic: 1) Click the Add New Topic icon. 2) Complete appropriate fields. Topic Details 3) Click Update. You can now add a Topic Item. 4) Select the Topic Title for the Topic Details page. Available Topics Arena Premium v2012.1.100 Arena User Manual – Web Content 245 5) Select the Edit Details. Topic Item Detail Topic – Select a topic. Title – Enter a title to display for this item. SubTitle – Enter a subtitle to display for this item. Keywords – Enter a comma-separated list of keywords. Link – Enter the link for this Topic. Author – Enter the name to display as author of this item. Active – Check this box to activate/deactivate this item. Explicit – Select description of the type of content in this item. Publish Date – Enter the date and time to start making item publicly available. Expire Date – Enter the date and time to stop making item publically available. Enclosure/URL – Enter the publicly hosted URL that contains the actual file. The URL must be in the URL box for the appropriate Enclosure type. If you know the length of the clip, enter it in mm:ss format in the Time block. This time will display in the feed. The size information will automatically fill when you select the "Update" button and the item is fully set up. Arena will attempt to find the file at the provided URL, then pull the file size of the item and populate the Size field. Website Image – You can upload an image to display with this item as it plays on your external website Podcast Image – Input URL for publicly hosted image to be displayed for this item. 6) Click Update. Arena Premium v2012.1.100 Arena User Manual – Web Content 246 Publishing Podcasts Once the feeds, channels, topics and items are properly setup, the RSS feed is ready to publish your podcasts. Each unique channel/feed combination is going to have its own RSS feed for which users can subscribe. The screenshots below show this relationship. Channel Details Page Arena Premium v2012.1.100 Arena User Manual – Check-In 247 Check-In Arena’s Check-In system is a detailed mechanism to ensure that the correct people end up in the correct classes at the correct time, but this can sometimes be a bit confusing to set up. This section covers how to configure and use Check-In to enter, track, and monitor attendance. Check-In works with independent kiosks, such as stand-alone computers with barcode readers, and label printers. Ideally, you can use these stations without supervision to allow a quick and efficient check-in process for individuals and families. You can tie Check-In to a Small Group, Group Level, or Tag, or use as its own Attendance Type Category for manual check in. If you are using Arena Check-In and would like to allow non-family members to Check-In one another, your Administrator can create a Relationship Type containing the phrase "can checkin" (case insensitive, no quotes) that will permit this action. As you begin to evaluate your organization for Check-in configuration, below is a diagram of a basic Check-In configuration. Kiosk Kiosk One Location Fellowship Hall Attendance Type Category Attendance Type Weekend Service 8:00am Service 10:00am Service Adults ABFGroup A Arena Premium v2012.1.100 Arena User Manual – Check-In 248 Kiosks The Kiosk page is where you can add and maintain Kiosks used for Check-In. Each Kiosk runs on a schedule, which determines when the kiosk is available for use. To connect a Kiosk with Arena, you can simply load the Check-In application directly from Arena or manually add the Kiosk on this page. Kiosk List Steps to add a Kiosk manually: 1) Click the add kiosk icon. 2) Complete all fields, as shown below. Kiosk Management Page New or Existing – Select if the kiosk is one already connection to the network or is a new kiosk. Computer Name – Enter the name for this, primarily for reporting. DNS Name – Enter the DNS (Domain Name Server) for the Kiosk, up to 100 characters. It is very important that you do not change the DNS Name. Changing the DNS Name will cause you to lose the connection between Arena and the kiosk. Only change the DNS Name if you want to reset your kiosk and run the initial kiosk setup again. However, it is fine to edit the other fields. Default Check-In Theme – Select a theme to use for the kiosk. A Theme is the display of the kiosk and includes the background image, the text, font and sounds. There are three default options. Select Default Printer – Select the printer to associate with this kiosk. Be sure to configure the printer for the kiosk. There are additional options available such as, using a central printer. Printer Name – Select an existing printer or specify a new printer for this kiosk. The network printer name must match what you enter here. Location – Select all Locations that you want connected to the kiosk. Notice that the list is a tree view, listing the various Locations by Building, as in the setup example used in the Locations section in the CheckIn chapter of this manual. Check the applicable boxes for this kiosk to run. A kiosk can have more than one location assigned to it, but it must have at least one location in order to function. 3) Click Update. Arena Premium v2012.1.100 Arena User Manual – Check-In 249 Kiosk Schedule To the right of the kiosk name, you will see a Schedule link. Schedule is where you determine the schedule name, the start and end times the kiosk is available, and the type of Occurrence. Steps to Create a Kiosk Schedule: 1) Click Schedule for the Kiosk you are creating. 2) Click the Add New Schedule icon. Kiosk Schedule 3) Complete the fields for this Schedule, as desired. For testing purposes, consider setting a daily schedule, as shown below. Kiosk Schedule Name – Enter a name for this kiosk schedule such for Sunday services, special events or for testing. Frequency – Select the frequency for this kiosk. Options are Daily, Weekly, Monthly, and One Time. Start and End Time – Enter the start and end times this kiosk is to be available. Occurrence Type – Select the occurrence type. Options are Centralized (use this option to enable every Attendance Type tied to the Locations such as, using one kiosk for multiple classes) and NonCentralized (use this option to select particular Attendance Type to use with this kiosk such as, using a specific kiosk for a class. Arena will prompt you to select the Attendance Type this kiosk will use). 4) Click Update. If you need to delete a kiosk for any reason, delete all associated schedules first. Arena Premium v2012.1.100 Arena User Manual – Check-In 250 Locations The Location page is where you create and edit a campus, building or room where people will check in such as Room 100 in the Fellowship Building on the Main Campus. Check-In Locations Steps to Create a New Location: 1) Go to Check-In >Locations 2) Click the Add link, or if there are existing locations, click the Add New Location 3) Enter all desired fields. icon. Locations Name (Require)– Enter the name for this location such as Main Campus. Campus (Optional) – Select a campus, if using multiple campuses. Building Name (Optional) –Click the icon to add a building, if desired. When you add a new building, it will be available for other locations. Room Closed (Optional)– Select this box to close a room. You can also edit this later or in the Check-In application. Maximum People (Optional) – Enter the number of people you want to allow to check into this location such as, room occupancy. If using room ratios, an occurrence with the location will automatically close when the maximum people check-in. You can set this value to “0” for no maximum. Attendance Type (Required) – Select Attendance Type(s) you want to associate with the Location. All active Attendance Type are available. You must select at least one Attendance Type. 4) Click Update to save your settings. Arena Premium v2012.1.100 Arena User Manual – Check-In 251 From the Location List page, you can view all available locations, the number of current attendees, the associated printer and the maximum people for this location. To edit a location, including associated Attendance Types, click the location. Location List Arena Premium v2012.1.100 Arena User Manual – Check-In 252 Attendance Type Categories Attendance Types define the parameters of the ‘class’ the user is checking in to, such as the age or grade range. Each Attendance Type must have one or more frequency, which defines the specific time that attendance type is active. You can assign a group or tag to an Attendance Type, indicating that the occurrences created for the attendance type. Frequencies determine the availability of the Attendance Type. An attendance type can only be associated with a single group or tag, but a single group or tag may have multiple attendance types assigned to it. When managing a large number of attendance types, setting the frequencies and labels for each attendance type can be time consuming. Consider setting frequencies and labels at the Attendance Type Category level. Steps to add an Attendance Type Category: 1) Go to Check-In Attendance Type Categories. 2) Click the Add New Attendance Type Category 3) Complete available fields, as desired. icon. New Attendance Type Category Category Name – Enter the name for this category. Report Form – Enter the begin date for this Attendance Type Category. Report Through – Enter the end date for this Attendance Type Category. Minimum Age – Enter the minimum age for this Attendance Type Category, if applicable. If there is not applicable age range, enter “0”. You can use either Age or Grade, not both. Maximum Age – Enter the maximum age for this Attendance Type Category, if applicable. If there is not applicable age range, enter “0”. Minimum Grade – Enter the minimum grade for this Attendance Type Category, if applicable. Maximum Grade - – Enter the maximum grade for this Attendance Type Category, if applicable. You can use either Age or Grade, not both. Arena Premium v2012.1.100 Arena User Manual – Check-In 253 4) Click Update to save the settings. Click on the Edit You are now ready to create Attendance Types. icon if you need to change the details of a Category. Attendance Type Categories To delete an Attendance Type, you must first delete all associated Occurrences, Labels and Frequencies. Then click the Delete icon. Arena Premium v2012.1.100 Arena User Manual – Check-In 254 Attendance Type Category Metrics Click an Attendance Type Category to display metrics for Check-In. You can also select an Additional Charts to view Metrics for a specific Attendance Type. Attendance Type Category Metrics Arena Premium v2012.1.100 Arena User Manual – Check-In 255 Attendance Types Attendance Types refer to the different people checking. Attendance types define the parameters of the ‘class’ the user is checking in to, such as the age or grade range. You can assign an Attendance Types to a group or tag. An attendance type can only be associated with a single group or tag, but a single group or tag may have multiple attendance types assigned to it. Each attendance type must have one or more frequency, which defines the specific time that attendance type is active. The frequency/frequencies of an attendance type are separate from the kiosk’s schedule(s) and define when the attendance type is active on all kiosk. Frequencies are used by the Create Occurrences Agent to automatically create occurrences for any attendance types that do not already have existing occurrences for the specified times. Steps to Create a New Attendance Type: 1) Click the Add link to create a new Attendance Type. For additional Attendance Types, click the Add New Attendance Type icon. 2) Complete all fields, as desired. New Attendance Type Arena Premium v2012.1.100 Arena User Manual – Check-In 256 Name – Enter a name for the Attendance Type. This will display at Check-In. Active – Mark if the Attendance Type is active. Minimum/Maximum Age – Enter a minimum and maximum age for this Attendance Type, if desired. o Setting the age range to 0-0 will ignore ages. o Setting the age range to any other range would require all records checking in to have a complete date of birth (MM/DD/YYYY). o Use “.99” to end the age range. If your age range is 6 to 7 year olds, enter 7.99 to include ALL 7 yearolds. Enter “0.5” for 6-months old. Age Range Text – Enter the field name of the Age Range text, if desired. Examples might be “six-months of age” or “crawlers”. Minimum/Maximum Grade – Enter the minimum and maximum grade for this Attendance Type, if desired. You can use Age or Grade, not both. Minimum/Maximum Birth Date – Enter MM/DD/YYYY for situations such as classes for children of less than 6-months in age and children ages 6-months to 1 year of age. Check-In Theme – Select a theme. Leave it at [Use Kiosk Default] if you are not using a kiosk. Otherwise, choose which theme you want to use for this Attendance Type. Location Specific Occurrence – Select this option if you have multiple kiosks that utilize the same Attendance Type in order to get information specific to that kiosk. If it is not checked, then you get totals across all kiosks when viewing Total Attendees. Weekend Service – Select this box to populate the attendance history graph on the person detail page. Merge Occurrences for the Day – Select a day if you have multiple occurrences within the same day. The attendee total combines across all occurrences. If set to “none”, the attendance will show separately for every occurrence for the Attendance Type. If it is set to any day of the week, Arena will merge all occurrences for the Attendance Type, for the week into a single representation on that selected day. Link with Tag/Group Level/Specific Group – Select a Tag or Group, if desired. By selecting a specific Tag or Group, Arena records occurrences for your Tags or Groups. If you plan to use a Specific Group, you must choose the Parent Group under Link with Group Level. If using manual attendance for multiple groups or tags, it is not necessary to select a Tag or Group. Membership Required – Check to require only Members to check in to the specified class/group. All people must be in the Group and will not be available for Family Registration (visitors). Secure – Check this box if occurrences of this type will only be available to non-centralized kiosks. This is only available for the Kiosk when in Non-Centralized mode. Gender Preference – Use this to limit records to a specific gender type. Pager Required – Select this if you are using pagers at time of Check-In or would like to identify people by a manually entered code. Room Ratios – Select this box to open and close occurrences based on the number of people checked in. for this attendance type. o Leader Tag - This identifies people from Tags that are eligible to check in as leaders of the class. o People per Leader – Enter the number of people who can check in for every leader who checks in. o Minimum Leaders – Enter the minimum number of people that can check in before the class opens. If set to “0”, then the next class (if available) will automatically open, if one fills up. o Maximum People – Enter the maximum people or define this value in Locations. Locations – Select the locations for this Attendance Type. Arena Premium v2012.1.100 Arena User Manual – Check-In 257 3) Click Update to save your settings. Attendance Type List Click the Name of the Type to edit. 4) Repeat this process if you have other Attendance Types for this Category. You can delete Attendance Types and Attendance Type Category that do not have occurrences. Arena Premium v2012.1.100 Arena User Manual – Check-In 258 Frequency Frequency is the time(s) that the Attendance Type is available for Check-In, and the actual meeting times of the Attendance Type. For example, if a group meets from 9:00 a.m. to 10:30 a.m., you can create a Frequency for 8:30 a.m. to 9:30 a.m. You can create multiple frequencies for an attendance type, if desired. Steps to Create a Frequency: 1) Click the Add link to create the first frequency for a type, or click the Add New Frequency an additional Frequency. 2) Complete all fields. icon to add Name – Enter the name for the frequency. Frequency – Select the applicable regularity for the Attendance Type. If you select Weekly, select the Day of the Week. If you choose Monthly, select Day of the Month. If you select One-Time, enter the specific date. For testing purposes, consider creating a Daily frequency. Start/End Time – Enter the start and end times for the actual meeting or class. For testing purposes, consider 08:00am-05:00pm start/end times. Check-In Start/End Time – Enter the start and end times attendees can check-in for this Attendance Type. 3) Click Update. Create at least one Frequency for each Attendance Type to be available at the Kiosk. For the kiosk to properly function and record occurrences, make sure that the Frequency is accurate for the Type, and that the Schedule encompasses the Check-In times established for the frequency. Arena Premium v2012.1.100 Arena User Manual – Check-In 259 Labels Labels are the printed receipts for Check-In for an Attendance Type or Attendance Type Category. Check-In has the ability to print one set of labels for a person who is checking into multiple Classes at once. The Classes have to be set up to print this type of label. Steps to Select a Label: 1) Click the Add New Label icon to select a label. Labels Report Name – Select the desired label for this Attendance Type or Attendance Type Category. Select the Printer – Select to use the Default printer setup for the Kiosk or a different printer. Print Landscape – Select the format to which the label should print. 2) Click Update. Arena Premium v2012.1.100 Arena User Manual – Check-In 260 Sample Default Labels Attendant Child Receipt Child Tag Parent Child Receipt Arena Premium v2012.1.100 Arena User Manual – Check-In 261 Occurrences Occurrences are attendance dates for events within Arena. Click on the Occurrences link to view a list of occurrences recorded for this type. The Check-In kiosk application will ONLY recognize the occurrences that are open for specific dates. Occurrences Arena Premium v2012.1.100 Arena User Manual – Check-In 262 Check-In Reporting You can access Attendance reporting by clicking the name of the Attendance Type Category on the Attendance Type Category page. Attendance Type Categories Attendance Type Category Reports Attendance Grid – Displays a grand total of attendees per class. Clicking on the number will display the records of those who were present. Attendance Summary for – This will display a grid of the dates this Attendance Type Category met, and the attendance records of the members. First Time Visitors – Displays the records where the first visit date falls between the date ranges. Missed at least – Displays the records meeting the supplied criteria. Attended at least – Displays the records meeting the supplied criteria. Arena Premium v2012.1.100 Arena User Manual – Check-In 263 Location List . Arena Premium v2012.1.100 Arena User Manual – Check-In 264 Monitor The Monitor page displays current active Check-In Locations. From this page you can see the number of attendees for each Occurrence (Class), the leaders checked (if you using Room Ratios), the available seats (if using Room Ratios), the start and end times of the Occurrence, and the Location. Monitor Page Click the View Occurrences to view the details of the Occurrence and a list of the people currently checked in. Occurrence Detail Arena Premium v2012.1.100 Arena User Manual – Check-In 265 Click View Occurrence to view the details of that occurrence and to modify individual attendance. View Occurrence Arena Premium v2012.1.100 Arena User Manual – Check-In 266 Check-In Themes A Check-In Theme is the display of the kiosk, including the background image, the text, font and sounds. There are three default themes. You can select a theme for each kiosk. If desired and have the applicable permissions, can select a custom theme. Check-In Themes Steps to Change Themes: 1) Click on the Add New Theme icon on the Check-In Themes page. New Theme 2) Enter the Theme Name. 3) Enter the Path. See your Arena Administrator for this information which pertains to the location of the custom theme, if applicable. 4) Select whether to use this theme by default for all Attendance Types. Theme Details 5) Click Update. Arena Premium v2012.1.100 Arena User Manual – Check-In 267 Check-In Implementation This section covers the setup and operation of Arena’s R.O.A.R. (Rapid Online Automated Registration) CheckIn. For ease of use, R.O.A.R. is for using with a touch-screen system, but a standard monitor will work, using a mouse for input. For this discussion, we assume you are using a touch-screen. I NI T I AL S T AR T UP AND C ONFI GUR AT I ON The first time you run this application on the kiosk, you will have to set up the Location, Attendance Type Category, and Mode. This is a one-time setup; unless you change kiosk DNS in the kiosk settings under CheckIn. Steps to Launch and Configure Check-In: 1) Click Check-In. Check-In Launch Page Arena Premium v2012.1.100 Arena User Manual – Check-In 268 2) Click Select All or Select Locations. These are the Locations as set up in Check-In within Arena. You can change these settings later under Check-InKiosks by opening the corresponding kiosk in Arena. Kiosk Locations 3) Click Finished. 4) Select the Check-In Mode. Kiosk Mode Centralized – Use this option to enable every Attendance Type tied to the Locations to check in. Use this option if you are using one kiosk for multiple classes. Non-Centralized – Use this option to select particular Attendance Type to use with this kiosk. Use this option if you are using a kiosk for each class. Arena will prompt you to select the Attendance Type this kiosk will use. Use Schedule – Use this option to narrow check-in even further. Arena Premium v2012.1.100 Arena User Manual – Check-In 269 5) From this screen, attendees can scan a Check-In card for themselves or their family, or they can use the Manual Check-In option to use the Phone Lookup. Check-In. Main Page Arena Premium v2012.1.100 Arena User Manual – Check-In 270 C HE CK I N A PPL I CAT I ON Once you run the Check-In application members can check into the available Attendance Types. Be sure to review Check-In Application Settings prior. For example if you want to allow Family Members to be Pre-selected or Must Manually Choose Family Members (This determines whether to scan a Member's entire family or not.), and if classes are preselected. If you are using Arena Check-In and would like to allow non-family members to Check-In one another, your Administrator can create a Relationship containing the phrase "can checkin" (case insensitive, no quotes) that will permit this action. Centralized Mode When a member scans a member card or checks in, Arena will display a list of the family members associated with the person whose card is used and whom are eligible to Check-In. Arena will display a page of family members and those records with a relationship type or “can checkin”. Arena will display the “best fit” class(es) for this person, based on what classes are currently open, what classes allow check in at this time, the person’s age, and gender. You can establish these parameters in the Attendance Types Categories and Attendance Types. Check-In Family Page Arena Premium v2012.1.100 Arena User Manual – Check-In 271 Once John selects his class, he then presses the white “Check In” box to check into the class, as shown below. A receipt will print for him, providing the printer is set up and the Label has been configured. Confirm Class He is then taken back to the family list, where he presses Jimmy’s name to Check In, and he receives the page shown below to confirm Jimmy’s Check In. Check-In Confirmation Notice Arena automatically places John and Jimmy into different classes. When John pressed his own name, the class selection page came up with his two class choices Couples and All Attendees. For Jimmy, who is 5 years old, the Kindergarten class comes up, as it is set to allow ages 5-6. If John accidentally presses the wrong person, he can press the green arrow to go back. Since he wants to check in Jimmy, John now presses Check In to check Jimmy into the Kindergarten class. A receipt prints out, and he is redirected again to the family list, as shown on the following page. Arena Premium v2012.1.100 Arena User Manual – Check-In 272 If John wanted to check into a different class, and another class was available that this kiosk was set up to use, John would get the following page: Notice that now, the Change button is active. When John presses Change, he sees the following: Arena Premium v2012.1.100 Arena User Manual – Check-In 273 In this scenario, John can check into All Attendees, instead of Couples. John would see a new Confirmation page, and can now complete the check in process. Family Page Notice that John and Jimmy are grayed out and “(checked in)” displays next to their names. If John is done checking people in, he presses Finished or he can check in someone else. Arena Premium v2012.1.100 Arena User Manual – Check-In 274 N ON -C E NT R AL I ZE D M ODE Non-Centralized Mode Using Non-Centralized mode will only allow you to check into one Attendance Type at this kiosk. The Main page will look similar, but the bottom left corner will show the Attendance Type, the Location, and the current number of people checked into the Class. In this example, the kiosk is set up for Kindergarten, which is in the Bartlett Check-In Location. In the Doe family, only Jimmy is eligible for the Kindergarten Attendance Type. When John scans his barcode or looks up his family using the Manual Lookup, Jimmy automatically checks in. Arena Premium v2012.1.100 Arena User Manual – Check-In 275 If John has multiple family members who are eligible for a Type, a page displays from which he can choose all or only those family members to check in, as shown on the following page. Family Page John would click Finished when he has chosen the correct family member(s). This will check them in and print out the receipt(s). Arena Premium v2012.1.100 Arena User Manual – Check-In 276 C HE CK I NG O UT The receipt, if designed properly, can include a Check Out barcode. To check someone out, simply scan that receipt while at the main page. The page displays a message stating the person is checked out. You can also check someone out while in the Check-In Management Page, as shown in the next section. Manually Check Out Arena Premium v2012.1.100 Arena User Manual – Check-In 277 C HE CK -I N M A NAGE M E NT P AGE If a person has an Alternate ID, the barcode will open the Management Page. Alternatively, if you have a keyboard attached to your kiosk, you can type the Manager ID number and press Enter. You will not see the number display on the page, but it will allow access to the Management page. Press Ctrl+M to open the Check-In Management page. Press Finished to return to Check-In. Press Exit to close Check-In. Kiosk Management Page Add/Remove Locations – Use this button to change locations and associated attendance types for this kiosk. Open/Close Locations – Use this button to manually close or open a location using this kiosk. Change Modes – Use this button to change the mode of this kiosk to Centralized or Non-Centralized. You can use Kiosk Schedule to reset back to the Schedule Settings, removing any temporary changes made to the Kiosk. View Attendees – Use this button to view and verify attendees, reprint labels, and to check out attendees. Print Attendees – Use this button to print attendees. Feature Available in Non-Centralized Mode: Print Attendees – Use this button to print a list of all people who are currently checked into this class. Display Random Attendees – Use this button to display a random list for people who are currently checked in for giveaways, drawings, etc. Press the number to the right to select how many people to display. Arena Premium v2012.1.100 Arena User Manual – Check-In 278 If this kiosk has no open Location, the below screen will display. Closed Check-In Arena Premium v2012.1.100 Arena User Manual – Check-In 279 S CANNI NG A B AR CODE WI T HI N T HE M ANAGE ME NT P AGE If you scan a barcode of someone while in the Management Page, it displays a list of the family members so that you can check any/all out. Click verify for a list of people who are authorized to check out the child, or print a receipt for each person. Press the “Back” button to exit this page. Scanning a Barcode Click Back to exit the management screen and return to the kiosk Main Page. Press Exit to close the application entirely. (Alternatively, pressing Alt+f4 at any time in the application will close the application entirely. For this reason, we do not recommend having an accessible keyboard attached to a non-attended kiosk) Arena Premium v2012.1.100 Arena User Manual – Check-In 280 Using Relationship with Check-In On the Check-In screen, individuals can check other people who have been identified on their record with a relationship type that includes "can checkin" (no quotes). Arena identifies those individuals by displaying the full name on the check-in screen. Arena Premium v2012.1.100 Arena User Manual – Check-In 281 T R OU B L E SH OOT IN G The Kiosk is inactive The kiosk application will display the following screen if there is not a schedule set to run on the Kiosk at this time. Edit the Kiosks’ schedule to correct this if this screen displays during needed Check-In times. Kiosk Troubleshooting Arena Premium v2012.1.100 Arena User Manual – Check-In 282 If the Kiosk is Closed If the Kiosk is currently closed, (the current time of the Arena Server is outside of the Kiosk Schedule time); you cannot use it for Check-In. You may enter the Management Page only by pressing Ctrl+M on the keyboard, as the barcode reader is disabled during this time. To enable the kiosk, edit the Schedule from within the Check-In area of Arena. Closed Kiosk Arena Premium v2012.1.100 Arena User Manual – Check-In 283 No Classes are available The following screen (name will be changed for whoever is attempting to check in) will show for various reasons, but usually a setting in the Attendance Types or the individual’s record is the culprit. Following are things to check for troubleshooting this message. Class Not Available Issue: The Attendance Type is for a specific gender, male or female. Fix: Check the gender option for the Attendance Type. If not all records are properly associated with the selected gender, change the gender to “Everyone”. Issue: Age Range is set for The Attendance Type. Fix: Be sure the person checking in has a complete date of birth. Fix: Remove the age range from the Attendance Type or enter a complete date of birth on the person’s record. Issue: The person’s current age does not fall into the Age Range of any Attendance Types. Fix: Go to the Kiosk Management Screen in the Check-In application and select a Location that has an Attendance Type that has the age range of this person. Fix: Go to Check-In>Locations in the Arena Application and select an Attendance Type that has the desired age range. Issue: The Attendance Type the person is eligible for has the Secured box selected, but the kiosk is running in Centralized mode. Fix: If you intend to use the Attendance Type not as previously described, uncheck the selection Secured on the type. Fix: Change the Kiosk to Non-Centralized and choose the Secured Attendance Type for it. Issue: There are no Attendance Types where the Frequency at this Check-In time is currently available, and an existing Occurrence has already ended. Fix: Edit the frequency of an Attendance Type, so that Occurrences are available for the appropriate time range. If this needs to be changed immediately, edit the Occurrence by going into Check-In > Attendance Type Categories > Attendance Types > Occurrences and change the End Time. Issue: All Occurrences for the current time are Closed (Arena v2.0 and later). Fix: Open an Occurrence. Or create a new Occurrence record. Issue: Classes are available, but Membership is required Fix: Connect the person to the tag/group. Fix: Uncheck the Membership Required selection for Check In. Arena Premium v2012.1.100 Arena User Manual – Contributions 284 Contributions Arena’s Contributions feature allows you to manage your organization’s Online Giving. You can set up for your organization to receive gift payments via Credit Card and ACH (Automated Clearing House). If using Shelby Financials, you can export batches to Shelby v5 Contributions or directly to Shelby v5 General Ledger. Fund Management In order to categorize your giving, you must set up Funds (comparable to Shelby v5 Purposes) to manage them. In order to accept Online Giving, you must have at least one fund set up in Arena. If you are using Shelby v5 Financials and would like for the Shelby v5 Funds available, see your Arena Administrator. If this is the first time you have opened Fund Management and the Shelby v5link is established, a prompt will display asking you to choose a v5 Company. By selecting your organization name from the drop-down list and clicking the Apply button your active Shelby v5 funds will be available. Note that Arena can only connect with one Shelby v5 Company, so you cannot use Purposes from multiple v5 Companies. Steps to Create a New Fund: 1) Go to Contributions Fund Management. 2) Click the Add link to create a new fund, or if funds already exist, click the Add New Fund icon. When connected to Shelby v5, a checklist of active purposes display, listing all purposes not already in use in Arena. Use the Checkboxes to choose which purpose to tie to this fund, and click Update. Note that while it is possible to have both Shelby v5 funds connected to Arena we strongly recommend against this practice due to the synchronization issues this situation creates. Fund Management Arena Premium v2012.1.100 Arena User Manual – Contributions 285 3) Enter the following information into the Fund Management page. To edit details of an existing fund connected to a Shelby v5 Purpose, select the Edit this Fund icon next to the fund Fund Management Details Active status – Select if the fund is active. Name – Enter the Name of the Fund. Description – Enter a description for the fund. Online Name – Enter the name to display online. Tax Deductible – Select if the fund is tax deductible. Allow Pledges – Select if you are going to allow pledges. Start/End Dates – Enter the start and end dates for this fund. Company – Enter the Arena company for this fund. Fund # - Enter the fund number. Bank Account # - Enter the bank account to use for this fund. Revenue Department # - Enter the revenue department number for this fund. Revenue Account # -Enter the revenue account number for this fund. Project Code - Enter the project code for this fund, if applicable. As you attempt to edit funds connected to Shelby v5 purposes, you will see that many fields are grayed out due to the way these fields are set up in the connected purpose. 4) Click the Update button to save your fund settings. You can change the order in which the funds will display by clicking the double arrows. To remove a fund, click the Delete icon. You can only delete funds with no contributions. When creating Mission Funds, please consult your tax advisor for IRS reporting guidelines for charitable contributions. Arena Premium v2012.1.100 Arena User Manual – Contributions 286 Contribution List The Contributions List page displays batch and individual contributions, scanned checks, check notes, fund summaries and individual contributors. C ONT R I BUT I ONS The Contribution List, as shown below, displays all Contributions, based on filter parameters. Filter options are dates, fund, type, transaction number, and name. On the results page you can make Bulk Updates, send e-mail print labels and export selected transactions. Contribution List Show Memo – Check this box to view all entered memo notes for each contribution. Show Images – Check this box to view scanned checks. You can also click a scanned check for an enlarged view. Bulk-update selected Contributions – Use this field to update the contribution date for selected transactions. Reassign Person – Use this option to reassign selected transactions to another person. You can also sort by any singled column by clicking the column name. You can export selected transactions to Excel® by clicking the Excel® icon. Arena Premium v2012.1.100 Arena User Manual – Contributions 287 Fund Summary The Fund Summary page lists all active funds, based on the filter parameters. You can filter by date, fund, type, transaction number, and person. Fund Summary Contributors The Contributors page lists all Contributors, based on the filter parameters. The results display the person’s name, dates of first and last contribution, number of contributions, the average contribution amount and the total contribution. Contributors You can search the results within a single column. You can also export the selected transactions to Excel® by clicking the Excel® icon. Arena Premium v2012.1.100 Arena User Manual – Contributions 288 Steps to Reassign a Contribution: 1) From the Contributions page, select the Contribution(s) you wish to reassign. Reassign Person 2) Select Reassign Person. 3) Search for the correct person. Person Search 4) Select the person. 5) Click Select. The Contribution reassignment is complete when you click Select. Person Select Arena Premium v2012.1.100 Arena User Manual – Contributions 289 Steps to Refund a Contribution: You can only refund non-exported transactions. 1) From the Contributions page, you can select the Contribution to refund. Select Contribution 2) Select Refund. Select Refund If the original transaction was processed through either PayFloPro or PDS, the below pop-up will display. Otherwise, skip to step #8. 3) Click OK. Refund Message 4) Arena will redirect you to the PayFloPro/PDS site where you can process the refund. 5) If the original transaction is not attached to a PayFloPro or PDS transaction, the below pop-up is displayed. Click OK. Arena Premium v2012.1.100 Arena User Manual – Contributions 290 Refund Confirmation 6) Arena will create a negative entry to reflect the refund. Refund Negative Entry 7) Refunds are listed on the Contributions page as a refund. Contribution List Refund You can process refunds for one-time and repeating (whole, not partial) payments. You can process refunds for finalized and non-finalized payments. Arena Premium v2012.1.100 Arena User Manual – Contributions 291 Batch List The Batch List, as shown below, displays previously entered Batches, that can be sorted by Date, Batch Name, whether or not the batch was finalized, and by Exportable status. You can export search results to an Excel ® spreadsheet by clicking the Excel® icon. The Amount field of the Batch Report formats numbers over 1,000 to use commas where appropriate. The new Batch Report .rdl will only be available upon install for fresh installs. Changes can be made to this report through Reporting Services. Batch List Arena Premium v2012.1.100 Arena User Manual – Contributions 292 Steps to Export from the Batch List to Shelby v5: 1) Go to the Contributions→Batch List page. 2) Use the Filter to access the Finalized batch. 3) Use the Filter to select to export the batch to Shelby GL or Shelby Financials (Contributions). 4) Click Export to GL File. Batch List 5) Select the Journal Type, as shown below. 6) Enter the appropriate Accounting Period, as shown below. 7) Click Export. GL File Export Arena Premium v2012.1.100 Arena User Manual – Contributions 293 Repeating Payments The Contributions Repeating Payments page allows you to view and edit all repeating payments for your members, as shown below. This list displays the Identifier code for the transaction, the member’s Name, the Frequency of the payment, the date of the First Payment, the total Number of Payments, the payment Method, the Status of the repeating payment, and the Amount of the total periodic payment (not the total of all payments over all periods) for that transaction. Repeating Payments You can filter based on the Repeating Payment Identifier, a date range in which the payment schedule was set up, an amount range, the Frequency, the contributor, and/or the Repeating Payment Profile's Active status. You can also click person’s Name to bring up their Person Details page, or you can click on a transaction Identifier number to bring up the details of that transaction, as shown below. Transaction Details When you enter or process a payment, Arena can send an email to the Contributors. Arena Premium v2012.1.100 Arena User Manual – Contributions 294 Steps to Add a Repeating Payment: Permissions may vary by user. 1) On the Repeating Payment page, select the Add Repeating Payment icon. New Repeating Payment 2) Search and select for an existing record. 3) Confirm Information. New Repeating Payment 4) Click Next. 5) Enter a Profile Name. 6) Select Frequency. Frequencies will vary being that these are determined by the Payment Gateway provider. 7) Enter or select Begin Date. 8) Enter amount(s) for each fund. Frequency and Amount Arena Premium v2012.1.100 Arena User Manual – Contributions 295 10) Click Next. 11) Select payment method. Payment Method 12) Click Next and complete the required payment information. Arena Premium v2012.1.100 Arena User Manual – Contributions 296 Steps to Edit a Repeating Payment: 1) Click on the Identifier number to pull up the details of the repeating payment. Repeating Payment Identifier 2) Click Edit this Profile. Edit This Profile Arena Premium v2012.1.100 Arena User Manual – Contributions 297 3) Make changes. Repeating Payment Details 4) Click Save. Arena Premium v2012.1.100 Arena User Manual – Contributions 298 Pledges Pledges allow you to view previously entered pledges based on the filter parameters. The filters allow you to search by Fund, Pledge Amount (Minimum and Maximum), and Percent Complete (Minimum and Maximum). Pledges Arena Premium v2012.1.100 Arena User Manual – Contributions 299 Pledge Quick Entry Pledge Quick Entry allows you to enter one pledge amount, per fund, per contributor. Contributions processed during the pledge period, will post against that pledge. There is also the option to creating Repeating Payments, if permissions allow the user to do so. Steps to enter New Pledge: 1) Select Pledge Quick Entry under Contributions. 2) Enter name and click Apply Filter. Name Search 3) 4) 5) 6) 7) Select Fund. Enter or select the Start Date. Enter or select the End Date. Enter the Amount. Select the Frequency. New Pledge 8) Click Save. Arena Premium v2012.1.100 Arena User Manual – Contributions 300 Steps to Edit a Pledge 1) Click the Contributions tab on the Person Detail page. 2) Select the edit icon of the pledge you would like to edit Individual Pledge 3) Edit the amount and dates, as desired. Editing a Pledge 4) Click the save icon. Arena Premium v2012.1.100 Arena User Manual – Contributions 301 Contribution Analysis This report allows you to view the contributions for selected funds. Steps to View Contributions Analysis Report: 1) Click Contributions→Contributions Analysis. 2) Enter the date range and select funds. Contributions Analysis Parameters 3) Click Apply Filter. The report will display. Contributions Analysis Report Arena Premium v2012.1.100 Arena User Manual – Contributions 302 Projects Projects are available for both Funds and Mission trips. Steps to Add Manually a Project: 1) On the Project List page, click the Add New Contribution Project icon. Contribution Projects 2) Enter the Code or leave Auto Assign selected. If you select Auto Assign, the next available numerical value is assigned to this fund. 3) Enter the Name for this project. 4) Enter a Description for this project New Project 5) Click Update. Arena Premium v2012.1.100 Arena User Manual – Contributions 303 Steps to Import to Shelby v.5 Active Project Code to Arena: 1) On the Project List page, click the Add New Contribution Project icon. Contribution Projects 2) Select the Import from Shelby radio button. You can import Shelby v5 Project Codes not already in use in Arena. 3) Select Enter the Name for this project. Import a Project 4) Click the Edit icon of the project you just imported. Project List Edit 5) Enter the appropriate description for this project. Edit Imported Project 6) Click Update. Arena Premium v2012.1.100 Arena User Manual – Contributions 304 If using Project Codes, you will first want to make the appropriate Contribution application setting change, as shown below. Application Settings Arena Premium v2012.1.100 Arena User Manual – Contributions 305 Contributions Application The Contributions application is a Click Once application used to process scanned checks. Steps to Create a Batch: 1) Launch the application by double clicking the Arena Contributions executable on the desktop or from the left-navigation bar. 2) Contribution Applications Arena Premium v2012.1.100 Arena User Manual – Contributions 306 3) Enter the batch date and the control amount, and give the batch a name. Creating a Batch 4) Click Next. Arena Premium v2012.1.100 Arena User Manual – Contributions 307 5) Enter checks either using a check scanning device or manually. If the person has already been associated to the account number the person information will automatically populate, as shown below. Contribution Scanned Entry You can adjust the Auto Detect POS Scanner setting if it accidentally is set to True when there is no scanner attached to the kiosk. Arena supports the Cannon CR-55 and CR-180 scanners. The Contributions application remembers the last setting of payment Type by a user. This will be the default Type the next time you open Contributions. You can enter a Mission trip contribution, if there is an active mission trip. The option to contribute to a Mission Team Member does not display if no active Mission Trip are in Arena. Click Associations to change the person associated with the bank account. You can select another family member from the dialog box. Arena Premium v2012.1.100 Arena User Manual – Contributions 308 6) If there is not a record associated with a MICR number then you need to look it up using the person search. Click the Search button in the top left corner to use the quick search tool to locate and select the appropriate record. You can search by first name, last name, a combination of both, or by person ID. Manual Search Arena Premium v2012.1.100 Arena User Manual – Contributions 309 7) If the person is not in Arena, you will have the option to add him or her. Adding a Member Arena Premium v2012.1.100 Arena User Manual – Contributions 310 8) Highlight the person and click Select in the bottom right corner to associate the transit and account number to the person. 9) Enter the amount of the check. 10) Click tab to enter the amount to the first fund in your list on the right hand side is the list. If the amount should go into another fund then you can manually make this adjustment. 11) Click the Next button in the bottom right to enter the contribution. 12) Once you enter all contributions for this batch click Done to proceed to the batch summary page. If the sum total of all entries exceeds that of the control amount that was initially set up then there will be a negative difference amount alerting you to this. 13) You can now enter the contribution. Once you enter the Amount, by default Arena will post to the first fund listed. To move the contribution to a different fund, press Delete then Tab on your keyboard until the fund posts to the desired fund, or you can delete the amount and enter it into the desired fund. If needed, you can also enter a negative amount in the Amount field. Arena Premium v2012.1.100 Arena User Manual – Contributions 311 As you process contributions, you can add the same fund multiple times in order to accommodate different project codes for the same fund. Steps to Select Project Codes: 1) Click the ellipsis icon Using Project Codes 2) Select the desired Project Code. Choose Project Code 3) Click Select. Arena Premium v2012.1.100 Arena User Manual – Contributions 312 Steps to Export a Batch: 1) From the Contribution Application, click the Finalize Batch button on the Open Batch page or the Export button from the Finalized Batch page. You must finalize a batch prior to exporting. Open Batch page Finalize Batch page Arena Premium v2012.1.100 Arena User Manual – Contributions 313 2) On the Confirm pop-up window, click the Yes button. You can also select the Print Batch Report box to print the batch report prior to exporting. 3) On the Confirm Export pop-up window, select Yes to confirm the batch export. 4) From the Export Batch pop-up window, make the desired selections and entries. 5) Click Export. Arena Premium v2012.1.100 Arena User Manual – Contributions 314 6) Save the GLTRN2000.txt file. You must save the GLTRN2000.txt in the SSV5.DAT folder. 7) Now you are ready to import the file into Shelby v.5 General Ledger. Arena Premium v2012.1.100 Arena User Manual – Contributions 315 Steps to Import the GLTN2000.txt file: 1) Open Shelby v.5 Journal Entries module. When opening Shelby v.5 Journal Entries module, the import process will begin automatically if the GLTN2000.txt file is present in the SSV5.DAT folder. 2) Click es on the Import Entries popup. Arena Premium v2012.1.100 Arena User Manual – Contributions 316 3) Select the desired Fiscal Year. 4) Click OK. Arena Premium v2012.1.100 Arena User Manual – Contributions 317 Contributions Entry (optional) On this page, you will be able to create manual batches and import Shelby Teller batches. Steps to create a manual batch: 1) Click Contributions Entry. 2) Enter a batch name, batch date, and control amount. 3) Click Next. 4) Complete all fields as desired. Using an existing record Arena Premium v2012.1.100 Arena User Manual – Contributions 318 Use the person picker icon to search and select by name, address, postal code, envelope number or phone number. Enter at least one letter for first and last name if searching by name. Click Add New Person icon, if no record if found. Adding a New Record Enter or select a Contribution Date. Select a Payment Type. Enter an Amount. Enter a Memo, if desired. Enter the amount for each Purpose. If desired, click the Project Code Click OK. icon to select a Project Code Arena Premium v2012.1.100 Arena User Manual – Contributions 319 5) Click the Save Contribution button to enter the next contribution. Repeat steps 4, 5, and 6 for each contribution. 6) Click Save Batch when all entries are complete. The below screen will display.From this page, you can edit the batch, delete the batch, and reassign contributions. Arena Premium v2012.1.100 Arena User Manual – Contributions 320 Batch Summary The final page shows a summary list of the contributions for this batch. If you wish to remove/add contributions to this batch, click the corresponding Delete Contribution or Add Contribution button in bottom portion of the page as shown below. Batch List If you want to add a new batch, click the Add Batch button in the top left. Click the Open Batches button to show the batch list page that shows any non-finalized batch. Arena Premium v2012.1.100 Arena User Manual – Contributions 321 Steps to create a enter a Shelby Teller batch: 7) Click Contributions Entry. 8) Enter a batch name, batch date, and control amount. 9) Click Choose File button. 10) Locate and upload Shelby Teller XML file. 11) Click Edit Details to review and/or edit each contribution. Using an existing record Arena Premium v2012.1.100 Arena User Manual – Contributions 322 12) Click the Next button. 13) From this page, you can review and adjust each contribution. 14) Once you review and/or adjust each contribution, select the Save Batch button. Arena Premium v2012.1.100 Arena User Manual – Contributions 323 You can select a batch to Edit, Finalize, or Delete. Batch List When you finalize a batch, you have the option to post attendance to an open Occurrence. Arena marks attendance for the contributor. See your Arena Administrator if this option is not available. Mark Attendance Arena Premium v2012.1.100 Arena User Manual – Contributions 324 If your organization uses Shelby v.5 Financials, you will also have the option to export the finalized batch. You can also view Finalized batches. You can export a negative finalized batch. Arena Premium v2012.1.100 Arena User Manual – Contributions 325 Reports Prebuilt reports enable you to run reports such as Contributions Statements and Batch Reports. To send Contributions via email, refer to the Mailing section of this manual. Arena Premium v2012.1.100 Arena User Manual – Missions 326 Missions Missions are a way to track the details involving Mission Trips. Arena can track the location, schedule, team, local facilitators, supporters, travelers, and even a participant’s financial ability to pay for the trip. What you will need: Setup the Payment Gateway, if needed. See your Arena Administrator. Create the appropriate Fund for this Mission Trip. Create the Mission Trip. Create at least one Contribution Fund in order to create a Mission Trip. Refer to the Fund Management section in Contributions. Review your organization’s Mission Team approval process for the purpose of allowing additional payment to be made towards a Team Member. Mission List The Mission List will show the Mission Trip name, the departure and return dates, a Delete button, and an Add button. From this page, you can do the following: Click on a Mission Trip hyperlink to edit. Click Click the copy icon to copy a mission trip. The copies will include Custom Field, Communications, Packing Lists, Documents, and General Information from the original Mission Trip. Click to delete a Mission Trip. to add a New Mission Trip. If no missions are currently in the list, click the Add… link. Arena Premium v2012.1.100 Arena User Manual – Missions 327 Steps to Create a Mission Trip: 1) Click the button to add a new Mission. If no missions are currently in the list, click the Add… link. 2) Click Edit. 3) Enter details for this Mission Trip. Mission Details Trip Name – Enter the name of the Mission Trip. Country – Choose the destination country of the trip from the drop-down menu. If the country is not in the list, click the green icon to add a new Country. Region – Choose the country’s region in the drop-down menu. If the desired region is not in the list, click the green icon to add a new Region. City – Choose the destination city from the drop-down menu. If the desired city is not in the list, click the green icon to add a new City. Departure Date – Click the calendar icon to choose the date the trip starts. To hide a trip from “public” view, set the “Departure Date” to a prior date. Return Date – Click the calendar icon to choose the date the trip members will be returning. Trip Purpose – Choose the reason for the trip from the drop-down menu. If the desired reason is not in the list, click the green icon to add a new Purpose. Each Trip Purpose type has a 50-character limit. See your Arena Administrator to set security by Trip Purpose. Trip Status – Choose a trip status. Active and inactive are default statuses. Arena Premium v2012.1.100 Arena User Manual – Missions 328 Trip Coordinator – Enter the name of the coordinator of the trip. This person is the “Leader” of the trip, but is not necessarily a Team Member. Begin typing the last name of the intended person, and the dropdown will filter the available persons. Once the desired person displays in the list, click on that name to select it. Description – Enter a description of the Trip, including any itinerary. Min Team Size – Enter the minimum number of people for the Team. Max Team Size – Enter the maximum number of people for the Team. Min Age – Enter the minimum age a Team Member can be in order to go on the trip. Deposit Amount – Enter the amount (if applicable) that each Team Member must provide up front to go on the trip. Cost Per Team Member – Enter the total amount (if applicable) each Team Member must provide to go on the trip. You can use commas and decimals in any cost fields associated with Missions. Any other character will not display. Registration Deadline – Click the calendar icon to choose the last day a Team Member can register to go on the trip. Deposit Due on Registration Deadline – Check this box if box is due at registration. Registration Deposit 1 Deadline – Enter the due date for the first deposit, if applicable. Registration Deposit 1 – Enter the amount of the first deposit. Registration Deposit 2 Deadline – Enter the due date for the second deposit, if applicable. Registration Deposit 2 – Enter the amount of the second deposit. Arena can automatically send reminder e-mails, using the deadline dates entered. See your Arena Administrator. Beginning Balance – Enter the beginning balance (if applicable). CN Fund – Choose the Contribution Fund from the drop-down menu. If the desired Fund does not show in the list, you will need to add the Fund on the Fund Management page under Contributions. GL Project Code – Enter the GL expense account designated for the mission trip, if applicable. Trip Contributors – Lists Contributors who have contributed to the Mission trip through Contributions. 4) Click Save. 5) Now you can enter other details for this Mission Trip, using the tabs below the Mission Trip details. Arena Premium v2012.1.100 Arena User Manual – Missions 329 Mission Details Editing or creating a new Mission Trip will display the Mission Details page. The details will display with a series of tabs along the bottom containing additional information about the trip. When creating a new trip, all tabs display after you save the details. Click the Edit link at the upper right to begin editing the Mission Details. The figure below shows the Mission Trip details and the tabs, respectively. Mission Detail Tabs Facilitators – People who are assisting with the Mission Trip at the trip’s destination. These records are not stored in the Arena DB. Supporters – People who are assisting with the Mission Trip from the organization’s location. These records are stored in the Arena DB. Travel – This is a simple expense/income register for the trip such as, ground transportation and hotel accommodations. Financial – This is where you can track trip expenses and income, not incurred by the Team. Documents – You can upload associated documents such as a trip application form. Packing List – This is where to list items to bring on the trip. Team – The trip Team Members and Leaders list on this tab. Email – This is where you create a template for the e-mail sent to registrants, once individuals register. Custom Fields – You can create custom fields to use during online registration. Include a standard packing list as a Document and include with the e-mail, and use Packing List to alert team members to bring unique items to this trip. To leave a trip online to collect donations beyond the trip date, set the “Departure Date” one day after the last day donations are accepted. To prevent people from registering themselves to a trip, set the “Max Team Size” value greater than zero, and the “Max Team Size” value smaller than the number of team members currently enrolled for a trip. i.e., Enroll at least one person and set Max Team Size to 1. You may add team members even if you have reached the “Max Team Size”. Arena Premium v2012.1.100 Arena User Manual – Missions 330 F ACIL IT AT OR S T AB A Facilitator list will display each Facilitator’s name, phone number, e-mail address, website, country, region, and city. The delete button will remove a facilitator from the list. Steps to Add a Facilitator: 1) Click Add New. New Facilitator 2) Complete the fields, as needed. Field Facilitator details Name – Enter the name of the Facilitator you want to add. Country – Choose the country of the Facilitator from the drop-down menu. If the country is not in the list, click the green icon to add a new Country. Region – Choose the region of the Facilitator from the drop-down menu. If the region is not in the list, click the green icon to add a new Region. City – Choose the city of the Facilitator from the drop-down menu. If the city is not in the list, click the green icon to add a new City. Phone – Enter the phone number of the Facilitator. You can enter and format international phone numbers. 10-digit phone numbers automatically format. E-mail – Enter the e-mail address of the Facilitator. Website – Enter the website URL for the Facilitator. Notes – Enter any notes about this Facilitator. 3) Click Save when done. Adding Facilitators will not add the person to the Arena database, therefore Facilitators are not searchable within Arena, nor can they be included in bulk e-mails. Arena Premium v2012.1.100 Arena User Manual – Missions 331 S U P P ORT E R S T AB The Supporters list displays each supporter’s name, address, phone number, e-mail address, and the type of support the person provides. To add a Supporter, the individual must first be in the database. If he or she is not in the database, you can add them using the Add New Family utility under Membership. Financial Supporters entered through Contributions will also display on this tab. Steps to Add a Supporter: 1) Click Add New. 2) Complete the fields, as needed. Supporter Details Supporter – Begin typing the last name of the intended Supporter, and the drop-down will filter the available persons. Once the desired person displays in the list, click on that name to select it. Supporter Type – Choose the type of support the supporter provides for the trip from the drop-down menu. If the type is not in the list, click the green icon to add a new Supporter Type. Notes – Enter any notes about this Supporter. 3) Click Save when done. Supporters The delete button will remove a supporter from the list. Using the icons, you can add a new Supporter, Bulk Update the selected Supporters, e-mail selected Supporters, produce labels for the selected Supporters or export the list of Supports to Excel. Click the Details, as shown below. icon to add a new Supporter, the below page the Supporter Arena Premium v2012.1.100 Arena User Manual – Missions 332 T R AV E L T AB The Travel list shows details relating to the travel arrangements for this trip. This includes information about the company, website, quantity of transportation modes, cost, cost due date, deposit, deposit due date, arrangement type, confirmation number, contact name, contact phone number for the arrangement and notes. The delete button will remove an arrangement from the list. Click the Add icon to create a new Arrangement, which will open Travel details, shown below. Steps to Add a New Travel Arrangement: 1) Click Add New. 2) Complete the fields, as needed. Travel Arrangement Company – Enter the name of the company providing the travel arrangement. Website – Enter the website (if applicable) of the company. Quantity – Enter the quantity of the modes of transportation, such as a number of buses. Cost – Enter the cost of this Arrangement. Cost Due – Enter the date the total Cost is due. Deposit – Enter the deposit amount for the Mission trip. Deposit Date – Enter the date the Deposit is due. Arrangement Type – Choose an Arrangement Type from the drop-down menu. If the type is not in the list, click the green icon to add a new Arrangement Type. Confirmation Number – Enter the confirmation number (if applicable) for this Arrangement. Contact Name – Enter the name of the contact at the company. Phone Number – Enter the phone number of the company contact. Notes – Enter any notes about this arrangement. 3) Click Save. Arena Premium v2012.1.100 Arena User Manual – Missions 333 F IN AN CIAL I N FOR MAT ION T AB Use this tab to track incomes and expenses for each mission trip. Steps to Add Financial Information: 1) Click Add New. 2) Choose Expense or Income. 3) Complete fields, as needed. Financial Item Expense/Income – Choose whether this item is an expense or income for the trip. Vendor – Enter the name of the vendor providing the item(s). Transaction Date – Click the calendar icon to choose the date of the transaction. Amount – Enter the dollar value of the item. Register Type – Choose a register type from the drop-down menu. If the type is not in the list, click the green icon to add a new register type. Check Number – Enter the check number used to pay for the item. Invoice Number – Enter the invoice number for the item. 4) Click Save. Financial Information Arena Premium v2012.1.100 Arena User Manual – Missions 334 D OCU ME N T S Use this tab to manage documents associated with this mission trip. You can indicate documents to include with registration. Steps to Add a New Document: 1) Click Add New. 2) Complete fields, as desired. New Document Title – Enter the title of the document. Description – Enter a description for the document. Document – Click the Browse button to search for the document file. The file can be a .text, .doc, .pdf, or image file. Required – Check the box if this document is required to go on the trip. Include in Registration E-mail – Check the box if the document should be an attachment sent in the Registration E-mail for Team Members. Due Date – Click the calendar icon to choose the date the document is due back from the trip registrant. Reminder Date – Click the calendar icon to choose the date to send a reminder e-mail to the approved trip registrant. Notes – Enter any notes pertaining to this document. 3) Click Save. Mission Documents Arena Premium v2012.1.100 Arena User Manual – Missions 335 P ACK IN G L IST Use this tab to track items to bring on the mission trip. Steps to Add a Packing List Item: 1) Click Add New. 2) Complete fields, as desired. Packing List Item Entry Item – Enter the name of the object. Description – Enter a description of the item. Required – Check if the item is required for the trip. 3) Click Save. Packing List Arena Premium v2012.1.100 Arena User Manual – Missions 336 T E AM The Team Member List displays the team member’s name, their trip roles, if they have met any requirements to be a team member, their balance due, applied discounts, and Contributors. Clicking on team member’s name will open the Team Member Details page for that member. Individuals can also register for a Mission Trip by using the Online Trip Registration module/control on your organization’s Arena-managed website. Steps to Add a Team Member: 1) Click Add New. 2) Complete fields, as needed. New Team Member Team Member – Click Change... to search for the individual from the database. As you type the first and/or last name, the drop-down will filter the available persons. Once the desired person displays in the list, click on that name to select it. Team Members must already exist in the Arena database. Trip Role – Select the role for this team member. To add a new role, click the plus icon to create a new Trip Role. Requirements – Check the box if the team member has met the requirements to go on the mission. Approved – Click this box if you have approved this individual as a member of the Mission Trip. Once you approve a team member, the team member or others can make payments for him on your Arenamanaged website. Discount Amount – Enter the dollar amount of the discount for this team member. 3) Click Save. Mission Team Arena Premium v2012.1.100 Arena User Manual – Missions 337 Team Member List From the Team tab, you can add team members, use Bulk Update, email, print labels, and export the selected records to Excel. You can also view the Contributors to each Team member. You can enter Mission contributions through Contributions and/or individuals can make payment for approved team members through your Arena-managed website. Team Member List Team Member Details Once someone is a team member, you can click on his name to change the role, enter discounts, approve him, resend the Registration Confirmation e-mail or reassign a contribution to a different team member. Team Member Details Arena Premium v2012.1.100 Arena User Manual – Missions 338 Steps to make a payment towards a Trip Member or the Mission Trip: 1) Choose a Mission Trip, if more than one is available. The Online Trip Registration module/control allows the logged-in user to apply his gift to the Mission itself or a specific Team Member, as shown below. 2) Choose whether to register Yourself or a Family Member as a Team Member of the trip, or if you are contributing to the mission. Only Adult members of a family can register other family members. Mission Trip Registration 3) Enter the First and Last names of the Trip Member for whom you want to make a payment. Leave the name fields blank to apply the entry to the Mission itself. 4) Click the Verify Attendee button to verify the Trip Member exists for the chosen mission. 5) Enter your payment options and click Next. 6) They will proceed with entering in payment information, as determined by your organization. Arena Premium v2012.1.100 Arena User Manual – Missions 339 E- MAIL T AB Use this tab to create the registration confirmation e-mail registrants receive, once they complete registration. Mission E-mail Template Arena Premium v2012.1.100 Arena User Manual – Missions 340 C U ST OM F IE L D S T AB Use this tab to create custom fields or select custom field groups to include on the on-line registration page. Mission Custom Fields Custom Filed Entry Custom Fields are listed in the order in which they appear on this tab. Use the order. icon to change the Arena Premium v2012.1.100 Arena User Manual – Assignments 341 Assignments Assignments are Arena’s request tracking system. You can use assignments to track many different types of requests such as IT, Operations, Comfort Care Ministries, etc. You can also use Assignments to begin a Workflow from the Person Detail page. Arena Premium v2012.1.100 Arena User Manual – Assignments 342 Assignment Types Use the Assignment Type page to create various Assignment Types, using Child Assignment as desired to organize Assignments. You also want to verify, with your organization's Arena Administrator, the below features are working as desired. The hierarchy of Assignments works similar to Tags. Security inherits from the parent level of an assignment type. Turn on ArenaMailQueue Agent. Turn on ArenaAssignment/ProcessState Agent, if using Workflow States. Create Assignment System E-mails. Steps to Create an Assignment Type: 1) Go to AssignmentAssignment Types. 2) Click the Add Assignment icon. While it is natural to want to complete the tabs in the order in which they appear you may want to add the Available Workers and Custom Fields first. Assignment Tabs 3) Complete General tab fields, as desired. Assignment Type - General Information Arena Premium v2012.1.100 Arena User Manual – Assignments 343 Name – The name for the Assignment. Active – Indicates if the Assignment is active. Upload Icon – The icon image that will show next to the Assignment on the Assignment Entry page. SLA – (Service Level Agreement) The number of days to the worker is complete the assignment. Parent – This shows the assignment level structure. Owner – This will default to the person creating the assignment type. You can click Change to select a different owner from the database. Request Term – This caption will show on the Assignment Entry. Description – This is the description of the assignment task. Allows Requestor to Edit – Selecting yes allows the requestor to edit the assignment. Allow Requester to Pick Worker – Selecting “Yes” allows the requestor to select the worker. If “No” is selected, you will need to determine how to the worker will be selected for this Assignment Type. Allow Requester to Set Due Date – If this is set to “Yes”, then a date picker displays on the Assignment Entry page. If you set SLA on the assignment type, the due date will default to today + SLA days, but the user will be able to change the date. If this set to “No” (default), then it will act normally and use the SLA days to calculate the due date. Default Worker (Default) – If this is set to “No”, no options are given. If you select “Yes”, you have the option to select Round Robin, Load Balance or a specific Worker. Round Robin—Select this option if want Arena to always assign the items "evenly", where each worker receives one task before the first worker receives his second. Select this option if your objective is to assign the tasks "evenly", where each worker receives one task before the first worker receives his second. Load Balance—Select this option if you want Arena to assign the items to the worker with the lowest total load of open assignments. At a specific snapshot in time (the moment you create a new assignment), Arena looks at the current 'load' of each worker and allocates the new assignment to the worker with the lowest total load of open assignments. Specific Work—Select this option if you want the Arena to assign the items to worker. Email Worker (on update) – Check this box if you would like to e-mail the worker when updates are madeto the assignment type. If you do not check this box, Arena will still e-mail the worker when a user creates an assignment for the assignment type. Email Requestor (on update) – Check this box if you would like to e-mail the requestor when updates are made to the assignment type, not upon entry or close. If you do not check this box, Arena will still e-mail the requestor when a user creates an assignment for the assignment type. If the requestor is the same person who is updating the assignment, they will not receive an e-mail. An update in considered any change to an active assignment such as adding notes or changing the state of an assignment workflow. Email Subscriber – Check the appropriate box to e-mail anyone who has subscribed to the assignment, upon entry and update. Priorities – This is the listing of available and selected priorities for this assignment. Select from the Available box and click the single right-arrow to move it to the Selected box. Click Add to create more priorities. Default Priority – This is the default priority used for the Assignment Entry. Workflow Type – If using Workflow, select Person Detail. If you want to add Workflow to Calling Campaigns, select Calling Campaigns and set Person ID Custom Field. Arena Premium v2012.1.100 Arena User Manual – Assignments 344 Workflow Custom Field – If using Workflow, select Person. You will need to create the Custom Field first so that it is available on the General tab. Base Detail URL – This is used for the ##AssignmentDetailUrl## merge code in the e-mails generated for this assignment type. If left blank, the AssignmentBaseDetailUrl organization setting value is used. 4) Click the Available Workers tab. 5) Click the Add New Worker icon to select the available workers for this assignment. Assignment Type – Available Workers Select the Custom Fields tab to create custom fields for this Assignment Type. If using Workflow States, the Person Type, value 7, is required. 6) Click the Add NewField icon to create a new custom field, as shown below. Assignment Type - Custom Fields 7) Complete Field, as desired. Some Types require additional setup information. Custom Field Arena Premium v2012.1.100 Arena User Manual – Assignments 345 Title – Enter a name for this custom field. Title Location – Select the location where the title should display. Type – Select the desired custom field. Some types require additional setup information. Below are the available Types: o Address – This allows the requester to enter in an address. o Area – This allows the requester to select and Area. See Areas in this manual. o Checkbox – This allows the requester to make multiple selections from a single list. Enter each item, separated by a comma. o Custom Query – This is where you can enter a SQL statement. o Date – This allows the requester to enter a date in MM/DD/YYYY format. o Document – This allows the requester to upload a document. o Drop-down List – This allows the requester to make a single selection for a drop-down list. Enter items, separated by a comma. o Lookup Type – This allows the requester to select from an existing list of items from Lookups (See your Arena Administrator). o Person – This allows the requestor to select a person from the database. The default Page ID is 7. o Phone Number – This allows the requester to enter in a phone number. Arena will format 10-digit phone numbers. You can enter international numbers. o Radio List – This allows the requester to select a single item from several choices. Enter the items in a list form. o Static HTML Content – This allows the Assignment creator the ability to enter HTML Content. o Textbox – This allows the requestor to enter a string of text. Rows – Enter the number of rows to use for this field. It is not necessary to change from the default. Pixels Wide – Enter the number of pixels for this custom field. It is not necessary to change from the default. Visible – Select “Yes” to display this custom field on the Assignment Entry page. Required – Select “Yes” to require this custom field to be complete. Read Only – Select “Yes” if this custom field is for view purpose only; no action is required. Show on List – Select “Yes” for this custom field to be available in Lists. 8) Click Save. 9) Select the Workflow States tab. Workflow states allow you to create a process for this Assignment Type. Workflows will vary for your organization. Workflow States Arena Premium v2012.1.100 Arena User Manual – Assignments 346 In this example the Workflow States for First Time Visitors are: (1) Sending a First Time Visitor letter, (2) A reminder e-mail when the State is not changed within x days, (3) Making a First Time Visitor Phone Call, (4) A reminder e-mail when the State is not changed within x days, (5) Closing the Assignment. 10) Select the Add New State icon to add a Workflow State. 11) Enter a name for this state. 12) Select User Selectable, if desired. Check this box to indicate if the state is selectable by the user. If checked, it will show up in the State drop down box. If not, it can only be selected by Arena through a state action or if the state was incremented from a previous state. 13) Select Increment State After Action, if desired. Check this box to indicate if the Assignment should increment to the next state automatically after successfully completing the previous state. 14) Select the Action from the available drop-down to add to this assignment. You can include more than one Action for a State. Workflow State Arena Premium v2012.1.100 Arena User Manual – Assignments 347 Available Workflow States are: Assign Specific Worker – Will assign to the worker that you configure for this action. Assign Worker – Will assign to the default worker that you configure on the assignment type Assign Worker (Load Balanced) – Will assign to the worker that has the fewest active assignments of the current type. This option is only available when using Workflow. Assign Worker (Round Robin) – Will rotate assignment between all the workers for the assignment type. This option is only available when using Workflow. Assign Specific Worker – Allows you to set the e-mail notifications for the worker and the requestor, as well as the worker to whom this assignment is to be assigned. Assign Worker (Default) – Allows you to set the e-mail notifications for the worker and the requestor for the default worker option. Assign Worker (Load Balanced) – Allows you to set the e-mail notifications for the worker and the requestor for the Load Balance worker option Assign Worker (Round Robin) - Allows you to set the e-mail notifications for the worker and the requestor for the Round Robin worker option. Close Assignment – Allows you to set the e-mail notification to notify the requestor when the assignment is closed. Remind Worker – Allows you to set the number of days after a state was last updated or this action was last run. Arena sends a reminder e-mail to the worker. Send Assignment Reminder E-mail – Allows you to create an email and set the dates prior and after the due date. Send E-mail – Allows you to set the e-mail notifications options for when a worker is e-mailed. Set State – Allows you to set the new state of an assignment. Set State After Number Days – Allows you to set the state after “x” days when a state was last updated. Set State after Testing Field – Allows you to set a state based upon a pre-determined value to decide what to do next. 15) Click the add workflow icon to add the workflow state to the Selected states. Selected Workflow States Arena Premium v2012.1.100 Arena User Manual – Assignments 348 16) Based on the Workflow state selected, select or enter the Action Settings for the workflow state, as shown below. Workflow State Action Settings 17) Click Save. 18) Repeat steps 1 through 7 for additional workflow states for this Assignment Type. 19) Set security for this Assignment Type, similar to Tags. This Assignment Type is now available on the Assignment Entry page. Permissions are automatically set at the parent level for the user who creates the Assignment Type. If you create an assignment type on the child level, it will inherit parent level permissions. See your Arena Administrator if the Security Tab is not available. Assignment Type Security Arena Premium v2012.1.100 Arena User Manual – Assignments 349 C H IL D A SSIGN ME N T T YP E S The Child Assignment Types tab displays any assignment types you create under the parent assignment type. Child Assignment Types Subscribe – This box allows you to add a hyperlink to this Assignment on your Arena home page. Subscribers will receive an e-mail when assignments are created or updated. The option to e-mail when an assignment is closed is set on the Close Assignment workflow. Name – This is the name of the Assignment. Click the name link to open the Assignment Type. Owner – This is the owner of the Assignment. Hovering over the person’s name will display the person popup. Active – This denotes if the Assignment is active or inactive . # of Child Types – This denotes the current number of all child Assignments associated with the Assignment Type. Assignments – This is the total number of Assignments, including all child Assignments. This number includes open, closed and inactive assignments. Active – This is the number of current active Assignments; that are still open. The number includes all statuses except for closed. Past Due – This is the number of Assignments that are past due, based on the Service Level Agreement (SLA) date. Delete Button – Click this to delete the Assignment Type. This is available when no Assignments exist. Add Button – Click this to create a new top level Assignment Type. Export to Excel button – Click this button to export the selected Assignment Types to Excel. Arena Premium v2012.1.100 Arena User Manual – Assignments 350 A SSIGN ME N T S T AB The assignments tab gives you the ability to filter through the statuses of current assignments as shown below. Assignment List Flags – The colored flags indicate if the Assignment is current , almost late , or late . Title – This is the title of the Assignment. Type – This is the type of Assignment. Requestor – This is who made the request. Worker – This is whom is responsible for this Assignment. State – This is the state of the Assignment, if using Workflow States. Priority – This is the current Assignment status. Created – This is the date the Assignment was created. Due Date – This is when the Assignment is due. Additional Columns will display, if you are using Workflow States. E-mail Requestors – This link allows you to create an e-mail Communication to all requestors. E-mail Workers – This link allows you to create an e-mail Communication to all workers. The Add Assignment Entry page. icon allows you to add an Assignment from this page, taking you to the Assignment Arena Premium v2012.1.100 Arena User Manual – Assignments 351 A SSIGN ME N T S E CU R IT Y T AB Use this page, to set security permissions for each Assignment Type. Assignment Security Tab Arena Premium v2012.1.100 Arena User Manual – Assignments 352 Assignment Entry The assignment entry page allows users to submit assignment requests, as shown below. Due to the customization options, Assignment Entry pages may vary. The below example provides you with an example of several Custom Fields. Assignment Entry Arena Premium v2012.1.100 Arena User Manual – Assignments 353 Steps to Create a New Assignment Entry: 1) Select the Assignment Type from the Assignment Entry page. 2) Complete fields, as needed. Due to the ability to use Workflow States and Custom Fields, your Assignment Entry page may vary. Assignment Entry 3) Click Submit. An e-mail is sent to the Worker. Arena Premium v2012.1.100 Arena User Manual – Assignments 354 Steps to Update an Assignment: 1) Click the link from the Assignment e-mail. 2) Click Edit Details. Fields may vary. If you choose the option to e-mail the requester when users make changes, an email is also sent when closing the assignment. 3) Make the appropriate changes. 4) Click Save. Assignment Details Arena Premium v2012.1.100 Arena User Manual – Assignments 355 Steps to Close an Assignment: 1) Click the link from the Assignment e-mail or from the desktop hyperlink. 2) Click Edit to make any updates, or click close if no changes are necessary. Closing an Assignment Workflow Once you create an Assignment with Workflow States, it will be available on the Person Detail page. Being that Workflows will vary, the example to follow includes the below States: Arena Premium v2012.1.100 Arena User Manual – Assignments 356 Send a First Time Visitor letter by a Specific Worker. Send a reminder e-mail to the Specific Worker when the State is not changed within 2 days. Make a First Time Visitor Call by a Specific Worker. Send a reminder e-mail to the Specific Worker when the State is not changed within 2 days. Closing the Assignment. Steps to Start a Workflow: 1) Go to the Person Detail page for whom you want to create an assignment. 2) Select the Workflow (Assignment) you would like to start for this person. This is not the person being assigned the Assignment, but the person for whom the Assignment is being done. Start a Workflow 3) Click the Start Workflow shown below. icon. The page will refresh and Arena will confirm the Workflow has begun, as Workflow Confirmation Arena Premium v2012.1.100 Arena User Manual – Assignments 357 4) The worker selects the Assignment. Active Workflow 5) Click Edit, once you are ready to make a State change. Workflow Assignment 6) Change the States, as needed for this Workflow. Workflow State Change 7) Click Save. The worker for the next State will receive an e-mail and repeat steps 4-7 until the Workflow is Complete. Arena Premium v2012.1.100 Arena User Manual – Glossary 358 G L OSSAR Y Agent An Agent is an automated program that performs specific Arena tasks (such as sending e-mail or geocoding addresses) at pre-defined intervals as a Windows Service. For more information, see the Agents Appendix in the Arena Administrator Manual. Browser A software program that enables you to view web pages. Database The entity that contains data in a structured format for data entry and retrieval. Arena uses SQL for its database structure. See also: SQL. Domain Indicates the logical or geographical venue of a web page. Common domains are .edu for education, .gov for government, .org for organizations and non-profits, .com for commercial. Domain Name Refers to the first part of a URL, including the domain and name of the host or Server computer. Extension or File Extension One of several letters at the end of a file name. Extensions usually follow a period (dot) and indicate the type of file. Common extensions are .txt for text, .exe for executable, .jpg for a picture file. Firewall Security measures designed to protect a networked system from unauthorized access. Frames A format for web documents that divides the page into segments, each with a scroll bar, as if it were a “window” within the window. Frequency (Attendance Type) An Attendance Type Frequency is the specific time that an Attendance Type is active and available for Check-In. It is also used in creating Occurrences generated by the Check-In application. Geocoding Geocoding is a process which provides the precise latitude and longitude coordinates of a street address, which is used by Arena for mapping and distance calculations. Groups (also Small Groups) Groups are one of the ways Arena is able to group and list members together. Group Category The Group Category acts as an overall assembly of all of the unique information for a set of groups such as the group member roles, group clusters, Cluster types/levels, etc. Group Cluster Level The Cluster Level refers to a specific level or tier within a particular Cluster Type. Group Cluster Type (also Group Structure) The Cluster Type is used to define different Group Tree structures within a Group Category. Group Subscription Group Subscriptions are used to track and easily view the count of Members or Pending Members of any Group. See Also: Tag Subscription Arena Premium v2012.1.100 Arena User Manual – Glossary 359 Group Tree The Group Tree refers to the overall structure of a set of groups, often displayed and visualized as a tree due to its single root Cluster Type which then proceeds to branch multiple times (according to its Cluster Type) before the Small Group level. Host (also Server) The computer that provides web pages and documents to clients or users. ID, Login (also Arena Login) Login IDs are the Username and Password used to authenticate a login to Arena and to identify that user as a specific person in the Arena Database. ID, Manager Manager IDs are used by the Check-In Kiosk application. When entered in place of a Person ID, a Manager ID switches the Check-In Kiosk application to the Management page. ID, Person Person IDs are the way Arena identifies a person. Each person in the Database has a unique Person ID. Person IDs are also used by the Check-In Kiosk application. When a Person ID is entered at the main page, the associated person is selected from the database for Check-In. Inactive Inactivating an entity (Tag/Group, Tag/Group member, etc), unlike Deleting it, will not remove it from the database. This allows for historical data such as occurrences and attendance to be maintained. Kiosk (Check-In) A Check-In Kiosk is an automated location where persons can register their attendance for events. The kiosk application requires a PC with Windows 2000, XP or newer and a network connection to your Arena server. See also: Centralized Mode, Non-Centralized Mode, Secured, and Occurrence. Kiosk Centralized Mode The Centralized Mode of a Check-In Kiosk allows for a single kiosk to offer check-in for multiple Attendance Types, but cannot be used for Secured Attendance Types. See also: Kiosk, Non-Centralized Mode, Secured, and Occurrence. Kiosk Non-Centralized Mode The Non-Centralized Mode of a Check-In Kiosk can only be used to offer check-in for a single Attendance Type, and must be used for Secured Attendance Types. See also: Centralized Mode, Kiosk, Secured, and Occurrence. Link The web address embedded in a piece of text or image that directs the user to a specified address. Lookup Lookups are one of Arena’s internal methods of storing frequently used values for fields. They are also used when a field should only have specific values available for selection. They are defined under Administration Lookups. Module Modules, or Controls, are the person interfaces for data entry or data display throughout Arena. Occurrence Occurrences represent specific dates or times of instances or meetings of a Group, Tag, or Attendance Type. Arena Premium v2012.1.100 Arena User Manual – Glossary 360 Organization This represents your company, entity or entities, and contains unique information and settings for each entity. Report Server The computer that runs and maintains the Microsoft Report Services application and website. Role, Security Security Roles are used to grant or limit access to areas of Arena. They can be assigned to persons or to groups, and are cumulative in nature. Role, Group Group Roles are used to indicate a group member’s position and responsibilities. These are defined in Small Group Roles under Administration Lookups. Secured (Attendance Type Option) The Secured option for an Attendance Type prevents the type from being used by a kiosk in Centralized mode. See also: Centralized Mode, Non-Centralized Mode, Kiosk, and Occurrence. Site or Website The term is used to mean “web page,” but there is a difference. A web page is a single file that you might find on the Web. A site is the location that links several related pages. SMS Short Message Service (SMS) is a text messaging service component of phone, web, or mobile communication systems, using standardized communications protocols that allow the exchange of short text messages between fixed line or mobile phone devices. SQL (Structured Query Language) SQL (pronounced just like ‘sequel’) is an acronym for Structured Query Language, and is the database management system for Arena. SQL is used for adding, removing, and retrieving data. SQL Server The computer that runs and maintains the SQL databases and services. Standardization Standardization refers to the process of determining the correct postal code in a zip+4 fashion, verifying and setting the complete street address, and then verifying the whole address as a valid location. Tags Tags are one of the ways Arena is able to group and list members together. There are four default Tag types: Personal, Ministry, Serving and Event. Tag Subscription Tag Subscriptions are used to track and easily view the count of Pending/In Process, Critical (for Serving Tags), and Connected members of any Tag. See Also: Group Subscription URL The abbreviation for Uniform Resource Locator, the URL is the unique address of a web document. Web Server A computer running software, assigned an IP address, and connected to the Internet so that it can provide documents via the World Wide Web. Widget A visual object on the page that can be manipulated with the mouse and keyboard. Arena Premium v2012.1.100