1
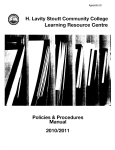
Redatam+SP
REtrieval of DATa for Small Areas by Microcomputer
8
Redatam+ WebServer
Basic Manual and
New Miranda Web Application
REDATAM+SP© is a software system developed by the Latin American and Caribbean
Demographic Center (CELADE), which is the Population Division of the Economic Commission
for Latin America and the Caribbean (ECLAC), United Nations.
www.eclac.cl/celade/Redatam
R+SP WebServer - Class Material
July 2011
ENGLISH
Index
Document contents............................................................................................................4
I.
What is R+SP WebServer ...........................................................................................5
I.1 Advantages of R+SP WebServer ..............................................................................5
I.2 R+SP WebServer applications available in Redatam+SP.........................................6
II.
New Miranda demonstration application ..................................................................9
II.1 Thematic structure.....................................................................................................9
II.2 Similarities and differences between the execute panels........................................10
II.2.a
II.2.b
II.2.c
II.2.d
II.2.e
II.2.f
II.2.g
II.2.h
II.2.i
II.2.j
II.2.k
II.2.l
II.2.m
II.2.n
Frequencies: Basic Characteristics of Population and Housing topic .......................14
Averages and medians: Basic Characteristics of Population and Housing topic ......15
Crosstabs: Basic Characteristics of Population and Housing topic ...........................16
Arealists: Basic Characteristics of Population and Housing topic .............................16
Population by age and sex.........................................................................................17
Dependency ratio (user defined)................................................................................17
Age distribution ..........................................................................................................18
Dependency ratios and/or Sex ratio ..........................................................................18
Person characteristics by age (65+) ..........................................................................19
Household characteristics by age (65+) ....................................................................19
Children / women ratio ...............................................................................................19
Average number of children.......................................................................................20
Population in school age............................................................................................20
Tables for education variables ...................................................................................20
II.3 Special sub-nodes ...................................................................................................20
II.3.a
II.3.b
II.3.c
II.3.d
Dictionary information ................................................................................................21
Programming in Redatam ..........................................................................................22
Help............................................................................................................................24
Redatam+SP homepage............................................................................................24
II.4 Output panels ..........................................................................................................24
II.4.a
II.4.b
II.4.c
II.4.d
Tables ........................................................................................................................24
Graphs .......................................................................................................................25
Maps ..........................................................................................................................25
Redatam+SP programs .............................................................................................26
III. Installation and configuration of R+SP Webserver ...............................................27
III.1 Download R+SP Webserver....................................................................................27
III.2 Install R+SP Webserver ..........................................................................................27
III.3 Apache Web Server ................................................................................................28
III.3.a
III.3.b
III.3.c
III.3.d
Apache installation.....................................................................................................29
Check the Apache installation....................................................................................29
Configure Apache to handle R+SP WebServer.........................................................30
Restart Apache ..........................................................................................................31
III.4 Microsoft IIS Server (Internet Information Server)...................................................31
III.4.a
III.4.b
III.4.c
III.4.d
IIS installation.............................................................................................................31
Check IIS installation .................................................................................................32
Activate IIS application...............................................................................................33
Redatam virtual directory ...........................................................................................34
R+SP WebServer – Basic Manual
III.4.e
III.4.f
III.4.g
III.4.h
III.4.i
Cgibin virtual directory ...............................................................................................35
Protection for cgibin directory ....................................................................................35
New Web Server extension (IIS version 6.0).............................................................36
Restrictions ISAPI and CGI (IIS version 7.0) .............................................................37
Check R+SP WebServer execution...........................................................................38
IV. Enable the server for other Redatam databases and R+SP xPlan applications .41
IV.1 Complete “cgibin” folder ..........................................................................................41
IV.2 Complete “Docs” folder............................................................................................43
IV.3 Complete “htdocs” folder .........................................................................................43
IV.4 Edit the R+SP WebServer “master” INL file ............................................................44
IV.5 Main file ...................................................................................................................49
IV.5.a
IV.5.b
Copy and paste from R+SP xPlan .............................................................................49
Modify main file (clauses specific to R+SP WebServer)............................................51
APPENDIX I: Answers to exercises ................................................................................56
ECLAC/CELADE
Redatam Development Center
3
R+SP WebServer – Basic Manual
Document contents
This user manual contains a detailed description of the R+SP WebServer module that is
part of the Redatam+SP software family developed by ECLAC/CELADE.
The document is divided into four sections. In the first section, the main characteristics of
the R+SP WebServer are detailed and the R+SP WebServer applications available online
in the Redatam official webpage are listed.
In the second section, the New Miranda R+SP WebServer demonstration application is
described.
The third section of the manual includes a tutorial for the installation of the R+SP
WebServer on Apache or IIS servers (most common servers).
Finally, the fourth section includes guidelines for enabling the server for other Redatam
databases and/or R+SP xPlan applications.
ECLAC/CELADE
Redatam Development Center
4
R+SP WebServer – Basic Manual
I. What is R+SP WebServer
The main objective of the R+SP WebServer module is to assist the National Statistical
Institutes (NSIs) in their task to publish data - whether it is from censuses, surveys, vital
statistics or other sources – in a safe way and without extra costs. The R+SP WebServer
module allows for the online processing of Redatam databases stored on a server
(through Intranet or Internet) without the users having direct access to them. It enables the
user to perform tabulations that are carried out from the server through an application via
predefined pages. This processing “simulates” the functions of the R+SP Process module.
R+SP WebServer applications work through files with an INL extension, the same files
that characterize the R+SP xPlan module. These applications comprise of thematic nodes
that permit different types of outputs. For example, there are predetermined outputs that
allow users to generate tabulations such as frequencies, crosstabs, means, medians,
maximums, minimums, counts, area lists or specific indicators defined by the user. R+SP
WebServer applications also include the possibility of online processing utilizing the
Redatam programming language.
In R+SP WebServer the outputs can be displayed through geographic selections, filters or
user defined areas. Results of analyses can be displayed as values/frequencies in tables,
as charts or maps. The user can specify how the results are displayed from those three
formats. In addition, another output type available is the Redatam program.
When obtaining the outputs through online processing using Redatam programming
language, the user has the same access that R+SP Process to the information contained
in the database.
In addition, R+SP WebServer applications provide the possibility to incorporate metadata,
such as documents with descriptions on the characteristics of the data source, the
questionnaire and methodological manuals. Help files and links to organizational
WebPages can also be included.
I.1 Advantages of R+SP WebServer
R+SP WebServer offers a set of advantages both for the user and for the organization
responsible for its implementation.
From the users’ point of view, the main benefit is the ease of use of the application and
the processing speed. As will be demonstrated later in this manual, the application is
designed in a way that both persons with no experience in Redatam and more advanced
users can take advantage of it. The module allows for the generation of predefined
tabulations, maps and graphs but also to make use of the Redatam programming
language for more specific tabulations.
The user also benefits from the data processing speed. The response time does not
depend on the hardware that is used but on bandwidth and the server of the organization
offering the database.
ECLAC/CELADE
Redatam Development Center
5
R+SP WebServer – Basic Manual
From the point of view of the NSIs, the benefits are numerous. To begin with, it is a free
software, simple to implement and offers an easy way to control the access to the
databases. Moreover, support and technical assistance is offered by the Redatam
Development Centre team of CELADE and through REDATAM user’s community.
R+SP WebServer permits the control over the access to the databases and the
processing options by the Web Site administrator. This characteristic contributes to the
management of the identification of the users, their entry options and eventually the
possibility of a nominal payment. These alternatives help to avoid the spread of illegal
copies of the databases.
Furthermore, R+SP WebServer is easy to implement. If an R+SP xPlan application is
already available, the steps to “convert” it to a R+SP WebServer application are only few.
I.2 R+SP WebServer applications available in Redatam+SP
In the Redatam official website (http:/www.eclac.org/celade/redatam/) a list of R+SP
WebServer applications can be found. They are organized in three major groups: 1)
Online censuses, 2) Online indicator systems, and 3) Demonstration application.
The link to “censuses” on the website, gives access to a list of countries that have made
available the microdata of one or more Population and Housing Censuses utilizing R+SP
ECLAC/CELADE
Redatam Development Center
6
R+SP WebServer – Basic Manual
WebServer. These applications have been developed by the NSIs with the support of
CELADE. The applications are available on the NSI websites and/or the ECLAC server
(as a mirror site or at the request of the National Statistical Institute).
CELADE website also includes links to R+SP WebServer applications for obtaining
indicators online. For example:
• ICPD: Indicator system with comparable information for countries of Latin America
and the Caribbean, which allows the follow-up of the ICPD Programme of Action
(Cairo 1994) and the Regional Plan of Action (subscribed by the countries of Latin
America in 1996).
• SISE: Regional System of Indicators on Ageing. The system contains comparable
sociodemographic information for elderly, for countries of Latin America and the
Caribbean.
• SISPPI: Sociodemographic Indicators System for Indigenous Peoples of Latin
America, (SISPPI). This system contains sociodemographic indicators built from
the 2000 round of population and household census. The sociodemographic
indicators were selected emphasizing ethnic, cohort and gender gaps.
ECLAC/CELADE
Redatam Development Center
7
R+SP WebServer – Basic Manual
Finally, the website includes a R+SP WebServer demonstration application based on the
New Miranda database in four languages. This application will be presented in the
following section.
ECLAC/CELADE
Redatam Development Center
8
R+SP WebServer – Basic Manual
II. New Miranda demonstration application
The following image shows the main page of the R+SP WebServer demonstration
application created with the New Miranda Redatam database.
II.1 Thematic structure
The application was constructed with the following thematic structure (the left side panel
of the image):
1.
2.
3.
4.
5.
6.
7.
8.
Population and housing
Population structure
Elderly
Fertility
Education
Dictionary information
Programming in Redatam
Documentation
Each one of these themes (also called nodes) is divided into sub-themes and these in turn
to a specific processing type.
For example, “Population and housing”, is divided into the following sub-themes:
•
Basic characteristics (frequencies, means and medians)
ECLAC/CELADE
Redatam Development Center
9
R+SP WebServer – Basic Manual
•
•
Basic characteristics (cross tabulations)
Basic characteristics (arealists)
“Population structure” is divided into four sub-themes:
•
•
•
•
Population by sex and age group
Dependency ratio (user defined)
Age distribution
Dependency ratio and/or sex ratio
The following sub-themes are included in the Elderly topic:
•
•
Person characteristics by age (65+).
Household characteristics (personas 65+).
“Fertility” has two sub-themes:
•
•
Children < 5 / Women ratio
Average number of children
“Education” also has two sub-themes:
•
•
School age population
Tables for education variables
“Dictionary information” includes information on the variables included in the Redatam
database (six subgroups). The “Programming in Redatam” has three subgroups. Finally,
the “Documentation” topic gives access to the help files and Redatam webpage.
Each of the sub-themes involves specific processes. The user can get access to the
processes, by simply clicking on a subtheme. Once this is done, the center panel changes
appearance and presents (in most the cases) an execute panel (also called menu).
However, the last three nodes offer other options, such as access to downloads, links etc.
II.2 Similarities and differences between the execute panels
The execute panel consists of a series of drop down menus and text boxes which the
user must complete or select for specifying the parameters such as variable name, areabreak level, geographic area, output format, etc. (see following image).
The panel also includes a “Help” button to access contextualized technical assistance and
an “Execute” button to run the process itself. Clicking the “Execute” button, then allows for
the display of the output based on the specified format; this can be a table, a graph, a
map or a Redatam program (or a combination).
Some of the boxes are “standard” and are therefore repeated on all panels irrespective of
the theme. However, in a few cases there are some boxes that are specific to particular
sub-themes.
ECLAC/CELADE
Redatam Development Center
10
R+SP WebServer – Basic Manual
Table Title: To be typed in by the user (Optional).
Areabreak Level: This selection allows the user to specify the level at which the results
will be expressed i.e. at the database level or for each of the selectable elements of the
database. This parameter is optional, thus if none of the options are selected the
application expresses the results at the database level (all database) which is the default.
Geographic Area (selection): To define the geographic area to which the cases included
in the process belong. The parameter is optional. The user can select one of the
predefined options or define the selection by self. Up to two user defined selections can
be created selecting either 1st or 2nd user’s selection from the box and making a click on
“Edit”. A new window will open for the definition of the selection. To save the selection and
return to the execute menu the user must click on OK.
ECLAC/CELADE
Redatam Development Center
11
R+SP WebServer – Basic Manual
Filter: This option allows the user to control the parameters that are processed i.e. the
universe (entire database) or parts of the database (based on specified criteria). The
parameter is optional. If the user doesn't make a selection, then entire database will be
taken into account in the process (unless geographic selections exist). On the contrary,
the application offers the following options: 1) select a predefined filter, 2) construct a filter
in the box below, or 3) use the expression builder option that is activated by clicking the
“Build filter” button.
The image above shows the expression builder window with “Filter” and “Entities” boxes,
“Variables”, “Labels”, “OK” and “Cancel” buttons and a toolbar with arithmetic connectors
such as “=” and “OR”.
To construct a filter, the user must select an entity by clicking on the desired entity from
the entity list of available entities. Next, click “Variables” button and from new the box that
opens, select the variable. A double-click on the variable name passes it to the “Filter” box
at the upper part of the window where the expression will be written. The user must then
choose the operator to be used, either using the buttons of the toolbar or typing directly in
the box. A click on the “Labels” button opens the category labels list. The category value
is selected either with a double click, or simply writing the value after the operator. If the
expression uses more than one variable, AND or OR must be used to join the two or more
conditions. Finally, the filter is activated by clicking “OK”.
The following image shows the construction of a filter for persons who are attending
school.
ECLAC/CELADE
Redatam Development Center
12
R+SP WebServer – Basic Manual
The following sequence was followed:
1. Selection of the “PERSON” entity in “Entity” box,
2. Click on “Variables” button,
3. Selection of the variable “School Attendance” from the list of variables in the
database
4. A double click on the variable name
5. Click on “=” button to specify the criteria for selection,
6. Click on “Labels” button,
7. Double click on “Attending”,
8. Click on OK.
Output format: This allows the users to choose the display format of the output from a list
of available display options given in the output format list. Once the user clicks “Execute"
the selected output will be displayed in a new window. The system offers two output
format types that vary depending on the sub-theme.
1. “Table”, “Graph”, “Table and Graph” and “R+SP Program”. This format has two
variations that refer to the graphs. In some cases the graph must have up to two
variables. In other case, the graph to be displayed as an age pyramid.
2. “Table”, “Graph”, “Map”, “R+SP Program”, “Table and Graph”, “Table and Map”,
“Map and Graph” and “Table, Graph and Map”.
Similar to the output format box, there are percentage type boxes that are present in subthemes that allow to user to specify how the values/frequencies are displayed. Two
options are available:
ECLAC/CELADE
Redatam Development Center
13
R+SP WebServer – Basic Manual
1. “Absolute numbers”, “row percentage”, “column percentage, “percentage of total”.
If the user doesn’t select any of the options, absolute numbers will be displayed.
2. “Total”, “total selected”, “percentage”, relative percentage”. This model is only
available for sub-themes that involve the selection of variables and categories. The
option “total” is used when the user wishes to obtain the results for all the
categories of the variable.
When “total selected” option is activated the output only displays the selected
category. With the option “percentage” the output shows the percentage of the
selected category of the total. “Relative percentage” is a ratio of the selected
category and the rest of the cases (for example, if the variable is SEX and the
selected category Male, the relative percentage would be equal to sex ratio.)
Also more specific cells exist. The options available in the New Miranda example can be
classified as follows:
Simple selection cell: For the selection of one or more variables (or indicators). The user
must activate the list and click the name of a variable (to select more than one variable
press CTRL button and select the other variables). Two variants exist:
1. Selection of variables of one entity.
2. Selection of variables from two different entities (for example, PERSON and
HOUSIN). The list is displayed in one box.
Multiple selection cells: For the selection of one main variable and two additional variables
to be included in the rows and columns of the table, each in separate cells. The selection
is done by activating the variable list and clicking on the variables of the three cells. This
option corresponds to crosstabs or to averages or medians with control variables.
Numerator and denominator cells: Two cells for the numerator and denominator to be
used in the calculation of an indicator. The user must activate one of the options available
in the numerator cell and another one in the denominator cell. Such a selection would
apply for the construction of indicators such as dependency ratio.
Variable and category selection cells: One cell for the selection of a variable and a second
cell for the selection of the categories of the selected variable. The user may select more
than one category; however, only one variable may be selected.
Finally, there are sub-themes that do not include specific cells in their execute panels.
This is the case, for example, when the process involves an indicator that has already
been calculated, such as average number of children born.
II.2.a Frequencies: Basic Characteristics of Population and Housing topic
The execute panel of these sub-themes (Housing variables and Person variables) allows
the user to generate simple frequencies of housing variables, person variables or both.
ECLAC/CELADE
Redatam Development Center
14
R+SP WebServer – Basic Manual
For each sub-theme the execute panel is exactly the same, the only difference would be
the in the variables available for selection.
II.2.b Averages and medians: Basic Characteristics of Population and
Housing topic
These sub-themes include an execute panel for the entry of parameters for the calculation
of averages and medians of population and housing variables. The standard boxes
available include the definition of the table title, output level, geographic selection, filter
and output format.
The additional features of this execute panel are the multiple selection cells; one for the
main variable and two for additional variables to be included in the rows and columns of
the output table.
ECLAC/CELADE
Redatam Development Center
15
R+SP WebServer – Basic Manual
The user must select one of the quantitative variables included in the first box, and if
desired, one variable for the rows and another one for the columns. These two (by row or
by column) are optional and can be left blank.
II.2.c Crosstabs: Basic Characteristics of Population and Housing topic
This sub-theme allows the creation of contingency tables for population and housing
variables, either for each entity separately or combining variables from both entities.
With reference to the standard cells, this execute panel is identical to the sub-themes that
include frequencies, averages or medians. As the following image shows, the difference is
given by the boxes where the row and column variables are selected.
The selection of a variable from each of the two drop down boxes is obligatory. In the
“Combination” sub-node, the variable lists provided in the two drop boxes are alike and
include all the variables from both entities.
The execute panel also provides the option to select between row, column or total
percentages. If none of the options are selected, the output displays absolute numbers.
In this execute panel the options “graph” and “table and graph” only accept up to two
variables.
II.2.d Arealists: Basic Characteristics of Population and Housing topic
The arealist sub-theme is for producing a frequency distribution of all the categories of the
variable for each geographic area.
As it relates to the standard cells, this execute panel is identical to the subthemes
mentioned above. The difference lies in the box where the variables are selected. Also a
new output format option is available, namely maps (also in combination with tables and
graphs).
ECLAC/CELADE
Redatam Development Center
16
R+SP WebServer – Basic Manual
II.2.e Population by age and sex
The population by sex and age sub-node offers three tabulation options: by five year age
groups, by single years or by major age groups.
Title, filter, areabreak level and geographic selection boxes are standard. The only special
characteristic is found in the output format options. Graphs are replaced by age pyramids.
II.2.f Dependency ratio (user defined)
In the dependency ratio execute menu, the user defines the numerator and the
denominator for the indicator to be calculated. As the following image shows, first the
grouping format for the variable age must be selected. Next, the user must define the age
ranges that make up the numerator and the denominator.
In addition to the standard cells (title, filter, output level and geographic area) a cell for the
selection of the output type is offered. The user can select between “Indicator” and
“Indicator and cases”.
ECLAC/CELADE
Redatam Development Center
17
R+SP WebServer – Basic Manual
The second option displays in two separate columns the counts for the denominator and
denominator.
II.2.g Age distribution
In the variable selection box the user can choose between larger age groups or five year
age groups. The user can select the age groups of interest. Moreover, the user can select
which values are to be displayed in the output table (absolute numbers or percentages).
The rest of the cells are standard. The output formats available include maps.
II.2.h Dependency ratios and/or Sex ratio
This sub-theme is for obtaining two indicators, dependency ratio ratios and sex ratio. The
indicator or indicators of interest must be selected from the cell as shown below.
The rest of the cells are standard. The output formats combine tables, graphs and maps.
ECLAC/CELADE
Redatam Development Center
18
R+SP WebServer – Basic Manual
II.2.i Person characteristics by age (65+)
This sub-node offers frequencies to be calculated for persons aged 65 years and above.
Once the variable of interest is selected the user must select the variable categories.
In addition to the standard options, a box for the selection of cell percentages is available.
II.2.j Household characteristics by age (65+)
This sub-theme offers a set of outputs including only persons aged 65 years or above
according to their housing characteristics. It works the same way as the sub-node
described above with the only exception being that the variables belong to HOUSIN entity
(i.e. variables at the household level).
II.2.k Children / women ratio
This sub-node is for obtaining an indicator for the proportion of children aged 0-5 to
women aged 15-49, by 100. Since the indicator is calculated directly by the system, the
only cells available on the execute menu are the standard ones.
ECLAC/CELADE
Redatam Development Center
19
R+SP WebServer – Basic Manual
II.2.l Average number of children
This sub-node is for obtaining the average number of children per women. The user must
indicate variables to be included in the rows and columns of the output. If these cells are
left blank, the output displays the average number of children alive/born alive.
II.2.m Population in school age
This sub-node is for obtaining outputs of the population according to age groups that
normally correspond to different levels of education. The user must select one or more of
the categories listed.
II.2.n Tables for education variables
This sub-node gives the option to make crosstabs of up to three variables with reference
to education and literacy level. In the execute panel, there are three cells for the
identification of the variables of interest.
II.3 Special sub-nodes
In the New Miranda sample application the sub-nodes belonging to the nodes “Dictionary
information”, “Programming in Redatam” and “Documentation” don’t include an execute
menu as described above. The following sections describe the other options offered by
the application.
ECLAC/CELADE
Redatam Development Center
20
R+SP WebServer – Basic Manual
II.3.a Dictionary information
As the name indicates the sub-nodes of this node provide information on the dictionary.
Once the user clicks any of the four sub-nodes, a list with all the variables including entity
names, labels, type, alias and group is displayed. The sub-nodes are:
-
All variables
Geographic variables
Household variables
Person variables
The image below displays a list of the sub-node “Geographic variables”.
To get access to a list with the variable categories, the user must select the Household or
Person categories sub-node and select a variable or variables from the available list and
click the “Execute” button.
ECLAC/CELADE
Redatam Development Center
21
R+SP WebServer – Basic Manual
In addition to the category list, the output displays information on the entity to which the
variable belongs, label, type, range, alias and group.
II.3.b Programming in Redatam
This sub-node allows the use of Redatam programming language to execute programs
and to download the dictionary and the software.
R+SP statistical processor
This sub-node gives access to the Redatam+SP programming menu. As the image below
shows, the center panel of the application is divided into three cells.
ECLAC/CELADE
Redatam Development Center
22
R+SP WebServer – Basic Manual
The program syntax is written in the upper left cell. The cell on the right hand side
includes information on the database dictionary. If the syntax contains errors, those errors
are displayed in the cell below the program syntax (lower left corner) upon clicking
“Execute” button. If the program contains no errors the results will be displayed.
Additional programming assistance may be obtained by downloading the data dictionary
and the Redatam+SP software (R+SP Process module).
Download dictionary
A click on the subtheme allows for the download of the New Miranda database dictionary.
ECLAC/CELADE
Redatam Development Center
23
R+SP WebServer – Basic Manual
Download Redatam+SP software
Through this sub-node the user is directed to a webpage for downloading the latest
version of the Redatam+SP software.
II.3.c Help
This sub-theme includes a link to a web help page that is displayed on the center panel of
the application.
II.3.d Redatam+SP homepage
With a click on this sub-node the user is directed to the Redatam+SP homepage.
II.4 Output panels
The New Miranda WebServer application includes three basic output types: tables,
graphs, maps and Redatam programs. These are displayed by clicking the “Execute”
button. In some cases, the three first display formats may be combined. Moreover, in
some cases the graph type available is an age pyramid. Table outputs can be saved in
Excel (.xls) of PDF (.pdf) formats.
II.4.a Tables
The following image shows an output table of the variable “Type of Activity” (person
variables sub-node).
ECLAC/CELADE
Redatam Development Center
24
R+SP WebServer – Basic Manual
II.4.b Graphs
The following graph displays the distribution of the New Miranda database by marital
status for people aged 15 years or older (person variables sub-node).
II.4.c Maps
The map below presents another output type available in the New Miranda R+SP
WebServer application. It was obtained from the dependency ratio and sex ratio sub-node
and is expressed at district level.
ECLAC/CELADE
Redatam Development Center
25
R+SP WebServer – Basic Manual
II.4.d Redatam+SP programs
Redatam program syntax is the fourth output type option. The following image shows the
program obtained as a result of the crosstab of “5-year age groups” by “education type”.
ECLAC/CELADE
Redatam Development Center
26
R+SP WebServer – Basic Manual
III. Installation and configuration of R+SP Webserver
The purpose of chapter is to serve as a quick guide for the R+SP WebServer installation
either on Apache web server or on Microsoft Internet Information Server (IIS). The choice
of the web server depends on the user’s working environment and/or his/her preferences.
The chapter is designed in such a way that it is not necessary to have any previous
knowledge on any of the web servers (Apache or IIS). The users who are familiar with the
servers can adjust the installation according to their needs.
The following two chapters describe how to download and install the R+SP WebServer
application. After that, each of the Web Servers (Apache or IIS) are described, and finally
it will be shown how to check the application and modify it to add new Redatam
databases.
III.1 Download R+SP Webserver
The most common way to obtain the R+SP WebServer is by downloading it from the
official REDATAM web site at:
http://www.eclac.cl/celade/redatam/
In the Updates section you will find a link to the latest version of the software.
Download the R+WebServer_V4Rev00.exe file to any temporary directory in your hard
disk (the version number (4) and/or the revision number (00) will be changed as new
versions/revisions of the software become available).
III.2 Install R+SP Webserver
Create a new folder on the “C:” disk and name it Servers (C:\Servers), and within this
folder, create a new folder called redatam (C:\servers\redatam). 1 It is important that you
have read and write permissions to this disk. Please contact your Network Administrator if
you experience any problems creating the folders on your disk.
Extract the installation files by executing the R+WebServer_V4Rev00.exe file (double
click on the filename) in the "c:\servers\redatam\" directory.
The whole structure of the main installation directory should be as shown in the picture
below:
You can use another disk, as well as different directory names. However, be careful to change accordingly the
remaining instructions in this document.
1
ECLAC/CELADE
Redatam Development Center
27
R+SP WebServer – Basic Manual
The Redatam directory is divided into three folders:
1. cgibin, contains the Redatam databases and this is the “protected” part of the
installation;
2. docs, contains all the documentation; and
3. htdocs, is the “visible” part of the application and can be recognized by the users
through its alias redatam.
III.3 Apache Web Server
This chapter is a quick guide for the users who want to use Apache and who haven’t
installed it yet. It is not a comprehensive Apache User’s Guide; on the contrary, the idea is
to make installation as easy as possible. However, it does not limit you from the possibility
of tailoring the installation to meet your own preferences.
The installation includes only two steps:
1. The installation itself (if not installed yet); and
2. The editing of Apache’s configuration file to make the R+SP WebServer available
(copy and paste two text blocks contained in this document).
ECLAC/CELADE
Redatam Development Center
28
R+SP WebServer – Basic Manual
III.3.a Apache installation
Verify in the lower right toolbar of your screen to see if Apache is already installed and
and once passing the mouse over the icon the
connected. The icon looks as follows
text “Running all Apache Services” should be displayed.
If the Apache server is not yet installed, go to http://httpd.apache.org/ and download the
last official version (not Beta). This version should be located at the “Win32 Binary (MSI
Installer)” on the Apache site. For the installation process, we recommend that you
choose the “Typical” installation. Accept all the default options presented by the program,
that is, just click “Next” as each screen appears. Define a domain known to the computer,
such as:
DomainName = eclac.org
ServerName = www.eclac.org
ServerAdmin = [email protected]
III.3.b Check the Apache installation
Once installed, the Apache server will be automatically started and ready for use. Look for
the Apache icon in the lower right Toolbar to verify it’s connected. Using any Internet
browser, access the default Apache page by typing the following in your browser's
address box:
http://localhost/
Depending on the Apache version installed, a page similar to the following should appear
on your screen:
ECLAC/CELADE
Redatam Development Center
29
R+SP WebServer – Basic Manual
III.3.c Configure Apache to handle R+SP WebServer
Using any text editor, open the "httpd.conf" file located under the "conf" directory under
the Apache installation directory (C:\Program Files\Apache Group\Apache2\conf\). You
can also access this file by selecting it directly from the Apache group from the main menu
Two modifications must be done; one for Redatam to be recognized by Apache and
another one for executing it through a script.
In the Apache 2.2 version the place where these modifications must be done is identified
by <IfModule alias_module> section. Within this section (closed with </IfModule>) and
before the ScriptAlias command, add the following text:
Alias /redatam "C:/servers/redatam/htdocs/"
For Redatam ScriptAlias, add the following after ScriptAlias command (/cgi-bin/):
ScriptAlias /cgibin/ "C:/servers/redatam/cgibin/"
Finally, you must define the options for these two folders (htdocs and cgibin). This is done
by copying the following sections after the definition of the directory “cgi-bin”
</Directory>:
<Directory "C:/servers/redatam/htdocs">
Options Indexes FollowSymLinks
AllowOverride None
Order allow,deny
Allow from all
</Directory>
<Directory "C:/servers/redatam/cgibin">
AllowOverride None
Options None
Order allow,deny
Allow from all
</Directory>
ECLAC/CELADE
Redatam Development Center
30
R+SP WebServer – Basic Manual
Save the "httpd.conf" file. See Annex I for more details.
III.3.d Restart Apache
Look for the Apache icon in the lower right Toolbar and left click it to show the existing
options. Select “Restart”, to restart the server and activate the new scripts added above.
Alternatively, you may go to the Start button, select Program Files, Apache, Control
Apache Server and Restart.
III.4 Microsoft IIS Server (Internet Information Server)
Like the Apache web server installation, IIS installation is also very simple. The difference
between them lies in the configuration. For the IIS’s, the configuration is done through its
service manager (a wizard) instead of having to edit the configuration file as in the case of
Apache
III.4.a IIS installation
In order to check if IIS is already installed, go to the Windows Control Panel, choose the
Add/Remove Programs option, and then use the Add/Remove Windows Components
button at the left side of the screen. The system should display the following:
If the IIS server is already installed the system will display a check mark at the Application
Server line, as above. If not, select the check box and this will then allow you to proceed
with the installation process. Again, it is recommended that you accept the default options
presented by the program. During the installation process you will be required to insert the
original Windows Operating System Installation CD to complete the process.
ECLAC/CELADE
Redatam Development Center
31
R+SP WebServer – Basic Manual
If your operating system is Windows Server 2008, go to “Server Manager” and verify in
server roles if IIS is installed. If not, proceed to install it. Be sure to select the option CGI in
“Application development”. It is recommended to accept the default options.
III.4.b Check IIS installation
Using any Internet browser of your choice, access the server’s default page by typing the
following address:
http://localhost/
If this is the first time you have installed IIS, the system should display the screen as
shown below:
For Windows Vista, 7 or Server 2008 the main screen should be as follows:
ECLAC/CELADE
Redatam Development Center
32
R+SP WebServer – Basic Manual
Otherwise, it may display the default page that was designed by the webmaster. If there
are errors in the displayed page, check the IIS configuration, or refer to the Microsoft
documentation at: (http://www.microsoft.com/).
III.4.c Activate IIS application
To activate the IIS application you have to use the Internet Information Server Manager,
which is found through the Windows Control Panel, Administrative Tools, and Internet
Information Server Manager. Alternatively you can select “Start”, click “Run” and in open
type “inetmgr” and click “Ok”. The below screen will be shown:
For IIS7 the screen should be as follows:
ECLAC/CELADE
Redatam Development Center
33
R+SP WebServer – Basic Manual
III.4.d Redatam virtual directory
To create a new virtual directory in the IIS Manager, right click on Default Web Site, and
then choose New and Virtual Directory. The system will then launch Wizard to receive
some parameters, the first one being the Virtual Directory Alias, which should be redatam
(this word is case sensitive), as shown in the following picture):
Press “Next” and then “Browse” to find the “htdocs” directory, located where the R+SP
WebServer installation files were extracted, for example: "C:\servers\redatam\htdocs", as
in the picture below:
The next step is to assign Access Permissions, check only the Read permission, as
shown in the following picture:
ECLAC/CELADE
Redatam Development Center
34
R+SP WebServer – Basic Manual
Or type the parameters in the following screen:
III.4.e Cgibin virtual directory
Repeat the process described in Section V.4 to create another virtual directory with the
following parameters
Alias:
cgibin (case sensitive)
Path:
"cgibin" subdirectory where the R+SP WebServer installation files were
extracted, for example: "C:\servers\redatam\cgibin""
Permisos:
Only “Execute” (NOT “Run Scripts”).
III.4.f Protection for cgibin directory
Since the cgibin virtual directory will store all Redatam databases, it is wise to establish
some access restrictions. Right click the cgibin entry in the IIS Manager and select
Properties.
ECLAC/CELADE
Redatam Development Center
35
R+SP WebServer – Basic Manual
First you have to change the way to access this directory: none should be checked, as in
the following screen:
Next, choose the Documents tab and make sure that the Enable default content page is
not checked (disabled):
Press OK to apply those changes and, before closing the IIS Manager, verify that the
installed IIS version is 6.0 (Select “Help” and then click “About).
III.4.g New Web Server extension (IIS version 6.0)
This IIS version, by default, does not allow CGI applications to be executed, thus, it has to
be changed, because this is precisely the case with the R+SP WebServer.
In order to do that, go to IIS Manager, right click the Web Service Extension and choose
Add New Service Extension. The system shows the following window:
ECLAC/CELADE
Redatam Development Center
36
R+SP WebServer – Basic Manual
The suggested extension name should be redatam and the files to be added are
“RpWebEngine.exe” and “WebUtilities.exe”, located in the “cgibin” directory, for example
"C:\servers\redatam\cgibin”, as shown below:
III.4.h Restrictions ISAPI and CGI (IIS version 7.0)
Similar to the IIS 6.0, in this version the type CGI programs that can be executed with the
server must be assigned manually, which is the case of R+SP WebServer.
To make these changes, in the configuration of IIS, you must be positioned at the starting
level of the server, enter the ISAPI and CGI Restrictions and select "Add". The following
screen is shown:
ECLAC/CELADE
Redatam Development Center
37
R+SP WebServer – Basic Manual
The name suggested for the restriction is "R+SP WebServer", the file you need to add is
"RpWebEngine.exe" located in "cgibin", eg "C:\servers\redatam\cgibin" and select "Allow
extension path to execute", as shown in the following screen:
Repeat the same procedure for the file "WebUtilities.exe" as the suggested restriction
name "R+SP WebUtilities”.
The next step, always in the IIS configuration, is to go to the level of "cgibin" Server and
go to "Handler Mappings", select "Edit Feature Permissions" and select "Scripts" and
"Execute", as shown in the following figure:
III.4.i Check R+SP WebServer execution
Using any Internet browser of your choice, access the REDATAM page by typing the
following:
http://localhost/redatam/
If you followed all the previous steps exactly, then the screen should display:
ECLAC/CELADE
Redatam Development Center
38
R+SP WebServer – Basic Manual
After clicking the “Enter Test Site” button the system should display the following screen:
Where R+SP WebServer application is running and will proceed to create a "Tempo"
directory required to store temporary Redatam files. It is important that this folder is
created by the application and not copied or created on the outside by the user. In the
case of reinstatement of R+SP WebServer or new WebServer versions, we recommend
that the "tempo" folder is removed previously, similar with the file RpWebEngine.tto
located in cgibin folder.
Refresh the page and the list of available databases should be displayed:
ECLAC/CELADE
Redatam Development Center
39
R+SP WebServer – Basic Manual
ECLAC/CELADE
Redatam Development Center
40
R+SP WebServer – Basic Manual
IV. Enable the server for other Redatam databases and R+SP
xPlan applications
This chapter is for enabling the site for R+SP xPlan applications. Before you organize the
site structure for another database it is important that you understand the file structure of
the site. Be aware that the folders that were created when installing the R+SP WebServer
(see III.2) exist under the root directory servers/redatam, as shown in the image below;
cgbin and htdocs (docs folder is optional).
These two branches are related. They contain all the files that are necessary to run R+SP
Web applications. The first branch under servers/redatam is cgibin. It is of “private” nature
as it contains the protected part of the application: databases, images, maps, inl files, etc.
The second required branch is named htdocs and it contains all public files and
documents (help files, images, etc. in general, all files referenced by the html files
executed in internet).
In this chapter the R+SP New Miranda demonstration application will be used as an
example. In other words, it is taken for granted that an R+SP xPlan application already
exists. This in turn means that the following material is at our disposal: inl files (structured
in a conventional manner) 2 , images and help files. Moreover, Apache, IIS or another Web
Server has already been installed.
IV.1 Complete “cgibin” folder
The first step is to create a directory for the database and all the files associated (from
maps to images and geographic selections). This directory must be created below the
cgibin folder and should be named RpBases. Remember that this folder contains all the
information that is “protected” by the system so that no one else than you can have
access to the information.
Below the private RpBases folder create a subdirectory for the new R+SP WebServer
application. In our example based on the New Miranda database the folder is named
NMIR, as can be seen in the image below.
It’s recommended that the principal file is named “Guest” and the other files as follows: “DataSels”, “Defines”,
“GeneralSections”, “Maps”, “Pages”, “Preferences”, “Styles” and “Utilities”
2
ECLAC/CELADE
Redatam Development Center
41
R+SP WebServer – Basic Manual
In order to keep the information organized (database files separated from the rest), it is
suggested you create the following three folders.
/Base: for database files (*.dic, *.rbf and *.ptr)
/Site: for images (*.jpg, *.gif) and *.html files
/Work: for geographic selection files (*.slw or *.sel), maps (*.mxp, *.shp, *.shx, *.dbf),
etc.
In the New Miranda example, the division of the folders follows the same logic. The
database and inl files are located under cgibin/RpBases/NMIR. Help files and images
referenced to in the html files (RpOutput_ENG.htm) etc. are located under htdocs/NMIR.
(The New Miranda application exists in four languages, which explains the folders ENG,
ESP, FRA and PTR.)
The first folder (BaseR) contains the database files as is shown in the image below.
In the remaining folders (ENG, ESP, FRA and PRT) you can find maps, geographic
selections and images corresponding to each language version.
ECLAC/CELADE
Redatam Development Center
42
R+SP WebServer – Basic Manual
We will only make reference to the English version of the New Miranda application (folder
ENG). In the following image shows the files that are found in this folder.
IV.2 Complete “Docs” folder
The docs folder is for storing all the information with reference to the application that may
be useful to you or others in reviewing the application, adding another one, etc.
IV.3 Complete “htdocs” folder
The htdocs folder stores all the public information of the application, that is, information
available on the Internet for the users, such as images, help documents etc.
ECLAC/CELADE
Redatam Development Center
43
R+SP WebServer – Basic Manual
The images folder of the htdocs folder contains all the standard images of the application
(R+SP logos etc.). The NMIR folder contains the information specific to the New Miranda
application. RpHelp stores the help files and images used in them.
IV.4 Edit the R+SP WebServer “master” INL file
The next step is to edit the master file that controls the R+SP WebServer main page. This
file is named WebServermain.inl and is found in \redatam\cgibin.
Open the WebServermain.inl file with a text editor in order to create a new entrance for
the new application.
Before making any modifications in the file, open the page which is displayed by clicking
on “Enter test site” on the Redatam+SP server site (at http://localhost/redatam/).
ECLAC/CELADE
Redatam Development Center
44
R+SP WebServer – Basic Manual
When clicking any of the options on the left hand side, you will find out that in fact they are
not databases but “groups” of databases. Click on Nueva Miranda (New Miranda) and the
following window will be displayed. It shows the databases available in the four languages
mentioned earlier.
The number of clauses in the WebServermain.inl file might make you think that the task of
creating a new entrance for the application is complicated. However, it is simpler than it
seems. Below the first lines of the WebServermain.inl file are displayed.
ECLAC/CELADE
Redatam Development Center
45
R+SP WebServer – Basic Manual
NODES=111
NODE1=*
NODE2=*
NODE10=NMIRGROUP
NODE11=*
NODE20=ONLINEGROUP
NODE21=*
NODE40=SPECIALGROUP
NODE41=*
NODE30=CENSUSGROUP
NODE31=*
NODE50=ENCHOGGROUP
NODE51=*
ITEM60=DHSGROUP
ITEM61=*
NODE70=ESVITGROUP
NODE71=*
NODE80=ENCAGRGROUP
NODE81=*
NODE90=CENAGRGROUP
NODE91=*
NODE100=ENCINDGROUP
NODE101=*
NODE110=ENCEDUGROUP
NODE111=*
Note that the NODES clause is followed by a numeric parameter which is for indicating
the maximum number of “database groups”, or “entries”, available.
NODE clause is completed with a number in a sequential order (1, 2, 10, 11, etc.) and the
following parameter can either be an asterisk or an expression. An asterisk indicates a
blank line while an expression represents a database group “nickname” (for internal use).
For example, the New Miranda database group is named “NMIRGROUP”.
The number of NODES – 111 – exceeds by large the real number of nodes. However, this
is done on purpose as it is easier to add new databases between existing ones without
the need to rewrite the sequential order, for example, adding NODE15 between NODE10
and NODE20.
ECLAC/CELADE
Redatam Development Center
46
R+SP WebServer – Basic Manual
Exercise 1
The following image shows a change in the R+SP WebServer group list. What
changes would you introduce in the WebServermain.inl file to obtain the same result?
After adding a database group we need to define the sections of the group and the
databases within them. Below the NMIRGROUP (New Miranda) is detailed:
[NMIRGROUP]
CAPTION=Nueva Miranda
PAGETYPE=GROUP
ITEMS=6
ITEM1=HR
ITEM2=NMIRESP
ITEM3=NMIRENG
ITEM4=NMIRPRT
ITEM5=NMIRFRA
ITEM6=
Basically four parts can be distinguished:
1.
Group name, within brackets (“[NMIRGROUP]” in the example);
2.
Expression that identifies the group in the R+SP WebServer database list,
CAPTION=Nueva Miranda;
3.
Section type with PAGETYPE command (“GROUP”), and
ECLAC/CELADE
Redatam Development Center
47
R+SP WebServer – Basic Manual
4.
The number of elements in the group (ITEMS clause), and the denomination (ITEM
clause completed with a sequential number and followed by a database name) 3 .
In this case the age type is GROUP. Other options are BASE – in case of a database – or
DISPLAYHTML.
The following sections of the WebServermain.inl file show how to establish the sections
corresponding to each database that make up the NMIRGROUP group.
[NMIRESP]
CAPTION=Español
INL=RpBases\NMIR\NMIRANDACENSO_ESP.inl
PAGETYPE=BASE
[NMIRENG]
CAPTION=English
INL=RpBases\NMIR\NMIRANDACENSO_ENG.inl
PAGETYPE=BASE
[NMIRPRT]
CAPTION=Português
INL=RpBases\NMIR\NMIRANDACENSO_PRT.inl
PAGETYPE=BASE
[NMIRFRA]
CAPTION=Français
INL=RpBases\NMIR\NMIRANDACENSO_FRA.inl
PAGETYPE=BASE
Four sections can be identified ([NMIRESP], [NMIRENG], etc.).
1. CAPTION clause identifies a name – in this case the language – to be displayed on
the web page.
2. INL details the location and name of the main inl file.
3. PAGETYPE indicates that it is a database.
3
HR parameter is equal to “introduce a horizontal line”.
ECLAC/CELADE
Redatam Development Center
48
R+SP WebServer – Basic Manual
Exercise 2
How would you proceed to obtain the following results?
IV.5 Main file
The following step is to define for each database the main file that permits their execution
in R+SP WebServer.
In R+SP xPlan the main file has extension inl. Within this file the thematic structure of the
application is defined. Moreover, the other inl files that make up the application are listed.
Thus, the main file already exists and we only need to make some modifications in it. So
instead of creating, we will “migrate” the files from R+SP xPlan to R+SP WebServer.
IV.5.a Copy and paste from R+SP xPlan
In our example based on the New Miranda database, the first thing to do is to identify the
files of the R+SP xPlan application. These files can be found in: \Program
Files\Redatam\NMIR and the main file (if the English version) is called
“NMIRANDACENSO_ENG.inl”. 4
4
This folder and files are created when Redatam+SP is installed.
ECLAC/CELADE
Redatam Development Center
49
R+SP WebServer – Basic Manual
Also the other files associated with the application are found in this directory (some of the
files are stored in ENG folder).
Next, go to the folders that have been created for R+SP WebServer and try to locate the
file that is equivalent to the main R+SP xPlan file. You can observe that the main file in
English is called the same (“NMIRANDACENSO_ENG.inl”) and is stored in
C:\servers\redatam\cgibin\RpBases\NMIR
The associated files also maintain the same names and are stored in the ENG folder in
C:\servers\redatam\cgibin\RpBases\NMIR\ENG.
ECLAC/CELADE
Redatam Development Center
50
R+SP WebServer – Basic Manual
If you open both files named NMIRANDACENSO_ENG.inl, for R+SP xPlan and R+SP
WebServer, you can observe some small differences. The R+SP WebServer inl file
contains some additional clauses such as “FILTER”, “FORMAT” and “HTMLHELP”.
IV.5.b Modify main file (clauses specific to R+SP WebServer)
The following sections detail the modifications that must be done in the main file, and one
modification that must be done in the “Preferences.inl” file.
Redirect or call pages of other sites with DisplayHtml
Supposing that Help and Front Page are included as entries in the thematic structure of
the R+SP WebServer application, the modification would be:
1.
To redirect the application page to a help file:
[Ayuda]
CAPTION=Help
PAGETYPE=DisplayHtml
FILENAME=/redatam/RpHelp/index.html
2.
To open a new window (for example the home page of the organization responsible
for the application):
[Portada]
CAPTION=Home
PAGETYPE=DisplayHtml
FILENAME=http://www.ine.gob.nm
NEWPAGE=YES
The DisplayHtml parameter of the PAGETYPE clause tells the program to go to the page
indicated in the FILENAME clause. This can be, for example, a help file stored in the
directory of the application, or an external web page. If you want the page to be opened in
a new window include the clause NEWPAGE=YES.
Add to each node FILTER, PERCENT and OUTPUT FORMAT
FILTER and FORMAT clauses assign a predefined filter and output format for the
processing nodes of the program.
FILTER=FILTER_1
FORMAT=FORMAT_2
Moreover, for processing nodes that involve outputs in real numbers PERCENT command
must be included.
PERCENT=PERCENT_1
ECLAC/CELADE
Redatam Development Center
51
R+SP WebServer – Basic Manual
The different filter, percent and output formats are defined in the “GeneralSections.inl” file.
In the New Miranda sample application the output formats available in the
“GeneralSections.inl” file are as follows:
/---------------------------------------------------------------------[FORMAT_1]
FORMATCAPTION=Output Format:
FORMATN=4
FORMAT1=HTML Table
FORMAT2=GRAPH Graph
FORMAT3=SPC R+ Program
FORMAT4=GRAPHHTML Table and Graph
/---------------------------------------------------------------------[FORMAT_2]
FORMATCAPTION=Output Format:
FORMATN=8
FORMAT1=HTML Table
FORMAT2=GRAPH Graph
FORMAT3=MAP Map
FORMAT4=SPC R+ Program
FORMAT5=GRAPHHTML Table and Graph
FORMAT6=MAPHTML Table and Map
FORMAT7=GRAPHMAP Map and Graph
FORMAT8=MAPGRAPHHTML Table, Graph and Map
/---------------------------------------------------------------------[FORMAT_3]
FORMATCAPTION=Output Format:
FORMATN=4
FORMAT1=HTML Table
FORMAT2=GRAPH Graph (up to 2 variables)
FORMAT3=SPC R+ Program
FORMAT4=HTMLGRAPH Table and Graph (up to 2 variables)
The processing node of frequencies of housing variables of the New Miranda application
uses the FORMAT_1 option.
ECLAC/CELADE
Redatam Development Center
52
R+SP WebServer – Basic Manual
Thus, the following list is displayed to the user.
Add online help file to each node (htm file)
Each processing node must also include a clause that determines the path and name of
the corresponding help file, as shown below:
HTMLHELP=/redatam/RpHelp/frecuencias.htm
These help files must have been created beforehand and saved in “RpHelp” folder.
Modifications in FRACTION type processing nodes
Introduce the following clauses and parameters in the nodes whose type is FRACTION.
OUTPUTCAPTION=Output Type:
OUTPUTN=2
OUTPUT1=OFF Indicator
OUTPUT2=COUNTS Indicator and Cases
ECLAC/CELADE
Redatam Development Center
53
R+SP WebServer – Basic Manual
These lines create a box with special output type options: “Only indicator” or “Indicator
and cases”. If you don’t include the options the box is not displayed and the output only
displays the indicator.
In New Miranda application the only processing node of the type FRACTION is the user
defined dependency ratio.
Replacements in AREALIST type processing nodes
In processing nodes of the type AREALIST that involve only one indicator, it is more
practical to replace the clauses VARCAPTION, VARHEIGHT, VARN, VAR1, and
VARSEL1 by only one expression:
VARFIXED=%OUTENT.DEFINEi
DEFINEi is the name of the variable defined to calculate the indicator (stored in the
“Defines.inl” file).
In New Miranda, only one processing node of the type AREALIST exists: the children to
women ratio. This indicator is calculated in DEFINE19 of the program, denominated
INDMC. Thus, the clause to be included is:
ECLAC/CELADE
Redatam Development Center
54
R+SP WebServer – Basic Manual
VARFIXED=%OUTENT.INDMC
Add “GLOSSARY” section to PREFERENCES.INL
Finally, in PREFERENCES file a GLOSSARY section with the following clauses and
parameters must be added.
/-------------------------------------------------------------[GLOSSARY]
PROCESSTITLE=Parameter Definition
TABLETITLECAPTION=Table Title
BUTTONSUBMIT=Execute
BUTTONFREQUENCY=Execute Frequency
BUTTONHELP=Help
BUTTONFILTER=Build Filter
BUTTONSELECTION=Edit
[email protected]
COPYRIGHT=Copyright © 2002-2011 Latin American and Caribbean Demographic
Center (CELADE), ECLAC, Santiago, Chile
EXERCICE 3
Modify the “Frequencies of Person Variables” node (Population and housing > Basic
characteristics) so that the output formats available also include combinations of tables
and graphs, tables and maps, maps and graphs, and tables graphs and maps.
ECLAC/CELADE
Redatam Development Center
55
R+SP WebServer – Basic Manual
APPENDIX I: Answers to exercises
EXERCICE 1:
In the WebServermain.inl delete or “block” with asterisks from NODE30 to NODE110.
Save the file and refresh the R+SP WebServer page. Blocking is always a better option
than deleting.
NODES=111
/NODE1=TITLE
NODE2=*
NODE10=NMIRGROUP
NODE11=*
NODE20=ONLINEGROUP
NODE21=*
NODE40=SPECIALGROUP
NODE41=*
*NODE30=CENSUSGROUP
*NODE31=*
*NODE50=ENCHOGGROUP
*NODE51=*
*ITEM60=DHSGROUP
*ITEM61=*
*NODE70=ESVITGROUP
*NODE71=*
EXERCICE 2:
You only need to indicate in the WebServermain.inl file that the number of elements
included in the NMIRGROUP is three.
[NMIRGROUP]
CAPTION=Nueva Miranda
PAGETYPE=GROUP
ITEMS=3
ITEM1=HR
ITEM2=NMIRESP
ITEM3=NMIRENG
ITEM4=NMIRPRT
ITEM5=NMIRFRA
EXERCICE 3:
To obtain the desired output format in the first place observe if the option is included
within the available output formats defined in the “GeneralSections.inl” file. The option is
identical to the format 2.
ECLAC/CELADE
Redatam Development Center
56
R+SP WebServer – Basic Manual
[FORMAT_2]
FORMATCAPTION=Output Format:
FORMATN=8
FORMAT1=HTML Table
FORMAT2=GRAPH Graph
FORMAT3=MAP Map
FORMAT4=SPC R+ Program
FORMAT5=GRAPHHTML Table and Graph
FORMAT6=MAPHTML Table and Map
FORMAT7=GRAPHMAP Map and Graph
FORMAT8=MAPGRAPHHTML Table, Graph and Map
Next, you need to locate the node Person Variables node in the main inl file of the
application, NMIRANDACENSO_ENG, and change the parameter of the format clause:
/-------------------------------------------------------------[FREQPOB]
CAPTION=Person Variables
NODETYPE=FREQUENCY
NODESTYLE=FREQUENCY.DEFAULT
NODESHOW=YES
ROWN=ROW_PER1
ABKN=ABK_1
FILTER=FILTER_1
*FORMAT=FORMAT_2
FORMAT=FORMAT_2
HTMLHELP=/redatam/RpHelp/recorriendolabasededatos.htm
Save the file and refresh the application page.
ECLAC/CELADE
Redatam Development Center
57