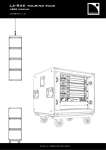
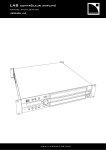
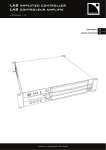
Download LA4 amplified controller
Transcript
LA4 amplified controller user manual VERSION 6.0 www .l-a cou sti cs. co m LA4 amplified controller user manual VERSION 6.0 SAFETY INSTRUCTIONS 1. Read this manual 2. Follow all SAFETY INSTRUCTIONS as well as DANGER and OBLIGATION warnings 3. Never incorporate equipment or accessories not approved by L-ACOUSTICS® 4. Read all the related PRODUCT INFORMATION documents before exploiting the system The product information document is included in the shipping carton of the related system component. 5. Environments Use the product only in E1, E2, E3, or E4 environments according to EN55103-2 standard. 6. Radio interference A sample of this product has been tested and complies with the limits for the EMC (Electro Magnetic Compatibility) directive. These limits are designed to provide reasonable protection against harmful interference from electrical equipment. However, there is no guarantee that interference will not occur in a particular installation. 7. Power cord caution Do not use the product if the power cord is broken or frayed. Protect the power cord from being walked upon or pinched - particularly at the plugs and the point where the power cord exits from the apparatus. 8. Mains supply Only connect the LA4 (CE type) or LA4US (US type) to an AC power outlet rated 230 V, 16 A, 50 - 60 Hz or 120 V, 30 A, 50-60 Hz. Only connect the LA4JP (Japan model) to an AC power outlet rated 100 V, 30 A, 50 - 60 Hz or 200 V, 15 A, 50-60 Hz. 9. Three-phase circuit Verify that each phase works, in particular the neutral one. Balance the loads between the three phases. Never try to reproduce a 230 V circuit connecting an LA4 or an LA4US to two live wires of a 120 V three-phase circuit. Never try to reproduce a 200 V circuit connecting an LA4JP to two live wires of a 100 V three-phase circuit. 10. Electrical generator You must power on the generator before powering on the amplified controllers. Verify that the amplified controllers are turned off before powering on the generator. 11. Thermal circuit breaker Always interconnect a thermal circuit breaker between the product and the mains. The circuit breaker current rating depends on the mains voltage rating as follows: 16 A for 230 V or 30 A for 120 V (LA4 or LA4US), 15 A for 200 V or 30 A for 100 V (LA4JP). 12. Grounding To plug the controller to mains only use an outlet fitted with a pin tied to ground. Do not defeat the ground pin of the outlet as it connects the controller to earth. If the local outlet is obsolete , consult an electrician. The product is fitted with a grounding-type plug. Do not defeat the ground wire connecting the plug’s female contact to the product’s chassis. 13. Plug replacement If the AC plug on the power supply cord of this product does not match the local outlet, it must be replaced by an appropriate one. This operation should only be performed by qualified service personnel. Verify that the cut-off plug is withdrawn from use, as it can cause severe electrical shock if connected to an AC outlet. LA4_UM_EN_6.0 w w w .l-a cous ti cs .c om 2 14. Lightning storm During lightning storms, disconnect the product from the mains. Switching the product off does not disconnect it from the mains. To do this, remove the plug from the mains outlet. 15. Interconnections When connecting the product to other equipment, mute all output channels. Carefully read the user manual of the other equipment and follow the instructions when making the connections. Do not connect a speaker output in parallel or series with any other amplifier output. Do not connect the speaker outputs to any other voltage source, such as a battery, mains source, or power supply, regardless of whether the product is turned on or off. 16. Over power risks The product is very powerful and can be potentially dangerous to both loudspeakers and humans alike. Even reducing the gain it is still possible to reach very high output power if the input signal level is high enough. 17. Operating temperature The product operates at a room temperature between 0 °C and +50 °C. 18. Ventilation Openings in the product chassis are for ventilation. They prevent the product from overheating and thus ensure reliable operation. These openings must not be blocked or covered. The product must be installed in accordance with the instructions given in this manual. 19. Heat Do not operate the product near any heat source, such as radiators or other devices. 20. Water and moisture To prevent fire or shock hazard, do not expose the product to rain or moisture. Do not use the product near water. Do not operate the product while wet. 21. Interference with external objects and/or liquids Never push objects of any kind into the product through openings as they may touch dangerous voltage points or short out parts that could result in a fire or electric shock. Never spill liquid of any kind on the product. 22. Cleaning Unplug the product from the mains before cleaning. Do not use liquid or aerosol cleaners. Clean only with dry cloth. 23. Mounting instructions Do not place the product on an unstable cart, stand, tripod, bracket, or table. The product may fall and be seriously damaged, and may cause serious human injury. Any mounting of the product should follow the manufacturer’s instructions given in this manual, and should use accessories recommended by the manufacturer. 24. Conditions which require immediate service Refer all servicing to qualified service personnel. Servicing is required when the product has been damaged in any way such as: Power supply cord or plug is damaged, Liquid has been spilled or an object has fallen into the product, The product has been exposed to rain or moisture, The product was dropped or the housing is damaged, The product does not operate normally. 25. Servicing and replacement parts Do not attempt to service this product as removing covers may expose to dangerous voltage or other hazards. The use of unauthorized replacement parts may result in injury and/or damage through fire, electric shock, or other electricity-related hazards. All service and repair work must be carried out by an L-ACOUSTICS® authorized dealer. 26. Shipping Use the original packaging for shipping the product, unless it is mounted in a rack with the front and rear panels fixed to the rack, as described in this manual. LA4_UM_EN_6.0 w w w .l-a cous ti cs .c om 3 LA4 amplified controller user manual VERSION 6.0 SYMBOLS INDICATED ON THE PRODUCT The product is potentially life threatening if open. Never attempt to remove the back cover. The lightning flashes symbols next to the SpeakON® connectors indicate that the product can generate high output voltages that are potentially life threatening. Always use ready-made leads to connect the product to speakers. Never touch any exposed speaker wires while the product is operating without first disconnecting the wires from the product. SYMBOLS The following symbols are used in this document: DANGER This symbol indicates a potential risk of harm to an individual or damage to the product. It can also notify the user about instructions that must be strictly followed to ensure safe installation or operation of the product. ELECTRICAL HAZARD This symbol indicates a potential risk of electrical injury. It can also notify the user about instructions that must be strictly followed to ensure safe installation or operation of the product. OBLIGATION This symbol notifies the user about instructions that must be strictly followed to ensure proper installation or operation of the product. EQUIPMENT This symbol indicates the equipment, tools, and spare parts required to perform a procedure. INFORMATION This symbol notifies the user about complementary information or optional instructions. LA4_UM_EN_6.0 w w w .l-a cous ti cs .c om 4 WELCOME TO L-ACOUSTICS® Thank you for choosing the L-ACOUSTICS® LA4 amplified controller. This document contains essential information on using the product properly. Carefully read this document in order to become familiar with the product. As part of a continuous evolution of techniques and standards, L-ACOUSTICS® reserves the right to change the specifications of its products and the content of its document without prior notice. Please check the L-ACOUSTICS® web site on a regular basis to download the latest document and software updates: www.l-acoustics.com. CONTENTS 1 PRESENTATION 8 2 SYSTEM COMPONENTS 9 2.1 Powering and driving system ......................................................................................................................................... 9 2.2 Loudspeaker enclosures and cables................................................................................................................................ 9 2.3 Rigging element............................................................................................................................................................ 9 2.4 Software application ..................................................................................................................................................... 9 3 LA4 AMPLIFIED CONTROLLER 3.1 Main features ............................................................................................................................................................. 10 3.2 3.3 10 3.1.1 Front and rear panels .................................................................................................................................. 10 3.1.2 Simplified block diagram.............................................................................................................................. 11 Signal processing and amplification ............................................................................................................................... 11 3.2.1 Analog input............................................................................................................................................... 11 3.2.2 AES/EBU digital input .................................................................................................................................. 11 3.2.3 DSP architecture ........................................................................................................................................ 12 3.2.4 Amplifier section and power supply .............................................................................................................. 13 3.2.5 Speaker output........................................................................................................................................... 13 Monitoring and control ............................................................................................................................................... 13 3.3.1 User interface ............................................................................................................................................ 13 3.3.2 L-NET and remote control network ............................................................................................................ 13 4 INSTALLATION 14 4.1 Mounting................................................................................................................................................................... 14 4.2 Cooling ..................................................................................................................................................................... 15 4.3 Connecting to AC mains ............................................................................................................................................. 15 4.3.1 AC mains specifications ............................................................................................................................... 15 4.3.2 Three-phase circuit..................................................................................................................................... 15 4.3.3 Circuit breaker........................................................................................................................................... 15 4.3.4 Electrical generator..................................................................................................................................... 16 4.3.5 Power plug ................................................................................................................................................ 16 LA4_UM_EN_6.0 w w w .l-a cous ti cs .c om 5 LA4 amplified controller user manual VERSION 6.0 4.4 4.3.6 Power consumption.................................................................................................................................... 16 4.3.7 Example of heat power calculation ............................................................................................................... 16 Audio and network cabling.......................................................................................................................................... 17 4.4.1 Connection panels ...................................................................................................................................... 17 4.4.2 Analog audio cabling ................................................................................................................................... 17 4.4.3 Loudspeaker cabling ................................................................................................................................... 18 4.4.4 L-NET cabling ............................................................................................................................................ 19 5 OPERATION 5.1 Powering on, powering off, selecting, standby mode ..................................................................................................... 20 5.2 Display ...................................................................................................................................................................... 21 5.3 20 5.2.1 Main screen ............................................................................................................................................... 21 5.2.2 LED meters ............................................................................................................................................... 22 5.2.3 L-NET LED................................................................................................................................................ 22 User interface ............................................................................................................................................................ 23 5.3.1 Quick access .............................................................................................................................................. 23 5.3.2 Access rights, PIN code............................................................................................................................... 26 5.3.3 Main menu................................................................................................................................................. 27 5.4 LOAD PST ................................................................................................................................................................ 28 5.5 STORE PRESET ......................................................................................................................................................... 29 5.6 DELETE PRESET ....................................................................................................................................................... 30 5.7 PRESET PARAMETERS............................................................................................................................................... 30 5.8 CLEAR GRP PARAMS................................................................................................................................................. 32 5.9 INPUT SETTINGS ..................................................................................................................................................... 33 5.10 5.11 5.9.1 INPUT MODE ........................................................................................................................................... 33 5.9.2 FALLBACK MODE ..................................................................................................................................... 34 5.9.3 AES/EBU GAIN .......................................................................................................................................... 35 MONITORING & INFO ............................................................................................................................................. 36 5.10.1 SPK HANDLING (%) ................................................................................................................................. 36 5.10.2 OUT CH TEMP (%)................................................................................................................................... 36 5.10.3 FIRMWARE................................................................................................................................................ 36 5.10.4 PRESET LIBRARY ....................................................................................................................................... 37 5.10.5 MAC ADDRESS.......................................................................................................................................... 37 OPTIONS ................................................................................................................................................................. 37 5.11.1 NETWORK ADDRESS ................................................................................................................................ 38 5.11.2 DELAY UNIT ............................................................................................................................................. 38 5.11.3 SCREEN CONTRAST................................................................................................................................. 39 5.11.4 RESET TO FACTORY DEFAULT SETTINGS? .............................................................................................. 39 APPENDIX A: PROTECTION SYSTEMS 40 APPENDIX B: APPROVALS 42 APPENDIX C: SPECIFICATION 43 LA4_UM_EN_6.0 w w w .l-a cous ti cs .c om 6 LA4_UM_EN_6.0 w w w .l-a cous ti cs .c om 7 LA4 amplified controller user manual VERSION 6.0 1 PRESENTATION At the heart of the L-ACOUSTICS® integrated system approach, the LA4 and LA8 amplified controllers offer cutting edge loudspeaker amplification, DSP, network control, and comprehensive system protection in a single ergonomic package. Based on similar platforms, the exceptional and ground-breaking performance level delivered by the LA4 and LA8 units allow full optimization of the resources of all L-ACOUSTICS® systems and deliver outstanding audio quality combined with the best possible transducer protection. The LA4 and LA8 share the following characteristics: A 2U lightweight format for high amplified density. A four-channel high efficiency amplifier section fed by two inputs. A DSP section featuring advanced filter algorithms and an exclusive L-DRIVE protection system for the transducers allowing optimum system performance. An on-board preset library to cover all the principal L-ACOUSTICS® loudspeaker system configurations. An intuitive and ergonomic user interface, fully accessible from the front panel for standalone operation. Two I/O Ethernet ports for networking up to 253 LA4 and LA8 units, remote-monitored by LA NETWORK MANAGER software (Windows® compatible). And the specific features of each unit are the following: The LA4 delivers up to 4 x 1000 watt into 4 ohm. The LA8 delivers up to 4 x 1800 watt into 4 or 2.7 ohm. An AES/EBU input card is integrated to the LA8 for digital audio implementation. This feature is available as an option on the LA4. The LA8 includes all current factory presets while the LA4 only includes presets of LA4 type. The output connectors are SpeakON® for the LA4 and CA-COM®/SpeakON® for the LA8. The unique ensemble of on-board features and the addition of peripherals are all offered in a secured and standardized environment. This approach simplifies system setting and operation with the benefit of superior and predictable audio results across the entire product range. Driving four amplified output channels through a DSP offers a wide range of options when it comes to sound system configuration. The LA4 and LA8 on-board preset libraries allow the sound engineer a high degree of flexibility in choosing the enclosure models and the system configuration for a specified application. The factory preset libraries are derived from 6 basic system templates: 3-way active mono, quad-amplified cardioid subwoofer mono 2-way active stereo passive stereo hybrid active/subwoofer mono hybrid passive/subwoofer stereo LA4_UM_EN_6.0 w w w .l-a cous ti cs .c om 8 2 SYSTEM COMPONENTS The system approach developed by L-ACOUSTICS® consists in offering a global solution that guarantees the highest and most predictable level of performance at any step of loudspeaker system deployment: modeling, installation, and operation. A complete L-ACOUSTICS® system includes enclosures, amplified controllers, cables, rigging system and software applications. The main components of an L-ACOUSTICS® system that includes the LA4 are the following: 2.1 LA4 2.2 Powering and driving system Amplified controller with DSP, preset library and networking capabilities Loudspeaker enclosures and cables Refer to the user manuals of the loudspeaker systems for detailed instructions about the enclosures and their connection to the LA amplified controllers. 2.3 Rigging element Refer to the rigging manuals of the loudspeaker systems for detailed instructions about the rigging of the enclosures. 2.4 Software application SOUNDVISION Proprietary acoustical and mechanical 3D modeling software. LA NETWORK MANAGER Remote control and monitoring of amplified controllers Using L-ACOUSTICS® software Refer to the SOUNDVISION user manual and the LA NETWORK MANAGER tutorial. Figure 1: Main components involved in loudspeaker system design and drive LA4_UM_EN_6.0 w w w .l-a cous ti cs .c om 9 LA4 amplified controller user manual VERSION 6.0 3 LA4 AMPLIFIED CONTROLLER 3.1 Main features 3.1.1 Front and rear panels Figure 2: LA4 front and rear panels 1. LED meters: CLIP level audio level (-25, -10, -5 dB) SIGNAL presence LOAD presence 7. input selection/menu keys 8. output selection keys 9. analog audio IN/LINK connectors (XLR) 10. L-NET network IN/OUT connectors (RJ45) 2. L-NET network control LED 3. LCD screen 11. Slot for the optional LA-AES3 AES/EBU input board (refer to the LA-AES3 user manual) 4. nav./edit encoder wheel 12. SpeakON ® output connectors 5. power switch 13. ventilation grill 6. ventilation foam filter 14. A/C power cord LA4_UM_EN_6.0 w w w .l-a cous ti cs .c om 10 3.1.2 Simplified block diagram The core of the LA4 is a DSP engine driving four channels of amplification from two inputs. The LA4 also features a flash memory for preset storage and management, high performance A/D-D/A converters for audio signals, an autosensing SMPS (Switched Mode Power Supply), a front panel user interface, and a Fast Ethernet device for network remote control. Figure 3: LA4 simplified block diagram 3.2 3.2.1 Signal processing and amplification Analog input The LA4 can be fed with two balanced analog audio signals using the appropriate XLR input ports (see Figure 2). Each of the analog input ports is ESD protected and equipped with one XLR3 female connector. The analog input panel also features two XLR link ports passively connected to the input ports. It allows transmitting the input signals to daisy-chained amplified controllers. Each of the analog link ports is ESD protected and equipped with one XLR3 male connector. To be processed by the DSP, the analog signal needs to be converted into a digital signal. For this purpose, the LA4 amplified controller is fitted with two cascaded 24-bit A/D converters with a sampling rate of 96 kHz allowing an encoding dynamic range of 130 dB. 3.2.2 AES/EBU digital input A slot located on the rear panel is designed to accept the optional L-ACOUSTICS® LA-AES3 AES/EBU input board (refer to the LA-AES3 user manual). LA4_UM_EN_6.0 w w w .l-a cous ti cs .c om 11 LA4 amplified controller user manual VERSION 6.0 3.2.3 DSP architecture The proprietary algorithms allow optimum performance and protection of each individual transducer of the L-ACOUSTICS® systems for an even more natural, transparent, and realistic sound experience. The DSP engine is a 32-bit floating point DSP at 96 kHz sampling rate offering an enhanced dynamic range since it does not generate calculation clips like a fixed point DSP. A dedicated engineering approach combining IIR and FIR filters generates perfectly linearized phase curves and significantly improved impulse responses. The 2 x 4 matrix architecture offers flexibility for various system configurations. The L-DRIVE transducer protection system offers advanced protection by monitoring both excursion and temperature of the transducer. With a complete factory preset library and the possibility of creating additional user presets, the flash memory offers a quick access to all the usual L-ACOUSTICS® speaker system configurations (refer to the LA-PRESETS GUIDE). Figure 4: Audio path parameters LA4_UM_EN_6.0 w w w .l-a cous ti cs .c om 12 3.2.4 Amplifier section and power supply The LA4 amplifier section uses a Class H technology supporting the very wide dynamic range found in live audio productions. The 4 channels can deliver up to 4 x 1000 watt into 4 ohm yielding perfect power matching to each individual L-ACOUSTICS® loudspeaker system. The auto-sensing SMPS (Switched Mode Power Supply) offers better stability by associating two symmetrical power supplies. 3.2.5 Speaker output The LA4 features four 4-point SpeakON® connectors for loudspeaker outputs. 3.3 3.3.1 Monitoring and control User interface The front panel user interface provides (see Figure 2): Real-time monitoring functionalities via the LED display (signals presence and level) and the LCD screen (system parameters). Instant access to navigation and parameters control using the encoder wheel and the six keys (for the 2 input and 4 output channels). Operating instructions Refer to section 5 for detailed operating instructions. 3.3.2 L-NET and remote control network The design of complex systems is made possible by the integration of the L-NET Ethernet-based network. Thanks to its high speed data transfer protocol of 100 Mbit/sec, up to 253 units (LA4 and LA8) can be controlled and monitored in real-time from LA NETWORK MANAGER software. Multiple network topologies such as daisy-chain, star, and hybrid are quickly and easily configurable for full flexibility in the required system architecture. The computer running LA NETWORK MANAGER and the units are connected to each other using industry standard CAT5e U/FTP cables (or higher category) fitted with RJ45 connectors. Each amplified controller connects to the network via the I/O Ethernet sockets located on its rear panel. Operating instructions Refer to the LA NETWORK MANAGER video tutorial for detailed operating instructions. LA4_UM_EN_6.0 w w w .l-a cous ti cs .c om 13 LA4 amplified controller user manual VERSION 6.0 4 INSTALLATION 4.1 Mounting The LA4 is two rack units high (2U) and can be mounted in an EIA-standard 19’’ rack (see Figure 5). The four points on the front panel are for rack mounting. Use four screws and washers to mount the controller to the rack front rails. Figure 5: LA4 dimensions There is a risk of damaging the controllers during transport During transport or while on tour it is essential that the controllers are rear supported in addition to the front panel mounting. Use the rear rack support brackets provided with the controller as shown in Figure 6. Any mechanical damage to the controllers used in portable applications without rear support will not be covered by warranty. Figure 6: LA4 with rear rack support brackets LA4_UM_EN_6.0 w w w .l-a cous ti cs .c om 14 4.2 Cooling To maintain a low and even operating temperature the LA4 contains two fans providing front to rear airflow. Instructions for proper ventilation Do not block the front and rear ventilation grills on a controller. Ensure that the front filter is clean and dust free. If the controller is rack-mounted: Do not block the ventilation grills with front or back panels or doors. If not possible, use a forced ventilation system and verify that the open area at the back is at least of 140 cm 3 per controller. 4.3 4.3.1 When stacking more than one controller in a rack, mount them directly on top of each other or close any open space in the rack with blank panels. Connecting to AC mains AC mains specifications Only connect the LA4 (CE type) or LA4US (US type) to an AC power outlet rated 230 V, 16 A, 50 - 60 Hz or 120 V, 30 A, 50-60 Hz. Only connect the LA4JP (Japan type) to an AC power outlet rated 100 V, 30 A, 50 - 60 Hz or 200 V, 15 A, 50-60 Hz. To plug the controller to a mains only use an outlet fitted with a pin tied to ground. Do not defeat the ground pin of the outlet as it connects the controller to earth. If the local mains does not conform to the power requirements or is unsure consult an electrician. The following table gives the LA4 power data in nominal use (4 Ω, 1/8 of maximum output power; refer to section 4.3.6) Table 1: LA4 power supply data in nominal use Voltage (V) * 120 / 230 (LA4, LA4US) 100 / 200 (LA4JP) * Frequency (Hz) 50 - 60 50 - 60 Current (A) 22 / 12 26 / 14 Power consumption (W) 1600 1600 If the mains voltage value increases up to more than 142 V the amplified controller will automatically switch to the 230 or 200 V mode. If the mains voltage value decreases down to less than 132 V the amplified controller will automatically switch to the 120 or 100 V mode. 4.3.2 Three-phase circuit Verify that each phase works, in particular the neutral one. Balance the loads between the three phases. Never try to reproduce a 230 V circuit connecting an LA4 or an LA4US to two live wires of a 120 V three-phase circuit. Never try to reproduce a 200 V circuit connecting an LA4JP to two live wires of a 100 V three-phase circuit. 4.3.3 Circuit breaker Always interconnect a thermal circuit breaker between the controller and the mains. The circuit breaker current rating depends on the mains voltage rating as follows: 16 A for 230 V or 30 A for 120 V (LA4 or LA4US), 15 A for 200 V or 30 A for 100 V (LA4JP). LA4_UM_EN_6.0 w w w .l-a cous ti cs .c om 15 LA4 amplified controller user manual VERSION 6.0 4.3.4 Electrical generator You must power on the generator before powering on the amplified controllers. Verify that the amplified controllers are turned off before powering the generator on. Planning the power of the generator in kVA Take the nominal values of the LA4, I and U. Look for the cos of the generator and its recommended operating range. Then apply the following formula: I x U / (cos x range). For instance, for LA4 in Europe, I = 16 A and U = 230 V. With a typical generator, cos = 0.8 and range = 70 %. Then the generator must be capable of delivering 16 x 230 / (0.8 x 0.70) = 6.5 kVA. 4.3.5 Power plug The LA4 is supplied with a CEE 7/7 power plug (16 A / 250 V grounded). The LA4US is supplied with a NEMA L5-30P power plug (30 A / 125 V grounded). The LA4JP is supplied with the power plug selected by the Japanese distributor. Plug connection Strictly apply the specific safety regulations of the country of use. Verify that the plug conforms to the specific voltage and current rating given in Table 1. Do not disable the ground connection of the supplied AC power cord using an adaptor or any other methods. If the power plug does not match the local power outlet, it can be cut off and wired to a suitable plug (refer to the LA4 maintenance manual – level 1). 4.3.6 Power consumption The LA4 power requirements depend on the load impedance and the signal level as indicated in the following table: Table 2: LA4 mains input power and current draw Maximum output power Number of Power per Load driven channel channels 4Ω 4 1000 W 8Ω 4 800 W Mains input power and current draw 1/3 output power (-5 dB) 1/8 output power (-9 dB) IDLE Standby 22 A / 3250 W 17 A / 2550 W 12 A / 1600 W 9 A / 1350 W 0.3 A / 80 W < 0.1 A / 12 W The current values are given for a mains rated at 230 V. Multiply by 2 for 120 V, 1.15 for 200 V, and 2.3 for 100 V. If the voltage outsides a plus or minus 10 % range, the maximum power is no longer guaranteed. Output power references A third of the maximum output power corresponds to the worst case scenario of a program source using highly compressed music or pink noise with amplifier driven to clip level. An eighth of the maximum output power corresponds to a loud music program with a small dynamic range and 9 dB of headroom (IEC standard power rating). 4.3.7 Example of heat power calculation Connect a 4 Ω load to each output channel of the LA4: each channel can now deliver a power of up to 1000 W. Consider a standard use at 1/8 of full power (9 dB headroom): the power delivered per channel is then 1000 / 8 = 125 W, leading to a total power of 4 x 125 = 500 W for the LA4. According to Table 2 the LA4 power consumption is 1600 W: the heat power produced is then 1600 - 500 = 1100 W (difference between power consumption and output power). LA4_UM_EN_6.0 w w w .l-a cous ti cs .c om 16 4.4 4.4.1 Audio and network cabling Connection panels The LA4 rear side features three connection panels (see Figure 7): ANALOG for analog audio distribution, L-NET for remote control with LA NETWORK MANAGER software and SPEAKER output. An AES/EBU digital audio distribution panel is also available as an option with the LA-AES3 board, refer to the LA-AES3 user manual. Figure 7: LA4 rear connection panels 4.4.2 Analog audio cabling The analog XLR connectors on the LA4 are wired according to IEC 268: pin 1= shield, pin 2= + signal, pin 3= - signal. Two 3-point female XLR input connectors (IN A and IN B) are provided for the LA4 to receive two analog signals. The headroom of the input circuits is high enough to accept the maximum output level from virtually any line level signal source (up to 22 dBu). In a daisy-chain layout two 3-point male XLR connectors (LINK A and LINK B) feed the input signals to the next unit in the signal chain (see Figure 8). Both LINK connectors are passively wired in parallel on channels A and B (see Figure 9). The input impedance is high enough (22 kΩ, balanced) to allow multiple parallel input connections. Figure 8: Daisy chaining analog audio LA4_UM_EN_6.0 w w w .l-a cous ti cs .c om 17 LA4 amplified controller user manual VERSION 6.0 Figure 9: Analog input panel wiring Balanced cables Symmetrical (balanced) shielded cables are highly recommended as balanced signals are less sensitive to AC hum and radio interference. Unbalanced lines may add noise especially over long cable runs. 4.4.3 Loudspeaker cabling Loudspeaker system connection Before connecting a loudspeaker system refer to the applicable user manuals for further instructions. Four 4-point SpeakON® connectors on the rear panel of the LA4 are for loudspeaker connection. They are wired as follows (see Figure 10): Top left SpeakON® connector Pin 1+ Out 1+ Pin 1 Out 1 Pin 2+ Out 2+ Pin 2 Out 2 - Top right SpeakON® connector Pin 1+ Out 3+ Pin 1 Out 3 Pin 2+ Out 4+ Pin 2 Out 4 - Bottom left SpeakON® connector Pin 1+ Out 2+ Pin 1 Out 2 Pin 2+ not used Pin 2 not used Bottom right SpeakON® connector Pin 1+ Out 4+ Pin 1 Out 4 Pin 2+ not used Pin 2 not used Figure 10: Output audio paths LA4_UM_EN_6.0 w w w .l-a cous ti cs .c om 18 The table below describes the maximum number of enclosures a single LA4 amplified controller can drive. Table 3: Maximum number of enclosures per LA4 Technology Coaxial Constant Curvature WST Variable Curvature WST Subwoofers Loudspeaker enclosure Max number of connections per output * Max number of enclosures per controller 5XT 4 16 8XT 2 8 Passive 12XT 1 4 Active 12XT 2 4 115XT HiQ 1 2 ARCS® WIDE/FOCUS 1 4 KIVA KILO 2 8 SB15m 1 4 SB18 1 4 * For passive loudspeakers, the value corresponds to the number of enclosures in parallel on the output. For active loudspeakers, the value corresponds to the number of sections in parallel on the output. 4.4.4 L-NET cabling The LA4 can be remote controlled over an Ethernet network (called L-NET) using LA NETWORK MANAGER software (refer to the LA NETWORK MANAGER video tutorial). To connect the LA4 to L-NET use the Ethernet RJ45 connectors on the LA4 rear panel (see Figure 7). L-NET cables specifications Connect the computer and the amplified controllers to the L-NET network using straight-through Ethernet cables of CAT5e U/FTP category (or higher) and of 100 m/328 ft maximum length. Exception: If the Auto MDI/MDIX functionality is not available on a switch used to build a star or hybrid topology, use a crossover cable between the switch and each controller. Network and cable specifications The L-NET network is rated at 100 Mbps. A straight-through cable has pin 1 of one side connected to pin 1 of the other side, pin 2 to pin, etc. A crossover cable has pin pairs 1-2 and 3-6 crossed. The type of a cable can be directly identified comparing the wire colors between its two RJ45 connectors. CAT5e U/FTP stands for a category 5, unshielded cable with foiled twisted pairs. Using lower category cables or CAT5e “patch” cables will result in connection issues. The maximum length for a typical CAT5e U/FTP cable is 100 m/328 ft. This value is indicative and can vary depending on the quality of the cable. LA4_UM_EN_6.0 w w w .l-a cous ti cs .c om 19 LA4 amplified controller user manual VERSION 6.0 5 OPERATION 5.1 Powering on, powering off, selecting, standby mode Press the power switch up to power the LA4 on (see Figure 11). The LA4 goes through a 9-second start-up sequence coming with Initializing Controller displayed on the LCD screen and all LED lit for test. The LA4 will be ready for use when the main screen is displayed (refer to 5.2.1). Figure 11: Start-up sequence Press the power switch down to power the LA4 off (see Figure 12). The LA4 goes through a shutdown sequence coming with Waiting SMPS displayed on the LCD screen and the four LOAD LED lit until complete shutdown. Figure 12: Shutdown sequence Power loss If the power has been lost the controller will shut down but all parameters will be restored to same state as before shutting down when the controller switches on again. Disconnection from mains The On/Off switch does not disconnect the amplified controller from mains. Standby mode To reduce the electrical consumption and lock the front panel interface, the controller can be put in standby mode from LA NETWORK MANAGER (refer to the LA NETWORK MANAGER video tutorial). Standby Mode will be displayed on the LCD screen while the controller is in standby mode. It is possible to cancel the standby mode from LA NETWORK MANAGER or from the LA4 front panel interface ( push and hold the encoder wheel for one second). LA4_UM_EN_6.0 w w w .l-a cous ti cs .c om 20 5.2 Display 5.2.1 Main screen Once the start-up sequence has fully cycled (refer to section 5.1), the LCD displays the main screen: Figure 13: Main screen 1. Preset memory number (1 to 255) Memory space containing the current preset The preset can be a user preset or come from an on-board preset library (refer to section 5.4). 2. Preset name Copied from a preset library or entered by the user (if prior stored as a user preset). 3. Last number in the IP address (1 to 254) Identifies the controller within the L-NET network (refer to section 5.11.1). 4. Star sign Indicates that parameters have been modified after the preset was last stored (refer to section 5.5). 5. Output name and routing Label placed above each output key, written in the xx_x format where: The first two characters indicate the type of transducer section or enclosure to be connected to the output channel: LF low frequency transducer section part of a 2-way loudspeaker enclosure HF PA SB high frequency transducer section part of a 2-way loudspeaker enclosure passive loudspeaker enclosure subwoofer enclosure installed with front face pointing towards the audience SR subwoofer enclosure installed with front face pointing towards the direction opposite from the audience (part of a cardioid configuration) A B + – The last character indicates which input channel or input channel combination is selected to drive the output channel: IN A IN B sum of IN A and IN B (A+B) difference between IN A and IN B (A-B) LA4_UM_EN_6.0 w w w .l-a cous ti cs .c om 21 LA4 amplified controller user manual VERSION 6.0 5.2.2 LED meters Four LED meters are located on the front panel above the LCD screen (see Figure 14). Figure 14: The four LED meters By default the LED meters monitor the state of the four output channels via six LED: LOAD The green LOAD LED is lit when a load is connected and when the output module delivers a minimum of 0.8 A. SIGNAL The green SIGNAL LED is lit when a signal is detected at the corresponding output of the amplified controller and when the output voltage reaches 100 mV. dB The green -25 dB, -10 dB, and -5 dB LED are lit when the output voltage reaches respectively 25 dB, 10 dB and 5 dB below the maximum level. CLIP The red CLIP LED is lit when the output voltage reaches the maximum level. 5.2.3 L-NET LED The L-NET LED is lit in green (see Figure 15) when the LA4 is part of a network of controllers and driven by LA NETWORK MANAGER software (refer to the LA NETWORK MANAGER video tutorial). Front panel commands The front panel commands remain accessible if the L-NET LED is lit. Figure 15: L-NET LED lit in green The L-NET LED can also be lit in red or orange: Red to indicate that a protection system is activated (refer to APPENDIX A: PROTECTION SYSTEMS). Orange during the start-up sequence (refer to section 5.1) to test the two possible colors at once (green+red = orange). LA4_UM_EN_6.0 w w w .l-a cous ti cs .c om 22 5.3 5.3.1 User interface Quick access The LA4 offers quick access functions for control (front panel locking, mute, and gain), identification and monitoring (display of input level, input selection, input mode, and group information). Lock/Unlock control To lock the front panel (even the mute function) and prevent unintentional operation press and hold the IN A and IN B keys simultaneously until Display Locked is displayed on the LCD screen. To unlock press and hold the IN A and IN B keys simultaneously until Display Unlocked is displayed on the LCD screen. Mute control Tap one of the four output keys holding it less than 0.3 sec to mute or unmute the corresponding output channel. The MUTE OUT page is displayed for 2 seconds. The quick access mute control is available at all times and positions in the menu tree. The key is lit in blue when the corresponding output channel is muted and not lit when unmuted. Outputs are muted in all factory presets. The gain can be set before unmuting. Figure 16: Unmuting OUT 1 Gain control Gain can be controlled in quick access mode simultaneously for all output channels fed by the same input following these steps: From the main screen press and hold the chosen output key. The LCD displays the gain values of all channels having the same routing as the selected channel. Turn the encoder wheel to set the gain values and simply release the key to return to the main screen. Figure 17: Setting the OUT 3 gain LA4_UM_EN_6.0 w w w .l-a cous ti cs .c om 23 LA4 amplified controller user manual VERSION 6.0 Additional information about gain control Quick access gain control is only available from the main screen. Gain values can be set at 0.1 dB resolution ( simply turn the encoder wheel) or 1 dB resolution ( simultaneously press and turn the encoder wheel). Examples of output channels routed to the same input (see Figure 18): Pressing OUT1 will select OUT1, OUT3 and OUT4 (containing A). Pressing OUT2 will select OUT2, OUT3 and OUT4 (containing B). Pressing OUT3 or OUT4 will select all channels (containing A and B). Individual gain settings are available from the PRESET PARAMETERS menu (refer to section 5.7). Figure 18: Multiple routings Identification If the controller is online with LA NETWORK MANAGER, it can be identified among other units in the workspace (refer to the LA NETWORK MANAGER video tutorial). Press and hold the encoder wheel from the main screen to launch the Identification function. The controller flashes in yellow in LA NETWORK MANAGER. While pressing, the L-NET LED and the output keys flash. The controller also displays IDENTIFICATION and the IP address of the unit (see Figure 19). Figure 19: Launching the Identification function LA4_UM_EN_6.0 w w w .l-a cous ti cs .c om 24 Input level, input selection, input mode and group information Press and hold the ESC or OK key from the main screen. The LED meter and the top line of the LCD screen display information about input channels IN A and IN B, respectively from left to right, see Figure 20. The bottom line of the LCD screen indicates the group assignation of output channels OUT 1, OUT 2, OUT 3 and OUT 4, respectively from left to right, see Figure 20. Figure 20: Pressing ESC or OK The LED SIGNAL to CLIP indicate the level of the signal on the corresponding input channel. For example in Figure 20, the signal of channel IN A has a level of -10 dB and the signal of channel IN B has a level of -20 dB. Input voltage values The SIGNAL LED is lit when the input voltage reaches -38 dBu (analog audio source) or -60 dBfs (digital audio source). The CLIP LED is lit when the input voltage reaches 22 dBu (analog audio source) or -0.1 dBfs (digital audio source). Reminder: -38 dBu = 10 mV and 22 dBu = 9.8 V. The LOAD LED is lit if the corresponding input channel is part of the input selection of at least one output channel (see also section 5.2.1). For example in Figure 20, both channel IN A and IN B are selected. The top line of the LCD screen indicates the input mode and status of the input channels (see also section 5.9.1). For example in Figure 20, IN A and IN B receive an AES/EBU signal of 44.1 kHz. The bottom line of the LCD screen indicates the group assignation of the corresponding output channel (see also section 5.8). For example in Figure 20, channels OUT 1 and OUT 2 are linked by brackets, it means that they are assigned to the same group or set of groups (if an output channel is assigned to several groups, the group name is mult_grp), OUT 3 is not assigned to any group and OUT 4 is assigned to a group named All. LA4_UM_EN_6.0 w w w .l-a cous ti cs .c om 25 LA4 amplified controller user manual VERSION 6.0 5.3.2 Access rights, PIN code The functionalities indicated in the following table can be locked or protected by a 4-digit PIN code defined from LA NETWORK MANAGER (refer to the LA NETWORK MANAGER video tutorial): Table 4: Functionalities locked or protected by PIN code Functionality Locked / PIN code protected Quick access to gains on keys OUT1 to OUT4 Locked LOAD PST FACTORY PIN code protected STORE PRESET PIN code protected DELETE PRESET Locked PRESET PARAMETERS (all parameters) PIN code protected CLEAR GRP PARAMS PIN code protected NETWORK ADDRESS PIN code protected RESET TO FACTORY DEFAULT SETTINGS? Locked When the protection is enabled, each time one tries to use a protected functionality, the LCD screen displays ACCESS LOCKED or ENTER PIN (see Figure 21). Figure 21: Lock and PIN code protection messages In the first case, the functionality cannot be accessed. Press the ESC key to abort. In the second case, access the functionality entering the PIN code as follows (see Figure 22): Press and hold the OUT1 key, or press the ESC key to abort. Turn the encoder wheel to select the first digit of the PIN code. Release the OUT1 key. Repeat the procedure for keys OUT2 to OUT4 and their associated digits. Press the OK key. If the controller displays ENTER PIN: ? ? ? ?, it means that the PIN code is wrong. Repeat the procedure to make corrections, or press the ESC key to abort. Else, the functionality is displayed and can be accessed until you leave the current menu. Figure 22: Entering a PIN code Disabling the protection The lock / PIN code protection can only be disabled from LA NETWORK MANAGER by entering the password defined for the specific amplified controller (refer to the LA NETWORK MANAGER video tutorial). LA4_UM_EN_6.0 w w w .l-a cous ti cs .c om 26 5.3.3 Main menu The main menu gives access to the pages described in the following table. Please refer to the appropriate sections for detailed instructions. LA NETWORK MANAGER software All parameters in each amplified controller can also be set from LA NETWORK MANAGER software (refer to the LA NETWORK MANAGER video tutorial). Table 5: Main menu description Page Functionalities LOAD PST USER load a user preset (memories 1-10) LOAD PST FACTORY load a factory preset (memories 11-199) STORE PRESET save the current preset (including the current settings) as a user preset (memories 1-10) 5.5 DELETE PRESET delete a user preset (memories 1-10) 5.6 PRESET PARAMETERS set the gain, delay, polarity, and routing parameters 5.7 CLEAR GRP PARAMS INPUT SETTINGS MONITORING & INFO OPTIONS Section 5.4 remove the group parameters defined in LA NETWORK MANAGER software (name, gain, delay, and contour EQ) set the input mode, fallback mode and AES/EBU gain (with the optional LA-AES3 board) display real-time measured values: RMS output voltage and output temperature (in percentage of the maximum values) display the firmware and factory preset library versions display the controller’s MAC address set the controller’s IP address set the delay unit and LCD screen contrast reset all parameters to factory defaults 5.8 5.9 5.9 5.11 To select a menu page follow these steps (see Figure 23): Press and release the encoder wheel. Turn the encoder wheel clockwise or counterclockwise to scroll through the page names. Press the OK key or the encoder wheel to select a page or press the ESC key to return to the main screen. On the LCD screen two types of arrow cursors indicate how to navigate through the menus (see Figure 23): Position cursors (on the left) Start of a menu. Other functionalities can be displayed turning the encoder wheel clockwise. Middle of a menu. Other functionalities can be displayed turning the encoder wheel clockwise or counterclockwise. End of a menu. Other functionalities can be displayed turning the encoder wheel counterclockwise. Selection cursors (on the right) Another menu level or function can be accessed pressing the OK key or the encoder wheel. Press the ESC key to return to the previous menu. No additional menu level or function exist. Turn the encoder wheel to access another menu or press the ESC key to return to the previous menu. LA4_UM_EN_6.0 w w w .l-a cous ti cs .c om Figure 23: Main menu 27 LA4 amplified controller user manual VERSION 6.0 5.4 LOAD PST A preset can be loaded from the following menu pages: Table 6: LOAD PST pages Page LOAD PST USER Memory range 1 – 10 (read and write) LOAD PST FACTORY 11 – 199 (read only) Contents User presets stored by the user (refer to section 5.5). Factory preset library created by L-ACOUSTICS® and automatically installed during firmware update (refer to the LA NETWORK MANAGER video tutorial). To load a preset follow these steps (see Figure 24): From the main menu, select LOAD PST USER or LOAD PST FACTORY. If the controller displays NO PRESETS AVAILABLE! when you select LOAD PST USER it means that all user memories are empty. Press the ESC key to abort. — END — Else, continue the procedure. Turn the encoder wheel to scroll through the presets. Press the OK key or the encoder wheel to select a preset (or ESC to abort). The controller displays ARE YOU SURE?. Press the OK key or the encoder wheel to validate (or ESC to abort). If the controller is not assigned to a group (refer to section 5.8) or is connected to L-NET (refer to section 5.2.3) the preset is activated and the main screen is displayed. If the controller displays CLEAR GROUP PARAM? it means that it has been assigned to a group (refer to section 5.8) but it is no longer connected to L-NET (refer to section 5.2.3). Press the OK key to clear the group parameters or press the ESC key to keep the group parameters active. Figure 24: Loading a preset (example with a factory preset) Complements about the LOAD screen The upper line of the screen displays the preset family allowing coarse selection while the bottom line displays the preset name allowing preset selection within a family. If the name of the displayed preset has been modified (user presets only): Press and hold the encoder wheel to display the original name. When returning to the main screen, the preset names containing more than 11 characters are not fully displayed and are followed by ellipsis (…). Turn the encoder wheel to display the full name for 2 seconds. LA4_UM_EN_6.0 w w w .l-a cous ti cs .c om 28 5.5 STORE PRESET The current preset and the possible setting modifications can be stored to a user memory (1-10). Modifications flag The modifications of the preset parameters are indicated by a star sign (on the top right corner of the LCD screen) until the preset has been stored to a user memory or set to its initial settings. There is a risk of loosing the preset parameter modifications Preset parameter modifications (refer to section 5.7) are not automatically saved to the current preset: they will be lost if the preset is reloaded prior to storing it (e.g. while the star sign is displayed). However, the current state is saved when the controller is shut down. To store a preset follow these steps (see Figure 25): From the main menu select STORE PRESET. Turn the encoder wheel to scroll through the user memories. Press the OK key or the encoder wheel to select a user memory (or ESC to abort). If the controller displays OVERWRITE? it means that a preset is already stored in the selected user memory. Press the OK key or the encoder wheel to validate (or ESC to abort). If necessary enter a new preset name (16 characters max) as follows: o Turn the encoder wheel to select the first character. o Press the encoder wheel to go to the next character. o Repeat these steps until the new name has been entered. Pressing the encoder wheel from the 16th character makes the cursor return to the first character so that it is possible to apply the procedure a new time for possible corrections. Press the OK key to validate (or ESC to abort). The preset is stored and the main screen is displayed. Figure 25: Storing a preset LA4_UM_EN_6.0 w w w .l-a cous ti cs .c om 29 LA4 amplified controller user manual VERSION 6.0 5.6 DELETE PRESET A user preset contained in a user memory (1-10) can be deleted following these steps (see Figure 26): From the main menu select DELETE PRESET. If the controller displays NO PRESETS AVAILABLE! it means that all user memories are empty. Press the ESC key to abort. — END — Else, continue the procedure. Turn the encoder wheel to scroll through the user presets. Press the OK key or the encoder wheel to select a preset (or ESC to abort). The controller displays ARE YOU SURE?. Press the OK key or the encoder wheel to validate (or ESC to abort). If the main screen is displayed it means that the selected preset has been deleted. If the controller displays CANNOT DELETE THE CURRENT PRESET it means that the selected preset is the current preset thus it is not possible to delete it. Press the ESC key to abort. Figure 26: Deleting a user preset 5.7 PRESET PARAMETERS The preset parameters (gain, delay, polarity, and routing) of the current preset can be set individually for each output channel or channel set (see the following INFORMATION note). Channel set In certain presets, some channels are interdependent and form what is called a channel set. Within a channel set the user preset parameters are common to all channels. On the LCD screen the channel sets are indicated by brackets displayed above the corresponding output channel keys. For example Figure 27 shows on the left a preset composed of two channel sets (LF/HF-LF/HF) for 2-way active loudspeakers, and on the right a preset composed of one 4-channel set (SR/SB/SB/SB) for 4 subwoofers in cardioid configuration. Figure 27: Channel sets To set the preset parameters follow these steps (see Figure 28): From the main menu select PRESET PARAMETERS. Turn the encoder wheel to select a preset parameter. Press and hold the chosen output key (or any output key of a channel set) and turn the encoder wheel to select a value (or press ESC to abort). Release the key. Repeat the procedure for each value to be set. Press ESC to return to the main menu. LA4_UM_EN_6.0 w w w .l-a cous ti cs .c om 30 If necessary all preset parameters (including the preset name) can be reset to default values following these steps (see Figure 28): Turn the encoder wheel to select RESET PRESET. Press the OK key or the encoder wheel two times (or ESC to abort). Figure 28: Setting the preset parameters Value ranges Gain values are adjustable between -60 dB and +15 dB. Delay values are adjustable from 0 to 680 ms (65280 samples / 233.5 m / 765.9 ft at 20 °C). Refer to section 5.11.2 for delay unit setting. Value setting resolution Turn the encoder wheel to obtain fine resolution (last digit). Press and turn the encoder wheel to obtain coarse resolution (second to last digit). Total delay The total delay is the sum of the group delays (set in LA NETWORK MANAGER) and the output channel delay. The total delay cannot exceed 680 ms. Preset parameters saving Preset parameter modifications apply immediately but are not automatically saved to the current preset (they will be lost if the preset is reloaded). Use the STORE PRESET function to save the current preset along with settings to a user memory (refer to section 5.5). LA4_UM_EN_6.0 w w w .l-a cous ti cs .c om 31 LA4 amplified controller user manual VERSION 6.0 5.8 CLEAR GRP PARAMS The group parameters (name, gain, delay, and contour EQ) defined in LA NETWORK MANAGER (refer to the LA NETWORK MANAGER video tutorial) can be cleared. Group and preset parameters The group parameters apply to a set of amplified controllers that are part of a group while the preset parameters apply to a single amplified controller (refer to section 5.7). The CLEAR GRP PARAMS function only clears the group parameters and does not clear the preset parameters. To clear the group parameters follow these steps (see Figure 29: Clearing the group parametersFigure 29): From the main menu select CLEAR GRP PARAMS. Press the OK key or the encoder wheel (or ESC to abort). If the controller displays L-NET ACTIVE. CANNOT CLEAR it means that the operation is not allowed since the controller is driven by LA NETWORK MANAGER. Press the ESC key to abort. — END — If the controller displays NO GROUP DEFINED. CANNOT CLEAR it means that the operation is not possible as no group is defined. Press the ESC key to abort. — END — If the controller displays ARE YOU SURE? OUTPUTS MUTED! it means that the operation can be continued and that all outputs will be muted in the process. Continue the procedure. Press the OK key or the encoder wheel (or ESC to abort). If the main screen is displayed it means that all group parameters are now reset and all outputs are muted. Figure 29: Clearing the group parameters Group parameters persistence The group parameters remain active even if the controller is disconnected from the computer running LA NETWORK MANAGER (controller in the standalone mode) and they are not preset dependent (they will remain the same even if a new preset is loaded). Therefore, when getting a controller for a standalone application that has been previously used within a network, L-ACOUSTICS® recommends using the CLEAR GRP PARAM function to clear all group parameters as they cannot be seen and accessed via the front panel user interface. Group information It is possible to verify if a controller is part of a group and to identify its name pressing and holding the IN A or IN B key from the main screen (refer to section 5.3.1). LA4_UM_EN_6.0 w w w .l-a cous ti cs .c om 32 5.9 INPUT SETTINGS 5.9.1 INPUT MODE This function allows selecting the physical input connector according to the audio source feeding the amplified controller: An analog audio source connects to the IN A and/or IN B inputs of the ANALOG panel (see Figure 7). In this case activate the analog inputs selecting the ANALOG input mode. A digital audio source connects to the AES/EBU IN input of the AES/EBU panel (see Figure 7). This feature is only available with the optional LA-AES3 AES/EBU input board (refer to the LA-AES3 user manual). To select the input mode follow these steps (see Figure 30): From the main menu select INPUT SETTINGS and press the OK key or the encoder wheel (or ESC to abort). Turn the encoder wheel to select ANALOG or AES/EBU. Press the OK key or the encoder wheel to validate the setting (or ESC to abort). Figure 30: Selecting the input mode In Figure 30 the AES/EBU input mode has been enabled. LOCK 44k1 is a status message indicating that the AES/EBU input mode is active and that the digital audio source provides signals of sampling frequency of 44.1 kHz. The LOCK status is obtained under the following conditions: a digital audio source is connected to the AES/EBU input, the signal delivered by the source has a format supported by the controller’s digital audio card, and no loss or fault is being detected during data transfer. If these conditions are not fulfilled the status will turn to LOCK-WARN or UNLOCK. The LOCK-WARN status (see Figure 31 left) indicates that the incoming digital signal has a sampling frequency out of the nominal range that does not lead to sound cut. On the contrary, the UNLOCK status (see Figure 31 right) indicates a faulty digital signal leading to sound cut. Figure 31: LOCK-WARN and UNLOCK statuses Sound cut can be avoided using the FALLBACK MODE on the AES/EBU IN input and a backup audio source connected to the ANALOG inputs (refer to section 5.9.2). In case of UNLOCK status the ANALOG input will automatically be selected, leading to one of the screens of Figure 32. AN.FBACK indicates that the amplified controller has switched to analog fallback. The text displayed on the right (UNLOCK, LOCK-WARN, or LOCK 44k1) informs the user about the status of the AES/EBU audio source. Figure 32: FALLBACK statuses When the LOCK status has been recovered, the user can manually reactivate the AES/EBU input applying the sequence described in Figure 33. Figure 33: Reactivating the AES/EBU IN input LA4_UM_EN_6.0 w w w .l-a cous ti cs .c om 33 LA4 amplified controller user manual VERSION 6.0 5.9.2 FALLBACK MODE An automatic fallback option can be enabled or disabled. When enabled, and when the AES/EBU input mode is selected, the amplified controller will automatically switch from digital to analog input in case of digital signal failure (no clock, loss of lock, CRC error, bipolar encoding error, data slip). This option prevents sound cut. After the digital signal has returned to normal state, reverting to digital input is not automatic and must be done manually by the user. This can be done simultaneously for all concerned amplified controllers from LA NETWORK MANAGER software. Precautions for using the automatic fallback option Before enabling the automatic fallback option, some precautions have to be taken in order to avoid sound cut or level differences in case of switch from digital to analog input: The ANALOG inputs must be connected to an audio source playing the same program as the digital audio source connected to the AES/EBU input. The level of the digital audio source connected to the AES/EBU input must be aligned to the level of the analog audio source using the AES/EBU GAIN control (see section 5.9.3). Two FALLBACK MODE settings are available, as described in the following table: Table 7: FALLBACK MODE settings OFF Automatic fallback option disabled. The sound will be cut off in case of digital signal failure, but it will automatically be recovered when the signal has returned to normal state. ON Automatic fallback option enabled. The ANALOG inputs will automatically be selected in case of digital signal failure on the AES/EBU inputs. Revert to AES/EBU is not automatic and must be done manually by the user. To select the fallback mode follow these steps (see Figure 34): From the main menu select INPUT SETTINGS and press the OK key or the encoder wheel (or ESC to abort). Turn the encoder wheel to select FALLBACK MODE. Press the OK key or the encoder wheel to enter the page (or ESC to abort). Turn the encoder wheel to select the chosen setting. Press the OK key or the encoder wheel to validate the setting (or ESC to abort). Figure 34: Selecting the fallback mode Invalid audio (validity bit) A validity bit at non-audio value will not trigger the automatic fallback. Instead the signal will be muted. LA4_UM_EN_6.0 w w w .l-a cous ti cs .c om 34 5.9.3 AES/EBU GAIN The AES/EBU input ports include a gain module, common to all ports, which can be set from -12 dB to +12 dB by 0.1 dB steps. It must be used when the fallback mode is enabled, a digital audio source is connected to AES/EBU input and an analog audio source is connected to the ANALOG inputs. The AES/EBU GAIN allows aligning the digital audio source level to the analog level value so as to ensure seamless fallback switch from AES/EBU to analog inputs in case of fallback mode activation (refer to section 5.9.2). The AES/EBU GAIN must be set according to the analog audio source’s calibration (based on manufacturer’s specs or user measurements) and the amplified controller’s analog inputs calibration (0 dBfs for an input signal of +22 dBu). The three following examples illustrate the most common cases: If the analog audio source is calibrated at +18 dBu for 0 dBfs, set the AES/EBU GAIN to -4 dB. If the analog audio source is calibrated at +24 dBu for 0 dBfs, set the AES/EBU GAIN to +2 dB. If the analog audio source is calibrated at +22 dBu for 0 dBfs or if the fallback option is disabled, set the AES/EBU GAIN to +0 dB. To set the AES/EBU GAIN follow these steps (see Figure 35): From the main menu select INPUT SETTINGS and press the OK key or the encoder wheel (or ESC to abort). Turn the encoder wheel to select AES/EBU GAIN. While holding the ESC, OK or OUT1 key, turn the encoder wheel to select an input gain value and release the key. The setting applies in real-time when turning the encoder wheel. Value setting resolution Turn the encoder wheel to obtain a 0.1-step resolution. Press and turn the encoder wheel to obtain a 1-step resolution. Figure 35: Setting the AES/EBU GAIN LA4_UM_EN_6.0 w w w .l-a cous ti cs .c om 35 LA4 amplified controller user manual VERSION 6.0 5.10 MONITORING & INFO This menu provides real-time measurements to monitor the output channels and provides the versions of embedded software. In more details, the MONITORING AND INFO menu allows to: Display in real-time the RMS output voltage and output temperature for each output channel. The output voltage is given in percentage of the maximum value supported by the particular transducer section connected. The temperature is given in percentage of the operating range. Display the firmware and factory preset library versions. Display the controller’s MAC address. Figure 36 shows all pages of the MONITORING AND INFO menu. Each one is detailed in sections from 5.10.1 to 5.10.5. Figure 36: MONITORING & INFO menu page 5.10.1 SPK HANDLING (%) This page displays the RMS voltage measured at each individual amplifier circuit output as a percentage of the maximum voltage supported by the particular speaker section connected to it. For example, in Figure 36 the RMS voltage of channels OUT 1 to OUT 4 is respectively 12, 10, 13, and 11 % of the maximum values. 5.10.2 OUT CH TEMP (%) This page displays the temperature of each individual amplifier channel circuit as a percentage of the maximum operating temperature: 85°C = 100 %. For example, in Figure 36 the temperature of channels OUT 1 to OUT 4 is respectively 44, 42, 43, and 42 %. 5.10.3 FIRMWARE This page displays the version of LA4 firmware in use in the controller. For example, Figure 36 shows LA4 firmware version 2.1.0.0. Network Always ensure that all LA4 amplified controllers used in a given network run the same firmware version. LA4_UM_EN_6.0 w w w .l-a cous ti cs .c om 36 5.10.4 PRESET LIBRARY This page displays the version of the preset library in use in the controller. For example, Figure 36 shows preset library version 4.0. PRESET LIBRARY description Refer to the PRESET GUIDE for full description of the factory presets. 5.10.5 MAC ADDRESS This page displays the MAC (Media Access Control) address of the amplified controller. This address (unique to each controller) is the equivalent of a serial number and identifies the controller internationally. It is set by the manufacturer and cannot be modified. For example, in Figure 36 the MAC address is 00:1B:92:01:02:1B. 5.11 OPTIONS This menu allows setting the amplified controller’s general parameters. These parameters are the following: IP address. delay unit (ms, meters, feet or samples). LCD screen contrast. An additional function allows resetting the amplified controller to its factory default state. Figure 37 shows all pages of the OPTIONS menu. Each one is detailed in sections from 5.11.1 to 5.11.4. Figure 37: OPTIONS menu page LA4_UM_EN_6.0 w w w .l-a cous ti cs .c om 37 LA4 amplified controller user manual VERSION 6.0 5.11.1 NETWORK ADDRESS Remote control of amplified controllers requires setting up a private local area Ethernet network to interconnect up to 253 units with a single control computer (and possible additional devices such as Ethernet switches). It is called L-NET and uses a proprietary communication protocol based on TCP/IPv4 called L-COM. The IP addresses on the units are class C addresses and must be set manually. The default subnet for L-NET is 192.168.1.0. IP address setting Each unit must be given an IP address that is not already in use by another device on the network. For practical reasons, it is suggested to start numbering the units at 192.168.1.1 and then 192.168.1.2, 192.168.1.3, etc. and manually set the control computer on 192.168.1.254. An IP address is a unique identifier for a network device on a given IP network. In IPv4 networking, it is made of 4 bytes. In class C private local area IP subnets, the three first bytes are the network prefix and the last byte is the device identifier on the subnet. Regarding device identifiers, two numbers are reserved: 0 for designating the subnet, and 255 to communicate with all devices of the subnet (aka the IP broadcast address). To select the IP address of a controller, follow these steps: From the main menu select OPTIONS and press the OK key or the encoder wheel (or ESC to abort). Press the OK key or the encoder wheel to enter the NETWORK ADDRESS page (or ESC to abort). Turn the encoder wheel to select a value for the last byte. Value setting resolution Turn the encoder wheel to obtain a 1-step resolution. Press and turn the encoder wheel to obtain a 10-step resolution. Press the OK key to validate the setting (or ESC to abort). For example, in Figure 37 the IP address has been modified from 192.168.1.110 to 192.168.1.123. Subnet modification According to the network administration requirements the default subnet (192.168.1.0) can be modified entering new values for the three first bytes as follows: Long-click on the key located just below the number to modify until it is selected. Turn the encoder wheel to select a new value and press the OK key to validate. Repeat the procedure for all numbers to modify. 5.11.2 DELAY UNIT Delay values can be displayed in ms (milliseconds), SAMPLES, METERS or FEET. The values in meters or feet are given for a temperature of 20 °C. To select the delay unit follow these steps: From the main menu select OPTIONS and press the OK key or the encoder wheel (or ESC to abort). Turn the encoder wheel to select DELAY UNIT. Press the OK key or the encoder wheel to enter the page (or ESC to abort). Turn the encoder wheel to select the chosen setting. Press the OK key or the encoder wheel to validate the setting (or ESC to abort). For example, in Figure 37 the delay unit has been modified from ms to METERS. LA4_UM_EN_6.0 w w w .l-a cous ti cs .c om 38 5.11.3 SCREEN CONTRAST To set the LCD screen contrast follow these steps: From the main menu select OPTIONS and press the OK key or the encoder wheel (or ESC to abort). Turn the encoder wheel to select SCREEN CONTRAST. Press the OK key or the encoder wheel to enter the page (or ESC to abort). Turn the encoder wheel to select a value between 0 and 100 %. Press the OK key or the encoder wheel to validate the setting (or ESC to abort). For example, in Figure 37 the screen contrast has been modified from 100 % to 30 %. 5.11.4 RESET TO FACTORY DEFAULT SETTINGS? To reset the amplified controller to its factory default settings follow these steps (see Figure 37): From the main menu select OPTIONS and press the OK key or the encoder wheel (or ESC to abort). Turn the encoder wheel to select RESET TO FACTORY DEFAULT SETTINGS?. The controller displays RESET AMP TO FACTORY, ARE YOU SURE?. Press the OK key or the encoder wheel to confirm (or ESC to abort). The start-up sequence is launched (refer to section 5.1). When complete, the main screen is displayed with the default preset memory (011) and IP address (100), indicating that the amplified controller has returned to its factory default settings and that all user memories have been deleted. Disconnect the controller from LA NETWORK MANAGER It is recommended to disconnect the controller from LA NETWORK MANAGER before using the RESET TO FACTORY DEFAULT SETTINGS? function. In the contrary case, if a virtual unit is present in the workspace at IP address 100 with a preset of same family as preset 011, its parameters will automatically be loaded to the controller after reset and restart. LA4_UM_EN_6.0 w w w .l-a cous ti cs .c om 39 LA4 amplified controller user manual VERSION 6.0 APPENDIX A: PROTECTION SYSTEMS The LA4 electronic vital parts are continuously monitored by the embedded operating system to optimize the power resources while ensuring safety even under extreme conditions. Each time a protection system is activated, a warning message blinks on screen and the L-NET LED also blinks in red. Remote monitoring In LA NETWORK MANAGER the activation of a protection system is indicated by an Event Message (refer to the LA NETWORK MANAGER video tutorial). Mains Mains voltage The LA4 amplified controller uses an auto-sensing SMPS (Switched Mode Power Supply) compatible with mains input nominal voltages of 120 / 230 V ±10 % (LA4, LA4US) or 100/200 V ±10 % (LA4JP). The mains voltage is continuously monitored for under and over-voltage as well as for failure in alternating cycles. If the mains voltage reaches a value 30 % below nominal or 10 % above nominal, or if it skips about two cycles, the SMPS is switched off and the outputs are muted. The controller displays Waiting SMPS, see the figure on the right. A soft start sequence will automatically be engaged as soon as the mains voltage returns to nominal state. If the mains voltage reaches a value between 30 % and 20 % below nominal, the outputs are muted and the controller displays Fuseprotect, see the figure on the right. Normal operation will resume as soon as the mains voltage returns to nominal state. Mains current The SMPS is continuously monitored for current peaks and over-current. The average mains current can peak temporarily at values several times higher than the nominal value supported by the internal fuse of the controller. If the current peaks too frequently, the amplitude of the output signals are attenuated by 1 to 6 dB in order to prevent the SMPS fuse from blowing. The controller displays Fuseprotect, see the figure on the right. The protection will automatically be disengaged as soon as the mains current returns to supported conditions. If an over-current is detected the SMPS is switched off and the controller displays Waiting SMPS, see the figure on the right. A soft start sequence will automatically be engaged when the SMPS returns to nominal state. LA4_UM_EN_6.0 w w w .l-a cous ti cs .c om 40 Output channels Output channel temperature The fans associated to the heat sinks operate permanently, but as long as the temperature remains below 40 °C they run at their slowest speed and can hardly be heard. The highest detected temperature controls the speed of the fans. Above 40 °C the speed is increased until it reaches its maximum value. If a temperature of more than 85 °C is detected at output channel x, the signal delivered at this output channel is attenuated and the controller displays High Temperature, see the figure on the right. If the temperature exceeds 96 °C, channel x is muted and the controller displays Over Temperature, see the figure on the right. In both cases the protection will automatically be disengaged when the temperature returns to nominal state. Output channel DC voltage The output channels are continuously monitored for sustained presence of DC voltage above a threshold of 3 V. If a sporadic DC voltage is detected at output channel x this channel is muted and the controller displays DC, see the figure on the right. The channel will automatically be unmuted when returning to nominal state. If a persistent DC voltage is detected at output channel x this channel is disabled and the controller displays DC, see the figure on the right. After the issue has been solved, the controller must be restarted manually to reactivate channel x. Output channel current The output channels are continuously monitored for unexpected current values (error). If an external error is detected at output channel x (typically due to a short-circuit in a cable) this channel is muted and the controller displays Error, see the figure on the right. The channel will automatically be unmuted as soon as the issue is solved. If an internal error is detected at output channel x (typically due to a cross-conduct in the power stage) this channel is disabled and the controller displays Error, see the figure on the right. For safety reasons all other channels are also disabled. The controller must be sent to an L-ACOUSTICS® representative for maintenance. Speakers The L-DRIVE transducer protection system provides a dual analysis of both signal intensity and voltage in real time and RMS. Under extreme conditions, when component membranes reach the over-excursion zone or if the coil ensemble temperature reaches a critical point, L-DRIVE is activated and acts as a power regulator. As a result, the amount of power delivered at any channel is adjusted to the dynamic and thermal capacity of each individual transducer. LA4_UM_EN_6.0 w w w .l-a cous ti cs .c om 41 LA4 amplified controller user manual VERSION 6.0 APPENDIX B: APPROVALS EC declaration of conformity L-ACOUSTICS® 13 rue Levacher Cintrat Parc de la Fontaine de Jouvence 91462 Marcoussis Cedex France States that the following product: product nameLA4 amplified controller. Established at Marcoussis, France, October 22, 2009 Is in conformity with the provisions of: 2006/95/EC: Low Voltage Directive; 2004/108/EC: Electro-Magnetic Compatibility Directive. Applied rules and standards: EN60065: Safety requirements for audio, video and similar electronic apparatus. EN55103-1: Electromagnetic Interference (Emission). EN55103-2: Electromagnetic Susceptibility (Immunity). Christophe PIGNON Research & Development Director Additional approvals The LA4 amplified controller has been CB, CCC, and cTUVus certified. It also complies with EMC and RoHS directives *. The main standards tested were: Safety requirements: IEC 60065:2001 (7th Edition) + A1:2005 EN 60065:2002 + A1:2006 UL 60065:2003 R11.06, CSA C22.2.60065:2003+A1:06, K60065, GB8898-2001 09/09/2008 EMC: CE: EN 55103-1:1996 E1-E5 and EN 55103-2:1996 E1E5 FCC: FCC 47 CFR Ch.1 Part 15 Korea: EN 55013:2001 + A1:2003 + A2:2006, K 00013:2006, EN 55020:2002 + A1:2003, K 00020:2003 China: GB17625.1-2003 and GB13837-2003 * The original certificates are available upon request. RoHS: Directive - EU 2002/95/EC LA4_UM_EN_6.0 w w w .l-a cous ti cs .c om 42 APPENDIX C: SPECIFICATION GENERAL Output power 8Ω 4 x 800 W RMS 4 x 930 W peak EIA (1% THD, 1 kHz, all channels driven) 4Ω 4 x 1000 W RMS 4 x 1600 W peak Max output voltage 125 V (Peak voltage, no load) Circuitry Bipolar, Class H 2-step high efficiency circuit Digital Signal Processor (DSP) SHARC 32 bit, floating point, 96 kHz sampling rate Frequency range 10 Hz-30 kHz (-0.1/+0.15 dB at 8 Ω) Distortion THD+N < 0.03 % (20 Hz-10 kHz, 8 Ω, 11 dB below rated power) Output dynamic range 112 dB (20 Hz-20 kHz, 8 Ω, A-weighted) Amplification gain 32 dB Noise level -73 dBV (20 Hz-20 kHz, 8 Ω, A-weighted) Channel separation > 80 dB (at 1 kHz) Damping factor > 400 (8 Ω, 1 kHz and below) Maximum output power Mains input power and current draw Nb. of driven Power per 1/3 Output 1/8 Output Load IDLE Standby Mains input power channels channel Power (-5 dB) Power (-9 dB) and current draw 4Ω 4 1000 W 22 A / 3250 W 12 A / 1600 W 0.3 A / < 0.1 A / (all channels driven) 8 Ω 80 W 12 W 4 800 W 17 A / 2550 W 9 A / 1350 W Current values given for a mains rated at 230 V. Multiply by 2 for 120 V, 1.15 for 200 V and 2.3 for 100 V. If the voltage outsides a plus or minus 10 % range the maximum power is no longer guaranteed. Mains ratings Operating temperature Circuits protection Transducers protection Fans Indicators Output Connectors L-NET connectors LA4_UM_EN_6.0 LA4 & LA4US 120/230 V AC (±10 %), 50-60 Hz LA4JP 100/200 V AC (±10 %), 50-60 Hz Room temperature from 0 °C to +50 °C Inside controller from 0 °C to +85 °C temperature monitoring of transformers and heat-sinks inrush-current limitation mains supply failure and over-voltage detection output DC protection output over current protection L-DRIVE thermal and over excursion protection 2 fans, temperature-controlled speed 4 meters including Load, Signal, Level and Clip LED L-NET presence LED 4 mute LED OUT1 (or OUT1/2), OUT2, 4 x 4-point SpeakON® OUT3 (or OUT3/4) and OUT4 2 x Fast Ethernet RJ45 (in/out) w w w .l-a cous ti cs .c om 43 LA4 amplified controller user manual VERSION 6.0 ANALOG INPUT Connectors 2 Neutrik® female XLR3, IEC 268, ESD protected 2 Neutrik® male XLR3, IEC 268, ESD protected Input Link Input 22 kΩ (balanced) impedance Max input level 22 dBu (balanced, THD 1 %) Latency 3.9 ms Digital two cascaded 24 bit A/D converters (130 dB dynamic range) conversion DIGITAL INPUT with the optional LA-AES3 AES/EBU input board (refer to the LA-AES3 product information document) PHYSICAL DATA Dimensions (H x W x D) 88 (2U) x 483 x 420 mm / 3.5 (2U) x 19 x 16.5 in Weight Finish 11.1 kg / 24.5 lb black and anthracite gray LA4_UM_EN_6.0 w w w .l-a cous ti cs .c om 44 Document reference: LA4_UM_EN_6.0 Distribution date: February 18, 2014 © 2014 L-ACOUSTICS ®. All rights reserved. No part of this publication may be reproduced or transmitted in any form or by any means without the express written consent of the publisher. www .l-a cou sti cs. co m


