1
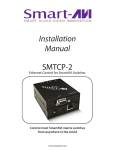
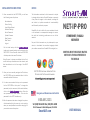
INITIAL SETUP FOR NET-IP-PRO NOTICE 1. Once connected to the NET-IP-PRO, you will see the following menu of options: The information contained in this document is subject to change without notice. SmartAVI makes no warranty of any kind with regard to this material, including but not limited to, implied warranties of merchantability and fitness for particular purpose. Administration Device Config Input/Output Select Network Settings Admin Password Update Firmware Web Console Web Telnet Logout For the initial setup, click the Network Settings button and manually assign an IP address to the NET-IP-PRO. This will assure that the NET-IP-PRO will always have the same IP address. SmartAVI will not be liable for errors contained herein or for incidental or consequential damages in connection with the furnishing, performance or use of this material. No part of this document may be photocopied, reproduced, or translated into another language without prior written consent from SmartAVI Technologies, Inc. 4. It is also recommended that you set a password for the NET-IP-PRO at this point. To change the password (and/or username) of the web interface, click on the Admin Password button. Enter the new password and click Submit. This sets the password for the HTTP interface only. 5. After the password has been changed, the system will automatically log the user out, so be ready to enter your new password soon after changing it if you want to access the system. ETHERNET/RS232 SERVER CONTROL MOST SMARTAVI MATRIX SWITCHES FROM ANYWHERE IN THE WORLD Note: Be sure to choose an address that will not conflict with any other devices on the network, and that the address is not in the range of the DHCP server. 2. Once you have manually assigned an IP address, the NET-IP-PRO must be restarted before it will be accessible at that IP address. NET-IP-PRO NET-IP-PRO has been tested with the Chrome and Firefox web-browsers. Internet Explorer is not supported. Designed and Manufactured in the USA 800.AVI.2131 Tel: (818) 503-6200 Fax: (818) 503-6208 11651 Vanowen St. North Hollywood, CA 91605 SmartAVI.com USER MANUAL INTRODUCTION INSTALLATION DIAGRAM The NET-IP-PRO is an RS-232 control module that allows most SmartAVI switching matrixes to be controlled remotely via HTTP or TELNET. Manage the switching functions of your matrix with ease from anywhere in the world. With the NET-IP-PRO you can save up to 10 preset input/output configurations for easy access. TELNET access provides transparent command control of your matrix, perfect for use with automated third-party control software. FEATURES Supports HTTP and TELNET control 10/100 Ethernet Interface Up to 10 user-definable configurations Password Protected Up to 5 Users can Control the Matrixes IP Configuration via TCP/IP and RS-232 Flexible control of several types of matrixes APPLICATIONS Server Collocation Digital Signage Airports Dealer Rooms Control Rooms Audio/Visual Presentations Hotels/Resorts WHAT’S IN THE BOX? PART NO. QTY. DESCRIPTION NET-IP-PRO 1 NET-IP-PRO Device PS5VDC2A 1 5VDC2A Power Supply CCRS232MM06 1 Serial male to male cable CONNECTING THE NET-IP-PRO 1. 2. 3. 4. 5. Power off all devices. Using a CAT5 cable, connect the NET-IP-PRO to your local network. Connect your SmartAVI device using the included RS-232 male-to-male cable. Plug the power into the NET-IP-PRO. After applying power, wait for about 30 seconds then run one of the discovery tool applications (mentioned below) to connect to the NET-IP-PRO web interface or telnet application. The first discovery tool, called detect, will open up a small console application that will display the IP address of the NET-IP-PRO. After obtaining the IP address connect to the device with the web application of your choice by typing that IP address in the web browser or connect through telnet on port 23. An alternative option is to use detect_gui. This program will find the IP address of the NET-IP-PRO and then open up a web browser to the NET-IP-PRO web interface. 6. Open a web browser and navigate to the IP address that is indicated. You will be prompted to enter a username and password. 7. To access the web interface of NET-IP-PRO, log in with the following information: User ID: admin Password: admin