1
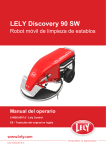
LELY Discovery 90 SW
Mobile Barn Cleaner
Operator Manual
5.4006.8501.0 - Lely Control
EN - English Original
INTENTIONALLY BLANK
ii
TRADEMARKS, COPYRIGHT AND
DISCLAIMER
5.4006.8501.0 - Lely Control
Lely, Astronaut, Astri, Atlantis, Attis, AWS, C4C, Calm, Caltive, Commodus,
Compedes, Cosmix, Discovery, F4C, Fertiliner, Gravitor, Grazeway,
Hibiscus, Hubble, Juno, L4C, Lely Center, Lelywash, Lotus, Luna, Nautilus,
Orbiter, Quaress, Qwes, SAE, Shuttle, Splendimo, Storm, T4C, Tigo, Vector,
Viseo, Voyager, Walkway and Welger are registered trademarks of the Lely
Group.
The right of exclusive use belongs to the companies of the Lely Group. All
rights reserved. The information given in this publication is provided for
information purposes only and does not constitute an offer for sale. Certain
products may not be available in individual countries and products supplied
may differ from those illustrated. No part of this publication may be copied or
published by means of printing, photocopying, microfilm or any other
process whatsoever without prior permission in writing by Lely Holding S.à
r.l. Although the contents of this publication have been compiled with the
greatest possible care, Lely cannot accept liability for any damage that might
arise from errors or omissions in this publication.
The English language manual is the original manual. Translations into other
languages use the English language manual as the source document. Lely
accepts no liability for discrepancies between the original English language
manual and versions in other languages. If there is a conflict over the
content and accuracy of any translated manual, the English language
manual is the authority document.
Copyright © 2014 Lely Industries N.V.
All rights reserved
Lely Industries N.V.
Cornelis van der Lelylaan 1
3147 PB Maassluis
the Netherlands
Phone: +31 (0)88 1228221
Fax: +31 (0)88 1228222
Website: www.lely.com
Trademarks, Copyright and Disclaimer
1
5.4006.8501.0 - Lely Control
INTENTIONALLY BLANK
2
Trademarks, Copyright and Disclaimer
WARRANTY RESTRICTIONS
Excluded from this warranty are any cost or expenses due to:
•
•
•
•
•
•
Abnormal use of the equipment which is not according to the
specifications stated in the Operator Manual or handled during the
Operators Service and Maintenance Certification program.
The result of any intervention by technicians other than Lely service
technicians or technicians who have Lely’s approval to perform certain
duties.
Incidents such as freezing, ice, fire, flood, inundation or any other form of
excessive water, lightning.
Defect of the electrical system or grounding.
Hacking activities, viruses or the like.
Damage to the electrical system as a result of vermin or the like.
Warranty does not apply to consequential damage which does not involve
the machine itself.
5.4006.8501.0 - Lely Control
All systems are tested. However in the event of a malfunction Lely cannot be
held responsible for consequential damage.
Warranty Restrictions
1
5.4006.8501.0 - Lely Control
INTENTIONALLY BLANK
2
Warranty Restrictions
LIST OF INCLUDED AMENDMENTS
No:
Issue Date Chapter(s)
(yy/mm)
Remarks
2
14/06
All
Bluetooth operation added
Pause button added
Operator manual separated
1
12/11
All
Full revision of the manual
- Hardware changes are incorporated
Initial issue
5.4006.8501.0 - Lely Control
11/02
List of Included Amendments
1
5.4006.8501.0 - Lely Control
INTENTIONALLY BLANK
2
List of Included Amendments
PREFACE
Manual Contents
This manual contains the information necessary to operate the Discovery
Mobile Barn Cleaner 90 SW.
Study and understand this information thoroughly before you operate the
Discovery Mobile Barn Cleaner 90 SW. Failure to do so could result in
personal injury or damage to equipment. Please consult your local Lely
service provider if you do not understand the information in this manual, or if
you need additional information.
All information in this manual has been compiled with care. Lely shall not be
liable for errors or faults in this manual. The recommendations are meant to
serve as guidelines. All instructions, pictures and specifications in this
manual are based on the latest information that was available at the time of
publication. Your Discovery Mobile Barn Cleaner 90 SW may comprise
improvements, features or options that are not covered in this manual.
Applicability
5.4006.8501.0 - Lely Control
The table below shows the type numbers of Discovery for which this manual
is applicable and the software version the procedures are based on.
Model designation
Model
Type number
Discovery Mobile Barn Cleaner 90 SW
5.4006.0020.1
Software version
The description, operation and procedures in this manual are based on the
software version:
•
•
•
ADS 3840 PCB: DISSv04.08.XX
ADS 3641 PCB: 1.2.41 or higher
Lely Control app Android: 1.2.23 or higher.
Standard Torque Loading of Parts
All the nuts, bolts and screws used on the Discovery Mobile Barn Cleaner 90
SW are torque tightened to standard torque loadings applicable to the
construction materials used.
If a part has a non-standard torque loading, it is specified in the applicable
part of the manual.
Registration
The Type and Serial Number Plate is attached to the upper side of the frame
of the Discovery Mobile Barn Cleaner 90 SW, under the red cover. Always
Preface
1
include the type and serial numbers of Discovery when you contact your
local Lely service provider or order spare parts.
Figure 1. Type and Serial Number Plate
We suggest you complete the table below with the type and serial numbers
of your Discovery. This makes sure you can easily find the information.
Type number
5.4006.0020.1
Serial number
Only technicians certified by Lely Industries are authorized to do
corrective maintenance on the Discovery.
If people who are not certified by Lely Industries do maintenance on
the Discovery, the warranty on the Discovery becomes invalid.
Before a technician does maintenance on an Discovery, the owner must
examine the service pass of the technician and make sure the technician is
currently certified to do maintenance on the Discovery.
When a technician completes maintenance on an Discovery the information
must be written in the logbook for the Discovery. The logbook must always
be kept near the Discovery. The information in the logbook must include:
•
•
•
•
The maintenance done
The name of the technician
The certification number of the technician
The date of the maintenance.
Technician Training
All the technicians certified by Lely Industries have completed an approved
training program, and passed written and practical examinations during and
at the end of the training program. The examinations are done under
supervision of a product specialist and include troubleshooting and
corrective maintenance of the Discovery.
There are four certification levels:
•
•
•
•
2
Installation Technician (certification valid for two years)
Maintenance Technician (certification valid for two years)
Service Engineer (certification valid for two years)
Product Specialist (certification valid for one year).
Preface
5.4006.8501.0 - Lely Control
Maintenance Authorization
During training, a trainee is permitted to work for up to a maximum of six
months on an Discovery in the presence of a certified technician.
When the training program is completed successfully, Lely issue a certificate
and a service pass to the technician. The service pass contains the following
information:
•
•
•
•
The name of the technician
A photograph of the technician
The certification number of the technician
The date of expiry of the certification.
Contact Number Local Service Provider
We suggest you write the telephone number and email address of your local
service provider contact in the table below. This makes sure you can easily
find the information.
Telephone number
5.4006.8501.0 - Lely Control
email address
Preface
3
4
5.4006.8501.0 - Lely Control
INTENTIONALLY BLANK
Preface
Table of Contents
1.
Introduction.........................................................................................................................................1-1
2.
Safety...................................................................................................................................................2-1
2.1
Introduction.............................................................................................................................. 2-1
2.2
Signal Icons..............................................................................................................................2-1
2.3
Safety Instructions....................................................................................................................2-1
5.4006.8501.0 - Lely Control
2.4
3.
General Safety......................................................................................................................... 2-2
2.3.2
Electrical Safety....................................................................................................................... 2-2
2.3.3
Operating Safety...................................................................................................................... 2-3
2.3.4
Maintenance Safety................................................................................................................. 2-3
Safety Decals........................................................................................................................... 2-4
2.4.1
Safety Decal Messages........................................................................................................... 2-4
2.4.2
Maintenance of Safety Decals................................................................................................. 2-4
2.4.3
Installation of Safety Decals.....................................................................................................2-5
Specifications..................................................................................................................................... 3-1
3.1
3.2
3.3
3.4
3.5
4.
2.3.1
Barn Cleaner............................................................................................................................ 3-1
3.1.1
Dimensions and Weight........................................................................................................... 3-1
3.1.2
Battery......................................................................................................................................3-1
3.1.3
Operation................................................................................................................................. 3-1
3.1.4
Cleaning Capacity....................................................................................................................3-1
3.1.5
Miscellaneous.......................................................................................................................... 3-1
Charging Station...................................................................................................................... 3-2
3.2.1
Dimensions and Weight........................................................................................................... 3-2
3.2.2
Battery Charger........................................................................................................................3-2
Water Filling Station................................................................................................................. 3-2
3.3.1
Dimensions and Weight........................................................................................................... 3-2
3.3.2
Water Requirements................................................................................................................ 3-2
Header Tank (Optional)............................................................................................................3-3
3.4.1
Dimensions and Weight........................................................................................................... 3-3
3.4.2
Hygiene Protection...................................................................................................................3-3
Requirements Smartphone...................................................................................................... 3-3
Description and Operation................................................................................................................ 4-1
4.1
Introduction.............................................................................................................................. 4-1
4.2
Component Description............................................................................................................4-2
4.3
4.2.1
Discovery Mobile Barn Cleaner 90 SW Vehicle.......................................................................4-2
4.2.2
Charging Station...................................................................................................................... 4-8
4.2.3
Water Filling Station.................................................................................................................4-9
User Interface.........................................................................................................................4-10
Table of Contents
v
4.4
Routes....................................................................................................................................4-13
4.3.3
Test........................................................................................................................................ 4-24
4.3.4
Settings.................................................................................................................................. 4-24
4.3.5
Alarms....................................................................................................................................4-25
4.3.6
Service................................................................................................................................... 4-25
4.3.7
Test Route............................................................................................................................. 4-25
Operation............................................................................................................................... 4-26
4.4.1
Routes, Actions, Manual Routes and Time Paths................................................................. 4-26
4.4.2
Control System...................................................................................................................... 4-26
4.4.3
Power and Water Supply....................................................................................................... 4-31
4.4.4
Cleaning.................................................................................................................................4-32
Operating Instructions....................................................................................................................... 5-1
5.1
Install or Update the Lely Control app on Your Smart Phone.................................................. 5-1
5.2
Rename the Discovery on the Smartphone............................................................................. 5-1
5.3
Set the farmer password.......................................................................................................... 5-1
5.4
Switch ON or OFF the Discovery............................................................................................. 5-1
5.5
Operate Device Specific Software with a Smartphone............................................................ 5-2
5.6
Start the Software on Your Smartphone.................................................................................. 5-2
5.7
Manually Drive the Discovery...................................................................................................5-3
5.8
Drive the Discovery to the Charging Station............................................................................ 5-4
5.9
Switch ON of OFF the Water Filling Function in the Wintertime.............................................. 5-4
5.10
Prepare for Programming.........................................................................................................5-5
5.11
5.12
vi
Work.......................................................................................................................................4-10
4.3.2
5.10.1
Requirements for a Good Route.............................................................................................. 5-5
5.10.2
Example Routes, Barn with Milking Robot...............................................................................5-5
5.10.3
Example Route, Barn with Milking Parlour.............................................................................5-11
5.10.4
To Pass a Crosswalk............................................................................................................. 5-11
5.10.5
To make a Turn......................................................................................................................5-12
5.10.6
To Approach the Charging Station from the Opposite Direction............................................5-13
5.10.7
To Follow a Bend in a Wall.................................................................................................... 5-14
Program the Discovery...........................................................................................................5-14
5.11.1
Program a New Route........................................................................................................... 5-14
5.11.2
Copy a Route......................................................................................................................... 5-21
5.11.3
Modify a Route.......................................................................................................................5-21
5.11.4
Reset a modified Route to the previous Version....................................................................5-22
5.11.5
Delete a Route....................................................................................................................... 5-22
5.11.6
Set or Delete a Manual Route................................................................................................5-23
5.11.7
Set a Time Path..................................................................................................................... 5-23
5.11.8
Make a Backup...................................................................................................................... 5-24
5.11.9
Copy a Backup file from the Smartphone to a PC................................................................. 5-24
5.11.10
Copy a Backup file from a PC to the Smartphone................................................................. 5-25
Start or Stop Timed Actions................................................................................................... 5-25
Table of Contents
5.4006.8501.0 - Lely Control
5.
4.3.1
5.4006.8501.0 - Lely Control
6.
7.
5.13
Start, Stop or Pause a Manual Route.................................................................................... 5-25
5.14
Block a Route.........................................................................................................................5-27
5.15
Set the Speed for a Route......................................................................................................5-27
5.16
Set the Speed for a Particular Action..................................................................................... 5-27
Maintenance........................................................................................................................................6-1
6.1
Introduction.............................................................................................................................. 6-1
6.2
Preventive Maintenance Schedule...........................................................................................6-1
6.3
Maintenance Procedures......................................................................................................... 6-1
Clean the Charging Strips and the Charging Electrodes......................................................... 6-2
6.3.2
Clean the Water Filter.............................................................................................................. 6-3
6.3.3
Clean the Nozzle Filters...........................................................................................................6-4
6.3.4
Clean the Ultrasonic Sensor.................................................................................................... 6-5
6.3.5
Clean the Sensing Wheel........................................................................................................ 6-6
6.3.6
Clean the Manure Scraper.......................................................................................................6-6
6.3.7
Clean the Covers..................................................................................................................... 6-7
6.3.8
Tighten a Chain - short procedure........................................................................................... 6-8
6.3.9
Replace the Manure Scraper................................................................................................... 6-9
6.3.10
Replace the Sliding Disc........................................................................................................ 6-11
Test and Adjustment.......................................................................................................................... 7-1
7.1
Introduction.............................................................................................................................. 7-1
7.2
Settings.................................................................................................................................... 7-1
7.3
8.
6.3.1
7.2.1
Set the Real-Time Clock.......................................................................................................... 7-1
7.2.2
Set the Display Language........................................................................................................7-1
7.2.3
Set the Motor Power................................................................................................................ 7-2
7.2.4
Modify the Beep Frequency for a Route.................................................................................. 7-2
7.2.5
Modify the Beep Length........................................................................................................... 7-2
7.2.6
Set the Water Fill Settings....................................................................................................... 7-2
Tests........................................................................................................................................ 7-3
7.3.1
Analyse the Reliability of a Route............................................................................................ 7-3
7.3.2
Test a Route............................................................................................................................ 7-4
7.3.3
Make sure the Battery is Loaded............................................................................................. 7-4
7.3.4
Make sure the Battery is Charging...........................................................................................7-4
7.3.5
Make sure the Bluetooth Connection is Reliable..................................................................... 7-5
7.3.6
Test the Ultrasonic Sensor.......................................................................................................7-5
Troubleshooting................................................................................................................................. 8-1
8.1
Introduction.............................................................................................................................. 8-1
8.2
Alarms and Reports................................................................................................................. 8-1
8.2.1
Recover alarms........................................................................................................................8-1
8.2.2
Read Non-Critical Alarm Messages.........................................................................................8-1
8.2.3
Read a Report..........................................................................................................................8-2
8.2.4
Alarm List................................................................................................................................. 8-2
8.2.5
Report List................................................................................................................................8-9
Table of Contents
vii
8.2.6
8.3
8.4
9.
Information Report List...........................................................................................................8-11
Troubleshooting Tables..........................................................................................................8-12
8.3.1
Troubleshooting Table Discovery Vehicle..............................................................................8-12
8.3.2
Troubleshooting Table Discovery Charging Station...............................................................8-14
Recovery Procedures.............................................................................................................8-14
8.4.1
Reset the Control System...................................................................................................... 8-14
8.4.2
Calibrate the Gyroscope........................................................................................................ 8-15
8.4.3
Charge the Discovery............................................................................................................ 8-15
Diagrams............................................................................................................................................. 9-1
Glossary of Terms
5.4006.8501.0 - Lely Control
Index
viii
Table of Contents
1.
INTRODUCTION
The Discovery Mobile Barn Cleaner 90 SW is a battery-driven vehicle that
cleans the floor of a barn. Two nozzles spray water on the floor before a
manure scraper on the bottom of the Discovery pushes the manure through
the openings of the slatted floor.
The farmer (operator) uses the Lely Control app on the smartphone to
program the route for the Discovery. Routes can be programmed flexibly.
The farmer has the option to do more intensive cleaning of some areas of
the barn during certain hours of the day.
The information in this manual is for operators. The operator uses the
information to program and operate the Discovery. The operator also uses
the information to do maintenance.
The operator must read the operating instructions for daily operation and for
the setup of routes and time paths. He must read the test and adjustment
section for the setup and for testing the Discovery and routes. He must also
read the maintenance and troubleshooting sections for preventive and basic
corrective maintenance instructions.
5.4006.8501.0 - Lely Control
The operator should refer to the description and the operation section for
background information. The operator must also read and understand the
safety instructions in section 'Safety'.
Introduction
1-1
5.4006.8501.0 - Lely Control
INTENTIONALLY BLANK
1-2
Introduction
2.
2.1
SAFETY
Introduction
The Discovery Mobile Barn Cleaner 90 SW is an automated machine.
Therefore it is of the utmost importance to obey all safety instructions.
The safety alert symbol identifies important safety messages on your
Discovery Mobile Barn Cleaner 90 SW and in the manual. When you see
this symbol, be alert to the possibility of personal injury or death. Follow the
instruction of the safety message.
5.4006.8501.0 - Lely Control
Safety Alert Symbol
2.2
Signal Icons
Note the use of the signal words DANGER, WARNING and CAUTION with
the safety messages. The signal word for each message uses the following
guidelines:
Danger: indicates an imminently hazardous situation that,
if not avoided, will result in death or serious injury.
Warning: indicates a potentially hazardous situation that, if not
avoided, could result in death or serious injury, and includes hazards
that are exposed when guards are removed.
Caution: indicates a potentially hazardous situation that, if not avoided, may
result in minor or moderate injury or product or property damage.
Note: this shows extra information that may help the reader.
2.3
Safety Instructions
YOU are responsible for the SAFE operation and maintenance of your barn
cleaner. YOU must make sure that you and anyone else who is going to
operate, maintain or work in the vicinity of the barn cleaner knows all the
related SAFETY information in this manual.
YOU are the key to safety. Good safety practices protect you and the people
around you. Make these practices a working part of your safety program.
Make sure EVERYONE who operates, maintains or works near the
Safety
2-1
Discovery obeys the safety precautions. Do not risk injury or death by
ignoring good safety practices.
•
•
•
•
•
General Safety
•
•
•
•
•
•
•
•
•
•
•
2.3.2
A first-aid kit must be available near the Discovery. Store in a highly
visible place
A carbon dioxide or foam fire extinguisher must be available near the
Discovery. Store in a highly visible place
Install all protective covers and guards before you operate the Discovery
Wear the correct protective clothing and equipment
Disconnect and isolate the electrical power supply and wait for all moving
parts to stop before you clean or do maintenance on the Discovery
Know the emergency medical center number for your area
Contact your nearest Lely service provider if you have any questions
Review safety related items with all operators frequently (annually).
Electrical Safety
•
•
•
•
•
2-2
When the water filling station is connected to the drinking water system, a
header tank must be installed between the drinking water system and
the water filling station to prevent the pollution of potable water by
backflow of water with bacterial contamination
Read and understand the manual and all safety signs before you connect
power supplies to operate, maintain or adjust the Discovery
Only trained persons are permitted to operate the Discovery
Only an authorized electrician must install the electrical power supply for
the charging station of the Discovery.
Make sure the electrical grounding of the electrical system and all parts of
the charging station of the Discovery meet the local rules and regulations.
Replace any damaged electrical lines, conduits, switches and
components immediately .
Switch the power OFF with the OFF button on the ADS 3840 PCB before
you start to work on the system (page 5‑1).
Pull the plug from the socket before you start to work on the charging
station.
Safety
5.4006.8501.0 - Lely Control
2.3.1
Discovery owners must train operators before they operate the barn
cleaner. This training must be repeated at least annually
The operator must read, understand and obey all safety and operating
instructions in the manual
A person who has not read and understood all safety and operating
instructions is not permitted to operate the barn cleaner
Do not modify the equipment in any way. Unauthorized modification may
impair the function and/or safety and could affect the life of the
equipment, and persons
Only use approved spare parts, and make sure they are only installed by
authorized technicians.
2.3.3
Operating Safety
Remote Operation of the smartphone or tablet by remote desktop
software (such as, but not limited by, Teamviewer) is strictly forbidden
to avoid dangerous situations.
•
•
•
•
•
•
•
•
•
5.4006.8501.0 - Lely Control
•
Read and understand this manual and all safety signs before you connect
power supplies to operate, maintain or adjust the Discovery
Only trained persons are permitted to operate the Discovery
Make sure all covers are installed before you operate the Discovery
Keep hands, feet, hair and clothing away from all moving parts
Keep away from all areas with high voltage
Keep unauthorized persons, especially small children away from the
Discovery at all times
Always be alert for unexpected movement of the cow. Cows can transmit
large forces to parts of the machine
Contact your nearest Lely service provider if you have any questions
Review safety related items with all operators frequently (annually).
Make sure the slope of the floor is 6 degrees maximum (10,5 cm per 100
cm).
Figure 2. Maximum slope
2.3.4
Maintenance Safety
•
•
•
•
•
Safety
Read and understand this manual and all safety signs before you connect
power supplies to operate, maintain or adjust the Discovery
Only trained persons are permitted to do corrective maintenance on the
Discovery
Disconnect and isolate the electrical power supply to the charging station
before you do maintenance on it
Switch OFF all timed actions before you do maintenance on the
Discovery or clean it
Do NOT touch the motors until they are cooled down
2-3
•
•
•
•
Keep tools and metal parts away from the battery
Do NOT use water to clean the body of the Discovery
Use water and a brush to clean the manure scraper or the ultrasonic
sensor of the Discovery. Refer to the maintenance instructions (page 6‑
6)
Install all covers after you finished the maintenance.
2.4
Safety Decals
2.4.1
Safety Decal Messages
Rotating Parts - Entanglement Hazard Symbol
Danger of being entangled by rotating parts.
Keep hands, loose clothing, and long hair away from moving parts
during operation of the Discovery.
The 'Danger of being entangled by rotating parts' decal is located at the
inner side of the motor plate of the Discovery.
2.4.2
Maintenance of Safety Decals
Safety decals on the Discovery Mobile Barn Cleaner 90 SW display
important and useful information that will help you safely operate and
maintain the Discovery.
Obey the instructions below to make sure all the decals stay in the correct
position and condition.
•
•
•
2-4
Keep the safety decals clean and legible at all times. Clean the safety
decals with soap and water. Do not use mineral spirits, abrasive cleaners
or other similar agents that may damage the safety decals
Replace safety decals that are missing or are illegible
Safety decals can be purchased from your local Lely service provider.
Safety
5.4006.8501.0 - Lely Control
General safety messages appear in this safety messages section. Specific
safety messages are in applicable parts of this manual when potential
hazards may occur if the instructions or procedures are not followed.
2.4.3
Installation of Safety Decals
1.
2.
3.
4.
5.
6.
5.4006.8501.0 - Lely Control
7.
Make sure the installation surface is clean and dry.
Make sure the temperature of the mounting surface is not less than 5
°C (41 °F).
Identify the correct position for the decal before you remove the
backing paper.
Remove a small part of the backing paper.
Put the decal in the correct position on the mounting surface and
carefully press the small part of exposed adhesive surface of the
decal onto the mounting surface.
Slowly remove the backing paper and attach the rest of the decal to
the mounting surface.
Puncture small air pockets in the decal with a pin and use the backing
paper to smooth the decal.
Safety
2-5
5.4006.8501.0 - Lely Control
INTENTIONALLY BLANK
2-6
Safety
3.
3.1
Barn Cleaner
3.1.1
Dimensions and Weight
SPECIFICATIONS
Refer to the Diagrams chapter for the complete dimensions of the Discovery.
•
•
•
•
•
5.4006.8501.0 - Lely Control
3.1.2
3.1.4
3.1.5
Height: 575 mm (22.64 in)
Weight: 340 kg (750 lb)
Sensing ring height: 102 mm (4.02 in).
Battery
•
•
•
•
3.1.3
Length: 1362 mm (53.60 in)
Width: 860 mm (33.86 in)
Number of batteries: 1
Nominal voltage: 12 V
Capacity: 55 Ah
•
Charging time: 6 hours maximum
Spare capacity: 120 min
•
•
•
•
•
•
Number of different programmable routes: max 16
Number of actions per route: max 125
Number of routes per time path: max 48
Maximum duration of a time path: 24 hour
Travel speed: 10.8 to 18 m/min (display: 180 - 300 mm/sec.)
Maximum driving time without charging: 4 hours
Operation
Cleaning Capacity
•
Max. cleaning capacity: 918 m²/h at 18 m/min
•
•
•
•
•
•
•
•
•
Suited for all level slatted floors
Drive: 2 electric motors
Average power consumption: 0.05 kWh
Number of wheels: 2 drive wheels
Detection of the driving direction: gyroscope
Distance measurement to wall: ultrasonic sensor
Traveled distance: measured via encoders on the motors
Water tank capacity: 30 l (7.9 gal)
Water output 2 nozzles: approx. 1 l/min (0.26 gal/min).
Miscellaneous
Specifications
3-1
3.2
Charging Station
3.2.1
Dimensions and Weight
Charging station
•
•
•
•
Width: 380 mm (15.0 in)
Depth: 220 mm (8.7 in)
Height: 1650 - 2050 mm (65.0 - 80.7 in)
Weight (excluding floor column): 40 kg (88 lbs)
Floor column (optional)
Width: 370 mm (14.6 in)
Depth: 100 mm (3.9 in)
Height: 2100 mm (82.7 in)
Weight: 44 kg (97 lbs)
•
•
•
•
•
Type: Impulse "L"
Input voltage: 230 VAC (50 Hz) or 110 VAC (60 Hz)
Nominal output voltage: 12 VDC
Max. charge current: 20 A
Battery Charger
•
•
•
•
5.4006.8501.0 - Lely Control
3.2.2
•
•
•
•
Max. power: 430 W
Weight: 1.7 kg (3.7 lbs)
Length, excluding battery terminals: 196 mm (7.7 in)
Width: 150 mm (5.9 in)
Height: 68 mm (2.7 in).
3.3
Water Filling Station
3.3.1
Dimensions and Weight
Refer to the Diagrams chapter for the complete dimensions of the
Discovery.
•
•
•
•
3.3.2
Water Requirements
•
•
3-2
Width: 406 mm (16.0 in)
Height: 282 mm (11.1 in)
Depth: 231 mm (9.1 in)
Weight: 11 kg (24.3 lb)
Max. water inlet pressure water filling station: 2.5 bar (36 psi).
Use potable water to prevent blockage of the nozzles or the water pump.
Specifications
3.4
Header Tank (Optional)
3.4.1
Dimensions and Weight
Refer to the Diagrams chapter for the complete dimensions of the
Discovery.
•
•
•
•
3.4.2
Width: 400 mm (15.7 in)
Height: 300 mm (11.8 in)
Depth: 200 mm (7.9 in)
Weight: 6 kg (13.2 lb); completely filled: 14 kg (31 lb).
Hygiene Protection
The header tank meets the standard "NEN-EN 1717:2000 en" which deals
with the means to be used to prevent the pollution of potable water inside
premises and the general requirements of protection devices to avoid
pollution by backflow.
Requirements Smartphone
5.4006.8501.0 - Lely Control
3.5
Use of a tablet is technically possible if it meets the specifications. However,
the user interface might not be displayed optimally since it is designed for
smartphones.
•
•
•
•
•
•
•
Specifications
Screen resolution 480 x 800 (or higher).
Android 2.3.x, 4.0.x or 4.2.x.
Bluetooth version 2.0, 2.1, 3.0, 4.0 dual mode (4.0 single mode is not
supported) .
Compliance with 1999/5/EC european directive for Radio and
Telecommunications Terminal Equipment.
For software updates a WiFi or 3G network must be available.
Processor: 1 GHz (or higher).
Android smartphone must have at least 10 MB free storage.
3-3
5.4006.8501.0 - Lely Control
INTENTIONALLY BLANK
3-4
Specifications
4.
4.1
DESCRIPTION AND
OPERATION
Introduction
5.4006.8501.0 - Lely Control
This chapter describes the parts of the Discovery. It also explains how the
parts work together to clean the barn floor.
Figure 3. Main components
KEY:
1. Indicator LEDs (not visible) - 2. Charging station - 3. Charging electrodes - 4. Discovery
vehicle - 5. Upper cover - 6. Header tank (optional) - 7. Water filling station - 8. Manure
scraper - 9. Sensing wheel
Description and Operation
4-1
10
1
9
2
8
4
5
7
6
Figure 4. Main components Discovery Mobile Barn Cleaner 90 SW Vehicle
KEY:
1. Water tank - 2. PCB box - 3. Concrete block/frame - 4. Water inlet - 5. Manure scraper 6. Water sprayer (1 of 2) - 7. Ultrasonic sensor - 8. Bluetooth antenna 9. Lower cover - 10.
Upper cover
4.2
Component Description
4.2.1
Discovery Mobile Barn Cleaner 90 SW Vehicle
The Discovery has the following mechanisms and systems:
•
•
•
•
4-2
Cleaning mechanism
Driving mechanism
Power system
Control system.
Description and Operation
5.4006.8501.0 - Lely Control
3
4.2.1.1 Covers
The Discovery has a red upper cover with a bolt to fasten it on the back side.
At the front side of the vehicle a rotatable bracket holds the cover.
Underneath the red upper cover, the lower cover gives extra protection to
the main components (page 4‑2) of the Discovery.
4.2.1.2 Cleaning System
A manure scraper installed underneath the Discovery pushes the manure
through the openings of the slatted floor (page 4‑2).
4.2.1.3 Driving Mechanism
The driving mechanism has the following parts:
•
•
•
•
Two drive motors
Two chains
Two chain wheels
Two wheels.
5.4006.8501.0 - Lely Control
The motors, one on the left side and one on the right side, drive the wheels
via chains.
Figure 5. Driving mechanism
KEY:
1. Motor right - 2. Wheel right - 3. Wheel bearing- 4. Chain right - 5. Chain left - 6. Wheel
bearing - 7. Wheel left - 8. Motor left
Description and Operation
4-3
4.2.1.4 Water Supply System
Two nozzles on the front spray water on the manure to soften the manure.
The water supply system supplies water to the nozzles. The water supply
system has:
•
•
•
•
•
Water inlet
Water filter
Water tank
Pump, pumps the water from the water tank to the nozzles. Switched ON
only during a route.
Two nozzles.
5.4006.8501.0 - Lely Control
The water tank is balanced installed on the concrete block and has a
capacity of 30 liter, enough for one route.
Figure 6. Water supply
KEY:
1. Water tank - 2. Water filter - 3. Water inlet- 4. Water sprayer (1 of 2) - 5. Water pump - 6.
Water sensor
4.2.1.5 Power System
The Discovery is battery-operated and after each route it returns to the
charging station, which is installed at a convenient point in the barn. This
charging station also functions as the starting point of each route.
The power system stores and distributes the electrical power for the driving
mechanism and the ADS 3840 PCB. The power supply is a single
4-4
Description and Operation
rechargeable 12V traction battery. Charging takes place at the charging
station. The power system has the following primary parts:
•
•
•
•
Battery
Charging strips
ON/OFF switch
ADS 3840 PCB.
4.2.1.6 Control System
The control system has the following parts:
•
•
•
•
ADS 3840 PCB, to control the operation of the Discovery
Encoders on the drive motors to measure the driven distance
Ultrasonic sensor to measure the distance to wall or fence
Gyroscope to measure angle differences to keep the right direction.
The water sensor detects when the water tank is full. The water temperature
sensor measures the water temperature for frost protection.
Encoders
5.4006.8501.0 - Lely Control
Each drive motor has an encoder that counts the rotation of the motor shaft.
This information is used to calculate the position of the vehicle.
The encoders send outputs to the ADS 3840 PCB.
Ultrasonic Sensor
The ultrasonic sensor makes sure the Discovery follows the wall or fence at
a pre-determined distance.
A foam ring is adhered on the sensor to minimize reflections and to focus the
reflected beam.
The sensor gets inputs from and sends outputs to the ADS 3840 PCB.
Gyroscope
The gyroscope measures the turning angle. This information is used to find
the correct direction. The gyroscope is essential for driving a route when
there is no wall that can be followed.
The gyroscope (1) is combined with the ADS 3840 PCB.
The gyroscope is not a spare part.
Water Sensor
The water sensor is installed next to the air release tube and detects when
the tank is completely filled.
Description and Operation
4-5
Pause button
A pause button is installed on the Discovery. When the pause button is
pushed while the Discovery is in operation, the Discovery goes into pause
mode:
•
•
•
•
The Discovery stops.
The LED light in the pause button turns on.
The operational sound of the Discovery is turned off.
The user interface on the smartphone displays a question to resume or
cancel the route.
When the pause button or the button in the Lely Control app is pushed
shortly while the Discovery is in pause mode, the Discovery goes back into
work mode:
•
•
•
The Discovery goes back into operation.
The LED light in the pause button turns off.
The operational sound of the Discovery is turned on.
If an alarm occurs, the LED in the pause button blinks. The alarm must be
confirmed with the Lely Control app on the smartphone.
Status of the Discovery
LED status of the pause button
Start up
Blink
Out of operation. Lely Control app in main tab
menu Work
On
Out of operation. Lely Control app in other menu
Blink
Discovery paused
On
Discovery in normal operation
Off
Alarm
Blink
4-6
Description and Operation
5.4006.8501.0 - Lely Control
The pause button can be operated remotely with the Lely Control app on the
smartphone.
5.4006.8501.0 - Lely Control
Figure 7. Pause button and acoustic warning device
KEY:
1. Acoustic warning device - 2. Pause button
Acoustic Warning Device
An acoustic warning device alerts persons and cows when the vehicle starts
to move, moves or when an alarm occurs.
The beep lengths and beep frequencies of the acoustic warning device are:
Operational state of the Discovery
Beep frequency acoustic warning device
Normal operation
Once per 2 seconds (default)
An alarm occurred
3 short beeps every minute
The acoustic warning device is installed on the Discovery.
Lely Control app
The Lely Control app controls and monitors the Discovery and
communicates with the management software. The Lely Control app is
available in the Google play store (Android).
The user interface of the Lely Control app displays nine buttons that enable
the user to give commands and change values in the Discovery. The user
interface also shows reports and alarms.
The Lely Control app communicates via bluetooth with the software on the
ADS 3840 PCB.
Description and Operation
4-7
The user interface has the following buttons:
•
[
] Execute the command on the display above the applicable soft
button.
[START/STOP] starts or stops an action.
•
[
] moves the selector up one item or increases a value by one.
•
[
] moves the selector down one item or decreases a value by one.
•
•
[ESC] returns to the previous screen.
•
•
opens the selected function or the next menu screen.
reduces the speed of the vehicle.
Acoustic signal
•
•
•
•
•
4.2.2
The Discovery is in normal operation
Settings are saved
The calibration of the gyroscope is finished
Backup is finished (create / restore)
Programming a route
Charging Station
The Discovery normally starts and ends at the charging station. The
Discovery recharges itself at the charging station. The battery charger
electrodes are at the front near the bottom of the charging station.
The Discovery can be left permanently connected to the charging station.
This keeps the battery in good condition. The ADS3840 PCB continuously
examines the voltage of the battery. It is not possible to overcharge the
battery.
The charging station has a 20 A electronic battery charger.
The charging station can be installed in the barn in two ways:
•
•
wall-mounted
floor-mounted.
If it is not possible to install the charging station to the wall, an optional floor
column can be supplied.
Battery Charger
The 20 A electronic battery charger has two indicator LEDs on the upper
right side. The LEDs are visible through the opening in the red cover. The
meaning of the LEDs are:
4-8
Description and Operation
5.4006.8501.0 - Lely Control
The Lely Control app gives an acoustic signal when:
4.2.3
Status
Charging LED
(orange)
Power LED (green)
Mains connected
OFF
ON
Recharging (>1A)
ON
ON
Error
blinking
blinking
Water Filling Station
The Discovery refills itself at the water filling station (page 4‑1) (7). The water
filling station has:
•
•
Mechanically operated shut-off valve
Water outlet
When the water filling station is connected to the drinking water system, a
header tank must be installed between the drinking water system and the
water filling station to prevent the pollution of potable water by backflow of
water with bacterial contamination (page 3‑3).
5.4006.8501.0 - Lely Control
The header tank supplies water with a constant pressure (0.2 bar) to the
water filling station. The water station is installed next to the charging station
on the wall. The header tank is installed 2 m above the floor.
Figure 8. Symbolic representation of the header tank
Description and Operation
4-9
4.3
User Interface
The Discovery is operated with a smartphone with an Android operating
system. The smartphone communicates with the software via bluetooth. The
main menu on the smart phone has the following items:
•
•
•
•
•
Work
Routes
Test
Settings
Alarms
Service.
5.4006.8501.0 - Lely Control
•
Figure 9. The Lely Control app menu structure
Buttons:
4.3.1
•
[
] or [
] to select a menu item
•
•
[
] to confirm an action
[ESC] to go to the previous menu.
Work
The menu 'Work' is used for daily operation of the Discovery. You can
operate the Discovery in automatic mode using a time path and in manual
mode.
The menu 'Work' has the following submenu's:
•
•
•
•
ON /OFF (to switch the time path ON or OFF )
MANUAL ROUTE (to manually start a selected route)
MANUAL DRIVING (to manually drive the Discovery)
MANUAL CHARGER (to drive the Discovery to the charging station,
following the wall).
The button [
] must be used to open next menu, [ESC] to open the
previous menu. A black dot on the right side of the screen indicates the
level. The highest level (ON/OFF ) has for instance a dot on the upper side,
the lowest level (MANUAL CHARGER) a dot on the lower side.
4-10
Description and Operation
Figure 10. Menu Work
5.4006.8501.0 - Lely Control
The level is indicated by a tab with a black dot on the right side of a display.
There are four levels:
•
•
•
•
Menu 'Work', indicated by the upper dot
'Manual route', indicated by the second dot
'MANUAL DRIVING', indicated by the third dot
'MANUAL CHARGER', indicated by the fourth dot.
4.3.1.1 Time Path ON/OFF
If the time path is switched ON, the upper pane is grayed out (see the
following figure).
Display
Description
•
•
Description and Operation
Start or stop timed actions which are set in
a time path (page 4‑19)
Display the status:
- Actual time
- ON or OFF
- NextRun: start of the next route
- Route: route number
- Action: action description (visible during
route)
- Act.nr: sequence number for the action in
this route
- Runnr: run number
- Battery: battery voltage.
4-11
Buttons:
•
[START/STOP] to start or stop timed actions
•
•
[
] to go to the next menu
[ESC] to go to the previous menu. Or
Push the pause button (page 4‑6) on the Discovery to start or stop timed
actions.
4.3.1.2 Manual Route
Driving manual route is only possible when the time path is switched OFF.
Description
•
Let the vehicle drive a series of maximum 3
subsequent routes
Buttons:
•
[START/STOP] to start or stop the action
•
[ESC] to go to the previous menu
•
•
[
•
Button [
•
Soft button [Reset] to clear the set route(s)
•
Soft button [Save] to save the set route. [
] to go to the next menu
Soft button [>] to select the first, second or third route in the series
] or [
] to select the route number
]
4.3.1.3 Manual Driving
Driving manual route is only possible when the time path is switched OFF.
Display
Description
•
4-12
Move the vehicle manually (page 5‑3)
Description and Operation
5.4006.8501.0 - Lely Control
Display
Buttons:
•
[START/STOP] to start or stop the action
•
•
•
•
[
•
[
] to go to the next menu
[ESC] to go to the previous menu
Soft button [L] to turn right
Soft button [R] to turn left
] to select the drive direction.
4.3.1.4 Manual Charger
Driving manually to the charger is only possible when the time path is
switched OFF.
Display
Description
5.4006.8501.0 - Lely Control
•
•
Let the vehicle automatically drive to the
charging station, following the wall (starting
within 1 m from the charging
station) (page 5‑4)
The values on the display indicate the
battery voltage and the charge current.
Buttons:
4.3.2
•
[START/STOP] to start or stop the action
•
•
•
[
] to go to the next menu
[ESC] to go to the previous menu
Soft buttons [L] and [R] to select the position of the charging station.
Routes
The menu 'Routes' is used for programming routes or for test and
adjustments.
Buttons:
•
[
] or [
] to select a menu item
•
•
[
] to confirm an action
[ESC] to go to the previous menu.
4.3.2.1 New Route
A new route is built from the following actions:
•
•
•
Description and Operation
'Water filling'
'Wall flw L' or 'Wall flw R'
'Straight'
4-13
•
•
•
•
'Turn L <--' or 'Turn R -->'
'Ultrasound L' (or 'Ultrasound R' or 'Ultrasound L+R')
'Charger'
'Waiting time'.
A route has a maximum of 125 actions.
Water filling
Drive from the charging station to the water filling station. After water filling
the Discovery drives back (adjustable) before it is ready for the next action.
The display shows the following information:
Display
Description
•
•
Actionr: sequence number for the action in
this route
Back: the distance the Discovery drives
back after filling (default 0.5 m (19 in))
Tracking along a wall on the left. The motor on the left side runs at 99% and
the right motor runs at 100%. The sensing wheel is pushed to the wall.
The display shows the following information:
Display
Description
•
•
•
•
Actionr: sequence number for the action in
this route
RunDst:distance travelled in mm
Speed1: left wheel speed in mm/s
Speed2: right wheel speed in mm/s
Buttons:
•
[START/STOP] to start or stop
•
[
•
Soft button [MAN] to adjust the position of the vehicle to get a good start
position (direction).
] to reduce speed when approaching a bump point
The same description applies for following a wall on the right side.
Straight
Drive straight forward, only with the use of the gyroscope to correct the
position.
The display shows the following information:
4-14
Description and Operation
5.4006.8501.0 - Lely Control
Wall Follow L
Display
Description
•
•
•
•
Actionr: Sequence number for the action in
this route
RunDst:Distance traveled in mm
Gyro: Angle value in gyroscope
Speed: Wheel speed in mm/s.
Buttons:
•
[START/STOP] to start or stop
•
[
•
Soft button [MAN] to adjust the position of the vehicle to get a good start
position (direction)
] to reduce speed when approaching a bump point
•
Soft button [
] to change the direction.
5.4006.8501.0 - Lely Control
Turn --> or <-- Turn
Turn right or left. You can choose from 12 standard turns to both right and
left. The chosen turn can be adjusted according to the specific situation. The
standard curves are:
•
•
•
Turn right 60 degrees gradually, following wall,
maximum cleaning
Turn right 90 degrees
Turn right 180 degrees, stop in adjacent lane 80
cm (31 in.) to the right.
•
•
•
Turn right 5 degrees
Turn right 25 degrees
Turn right 180 degrees, stop in adjacent lane 40
cm (16 in.) to the right (clean 50 cm (20 in.) from
previous lane).
•
•
•
Turn right 45 degrees
Turn right 60 degrees
Turn right 180 degrees, stop in the adjacent lane
20 cm (8 in.) to the right (clean 70 cm (28 in)
from the previous lane).
•
Make a sharp right turn, maximum cleaning in the
corner
Turn right 90 degrees
Turn right 180 degrees.
•
•
Description and Operation
4-15
•
•
Turn left 60 degrees gradually, following wall,
maximum cleaning
Turn left 90 degrees
Turn left 180 degrees, stop in adjacent lane 80
cm (31 in.) to the left.
•
•
•
Turn left 5 degrees
Turn left 25 degrees
Turn left 180 degrees, stop in adjacent lane 40
cm (16 in) to the left (clean 50 cm (20 in.) from
previous lane).
•
•
•
Turn left 90 degrees, no wall following
Turn 180 degrees
Turn left 180 degrees, stop in adjacent lane 20
cm (8 in) to the left (clean 70 cm (28 in) from the
previous lane).
•
Make a sharp left turn, maximum cleaning in the
corner
Turn left 90 degrees
Turn left 180 degrees.
•
•
After selecting an option, the variables of the turn can be adjusted. The
display shows the following information:
Display
Description
•
•
•
•
4-16
Actionr: Sequence number for the action in
this route
TurnAngle of the turn, positive value (+) =
turn right, negative value (-) = turn left
Radius: The radius of the turn the vehicle
will make:
0 = on the spot,
300 = about one of the drive wheels
For instance: a turn of 180 degrees with a
radius of 0 is used to clean the same lane
again. A turn of 180 degrees with a radius of
300 is used to clean the next lane.
Back: The distance (in mm.) the vehicle first
goes back before making the turn (needed
if the vehicle is near an obstacle).
Description and Operation
5.4006.8501.0 - Lely Control
•
Buttons:
•
Soft button [<] to select the variable you want to modify
•
•
Push [
[START/STOP] to start or stop
•
Soft button [MAN] to adjust the position of the vehicle.
] or [
] to adjust the value of the selected variable
The same description applies for turning to the left.
Ultrasound L
Tracking along a wall or fence on the left at a certain distance (max. 200 cm
(6.5 ft)). The ultrasonic sensor is used to measure the distance to the
wall (page 4‑5).
Default the ultrasonic sensor is installed on the left. If the sensor is installed
on the right, the menu is 'Ultrasound R' or if a sensor is installed on both
sides, the menu is 'Ultrasound L+R'.
5.4006.8501.0 - Lely Control
The display shows the following information:
Display
Description
•
•
•
•
Actionr: Sequence number for the action in
this route
RunDst: Covered distance (mm)
UltraDst: Actual distance to the wall (mm)
(max. 200 cm (6.5 ft)
ULTRADST: Adjustable distance to the wall
(mm).
Buttons:
•
[
] or [
] to modify the value of the selected variable
•
•
[START/STOP] to start or stop
Soft button [MAN] to adjust the position of the vehicle.
Charger
Drive the vehicle back to the charging station. The Discovery finds the
charging station independently (default = on the left), within a distance of 1.5
- 3 m (5 -10 ft.) (page 5‑21). The vehicles nose must point approximately
into the direction of the charging station.
The display shows the following information:
Description and Operation
4-17
Display
Description
•
•
•
Actionr: sequence number for the action in
this route
RunDst:Covered distance (mm)
Charger: not applicable
Buttons:
•
Soft button [L] to modify the position of the charging station
•
•
Soft button [MAN] to adjust the position of the vehicle
[START/STOP] to start or stop.
Waiting time
Wait an adjustable time before continuing with the next action in a
route (page 5‑21). This action is used in a route through a waiting area.
The vehicle stops before entering the area to give cows time to move out.
Display
Description
•
•
Actionr: Sequence number for the action in
this route
time (min): Waiting time (min).
Buttons:
•
•
[
] or [
] to modify the value of the selected variable
[START/STOP] to start or stop
Soft button [Save ] to save the setting.Buttons:
•
•
[
] or [
] to modify the value of the selected variable
[START/STOP] to start or stop
Soft button [Save ] to save the setting.Buttons:
[
] or [
] to modify the value of the selected variable
•
•
[START/STOP] to start or stop
•
Soft button [Save] to save the setting.
4.3.2.2 Delete Route
This menu is used to delete an existing route.
The display shows the following information:
4-18
Description and Operation
5.4006.8501.0 - Lely Control
The display shows the following information:
Display
Description
•
List of set routes.
Buttons:
•
[
] or [
] to select a route
•
[
] to confirm.
4.3.2.3 Time Path
5.4006.8501.0 - Lely Control
It is useful to combine routes into a time path. If the time path is switched ON
the Discovery drives the set routes automatically at the set times each day.
A time path lasts maximum 24 hours. A time path has 48 time/route
combinations maximum, made up of 16 different routes maximum.
The display shows the following information:
Display
Description
•
Time path; start times of set routes.
Buttons:
•
•
•
•
[
] or [
] to select a route in the time path
Soft button [Del] to delete a route from the time path
Soft button [New] to add a new route to the time path
Soft button [>] to select the next variable.
4.3.2.4 Blockage Route
This menu is used to temporary block one or more routes. If you do not want
the vehicle to drive in a particular part of the barn, block the routes that go
through that part. Blocked routes will be skipped from the time path.
This option can be used if part of the barn is reconstructed or if a cow is
calving.
Description and Operation
4-19
4.3.2.5 Route Analysis
The menu 'Route analysis' has the following options:
•
•
'Fail. problty'
'Failure analys'.
'Fail. problty' gives a quick overview of the reliability per route. 'Failure
analys' gives detailed information and shows per route the action numbers
have a high risk of failure. It also gives an indication of the fault (page 7‑
3).
Failure Probability per Route
The display 'Fail. problty' displays for each route, numbered from 1 - 16, the
probability of a failure on a scale from 0 - 5. In the next figure route 1 has a
low risk and route 4 a very high risk.
1-2 Failures/route
5
1
1
2
3
4
5
6
7
8
If a routes has a failure probability of more than 2, the risk of failures is too
high. This could be due to a number of factors like:
•
•
•
few bump points
many so called 'short actions', like 'Straight', ' Turn L <--' or 'Turn R -->'
without 'long actions' in between to enable the Discovery to correct itself
obstacles.
Buttons:
•
•
[
] to open the next screen
[ESC] to go one level up.
Failure Analysis
The display Failure analysis has 3 tables:
•
•
•
4-20
The table Failure analysis displays per fault category (A - H) the action
numbers that causes a risk
The second table displays the percentage of actions in a route that have
bump points (must be more than 20%) and the percentage short actions
versus long actions (must be less than 50%)
The third table displays explanations.
Description and Operation
5.4006.8501.0 - Lely Control
3
5.4006.8501.0 - Lely Control
Display text
Explanation
A
Bends in route
Very unreliable route due to a combination of
factors (B-H)
B
Start-Resetp. angle
Angle of more than 20 degrees between the
start and the reset point. This could be due to
an angled start point
C
Resetp.-End angle
Angle of more than 15 degrees between the
reset point and the end point. The vehicle
goes in the wrong direction before it reaches
the end point. This could be due to an
obstacle
D
Angle betw. actions
Vehicle has unexpectedly turned after saving
an action, causing the next action to start in a
different direction.
E
Drift/bend action
Vehicle is forced to make a bend during an
action (wall follow or ultrasound drive) less
than 1.5 m (4.9 ft.) after the start of the
action.
Description and Operation
4-21
Explanation
F
Drift/angled start
Vehicle starts angled due to, for instance
angled ending of the previous action
G
Angled ending
Vehicle ends action angled (>10 degrees)
due to for instance a collision with a cow leg
H
Straight > 5 m
Deviation caused by driving straight for more
than 5 m (15.4 ft)
4.3.2.6 Speed Route
This menu is used to set the speed for a route (page 5‑27).
The maximum speed is 300 mm/sec. which is approximately 18 m/min.
During programming, the speed is 300 mm/sec., during operation the speed
is default 180 mm /sec. (10.8 m/min). You can adjust the speed for each
particular route.
4.3.2.7 Speed Action
This menu is used to set the speed for an action during a
route (page 5‑27), for example driving slowly when passing the feed fence
or a waiting area.
4.3.2.8 Beepfreq Route
This menu is used to set the beep frequency during the driving. The default
frequency is every 2 seconds. The frequency can be set for each route
separately. The display displays the value per second, so 0.5 equals one
peep per two seconds. When the value is set to zero, the beep is switched
OFF.
Switch the beep ON if the route passes a feed fence or a waiting area. The
cows present in the area are alerted and can move out of the way.
4-22
Description and Operation
5.4006.8501.0 - Lely Control
Display text
4.3.2.9 Copy Route
The menu 'Copy route' is used to copy a route. The copied route can be
modified to make a new route.
4.3.2.10 Modify Route
The menu 'Modify route' is used to modify parts of an existing route. Since a
route is built of many actions, changing one action influences the rest of the
route. Therefore modification is restricted to:
•
•
•
Modify the run distance
Modify the angle of a turn
Add waiting time.
Examples:
If the Discovery slips during action (3), the vehicle will not reach the wall
during the next action (4). Instead of following the wall, it will then hit the
manger on the cross wall. In that case the run distance of action 3 ('Straight')
should be increased.
5.4006.8501.0 - Lely Control
If, after following a wall, a crosswalk must be passed, the Discovery must
first make a small turn to the left (2). Otherwise the vehicle will hit the cross
wall on the other side of the crosswalk. If it turns out that, despite the turn,
the vehicle hits the wall, the angle of the turn must be increased.
Figure 11. To pass a crosswalk
4.3.2.11 Wheel Correction
If the wheels become worn, the diameter and thus the covered distance per
rotation decreases. As a result the driving distance in a route decreases.
The menu 'Wheel corr.' is used to correct the wheel diameter in the software
and thus the driving distance.
4.3.2.12 Backup Route
This menu is used to make a backup with the Lely Control app on the
smartphone or to restore the information on the ADS 3840 PCB.
Description and Operation
4-23
4.3.2.13 Sprinkler Route
The menu 'Sprinkler route' is used to set the water sprinkler 'On' or 'Off' per
route.
4.3.3
Test
The menu 'Test' is used to do functional tests of components and actions.
4.3.4
Settings
RealTime clock
This menu is used to set the date and time of the Discovery. The correct
date setting is also important to search for alert reports on a date.
Date 02-09-12 (dd/mm/yy).
Time 16:53:31 (hh/mm/ss).
Language
This menu is used to modify the language of the user interface.
This menu is used to recalibrate the gyroscope. The Discovery must not be
moved during the calibration.
Motor power
The motor power must be high enough to overcome an unevenness or a
slope. Otherwise it must not be too high, because the control system uses
the current value to detect an obstacle.
The motor power can be set to:
•
•
Average
Low.
Do not modify the motor power without the consent of your local Lely service
provider.
Wheel diameter
Specifies the diameter of the wheels. The default diameter is 250 mm.
Do not modify this setting when the wheel diameter is not changed. This
affects the route accuracy.
Beep length
This menu is used to set the duration of the beep. The default length is 200
mSec. This setting is for all routes. When the value is set to zero, the beep is
switched OFF.
Reset report
This menu resets the service information data.
4-24
Description and Operation
5.4006.8501.0 - Lely Control
Gyroscope
Fill water
The menu 'Fill water' is used to:
•
•
•
4.3.5
Set the 'Push power' (default 15.5 A). The power the Discovery exerts on
the water filling station must be high enough to open the water valve
without causing damage.
Set the 'Pump current' (default 1000 mA). The pump must stop when the
water tank is empty. When the pump current drops below the set value,
the pump stops.
Set the water fill function ('Water in use') 'On' or 'Off'. When this setting is
'Off', the Discovery does not stop at the water filling station when it starts
a route. This setting can be used to clean the barn without the use of
water, for example during periods of frost. When the setting is set to 'Off'
the Discovery skips a visit to the water filling station and continues the
route immediately.
Alarms
The Discovery monitors itself continuously and informs you about the
situation. The Discovery generates alarms and reports.
5.4006.8501.0 - Lely Control
Alarm List
The alarm list gives a summary of the alarms received. This list stores up to
250 alarms (page 8‑1). Once 250 alarms are stored, the next alarm
overwrites the oldest alarm of the list.
Report list
The report list gives a summary of the generated reports (page 8‑9).
Info list
The list gives technical details. It is used by the service technician.
Reset list
To delete all alarm, report and info information.
4.3.6
Service
The menu 'Service' has the following sub menus:
•
•
•
•
•
4.3.7
'Hour counter' to display the hours in use since the last counter reset.
'Version' to display the software version
'Installation1' (password protected)
'Installation2' (password protected)
'Tests service' (password protected).
Test Route
The test procedure 'Test route' is used to test a selected route.
Description and Operation
4-25
4.4
Operation
4.4.1
Routes, Actions, Manual Routes and Time Paths
Actions make a route
The Discovery drives through a barn along a programmed route. A route is
build up of actions, for example 'Wall flw L' or 'Turn L <--'. A route in most
cases starts, and always ends at the charging station (page 4‑26) (1).
Automatic cleaning with a time path
The Discovery cleans the barn each day automatically on the same time if a
time pathis set and switched ON (page 4‑19).
Manual cleaning with manual routes
5.4006.8501.0 - Lely Control
It is useful to enable 'MANUAL ROUTE'. You then can clean a part of the
barn whenever you want or test a route (page 4‑12). It is also useful to
program routes from different points in the barn back to the charging station
for instance to pick up a lost vehicle.
Figure 12. Actions make a route
KEY:
1. Charging station - 2. Wall flw L - 3. Turn R --> - 4. Straight - 5. Wall flw R
4.4.2
Control System
The control system keeps the vehicle on the right track.
4.4.2.1 Driving Distance
The encoders on the drive motor measure the number of rotations of the
motor shafts. This value is used to calculate the travelled distance. If, due to
4-26
Description and Operation
slip, the actual driving distance is less than calculated, it can only be
corrected if the action ends at a bump point (a collision point with a wall). If
an expected bump point is not reached, the Discovery continues driving for a
limited distance.
5.4006.8501.0 - Lely Control
The driving distance is corrected in the software, so the next time the
Discovery drives a bit further. On the other hand, if a bump point is reached
earlier than expected, it is also corrected. These corrections are deleted
when you reset the ADS 3840 PCB.
Figure 13. Bump points to correct the driving distance
KEY:
1.Bump point - 2. Bump point
4.4.2.2 Speed
The number of revolutions of the motors are also used to calculate the
speed. The speed can be set for a route or for an action in a route.
4.4.2.3 Distance to a Wall
The ultrasonic sensor sends a pulsed ultrasound wave at an object and then
measures the time for the sound echo to return (page 4‑5).
4.4.2.4 Direction
At the start of a route, the angle with the wall is 0°. During the route the
gyroscope calculates each deviation from a straight line (page 4‑5). This
information is used to control the direction of the vehicle. This is especially
important during so called 'short actions', when there is no contact with the
wall.
Short actions
Short actions are:
•
•
•
Description and Operation
'Straight'
'Turn L <--'
'Turn R -->'.
4-27
Due to a combination of factors like skidding, obstacles or drift from
gyroscope, the calculated angle with the wall may differ from the actual
angle. This can cause the vehicle to drive in the wrong direction. This is no
problem if the control system is able to correct itself during a 'long action'
Long actions
Direct wall contact with the sensing wheel or indirect wall contact with the
ultrasonic sensor are used to keep the Discovery in the correct direction.
This is the case during:
•
•
•
•
•
'Water filling'
'Wall flw L'
'Wall flw R'
'Ultrasound L' (or 'Ultrasound R' or 'Ultrasound L+R')
'Charger'.
If these actions continue for more than 10 m (33 ft) they are called 'long
actions' because then the vehicle passes the 'reset point' (between 3 and 10
m (9.8 and 33 ft)). At that point the angle is reset to 0° and a beep is sound.
In a situation with a succession of 'short actions' ('Straight', 'Turn L <--' and
'Turn R -->') the vehicle can get lost, due to an accumulation of errors. In the
figure (page 4‑29), the left part shows a programmed route (example). The
right part shows what could happen.
The risk of deviating from the programmed route can be minimized
when (page 4‑30):
•
•
•
4-28
The Discovery has contact with the wall, barn or feed fence, either direct
('Wall flw L' or 'Wall flw R') or indirect ('Ultrasound L').
Bump points enable the control system to compare the traveled distance
with its own information.
'Short actions' are mixed with 'Long actions' to correct the direction.
Description and Operation
5.4006.8501.0 - Lely Control
'Long actions' compensate for the deviations caused by 'short actions'. It is
therefore very important to program a subsequent 'long action' after a
succession of 'short actions'.
5.4006.8501.0 - Lely Control
Figure 14. Example situation of short routes resulting in errors; left side:
programmed route, right side: resulting route
Description and Operation
Number
Explanation
1
The vehicle doesn't reach the wall, due to skidding. There is no
bump point to correct this error.
3, 5, 7
Due to deviations in the gyroscope (drift) and/or skidding the
turns are less than 180 degrees.
2, 4, 6
The errors are not corrected while driving straight.
8
The vehicle bumps the cubicle, tries to go on and eventually
gets lost.
4-29
Number
Explanation
1
The vehicle follows the cubicles on the right side until the wall
(bump point)
2
The vehicle follows the wall on the right side until the feed fence
(bump point), followed by 'Turn L <--'
3
The vehicle follows the wall on the left side ('Ultrasound L'), until
the cubicles (bump point)
4
The vehicle drives back and follows the cubicles on the left side
('Ultrasound L')
5
The vehicle follows the cubicles on the left side with 'Ultrasound
L' followed by 'Straight' until the wall (bump point)
6
The vehicle drives back followed by 'Turn L <--'
7
The vehicle drives 'Straight' until the feed fence (bump point)
followed by 'Turn L <--'
8
The vehicle drives 'Straight' until the start of the cubicles on the
right, then 'Wall flw R', followed by 'Straight' until the bump point
9
The vehicle drives back followed by 'Wall flw R'
4-30
5.4006.8501.0 - Lely Control
Figure 15. Alternation of short and long actions
Description and Operation
4.4.2.5 Obstacles
If the Discovery unexpectedly comes across an obstacle, for example the leg
of a cow or a pile of manure, the Discovery acts as follows:
•
•
4.4.3
it reverses and tries again (up to 3 times)
it reverses and makes a 45 degrees turn to the left or right, depending on
the previous action (left or right wall tracking/ultrasonic). If it succeeds in
passing the obstacle, it returns to the original route and continues to
finish the route.
Power and Water Supply
At the end of a route, the Discovery drives to the charging station. It stays
there until the start of the next route.
Each time the Discovery starts a route, it first drives to the water filling
station (1). The water inlet tube enters the funnel shaped water supply tube
and opens the mechanically operated shut-off valve. The vehicle stops
automatically. The water enters the water tank via a water filter.
When the tank is full, it overflows through the air feed tube. The water
sensor makes sure the Discovery drives back (2) from the water filling
station and thereby stops the water filling process.
5.4006.8501.0 - Lely Control
After that, the Discovery turns to the right (3), drives alongside the water
filling station (4) and (5) and continues its route (6).
Description and Operation
4-31
5.4006.8501.0 - Lely Control
Figure 16. Start of a route
4.4.4
Cleaning
The two nozzles spray water just in front of the manure scraper to soften the
manure. The manure scraper pushes the manure over the slatted floor until
it falls through the gaps.
4-32
Description and Operation
5.
5.1
OPERATING INSTRUCTIONS
Install or Update the Lely Control app on Your Smart Phone
1.
2.
3.
4.
5.
On the smartphone go to the Google play store.
Download the Lely Control app.
Install the app.
Wait until the software is correctly installed.
The first time you start to control the Discovery with the software on
the smartphone, you must enter a password for the Discovery system.
Ask your local Lely service provider for the password.
If there is new software available, a notification is displayed on the icon of
the Google play store.
5.4006.8501.0 - Lely Control
5.2
Rename the Discovery on the Smartphone
The device name of the Discovery that is displayed on the smartphone can
only be modified by a certified Lely technician.
5.3
Set the farmer password
The farmer password must be set by a certified Lely technician.
It is recommended to use the same password for all smartphone controlled
machines on a farm.
5.4
Switch ON or OFF the Discovery
To switch OFF
1.
2.
3.
4.
5.
Operating Instructions
Remove the upper cover.
Remove the lower cover.
On the PCB box, push the button [OFF] to switch OFF the power.
Reinstall the lower cover.
Reinstall the upper cover.
5-1
To switch ON
1.
2.
3.
4.
5.
5.5
Remove the upper cover.
Remove the lower cover
On the PCB box, push the button [ON] to switch ON the power.
Reinstall the lower cover.
Reinstall the upper cover.
Operate Device Specific Software with a Smartphone
Connect the Smartphone
1.
2.
3.
Make sure the App is installed on your smartphone.
Make sure the Discovery is in your line of sight before you start the
software.
Start the software on your smartphone (page 5‑2).
Disconnect the Smartphone
5.6
Stop the software on your smartphone.
Start the Software on Your Smartphone
Remote Operation of the smartphone or tablet by remote desktop
software (such as, but not limited by, Teamviewer) is strictly forbidden
to avoid dangerous situations.
Make sure the machine is in your line of sight.
Make sure you are in the vicinity of the Discovery when you want to connect
the phone to the machine. If the distance is too big, it will not appear in the
list on the smartphone display.
The device name of the Discovery that is displayed on the smartphone can
only be modified by a certified Lely technician.
Sometimes the phone must be paired with the Discovery before you can do
the procedure below.
The Discovery can not be connected to more than 1 smartphone
simultaneously.
On the Smartphone:
1.
2.
3.
5-2
Start the Lely Control app.
If bluetooth was not in operation the following question (or similar)
appears: 'The application tries to switch on bluetooth, continue?'
Push 'Yes'.
Operating Instructions
5.4006.8501.0 - Lely Control
1.
4.
Push the line: 'Search for devices'. The devices near the smartphone
will be found. If one or more devices are not found, repeat this step.
Push the line with the machine you want to operate. A connection will
be made with the selected machine. A green light is displayed in the
title when the connection is made. The smartphone shows a set of
control buttons and a display that can be used to operate the
software. If the smartphone loses connection the green light turns red.
Move towards the machine and make the connection again.
5.
Push
6.
7.
If the Discovery was switched OFF, Calibrate the gyroscope.
In general the buttons have the following function:
•
[
] Execute the command on the display above the applicable soft
button.
[START/STOP] starts or stops an action.
•
[
] moves the selector up one item or increases a value by one.
•
[
] moves the selector down one item or decreases a value by one.
•
•
[ESC] returns to the previous screen.
5.4006.8501.0 - Lely Control
•
opens the selected function or the next menu screen.
reduces the speed of the vehicle.
•
5.7
Manually Drive the Discovery
1.
Stop all timed actions (page 5‑25).
2.
3.
Push [
4.
5.
In the menu 'Manual driving', push:
•
•
•
Operating Instructions
] twice to select the menu 'Manual driving'.
The message 'SAFETY WARNING. Manual operation is permitted
only with a clear overview of the vehicle. Confirm?' appears on the
smartphone display.
Confirm if you have a clear overview of the Discovery.
[L] to turn right, or
[R] to turn left, or
[L] and [R] to go straight on.
6.
Push [
] to change the direction, if necessary.
7.
8.
Push [START/STOP] to start, hold it.
Release [START/STOP] to stop.
5-3
Figure 17. Manual driving
Drive the Discovery to the Charging Station
1.
2.
3.
4.
5.
Stop all timed actions (page 5‑25).
Manually drive the Discovery to 1.5 - 3 m (5 -10 ft.) from the charging
station (page 5‑3).
Make sure the front of the vehicle points in the direction of the
charging station.
Push button [
Push:
1.
2.
6.
] to select the menu 'MANUAL CHARGER'.
[L] if the charging station is on the left side
[R] if the charging station is on the right side.
Push [START/STOP] to start.
The Discovery approaches the charging station and stops by itself.
Figure 18. Manual charger
5.9
Switch ON of OFF the Water Filling Function in the Wintertime
The water filling function must be switched Off and the header tank and the
water tank must be drained before the environmental temperature drops
5-4
Operating Instructions
5.4006.8501.0 - Lely Control
5.8
below freezing point. Lely Industries N.V. will not take any liability for
damage due to frost.
1.
2.
3.
Switch off the water supply to the header tank.
Push against the water outlet of the water filling station until the
header tank is empty.
Set the water fill function 'On' or 'Off' (page 7‑2).
5.10
Prepare for Programming
5.10.1
Requirements for a Good Route
Make it possible for the Discovery to correct itself
•
•
5.4006.8501.0 - Lely Control
•
Include as many bump points as possible in all directions. If, due to
slipping, the bump point is not reached in time, the Discovery continues
until the bump point is reached. This improves the reliability of the route.
Be aware that actions like 'turn' and 'straight' may cause inaccurate
results. Make sure the vehicle cannot get stuck after making a turn or
driving straight. Program a 'long action' (wall contact: 'wall follow' or
'ultrasound') after a 'short action' (no wall contact: 'turn' or 'straight').
If the vehicle follows the wall or cubicle row ('wall follow' or 'ultrasound')
and if there is a bend, stop the vehicle, program a turn and go on to
follow the wall (page 5‑14).
Make it easy for yourself
•
•
Program routes from different positions in the barn back to the charging
station. This will enable you to easily return the vehicle back to the
charging station in case it gets lost.
Make a backup after programming a route.
Adapt the route or settings to the herd
•
•
The beep can be modified separate for each route. If the beep length is
set to 0, the beep is switched is OFF. If a warning signal is given, the
cows have time to move out of the way. However, the sound may equally
well disturb other cows (see which settings suit your herd best).
Set the speed to a lower level for parts of the route or the whole route if
the cows are disturbed (page 5‑27).
Only spray water when needed
The water tank capacity is 30 L (7.9 gal), which is enough for approximately
30 minutes of spraying. As a result the Discovery must return to the water
filling station (and the charging station) for a refill.
5.10.2
Example Routes, Barn with Milking Robot
In the example situation, the barn is divided into 3 areas. The time path has
different routes to clean each area:
Route 1
The area behind the cubicles is most extensively polluted (page 5‑6). It
should be cleaned each hour at least.
Operating Instructions
5-5
Route 2
The walking alley should be cleaned 4 times a day (page 5‑7). Because
the area behind the cubicles should be cleaned often, the route combines
cleaning the walking area and the area behind the cubicles.
It is useful to clean the walking area just before you enter the stall, for
instance at 7:00, 12:00, 17:00 and 22:00 hour.
Route 3
The area between the cubicles and the feeding fence should be cleaned no
more than 2 times a day, preferably at night (page 5‑7). Cows should not
be disturbed when eating.
Time
Route
12:00
2
13:00
1
14:00
1
15:00
1
16:00
1
17:00
2
18:00
1
19:00
1
20:00
1
21:00
1
22:00
2
23:00
1
00:00
1
01:00
3
02:00
1
03:00
1
04:00
2
5.4006.8501.0 - Lely Control
The following example time path is based on these routes:
Figure 19. Route 1, clean all areas behind the cubicles each hour
5-6
Operating Instructions
Figure 20. Route 2, like route 1, but also clean the walking alley, 4 times a
day
5.4006.8501.0 - Lely Control
Figure 21. Route 3, clean the areas between the cubicles and the feed
fence, 2 times a day
Each route is built of many actions. The following figure shows the actions of
route 1 on the left side of the barn, the table below explains each action.
Refer to the complete picture for an overview.
Figure 22. Example actions (left side)
Operating Instructions
5-7
Action
Explanation
1
Wall flw L
Follow the wall is always the first action, necessary to leave
the charging station
2
Turn R --> (90°)
Standard turn. Make sure the vehicle will not hit the cubicle
wall after action 3. Else modify the turn (page 5‑19)
3
Straight
Driving straight is the only option because the distance to a
wall is more than 2 meter
4
Wall flw R
Vehicle will turn right until it hits the cubicle floor and will then
follow the cubicle floor.
Although it is easier to clean the left side first, this is not
allowed because cows can get hurt, due to the opening for
the ultrasonic sensor (page 5‑15)
5
Wall flw R
Follow the cubicle floor until the wall (bump point)
6
Turn L <-- (90°, 1000 mm back)
Standard turn 90°. Modify turn: back 1000 mm before turning
7
Straight
Drive straight until the wall (bump point)
8
Turn R --> (180°)
Standard turn R (180°)
9
Straight
10
Turn R --> (90°)
Standard turn 90°, modify if the nose of vehicle doesn't point
in the correct direction
11
Straight
Straight until the first cubicle on the left side
12
Ultrasound L
Ultrasound drive (1100 mm)
The following figure (page 5‑9) shows the actions of route 1 in the middle
of the barn, the table below explains each action. Refer to the complete
picture for an overview.
5-8
Operating Instructions
5.4006.8501.0 - Lely Control
Number
5.4006.8501.0 - Lely Control
Figure 23. Example routes (middle part)
Number
Action
Explanation
1
Wall flw R
Follow the cubicle floor until the end of the cubicle row
2
Turn L <-- (45 degrees)
3
Straight
4
Turn R --> (45 degrees)
5
Wall flw L
6
Turn R --> (45 degrees)
7
Straight
8
Turn L <-- (45 degrees)
9
Wall flw R
10
Wall flw R
11
Turn L <-- (10 degrees)
Straight
Turn R --> (5 degrees)
Move to the left to prevent hitting the wall after crossing
over (page 5‑11)
12
Straight
Drive straight until bump point
13
Turn L <-- (180 degrees)
Standard turn, stop in adjacent lane
14
Straight
15
Ultrasound L
Ultrasound drive 1100 mm
16
Ultrasound L
Ultrasound drive 1100 mm
17
Straight
Drive straight until bump point
18
Turn L <-- (90 degrees)
19
Wall flw R
Operating Instructions
Drive straight
Follow the cubicle floor
Drive straight
Follow wall until bump point
5-9
Number
Action
Explanation
20
Turn L <-- (90 degrees)
Standard turn, back 500 mm
21
Straight
Drive straight until begin of cubicle row
22
Turn R --> (10 degrees)
23
Wall flw R
5.4006.8501.0 - Lely Control
The following figure shows the actions of route 1 on the right side of the
barn, the table below explains each action. Refer to the complete picture for
an overview.
Figure 24. Example actions (right side)
Number
Action
Explanation
1
Wall flw R
Follow the wall until the end of the cubicle row
2
Straight
Drive straight until bump point
3
Turn R --> (90 degrees)
4
Wall flw L
5
Turn R --> (90 degrees)
6
Straight
7
Wall flw R
8
Ultrasound L
Ultrasound drive 1100 mm until end of the cubicle row
9
Straight
Drive straight until bump point
10
Turn L <-- (90 degrees)
5-10
Drive straight until start of a cubicle row
Operating Instructions
Number
Action
Explanation
11
Wall flw R
Follow the wall until bump point
12
Turn L <-- (90 degrees)
13
Wall flw R
5.10.3
Example Route, Barn with Milking Parlour
5.4006.8501.0 - Lely Control
In a barn with a milking parlour the situation is different from a barn with a
milk robot. There is no free cow traffic to the milking parlour. If the cows are
milked, a half of the barn is closed and can be cleaned.
Figure 25. Example route, barn with milking parlour
5.10.4
To Pass a Crosswalk
If the Discovery passes a crosswalk between two cubicle rows, the direction
must be corrected to avoid hitting the opposite cubicles. The next figure and
the corresponding table with action show how to do this.
Figure 26. To pass a crosswalk
Operating Instructions
5-11
Number
Action
Explanation
1
Wall flw R
Follow the cubicles row, stop at the end
2
Turn L <--
Turn left, 5 degrees
3
Straight
Drive straight until middle of the next cubicle
4
Wall flw R
Follow the wall, the vehicle automatically turns to the cubicles
5.10.5
To make a Turn
Turn to clean the next (adjacent) lane
When the Discovery approaches a wall and must be turned 180 degrees to
clean the next lane, it must:
•
•
•
Hit the wall (bump point)
Drive back to enable turning
Turn 180 degrees with a certain radius.
•
•
•
•
Go back, turn 180 degrees, stop in the next lane 80 cm (31 in.) to the
right or left (to clean the next lane)
Go back, turn 180 degrees, stop in the next lane 40 cm (16 in.) to the
right or left (to clean the next lane and also half of the former lane)
Go back, turn 180 degrees, stop in the next lane 20 cm (8 in.) to the right
or left (to clean the next lane and also three quarter of the former lane)
Go back, turn 180 degrees, stop in the same lane (to clean the same lane
again).
The next figure shows the options.
KEY:
A. 20 cm (8 in.) - B. 40cm (16 in.) - C. 80 cm (31 in.)
5-12
Operating Instructions
5.4006.8501.0 - Lely Control
You can choose from 4 standard turns, both left and right each with a
different radius:
5.4006.8501.0 - Lely Control
5.10.6
To Approach the Charging Station from the Opposite Direction
Figure 27. Approach the charging station
Number
Action
Explanation
1
Wall flw R
Follow the wall on the right side
2
Turn L <--
Turn left
3
Straight
Drive straight
4
Turn R -->
Turn R 20 degrees
5
Wall flw R
Follow the wall on the right side
6
Turn L <--
Turn L 180 degrees
7
Wall flw L
Follow the wall until 1.5 - 3 m (5 - 10 ft.) from the charging
station
8
Charger
Go to the charging station
Operating Instructions
5-13
5.10.7
To Follow a Bend in a Wall
Number
Action
Explanation
1
Wall flw L
Wall follow
2
[START/STOP]
Stop the wall follow action
3
Wall flw L
Wall follow (no turn action needed because the angle < 20
degrees)
4
Turn R -->
Turn right, nose in drive direction
5
Wall flw L
Wall follow
5.11
Program the Discovery
5.11.1
Program a New Route
Preparation
1.
2.
3.
4.
Make sure you understand the requirements for setting up a good
route (page 5‑5).
Plan the route on a piece of paper.
Open (page 5‑2) the Lely Control app on the smartphone
Stop all timed actions (page 5‑25).
Program
1.
In the main menu of the Lely Control app, select 'Routes' and push
[
2.
5-14
].
Select menu 'New route' and push [
].
Operating Instructions
5.4006.8501.0 - Lely Control
Figure 28. Follow a bend in a wall
If the the vehicle is not connected to the charging station, you can push soft
button [CHARGR] to drive the Discovery to the charging station (page 5‑3).
3.
Push soft button [START].
4.
5.
6.
Read the messages on the display and push [
Program the first action ('Water filling').
Program the next action in the route:
•
7.
5.4006.8501.0 - Lely Control
8.
9.
] (2×).
•
•
•
•
•
•
'Water filling'
'Wall flw L'
'Wall flw R' (page 5‑15)
'Straight'
'Turn R -->'
'Turn L <--'
'Ultrasound L' or 'Ultrasound R' or 'Ultrasound L+R'
•
'Charger'.
If the vehicle has returned to the charging station within 1 - 3 m (3.2 9.8 ft), go to the charging station (page 5‑21),
Else repeat step 6.
Push soft button [Exit].
Push soft button [Yes] to save the new route.
Close-up
1.
2.
Test the route (page 7‑4).
Make a backup of the route.
5.11.1.1 Follow a Wall (Left or Right)
Try to avoid to move past cows on the left side, they may get hurt due to the
opening for the ultrasonic sensor (page 5‑16).
If the angle between the Discovery and the wall is more than 30 degrees,
you must program a 'turn' action first before you program a 'follow wall'
action (page 5‑17).
1.
2.
Operating Instructions
If the wall is:
•
On the left side, select the menu 'Wall Flw L' and push [
•
On the right side, select the menu 'Wall Flw R' and push [
]
].
Push [START/STOP] to start.
5-15
Build in as many bump points as possible in all driving directions.
If the Discovery approaches a bump point (approx. 30 cm (12 in)),
3.
4.
push [
] to smoothly reduce speed.
Push [START/STOP] to stop the Discovery immediately.
The display shows the status ('Manual stop' or 'Bump stop') and the travelled
distance (in mm).
Push soft button [Save].
5.4006.8501.0 - Lely Control
5.
Figure 29. Try to avoid to move past cows on the left side
5-16
Operating Instructions
5.4006.8501.0 - Lely Control
Figure 30. Never make an angled start (>30 degrees)
5.11.1.2 Go Straight
When moving straight forward, the deviation can be more than 10%. Take
this into account when you set up a route. If possible, include a bump point
after going straight.
Operating Instructions
5-17
Before starting, make sure the Discovery points in the correct direction. Use
the ''Straight' option as little as possible. If it really is necessary, for example
to get the Discovery through a doorway, make the distance travelled as short
as possible. Once through the doorway, continue to follow a wall left or right,
or ' Ultrasound L'. This improves the accuracy of the route that is travelled.
1.
2.
3.
Select 'Straight' and push [
].
Push [START/STOP] to start.
If the vehicle approaches the wall from an angle,
1.
2.
3.
Push [START/STOP].
Turn the vehicle to a right-angled position to the wall (page 5‑
19).
Resume driving 'Straight'.
If the Discovery approaches a bump point (approx. 30 cm (12 in)),
4.
The display shows the status ('Manual stop' or 'Bump stop') and the travelled
distance (in mm).
6.
Push soft button [MAN] to modify the position.
1.
2.
7.
5-18
Push soft button to turn left, or to turn right.
Push [ESC] to confirm and go one level up.
Push soft button [Save].
Operating Instructions
5.4006.8501.0 - Lely Control
5.
push [
] to smoothly reduce speed.
Push [START/STOP] to stop the Discovery immediately.
5.4006.8501.0 - Lely Control
Figure 31. Avoid angled bumping
5.11.1.3 Turn Left or Right
Operating Instructions
1.
If you want to turn left, select 'Turn L <--' and push [
2.
If you want to turn right, select 'Turn R -->' and push [
3.
Read the message on the display and push [
].
].
].
5-19
You can choose from 12 standard turns and modify the turn afterwards.
Preferably do not make sharp turns in heavy polluted areas (less power).
5.
6.
7.
8.
9.
Push [
] until the most appropriate standard turn is displayed, or
push [ESC] to go to the previous display.
Select one of the standard turns with the appropriate soft
button (page 4‑16).
If you want to modify the turn, push [
] or [
] to select the angle.
If you want to drive back before making a turn:
1.
Push soft button [>] to select 'Back'.
2.
Push [
] or [
] to select the reverse distance.
If you want to modify the radius of a turn:
1.
Push soft button [>] to select 'Radius'.
2.
Push [
] or [
] to select the radius.
Push [START/STOP] to start.
If the made turn is not exactly as planned, modify the position (see the next
step). This is above all important if the angle is 90 or 180 degrees left or
right.
10.
Push soft button [MAN] to modify the position.
1.
2.
11.
Push soft button to turn left, or to turn right.
Push [ESC] to confirm and go one level up.
Push soft button [Save].
5.11.1.4 Follow a Wall or Fence on a Certain Distance (Ultrasound)
Do not program Ultrasound L when the wall is more than 2 meters away.
1.
2.
3.
4.
Select the menu 'Ultrasound Land push[
]
Read the actual distance to the wall (UltraDst) from the display.
Push [
] or [
] to select the required distance to the wall
(ULTRADST).
Push [START/STOP] to start.
If the Discovery approaches a bump point (approx. 30 cm (12 in)),
5.
6.
5-20
push [
] to smoothly reduce speed.
Push [START/STOP] to stop the Discovery immediately.
Operating Instructions
5.4006.8501.0 - Lely Control
4.
The display shows the status ('Manual stop' or 'Bump stop') and the travelled
distance (in mm).
7.
Push soft button [MAN] to modify the position.
1.
Push soft button to turn left, or to turn right.
Push [ESC] to confirm and go one level up.
2.
8.
Push soft button [Save].
5.11.1.5 Go to the Charging Station (Charger)
1.
2.
3.
Make sure the Discovery is within 1.5-3 m from the charging station,
pointing towards it (page 5‑3).
Select the menu 'Charger'.
Push soft button [MAN] to modify the position.
Push soft button to turn left, or to turn right.
Push [ESC] to confirm and go one level up.
1.
2.
5.4006.8501.0 - Lely Control
4.
5.
If the charging station is on the right, push soft button [L].
Push [START/STOP] to start.
The Discovery approaches the charging station and stops by itself.
5.11.1.6 Waiting Time
5.11.2
1.
Select the menu 'Waiting time'.
2.
3.
Push[
1.
Open (page 5‑2) the Lely Control app on the smartphone
Stop all timed actions (page 5‑25).
In the main menu of the Lely Control app, select 'Routes' and push
] to select the waiting time.
Push soft button [Save].
Copy a Route
2.
3.
[
5.11.3
]or [
].
4.
Select Copy route and push [
].
5.
6.
Select the route you want to copy and push [
1.
2.
Open (page 5‑2) the Lely Control app on the smartphone
Stop all timed actions (page 5‑25).
3.
Test the route (page 7‑4).
4.
In the main menu of the Lely Control app, select 'Routes' and push
].
Push soft button [Yes] to confirm.
Modify a Route
[
5.
Operating Instructions
].
Select Modify route and push [
].
5-21
6.
Select Modify route and push [
7.
8.
Select the route you want to modify and push [
9.
10.
Select the action you want to modify and push [
5.11.4
1.
2.
Select the action.
3.
Select Waiting time and push [
4.
Modify the waiting time with [
Push soft button [New].
].
] or [
].
If you want to modify the driving distance or the turn:
1.
2.
Select the action and push [
].
3.
Modify the value of the property with [
Select the property you want to modify with soft button [<].
Push [ESC] to confirm and go one level up.
13.
Push soft button [Yes] to confirm.
] or [
].
Reset a modified Route to the previous Version
3.
Open (page 5‑2) the Lely Control app on the smartphone
Stop all timed actions (page 5‑25).
In the main menu of the Lely Control app, select 'Routes' and push
[
].
4.
Select 'Modify route' and push [
].
5.
Select 'Modify reset' and push [
].
6.
Select the route you want to reset and push [
7.
Push soft button [Yes] to confirm.
1.
2.
Open (page 5‑2) the Lely Control app on the smartphone
Stop all timed actions (page 5‑25).
In the main menu of the Lely Control app, select 'Routes' and push
].
Delete a Route
3.
[
5-22
].
If you want to add extra waiting time before the action:
12.
1.
2.
5.11.5
].
Read the message and make sure to understand it.
].
4.
Select Delete route and push [
].
5.
6.
Select the route you want to delete and push [
].
Push soft button [Yes] to confirm.
Operating Instructions
5.4006.8501.0 - Lely Control
11.
].
5.11.6
Set or Delete a Manual Route
Set a manual route to manually drive (a set of) route(s) or to test a
route (page 4‑12).
1.
Open (page 5‑2) the Lely Control app on the smartphone
2.
Stop all timed actions (page 5‑25).
In the main menu of the Lely Control app, select 'Work' and push
3.
[
4.
].
Push [
] to select the menu MANUAL ROUTE.
Set a Series of Routes
1.
2.
5.4006.8501.0 - Lely Control
3.
4.
In the menu MANUAL ROUTE, push [
] to select the series of
routes you want to set (A, B, C or D).
Push soft button [>] to select the first route in the series.
Push [
] or [
] to select the route number (page 4‑13).
5.
Repeat step 2 and 3 to select the next route in the series (if
applicable).
Push soft button [>] twice.
6.
Push [Save] to save the series of manual routes.
Delete a Manual Route
5.11.7
1.
2.
Push [
] or [
] to select the route you want to delete.
1.
2.
Open (page 5‑2) the Lely Control app on the smartphone
Stop all timed actions (page 5‑25).
3.
In the main menu of the Lely Control app, select 'Routes' and push
Push soft button [Reset].
Set a Time Path
[
4.
].
Select time path and push [
].
Refer to the time path description (page 4‑19).
The Discovery must not drive more than 40% of the total time in a time path.
It must spend minimum 60% of the total time charging at the charging
station.
Operating Instructions
5.
6.
Push soft button [New].
7.
Push [
Push soft button [>].
] to select the start time (hour) and push soft button [>].
5-23
8.
Push [
] to select the start time (minutes) and push soft button [>].
9.
10.
Push [
] to select the route and push soft button [>].
If you want:
•
•
11.
5.11.8
To add another route to the time path, push soft button [New] and
repeat steps 7 to 11
Confirm an go up one level, push [ESC].
Push soft button [Yes] to save the new time path (page 4‑19).
Make a Backup
Make a backup each time you changed a route or time path or when another
smartphone is used. Backups are made on the smartphone.
Make sure to give each backup you make a unique name.
1.
Stop all timed actions (page 5‑25).
2.
In the main menu of the Lely Control app, select 'Routes' and push
[
3.
4.
5.
6.
7.
8.
5.11.9
Select 'Backup route' and push [
]. The question 'Backup or restore
the current routes and settings? ' appears on the display of the
smartphone.
Push soft button [Bckup]. The software asks if you want to make a
backup on the smartphone.
Push soft button [Yes]. The smartphone displays a progress bar of the
backup process.
Enter the name for the backup file.
Push soft button [OK].
Wait until the process ends with a beep.
Copy a Backup file from the Smartphone to a PC
1.
2.
3.
4.
5.
5-24
].
Connect the smartphone to a usb port of the PC. Use the data cable
of the smartphone to connect.
Use the PC to browse to the Lely backup folder on the smartphone.
Select the applicable backup file (.bkp).
Copy the backup file from the smartphone.
Paste the backup file to the pc.
Operating Instructions
5.4006.8501.0 - Lely Control
Make sure the phone has a proper connection with the Discovery and has
enough storage space available for the backup file.
5.11.10
Copy a Backup file from a PC to the Smartphone
1.
2.
3.
4.
5.12
Connect the smartphone to a usb port of the PC. Use the data cable
of the smartphone to connect.
Use the PC to browse to the location of the backup file (.bkp).
Copy the backup file from the PC.
Paste the backup file to the Lely backup folder on the smartphone.
Start or Stop Timed Actions
Remote Operation of the smartphone or tablet by remote desktop
software (such as, but not limited by, Teamviewer) is strictly forbidden
to avoid dangerous situations.
1.
Open (page 5‑2) the Lely Control app on the smartphone
2.
In the main menu of the Lely Control app, select 'Work' and push
5.4006.8501.0 - Lely Control
[
].
If the pane on the upper side of the menu, that displays the actual time, is
grayed out, the timed actions are ON.
3.
4.
Push [START/STOP]. Or
Push the pause button on the Discovery to start/stop the timed actions
of the Discovery.
Figure 32. Start or stop timed actions
5.13
Start, Stop or Pause a Manual Route
Remote Operation of the smartphone or tablet by remote desktop
software (such as, but not limited by, Teamviewer) is strictly forbidden
to avoid dangerous situations.
Operating Instructions
5-25
To start a manual route:
1.
2.
Stop all timed actions (page 5‑25).
In the main menu of the Lely Control app, select 'Work' and push
[
].
3.
Push [
] to select the menu 'Manual route'.
4.
Push [
] to select the series of routes (A, B, C or D).
5.
6.
Push [START/STOP].
If you want to switch ON the time path after the manual route, push
soft button [Yes],
Else push soft button [No].
To pause or stop a manual route:
Push [START/STOP] or the pause button on the Discovery.
If you want to:
•
•
•
3.
Stop the route immediately, push soft button [Yes].
Resume the route, push soft button [No] or the pause button on the
Discovery.
Pause,
1.
Push soft button [Pause].
2.
Push button [
pause.
] to select the number of minutes you want to
Push soft button [OK].
Figure 33. Start a manual route
5-26
Operating Instructions
5.4006.8501.0 - Lely Control
1.
2.
5.14
Block a Route
1.
2.
Stop all timed actions (page 5‑25).
In the main menu of the Lely Control app, select 'Routes' and push
[
].
3.
Select 'Blockage route' and push [
].
4.
Push [
5.
Push [
] to block the route (value 1) and push [ESC] to confirm and
go one level up.
] to select the route that you want to block and push [
].
Blocking a route has no effect on Manual Route (page 5‑25).
5.15
Set the Speed for a Route
1.
Stop all timed actions (page 5‑25).
2.
In the main menu of the Lely Control app, select 'Routes' and push
5.4006.8501.0 - Lely Control
[
5.16
].
3.
Select 'Speed route' and push [
4.
Select the route that you want to change and push [
5.
6.
Push [
] or [
].
].
] to modify the speed.
Push [ESC] to confirm and go one level up.
Set the Speed for a Particular Action
1.
Stop all timed actions (page 5‑25).
2.
In the main menu of the Lely Control app, select 'Routes' and push
[
Operating Instructions
].
3.
Select 'Speed action' and push [
4.
Select the route that you want to change and push [
5.
Select the action that you want to change and push [
6.
7.
8.
9.
Push [
] or [
].
].
].
] to select the speed for that particular action.
Push [ESC] twice to confirm and go two levels up.
Push [Yes] to save the modification.
Push [ESC] to confirm and go one level up.
5-27
5.4006.8501.0 - Lely Control
INTENTIONALLY BLANK
5-28
Operating Instructions
6.
6.1
MAINTENANCE
Introduction
This chapter contains the preventive maintenance schedule and the
applicable preventive maintenance procedures for the Discovery. It also
contains some basic corrective maintenance procedures.
6.2
Preventive Maintenance Schedule
The following table shows the preventive maintenance schedule for the
Discovery. Preventive maintenance must obey local regulations, if
applicable.
The frequencies of the tasks shown in the table are the minimum
frequencies recommended.
5.4006.8501.0 - Lely Control
Maintenance Tasks
Frequencies
Operating
Weeks
Operating
Months
Note
Check the drive chains and tighten if
necessary (page 6‑8)
1
Tighten new chains again after 2
days
Check the battery is charging (page 7‑
4)
1
Clean the ultrasonic sensor (page 6‑
5)
1
Replace the manure scraper (page 6‑
9)
3-6
Clean the charging strips (page 6‑
2)
1
Clean the charging electrodes on the
charing station (page 6‑2)
1
Clean the water filter (page 6‑3)
2
Clean the nozzle filters (page 6‑4)
2
Read the report list and perform any
indicated maintenance
procedure (page 8‑9)
2
6.3
Replace if broken or cleaning
insufficient
Maintenance Procedures
Block the cow traffic to the Discovery before you do this procedure.
Maintenance
6-1
Danger of being entangled by rotating parts.
Keep hands, loose clothing, and long hair away from moving parts
during operation of the Discovery.
6.3.1
Clean the Charging Strips and the Charging Electrodes
Make sure that after cleaning the charging electrodes slide over the
middle of the charging strips when the Discovery parks.
Preparation
1.
2.
Disconnect the main power supply to the charging station.
Manually drive the Discovery to a clean and quiet location (page 5‑3).
3.
Switch OFF the Discovery (page 5‑1).
Clean
2.
Thoroughly clean the charging strips (1,2) of the Discovery with sand
paper or a steel brush.
Thoroughly clean both electrodes of the charging station (3) with sand
paper.
Close-up
1.
2.
Connect the charging station to the main power supply.
Switch ON the Discovery (page 5‑1).
During the calibration process you must not move the Discovery.
3.
4.
5.
6.
7.
6-2
Push soft button [Yes] to start the gyroscope calibration process.
Wait until a beep is heard (about 10 minutes) to confirm that the
calibration is complete.
Manually drive the Discovery to the charging station.
Examine the charging electrodes slide over the middle of the charging
strips when you park the Discovery.
Start the timed actions (page 5‑25).
Maintenance
5.4006.8501.0 - Lely Control
1.
5.4006.8501.0 - Lely Control
Figure 34. Clean the charging strips and the charging electrodes
6.3.2
Clean the Water Filter
Make sure to reinstall the water filter properly after cleaning to avoid water
damage.
Preparation
1.
2.
Manually drive the Discovery to a clean and quiet location (page 5‑3).
Remove the upper cover.
Clean
1.
2.
3.
4.
5.
Maintenance
Turn the cap (1) counter clockwise to remove it from the filter housing.
Remove the filter (2) from the filter housing.
Clean the filter and the cap.
Install the filter in the filter housing.
Install the cap on the filter housing.
6-3
Close-up
Install the upper cover.
Manually drive the Discovery to the charging station (page 5‑4).
Start the timed actions (page 5‑25).
5.4006.8501.0 - Lely Control
1.
2.
3.
Figure 35. Clean the water filter
6.3.3
Clean the Nozzle Filters
Preparation
1.
2.
3.
Manually drive the Discovery to a clean and quiet location (page 5‑3).
Remove the cover.
Put the Discovery on its rear.
Clean
1.
2.
3.
4.
5.
6.
6-4
Clean the sensing wheel and the manure scraper (page 6‑6).
Put the Discovery on its rear.
Remove the nozzle (3) from its base with a spanner.
Clean the filter (2) and the nozzle.
Install the nozzle on its base.
Repeat the cleaning procedure for the other nozzle.
Maintenance
Close-up
Put the Discovery on the floor.
Install the cover.
Manually drive the Discovery to the charging station (page 5‑4).
Start the timed actions (page 5‑25).
5.4006.8501.0 - Lely Control
1.
2.
3.
4.
Figure 36. Clean the nozzle filters
6.3.4
Clean the Ultrasonic Sensor
Inspect the black foam ring on the ultrasonic sensor after cleaning. Replace
the foam ring if it is damaged.
Preparation
1.
Manually drive the Discovery to a clean and quiet location (page 5‑3).
Clean
Do not use sharp objects to clean the ultrasonic sensor.
1.
Maintenance
Clean the ultrasonic sensor with a tissue via the ultrasonic sensor
opening.
6-5
Close-up
1.
2.
6.3.5
Manually drive the Discovery to the charging station (page 5‑4).
Start the timed actions (page 5‑25).
Clean the Sensing Wheel
Preparation
1.
Manually drive the Discovery to a clean and quiet location (page 5‑3).
Clean
1.
2.
3.
4.
Put the vehicle on its rear.
Use a brush to remove the dirt between the sensing wheel and the
chassis.
Make sure the sensing wheel can turn freely.
Put the vehicle on its wheels.
Close-up
6.3.6
Manually drive the Discovery to the charging station (page 5‑4).
Start the timed actions (page 5‑25).
Clean the Manure Scraper
Preparation
1.
Manually drive the Discovery to a clean and quiet location (page 5‑3).
Clean
To prevent damage of the electronics, do not clean the manure scraper with
a high pressure cleaner!
1.
2.
Put the Discovery on its rear to access the manure scraper.
Clean the manure scraper with water and a brush (page 6‑7).
Close-up
1.
2.
3.
6-6
Clean the ultrasonic sensor (page 6‑5).
Manually drive the Discovery to the charging station (page 5‑4).
Start the timed actions (page 5‑25).
Maintenance
5.4006.8501.0 - Lely Control
1.
2.
5.4006.8501.0 - Lely Control
Figure 37. Do not clean the manure scraper with a high pressure cleaner
Figure 38. Clean the manure scraper with water and a brush
6.3.7
Clean the Covers
Preparation
1.
Manually drive the Discovery to a clean and quiet location (page 5‑3).
2.
Remove the upper cover and store it in a safe place.
Clean
Do not spray water on the vehicle.
1.
Clean the cover with water and a brush.
Close-up
1.
2.
3.
Maintenance
Install the upper cover.
Manually drive the Discovery to the charging station (page 5‑4).
Start the timed actions (page 5‑25).
6-7
6.3.8
Tighten a Chain - short procedure
Danger of being entangled by rotating parts.
Keep hands, loose clothing and long hair away from moving parts
during operation of the Discovery.
When a chain must be tightened for the third time, the extensive procedure
must be done to prevent wearing of the chain's bearing points. Only a Lely
certified technician is allowed to do the extensive procedure.
When it is unknown how many times a chain has been tightened, the
extensive procedure must be done to prevent wearing of the chain's bearing
points. Only a Lely certified technician is allowed to do the extensive
procedure.
Preparation
Manually drive the Discovery to a clean and quiet location (page 5‑3).
Switch off (page 5‑1) the Discovery.
Tighten a chain
1.
2.
3.
4.
5.
Loosen the two bolts above the wheel (page 6‑9) (1, 2). Do not
remove the two bolts.
Put a ring spanner on the bolt in the slot (2).
Pull up the ring spanner to tighten the chain (2).
Tighten the bolt in the slot (2).
Tighten the other bolt (1).
Close-up
1.
2.
Switch on (page 5‑1) the Discovery.
Open the Lely Control app on the smartphone.
3.
Push [
]
During the calibration process you must not move the Discovery.
4.
5.
Push soft button [Yes] to start the gyroscope calibration process.
Wait until a beep is heard (about 5 minutes) to confirm that the
calibration is complete.
6.
Manually drive the Discovery to the charging station (page 5‑4).
Start the timed actions (page 5‑25).
7.
6-8
Maintenance
5.4006.8501.0 - Lely Control
1.
2.
5.4006.8501.0 - Lely Control
Figure 39. Tighten a chain - short procedure
6.3.9
Replace the Manure Scraper
Danger of being entangled by rotating parts.
Keep hands, loose clothing and long hair away from moving parts
during operation of the Discovery.
Preparation
1.
2.
Manually drive the Discovery to a clean and quiet location (page 5‑3).
Switch off (page 5‑1) the Discovery.
Removal
1.
Maintenance
Lift the front of the Discovery and put the vehicle on its rear.
6-9
Make sure not to lose the bushing located inside the fixation plate and the
bolts, washers and nuts through the openings of the slatted floor.
2.
3.
4.
5.
6.
7.
Release the bolt (page 6‑11) (1) that attaches the sliding disk (2)
and the top of the fixation plate of the scraper (9) to the nose of the
Discovery.
Remove the sliding disk (2).
Remove the fixation plate (11) with the old manure scraper (4).
Clean the manure scraper.
Remove the ten bolts, nuts and washers (6,7,8) that attach the
clamping strip (5) and the manure scraper (4) to the fixation plate (11).
Remove the clamping strip (5) and the manure scraper (4).
1.
2.
3.
4.
5.
6.
7.
Loosely install the new manure scraper (4) between the fixation plate
(11) and the clamping strip (5) with the ten bolts, washers and nuts
(6,7,8).
Put the fixation plate (11) with the manure scraper (4) on a flat
surface.
Make sure the manure scraper (4) is installed equally divided between
the fixation plate (11) and the clamping strip (5).
Tighten all nuts (6).
Put the bushing (10) back inside the top of the fixation plate (9).
Install the sliding disk (2) and the fixation plate (11) with the manure
scraper (4) on the nose with the bolt (1) and the self locking nut (3).
Make sure the self locking nut still locks. If not, install a new nut.
Close-up
1.
2.
3.
Put the Discovery back onto its wheels.
Switch on (page 5‑1) the Discovery.
Open the Lely Control app on the smartphone.
4.
Push [
]
During the calibration process you must not move the Discovery.
5.
6.
Push soft button [Yes] to start the gyroscope calibration process.
Wait until a beep is heard (about 5 minutes) to confirm that the
calibration is complete.
7.
Manually drive the Discovery to the charging station (page 5‑4).
Start the timed actions (page 5‑25).
8.
6-10
Maintenance
5.4006.8501.0 - Lely Control
Installation
5.4006.8501.0 - Lely Control
Figure 40. Replace the manure scraper
6.3.10
Replace the Sliding Disc
Preparation
1.
Manually drive the Discovery to a clean and quiet location (page 5‑3).
2.
Switch off (page 5‑1) the Discovery.
Removal
3.
Lift the front of the Discovery and put the vehicle on its rear.
Make sure not to lose the bushing located inside the fixation plate ,the bolt
and nut through the openings of the slatted floor.
4.
5.
6.
Release the bolt (2) that attaches the sliding disk and the fixation plate
(3) of the scraper to the nose of the Discovery.
Remove the sliding disk (1).
Remove the fixation plate (3) with the manure scraper.
Installation
7.
Maintenance
Install the fixation plate (3) and the new sliding disk (1) with the bolt
(2), the bushing and the nut.
6-11
Close-up
8.
9.
10.
Put the Discovery back on its wheels.
Switch on (page 5‑1) the Discovery.
Open the Lely Control app on the smartphone.
11.
Push [
]
During the calibration process you must not move the Discovery.
12.
13.
Push soft button [Yes] to start the gyroscope calibration process.
Wait until a beep is heard (about 5 minutes) to confirm that the
calibration is complete.
14.
Manually drive the Discovery to the charging station (page 5‑4).
Start the timed actions (page 5‑25).
5.4006.8501.0 - Lely Control
15.
Figure 41. Replace the sliding disk
6-12
Maintenance
7.
7.1
TEST AND ADJUSTMENT
Introduction
This chapter contains the test- and adjustment procedures for the Discovery
Mobile Barn Cleaner 90 SW.
Several options shown on the display of the user interface are not relevant
for standard test and adjustment procedures, but may be useful for
troubleshooting by your service provider.
7.2
Settings
7.2.1
Set the Real-Time Clock
1.
2.
Open (page 5‑2) the Lely Control app on the smartphone
In the main menu of the Lely Control app, select 'Settings' and push
5.4006.8501.0 - Lely Control
button [
].
3.
Select 'RealTime clock' and push button [
4.
Push soft button [
].
] to select a menu item (page 4‑24).
The real-time clock has a 24 hour format. For instance 7:00 is not the same
as 19:00.
5.
6.
7.2.2
Push [
] or [
] to increase or decrease the value of the selected
option.
Push button [ESC] to confirm and go to the previous menu.
Set the Display Language
1.
2.
Open (page 5‑2) the Lely Control app on the smartphone
In the main menu of the Lely Control app, select 'Settings' and push
button [
Test and Adjustment
].
3.
Select 'Language' and push button [
4.
5.
Push [
] or [
].
] to select the display language.
Push button [ESC] to confirm and go to the previous menu.
7-1
Set the Motor Power
1.
2.
Open (page 5‑2) the Lely Control app on the smartphone
In the main menu of the Lely Control app, select 'Settings' and push
button [
7.2.4
].
3.
Select 'Motor power' and push [
4.
Push [
5.
Push button [ESC] to confirm and go to the previous menu.
] or [
].
] to modify the power.
Modify the Beep Frequency for a Route
1.
2.
Open (page 5‑2) the Lely Control app on the smartphone
In the main menu of the Lely Control app, select 'Routes' and push
[
].
3.
Select 'Beepfreq route' and push [
4.
Select the route you want to modify and push [
5.
Push [
] or [
].
].
] to modify the number of beeps per second.
The standard value 0.5 equals one beep per two seconds.
6.
7.2.5
Push [ESC] to confirm and go one level up.
Modify the Beep Length
1.
Open (page 5‑2) the Lely Control app on the smartphone
2.
In the main menu of the Lely Control app, select 'Settings' and push
3.
button [
].
Select 'Beep length'.
4.
Push button [
] or button [
] to modify the length (page 4‑24).
The standard value is 200 mSec.
5.
7.2.6
Push button [ESC] to confirm and go to the previous menu.
Set the Water Fill Settings
1.
Open (page 5‑2) the Lely Control app on the smartphone
2.
In the main menu of the Lely Control app, select 'Settings' and push
button [
3.
].
Select 'Fill water' and push [
].
To set the push power
7-2
1.
Select 'Push power'.
2.
Push [
] or [
] to modify the drive motor current (page 4‑25).
Test and Adjustment
5.4006.8501.0 - Lely Control
7.2.3
To set the water pump power
1.
Select 'Pump current'.
2.
Push [
] or [
] to modify the water pump current (page 4‑25).
To set the water fill function 'On' or 'Off'
1.
2.
Select 'Water in use'.
Select 'On' or 'Off' (page 4‑25).
Close-up
1.
Push button [ESC] to confirm and go to the previous menu.
7.3
Tests
7.3.1
Analyse the Reliability of a Route
1.
2.
Open (page 5‑2) the Lely Control app on the smartphone
Stop all timed actions (page 5‑25).
3.
In the main menu of the Lely Control app, select 'Routes' and push
5.4006.8501.0 - Lely Control
[
].
To Analyse the Reliability per Route
1.
Select 'Route analysis' and push [
2.
Select 'Fail. problty' and push [
Push [
1.
].
] or [ESC] to display routes that are not displayed
If a route has a failure probability of more than 2 (page 4‑20),
1.
2.
].
Make a note of the route number.
Push [ESC] to go one level up.
Because a route can not been modified, you have to delete an unreliable
route and to make a new one. Before doing so it is good to figure out what is
wrong.
To Analyse the Cause of an Unreliable Route
1.
Select 'Failure analys' and push [
2.
3.
Select the noted route number and push [
4.
Push [
] and make a note of the fault categories (F-H) that have an
(action) number and note the numbers.
Make a note of the percentage bump points (page 4‑20).
5.
Test and Adjustment
].
].
Make a note of the fault categories (A-E) that have an (action) number
and note the numbers (page 4‑20).
7-3
6.
Make a note of the percentage short routes (page 4‑20).
7.
Push [
] and look up the explanation of the noted fault categories
(A-H).
Make sure you understand the explanation of the noted fault
categories.
Make a test route and find out where the notes risky action numbers
appear (page 7‑4).
8.
9.
Delete the route.
Make a new route (page 4‑13).
1.
2.
3.
Put the route into a manual route.
Start the manual route (page 5‑25).
Find the actions and action numbers on the display of the user
interface of the Lely Control app.
Make sure the route is correct.
Test a Route
4.
7.3.3
Make sure the Battery is Loaded
1.
2.
Stop all timed actions (page 5‑25).
In the main menu of the Lely Control app, select 'Work' and push
3.
4.
[
].
Make sure the battery voltage is more than 12500 mV.
If the voltage is less then 12500 mV:
1.
2.
5.
Manually drive the Discovery to the charging station (page 5‑4).
Make sure the battery is charging (page 7‑4).
Charge the battery for one hour.
Figure 42. Battery voltage
7.3.4
Make sure the Battery is Charging
1.
2.
3.
4.
5.
6.
7-4
Make sure the Discovery is connected to the charging station.
Stop all timed actions (page 5‑25).
In the main menu of the Lely Control app, select 'Work' and push
[
]. (three times).
Make sure the menu MANUAL CHARGER is displayed.
Make sure the charging current is more than 1.0 A.
If the charging current is less than 1.0 A, make sure the orange LED
on the charging station is ON (page 4‑8).
Test and Adjustment
5.4006.8501.0 - Lely Control
7.3.2
10.
11.
7.
8.
9.
10.
11.
If not, make sure the main power is connected to the battery charger.
If the Discovery is still not charging, make sure the electrodes are
connected to the battery charger.
If the Discovery is still not charging, clean the charging strips and the
electrodes (page 6‑2).
If the Discovery is still not charging, make sure all power connection
are connected properly.
If the Discovery is still not charging, call the local service provider.
Figure 43. Charging current
7.3.5
Make sure the Bluetooth Connection is Reliable
5.4006.8501.0 - Lely Control
1.
2.
3.
4.
5.
Start the Lely Control app on the smartphone.
Connect the smartphone to the Discovery.
Push the button 'Settings' at the bottom of the smartphone display.
Select 'Signal Strength'.
Examine the value of the signal of the Discovery.
•
•
•
7.3.6
0 = very good
-20 - -25 = poor
< -25 = very bad
Test the Ultrasonic Sensor
Test
1.
2.
Manually drive the Discovery to a location more than 6 m (6.6 yrd)
from a wall.
Make sure no object is between the ultrasonic sensor and the wall.
3.
In the main menu of the Lely Control app select 'Test'and push [
4.
5.
Select 'Ultrasound' and push [
6.
Test and Adjustment
].
].
If the ultrasonic sensor is on the left, push soft button [L], else push
[R].
Make sure the Discovery is between you and the wall.
7-5
Make sure not to interrupt the sensing beam while turning the wheel.
7.
8.
9.
10.
11.
12.
Monitor the display of the user interface while you turn the sensing
wheel.
Make sure the 'Puls 1',' Puls 2', 'Puls 3' and 'Filter' values are 0, when
the wheel is rotating.
If the values are not 0, clean the ultrasonic sensor with a tissue.
Repeat the steps 7 and 8.
If the values are not 0, call your local Lely service provider.
If the puls and filter values are 0,
1.
2.
Put an object exactly 1 m. (1.1 yrd) from the ultrasonic sensor.
Make sure the Puls 1 and Filter show 1000 (mm).
Else call your local service provider.
Close-up
Manually drive the Discovery to the charging station (page 5‑4).
Start the timed actions (page 5‑25).
5.4006.8501.0 - Lely Control
1.
2.
Figure 44. Test the ultrasonic sensor
7-6
Test and Adjustment
8.
8.1
TROUBLESHOOTING
Introduction
This chapter contains the troubleshooting procedures for the Discovery.
•
•
•
8.2
Alarms and reports
Troubleshooting table
Recovery procedures.
Alarms and Reports
The Discovery Mobile Barn Cleaner 90 SW monitors itself continuously. As
soon as it detects an error it generates a message, the system also
generates and displays reports with important information:
5.4006.8501.0 - Lely Control
•
•
A critical alarm message: 3 beeps sound and the Discovery stops
functioning. The user interface on the smartphone displays the message
"ALARM" with a description (page 8‑1). The error requires an error
recovery procedure.
A non-critical report is recorded in the report list, the Discovery continues
functioning (page 8‑9).
The system also displays information about the operation of the
Discovery (page 8‑11).
8.2.1
Recover alarms
When the Discovery is in normal operation and a critical alarm occurs:
•
•
•
An alarm message is displayed on the smartphone.
The LED in the pause button on the Discovery blinks.
An alarm sounds.
To recover the critical alarm:
1.
8.2.2
Push any key on the smartphone to accept the alarm. The alarm
sound stops. The LED in the pause button still blinks.
Read Non-Critical Alarm Messages
1.
2.
3.
Open (page 5‑2) the Lely Control app on the smartphone
Stop all timed actions (page 5‑25).
In the main menu of the Lely Control app, select 'Alarms' and push
[
4.
Troubleshooting
].
Push [
] to select the menu 'Alarm List'.
8-1
The display displays the number, the date and time when the alarm occured
and the alarm number, see the following example:
No.
Date
Time
Alarm
1
4-1
22:17
7
2
4-1
21:33
10
Select an alarm in the list and push [
extra information.
5.
Note the alarm number and refer to the alarm list (page 8‑1).
6.
Do the recovery procedure described in the alarm list.
1.
2.
Open (page 5‑2) the Lely Control app on the smartphone
Stop all timed actions (page 5‑25).
3.
In the main menu of the Lely Control app, select 'Alarms' and push
Read a Report
[
4.
].
Select 'Report list' and push [
].
The display displays the number, the date and time the report was recorded
and the report number, like in the following example:
No.
Date
Time
Rep
1
4-1
20:10
6
2
4-1
21:31
15
Select a report in the list and push [
extra information.
5.
6.
8.2.4
] to open the report message for
Note the report number and look it up in the report list (page 8‑9).
Do the indicated procedure.
Alarm List
The table below gives the alarm numbers and any actions to be taken:
8-2
Troubleshooting
5.4006.8501.0 - Lely Control
8.2.3
] to open the alarm message for
5.4006.8501.0 - Lely Control
Alarm Alarm message
code
Description / cause
Recovery procedure
1
EMPTY_BATTERY •
"Battery power too
low to start route,
charge first! "
•
Check charge strip •
for dirt
Bad contact with battery
1.
charger due to dirt and/or
corrosion.
2.
Loose connections.
Before the start of a route the 3.
level is too low.
4.
Clean the charging strips and the
charging electrodes (page 6‑2).
Manually drive the Discovery to the
charging station (page 5‑4).
Make sure the battery is
charging (page 7‑4).
If the Discovery is still not charging, call
your local service provider.
2
DOUBLE_ACTION
•
Software failure.
1.
Call your local Lely service provider.
3
DIS_OFF_RANGE
Discovery lost ->
searching bump
point
Slip: reduce
- wall bump force
- motor power
•
No bump point found.
1.
2.
3.
Calibrate the gyroscope (page 8‑15).
Test the route (page 7‑4).
If the problem remains:
1.
2.
Do a route analysis (page 7‑3).
Modify the routes that are unreliable.
TURN BLOCK
Discovery can not
take the turn!
•
4
1.
2.
•
5
NO TIME
No active time!
6
BLOCKAGE_DISC . •
Discovery blocked!! •
•
Mechanical problem, worn
1.
parts, dirt causing resistance. 2.
Vehicle has not turned far
enough.
3.
4.
Make sure there are no obstacles.
Make sure the sliding disc is not worn
out, replace if necessary.
Make sure the manure scraper is not
worn out, replace if
necessary (page 6‑9).
If the problem remains:
1.
2.
Do a route analysis (page 7‑3).
Modify the routes that are unreliable.
Time path is empty
1.
Set the time path and try again.
Obstacle.
Gyroscope inaccurate.
1.
2.
3.
Make sure there are no obstacles.
Try to run the route again.
If the discovery is blocked on the
same. place:
1.
2.
Do a route analysis (page 7‑3).
Modify the routes that are unreliable.
1.
Troubleshooting
Test the route (page 7‑4).
If the problem remains, call your
local Lely service provider.
If the discovery is blocked at a
different place, calibrate the
gyroscope (page 8‑15).
8-3
7
Description / cause
DISCOV_LOST
•
Discovery deviates
from correct directn!
Slip: reduce
- wall bump force
- motor power
Recovery procedure
While turning, the vehicle did 1.
not reach the programmed
2.
position and not even after
3.
retrying.
4.
5.
6.
1.
2.
Make sure there are no obstacles.
Calibrate the gyroscope (page 8‑15).
Test the ultrasonic sensor (page 7‑5).
Test the motors.
Start the timed actions.
If the problem remains:
Do a route analysis (page 7‑3).
Modify the routes that are unreliable.
1.
8
TURN ERROR
•
Discovery turns
more than 360 deg!
- Check gyroscope
- Calibrate via menu
Settings
More than 360 degree turn.
9
LOADING
•
No charging current!
Check charge strips
for dirt
Discovery does not reach the 1.
charging station.
2.
1.
3.
4.
5.
If the problem remains, call your
local Lely service provider.
Calibrate the gyroscope (page 8‑15).
Make sure there are no obstacles.
Clean the charging strips and the
charging electrodes (page 6‑2).
Manually drive the Discovery to the
charging station (page 5‑4).
Make sure the battery is
charging (page 7‑4).
If the Discovery is still not charging, call
your local service provider.
10
STARTUP
11
ROUTE-MEMORY •
Route memory is
full. First delete one
route!!
Route memory has reached
the maximum of 16 different
routes.
1.
Delete a route prior to programming a
new one.
12
NO_ULTRASIGN
No ultrasound
signal:
- dirt on sensor
- dirt sensing wheel
- no object
Dirt on the ultrasonic sensor.
Dirt on sensing wheel.
No object within reach of the
sensor.
Sensor broken.
1.
2.
3.
Clean the ultrasonic sensor (page 6‑5).
Clean the sensing wheel.
Test the ultrasonic sensor (page 7‑5).
8-4
Alarm appears with every startup of the
Discovery. For information only.
•
•
•
•
Troubleshooting
5.4006.8501.0 - Lely Control
Alarm Alarm message
code
Alarm Alarm message
code
Description / cause
13
•
BENDSKIDDING
Discovery skid in
the turn!
Recovery procedure
Although the motors did run, 1.
de gyroscope did not observe 2.
any rotation, not even after
retrying.
3.
5.4006.8501.0 - Lely Control
4.
5.
Make sure the floor is not slippery.
Make sure the wheels are not worn
out. If so, call your local service
provider.
Make sure the manure scraper is not
worn out, replace if
necessary (page 6‑9).
Test the route (page 7‑5).
If the problem remains, call your local
Lely service provider.
14
EXTRA CHARGE1
Voltage is too low, the Discovery recharges
for an extra hour. For information only.
15
EXTRA CHARGE2
More than 20Ah used. For information only.
16
EXTRA READY1
Recharging is complete. For information
only.
17
EXTRA READY2
Recharging is complete. For information
only.
18
CHARG TIMEOUT •
Timeout charger:
battery not charging!
Check charge LEDs
on charger and
clean charge strips
Battery not full despite
charging.
1.
2.
3.
4.
Clean the charging strips and the
charging electrodes (page 6‑2).
Manually drive the Discovery to the
charging station (page 5‑4).
Make sure the battery is
charging (page 7‑4).
If the problem remains, call your local
Lely service provider.
19
DOUBLE TIME
Similar points in
time exist!
1.
Correct the start and end times in the
time path.
20
BATTVOLT LOW
Battery power too
low to start route!
Drive Discovery to
charger or clean
charge strips!
1.
Clean the charging strips and the
charging electrodes (page 6‑2).
Manually drive the Discovery to the
charging station (page 5‑4).
2.
3.
4.
Troubleshooting
Make sure the battery is
charging (page 7‑4).
If the problem remains, call your local
Lely service provider.
8-5
SKIDDING. WFL
•
Skidding (the angle calculated 1.
from wheel distance and
2.
angle from gyro differ) during
straight, wallfollow or
3.
ultrasonic actions.
4.
22
SKIDDING_STOP
•
The Discovery stopped
because alarm 13 was
generated multiple times.
1.
2.
3.
23
HEAVY DRIVE
Discovery drives
hard!!
•
Make sure the floor is not slippery.
Make sure the wheels are not worn
out, replace if necessary.
Make sure the manure scraper in not
worn out, replace if necessary.
Test the route.
Make sure the scraper is not worn or
damaged. Replace if
necessary (page 6‑9).
Manually run the route again.
If the problem remains, decrease the
motor power.
The Discovery has difficulties If the alarm is repeated more that 5 times
per week:
driving the route.
1. Make sure there are no obstacles.
2. Make sure the barn bedding has no
long hay.
3. If the problem remains:
1.
2.
Do a route analysis (page 7‑3).
Modify the routes that are unreliable.
24
FLASH-ERROR
1.
Call your local Lely service provider.
25
SHORT-CIR. 1L
1.
Call your local Lely service provider.
26
SHORT-CIR. 2R
1.
Call your local Lely service provider.
27
BACKUP ERROR
Error backup: Try
again!
•
•
•
•
29
NO_GYRO_START
30
M1 THERMISCH
•
Motor 1 thermic out
8-6
Smartphone is not connected. 1.
Software on the smartphone
is not correct.
2.
Smartphone is defect.
3.
Not enough storage space.
4.
5.
Current left motor too high,
probably due to dirt or worn
parts.
Make sure the smartphone is
connected via bluetooth.
Make sure to use the correct version of
the Lely Control app.
Free up storage space.
Try to make another backup.
If the problem remains, call your local
Lely service provider.
1.
Call your local Lely service provider.
1.
2.
Remove any dirt or obstacles.
Make sure there are no worn parts
(manure scraper, sliding disk).
Troubleshooting
5.4006.8501.0 - Lely Control
21
31
M2 THERMISCH
•
Motor 2 thermic out
Current right motor too high,
probably due to dirt or worn
parts
1.
2.
Remove any dirt or obstacles.
Make sure there are no worn parts
(manure scraper, sliding disk)
32
COOL DOWN
Discovery pauses to cool
down the motors.
1.
2.
Remove any dirt or obstacles.
Make sure there are no worn parts
(manure scraper, sliding disk).
If the alarm is repeated more than 5
times a week, call your local Lely
service provider.
•
3.
33
FULL CHARGING
•
Not enough charging time
1.
between routes. The
2.
Discovery must recharge fully
during nighttime.
Modify the routes.
Make sure the time period between the
routes is long enough to fully recharge
the battery.
35
BATT ERROR
•
Battery recharge failed, too
low charging current
Bad contact with battery
charger due to dirt and/or
corrosion.
Loose connections.
Clean the charging strips and the
charging electrodes.
Make sure the battery is
charging. (page 7‑4)
5.4006.8501.0 - Lely Control
•
•
37
GYROANGLEFACT
38
LOADING2
•
No charging current!
Check charge strips
for dirt
•
Bad contact with battery
charger due to dirt and/or
corrosion.
Loose connections
1.
2.
1.
Call your local Lely service provider.
1.
2.
3.
Clean the charging strips and the
charging electrodes (page 6‑2).
Make sure the battery is charging.
Charge the Discovery.
1.
Call your local Lely service provider.
39
GYRO_TEMP
41
COM_BATTCHAR2 •
Gyro calibration failed.
1.
Try again.
43
BATTERY_STOP
Discovery battery
runs down. Switch
off or charge
Discovery
More than 24 hours not
charged or started a route.
The Discovery stops and
beeps for 1 hour.
1.
2.
3.
Clean the charging strips and the
charging electrodes (page 6‑2).
Make sure the battery is charging
Charge the Discovery (page 8‑15).
•
•
44
BATT_FATAL_ER
1.
Call your local Lely service provider.
45
GYRO_TYPE
1.
Call your local Lely service provider.
47
GYRO_AUTOSTOP •
Automatic gyro recalibration
has been interrupted
1.
Recalibrate the gyroscope in settings
menu.
48
BATTERY_OFF
After 1 hour of alarm #43, the 1.
Discovery will power off to
protect the battery.
2.
3.
Troubleshooting
•
Clean the charging strips and the
charging electrodes (page 6‑2).
Make sure the battery is charging.
Charge the Discovery (page 8‑15).
8-7
50
BATTERY_CABLE
Loader error! Check
cable connections
1.
2.
Manually drive the Discovery to a
clean and quiet location (page 5‑3).
Make sure the charging wires are
connected correctly to the battery.
DIRECTION_DIS
Discovery not in
correct direction!
- obstacle
- gyro drifting
- bend in action
1.
2.
3.
4.
5.
Make sure there are no obstacles.
Calibrate the gyroscope (page 8‑15).
Test the ultrasonic sensor (page 7‑5).
Test the motors.
If the problem remains:
1.
2.
Do a route analysis (page 7‑3).
Modify the routes that are unreliable.
52
ULTRAS_CALIB
1.
Call your local Lely service provider.
53
CALIBR_I_PCB
1.
Call your local Lely service provider.
54
CLOCK ERROR
The 24 hours clock
is not correct
-> adjust the time!!
1.
Make sure the real-time clock is set in
the correct 24 hour format.
Make sure all start and end times in
the time path are entered in the correct
24 hour format.
•
Internal clock is not set.
2.
3.
Correct the clock or the start and end
times if necessary.
1.
Make a backup.
55
BACKUP ERROR2
56
SHORT-CIR. 34
1.
Call your local Lely service provider.
57
GYRO_SPI
1.
Call your local Lely service provider.
58
GYRO_I_INSTAB
1.
Call your local Lely service provider.
59
GYRO_TIMEOUT
1.
Call your local Lely service provider.
60
GYRO BIAS1
1.
Call your local Lely service provider.
61-64 GYRO BIAS2 - 5
1.
Call your local Lely service provider.
65
Gyroscope type
does not match
output signal!! Reset
PCB
1.
Switch off the Discovery and wait at
least 10 seconds.
Switch on the Discovery.
If the problem remains, call your local
Lely service provider.
Gyro heater current
is not 0!
1.
66
8-8
•
No backup on the
Smartphone
2.
3.
Call your local Lely service provider.
Troubleshooting
5.4006.8501.0 - Lely Control
49
5.4006.8501.0 - Lely Control
70
DIS_OFF_RANGE
Discovery lost ->
searching bump
point
Slip: reduce
- wall bump force
- motor power
•
No bump point detected after 1.
expected bump point.
Wait for the Discovery to correct itself.
73
NO_ULTRASIGN
•
No ultrasound
signal:
- dirt on sensor
- dirt sensing wheel
- no object
Appears when alarm 12 is not 1.
resolved
2.
3.
Clean the ultrasonic sensor (page 6‑5).
Clean the sensing wheel (page 6‑6).
Make sure an object is within 2.5 m
(8.2 ft).
Test the ultrasonic sensor (page 7‑5).
If there is still no signal, call your local
Lely service provider.
77
EXTRA CHARG3
•
Battery Discovery has
insufficient capacity to
complete the route
78
EXTRA READY3
•
Battery is charged enough to
start the route.
80
Emergency button
pushed
1.
Call your local Lely service provider.
84
Hardware safety
protection
1.
Call your local Lely service provider.
89
FPGA error
1.
Call your local Lely service provider.
90 - 98 Software 1-5
Software FAILURE
Call Lely!
1.
Call your local Lely service provider.
120
1.
Call your local Lely service provider.
8.2.5
4.
5.
Unexpectedly in
water filling station
(90SW)
Report List
The table below gives the report numbers and any actions to be taken:
Report code
Report
Description/Procedure
2
Left chain is slack. Check chain tension
1.
2.
3
4
Troubleshooting
Right chain is slack. Check chain
tension
Left tire has a smaller diameter. Route
less reliable!!
Make sure the chain can move 5 mm up and
down.
If not, tighten the chain (page 6‑8).
2.
Make sure the chain can move 5 mm up and
down.
If not, tighten the chain (page 6‑8).
1.
Call your local Lely service provider.
1.
8-9
Report code
Report
5
Right tire has a smaller diameter. Route 1.
less reliable!!
Call your local Lely service provider.
6
Drive distance increases Check skid.
Route less reliable!!
1.
2.
Make sure the floor is not slippery.
Make sure the Discovery does not skid.
7
Ultrasonic sensor gives too many reflec
Check startpulse
Clean ultrason sensor
Clean sensing wheel
1.
Clean the ultrasound sensor and the sensing
wheel (page 6‑5).
If the problem remains, call your local Lely
service provider.
Ultrasonic sensor gives too many reflec
Check startpulse
Clean ultrason sensor
Clean sensing wheel
1.
9
Left motor drives harder than the right
motor -> check the drive
1.
Call your local Lely service provider.
10
Right motor drives harder than the left
motor -> Check drive
1.
Call your local Lely service provider.
11
Low charging current!
-Clean chargingstrips
-Check charger
1.
Manually drive the Discovery to the charging
station (page 5‑4).
Clean the charging strips and the charging
electrodes (page 6‑2).
Make sure the battery is charging (page 7‑4).
2.
2.
2.
3.
Clean the ultrasound sensor and the sensing
wheel (page 6‑5).
If the problem remains, call your local Lely
service provider.
12
The charging current is too low, check
connection points and power
Refer to report 11.
13
Battery condition bad Install a new
battery
1.
14
Battery is overloaded too many times
Vehicle drives back 20 cm automatically to
See battery yield and check battery and protect the battery.
capacity
1. Call your local Lely service provider.
15
"Battery power too low to start route,
charge first! "
1.
2.
16
Battery power too low to start route!
Drive Discovery to charger or clean
charge strips!
1.
2.
Install a new battery (operator is NOT
allowed to open the PCB box).
Clean the charging strips and the charging
electrodes (page 6‑2).
Charge the Discovery (page 8‑15).
Clean the charging strips and the charging
electrodes (page 6‑2).
Charge the Discovery (page 8‑15).
17
Discovery is not finished with test route. 1.
Please switch on the route.
Call your local Lely service provider.
18
Battery condition deteriorates. Check
battery
1.
Call your local Lely service provider.
19
The current of the batt is low when the
Discovery drives
1.
Call your local Lely service provider.
8-10
Troubleshooting
5.4006.8501.0 - Lely Control
8
Description/Procedure
5.4006.8501.0 - Lely Control
Report code
Report
Description/Procedure
20
Bad signal of ultrasonic sensor->
clean:
- ultrasonic sensor
- sensing wheel
1.
Clean the ultrasonic sensor and the sensing
wheel (page 6‑5).
21
Route is not correct
- unreliable
- see route analysis
- see manual
1.
2.
Do a route analysis (page 7‑3).
Modify the routes that are unreliable.
34
Battery is charged The charge cyclus is
complete
For information only.
40
The factory route is complete.
For information only.
50 - 55
Battery is overloaded too many times
1.
See battery yield and check battery and
capacity
Call your local Lely service provider.
60
Ultrasonic sensor gives too many reflec
Check startpulse
Clean ultrason sensor
Clean sensing wheel
1.
Clean the ultrasonic sensor and the sensing
wheel (page 6‑5).
Test the ultrasonic sensor (page 7‑5).
If the problem remains, call your local Lely
service provider.
61
Bad signal of ultrasonic sensor->
clean:
- ultrasonic sensor
- sensing wheel
1.
Clean the ultrasonic sensor and the sensing
wheel (page 6‑5).
62
Gyroscope values deviate ->check drift!
1.
2.
Calibrate the gyroscope (page 8‑15).
If the problem remains:
1.
2.
Do a route analysis (page 7‑3).
Modify the routes that are unreliable.
8.2.6
2.
3.
Information Report List
The table below gives the reports that are not recorded and any actions to
be taken:
Description
Explanation
Timepath contains x % drive time
The Discovery must not drive more than 40% of the total time in a
time path. It must spend minimum 60% of the total time charging at
the charging station.
Not enough bump points in route: % At least 25% of the actions in a route must have a bump point. If not,
Low reliability of of the route!!
the route is less reliable.
Too many actions in one route. Not
possible to finish the route!!
The number of actions in the present route is more than the maximum
125. You must start again, break up the route in smaller parts.
You have the possibility to program
x actions in this route!!
Gives you the number of actions left in the present route until the
maximum 125 is reached.
Troubleshooting
8-11
ERROR: timepath contains % of the The Discovery must not drive more than 40% of the total time in a
drive time. Max 40%
time path. It must spend minimum 60% of the total time charging at
the charging station. Delete some routes from the time path
NOTE: bump points! Program as
much as possible bump points PRbutton==slowly
Discovery auto stop
For information only.
NOTE: Gyroscope! End actions
straight Alternate long action with
short action
For information only.
Is Discovery nose in the correct
direction?
Manually turn the vehicle in the correct direction with Manual
Drive (page 5‑3) if the direction is not correct.
ERROR: Distance correction on
exist routes -> check on skid during
drive
The control system has corrected the drive distance because the
expected bump point was not reached in time. This could be due to
skidding. Refer to Control System.
Direction ERROR
- Action with bends
- Gyroscope drifting
Route is not reliable!!
The driving direction is not reliable. This could be due to a drifting
gyroscope or to a programmed action that did not follow a straight
course. Refer to Failure Analysis (page 4‑20).
12 standard turns Switch between
the 4 screens with Enter and
Escape!
You can choose from 12 standard turns that are displayed on 4
screens. Push [
up.
] to open the next screen, or [ESC] to go one level
8.3
Troubleshooting Tables
8.3.1
Troubleshooting Table Discovery Vehicle
Symptom
Possible cause
Action
The smartphone does not
connect to the Discovery /
connection lost
The farmer password is not set on
the smartphone
Ask the Lely service provider for the
password, see install or update the
app (page 5‑1).
The smartphone is not paired with
the Discovery.
1.
2.
Make sure bluetooth of the
smartphone is switched on.
Examine in the bluetooth
settings of the smartphone if the
Discovery is paired. If not, try to
pair (PIN = '0000').
Refer to the user manual of the
smartphone.
8-12
The Discovery is switched OFF
Switch ON the Discovery (page 5‑1)
The distance between the
smartphone and the Discovery is
too big
Move the smartphone towards the
Discovery and try to
connect (page 5‑2)
Troubleshooting
5.4006.8501.0 - Lely Control
At start ultrasound action, Discovery Angle of more than 20 degrees between the start and the reset point.
was not pointing in the intended
This could be due to an angled start point. Refer to Failure
direction Route less reliable!!
Analysis (page 4‑20).
Symptom
Possible cause
Action
The vehicle does not move
Discovery is switched OFF
Switch ON the Discovery (page 5‑1)
Start the timed actions (page 5‑25)
The route is blocked
Remove the blockade
The battery is low
Drive the Discovery to the charging
station (page 5‑4)
Charge for one hour
The fuse is blown
Call your local Lely service provider.
The power supply is not connected
Connect the power supply
Other
Call your local Lely service provider.
The chains are not tightened
correctly
Tighten the chains (page 6‑8)
The wheel bearing is worn out
Call your local Lely service provider.
The gyroscope is drifting
Calibrate the gyroscope (page 8‑
15)
The ultrasonic sensor does not
function correctly
Clean the ultrasonic
sensor (page 6‑5)
Test the ultrasonic sensor (page 7‑5)
Other
Call your local Lely service provider.
The Discovery drives more
shaky than before
5.4006.8501.0 - Lely Control
Discovery swings
Discovery does not stop at the The charging strips or electrodes do Clean the electrodes and charging
charging station
not make contact
strips (page 6‑2)
No power supply
Make sure the charging station is
connected to the power supply.
Springs that hold the electrodes are Attach the springs properly
loose
The 'Go to the charger' action is not •
started within 1-3 meters from the
•
charger (page 5‑21)
•
Modify the route
Delete the route
Setup a new route
The battery charger is out of
Remove any dirt.
operation and gives an alarm signal Disconnect the mains for 30 s and
connect again.
Discovery does not stop at a
bump point
Discovery does not fill water
Troubleshooting
Floor is less slippery than before
Adjust the motor power to a lower
level
Other
Call your local Lely service provider.
Bad route
Modify the route
Water filling function switched Off
Switch On the water filling
function (page 5‑4)
Water supply disrupted
Make sure the water filling station
supplies water when you push
against the water outlet. If the water
filling station does not supply water:
Call your local Lely service provider.
8-13
Symptom
Possible cause
Action
The backup process of the
routes does not function
The software version of the
smartphone is not correct.
Make sure software version on the
smartphone is correct. If the version
is not correct update the smartphone
software.
Discovery is not starting a
route
The time path is not correct
Make sure the time path is correct
The battery is low or not charged
Drive the Discovery to the charging
station (page 5‑4)
The route is blocked
Unblock the route
No route is programmed
Program a short test route and try
again
Other
Call your local Lely service provider.
Symptom
Troubleshooting Table Discovery Charging Station
Possible cause
Action
Green and Yellow LED
Battery loader defect
together blink 2 times, followed
by a few seconds rest
Call your local Lely service provider.
Green and Yellow LED
Temperature lower than - 15
together blink 4 times, followed degrees C (5 degrees F)
by a few seconds rest
Battery loader defect
Warm the barn and try again.
Green and Yellow LED
Internal temperature is higher than
together blink 5 times, followed 85 degrees C (185 degrees F)
by a few seconds rest
Remove plug from the mains.
Connect plug and retry after one
hour.
Green and Yellow LED
Current too high (>20 A).
together blink 7 times, followed
by a few seconds rest
Remove short-circuit, else:
Call your local Lely service provider.
8.4
Recovery Procedures
8.4.1
Reset the Control System
1.
2.
3.
4.
5.
6.
7.
8.
8-14
Call your local Lely service provider.
Open (page 5‑2) the Lely Control app on the smartphone
Manually drive the Discovery away from the charging
station (page 5‑3).
Remove the upper cover.
Remove the lower cover.
On the PCB box, push button OFF .
On the PCB box, push button ON .
Calibrate the gyroscope.
Manually drive the Discovery to the charging station (page 5‑3).
Troubleshooting
5.4006.8501.0 - Lely Control
8.3.2
8.4.2
Calibrate the Gyroscope
1.
2.
Open (page 5‑2) the Lely Control app on the smartphone
Stop all timed actions (page 5‑25).
3.
4.
5.
Select 'Settings' and push [
].
Select 'Gyroscope'.
The message 'SAFETY WARNING. Manual operation is permitted
only with a clear overview of the vehicle. Confirm?' appears on the
smartphone display. Confirm if you have a clear overview of the
Discovery.
Do not move the Discovery.
6.
8.4.3
Push soft button [Yes] and wait until you hear a beep sound
(approximately 5 minutes).
Charge the Discovery
5.4006.8501.0 - Lely Control
1.
2.
3.
Troubleshooting
Manually drive the Discovery to the charging station (page 5‑4).
Make sure the Discovery is charging (orange and green LEDs are
ON (page 4‑8)).
Let the Discovery be charged for one hour minimum.
8-15
5.4006.8501.0 - Lely Control
INTENTIONALLY BLANK
8-16
Troubleshooting
DIAGRAMS
5.4006.8501.0 - Lely Control
9.
KEY:
A. 1650 - 2050 mm (65.0 - 80.7 in.) - B. 380 mm (15.0 in.) - C. 220 mm (8.7 in.)
Diagrams
9-1
5.4006.8501.0 - Lely Control
KEY:
A. 860 mm (33.86 in.) - B 1362 mm (53.6 in.) - C. 102 mm (4.02 in.) - D. 575 mm (22.64 in.)
- E. 860 mm (33.9 in.)
9-2
Diagrams
5.4006.8501.0 - Lely Control
Figure 45. Dimensions water filling station
Diagrams
9-3
5.4006.8501.0 - Lely Control
INTENTIONALLY BLANK
9-4
Diagrams
GLOSSARY OF TERMS
PCB: printed circuit board with electrical
components.
action: building block for a cleaning route, for
instance wall following or turning
alarm: alarm message on the smartphone display
that requires an error recovery procedure
Android: operating system for smartphones and
tablet computers.
approx: approximately
Astronaut: Lely Astronaut A4 milking robot
5.4006.8501.0 - Lely Control
bump point: a straight collision with the wall on slow
speed enabling the control system to correct itself
report: message on the smartphone display that
informs you about the status of the Discovery or
actions to be taken
route: route through a (part of a) barn for cleaning
route analysis: built-in function to analyse the
probability of failures per route and to indicate the
actions that causes the risk
short action: driving without contact with the wall,
Straight, Turn L <-- or Turn R -->
cm: centimeter
Lely Control app: Control software on a smartphone,
used to adjust the settings or manually control the
installation.
encoder: electronic device to measure the number of
rotations
time path: 24 hour time schedule with 48 routes
maximum
EU: European Union
ultrasonic sensor: electronic device for measuring
the distance to an object
gyroscope: electronic device for measuring or
maintaining orientation
V: Volt
in: inch
VAC: Voltage in Alternating Current
kg: kilogram
VDC: Voltage in Direct Current
lb: pound
yd: yard (36 inches)
LED: Light Emitting Diode
long action: driving with contact with the wall, Wall
Flw L, Wall Flw R or Ultrasound L for more than
10m, enabling the control system to correct itself
m: metre
mA: milliAmperes
manual route: (series of) routes that can be started
manually
manure scraper: flexible strip, installed under the
Discovery to clean the floor
Glossary of Terms
1
5.4006.8501.0 - Lely Control
INTENTIONALLY BLANK
2
Glossary of Terms
INDEX
description....................................................................4-26
set a manual route....................................................... 5-23
A
manure scraper...........................................................
replace........................................................................... 6-9
action..........................................................................
description....................................................................4-15
set the speed...................................................... 5-27, 4-22
alarms.........................................................................
recover alarms............................................................... 8-1
N
note........................................................................2-1
B
P
backup route........................................................ 4-23
Pause button..........................................................4-6
preventive maintenance..............................................
procedures.............................................................. 6-1, 6-1
schedule.........................................................................6-1
C
caution................................................................... 2-1
chain...........................................................................
tighten a chain................................................................6-8
charging station...........................................................
5.4006.8501.0 - Lely Control
description......................................................................4-8
drive to the charging station........................................... 5-4
R
report list................................................................ 8-1
route............................................................................
beepfreq................................................................4-22, 4-7
blockage route.................................................... 4-19, 5-27
delete route......................................................... 4-18, 5-22
manual route....................................................... 4-12, 5-25
new route..................................................................... 4-13
route analysis............................................................... 4-20
speed......................................................... 5-27, 4-22, 4-22
clean...........................................................................
clean charging strips, electrodes....................................6-2
clean the nozzle filters....................................................6-4
clean the water filter....................................................... 6-3
covers.............................................................................6-7
manure scraper.............................................................. 6-6
ultrasonic sensor............................................................ 6-5
S
D
safety..........................................................................
danger....................................................................2-1
dimensions.............................................................9-2
driving distance......................................................4-5
driving mechanism.................................................4-3
E
encoder..................................................................4-5
G
gyroscope...................................................................
calibrate........................................................................8-15
location...........................................................................4-5
L
electrical safety.............................................................. 2-2
maintenance safety........................................................ 2-3
operating safety..............................................................2-3
safety decals.................................................................. 2-4
short action.......................................................... 4-27
sliding disk, replace............................................. 6-11
slope, maximum.....................................................2-3
specifications........................................................... -1
straight................................................................. 4-14
T
time...................................................................... 4-24
time path.....................................................................
description....................................................................4-26
set a time path..............................................................5-23
timed actions...............................................................
set................................................................................ 5-23
start or stop.................................................................. 5-25
LED indication........................................................4-1
long action........................................................... 4-27
M
manual driving....................................................... 5-3
manual route...............................................................
Index
U
ultrasonic sensor.........................................................
description......................................................................4-5
1
W
5.4006.8501.0 - Lely Control
warning.................................................................. 2-1
work, menu.......................................................... 4-10
2
Index
5.4006.8501.0 - Lely Control
INTENTIONALLY BLANK
5.4006.8501.0 - Lely Control
LELY INDUSTRIES N.V.
Cornelis van der Lelylaan 1
NL-3147 PB Maassluis
Tel +31 (0)88 - 12 28 221
Fax +31 (0)88 - 12 28 222
www.lely.com
Live Life Lely