1
The photo manager that sets you free
USER GUIDE
© ACD Systems Ltd. 2004 All rights reserved.
Credits and acknowledgements
Portions of this software are based in part on the work of the Independent JPEG Group.
This software contains portions of imaging code owned and copyrighted by Pegasus Imaging Corp., Tampa FL, ALL
RIGHTS RESERVED.
CD/DVD recording software developed under license from Padus, Inc. - www.padus.com
MPEG 1 codec provided by Cinegy © 2003 Cinegy LLC.
TIFF support based on LibTIFF, Copyright © 1988-1997 Sam Leffler, Copyright © 1991-1997 Silicon Graphics,
Inc. This notice must appear in all copies of the Software and related documentation. The names of Sam Leffler and
Silicon Graphics may not be used in any advertising or publicity relating to the software without the specific, prior
written permission of Sam Leffler and Silicon Graphics. THE SOFTWARE IS PROVIDED "AS-IS" AND
WITHOUT WARRANTY OF ANY KIND, EXPRESS, IMPLIED OR OTHERWISE, INCLUDING WITHOUT
LIMITATION, ANY WARRANTY OF MERCHANTABILITY OR FITNESS FOR A PARTICULAR PURPOSE.
IN NO EVENT SHALL SAM LEFFLER OR SILICON GRAPHICS BE LIABLE FOR ANY SPECIAL,
INCIDENTAL, INDIRECT OR CONSEQUENTIAL DAMAGES OF ANY KIND, OR ANY DAMAGES
WHATSOEVER RESULTING FROM LOSS OF USE, DATA OR PROFITS, WHETHER OR NOT ADVISED OF
THE POSSIBILITY OF DAMAGE, AND ON ANY THEORY OF LIABILITY, ARISING OUT OF OR IN
CONNECTION WITH THE USE OR PERFORMANCE OF THIS SOFTWARE.
Windows, Windows Explorer, Microsoft Internet Explorer, and Microsoft DirectX are trademarks of Microsoft
Corporation in the United States and/or other countries.
Other product and company names mentioned herein may be the trademarks of their respective owners.
ACD Systems Technical Writing Department: Cassandra Petrachenko and Wm. Don Clark
Table of Contents
ACD Systems at the hub of digital imaging .............................................. 1
CHAPTER 1:WELCOME TO ACDSEE 7.0 .................................... 3
System requirements .................................................................................
Installing ACDSee .....................................................................................
Starting ACDSee .......................................................................................
Running ACDSee in the Taskbar Notification area ...........................
4
5
6
6
CHAPTER 2:GETTING STARTED .................................................. 7
Running ACDSee for the first time ........................................................... 8
About the ACDSee user interface ............................................................. 8
The Browser ....................................................................................... 8
The Viewer ......................................................................................... 9
Edit Mode ........................................................................................... 9
Associating file formats with ACDSee ................................................... 10
Customizing ACDSee ............................................................................. 11
Customizing toolbars ....................................................................... 11
Configuring image editors ................................................................ 13
Setting ACDSee options .................................................................. 14
Checking for updates ............................................................................... 14
Using myACD ......................................................................................... 15
Installing the ACD Media Support Package .................................... 16
Using the Help system ............................................................................. 17
CHAPTER 3: BROWSING ............................................................. 19
About Browser panes ..............................................................................
Customizing the Browser pane layout .............................................
About the Browser toolbars .............................................................
Setting the Browser options ....................................................................
Using the File List pane ...........................................................................
Filtering files ....................................................................................
Changing view modes ......................................................................
Sorting files ......................................................................................
Selecting files ...................................................................................
Setting the File List pane options .....................................................
Customizing thumbnails ...................................................................
Using the Preview pane ...........................................................................
Setting the Preview pane options .....................................................
Using the Folders pane ............................................................................
20
21
22
23
24
26
26
28
29
30
31
33
33
34
Table of Contents | i
Creating and managing folders ......................................................... 34
Creating a Favorites shortcut ............................................................ 35
Setting the Folders pane options ...................................................... 35
Working with files and folders in the Browser ........................................ 36
Setting File Management options ..................................................... 36
Copying and moving files ................................................................ 37
Pasting files and folders ................................................................... 38
Copying images ................................................................................ 38
Replacing a file ................................................................................. 39
Renaming a file or folder .................................................................. 39
Working with offline media ............................................................. 40
Using shell commands ...................................................................... 40
Using the Calendar pane .......................................................................... 41
Displaying files by date and time ..................................................... 42
Navigating in the Calendar pane ...................................................... 42
Setting the Calendar pane options .................................................... 43
Using the Image Basket ........................................................................... 44
Refreshing the Browser ........................................................................... 45
CHAPTER 4: ACQUIRING ............................................................ 47
About removable devices ................................................................. 48
Using the Acquire Wizard ...................................................................... 48
Creating a renaming template ........................................................... 49
Using the ACDSee Device Detector ....................................................... 50
Starting the ACDSee Device Detector ............................................. 51
Setting the Device Detector options ................................................. 51
Automatically acquiring files from a removable device ......................... 52
Configuring a device ........................................................................ 52
Acquiring files from a profiled device ............................................. 54
Updating or deleting a device profile ............................................... 54
Downloading files from a mobile phone ................................................. 55
Taking a screen capture ........................................................................... 55
CHAPTER 5: VIEWING ................................................................ 57
Opening files in the Viewer ..................................................................... 58
Viewing images in full screen mode ................................................ 58
Setting Viewer options ............................................................................ 59
Customizing the Viewer display ...................................................... 60
Zooming an image ................................................................................... 61
Setting a zoom level ......................................................................... 62
Automatically shrinking or enlarging images .................................. 63
Panning an image ............................................................................. 64
Using the Magnifying Glass and Navigator panes ........................... 65
ii | Table of Contents
Using the Histogram pane ................................................................
Viewing file properties in the Viewer .....................................................
Displaying text and file information on images ...............................
Changing image color depth ...................................................................
Selecting part of an image .......................................................................
Playing audio and video files ..................................................................
Selecting part of a media file ...........................................................
Saving video frames as images ........................................................
Working with image audio ......................................................................
Adding and editing image audio ......................................................
Recording and adding audio to an image .........................................
Viewing a slide show ..............................................................................
Setting slide show options ................................................................
Starting a slide show automatically .................................................
Using Auto Advance ........................................................................
Creating a desktop screen saver ..............................................................
Setting an image as the desktop wallpaper ..............................................
Synchronizing the Viewer to a folder .....................................................
Returning to the Browser ........................................................................
66
66
66
68
68
69
70
71
72
72
73
74
75
77
78
79
81
82
83
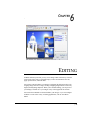
CHAPTER 6: EDITING ................................................................. 85
Working in Edit Mode .............................................................................
Customizing the Edit Panel ..............................................................
About tool presets ............................................................................
Using the undo/redo system .............................................................
Using the Preview bar ......................................................................
Saving images in Edit Mode ............................................................
Closing Edit Mode ...........................................................................
Adjusting image light levels ....................................................................
Automatically adjusting an image's exposure ..................................
Adjusting image brightness ..............................................................
Adjusting image levels .....................................................................
Adjusting brightness curves .............................................................
Adjusting image color .............................................................................
Automatically adjusting image colors ..............................................
Removing a color cast ......................................................................
Changing HSL values ......................................................................
Changing RGB values ......................................................................
Removing red-eye from digital photos ....................................................
Sharpening and blurring images ..............................................................
Using the Sharpness tool ..................................................................
Using the Unsharp Mask tool ...........................................................
Blurring an image .............................................................................
86
86
87
88
88
89
89
89
90
90
91
92
93
93
93
94
94
95
95
95
96
96
Table of Contents | iii
Adding and removing image noise .......................................................... 98
Adding noise to an image ................................................................. 98
Removing noise from an image ........................................................ 99
Resizing an image .................................................................................. 100
About resampling filters ................................................................. 101
Cropping an image ................................................................................. 102
Resizing the crop window .............................................................. 102
Rotating and flipping an image ............................................................. 103
Rotating an image ........................................................................... 103
Flipping an image ........................................................................... 104
Applying special effects filters .............................................................. 104
Applying a Bathroom Window effect ............................................ 104
Applying a Blinds effect ................................................................. 105
Applying a Bulge effect ................................................................. 105
Applying a Colored Edges effect ................................................... 106
Applying a Contours effect ............................................................ 107
Applying a Crosshatch effect ......................................................... 107
Applying a Dauber effect ............................................................... 108
Applying an Edge Detect effect ..................................................... 108
Applying an Emboss effect ............................................................ 109
Applying a Furry Edges effect ....................................................... 109
Applying a Mirror effect ................................................................ 110
Applying a Negative effect ............................................................. 111
Applying an Oil Paint effect ........................................................... 111
Applying a Pencil Drawing effect .................................................. 111
Applying a Pixel Explosion effect .................................................. 112
Applying a Pixelate effect .............................................................. 112
Applying a Posterize effect ............................................................ 113
Applying a Ripple effect ................................................................ 113
Applying a Scattered Tiles effect ................................................... 114
Applying a Sepia effect .................................................................. 115
Applying a Sheet Metal effect ........................................................ 115
Applying a Shift effect ................................................................... 116
Applying a Solarize effect .............................................................. 116
Applying a Sunspot effect .............................................................. 117
Applying a Swirl effect .................................................................. 117
Applying a Topographic Map effect .............................................. 118
Applying a Wind effect .................................................................. 119
Creating a custom effect filter ........................................................ 120
CHAPTER 7:ORGANIZING AND MANAGING ............................ 121
About the ACDSee database .......................................................... 122
Using the Properties pane ...................................................................... 123
iv | Table of Contents
Properties pane areas ......................................................................
Creating and managing keywords ..................................................
Using the Organize pane .......................................................................
Organize pane classifications .........................................................
Managing categories ......................................................................
Classifying files ..............................................................................
Customizing the Organize pane .....................................................
Managing database information ............................................................
Cataloging files ..............................................................................
Adding EXIF information to the database .....................................
Rebuilding thumbnails ...................................................................
Excluding folders from the database ..............................................
Converting an older ACDSee database ..........................................
Exporting database information .....................................................
Importing database information .....................................................
Importing file information from other sources ...............................
Backing up database information ...................................................
Restoring database information from a backup .............................
Quarantining files ...........................................................................
Maintaining the database ...............................................................
Working with multiple images ..............................................................
Converting images to another format .............................................
Rotating or flipping images ............................................................
Resizing images .............................................................................
Adjusting the exposure of multiple images ....................................
Changing the date and time properties of your files ......................
Renaming a group of files ..............................................................
Adding EXIF information ..............................................................
Comparing images .................................................................................
Creating archives of your files ..............................................................
Generating file lists ...............................................................................
123
124
125
126
127
127
128
129
130
130
131
131
132
132
133
134
135
137
137
138
139
139
140
142
146
148
150
152
152
154
156
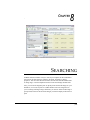
CHAPTER 8: SEARCHING ......................................................... 157
Finding images quickly .........................................................................
Using the Search pane ...........................................................................
Search pane areas ...........................................................................
Searching with file name patterns ..................................................
Using selective browsing ......................................................................
Setting selective browsing criteria .................................................
Tips for selective browsing ............................................................
Finding duplicate files ...........................................................................
158
158
158
160
161
162
163
164
Table of Contents | v
CHAPTER 9: SHARING .............................................................. 165
Emailing images .................................................................................... 166
Creating an online SendPix album ........................................................ 167
Publishing images to TiVo .................................................................... 167
Creating a slide show you can share ...................................................... 168
Creating a PDF ...................................................................................... 169
Creating a CD or DVD .......................................................................... 170
Creating an HTML album ..................................................................... 172
Creating a contact sheet ......................................................................... 172
CHAPTER 10: PRINTING ........................................................... 175
Printing images in ACDSee ................................................................... 176
Setting contact sheet options .......................................................... 177
Setting printer options .................................................................... 178
Adjusting page settings .................................................................. 179
Adding text to pages ....................................................................... 179
Ordering prints online ............................................................................ 180
APPENDIXES .............................................................................. 181
Appendix 1: Contacting ACD Systems ................................................. 182
About the ACDInTouch Service .................................................... 183
Appendix 2: Supported File Formats ..................................................... 184
Image formats ................................................................................. 184
Archive formats .............................................................................. 187
Video and audio formats ................................................................ 188
Working with plug-ins .................................................................... 189
Appendix 3: Default toolbar layouts ..................................................... 191
Appendix 4: Keyboard shortcuts ........................................................... 194
Browser keyboard shortcuts ........................................................... 194
Viewer keyboard and mouse shortcuts ........................................... 198
Appendix 5: System administrator options ........................................... 203
Command line arguments ............................................................... 203
DDE interface ................................................................................. 204
GLOSSARY ................................................................................. 209
INDEX ........................................................................................ 223
vi | Table of Contents
ACD Systems at the hub of digital imaging
Based in Victoria, British Columbia, Canada, ACD Systems designs, develops
and markets digital imaging software that meets the needs of home and
professional users. Millions of consumers and more than 33,000 corporate clients
use our flagship product ACDSee. To serve our global customers well, our Web
content is available in 12 languages along with many of our products for PC and
Macintosh.
ACD Systems continues to capitalize on the explosive growth in the use of digital
images via cameras, scanners, PDAs and the Internet. We have strong strategic
alliances with value added resellers (VARs), original equipment manufacturers
(OEMs), retailers, software publishers and distributors throughout North America
and worldwide. Plus, our unique platform model and Software Development Kit
(SDK) lets third parties offer their own imaging solutions through our software.
ACD Systems at the hub of digital imaging | 1
CHAPTER
1
WELCOME TO
ACDSEE 7.0
Congratulations on choosing ACDSee – the world’s #1 digital imaging software.
ACDSee is a comprehensive application ideal for acquiring, organizing, viewing,
enhancing, and sharing your images.
With ACDSee, you can find, organize, and preview images and media files on
your computer, and efficiently acquire images from digital cameras, scanners, and
other devices.
ACDSee’s full-featured image viewer and media player quickly generates highquality displays of your images and media files. You can run slide shows, play
embedded audio, and display multiple page images in any of the over 50
supported image and multimedia file formats.
| 3
CHAPTER 1: WELCOME TO ACDSEE 7.0
Also, ACDSee includes a wide variety of image editing tools you can use to
create, edit, and touch-up your digital images. Use tools such as red-eye
reduction, crop, sharpen, blur, and emboss to enhance or correct your images.
Image management tools, such as exposure adjustment, convert, resize, rename,
and rotate, can be used to adjust multiple files at the same time.
The user interface is completely customizable, and provides quick access to tools
and features. You can customize the screen layout, toolbar display, and many
other options to suit your preferences. ACDSee also contains extensive contextsensitive Help to assist you as you move through the application.
ACDSee 7.0 is a fast, powerful, and easy-to-use image management system that
everyone from beginners to professionals can use and enjoy.
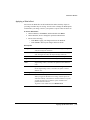
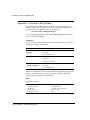
System requirements
To browse and view your images and videos, and listen to your audio files with
ACDSee, it is necessary that your system include the following components:
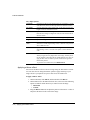
Minimum
Hardware Pentium III 500 MHz processor or
equivalent
Recommended
Pentium 4 or higher
128 MB RAM
256 MB RAM
100 MB hard drive space
250 MB hard drive space
16-bit High Color display adapter
High Color display adapter
CD/DVD writer
Software
Windows 98SE, ME, 2000, XP
Microsoft Internet Explorer 5.0
Windows XP
Microsoft Internet Explorer 6.0
ACD Media Support Package
Microsoft DirectX 9.0* — for
Microsoft DirectX file format support,
and for creating slide shows and screen
savers
QuickTime 6.0* — for QuickTime file
format support
Ghostscript 8.0* — for PDF support
Windows Media Player 9.0 or later*
— for Windows Media Player file
format support
4 | System requirements
CHAPTER 1: WELCOME TO ACDSEE 7.0
*To download these components, please visit our Web site at:
www.ACDSYSTEMS.com/English/Support/installation-support
Installing ACDSee
You can install ACDSee from a CD-ROM, or from an executable file
downloaded from the Internet.
To install ACDSee from a CD-ROM:
1. Insert the CD into your CD-ROM drive.
2. Click the Start button, and then click Run.
3. Click Browse.
4. In the Look in drop-down list, select the CD-ROM drive.
5. Select Setup.exe.
6. Click Open.
7. Click OK to run the installation, and follow the instructions in the install
wizard.
To install from an executable file:
1. Double-click the executable file.
2. Click Next to start the install process, and follow the instructions in the
install wizard.
The install wizard places application shortcut icons on the desktop and in the
Start menu.
Uninstalling
You can remove any ACD Systems product from your computer at any time.
To uninstall ACDSee from your system:
1. Click the Start button, and then click Settings | Control Panel.
2. Double-click Add/Remove Programs.
3. Select ACDSee 7.0.
4. Click Change/Remove. Follow the instructions in the uninstall wizard.
Installing ACDSee | 5
CHAPTER 1: WELCOME TO ACDSEE 7.0
Starting ACDSee
When you install ACDSee on your computer, the install wizard places application
shortcut icons on the desktop and in the Start menu.
To start ACDSee:
Do one of the following:
•
Double-click the ACDSee 7.0 icon on your desktop.
•
Click Start | Programs, and then select ACD Systems | ACDSee 7.0.
Opening a second copy of ACDSee
You can open another instance of ACDSee and use it to view images while
browsing your files with the first instance. You can also drag files from one
instance to the other.
To open another instance of ACDSee:
In ACDSee, click File | New, and then click Window.
Running ACDSee in the Taskbar Notification area
You can set ACDSee to display an icon that you can right-click to launch new
windows or take screen captures. You can also configure ACDSee to continue to
run in the Taskbar Notification area after you exit the program, or to start
automatically when you start your system.
To run ACDSee in the Taskbar Notification area:
1. In ACDSee, click Tools | Options.
2. In the Options dialog box, click Browser.
3. On the Browser page, select Show icon in Taskbar Notification area.
4. To continue to run ACDSee in the background after you close the
program, select Continue running in Taskbar Notification area on exit.
5. To automatically run ACDSee in the Taskbar Notification area whenever
you start Windows, select Run ACDSee in Taskbar Notification area
when system starts.
6. Click OK.
6 | Starting ACDSee
CHAPTER
2
GETTING
STARTED
This chapter identifies the different components in ACDSee, and explains each
part of the user interface. It also contains information and instructions on how to
use ACDSee and customize the interface to suit your preferences, including
rearranging the various elements, setting the program options, and associating file
types so they will automatically open in ACDSee.
This section also explains how to use the context-sensitive Help system included
in ACDSee, and describes how to acquire additional features and plug-ins using
the new software updating and license management tool, myACD.
| 7
CHAPTER 2: GETTING STARTED
Running ACDSee for the first time
When you run ACDSee for the first time, you are prompted to activate your copy
over the Internet. No personal or identifying information is sent, and the process
should only take a few seconds.
Also on the first run, ACDSee catalogs the contents of your My Pictures folder to
create the database. Cataloging your files will help to increase the speed with
which you browse the images and folders on your computer.
To learn more about the ACDSee database, and how to catalog more files, see
“About the ACDSee database” on page 122.
About the ACDSee Device Detector
ACDSee includes the Device Detector, which will automatically detect when you
have a removable device plugged into your computer. The Device Detector starts
when you run ACDSee, and displays an icon in the Taskbar Notification area.
For more information about the ACDSee Device Detector, and to learn how to
use it to acquire your images from digital cameras, memory cards, scanners, and
CDs, see “Using the ACDSee Device Detector” on page 50.
About the ACDSee user interface
The ACDSee user interface provides easy access to the various tools and features
you can use to browse, view, edit, and manage your images and media files. The
following section describes each of the three main parts of ACDSee, and explains
the function of each component.
The Browser
The ACDSee Browser is the main browsing and managing component of the user
interface, and is what you see when you start ACDSee using the shortcut icon on
your desktop. In the Browser, you can find, move, preview, and sort your files,
and access the organization and sharing tools.
The Browser consists of nine panes, eight of which can be closed when not in use.
The File List pane is always visible, and displays the contents of the current
folder, the results of your latest search, or the files in your database that match
your filtering criteria. A status bar, located at the bottom of the Browser window,
displays information about the currently selected file, folder, or category.
8 | Running ACDSee for the first time
CHAPTER 2: GETTING STARTED
The Browser also features two toolbars: the main toolbar, which provides
shortcuts to commonly used commands, and the context-sensitive toolbar, which
provides different shortcuts depending on what is currently selected in the
Browser.
You can open and close panes, move them to different areas of your screen, and
stack them on other panes or dock them to the edge of your desktop. Most panes
also have additional options you can set to further customize their behavior and
appearance.
For more information about the Browser panes and their different functions, see
“About Browser panes” on page 20.
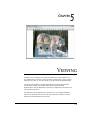
The Viewer
The ACDSee Viewer plays media files and displays images in full resolution, one
at a time. You can also open panes in the Viewer to view image properties,
display areas of an image at varying magnifications, or examine detailed color
information.
You can open the Viewer directly by double-clicking an associated file type in
Windows Explorer, and you can use the Viewer to flip quickly between all of the
images in a folder, or compare two or more images side by side. The Viewer
contains a toolbar with shortcuts to commonly used commands, and a status bar,
located at the bottom of the Viewer window, which displays information about
the current image or media file.
For more information about the Viewer, as well as more detailed descriptions of
the Viewer panes, see “Viewing” on page 57.
Edit Mode
You can open your images in ACDSee’s Edit Mode to adjust or enhance them
using the editing tools and effects.
Edit Mode displays the available tools on the Edit Panel, a customizable menu
that can be closed or hidden when not in use. Clicking the name of a tool on the
menu opens that tool in the Edit Panel, where you can adjust the settings to edit or
enhance your image.
The Edit Mode also contains a status bar, which displays information about the
image you are editing.
About the ACDSee user interface | 9
CHAPTER 2: GETTING STARTED
For more information on Edit Mode, as well as descriptions and explanations of
all the tools and features, see “Working in Edit Mode” on page 86.
Associating file formats with ACDSee
You can associate supported image, media, and archive file formats with
ACDSee. When you double-click an associated file in Windows Explorer,
ACDSee opens the file and displays it in the Viewer. For a complete list of the
file formats ACDSee supports, see “Appendix 2: Supported File Formats” on
page 184.
You can also choose to display ACDSee commands in the shortcut menu in
Windows Explorer, and configure which options are available for different file
types.
To associate a file with ACDSee:
1. Click Tools | File Associations.
2. Select the Image tab, and then select the check boxes next to the image
formats that you want to associate with ACDSee.
3. Select the Video tab, and then select the check boxes next to the video
formats that you want to associate with ACDSee.
4. Select the Audio tab, and then select the check boxes next to the audio
formats that you want to associate with ACDSee.
5. Select the Archive tab, and then select the check boxes next to the archive
formats that you want to associate with ACDSee.
6. Select the Shortcut Menu tab, and then select the check boxes beside each
command you want to add to the Windows Explorer shortcut menu.
7. Click OK.
You can add plug-ins to increase the number of supported file formats or to extend
the functionality of ACDSee. For more information about the types of plug-ins
available and how to manage them, see “Working with plug-ins” on page 189.
10 | Associating file formats with ACDSee
CHAPTER 2: GETTING STARTED
Customizing ACDSee
The ACDSee user interface is designed to be fully customizable, and adjust to
your specific working preferences. You can customize the toolbars, set file
management options, adjust the appearance and behavior of the Browser and
Viewer, and control the type and nature of the information presented with each
file. You can also specify a default editing application for adjusting and
enhancing your images, and open your images in your favorite photo editor right
from ACDSee.
The following sections explain how to access the customization tools and features
available in ACDSee. For information on customizing the individual Browser
panes, see “About Browser panes” on page 20.
Customizing toolbars
You can customize the appearance and organization of the main toolbars in the
Browser and Viewer windows by selecting which toolbars to display, and
specifying each toolbar’s buttons or commands. You can also discard your
changes and reset the toolbars to their default layout at any time. For a description
of the default layouts, see “Appendix 3: Default toolbar layouts” on page 191.
Displaying and hiding toolbars
You can choose to show or hide the main toolbars and status bars in the Browser
and Viewer, and the context-sensitive toolbar in the Browser.
To show or hide a toolbar:
Do one of the following:
•
In the Browser, click View | Toolbars, and then select the toolbar you
want to show or hide.
•
In the Viewer, click View, and then select Main Toolbar or Status
Bar.
Customizing ACDSee | 11
CHAPTER 2: GETTING STARTED
Customizing toolbar contents
You can add, remove, resize, and rearrange the buttons on the main toolbars in the
Browser and Viewer. You can also choose to show or hide the text labels and tool
tips for the buttons.
To customize a toolbar:
1. If the main toolbar is not visible, do one of the following:
•
In the Browser, click View | Toolbars, and then select Main Toolbar.
•
In the Viewer, click View | Main Toolbar.
2. Right-click the main toolbar and then select Customize.
3. To change the commands and buttons available on the toolbar, select the
Commands tab, and do one of the following:
•
Add a button by dragging a command from the Commands list to a
new location on the main toolbar.
•
Remove buttons from the toolbar by dragging them from the toolbar
to the Commands list.
•
Rearrange the buttons by dragging them to a new location on the
toolbar.
4. To display or hide the text labels on the toolbar buttons, select the
Toolbars tab, click Main Toolbar, and then select or clear the Show text
labels check box.
5. To set the tool-tip and button size options, select the Options tab, and then
select or clear the check boxes. Note that the options you select on this tab
apply to both the Browser and Viewer main toolbars.
6. When you are satisfied with your changes, click Close.
Resetting toolbars
You can discard all of your changes, and return the toolbars and buttons to their
default states.
To reset the toolbars:
1. In the Browser or Viewer, right-click the main toolbar and select
Customize.
2. Click the Toolbars tab, and then click Reset All.
3. Click Yes to reset the toolbars.
4. Click Close.
12 | Customizing ACDSee
CHAPTER 2: GETTING STARTED
Configuring image editors
You can configure ACDSee to work with a variety of image editors, such as ACD
Photo Editor, and specify which image editor ACDSee uses by default.
To add an image editor to ACDSee:
1. Click Tools | Open in Editor, and then select Configure Editors.
2. In the Configure Photo Editors dialog box, click Add.
3. Browse to a folder on your hard drive that contains an image editing
application.
4. Select the executable file of the editing application, such as
PhotoEditor3.exe, and click Open.
5. In the Name field, type a name for the editor, and then click OK.
6. To specify a default image editor, select an application in the Editor Name
list, and click Set As Default.
7. Click OK.
To manage your image editors:
1. From the Editors list, select the application you want to change.
2. Do any of the following:
•
To change the location of the executable file or the name of the
application displayed in the Editors list, click Edit. Set the location
and name of the application in the Configure Photo Editor dialog box,
and then click OK.
•
To set the application as the default image editor for ACDSee, click
Set As Default.
•
To specify whether the application can handle multiple images at the
same time, select or clear the check box in the Supports Multiple
Images column.
•
To remove the application from the list, click Remove.
3. Click OK to accept your changes and return to ACDSee.
Customizing ACDSee | 13
CHAPTER 2: GETTING STARTED
Setting ACDSee options
The General page of the ACDSee Options dialog box contains a number of
settings to help you customize the user interface to suit your preferences.
To set the General options:
1. Click Tools | Options.
2. In the Options dialog box, set or change the options as described below.
3. Click OK to apply your changes and return to ACDSee.
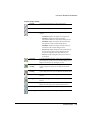
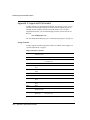
General options
Enable gamma
correction
Applies the specified amount of gamma correction when
viewing or previewing images.
Show Tip of the Day
dialog on startup
Displays a helpful hint or usability tip each time you start
ACDSee.
Show Acquire Wizard
welcome step
Displays the Welcome page each time you launch the Acquire
Wizard.
Automatically check
for updates
Automatically checks for program updates.
Show screen capture
help tips
Displays the Help Tips dialog box when using the screen
capture tool.
Automatically stretch
wallpaper to fit screen
Stretches small images to fit the entire desktop when you set
them as your wallpaper.
Disable image
animation
Displays only the first frame of an animated image in the
Browser's Preview pane and in the Viewer.
Status bar date
Specifies the date to display in the status bar for a selected file.
Default system format
Uses the default system format to display the date and time in
information overlays.
Custom format
Uses the specified format to display the date and time in
information overlays. Select a format for both Date and Time
from the drop-down lists.
Checking for updates
ACD Systems is committed to providing updates and improvements to our
software, and delivering them to our customers. You can use the Check for
Updates feature to ensure that your copy of ACDSee is the most up-to-date
version available. You must be connected to the Internet to use this feature.
14 | Checking for updates
CHAPTER 2: GETTING STARTED
To check for updated software:
Click Help | Updates, and then select Check for Updates.
ACDSee launches the ACDInTouch Viewer, which connects automatically to the
ACD Systems Web site and notifies you if there are any updates available for
your software.
Using myACD
You can use myACD to manage your ACD Systems software. With it, you can
check the status of your software, enter a license code to update your trial
versions, and if you have an Internet connection, download other products to try
and buy at a later time.
To open the myACD Control Panel:
Click Help, and then select myACD.
The myACD Control Panel displays a list of currently installed software, and
indicates whether each software package is a trial or full version. You can
purchase trial software and even update it to a full version. You can also view a
list of additional products that you can download and install on your hard drive.
For complete access to all the myACD features, you must be connected to the
Internet.
To obtain a full version license code for trial software already installed:
1. In the Installed Products list of the myACD Control Panel dialog box,
select a product containing a trial version status.
2. Click the Buy button below the Installed Products list. You will be
prompted with further instructions.
To update a trial version with a full version license code:
1. In the Installed Products list of the myACD Control Panel, select a
product that contains a trial version status.
2. Click Enter License Code.
3. In the License Code dialog box, type the license code provided to you by
ACD Systems.
4. Click OK.
Using myACD | 15
CHAPTER 2: GETTING STARTED
To download and install free software:
1. In the Additional Products list of the myACD Control Panel dialog box,
select a free product.
2. Click the Install button. You will be prompted with further instructions.
(The Install button is only displayed for free products.)
To download and install trial version software:
1. In the Additional Products list of the myACD Control Panel dialog box,
select a product.
2. Click the Try button located below the Additional Products list. You will
be prompted with further instructions.
To buy, download, and install full version software:
1. In the Additional Products list of the myACD Control Panel dialog box,
select a product.
2. Click the Buy button located below the Additional Products list. You
will be prompted with further instructions.
Installing the ACD Media Support Package
The ACD Media Support Package provides additional multimedia features for
ACDSee, such as CD and DVD creation, and audio support for slide shows. If
you purchased a CD copy of ACDSee, the Media Support Package is included,
and can be installed directly from your CD.
If you purchased a downloadable version of ACDSee, you can acquire the ACD
Media Support Package for free, using myACD.
16 | Using myACD
CHAPTER 2: GETTING STARTED
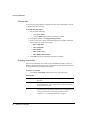
Using the Help system
ACDSee contains extensive context-sensitive Help to assist you as you move
through the application. You can click the Help button or press the F1 key at any
time to view a Help file page specific to whatever part of the application you are
currently using. Most of the dialog boxes and tools contained in ACDSee are
equipped with What's This Help which provides an instant overview of each
control.
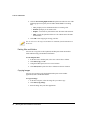
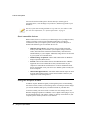
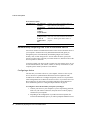
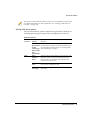
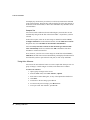
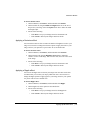
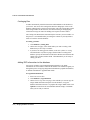
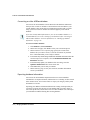
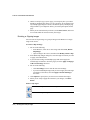
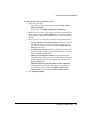
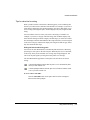
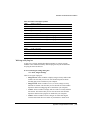
Using What's This Help
To get Help or more information about a specific control within a dialog box you
can use the What's This Help feature. Tools equipped with What's This Help have
a 'question mark' button in the upper-right corner of the dialog box.
To use What's This Help:
1. Click the What's This button. The cursor changes to a question mark and
pointer.
2. Click a check box, radio button, or other control to view a pop-up
description of the feature.
What's This tools
What's This Help button
What's This Help cursor
Checking for updated Help
If you would like to update to the complete ACDSee Help file, where you can
browse a table of contents and use the search feature, use the Check for Updates
feature or visit our Web site at ACDSystems.com.
Using the Help system | 17
CHAPTER
3
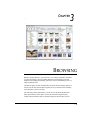
BROWSING
With the ACDSee Browser, you can browse, sort, manage, manipulate, and share
your files and images. You can combine different tools and panes to perform
sophisticated searching and filtering operations, and view thumbnail previews of
images and media files.
The Browser panes are fully customizable, and can be moved, hidden, docked, or
closed. You can also stack the panes together for easy reference and accessibility,
and to maximize your screen space.
The following section explains how to access and use the different panes that
make up the Browser. Some panes, such as the Search and Organize panes,
contain advanced features that are explained in greater detail in later sections.
| 19
CHAPTER 3: BROWSING
About Browser panes
The ACDSee Browser consists of the following nine panes:
File List pane
This pane displays the contents of the currently selected folder, the results of your
latest search, or the files and folders that match your selective browsing criteria.
The File List pane is always visible, and cannot be hidden or closed. For more
information, see “Using the File List pane” on page 24.
Preview pane
This pane displays a thumbnail preview of any image or media file currently
selected in the File List pane. You can adjust the size of the thumbnail by resizing
the Preview pane, and also specify whether you want the Preview pane to play
media files or just display the first frame. For more information, see “Using the
Preview pane” on page 33.
Folders pane
This pane displays the directory structure of your computer, much like the
directory tree in Windows Explorer. You can browse through the folders and
display their contents in the File List pane. For more information, see “Using the
Folders pane” on page 34.
Calendar pane
This pane displays a calendar that you can use to organize and browse your files
according to their associated dates. For more information about the Calendar
pane, as well as a description of the toolbar buttons, see “Using the Calendar
pane” on page 41.
Image Basket
While browsing through your files and folders, you can place images in the Image
Basket pane to hold them temporarily. You can then edit, print, or share those
images without moving them all into a single folder. For more information, see
“Using the Image Basket” on page 44.
Properties pane
This pane displays file properties and database information for any file or folder
you select in the File List pane. You can use the Properties pane to view and edit
database information for your files, and the EXIF metadata included in digital
20 | About Browser panes
CHAPTER 3: BROWSING
photos. For more information about the Properties pane, see “Using the Properties
pane” on page 123.
Organize pane
This pane lists the categories and ratings to which you can assign your files to
help sort and manage them more easily. You can also use the Special Items area
to quickly view all of the images on your computer, or see any uncategorized files
in the current folder. For more information about the Organize pane, see “Using
the Organize pane” on page 125.
Selective Browsing pane
This pane combines input from the Folders, Organize, and Calendar panes to
narrow the list of files in the File List pane to those that match a specific set of
criteria. You can include or exclude files by adjusting the different criteria. For
more information about selective browsing, see “Using selective browsing” on
page 161.
Search pane
This pane provides access to ACDSee’s powerful search utility. You can specify
the type of search you want to perform, and enter your search criteria into the
fields provided. For more information about the Search pane, see “Using the
Search pane” on page 158.
Customizing the Browser pane layout
You can open and close Browser panes to suit your preferences, and move or
stack any panes you choose to customize the layout of the Browser window.
To open or close a Browser pane:
Click View and select the pane you want to open or close.
Moving panes
You can move a pane from a docked or floating position to a new location. You
can move one pane at a time, or two or more stacked panes.
To dock a pane:
1. Drag the pane's title bar to a side of the Browser window until the marquee
automatically resizes, and release the mouse button.
2. To return a pane to its previous location, double-click its title bar.
About Browser panes | 21
CHAPTER 3: BROWSING
To move a docked or floating pane:
Do one of the following:
•
Drag the pane's tab to a new location.
•
Drag the pane's title bar to a new location. Any stacked panes will also
move.
Stacking panes
You can stack panes and reorder their tabs to suit your needs.
To stack panes:
1. Drag one pane's title bar onto the title bar of another pane until the
marquee automatically resizes, and then release the mouse button.
2. To reorder the panes, drag a tab to the left or right in the tab order.
3. To separate a tabbed pane, drag the pane’s tab to another location on the
desktop.
Resetting the Browser layout
You can return all of the Browser panes to their default positions at any time.
To reset the Browser layout:
Click View | Reset Layout.
About the Browser toolbars
The ACDSee Browser has two toolbars and a status bar you can choose to show
or hide at any time.
The Main toolbar contains shortcuts to commonly used commands and tools. You
can customize the order and appearance of the buttons on the toolbar, and change
the shortcuts and commands. For more about customizing, see “Customizing
toolbars” on page 11. For an explanation of the default buttons on the toolbar, see
“Appendix 3: Default toolbar layouts” on page 191.
The Context Sensitive toolbar also contains shortcuts to common commands and
tools, but the contents of the toolbar change depending on what you select in the
Browser panes. For example, the Context Sensitive toolbar will contain image
manipulation commands when you select an image file, and will provide category
and sharing shortcuts when you select a category.
The status bar displays information about the currently selected file.
22 | About Browser panes
CHAPTER 3: BROWSING
To show or hide a Browser toolbar:
1. Click View | Toolbars.
2. Select one of the following:
•
Main Toolbar
•
Context Sensitive Toolbar
•
Status Bar
Setting the Browser options
You can use the ACDSee Options dialog box to set various options for the
Browser, including the default start folder and color scheme.
To set the Browser options:
1. Click Tools | Options.
2. In the Options dialog box, click Browser.
3. On the Browser options page, set or change any of the options described
below.
4. Click OK to accept your changes and return to ACDSee.
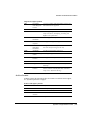
Browser options
Default start
folder
Folder (and all
Opens the Browser in the same folder that
browsing criteria)
was open the last time you used ACDSee,
from previous session and automatically applies any browsing
criteria you were using.
Specific folder
Taskbar
Notification
area
Always opens the Browser in the specified
folder. Click the Browse button to locate a
starting folder on your hard drive.
Show icon in Taskbar Displays the ACDSee icon in the Taskbar
Notification area
Notification area.
Continue running in
Taskbar Notification
area on exit
Continues to run ACDSee in the
background after you exit the application.
You can restart ACDSee by clicking the
icon in the Taskbar Notification area.
Start ACDSee when
the system boots
Starts ACDSee automatically when you
turn on your computer.
Setting the Browser options | 23
CHAPTER 3: BROWSING
Browser options
Browser display
scheme
Specifies the color scheme for the Browser. Select one of the
following options:
• Light
• Medium
• Dark
Clear path
history on exit
Clears the list of recently-accessed folders whenever you exit
ACDSee.
Show full path in Displays the full path of a selected file in the ACDSee title bar.
the title bar
Using the File List pane
The File List pane displays the contents of the currently selected folder, the
results of your latest search, or any files that match your filtering criteria. It lists
files in any order you choose, and can display thumbnail previews of images, a
detailed list of file properties, file format icons, or almost any combination of
image details.
You can use the File List pane to identify and select the images you want to
move, view, edit, print, or share. The following sections explain how to set the
File List options, specify the types of files you want to list, and change how the
files are displayed.
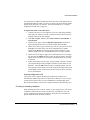
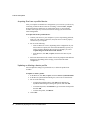
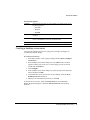
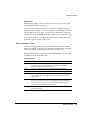
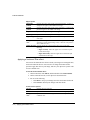
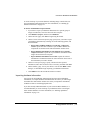
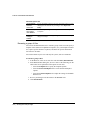
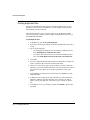
The Contents bar
The Contents bar is located at the top of the File List pane and describes what you
are currently browsing. When you are using the Folders pane, the Contents bar
will display the path or paths to the folders you are browsing, as in the following
example:
If you are browsing files by category or rating with the Organize pane, the
Contents bar displays the selected classifications, as in the following example:
The Contents bar also displays a date range when browsing with the Calendar
pane, and a summary of your search criteria when you use the Search pane.
24 | Using the File List pane
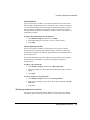
CHAPTER 3: BROWSING
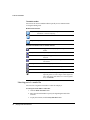
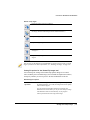
The File List toolbar, located at the top edge of the File List pane, provides
shortcuts to commonly used commands and settings to adjust the appearance of
the files displayed in the pane.
File List toolbar
Selective
Browsing
Opens the Selective Browsing pane, where
you can browse files within a combination of
folders, organize methods, and date ranges.
For more information, see “Using selective
browsing” on page 161.
Filters
Opens the Filters dialog box, where you can
specify what types of files to display in the
File List pane.
View Modes
Opens the View Modes menu, where you can
select how to display files in the File List
pane.
Sort
Displays a list of available file attributes you
can use to sort the files in the File List pane,
and choose the order in which you want to
display your files.
Select
Displays a list of available selection types.
Choose one of the following to make or
change your selection:
• Select All
• Select All Files
• Select All Images
• Select by Rating
• Clear Selection
• Invert Selection
Thumbnail
Size
Controls the size of the thumbnails in the File
List pane.
Using the File List pane | 25
CHAPTER 3: BROWSING
Filtering files
You can set the Filters options to identify the types of files and folders you want
to display in the File List pane.
To set File List pane filters:
1. Do one of the following:
•
Click View | Filters.
•
Click the Filters button on the File List pane toolbar.
2. In the Filters dialog, select Apply filtering criteria.
3. Select or clear one or more of the following filters to display or hide that
file or folder type in the File List pane:
•
Show image files
•
Show media files
•
Show folders
•
Show archive files
•
Show hidden files & folders
4. Click OK to accept your changes and return to ACDSee.
Changing view modes
You can select different view modes, such as Thumbnails, Details, or Icons, to
display your files in the File List pane. You can also specify which file properties
or image information to display with each file.
To select a view mode:
Click View | View Mode, and then select one of the following:
View modes
Thumbs+Details Displays a list of thumbnail previews, along with columns of file
properties.
Filmstrip
Displays thumbnail previews of your files in a single row across the
bottom of the File List pane, and displays the currently selected file in
an expanded Preview pane.
Thumbnails
Displays thumbnail previews of all images and media files in the File
List pane. You can customize the appearance of your thumbnails, and
specify what information is displayed with them. For more
information, see “Customizing thumbnails” on page 31.
26 | Using the File List pane
CHAPTER 3: BROWSING
View modes
Tiles
Displays each thumbnail preview and relevant file information on a
tiled background.
Icons
Displays files in a list, represented by large default system icons for
each file type.
List
Displays a list of file names and extensions.
Details
Displays a list of file names and extensions, along with details about
each file, such as size, format, and creation date. You can customize
the appearance of the Details view mode, and specify what
information appears for each file.
Customizing the Details view mode
You can set Details view mode to automatically resize columns, display or hide
grid lines, and select an entire row when you select a column entry in that row.
You can also change the appearance of the Details view mode, select which
columns to display, and customize the column order.
To select columns and set column order:
1. Click View | View Mode, and then select Choose Details.
2. In the Choose Details dialog box, do one or more of the following:
•
To add a column, select a folder or detail name in the Available Details
pane, and then click Add. Adding a folder adds all detail names within
the folder.
•
To remove a column, select a detail name in the Currently Displayed
Details pane, and then click Remove.
3. To move a column to the left in the File List pane, select its name in the
Currently Displayed Details pane and click Move Up.
4. To move a column to the right in the File List pane, select its name in the
Currently Displayed Details pane and click Move Down.
5. Click OK.
You can click Reset to display only the default column names in the Currently
Displayed Details pane, and you can also move a column in the File List pane by
dragging its header to a new position. A vertical line indicates where the column
will be inserted.
Using the File List pane | 27
CHAPTER 3: BROWSING
To set how Details view mode displays information:
1. Click Tools | Options.
2. In the Options dialog box, click File List | Details View.
3. In the Details view area, set the options as described below.
4. Click OK.
Details View options
Show grid lines
Separates each row and column with a grid line.
Full row select
Selects the entire row when you click a column entry in that
row.
Column auto-width
Automatically resizes each column to fit its contents.
Highlight sort column
Highlights the column used to sort files when you click on
the column's title.
Choose Details
Opens the Choose Details dialog box, where you can select
which columns to display and customize the column order.
Sorting files
In any view mode, you can sort your files according to different file properties to
quickly organize your images, find specific files, and create a range of files with
similar attributes for easy selection.
To sort items in the File List:
Click View | Sort, and select one of the following criteria:
•
Filename
•
Size (KB)
•
Image Type
•
Modified Date
•
Image Properties
•
Caption
•
Rating
•
Custom Sort
To set the direction of the sort:
Click View | Sort, and select a direction:
28 | Using the File List pane
•
Sort Forward
•
Sort Backward
CHAPTER 3: BROWSING
Sorting files using column headers
You can quickly sort files in Details view mode using column headings.
To sort files using a column header:
1. Click a column header. An arrow appears, indicating the sort direction.
2. Click the column header again to change the sort direction.
Custom sorting files
You can use custom sorting to customize the order of files in the File List pane.
After custom sorting your files, ACDSee automatically saves the file order for the
selected folder until you change it or delete the custom sort.
To customize the sorting order of your files:
1. Select one or more files.
2. Drag the selected files to a new location in the File List.
3. To delete a custom sort, click View | Sort, and select Delete Custom Sort.
Selecting files
In the File List pane, you can select all of your files and folders at once, select all
of the files in the current folder, select only the image files, or clear your selection
entirely.
You can also set an option to automatically select new files whenever you add
them to the File List.
To select your files or folders:
1. Click Edit.
2. Select one of the following options:
•
Select All: selects all files and subfolders in the current folder.
•
Select All Files: selects all files in the current folder.
•
Select All Images: selects all image files in the current folder.
•
Select by Rating: displays a list of ratings, and selects all files
currently assigned to the rating you select.
•
Clear Selection: clears your selection.
•
Invert Selection: selects all files except for your original selections.
Using the File List pane | 29
CHAPTER 3: BROWSING
Setting the File List pane options
You can use the ACDSee Options dialog box to set the File List pane options to
suit your preferences, such as grouping archive files with subfolders, or
highlighting image types with different background colors.
To set the File List pane options:
1. Click Tools | Options.
2. In the Options dialog box, click File List.
3. On the File List options page, set or change any of the options described
below.
4. Click OK to accept your changes and return to ACDSee.
File List options
Automatically select new
files
Automatically selects new files when they are added to
the folder displayed in the File List pane.
Group archives with folders Treats archive files as folders when sorting items in the
File List pane.
Use embedded JPEG
thumbnails
Uses thumbnails embedded in files instead of generating
a new thumbnail.
Show thumbnails on folders Displays thumbnails of a folder's contents on the folder
icon in the File List pane.
Show info tips for items in
the file list
Shows a text pop-up of file properties when placing the
mouse pointer over a file in the File List pane.
Show the Windows
Displays the default Windows Explorer shortcut menu
Explorer shell context menu instead of the ACDSee shortcut menu.
as the default right-click
menu
CTRL key activates hottracking
Updates the Preview and Properties panes without
changing the file selection. To hot-track, hold the CTRL
key and move your mouse pointer over the File List pane.
Don't highlight image files
Does not highlight image files in Details and
Thumbs+Details view modes.
Use a single color to
highlight image files
Uses a single color to highlight all image file types in
Details and Thumbs+Details view modes.
Use multiple colors to
highlight image files
Uses a different color to highlight each image type in
Details and Thumbs+Details view modes.
Configure Filters
Opens a dialog box where you can select which file types
to display in the File List pane.
30 | Using the File List pane
CHAPTER 3: BROWSING
Maximizing the File List pane
To make the most of your available screen space, you can choose to maximize the
File List pane and hide the rest of the Browser panes. The only parts of the
Browser still visible are the File List pane and whichever toolbars you are
currently using.
To maximize the File List pane:
1. Click View | Maximize File List.
2. To show only the File List pane and its toolbar, click View | Full Screen.
Click the Close Full Screen button to return to the Browser.
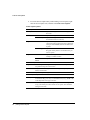
Customizing thumbnails
You can customize the appearance of thumbnails in the File List pane by
choosing which image information and overlay icons to display, and by setting
the thumbnail size, ratio, and spacing.
You can control and adjust the size of the thumbnails by moving the Thumbnail
Size slider in the File List pane toolbar. For more information, see “File List
toolbar” on page 25.
To customize thumbnails in the File List pane:
1. Click Tools | Options.
2. In the Options dialog box, click Thumbnail Display or Thumbnail
Ratio.
3. On the thumbnail options pages, set or change any of the options described
below.
4. Click OK to accept your changes and return to ACDSee.
Thumbnail Display options
Information
File name
Displays the name of each file on the thumbnail in
the File List pane.
Choose
Thumbnail Info
Opens a dialog box where you can select the
information to display on each thumbnail in the
File List pane.
Choose Tiles
Info
Opens a dialog box where you can select the
information to display on each tile in Tiles view
mode.
Using the File List pane | 31
CHAPTER 3: BROWSING
Thumbnail Display options
Thumbnail
style
Show drop
shadow
Displays a drop-shadow effect on thumbnails in
the File List pane.
Show image
border
Displays a border around images on thumbnails in
the File List pane.
Show outer
border
Displays a border around each thumbnail in the
File List pane.
Thumbnail
spacing
Specifies the amount of space between thumbnails in the File List
pane.
Overlay icons
Sound
Displays a sound overlay icon on thumbnails if the
image contains embedded or associated audio.
Rating
Displays a rating overlay icon on thumbnails if the
file has been rated in the ACDSee database.
Database
information
Displays a database overlay icon on thumbnails if
the file has information stored in the ACDSee
database.
Icon
Displays a file format overlay icon on thumbnails
in the File List pane.
Category
Displays a category overlay icon on thumbnails if
the file has been categorized.
Shortcut
Displays a shortcut overlay icon on thumbnails if
the item is a shortcut to another file.
Offline
Displays an offline overlay icon on thumbnails if
the file is stored on an offline device.
Excluded items
Displays an excluded file icon on thumbnails if the
file is excluded from the ACDSee database.
High-quality
scaling
Uses high-quality thumbnail scaling in the File List pane.
Thumbnail Ratio options
Custom
Specifies a custom ratio for the shape of the thumbnails in the File
List pane. Drag the slider to set the ratio.
Portrait
Specifies a standard 3:4 portrait ratio for the shape of the thumbnails
in the File List pane.
Landscape
Specifies a standard 4:3 landscape ratio for the shape of the
thumbnails in the File List pane.
32 | Using the File List pane
CHAPTER 3: BROWSING
Using the Preview pane
You can preview image, audio, and video files in the Preview pane. The Preview
pane displays a thumbnail of the currently selected image or media file. You can
resize the pane to adjust the thumbnail dimensions, and reposition the pane
anywhere on your screen.
To open or close the Preview pane:
Click View | Preview.
Setting the Preview pane options
You can customize the delay, image size, and display settings of the Preview
pane.
To set the Preview pane options:
1. Click Tools | Options.
2. In the Options dialog box, click Preview.
3. On the Preview options page, set or change any of the options described
below.
4. Click OK to accept your changes and return to ACDSee.
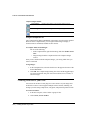
Preview options
Delay
Specifies how quickly the Preview pane displays an image after you
select it in the File List pane.
Size
Specifies the size of the previewed image in relation to the Preview
pane or original image.
Preview audio
and video clips
Previews media files as you select them in the File List pane.
Autoplay audio Automatically starts playing audio and video files in the Preview pane.
and video clips
Instant image
preview
Displays an instant preview that improves in quality as the image is
decoded.
Using the Preview pane | 33
CHAPTER 3: BROWSING
Using the Folders pane
The Folders pane displays a directory tree of all the folders on your computer,
similar to Windows Explorer. You can select one or more folders in the Folders
pane to display their contents in the File List pane.
You can also use the Folders pane to create shortcuts to your favorite files,
folders, or applications. Then, instead of having to search for a specific file, you
can quickly access it in the Favorites folder.
Whenever you browse to a folder using the Folders pane, the ACDSee database
automatically catalogs any images or media files in the folder. For more
information, see “Cataloging files” on page 130.
Creating and managing folders
You can use the Folders and File List panes to create, delete, rename, and move
folders on your hard drive to help organize your files.
To manage your folders:
1. In the Folders pane, browse to where you want to add, delete, or rename a
folder.
2. Do one of the following:
•
To create a folder, click File | New, and then select Folder. Type a
name for the new folder and press ENTER.
•
To delete a folder, select a folder and press DELETE.
•
To rename a folder, right-click the folder you want to rename and
select Rename. Type a new name for the folder and press ENTER.
You cannot create, rename, or delete a drive or any folder on a read-only file
system, such as a CD-ROM.
Selecting multiple folders
Easy-Select bars are vertical columns of check boxes on the left side of the
Folders and Organize panes. You can use the Easy-Select bars to select multiple
folders, and display their contents in the File List pane.
To use the Easy-Select bar:
In the Folders pane, select the check box to the left of each folder with
contents you want to display.
34 | Using the Folders pane
CHAPTER 3: BROWSING
You can also use the Easy-Select bars with the Selective Browsing pane. For
more information, see “Using selective browsing” on page 161.
Creating a Favorites shortcut
You can create shortcuts to folders, files, and even applications, which you can
then access in the Folders pane. Favorites shortcuts can be renamed, moved, or
deleted just like a folder.
To create a Favorites shortcut:
1. In the File List pane, select a file or folder.
2. Do one of the following:
•
Right-click the item you selected, and then select Add to Favorites.
•
Click File | Add to Favorites.
3. Type a name for the new shortcut and click OK.
You can also drag items from the File List pane to the Favorites folder in the
Folders pane.
Setting the Folders pane options
You can customize the Folders pane by showing or hiding the Easy-Select bar,
setting the confirmation prompts for moved folders, and displaying archives.
To set the Folders pane options:
1. Click Tools | Options.
2. In the Options dialog box, click Folders.
3. On the Folder options page, set or change any of the options described
below.
4. Click OK to accept your changes and return to ACDSee.
Folders options
Easy-Select
Show Easy-Select
Displays the Easy-Select bar in the Folders
pane, which you can use to select multiple
folders.
Enable Easy-Select Displays a tool-tip reminder when you place
tooltip
your mouse pointer over the Easy-Select bar.
Using the Folders pane | 35
CHAPTER 3: BROWSING
Folders options
Folder display
Show archives in
Folder pane
Lists archive files in the Folders pane.
Confirm drag-and- Prompts you for confirmation of folder
drop move within
movements within the Folders pane.
folder views
Show overlay for
excluded folders
Displays an overlay icon on folders that are
excluded from the ACDSee database.
Working with files and folders in the Browser
You can perform many of the same operations on your files in ACDSee that you
can in Windows Explorer. The advantage to copying, moving, and renaming your
files with ACDSee is that you will retain all of your database information. For
more information about the ACDSee database, see “Managing database
information” on page 129.
Setting File Management options
You can specify how ACDSee handles renaming and deleting files and folders,
and whether ACDSee sends deleted files to the desktop Recycle Bin by default.
To set the File Management options:
1. Click Tools | Options.
2. In the Options dialog box, click File Management.
3. On the File Management page, set or change any of the options as
described below.
4. Click OK to accept your changes and return to ACDSee.
File Management options
Confirmations
Confirm folder
delete
Prompts you for confirmation when deleting
folders.
Confirm file delete
Prompts you for confirmation when deleting
files.
Confirm read-only
rename and delete
Prompts you for confirmation when renaming
or deleting read-only items.
36 | Working with files and folders in the Browser
CHAPTER 3: BROWSING
File Management options
Overwriting
duplicate files
Other
Ask
Prompts you for confirmation when
overwriting duplicate files.
Rename
Automatically resolves any naming conflicts
when moving or copying files by renaming the
source files. In the Separator character field,
type a character to use to separate file names in
the automatic renaming system.
Replace
Automatically overwrites files in the target
folder without prompting for confirmation.
Skip
Does not move, copy, or overwrite any files
that result in naming conflicts.
Click to edit file
name
Specifies that file names can be edited by
clicking the file name in the File List pane.
Use Recycle Bin
Sends files to the Desktop Recycle Bin. If not
selected, deleted files are permanently removed
from your hard drive.
Copying and moving files
You can use the Copy To Folder and Move To Folder commands to relocate files
and folders on your hard drive, and specify how to handle overwriting existing
files. You can also select from a list of previously accessed folders to save time
looking through your directory structure.
To copy or move files:
1. Do one of the following:
•
In the File List pane, select one or more files or folders.
•
In the Folders pane, select one or more folders.
2. Click Edit | Copy To Folder or Move To Folder.
3. In the Copy Files or Move Files dialog box, do one of the following:
•
Select the Folders tab, and locate the folder on your hard drive where
you want to place the files.
•
Select the History tab, and select a folder from the list of recently
accessed folders.
Working with files and folders in the Browser | 37
CHAPTER 3: BROWSING
4. Click the Overwriting duplicate files drop-down list and select one of the
following options to specify how ACDSee should handle overwriting
files:
•
Ask: prompts you for confirmation when overwriting a file.
•
Rename: prompts you to rename a file.
•
Replace: overwrites any file with the same file name and extension.
•
Skip: cancels the operation if there is a file with the same file name
and extension.
5. Click OK to start copying or moving your files.
You can also access the Copy To and Move To commands from the Edit menu in
the Viewer.
Pasting files and folders
You can cut or copy files to the Clipboard, and then paste them into another
folder without losing your database information.
To cut and paste files:
1. In the File List or Folders pane, select one or more files or folders.
2. Click Edit | Copy or Cut.
3. Using the Folders pane, browse to a new location.
4. Click Edit | Paste to place the files or folders into the new location.
Copying images
You can copy an image to the Clipboard and then paste it into another
application, such as ACD Photo Editor.
To copy an image:
1. In the File List pane, select the image file you want to copy.
2. Click Edit | Copy Image.
3. Paste the image into your other application.
38 | Working with files and folders in the Browser
CHAPTER 3: BROWSING
Replacing a file
When copying or moving files from one location to another, if a file already
exists in the destination folder with the same file name and extension as a file you
are relocating, a file name collision occurs. In ACDSee, you can view both of the
files involved in the Confirm File Replace dialog box. If the files involved are
image files, ACDSee displays thumbnail previews of both files, and provides
options to replace the existing file, rename, delete, or skip the file you are
moving, or cancel the operation entirely.
To use the Confirm File Replace dialog box:
1. If you are moving a number of files and want to handle all potential file
name collisions in the same manner, select the Apply to all check box.
2. To help determine any differences between the two files, use the toolbar
between the two preview fields to shrink or enlarge the size of the
previews.
3. Do one of the following:
•
To replace the destination file with the source file, click Replace.
•
To rename the new file before moving it into the destination folder,
type a new name for the file in the Rename to field, and then click
Rename.
•
To skip this file, and leave both files intact, click Skip.
•
To delete either the destination or source file, click Delete below the
file you want to remove from your hard drive.
•
To cancel the operation and not move or copy any more files, click
Cancel.
In the Confirm File Replace dialog box, "destination file" refers to the file that
exists in the target folder, and "source file" refers to the file you are moving or
copying.
Renaming a file or folder
You can rename a file or folder on your hard drive in the Folders or File List
pane. To rename a group of files at the same time, see “Renaming a group of
files” on page 150.
To rename a file or folder:
1. In the File List or Folders pane, select the item you want to rename.
2. Click Edit | Rename.
Working with files and folders in the Browser | 39
CHAPTER 3: BROWSING
3. Without removing or changing the file name extension, such as “.jpg”,
type a new name for the file.
4. Press ENTER.
Working with offline media
ACDSee stores thumbnails and database information for images contained on
CDs or other removable media as Photo Discs. You can then browse the
thumbnails and view the information for those images, even when the disc is not
in your CD-ROM drive.
To add a Photo Disc:
1. Place a disc containing images into your CD-ROM drive.
2. Do one of the following:
•
If Device Detector is active, follow the steps to create an ACDSee
Photo Disc. For more information, see “Using the ACDSee Device
Detector” on page 50.
•
If Device Detector is not active, click File | New, and then select
Photo Disc.
3. In the New Disc dialog box, type a name for your disc in the Title field,
and then click OK.
You can then browse the contents of the Photo Disc in the Offline Media section
of the Folders pane.
If you add or remove images from a disc that you have already added to ACDSee
as a Photo Disc, you can update the information stored in the database. Insert the
disc in your CD-ROM drive, and then right-click the name of the disc in the
Folders pane and select Update Photo Disc.
Using shell commands
You can open a file in another program from ACDSee. For example, you can
open documents in the application used to create them.
40 | Working with files and folders in the Browser
CHAPTER 3: BROWSING
To use the shell open and edit commands:
1. Click File | Shell.
2. Select one of the following options:
•
Open: opens the file using the application with which its extension is
associated.
•
Edit: opens the file using the default system application, or opens a
dialog box where you can select an application.
Using the Calendar pane
With the Calendar pane, you can organize and browse your collection of image
and media files using the dates associated with each file. The Calendar pane
includes Year, Month, and Day view modes that you can select to view and sort
your files. You can click any date in the Calendar pane to display a list of files
associated with that date.
To open the Calendar pane:
Click View | Calendar.
The Calendar pane searches for and displays items that are cataloged in the
ACDSee database. If you have not viewed a folder of images with ACDSee yet,
that folder’s contents will not be included in the database. For more about
cataloging files, and the ACDSee database, see “Managing database
information” on page 129.
Calendar pane toolbar buttons
The Calendar toolbar is located at the bottom of the pane, and consists of six
buttons separated by a scroll bar:
Year View
Switches the Calendar pane to Year view.
Month View
Switches the Calendar pane to Month view.
Day View
Switches the Calendar pane to Day view.
Options
Opens the Calendar options dialog box.
Previous Item
Selects the closest previous date that has associated files.
Next Item
Selects the next closest date that has associated files.
Using the Calendar pane | 41
CHAPTER 3: BROWSING
Displaying files by date and time
You can sort and view your images and files with the Year, Month, and Day view
modes in the Calendar pane.
To sort and display your files by date or time:
1. On the Calendar pane toolbar, click the Year View, Month View, or Day
View buttons to specify a view mode.
2. Click a bolded item in the Calendar pane tables. The File List pane will
display all of the files associated with that date or time.
Navigating in the Calendar pane
In the Calendar pane, each table can represent one year, one month, or one day,
depending on the view mode you select. Each table's cells represent the parts of
the year, month, or day. If the month, day, or hour has any images associated with
it, the label on the cell is bold. At the top of each table, a title bar displays the date
on the left, and the number of items associated with that date on the right.
Calendar table in Year View
Calendar table in Month View
Example
If you select Year view, the Calendar pane displays a row of tables. Each table
represents a single calendar year, and the cells in the table display the months of
the year. A bolded month indicates that month has associated files. By selecting a
bolded month, you can display all files associated with that month in the File List
pane, no matter where the files are located on your computer.
42 | Using the Calendar pane
CHAPTER 3: BROWSING
Calendar pane shortcuts
You can use the various parts of the Calendar pane as shortcuts to navigate
through the different view modes to isolate and view files associated with specific
dates.
Year view
• Click the title bar on a year table to select the entire year and view all files
associated with that year.
• Right-click the title bar on a year table to scroll through and select from
adjacent years.
• Double-click any month to switch to Month view.
Month view
• Click the title bar on a month table to select the entire month and view all
files associated with that month.
• Right-click the title bar on a month table to scroll through and select from
adjacent months.
• In the table heading, click the letter indicating a day of the week to select a
column of days in the month table. For example, click F to select all
Fridays in that month.
• Double-click any date to switch to Day view.
Day view
• Click the title bar on a day table to select the entire day and view all files
associated with that day.
• Right-click the title bar on a day table to scroll through and select from
adjacent days.
• In the table heading, click AM or PM to select the first or second half of a
day.
Setting the Calendar pane options
You can customize the Calendar pane to start each week on a specific day, to use
a 12- or 24-hour clock format, and to use one of four date types when sorting files
To set the options for the Calendar pane:
1. Click Tools | Options.
2. In the Options dialog box, click Calendar.
3. On the Calendar options page, set or change any of the options described
below.
Using the Calendar pane | 43
CHAPTER 3: BROWSING
4. Click OK to accept your changes and return to ACDSee.
Calendar pane options
Date types
Database date
Sorts files in the Calendar pane based on the date
stored in the ACDSee database.
Metadata (Exif) Sorts files in the Calendar pane based on the EXIF
date
date of each item.
File modified
date
Sorts files in the Calendar pane based on the lastmodified date of each item.
File created date Sorts files in the Calendar pane based on the
creation date of each item.
Filters
Apply file list
filters
Filters the items displayed in the Calendar pane
based on the currently selected filter settings for
the File List pane. For information on File List
filters, see “Filtering files” on page 26.
Show image and Displays only image, audio, and video files in the
media files only Calendar pane.
Start of week
Specifies the first day of each week in the Calendar pane.
Clock formats
12 hour
Uses a 12-hour clock in the Calendar pane.
24 hour
Uses a 24-hour clock in the Calendar pane.
Using the Image Basket
You can use the Image Basket to gather and hold images and media files from
different locations or folders. Once you have placed items in the Image Basket,
you can use any of the tools or features in ACDSee to edit, share, or view those
files.
To use the Image Basket:
1. To open the Image Basket, click View | Image Basket.
2. In the File List pane, select the files you want to add. Drag the items to the
Image Basket, or right-click a selected item and select Add to Image
Basket.
3. To remove one or more files, right-click the file and select Remove from
Image Basket.
4. To remove all files, right-click the Image Basket and select Clear Image
Basket.
44 | Using the Image Basket
CHAPTER 3: BROWSING
You can also add items to the Image Basket by dragging them from Windows
Explorer.
Refreshing the Browser
When you add or remove files from a folder, you can refresh the File List, refresh
the entire Browser, or set the File List to refresh automatically.
To refresh the Browser:
Click View, and then select one of the following:
•
Refresh File List: refreshes the contents of the File List pane.
•
Refresh Automatically: sets the File List pane to refresh
automatically whenever files are added or removed.
•
Refresh All: refreshes all of your open Browser panes.
Refreshing the Browser | 45
CHAPTER
4
ACQUIRING
You can use ACDSee to download or acquire images from your digital camera,
scanner, mobile phone, or other removable device. You can also use ACDSee to
capture images of your screen and save them as files.
ACDSee guides you through the process of downloading images from a
removable device. You can preview the images you want to download, copy or
move them to a specific location on your hard drive, and add them to the ACDSee
database all at the same time.
You can also use ACDSee’s Device Detector to detect whenever a device is
connected to your computer, and create a profile for each of your devices to
automate the acquire process with the Device Synchronizations Wizard.
| 47
CHAPTER 4: ACQUIRING
You can also use the Folders pane to browse directly to certain types of
removable device, view the images on your device, and then copy them to your
hard drive.
You may require DirectX and QuickTime to copy and view your audio or video
files. For more information, see “System requirements” on page 4.
About removable devices
With ACDSee, there are several ways to obtain images from your digital camera,
scanner, or memory card. For more information about how your device
communicates with your computer, please consult your device's Help file or
manual. The different types of removable devices are:
• USB mass storage device: mass storage devices include removable
memory cards that you can attach to your computer using a USB card
reader, and cameras that contain an internal memory card and can be
attached directly to your computer. USB mass storage devices are detected
by your system as a removable drive.
• Windows Image Acquisition: cameras and scanners that use Windows
Image Acquisition (WIA) drivers.
• TWAIN: cameras and scanners that use the TWAIN interface. TWAINsupported devices use TWAIN drivers that you must install on your
computer to communicate with the device. For more information about
drivers, and whether or not your device uses TWAIN, please consult your
device's Help file.
• Older model digital cameras: some older model cameras require an ACD
Systems digital camera plug-in. Newer camera models connect to your
computer as a mass storage device.
Using the Acquire Wizard
ACDSee's Acquire Wizard will guide you through the process of downloading
files from a camera, scanner, or mass storage device. You can preview the images
you want to download, and specify a location for them on your hard drive.
To use this wizard, your device needs to connect as a mass storage device, use
Windows Imaging Acquisition or TWAIN, or use a digital camera plug-in. If you
are uncertain about how your camera, scanner, or memory card connects to your
computer, please consult your device’s user manual.
48 | Using the Acquire Wizard
CHAPTER 4: ACQUIRING
You can also have ACDSee automatically detect your device and open the Device
Synchronization Wizard, which you can use to profile your device and set default
options for the next time you connect it. For more information, see “Using the
ACDSee Device Detector” on page 50.
To acquire files from a removable device:
1. Connect your device to your computer. If you are experiencing problems,
make sure your camera or scanner is turned on, and your device's cable is
properly connected to your computer.
2. Click File | Acquire, and then select From Camera or Card Reader or
From Scanner.
3. On the Welcome page, select the Skip this step next time check box to
bypass the page the next time you use the wizard, and click Next.
4. On the Source Device page, select the type of device you want to use from
the Type list. ACDSee scans your device and displays the available
options. In the Device list, select the specific name of the device from
which to acquire your files. Click Next when you are ready to continue.
5. On the File Format Options page, select a file format to save your images.
You can click the Options button to select file-specific options. Note that
options do not exist for every file format. Click Next when you are ready
to continue.
6. Finally, on the Output Options page, specify whether you want to rename
your acquired images using a template, and where to place them on your
hard drive. Click the Edit button to define a renaming template. You can
select options to automatically correct the orientation of images taken with
certain digital cameras, and to remove the files from your device once they
are on your hard drive.
Acquiring images from a CD
You can also use the Acquire Wizard with ACDSee's Device Detector to
automatically obtain images from a CD. If the Device Detector is active on your
system when you place a disc in your CD-ROM drive, and depending on the
Device Detector options you select, the Acquire Wizard will automatically open.
Creating a renaming template
When acquiring files from a camera, scanner, or mass storage device, you can use
a template to rename the files as they are placed on your hard drive. You can
specify a template with a numerical sequence, add custom text, and insert filespecific information into each new file name.
Using the Acquire Wizard | 49
CHAPTER 4: ACQUIRING
To create a renaming template:
1. In the Edit File Name Template dialog box, do one or both of the
following:
•
In the Template field, type a word or phrase to use in each file name.
•
Click the Insert Property button and select the file-specific properties
to use in each file name.
2. Click the Insert Sequence Number button to add number signs to your
template. Any number signs (#) in the template are replaced with
sequential numeric characters, starting at the number you specified in the
wizard.
3. Click OK to return to the wizard.
Using the ACDSee Device Detector
You can use the ACDSee Device Detector to access the images stored on your
camera or other removable device, and display them using ACDSee.
After you install ACDSee, the Device Detector runs in the background and
displays a camera icon in the Taskbar Notification area. When you plug a camera
or other device into your computer, the Device Detector detects the connection,
the icon changes color, and either prompts you to specify what you want to do
with your images or, depending on the type of device, automatically launches the
Device Synchronization Wizard or Acquire Wizard.
The ACDSee Device Detector can also detect when you insert a CD into your
CD-ROM drive, or attach a mass storage or Windows Image Acquisition (WIA)
device to your computer. Such devices may include cameras, card readers, Web
cams, and scanners.
If your device does not have a TWAIN or WIA driver installed, is not a mass
storage device, or if there are no files on your device, ACDSee Device Detector
will not be able to detect it.
ACDSee Device Detector replaces the Windows XP AutoPlay feature. To resume
AutoPlay functionality, exit the ACDSee Device Detector.
50 | Using the ACDSee Device Detector
CHAPTER 4: ACQUIRING
Starting the ACDSee Device Detector
You can start the ACDSee Device Detector from the Start menu, or from within
ACDSee. The ACDSee Device Detector needs to be active to detect when you
have connected a device to your computer.
If the ACDSee Device Detector is active when you shut down your computer, it
will run automatically the next time you start your computer.
To start the Device Detector:
Click File | Acquire, and then select ACDSee Device Detector.
Starting ACDSee from the Device Detector
When you plug a camera or other device into your computer, the ACDSee Device
Detector detects the connection and opens ACDSee. However, at any time while
your device is attached to your computer, you can manually open ACDSee and
display the images on the device.
To manually open ACDSee:
1. In the Taskbar Notification area, right-click the Device Detector icon.
2. Select Launch ACDSee.
Setting the Device Detector options
You can select options to specify how the ACDSee Device Detector responds
when it detects a camera or other device on your computer.
To set ACDSee Device Detector options:
1. In the Taskbar Notification area, right-click the Device Detector icon.
2. In the Device Detector menu, select Options.
3. In the Device Options dialog box, select or change the options described
below.
4. Click OK.
Device Detector options
When new
media is
detected on
your computer
Ask what to do
each time
Prompts you to select an operation when you
connect a device to your computer.
Automatically
launch
ACDSee’s
Acquire Wizard
Automatically opens the Device Synchronization
Wizard or Acquire Wizard, depending on the
type of device you have connected to your
computer.
Using the ACDSee Device Detector | 51
CHAPTER 4: ACQUIRING
Device Detector options
CD-ROM Drives
Ask what to do
each time
Prompts you to select an operation when you
insert a disc into your computer.
Automatically
launch
ACDSee’s
Acquire Wizard
Automatically opens the Acquire Wizard.
Automatically
prompt to create
or view an
ACDSee Photo
Disc
Automatically prompts you to add the disc as a
Photo Disc. For more information about Photo
Discs, see “Working with offline media” on
page 40.
Automatically acquiring files from a removable device
You can use ACDSee to automate the transfer of files from a removable device to
your computer. ACDSee's Device Synchronization Wizard will guide you
through the process of automatically downloading images from a camera,
memory card, or other storage device. You can name the device, specify the
actions you want to take each time you connect the device, and edit or remove the
device's profile at a later time.
To use this wizard, your device needs to connect as a mass storage device. If you
are uncertain about how your camera, scanner, or memory card connects to your
computer, please consult your device’s user manual.
Configuring a device
The first time you connect a device to your computer, if there are files on your
device, the Device Synchronization Wizard will work in conjunction with
ACDSee's Device Detector to configure and profile your device. To perform the
initial configuration, Device Detector needs to be active. If you choose not to use
Device Detector, you can acquire your images using the Acquire Wizard. For
more information, please see “Using the Acquire Wizard” on page 48.
To configure a device the first time you acquire your images:
1. Connect your device to your computer. If you are experiencing problems,
make sure your camera is turned on, and your device's cable is properly
connected to your computer.
2. Depending on the configuration of your Device Detector options, the
wizard will automatically open or you will be prompted. When the Device
52 | Automatically acquiring files from a removable device
CHAPTER 4: ACQUIRING
Detector prompts you, select Acquire images from the device with
ACDSee.
3. On the Welcome page of the Device Synchronization Wizard, type a name
for your device. Click Next when you are ready to continue.
4. On the Synchronization Settings page, specify how you would like to
download and process files each time you connect the device to your
computer, and click Next to continue:
•
Files options: specifies whether the wizard will automatically select
and copy new files to your hard drive, or ask you which new files to
copy.
•
Destination and naming options: specifies whether the wizard will
automatically retain file names used on your device and place files in
your My Pictures folder, prompt you to name the files and select a
destination, or use a custom file and folder naming template. Click
Settings to create a naming template and specify the folder options.
For more information about renaming templates, see “Creating a
renaming template” on page 49.
•
Device storage space options: specifies whether the wizard will
automatically delete files from your device once they are copied to
your hard drive, prompt you to delete files, or use custom storage
settings. Click Settings to specify the storage options.
5. If you selected the Files option Always prompt for which files to copy,
on the Files to Copy page, select which files to copy to your hard drive,
and click Next.
6. If you selected the Destination and naming option Ask what to do each
time, on the Output Options page, specify the file name and folder options.
Click Edit if you would like to specify a naming template. Click Next
when you are ready to continue.
7. If you selected the Device storage space option Ask what to do each time,
on the Device Storage Options page, specify how you would like to delete
files from your device. Click OK when you are finished.
8. Click Finish to close the wizard. Your files will be placed in the specified
location on your hard drive, and the profile for your device will be saved.
Automatically acquiring files from a removable device | 53
CHAPTER 4: ACQUIRING
Acquiring files from a profiled device
After you complete an initial device configuration, you can access your device by
connecting it while the Device Detector is running, or from the File | Acquire
menu in the Browser. Each time you connect that device to your computer,
ACDSee will acquire any new files based on the settings you selected in the
initial configuration.
To acquire files from a profiled device:
1. Connect your device to your computer. If you are experiencing problems,
make sure your camera is turned on, and your device's cable is properly
connected to your computer.
2. Do one of the following:
•
If Device Detector is active, depending on the configuration of your
Device Detector options, the wizard will automatically open or you
will be prompted. When the Device Detector prompts you, select
Acquire images from the device with ACDSee.
•
In the Browser, click File | Acquire, and select the name of your
device.
3. Follow the instructions in the wizard. You will be prompted with different
dialog boxes depending on the settings you selected in the initial
configuration.
Updating or deleting a device profile
You can adjust the settings of a profiled device, or delete the profile from
ACDSee.
To update or delete a profile:
1. In the Browser, click File | Acquire, and select Device Synchronizations.
2. In the Device Synchronizations dialog box, select a device from the list.
3. Do one of the following:
•
To adjust the profiled settings, click Edit. In the Edit Device
Synchronization dialog box, change the options, and click OK.
•
To rename the profile, click Rename. Type a new name for the profile
and click OK.
•
To delete the profile, click Delete.
4. Click Close.
54 | Automatically acquiring files from a removable device
CHAPTER 4: ACQUIRING
Downloading files from a mobile phone
ACDSee's Mobile Phone Acquire Wizard will guide you through the process of
downloading images from your mobile phone.
To download files from your mobile phone:
1. Click File | Acquire, and select From Mobile Phone Folder.
2. On the Welcome page, select the location of your mobile phone folder, and
where you want to place the images on your hard drive. You can select
options to place images in a dated subfolder, and to remove the files from
your device once they are on your hard drive. Click Next when you are
ready to continue.
3. On the Downloaded Images page, preview your downloaded images.
Click Next when you are ready to place the images on your hard drive.
Taking a screen capture
You can use the ACDSee Screen Capture utility to create images from different
areas of your screen. You can select what areas to capture, how you want to
perform the capture, and where to store the captured image.
To take a screen capture:
1. Click Tools | Screen Capture.
2. In the Source area of the Screen Capture dialog box, identify the part of
the screen you want to capture:
3. If you want to include your mouse pointer in the output image, select the
Include mouse cursor check box
4. In the Destination area, identify where you want to place the output
image.
5. In the Initiate capture area, identify how you want to take the screen
capture.
6. Click Start to launch the screen capture tool. An icon appears in the
Taskbar Notification area.
7. Prepare your screen to show the area you want to capture, and then follow
the steps that appear in the bubble above the Screen Capture icon.
Downloading files from a mobile phone | 55
CHAPTER 4: ACQUIRING
8. To exit the Screen Capture utility without taking a screen capture, rightclick the Screen Capture icon, and then select Exit Screen Capture.
Screen capture options
Source options
Desktop
Current monitor
Captures an image of the entire area displayed on
the screen.
Window
Entire window
Captures an image of the entire active window.
Content only
Captures an image of the window contents (does
not include the frame or title bar).
Fixed size
Captures an image of a fixed area on the screen.
Click the drop-down button and select a dimension
setting or select Custom, and enter the dimension
in pixels.
Selected region
Captures a selected area of the screen. Click and
drag your mouse pointer to surround the area you
want to capture.
Child window
Captures an image of sections of the window. For
example, a toolbar or button.
Menu under
cursor
Captures selected menu commands.
Region
Object
Destination options
Clipboard
Places a copy of the image on the Clipboard. From the Clipboard you
can paste the image in a new location.
File
Displays the Save dialog box to save the file; you can specify location,
format, and file name.
Editor
Opens the captured image in the default editor.
Initiate Capture options
Hot key
Designates a keystroke combination to trigger the screen capture.
To set the Hot Key, press a key or combination of keys (e.g., CTRL + S)
on the keyboard; do not type in the box.
Timer
Takes a screen capture after a designated period. Choose enough time to
set up your desktop or window for the screen capture. The maximum
setting is 60 seconds.
56 | Taking a screen capture
CHAPTER
5
VIEWING
ACDSee’s Viewer displays your images and media files in full resolution, or at
any magnification you choose. You can examine a single image, open a group of
images one at a time, or view the contents of an entire folder in sequential order.
The Viewer also contains tool panes that display more information about the
current image and help you navigate while viewing images at higher
magnifications. You can add audio to your images, change their color depth, and
create instant slide shows.
The following section explains how to open and view your images and media
files, how to customize the Viewer to suit your preferences, and how to access
and use the tools and features in the Viewer.
| 57
CHAPTER 5: VIEWING
Opening files in the Viewer
You can use the Viewer to display your images and media files using their actual
dimensions or at a variety of magnifications. You can also display a group of
images in sequential order.
To open an image or media file in the Viewer:
In the File List pane, do one of the following:
•
Select a file and press ENTER.
•
Double-click a file.
•
Right-click an image or media file and select View.
To open a group of images in the Viewer:
1. In the File List pane, select a group of images.
2. Press ENTER.
3. To navigate through the images, do the following:
•
To view the next image in the sequence, click View | Next Image.
•
To view the previous image in the sequence, click View | Previous
Image.
By default, the Viewer displays all of the files in a folder. You can customize the
Viewer to display only those files that you select in the File List pane. For more
information, see “Setting Viewer options” on page 59.
Viewing images in full screen mode
You can use the entire screen of your monitor to display images. In full screen
mode, the window borders, menu bar, status bar, and toolbars are hidden, and
only the image is visible. If you want to always view your images in full screen
mode, you can set this option as the default for the Viewer.
To view images in full screen mode:
1. Open an image or a group of images in the Viewer.
2. Click View | Full Screen.
3. Right-click the image to access the Viewer tools and options via a shortcut
menu.
58 | Opening files in the Viewer
CHAPTER 5: VIEWING
To exit full screen mode:
Do one of the following:
•
Press the F key.
•
Right-click the image and select View | Full Screen.
Setting Viewer options
You can use the ACDSee Options dialog box to adjust the behavior of the Viewer
to suit your preferences, and increase the speed with which images are displayed.
To set the Viewer options:
1. Click Tools | Options.
2. In the Options dialog box, click Viewer.
3. On the Viewer options page, set or change any of the options described
below.
4. Click OK to accept your changes and return to ACDSee.
Viewer options
Decoding and
caching
Decode next
Automatically decodes the next image in
image in advance sequence in the Viewer.
Keep previous
Keeps the previously decoded image in
image in memory memory for quick display in the Viewer.
Startup files
Resampling
algorithm
Replace images
in list
Does not open a new Viewer window if an
image is opened from another application.
Images in new
window
Opens a new Viewer window to display
images opened from another application.
Bicubic
Resamples images in the Viewer to minimize
the raggedness normally associated with
image expansion.
Bilinear
Resamples images in the Viewer to produce
smooth transitions, but may cause excessive
blurring.
Nearest
neighbour
Does not apply resampling to images
displayed in the Viewer.
Setting Viewer options | 59
CHAPTER 5: VIEWING
Viewer options
Dropped files
Replaces images
in list
Replaces the list of images open in the
Viewer with images dropped into the Viewer
from another application.
Add images to list Adds any images dropped into the Viewer by
another application to the list of images
already open.
Always on top
Keeps the Viewer as the top window in a stack of windows.
Full-screen
Opens images in the Viewer in full-screen mode.
Hide mouse cursor Hides the mouse pointer in full-screen mode.
in full-screen
Instant image
preview
Displays an instant preview in the Viewer that improves in quality
as the image is decoded.
Exit after delete/
move
Automatically returns to the Browser after moving or deleting an
image in the Viewer.
View all images in
folder
Adds all images in a folder to the current image list when viewing
any file from that folder.
Show full image
file path
Displays the image's full file path in the Viewer title and status
bars.
Customizing the Viewer display
You can customize the Viewer display options to specify the Viewer window's
size, background, and how it zooms images.
Display options
Window size
60 | Setting Viewer options
Change window
size to fit image
Automatically resize the Viewer window to fit
the displayed image.
Center window on
screen
Automatically centers the Viewer window on
the screen.
Fix window size
Sizes the Viewer window based on the Zoom
Options settings.
Save window
position
Saves the position and size of the Viewer
window when moved or resized.
CHAPTER 5: VIEWING
Display options
Background
Zoom options
Default color
Uses the default ACDSee color for the
background in the Viewer window.
Custom color
Specifies a color to use as the background in
the Viewer window.
Tiled image
Uses a tiled image as the background for the
Viewer window. Click Browse to locate an
image on your hard drive.
Default zoom mode Specifies the default zoom level for images in
the Viewer. For more information about this
setting, see “Automatically shrinking or
enlarging images” on page 63.
Reset zoom mode
to default on every
image change
Resets the zoom mode to the selected default
when the displayed image changes.
Resize
Resizes the image based on the selected
option. For more information about this
setting, see “Automatically shrinking or
enlarging images” on page 63.
Zooming an image
By default, the Viewer displays images using their actual dimensions. You can
use the Zoom tools to enlarge or reduce the size of an image you are viewing.
When an image is zoomed to a larger size than the Viewer window, the mouse
pointer changes to a hand so that you can pan or scroll the image.
To zoom an image in or out:
Do one of the following:
•
Click Zoom, and then select one of the zoom options described below.
•
Click View | Zoom Tool, and then click the image to zoom in, or rightclick the image to zoom out.
Zoom menu options
Zoom In
Increases the magnification of the image.
Zoom Out
Decreases the magnification of the image.
Actual Size
Displays the image at its original dimensions.
Zooming an image | 61
CHAPTER 5: VIEWING
Zoom menu options
Fit Image
Displays the image at the largest magnification that fits in the Viewer
window.
Fit Width
Fits the image within the left and right sides of the Viewer window.
Fit Height
Fits the image within the top and bottom of the Viewer window.
Zoom Lock
Displays all images at the zoom option of the current image. If the zoom
level is adjusted, the new zoom level is applied to all images that you
view.
Zoom To
Opens a dialog box where you can select a zoom level. For more
information, see below.
Pan Lock
Locks the “panned” area of an image. For more information, see
“Panning an image” on page 64.
Setting a zoom level
You can use the Set Zoom Level dialog box to set a specific zoom level for the
Viewer.
To set a specific zoom level:
1. Click Zoom | Zoom To.
2. In the Zoom level area, select one of the following:
•
Fit whole image: zooms the image to fit entirely within the Viewer
window.
•
Fit width: zooms the image to fit the width of the Viewer window.
•
Fit height: zooms the image to fit the height of the Viewer window.
•
Specify: specifies a zoom percentage. Type a number in the field or
click the drop-down list and select a zoom level.
3. To use this setting as the default Viewer zoom level, select the Lock at
this zoom level check box. The Viewer displays all images based on the
specified zoom level.
4. Click OK.
62 | Zooming an image
CHAPTER 5: VIEWING
Automatically shrinking or enlarging images
You can use the settings on the Display page of the ACDSee Options dialog box
to automatically enlarge or shrink images to fit the size of the Viewer. For
information about how the combination of the choices affects the display of
images, see the Zoom mode and Resize results table below.
To automatically shrink or enlarge images:
1. Click Tools | Options.
2. In the Options dialog box, under Viewer, click Display.
3. In the Window size area, select Fix window size.
4. In the Zoom options area, select one of the following options from the
Default zoom mode drop-down list:
•
Actual Size: displays the image at its original dimensions.
•
Fit Image: displays the image at the largest magnification that fits in
the Viewer window.
•
Fit Width: fits the image within the left and right sides of the Viewer
window.
•
Fit Height: fits the image within the top and bottom of the Viewer
window.
5. Select one of the following options from the Resize drop-down list:
•
Reduce only: reduces large images to fit the size of the Viewer.
•
Enlarge only: enlarges smaller images to fit the size of the Viewer.
•
Reduce or Enlarge: reduces large images, and enlarges smaller
images to fit the size of the Viewer.
Zooming an image | 63
CHAPTER 5: VIEWING
Zoom options table
The Automatic Zoom option on the Display page of the ACDSee Options dialog
box determines if your images are reduced or enlarged to fit the Viewer. The
following table outlines the results of each combination of choices.
Zoom mode and Resize results
Fit Image
Fit Width
Fit Height
Reduce
Only
Reduces large images
to fit the size of the
Viewer.
Images that are smaller
than the Viewer are
displayed at their
original size.
Reduces large images
to fit between the left
and right sides of the
Viewer.
Images that are smaller
than the Viewer are
displayed at their
original size.
Reduces large images
to fit between the top
and bottom of the
Viewer.
Images that are smaller
than the Viewer are
displayed at their
original size.
Enlarge
Only
Enlarges small images
to fit the size of the
Viewer.
Images that are larger
than the Viewer are
displayed at their
original size.
Enlarges small images
to fit between the left
and right sides of the
Viewer.
Images that are larger
than the Viewer are
displayed at their
original size.
Enlarges small images
to fit between the top
and bottom of the
Viewer.
Images that are larger
than the Viewer are
displayed at their
original size.
Reduce and Reduces large images
Enlarge
and enlarges small
images to fit the size of
the Viewer.
Reduces large images
and enlarges small
images to fit between
the left and right sides
of the Viewer.
Reduces large images
and enlarges small
images to fit between
the top and bottom of
the Viewer.
Panning an image
In the ACDSee Viewer, you can pan large images by moving them vertically,
horizontally, and diagonally across the display area to view specific areas of the
image. When an image is larger than the Viewer window, the mouse pointer
changes to a hand.
To pan an image:
Do one of the following:
64 | Zooming an image
•
Drag the image to center the area you want to view.
•
Press an arrow key. You can hold the CTRL key to pan quickly, or hold
the SHIFT key to pan more slowly.
CHAPTER 5: VIEWING
Using Pan Lock
You can use the Pan Lock setting to automatically center the same area of a series
of larger images in the Viewer window.
To use Pan Lock:
1. In the Viewer, pan over a large image to a specific area you want to view.
2. Using the Zoom menu, zoom in on the image until you reach the
magnification you want to use for all of your images.
3. Click Zoom | Zoom Lock to keep the current zoom level.
4. Click Zoom | Pan Lock.
As you move through your images, each one will be automatically zoomed in and
panned to the same area.
Using the Magnifying Glass and Navigator panes
You can view specific areas of an image at a higher magnification with the
Magnifying Glass and Navigator panes.
To use the Magnifying Glass pane:
1. In the Viewer, click View | Magnifying Glass.
2. Move the mouse pointer over an area of the image to view that area in the
Magnifying Glass pane.
3. Change the Magnifying Glass pane settings by doing any of the following:
•
Move the slider at the bottom of the Magnifying Glass pane to increase
or decrease the magnification.
•
Select the Fixed check box to apply the slider setting to the original
size of the image. Clear the Fixed check box to apply the slider setting
to the magnification of the zoomed image in the Viewer.
•
Select the Smooth check box to apply anti-aliasing to the magnified
portion of the image, or clear the Smooth check box to view the
individual pixels.
To use the Navigator pane:
1. In the Viewer, click View | Navigator.
2. In the Navigator pane, drag the slider to set a magnification level for the
image displayed in the Viewer.
3. Drag the marquee in the Navigator pane to pan the image in the Viewer
window.
Zooming an image | 65
CHAPTER 5: VIEWING
Using the Histogram pane
The Histogram displays a graphical representation of the distribution of intensity
levels of pixels for each color channel in an image.
To display and use the Histogram:
1. In the Viewer, click View | Histogram.
2. On the Histogram, select or clear the following check boxes:
•
R: shows or hides the red color channel.
•
G: shows or hides the green color channel.
•
B: shows or hides the blue color channel.
•
L: shows or hides the lightness of the image.
Viewing file properties in the Viewer
You can view an image’s properties in the Viewer and edit the information in the
Properties pane.
To view an image’s properties:
In the Viewer, click View | Properties.
For more information about the Properties pane, and adding or editing database
information, see “Using the Properties pane” on page 123.
Displaying text and file information on images
You can use the Header/Footer tool to display text and file-specific information
with your images in the Viewer. The text is displayed while you are viewing the
image, but does not modify the original image. You can also toggle the text
display without changing the settings.
To display text:
1. In the Viewer, click View | Edit Header/Footer.
2. Do one or both of the following:
•
Select the Header check box to add text at the top of the image.
•
Select the Footer check box to add text at the bottom of the image.
3. Select or change the text options.
4. Click OK.
66 | Viewing file properties in the Viewer
CHAPTER 5: VIEWING
Text options
Alignment
Specifies the justification of the captions.
Background
Adds a background color to the text. Click Color to specify a color.
Description
Displays the text you want to see on your images.
Insert Metadata
Inserts file-specific information into the text for each image.
Font
Sets the font, size, and color of the caption text.
To insert metadata in image text:
1. Position the cursor in the Description field where you want to display the
file information and click Insert Metadata.
2. In the Choose Property dialog box, select the file information you want to
include.
3. Click OK.
4. Repeat steps 1 through 3 for each metadata item you want to add.
Toggling image text
You can show or hide the header or footer, or toggle both at once, without
changing or deleting the information in the header and footer fields.
To hide the image text:
1. From the Viewer, click View | Edit Header/Footer.
2. Do one or both of the following:
•
Clear the Header check box to remove text from the top of the image.
•
Clear the Footer check box to remove text from the bottom of the
image.
3. Click OK.
To show or hide both headers and footers simultaneously, click View | Show
Header/Footer.
Viewing file properties in the Viewer | 67
CHAPTER 5: VIEWING
Changing image color depth
You can modify an image's color depth in the Viewer. Color depth refers to the
range of colors an image contains.
To change the color depth of an image:
Click Modify | Change Color Depth, and select one of the options
described below.
Color depth options
Black and White
Two-color black and white palette
16 Grays
16-color grayscale palette
256 Grays
256-color grayscale palette
16 Colors
16-color palette
256 Colors
256-color palette (GIF format uses 256 colors by default)
Hicolor
32,768-color palette
Truecolor
16,777,216-color palette of all colors visible to humans
You can use ACDSee to convert an image to any of these color depths. However,
to use certain image enhancement tools, filters, blends, and adjustment options,
the image must be Hicolor or Truecolor. To edit an image that is not originally
Hicolor or Truecolor, you can convert it, edit the image, and then convert it back
to its original color depth.
Selecting part of an image
You can use the Select tool in the Viewer to select a rectangular area of an image.
You can then zoom in on the selection, copy the selection, save the selection as a
new image, print the selection, and use the selection as the desktop wallpaper.
To select part of an image:
1. Drag the mouse pointer across the image to create a marquee.
2. Right-click inside the marquee and select one of the options described
below.
3. To cancel the selection, click an area of the image outside of the marquee.
68 | Changing image color depth
CHAPTER 5: VIEWING
Selection options
Zoom To
Zooms in on the selected area.
Copy
Copies the selected area to the Clipboard.
Save Crop As
Saves the selected area as a new image.
Print
Prints the selected area. For more information about printing
with ACDSee, see “Printing images in ACDSee” on page 176.
Wallpaper Centered
Creates desktop wallpaper using the selected area and centers it
on your desktop, shrinking it to fit if necessary.
Wallpaper Tiled
Creates a tiled desktop wallpaper pattern using the selected area.
Playing audio and video files
You can play audio and video files in many formats with the ACDSee Viewer.
You can control playback volume and appearance, select parts of a media file to
play or save, and create an image from a video frame.
To play audio or video files:
1. In the File List pane, do one of the following:
•
Double-click an audio or video file.
•
Select one or more files, and press Enter.
•
Select one or more files, right-click a selected file and select View.
2. Use the Media toolbar to adjust the volume, stop, pause or restart the file
playback, and control the appearance of media files.
Automatically playing audio and video files
You can configure your settings to play audio and video files automatically, as
soon as you open them in the Viewer, or as you view them in the Browser's
Preview pane.
To start playing media files automatically:
1. In the Browser or Viewer, click Tools | Options, and then click Preview.
2. Select the Autoplay audio or video clips check box.
3. Click OK.
Playing audio and video files | 69
CHAPTER 5: VIEWING
The Media toolbar
You can use the Viewer's Media toolbar to quickly access common media
viewing and editing tools.
Media toolbar buttons
Play
Plays the media file or selection. Changes into the Pause button when
a media file or selection is playing.
Pause
Pauses the media file or selection.
Stop
Stops playback of the media file or selection.
Selection and media controls toolbar buttons
Show Selection
Toggles between displaying and hiding the selection
handles.
Play Selection
Plays only the selected portion of the media file.
Save As
Opens a dialog you can use to save the video with a new
file name.
Extract Frames
Opens a menu you can use to copy, save, and extract
video frames.
Loop
Continuously plays the media file or selection.
Rotate
Rotates a video clockwise in 90-degree increments.
Auto Levels Effect
Automatically adjusts the color and light levels in a video.
Gamma Effect
Opens the Gamma dialog box, which you can use to
adjust the gamma of a video. Higher values brighten the
video, while lower values darken it. To reset the gamma
level, click Default.
Selecting part of a media file
You can select a segment of an audio or video file and play it.
To select part of an audio or video file:
1. Click the Show Selection button.
2. Move the selection handles to specify the beginning and end of the
selection.
3. To play the selection, click the Play Selection button.
70 | Playing audio and video files
CHAPTER 5: VIEWING
Saving video frames as images
You can extract an individual frame from a video and save it as still image, or
extract multiple frames and save each one as a single image.
To extract and save a single video frame as an image:
1. Do one of the following:
•
While the video is playing, click the Pause button at the frame you
want to save.
•
On the progress slider, move the pointer to display the frame you want
to save.
2. On the Selection and media controls toolbar, click the Extract Frames
button and select Extract Current Frame.
3. In the Extract Current Frame dialog box, select a folder in which to save
your file.
4. In the File name field, type a file name.
5. Click the Save as type drop-down list and select a file format. You can
click the Options button to select or change any options associated with
the file format.
6. Click Save.
To extract and save multiple video frames as images:
1. Select part of the video.
2. On the Selection and media controls toolbar, click the Extract Frames
button, and then select one of the following options:
•
Extract Selected Frames: extracts all the video frames contained in
the selected portion of the video file.
•
Extract All Frames: extracts all of the video frames in the video file.
3. In the Extracting Frames dialog box, click the Browse button and select
the folder where you want to save your files.
4. In the Filename Template field, type a filename template to use when
saving the images. Type a number sign (#) to insert a sequential number.
5. Click the Format drop-down list and select a file format. You can click
the Options button to select or change any options associated with the file
format.
6. Click OK.
Playing audio and video files | 71
CHAPTER 5: VIEWING
Working with image audio
ACDSee supports images with embedded audio and images with associated audio
files.
• Images with embedded audio: TIFF or JPEG images with audio saved
inside the image file. You can embed audio inside an image file by adding
audio to the image.
• Images with associated audio: image files paired with WAV audio files.
Image files and their associated audio files contain the same file name and
are located in the same folder. You can associate any WAV file with an
image file by giving them the same name and placing them in the same
folder, or by adding audio to the image.
If you move or rename either an image file or the audio file associated with it,
both files must be renamed and in the same folder or they will no longer be
associated. This does not apply to images with embedded audio.
To play the audio associated with or embedded in an image:
1. Do one of the following:
•
In the Browser, click the Audio (speaker) icon on the image
thumbnail.
•
Select the thumbnail or open the image in the Viewer, and click Tools
| Image Audio, and then click Play.
2. To stop the audio, click the Audio icon on the thumbnail again, or click
Tools | Image Audio, and then click Stop.
Adding and editing image audio
You can add WAV files to your images. When you add audio to a JPG or TIFF
image, the audio is embedded in the image. With other file formats, the audio file
is associated with the image; the audio file is saved in the same folder and is
played when the image is viewed.
To add audio to an image:
1. Do one of the following:
•
Select an image in the Browser.
•
Open an image in the Viewer.
2. Click Tools | Image Audio | Edit.
3. In the Edit Audio dialog box, click the Browse button.
72 | Working with image audio
CHAPTER 5: VIEWING
4. Select a WAV file and click Save.
5. If you would like to truncate or clip the audio file, select the Use markers
check box, and drag the Start marker and End marker sliders. Do one of
the following.
•
Click the Truncate button to remove the beginning and end of the
audio file (the area outside of the start and end markers).
•
Click the Clip button to remove a section of the audio file (the area
inside the start and end markers).
6. To hear a preview of the file, click the Play button.
7. Click OK.
Recording and adding audio to an image
You can record your own audio files and add them to your images. When you add
audio to a JPG or TIFF image, the audio is embedded in the image. With other file
formats, the audio file is associated with the image; the audio file is saved in the
same folder and is played when the image is viewed.
To record and add an audio file to an image:
1. Do one of the following:
•
Select an image in the Browser.
•
Open an image in the Viewer.
2. Click Tools | Image Audio | Edit.
3. In the Edit Audio dialog box, select or change the Record sound settings
options as described below.
4. Click the Record button and do one of the following:
•
Use a microphone and record a sound.
•
Play audio from an audio player on your computer.
5. Click the Record button to stop the recording.
6. Click the Save As button to save the audio file.
7. In the Save Sound File dialog box, type a name in the File name field, and
click the Save button.
8. Click OK.
Working with image audio | 73
CHAPTER 5: VIEWING
Record sound settings options
Capture device
Specifies which device to use on your computer to record the audio.
Input format
Specifies which sample rate and audio type are used to record the
sound. The formats displayed depend on the sound card you have
installed on your computer.
Overwrite
Replaces the recorded audio from the start marker.
Mix
Combines the recording with the existing audio file.
Insert using
start marker
Inserts the recording at the start marker location. Drag the Start
marker slider to select a position.
Append to
sound file
Adds the recording to the existing audio file.
Replace sound
file
Replaces the entire audio file with the new recording.
Viewing a slide show
You can view a slide show of images from the Browser, or from the Viewer.
To start a slide show from the Browser:
1. Do one of the following:
•
In the File List pane, select a group of images.
•
In the Folders pane, select a folder or use the Easy-Select bar to select
multiple folders that contain images.
2. Click Tools | Slide Show.
3. In the Slide Show dialog box, select or change the options.
4. To save your settings as the default slide show behavior, select the Save
current settings as default check box.
5. Click OK to launch the slide show.
6. To stop the slide show at any time, press ESC.
To start a slide show in the Viewer:
1. Click View | Slide Show.
2. In the Slide Show dialog box, select or change the options.
3. To save your settings as the default slide show behavior, select the Save
current settings as default check box.
4. Click OK to launch the slide show.
5. To stop the slide show at any time, press ESC.
74 | Viewing a slide show
CHAPTER 5: VIEWING
You can also create slide shows that you can save as executable files to share with
your family and friends. For more information, see “Creating a slide show you
can share” on page 168.
Setting slide show options
You can set the slide show options to adjust how long each image is displayed, set
the background color, apply transition effects, and add header or footer text.
Slide show options
File
Selection
Basic
Slide show
contents
Specifies the locations and images you want to use in the
slide show.
Always use
these contents
for this
selection type
and start slide
show
automatically
Retains the current Slide show contents setting and starts
automatically the next time you launch the slide show. For
more information about this option, see “Starting a slide
show automatically” on page 77.
Select
transition
effects
Identifies which transition effects you want to use in your
slide show. Select or clear the check box next to each
transition effect. The slide show will randomly select
transitions from your choices.
Background
color
Specifies the background color. Click the color picker
arrow to select or change the color.
Image delay
(in seconds)
Specifies how long you want the slide show to display
each image.
Viewing a slide show | 75
CHAPTER 5: VIEWING
Slide show options
Advanced
Transition
quality
Specifies the overall quality of the slide show. Drag the
slider to the left to improve slide show speed, or drag to
the right to improve the quality of the transition effects.
General
settings
Specifies the general appearance and operation of the
slide show. Select or clear any of the following options:
• Play embedded audio: plays any audio clips
embedded in the images.
• Autohide control bar: hides the slide show controls
whenever the mouse pointer stops moving for more
than a few seconds.
• Repeat: repeats the slide show after displaying the
last image.
• Stretch images to fit screen: enlarges small images
to fill the entire screen.
• Stretch video to fit screen: enlarges video files to
fill the entire screen.
Slide order
Specifies the order of images in your slide show. Select
one of the following options:
• Forward
• Backward
• Random
Text
Display
header text
Displays a text caption at the top of each image. Set the
options to specify the text you want to display.
Display footer Displays a text caption at the bottom of each image. Set
text
the options to specify the text you want to display.
Alignment
Specifies the alignment of the text captions.
Background
color
Specifies a background color for the caption text.
Text
Specifies the text to display as a caption.
Font
Opens the Font dialog box in which you can select or
change the font options for your text.
Insert
Inserts file-specific information called metadata into the
Metadata Tag caption. Click to open the Choose Property dialog box and
select the metadata you want to insert.
Save current settings as
default
76 | Viewing a slide show
Retains the current settings on all of the tabbed pages and
applies them the next time you view a slide show.
CHAPTER 5: VIEWING
Starting a slide show automatically
You can configure your slide show to use your preferred settings and start playing
automatically when you click the menu command or the Slide Show button on the
toolbar. The combination of items you select in the Browser determines the
content of the slide show, and whether it starts automatically.
To configure a slide show to start automatically:
1. In the Browser, do one of the following:
•
Select two or more images in the File List pane.
•
Select two or more folders in the File List pane.
•
Select a combination of files and folders in the File List pane.
•
Add two or more images to the Image Basket.
2. Click Tools | Configure Slide Show.
3. In the Slide Show Properties dialog box, select the File Selection tab.
4. In the Slide show contents drop-down list, select the items you want to
use in the slide show. The options available change depending on the type
and variety of files and folders that you selected in Step 1.
5. Select the Always use these contents for this selection type and start
slide show automatically check box.
6. Click OK.
7. To exit the slide show, press ESC.
8. To start a slide show automatically, select the same type or combination of
files or folders you selected in Step 1, and then click Tools | Slide Show.
Example One
You can configure the slide show to start automatically when you select a
combination of files and folders, using the media files that you select, as well as
the contents of the selected folders.
In the File List pane, select at least one image file and one folder, and then click
Tools | Configure Slide Show. On the File Selection tab, from the Slide show
contents drop-down list, select Selected media, and media in selected folders.
Select the Always use these contents for this selection type and start slide
show automatically check box, and then click OK to launch the slide show.
Press ESC to return to the Browser.
Now, whenever you select any combination of media files and folders in the File
List pane and click Tools | Slide Show, the slide show will start automatically,
Viewing a slide show | 77
CHAPTER 5: VIEWING
and display any media items you selected, as well as any media items contained
in the selected folders. The slide show will not display any of the other images or
media files in the current folder, or those files contained in any subfolders of the
selected folders.
Example Two
You can now make a different selection and configure your slide show to start
automatically using all of the files in the current folder - not just those you have
selected.
In the File List pane, select one or more image or media files and click Tools |
Configure Slide Show. On the File Selection tab, from the Slide show contents
drop-down list, select All media in current folder and subfolders.
Select the Always use these contents for this selection type and start slide
show automatically check box, and then click OK to launch the slide show.
Press ESC to return to the Browser.
Now, whenever you select two or more images or media files and click Tools |
Slide Show, the slide show will start automatically, and display all media items in
the folder that you have open in the File List pane, as well as any subfolders.
Using Auto Advance
You can use the Auto Advance feature to create a simple slide show preview of a
group of images, or all the images in a folder, in the main Viewer window.
To start Auto Advance:
1. Open a group of images in the Viewer.
2. From the View menu, select Auto Advance | Options.
3. In the Auto Advance dialog box, set any of the options described below.
4. Click Start.
5. To advance to the next image, press SPACE.
6. To return to the previous image, press BACKSPACE.
7. To stop or restart Auto Advance, press PAUSE.
78 | Viewing a slide show
CHAPTER 5: VIEWING
Auto Advance options
Sequence
Determines the order that you want to display your images. Select one of
the following options:
• Forward
• Reverse
• Random
Repeat
Automatically restarts the slide show after the last image has been
displayed.
Delay
Specifies how long to display each image. Drag the slider or type a value
from 0 to 864000000 to set the time (in milliseconds).
Sound
Plays any embedded audio in the selected images while displaying them.
Creating a desktop screen saver
You can create a desktop screen saver using your own images, and apply it to
your Windows display settings.
To create a screen saver:
1. In the File List pane, select a group of images and click Tools | Configure
Screen Saver.
2. In the ACDSee Screen Saver dialog box, click Add to browse for more
images to add to your screen saver, or select images you do not want to
include and click Remove.
3. Click Configure.
4. In the ACDSee Screen Saver dialog box, specify the options as described
below, and then click OK.
5. To automatically use the screen saver on your desktop, select the Set as
default screen saver check box.
6. When you are satisfied with your choices, click OK.
To activate the screen saver, select the Screen Saver tab in your Windows
Display Properties dialog box, and select ACD Screen Saver from the dropdown list.
Creating a desktop screen saver | 79
CHAPTER 5: VIEWING
Configuring your screen saver
You can set the screen saver options to adjust how long each image is displayed,
set the background color, apply transition effects, and add header or footer text.
Screen saver options
Basic tab
Advanced
tab
Select
transition
effects
Identifies which transition effects you want to use in your
screen saver. Select or clear the check box next to each
transition effect. The screen saver will randomly select
transitions from your choices.
Background
color
Specifies the background color. Click the color picker
arrow to select or change the color.
Image delay
(in seconds)
Specifies how long you want the screen saver to display
each image.
Transition
quality
Specifies the overall quality of the screen saver. Drag the
slider to the left to improve screen saver speed, or drag to
the right to improve the quality of the transition effects.
General
settings
Specifies the general appearance and operation of your
screen saver. Select or clear any of the following options:
• Play embedded audio: plays any audio clips
embedded in the images.
• Repeat: repeats the images after displaying the last
image.
• Stretch images to fit screen: enlarges small images
to fill the entire screen.
Slide order
Specifies the order in which your images will be
displayed. Select one of the following options:
• Forward
• Backward
• Random
80 | Creating a desktop screen saver
CHAPTER 5: VIEWING
Screen saver options
Text tab
Display
header text
Displays a text caption at the top of each image. Set the
options to specify the text you want to display.
Display footer Displays a text caption at the bottom of each image. Set
text
the options to specify the text you want to display.
Alignment
Specifies the alignment of the text captions.
Background
color
Specifies a background color for the caption text.
Text
Specifies the text to display as a caption.
Font
Opens the Font dialog box where you can select or change
the font options for your text.
Insert
Inserts file-specific information into the caption. Click to
Metadata Tag open the Choose Property dialog box and select the
metadata you want to insert.
Setting an image as the desktop wallpaper
You can select any image and set it as the Windows desktop wallpaper. You can
also automatically stretch a wallpapered image to fill the screen, and restore your
previous wallpaper.
To set an image as the desktop wallpaper:
1. Do one of the following:
•
In the Browser, select an image and click Tools | Set Wallpaper.
•
In the Viewer, click Tools | Set Wallpaper.
2. Select one of the following:
•
Centered: places the image in the center of the screen. If the image is
larger than the screen, it is shrunk to fit.
•
Tiled: places the image in a tiled pattern that fills the entire desktop.
The selected image is saved as ACD Wallpaper.bmp in the Windows folder.
ACDSee automatically changes the wallpaper settings in the Control Panel
Display properties to display the image.
Setting an image as the desktop wallpaper | 81
CHAPTER 5: VIEWING
To automatically stretch wallpapered images to fit the screen:
1. Click Tools | Options.
2. In the Options dialog box, click General.
3. On the General page, select the Automatically stretch wallpaper to fit
screen check box.
4. Click OK.
To display the previous wallpaper:
Click Tools | Set Wallpaper, and then select Restore.
Synchronizing the Viewer to a folder
You can use the Sync to Folder option to change the images displayed in the
Viewer. If you sync ACDSee to the folder used by your newsreader, images
downloaded into the folder are displayed in the Viewer.
To synchronize to a folder:
1. In the Viewer window, click Tools | Sync To Folder.
2. Type the path to the folder you want to synchronize, or click the Browse
button to locate the folder.
3. Select or change the New Images options as described below.
4. Click OK.
All images in the folder are displayed as a slide show in the Viewer. As you add
or remove images from the folder, the slide show updates automatically.
New Images options
Show new image(s) Displays images as soon as they appear in the folder. If this option
immediately
is cleared, new images are added to the end of the slide show.
Ignore open files
Delays adding a new file to the slide show until the transferring
application has finished moving or downloading the file.
Sort by name
Sorts the images displayed in the slide show by their file name.
To stop synchronizing to a folder:
In the Viewer, click Tools | Sync To Folder.
82 | Synchronizing the Viewer to a folder
CHAPTER 5: VIEWING
Returning to the Browser
You can close the Viewer window and return to the Browser at any time.
To return to the Browser from the Viewer window:
Do one of the following:
•
Press ESC.
•
Press ENTER.
•
Double-click the image.
•
Click File | Browse.
•
Click the Browse button on the toolbar.
Returning to the Browser | 83
CHAPTER
6
EDITING
ACDSee includes a powerful, yet easy-to-use image editor with an array of useful
tools to help reduce red-eye in digital images, remove an unwanted color cast,
apply special effects, and much more.
You can also edit and enhance your images by adjusting the light and color levels,
cropping images that are too large, rotating or flipping images that are incorrectly
aligned, and adjusting sharpness. When you’re finished editing, you can preview
your changes, and then save your images in any of the supported file formats.
You can use the Edit Mode to edit and enhance your images, or you can configure
ACDSee to work with a variety of editing applications, such as ACD Photo
Editor.
| 85
CHAPTER 6: EDITING
To edit an image in Edit Mode:
Do one of the following:
•
In the Browser, click Tools | Open in Editor, and then click ACDSee.
•
In the Viewer, click Modify | Edit Mode.
To edit an image using another image editor:
Do one of the following:
•
In the Browser, click Tools | Open in Editor, and then select the
editing application you want to use.
•
In the Viewer, click Modify | Open in Editor, and then select the
editing application you want to use.
For more information about adding and configuring image editing applications,
see “Configuring image editors” on page 13.
Working in Edit Mode
In Edit Mode, the right side of your screen displays the Edit Panel, which
provides access to all of the editing tools and effects. Click a name in the Edit
Panel to open that tool and edit your image with it.
The Edit Mode toolbar provides access to commonly used commands, and
scrolling and zooming controls. For an explanation and description of each button
on the toolbar, see “Appendix 3: Default toolbar layouts” on page 191.
At the top of the screen, just below the Edit Mode toolbar, are the View tabs. You
can select these tabs at any time to compare your original image with the edited
version, and preview your editing choices before saving them to your hard drive.
Customizing the Edit Panel
You can resize, move, and dock the Edit Panel to suit your preferences. You can
also set the Edit Panel to automatically hide when you are not using it.
To customize the Edit Panel:
1. Drag the Edit Panel’s title bar to a new location. If you drag the Edit Panel
to an edge of the window, it will dock against that edge.
2. To resize the Edit Panel, drag one of its edges.
86 | Working in Edit Mode
CHAPTER 6: EDITING
Auto-hiding the Edit Panel
You can use the Auto Hide button to automatically hide the Edit Panel in Edit
Mode. When the panel is set to auto-hide, it rolls away when you click outside of
it, leaving a tab displayed. You can access the panel by moving the mouse pointer
over the tab.
The Auto Hide button's appearance on the panel’s title bar reflects its current
setting:
A horizontal pushpin indicates that the panel is set to automatically hide
when you click outside of it.
A slanted pushpin indicates that the panel is fixed and will remain visible
even if you click outside of it.
When a pane is floating, the auto-hide feature is not available, and you cannot
move the Edit Panel to a new location if it is set to auto-hide.
To set or remove auto-hide:
Click the Auto Hide button on the pane's title bar so that it displays a
slanted or horizontal pushpin.
About tool presets
Many ACDSee editing tools and special effects allow you to save your settings as
presets. This is convenient when you frequently use the same settings for a
particular tool or effect.
For most tools, ACDSee automatically saves the last option settings you applied
to an image when you clicked Apply or Done. This preset is called Last Used.
To save tool settings:
1. Select a tool and specify its settings.
2. In the Presets area, click the Save button.
3. In the New Preset dialog box, enter a name for your preset and click OK.
To use a previously-saved preset:
1. Select the tool for which you created the preset.
2. Select the desired preset from the Presets drop-down list.
Working in Edit Mode | 87
CHAPTER 6: EDITING
To delete a preset:
1. Select the tool for which you created the preset.
2. Click the Presets drop-down list and select the preset you want to delete.
3. Click the Delete button.
4. In the Confirm Delete dialog box, click Yes.
Using the undo/redo system
You can undo and redo your changes when editing an image.
To undo a change:
Do one of the following:
•
In the Viewer, click Edit | Undo.
•
In Edit Mode, on the Edit Panel, click the Undo button.
To redo a reversed change:
Do one of the following:
•
In the Viewer, click Edit | Redo.
•
In Edit Mode, on the Edit Panel, click the Redo button.
Using the Preview bar
You can use the Preview bar to see how the current editing tool affects a specific
area of your image. You can pan either image in the Preview bar by dragging it
within its pane, and drag the edges or corners of the Preview bar to resize it.
To open the Preview bar:
1. On the Edit Panel, open one of the following editing tools: Exposure,
Color, Red Eye, Sharpness, or Noise.
2. On the tool tab, click the Preview Bar button.
The Preview bar displays the original version of your image in the top pane, and
the edited version of your image in the bottom pane, with a toolbar between the
two.
88 | Working in Edit Mode
CHAPTER 6: EDITING
Saving images in Edit Mode
After editing or enhancing your images in Edit Mode, you can save them to a new
format, or overwrite the original images with your changes.
To save an image in Edit Mode:
1. Click the Save As button on the toolbar.
2. In the Save Image As dialog box, browse to the folder where you want to
save the image.
3. In the File name field, type a name for the edited image.
4. In the Save as type drop-down list, select a file format for the new image.
Click Options to select settings specific to that image format.
5. Click Save.
For more information about saving images in other formats, see “Converting
images to another format” on page 139.
Closing Edit Mode
You can close the Edit Mode window and return to the Viewer or Browser at any
time.
To close Edit Mode:
Do one of the following:
•
Click the Finished Editing button on the toobar.
•
Press Esc.
Adjusting image light levels
The Edit Mode’s exposure tools adjust an image’s light levels: the Auto-Exposure
tool analyzes the image and adjusts its exposure automatically; the Brightness
tool provides slider controls so you can adjust the gamma, brightness, and
contrast individually; the Levels tool provides precise control over all aspects of
an image’s light levels and color channels; and, the Curves tool provides control
over the tonal ranges within an image, as well as the tonal range of each color.
Adjusting image light levels | 89
CHAPTER 6: EDITING
Automatically adjusting an image's exposure
You can use the Auto Exposure tool to automatically correct the exposure of your
images. Auto Exposure makes the darkest image pixels darker, and the brightest
pixels brighter. You can save your options as a preset for future use.
To automatically correct an image's exposure:
1. In Edit Mode, on the Edit panel, click Exposure, and select the Auto
Exposure tab.
2. Select one of the following options:
•
Auto Contrast and Color: adjusts color differences, brightness, and
image color channels.
•
Auto Contrast: adjusts the color differences and brightness only.
3. Use the slider to fine tune the amount of exposure you want to apply.
4. Do one of the following:
•
Select another tab to use another tool.
•
Click Done to apply your changes and close the Auto Exposure tool.
•
Click Cancel to discard all changes and close the tool.
Adjusting image brightness
You can use the Brightness tool to adjust an image's brightness, contrast, and
gamma. You can save your options as a preset for future use.
To adjust an image's light levels:
1. In Edit Mode, on the Edit panel, click Exposure, and select the
Brightness tab.
2. On the Brightness tab, set the options.
3. Do one of the following:
•
Click Apply to apply your changes and set options on another tab.
•
Click Done to apply your changes and close the Brightness tool.
•
Click Cancel to discard all changes and close the tool.
Brightness options
Brightness
Specifies the image's light intensity. Moving the slider to the right
lightens the image, while moving the slider to the left darkens it.
Contrast
Specifies the amount of difference between color and brightness in an
image. Moving the slider to the right darkens the shadowed areas in
an image, while moving the slider to the left brightens them.
90 | Adjusting image light levels
CHAPTER 6: EDITING
Brightness options
Gamma
Specifies the intensity of the light spectrum in an image. Moving the
slider to the right lightens the image, while moving the slider to the
left darkens it.
Adjusting image levels
You can use the Levels tool to precisely adjust the contrast and light levels in
your images. You can save your options as a preset for future use.
To adjust image levels:
1. In Edit Mode, on the Edit Panel, click Exposure, and then select the
Levels tab.
2. Do one of the following:
•
Set the options to adjust the contrast and light levels manually.
•
Click Auto and select a menu option to automatically adjust image
properties.
3. Do one of the following:
•
Click Apply to apply your changes and set options on another tab.
•
Click Done to apply your changes and close the Levels tool.
•
Click Cancel to discard all changes and close the tool.
Levels options
Channel
Specifies the brightness or color channel you want to adjust.
Logarithmic
scale
Applies a logarithmic scale to the histogram so that you can see and
adjust lower color levels.
Shadows
Specifies the blackpoint of an image.
Move the slider or type a number from 0 to 255 into the spin box to
define the blackest area of an image. As the value increases, the dark
colored areas of the image become darker.
Midtones
Specifies the gamma correction in an image.
Move the slider or type a number from 0.00 to 2.00 into the spin box
to set the amount of gamma correction. Higher values make the image
appear brighter, while lower values make the image appear darker.
Highlights
Specifies the whitepoint of an image.
Move the slider or type a number from 0 to 255 into the spin box to
define the whitest area of an image. As the value increases, the light
colored areas of the image become lighter.
Adjusting image light levels | 91
CHAPTER 6: EDITING
Levels options
Clipped %
Indicates how much of the image detail is lost due to blackpoint and
whitepoint correction.
Shadows
picker
Specifies the blackpoint of the image. Click the Shadows picker and
then click the image area you want to set as the blackpoint.
Midtones
picker
Specifies the gamma correction value to use for the image. Click the
Midtones picker and then click the image area you want to set as the
gamma correction value.
Highlights
picker
Specifies the whitepoint of the image. Click the Highlights picker
and then click the image area you want to set as the whitepoint.
Auto
Select one of the following options:
• Adjust Contrast: automatically analyzes and adjusts image
contrast.
• Adjust Color and Contrast: automatically analyzes and adjusts
each color channel independently, and adjusts the contrast.
• Adjust Color and Brightness: automatically analyzes and
adjusts image color and brightness.
• Tolerance: opens the Tolerance settings dialog box. Specify the
maximum clipping percentage for Shadows and Highlights, and
click OK. ACDSee adjusts the image levels automatically.
Reset
Discards all changes and reverts to the original image levels.
Adjusting brightness curves
You can use the Curves tool to change the tonal range of an image. Select the
RGB color channel to adjust the entire range of the image, or select a specific
color. You can save your options as a preset for future use.
To adjust the brightness curves in an image:
1. In Edit Mode, on the Edit panel, click Exposure, and select the Curves
tab.
2. On the Curves tab, set the options.
3. Drag the histogram bar to manipulate the image.
4. Do one of the following:
•
Click Apply to apply your changes and set options on another tab.
•
Click Done to apply your changes and close the Curves tool.
•
Click Cancel to discard all changes and close the tool.
92 | Adjusting image light levels
CHAPTER 6: EDITING
Curves options
Channel
Specifies the color channels to adjust.
Show Histogram
Toggles the histogram display.
Histogram
Displays a visual representation of the color information levels
in the image, based on the selected channel. Click and drag the
line to manipulate the curve.
Reset
Discards all changes and reverts to the original image.
Exposure warning
Highlights over- and under-exposed areas of the image.
Adjusting image color
The Edit Mode’s color adjustment tools enhance the color levels of your images:
the Auto Color tool analyzes each image and applies color correction
automatically; the Color Cast tool removes unwanted hues and colored areas; the
HSL tool specifies the hue, saturation, and lightness values; and, the RGB tool
adjusts the red, green, and blue levels individually.
Automatically adjusting image colors
You can use the Auto Color tool to automatically adjust an image's colors.
To automatically adjust image colors:
1. In Edit Mode, on the Edit Panel, click Color.
2. Select the Auto Color tab.
3. Move the slider to use more or less color correction.
4. Do one of the following:
•
Click Done to apply your changes and close the Auto Color tool.
•
Click Cancel to discard all changes and close the tool.
Removing a color cast
You can use the Color Cast tool to remove an unwanted hue from an image. For
example, if you take a photo at sunset and the resulting image has a reddish hue,
you can use the Color Cast tool to remove it. You can save your options as a
preset for future use.
To remove a color cast from an image:
1. In Edit Mode, on the Edit Panel, click Color.
2. Select the Color Cast tab.
Adjusting image color | 93
CHAPTER 6: EDITING
3. Click an image area that should be white or gray. The color square shows
the color of the original pixel on the left, and of the modified pixel on the
right.
4. Move the slider to specify the color cast removal strength. Higher settings
remove more of the unwanted color.
5. Do one of the following:
•
Click Done to apply your changes and close the tool.
•
Click Cancel to discard all changes and close the tool.
Changing HSL values
You can adjust an image's HSL (hue, saturation, and lightness) values. You can
save your options as a preset for future use.
To adjust an image's HSL:
1. In Edit Mode, on the Edit Panel, click Color.
2. Select the HSL tab, and then move the sliders to adjust the Hue,
Saturation, and Lightness amounts.
3. Do one of the following:
•
Click Apply to apply your changes and set options on another tab.
•
Click Done to apply your changes and close the tool.
•
Click Cancel to discard all changes and close the tool.
Changing RGB values
You can adjust an image's red, green, and blue (RGB) color values. You can save
your options as a preset for future use.
To adjust an image's RGB values:
1. In Edit Mode, on the Edit Panel, click Color.
2. Select the RGB tab, and then move the sliders to adjust the amount of
Red, Green, and Blue.
3. Do one of the following:
•
94 | Adjusting image color
Click Apply to apply your changes and set options on another tab.
•
Click Done to apply your changes and close the tool.
•
Click Cancel to discard all changes and close the tool.
CHAPTER 6: EDITING
Removing red-eye from digital photos
You can use the Red Eye Reduction tool to correct the red-eye effect in digital
photographs.
To correct red-eye:
1. In Edit Mode, zoom the image to enlarge and center the eye you want to
correct.
2. On the Edit Panel, click Red Eye.
3. On the Red Eye tab, set the options.
4. Drag the mouse pointer across your image to create a marquee. Use the
handles on the marquee to center it over the eye.
5. Do one of the following:
•
Click Apply and repeat for each eye needing correction.
•
Click Done to apply your changes and close the Red-Eye Reduction
tool.
•
Click Cancel to discard all changes and close the tool.
Red Eye options
Amount
Specifies how much color to use. Higher values fill more of the
ellipse.
Eye color
Specifies the eye color to apply. You may need to experiment with
colors to produce realistic-looking eyes. To do this, select Custom,
select a color, click Add to Custom Colors, and click OK.
Show outline
Displays an ellipse inside the marquee.
Sharpening and blurring images
You can use the Sharpness and Unsharp Mask tools to sharpen your images, or
use the Blur tool to apply different types of image blur and artistic blurring
effects. With these tools, you can heighten the contrast between adjacent colors,
enhance the edges of your subjects, or soften the overall appearance of your
digital photos.
Using the Sharpness tool
You can use the Sharpness tool to increase the color difference in adjacent pixels,
resulting in sharper images. You can save your options as a preset for future use.
Removing red-eye from digital photos | 95
CHAPTER 6: EDITING
To sharpen an image using the Sharpness tool:
1. In Edit Mode, on the Edit Panel, click Sharpness, and then select the
Sharpness tab.
2. To increase the image's sharpness, move the slider to the right. To
decrease the image's sharpness, move the slider to the left.
3. Do one of the following:
•
Click Apply to apply your changes and set options on another tab.
•
Click Done to apply your changes and close the Sharpness tool.
•
Click Cancel to discard all changes and close the tool.
Using the Unsharp Mask tool
You can use the Unsharp Mask tool to sharpen an image by enhancing the
contrast of medium and high contrast edges. You can save your options as a
preset for future use.
To sharpen an image using the Unsharp Mask tool:
1. In Edit Mode, on the Edit Panel, click Sharpness, and then select the
Unsharp Mask tab.
2. Specify the options.
3. Do one of the following:
•
Click Done to apply your changes and close the Unsharp Mask tool.
•
Click Cancel to discard all changes and close the tool.
Blurring an image
You can use the Blur tool to apply different kinds of blur to an image, and you
can save your options as a preset for future use.
To blur an image:
1. In Edit Mode, on the Edit Panel, click Sharpness, and then select the Blur
tab.
2. In the Blur type drop-down list, select the type of blur to apply.
3. Specify the options for the blur type, as described below.
4. Do one of the following:
•
Click Done to apply your changes and close the Blur tool.
•
Click Cancel to discard all changes and close the tool.
96 | Sharpening and blurring images
CHAPTER 6: EDITING
Blur types
Gaussian
Produces an even, smooth blur over the entire image.
Amount
Linear
Radial
Spread
Produces a blurring effect that gives the illusion of movement.
Amount
Specifies the amount of blur. Move the slider to the
right to intensify the effect.
Angle
Specifies the direction of the blur effect.
Produces blur around a central point. Click the image to set the center point
of the effect.
Amount
Specifies the amount of blur. Move the slider to the
right to intensify the effect.
Clockwise
Specifies clockwise blur.
Counter-clockwise
Specifies counter-clockwise blur.
Horizontal position
Specifies the blur effect’s center point on the
horizontal axis.
Vertical position
Specifies the blur effect’s center point on the vertical
axis.
Produces a smeared or frosted blur over the entire image.
Amount
Zoom
Specifies the amount of blur. Move the slider to the
right to intensify the effect.
Specifies the amount of blur. Move the slider to the
right to intensify the effect.
Produces inward or outward blur to or from a central point. Click the image
to set the center point of the effect.
Amount
Specifies the amount of blur. Move the slider to the
right to intensify the effect.
Zoom in
Creates a blur that zooms in to the image's center.
Zoom out
Creates a blur that zooms out from the image's
center.
Horizontal position
Specifies the blur effect's center point on the
horizontal axis.
Vertical position
Specifies the blur effect's center point on the vertical
axis.
Sharpening and blurring images | 97
CHAPTER 6: EDITING
Adding and removing image noise
Image noise is the effect produced when a variety of pixel colors are used in the
same color region of a digital image. Noise is often produced when an image is
resized or converted to another format. With ACDSee, you can remove unwanted
image noise, or add it purposefully to give your photos a grainy texture.
Adding noise to an image
You can use the Add Noise tool to add a grainy texture to an image, or to reduce
the appearance of minor imperfections. You can save your options as a preset for
future use.
To add noise to an image:
1. In Edit Mode, on the Edit Panel, click Noise, and then select the Add
Noise tab.
2. Set the options as described below.
3. Do one of the following:
•
Click Done to apply your changes and close the Add Noise tool.
•
Click Cancel to discard all changes and close the tool.
Add Noise options
Intensity
Specifies the amount of noise added to the image. A higher intensity
increases the chance that a noise pixel will replace a pixel in the
original image.
Color proximity
Specifies the color of noise pixels added to the image. A lower value
gives each noise pixel a color similar to the pixel it replaces. Higher
values result in a random selection of the noise pixel color.
Noise color
Specifies the color of the noise pixels. Select one of the following
options:
• Random: randomly selects the color.
• Monochrome: produces black and white noise pixels.
• Adjustable: randomly selects the color of each noise pixel, but
more pixels match a defined color. To define a color, click the
color picker and select a color.
Noise placement
98 | Adding and removing image noise
Adds noise to image areas that closely match a defined color. Select
the Set color check box to enable noise placement, and click the
color picker to specify a color.
CHAPTER 6: EDITING
Add Noise options
Random Seed
Indicates the random placement of noise in an image.
When you apply the Add Noise filter to an image, ACDSee places
the noise pixels based on a random seed. This makes the image noise
different each time you apply the filter. You can define a specific
random seed to generate identical image noise.
To generate a new random seed, click Random Seed.
Removing noise from an image
You can use the Remove Noise tool to remove unwanted image noise while
preserving details that you want to retain.
To remove noise from an image:
1. In Edit Mode, on the Edit Panel, click Noise, and then select the Remove
Noise tab.
2. Set the options as described below.
3. Do one of the following:
•
Click Done to apply your changes and close the Remove Noise tool.
•
Click Cancel to discard all changes and close the tool.
Remove Noise options
Despeckle
Removes noise.
Square
Removes noise using a 3 x 3 pixel square.
X
Removes noise using a 3 x 3 pixel X shape. Use this option when you
want to preserve an image's thin diagonal lines.
Plus
Removes noise using a 3 x 3 pixel plus (+) shape. Use this option
when you want to preserve an image's thin vertical and horizontal
lines.
You can use the Remove Noise filter to remove hot image pixels caused by digital
cameras with malfunctioning CCD array sensors, or the extra pixels caused by a
dusty scanner or camera lens.
Adding and removing image noise | 99
CHAPTER 6: EDITING
Resizing an image
You can resize an image by adjusting its dimensions in pixels, percentage, or
actual/print size. While resizing, you can also choose an aspect ratio and a
resampling filter to adjust the resized image's appearance. You can save your
options as a preset for future use.
To resize an image:
1. In Edit Mode, on the Edit Panel, click Resize.
2. Select one of the following resize options:
•
Pixels: resizes the image to specific dimensions in pixels.
•
Percent: resizes the image to a percentage of the original.
•
Actual/Print size in: resizes the image to match a specific output size.
Click the drop-down list to specify a unit of measurement.
3. If you want to maintain a specific width to height ratio, select the Preserve
aspect ratio check box, and select one of the following options from the
drop-down list:
•
Original: maintains the original image's width to height ratio.
•
1 x 1: forces the width and height to be equal.
•
2 x 3: forces a width to height ratio of 2:3.
•
3 x 2: forces a width to height ratio of 3:2.
•
3 x 5: forces a width to height ratio of 3:5.
•
5 x 3 forces a width to height ratio of 5:3.
•
Custom: applies a custom ratio. Enter a width to height ratio in the
Custom Aspect Ratio dialog box.
4. Select a resample filter from the Filter drop-down list. For an explanation
and description of each filter, see “About resampling filters” on page 101.
5. Under the resize option you selected in step #2, type the image's new
dimensions into the Width and Height spin boxes. If you selected Actual/
Print size in, click the Resolution drop-down list and select a resolution
(in dots per inch) for your output image.
6. To estimate the size of the output image, click the Estimate new file size
button.
7. Do one of the following:
100 | Resizing an image
•
Click Done to apply your changes and close the Resize tool.
•
Click Cancel to discard all changes and close the tool.
CHAPTER 6: EDITING
Resizing tips
Maintain image quality by reducing images only by 33%, 50%, or 66%. Other
percentages can distort the aspect ratio.
Avoid resizing an image repeatedly. Each resizing places image pixels using a
slightly different orientation. As a result, multiple resizes can change the overall
color and appearance of the image. If your first resize attempt does not produce
the desired result, click the Undo button rather than try to resize the image again.
Avoid increasing the size of an image. Increasing image size makes the image's
pixels more apparent, causing a grainy effect.
About resampling filters
You can use resampling filters to enhance the appearance of resized or printed
images. For example, some filters add a blurring or smoothing effect to an image,
while others enhance the hard edges between different image areas.
Because each filter's effect is subjective, it is recommended that you experiment
with them to produce the desired result.
Resampling filters
Bell
Smoothes the image.
Bicubic
Produces good results with photo-realistic images and with images that are
irregular or complex. Uses interpolation to minimize the raggedness
normally associated with image expansion.
Box
Displays considerable tiling or jaggies when you resize an image.
B-spline
Produces smooth transitions, but may cause excessive blurring.
Lanczos
Produces the sharpest images, but may also introduce some ringing artifacts.
Use the Edit Mode’s sharpening tools to smooth fuzzy images produced
using Lanczos.
Mitchell
Produces smooth transitions when enlarging photo-realistic images. This
filter is good compromise between the ringing effect of Lanczos and the
blurring effect of other filters. Use the Edit Mode’s sharpening tools to
smooth fuzzy images produced using Mitchell.
Triangle
Produces good results for image reduction and enlargement, but displays
sharp transition lines.
Resizing an image | 101
CHAPTER 6: EDITING
Cropping an image
You can use the Crop tool to remove unwanted parts of your images, or to reduce
the image canvas to a particular size. You can save your options as a preset for
future use.
To crop an image:
1. In Edit Mode, on the Edit Panel, click Crop.
2. Resize the crop window, and position it over the area of the image you
want to keep.
3. To darken the parts of the image outside the crop window, drag the
Darken outside crop area slider to the left. Drag the slider to the right to
lighten the area outside the crop window.
4. To estimate the size of the output image, click the Estimate new file size
button.
5. Do one of the following:
•
Double-click the crop window to crop the image and close the Crop
tool.
•
Click Done to crop the image and close the tool.
•
Click Cancel to exit the tool without cropping the image.
Resizing the crop window
You can resize the crop window in three ways: drag the edges of the crop window
to the desired size, specify an exact size for the crop window in pixels, inches,
centimeters, or millimeters, or apply a ratio to constrain the crop window
proportions.
To resize the crop window by dragging:
1. Position your mouse cursor over the edge or corner of the crop window
until it changes into a double-pointed arrow.
2. Drag the crop window's border to the desired size.
To specify an exact size for the crop window:
1. In the Units drop-down list, select a unit of measurement.
2. Use the Dots per inch spin box to specify a resolution.
3. Type the desired crop window proportions into the Width and Height spin
boxes.
102 | Cropping an image
CHAPTER 6: EDITING
To constrain the crop window to a ratio:
1. Select the Constrain cropping proportion check box.
2. Select a ratio from the drop-down list and select or clear the Landscape
check box to toggle the crop window between landscape and portrait
orientation.
3. Do one of the following:
•
Position your mouse cursor over the edge of the crop window until it
changes into a double-pointed arrow, and then drag the edge of the
crop window to the desired size.
•
Use the Width or Height spin box to specify a dimension for one side
of the crop window. ACDSee automatically resizes the other
dimension based on the ratio you selected.
Rotating and flipping an image
You can use the Edit Mode’s Rotate and Flip tools to reorient your images
horizontally, vertically, or at any angle you choose. You can save your settings as
a preset for future use.
Rotating an image
You can rotate your image in 90-degree increments, or you can specify a custom
angle of rotation in degrees.
To rotate an image:
1. On the Edit Panel, click Rotate, and then select the Rotate tab.
2. Select the amount of rotation you want to apply.
3. If you selected Custom Angle, do one of the following:
•
In the Custom angle rotation area, specify an Angle and Background
color.
•
In the Custom angle rotation area, click the Horizontal or Vertical
button and use the mouse pointer to draw a line on the image that you
want set as horizontal or vertical.
4. Do one of the following:
•
Click Apply to apply your changes and set options on another tab in
the Rotate/Flip tool.
•
Click Done to apply your changes and close the tool.
•
Click Cancel to discard all changes and close the tool.
Rotating and flipping an image | 103
CHAPTER 6: EDITING
Flipping an image
You can flip an image vertically, horizontally, or both.
To flip an image:
1. In Edit Mode, on the Edit Panel, click Rotate.
2. On the Flip tab, do one or both of the following:
•
Select the Horizontal Flip check box.
•
Select the Vertical Flip check box.
3. Do one of the following:
•
Click Apply to apply your changes and set options on another tab in
the Rotate/Flip tool.
•
Click Done to apply your changes and close the tool.
•
Click Cancel to discard all changes and close the tool.
Applying special effects filters
ACDSee includes a number of special effects filters that you can use to add
unique effects to an entire image or to a selected image area. You can enhance
dull images by adding sunspots and wind effects, transform a regular photo into
an oil painting, and much more.
The following section explains how to apply each of the special effects filters, and
includes some examples of filtered images.
Applying a Bathroom Window effect
The Bathroom Window effect divides your images into bars, transforming them
so they resemble the view through privacy glass often found in bathrooms. You
can select or change the Bathroom Window options to apply this effect to your
image, and save your options as a preset value for use at another time.
To use the Bathroom Window effect:
1. On the Edit Panel, click Effects, and then double-click Bathroom
Window.
2. In the Bathroom Window dialog box, in the Bar direction area, select one
of the following to specify the orientation of the bars in your image:
•
Vertical
•
Horizontal
104 | Applying special effects filters
CHAPTER 6: EDITING
3. Drag the Bar width slider to set the thickness of the bars. Thinner bars
result in a more distorted image.
4. Do one of the following:
•
Click Done to apply your changes and close the Bathroom Window
tab.
•
Click Cancel to discard all changes and close the tab.
Applying a Blinds effect
You can use the Blinds effect to divide your image into bars that look like
Venetian or vertical window blinds. You can select or change the Blinds options
to add blinds to your image, and save your options as a preset value for use at
another time.
To use the Blinds effect:
1. On the Edit Panel, click Effects, and then double-click Blinds.
2. On the Blinds tab, set the options as described below.
3. Do one of the following:
•
Click Done to apply your changes and close the Blinds tab.
•
Click Cancel to discard all changes and close the tab.
Blinds options
Blind width
Specifies the width of the blinds. Type a number from 1 to 1000 or
drag the slider to adjust the width of each blind. As the value
increases, the width of the blind also increases.
Blind opacity Specifies the opacity of the blinds. Type a number from 1 to 99 or
drag the slider to adjust the opacity of the blinds. The higher the
opacity, the more the image is obscured.
Angle
Specifies the angle of the blinds. Type a number from 1 to 360 or drag
the arrow to adjust the angle.
Blind color
Specifies the color of the blinds.
Applying a Bulge effect
You can use the Bulge effect to stretch or shrink areas of your images
horizontally and vertically. You can set the radius and position of the distortion,
and save the options as a preset value for use at another time.
Applying special effects filters | 105
CHAPTER 6: EDITING
To use the Bulge and Shrink effect:
1. On the Edit Panel, click Effects, and then double-click Bulge.
2. On the Bulge tab, set the options as described below.
3. Do one of the following:
•
Click Done to apply your changes and close the Bulge tab.
•
Click Cancel to discard all changes and close the tab.
Bulge options
Horizontal
position
Specifies the center of the distortion along the horizontal axis. A
lower value moves the distortion towards the left side of the image,
while a higher value moves it towards the right side of the image.
Vertical
position
Specifies the center of the distortion along the vertical axis. A lower
value moves the distortion towards the bottom of the image, while a
higher value moves it towards the top of the image.
Radius
Specifies the radius of the distorted area. A lower value decreases the
radius of the distortion, while a higher value increases the radius of
the distortion.
Strength
Specifies the strength of the distortion. A negative value shrinks the
center of the distortion, while a higher value bulges the distortion.
Background
color
Specifies the background color for the filtered image.
Bulge direction
Specifies the direction of the distortion. Select one or both of the
following options:
Select the Image check box to use the original image color, or click
the color picker to select a different color.
• Horizontal: moves the distortion horizontally.
• Vertical: moves the distortion vertically.
Applying a Colored Edges effect
You can use the Colored Edges effect to trace the lines and details of people or
objects in your images. You can save your options as a preset value for future use.
To use the Colored Edges effect:
1. On the Edit Panel, click Effects, and then double-click Colored Edges.
2. On the Colored Edges tab, set the options as described below.
3. Do one of the following:
•
Click Done to apply your changes and close the Colored Edges tab.
•
Click Cancel to discard all changes and close the tab.
106 | Applying special effects filters
CHAPTER 6: EDITING
Colored Edges options
Intensity
Specifies the amount of color added to the edges within the image.
The higher the setting, the thicker the color that is applied to the
image.
Edge color
Specifies the color of the edges.
Edge detection
Specifies the edge detection method.
Blurring
Blurs the edges in the image.
Select the Use blurring check box and select a blur setting to
determine how much blur is applied to the edges.
Applying a Contours effect
You can use the Contours effect to draw contour lines on your image that create a
cartoon effect. You can select or change the Contours options to apply the effect
to your image, and save your options as a preset value for use at another time.
To use the Contours effect:
1. On the Edit Panel, click Effects, and then double-click Contours.
2. On the Contours tab, set the options as described below.
3. Do one of the following:
•
Click Done to apply your changes and close the Contours tab.
•
Click Cancel to discard all changes and close the tab.
Contours options
Rounding
Specifies the amount of curve in the contour lines. The higher the
value, the rounder the lines.
Line frequency
Specifies the amount of space between the contour lines. The higher
the value, the closer the lines move together.
Line strength
Specifies the strength of the line. The higher the value, the darker the
line.
Line color
Specifies the color of the contour lines.
Applying a Crosshatch effect
You can use the Crosshatch effect to add crosshatching to an image.
To use the Crosshatch effect:
On the Edit Panel, click Effects, and then double click Crosshatch.
Applying special effects filters | 107
CHAPTER 6: EDITING
Applying a Dauber effect
You can use the Dauber effect to make your images look like they were painted
with a paint dauber. You can select or change the Dauber options to apply the
effect to your image, and save your options as a preset value for use at another
time.
To use the Dauber effect:
1. On the Edit Panel, click Effects, and then double-click Dauber.
2. On the Dauber tab, set the options as described below.
3. Do one of the following:
•
Click Done to apply your changes and close the Dauber tab.
•
Click Cancel to discard all changes and close the tab.
Dauber options
Intensity
Specifies the amount of color applied with each daub.
Frequency
Specifies the number of daubs added to the image.
Background
color
Specifies the background color of the filtered image.
Random Seed
Indicates the random placement of the paint daubs.
Select the Image check box to use the original image colors or click
the color picker to select a different color.
When you apply the Dauber effect to an image, ACDSee places the
daubs randomly. This makes the paint daubs different every time you
apply the filter. You can define a specific random seed to generate
identical daubs.
To generate a new random seed, click Random Seed.
Applying an Edge Detect effect
You can use the Edge Detect effect to create a highlighted outline of your image.
After creating a black image, the effect uses colored lines to outline the detail of
an image where significant color differences exist. Greater differences between
colors in the original image produce brighter outline colors.
To use the Edge Detect effect:
On the Edit Panel, click Effects, and then double click Edge Detect.
108 | Applying special effects filters
CHAPTER 6: EDITING
Applying an Emboss effect
You can use the Emboss effect to add a grayscale relief to an image. You can save
your options as a preset for future use.
To emboss an image:
1. On the Edit Panel, click Effects, and then double-click Emboss.
2. In the Emboss dialog box, set the options as described below.
3. Do one of the following:
•
Click Done to accept your changes and close the Emboss tab.
•
Click Cancel to discard your changes and close the tab.
Emboss options
Elevation
Specifies the light source's elevation on the image. Lower values produce
more shadows and a darker image. Higher values produce fewer shadows
and a lighter image.
Weight
Specifies the amount of relief added to the image. Higher values increase
the relief depth.
Azimuth
Specifies the angle of shadows that extend from the edges of image
details. A value of 0 adds shadows to the left side, while a value of 180
adds shadows to the right side.
Applying a Furry Edges effect
You can use the Furry Edges effect to add fur and bristles to the lines and details
of people or objects in your images. You can save your options as a preset value
for future use.
To use the Furry Edges effect:
1. On the Edit Panel, click Effects, and then double-click Furry Edges.
2. On the Furry Edges tab, set the options as described below.
3. Do one of the following:
•
Click Done to accept your changes and close the Furry Edges tab.
•
Click Cancel to discard your changes and close the tab.
Furry Edges options
Frequency
Specifies how much fur is added to the image. The higher the setting,
the more dense the fur that is applied to the image.
Applying special effects filters | 109
CHAPTER 6: EDITING
Furry Edges options
Threshold
Specifies how sharp an edge must be before fur is applied to it. As the
value decreases, the area of the image that fur is added to increases.
Fur length
Specifies the length of each strand of fur. As the value increases, the
length of each fur strand also increases.
Variance
Specifies how much of the fur grows in the direction indicated by the
Hair direction setting. The higher the value, the more random the fur
direction will be.
Hair direction
Specifies the general direction in which fur will appear to grow.
Edge detection
Specifies the edge detection method.
Background
color
Specifies the background color of the filtered image. Select the Image
check box to use the original image colors, or click the color picker to
select a different color.
Fur color
Specifies the color of the fur. Select the Image check box to use the
original image colors, or click the color picker to select a different
color.
Random Seed
Indicates the random placement of the fur strands.
When you apply the Furry Edges effect to an image, ACDSee places
the fur randomly. This makes the fur strands different every time you
apply the filter. You can define a specific random seed to generate
identical fur patterns.
To generate a new random seed, click Random Seed.
Applying a Mirror effect
You can use the Mirror effect to reflect an image along the horizontal or vertical
axis. You can select or change the Mirror options to apply mirroring to your
image, and save your options as a preset value for use at another time.
To apply a Mirror effect:
1. On the Edit Panel, click Effects, and then double-click Mirror.
2. On the Mirror tab, in the Mirror direction area, select one of the following
options to indicate which direction you want to mirror the image:
•
Horizontal
•
Vertical
3. Drag the Mirror axis slider to adjust the position of the mirror. A value of
500 places the mirror in the center of the image.
110 | Applying special effects filters
CHAPTER 6: EDITING
4. Do one of the following:
•
Click Done to apply your changes and close the Mirror tab.
•
Click Cancel to discard your changes and close the tab.
Applying a Negative effect
You can use the Negative effect to create a negative of your image. You can also
apply the Negative filter to a negative scanned from a roll of film to produce a
positive image.
To create an image negative:
On the Edit Panel, click Effects, and then double-click Negative.
Applying an Oil Paint effect
You can use the Oil Paint effect to give your images a painted appearance. You
can save your options as a preset for future use.
To create an oil painting from an image:
1. On the Edit Panel, click Effects, and then double-click Oil Paint.
2. On the Oil Paint tab, drag the Brush width slider to specify the width of
the brush strokes in the effect. The higher the value, the wider the brush
stroke.
3. Drag the Variance slider to specify the color variance in each brush
stroke. Higher values increase the number of colors used in each stroke.
4. Drag the Vibrance slider to adjust the intensity of the colors in the image.
5. Do one of the following:
•
Click Done to apply your changes and close the Oil Paint tab.
•
Click Cancel to discard your changes and close the tab.
Applying a Pencil Drawing effect
You can use the Pencil Drawing effect to create a pencil drawing from your
images.
To create a Pencil Drawing effect:
On the Edit Panel, click Effects, and then double click Pencil Drawing.
Applying special effects filters | 111
CHAPTER 6: EDITING
Applying a Pixel Explosion effect
You can use the Pixel Explosion effect to explode pixels from a center point in
your images. You can select or change the Pixel Explosion options to apply this
effect to your image, and save your options as a preset value for use at another
time.
To use the Pixel Explosion effect:
1. On the Edit Panel, click Effects, and then double-click Pixel Explosion.
2. On the Pixel Explosion tab, set the options as described below.
3. Do one of the following:
•
Click Done to accept your changes and close the Pixel Explosion tab.
•
Click Cancel to discard your changes and close the tab.
Pixel Explosion options
Horizontal
center
Specifies the center point of the explosion on the horizontal axis. A
value of 500 places the explosion at the middle of the image.
Vertical center
Specifies the center point of the explosion on the vertical axis. A
value of 500 places the explosion at the middle of the image.
Intensity
Specifies the intensity of the explosion. A higher value creates a
larger, more brilliant spread of the pixels in the image.
Explosion
direction
Specifies the direction of the explosion. Select one or both of the
following:
• Explode horizontally: explodes the pixels towards the top and
bottom of the image.
• Explode vertically: explodes the pixels towards the right and left
sides of the image.
Random Seed
Indicates the random placement of the pixels.
When you apply the Pixel Explosion effect to an image, ACDSee
places the pixels randomly. This makes the pixels different every time
you apply the filter. You can define a specific random seed to
generate identical pixel patterns.
To generate a new random seed, click Random Seed.
Applying a Pixelate effect
A pixel is the smallest piece of a digital image, arranged in rows and columns.
When you reduce the resolution of your image, the size of the pixel increases and
produces blurring. You can use the Pixelate effect to increase the size of the
pixels in your image, and save your options as a preset value for future use.
112 | Applying special effects filters
CHAPTER 6: EDITING
To use the Pixelate effect:
1. On the Edit Panel, click Effects, and then double-click Pixelate.
2. On the Pixelate tab, drag the Width and Height sliders to set the size of
the pixels in your image. Select the Square check box to make the width
and height equal.
3. Do one of the following:
•
Click Done to accept your changes and close the Pixelate tab.
•
Click Cancel to discard your changes and close the tab.
Applying a Posterize effect
You can use the Posterize effect to reduce the number of brightness levels in your
image. You can select or change the Posterize options to apply this effect to your
image, and save your options as a preset value for use at another time.
To use the Posterize effect:
1. On the Edit Panel, click Effects, and then double-click Posterize.
2. On the Posterize tab, drag the Brightness levels slider to adjust the
variance of colors in the image. The lower the value, the fewer colors used
in the image.
3. Do one of the following:
•
Click Done to accept your changes and close the Posterize tab.
•
Click Cancel to discard your changes and close the tab.
Applying a Ripple effect
You can use the Ripple effect to divide your images into concentric circles that
resembles what you see when you drop a pebble into water. You can select or
change the Ripple options to apply ripples to your image, and save your options
as a preset value for use at another time.
To use the Ripple effect:
1. On the Edit Panel, click Effects, and then double-click Ripple.
2. On the Ripple tab, set the options as described below.
3. Do one of the following:
•
Click Done to accept your changes and close the Ripple tab.
•
Click Cancel to discard your changes and close the tab.
Applying special effects filters | 113
CHAPTER 6: EDITING
Ripple options
Horizontal
position
Specifies the center of the ripples on the horizontal axis. A value of
500 places the ripples in the middle of the image.
Vertical
position
Specifies the center of the ripples on the vertical axis. A value of 500
places the ripples in the middle of the image.
Amplitude
Specifies the depth and height of each ripple.
Wavelength
Specifies the amount of space between ripples.
Light strength
Specifies the amount of light contrast between the top and bottom of
each ripple.
Background
color
Specifies the background color of the filtered image. Select the Image
check box to use the original image colors, or click the color picker to
select a different color.
Ripple direction Specifies the direction of the ripples. Select one or both of the
following:
• Ripple vertically: makes the ripples move towards the top and
bottom of the image.
• Ripple horizontally: makes the ripples move towards the right
and left sides of the image.
Applying a Scattered Tiles effect
You can use the Scattered Tiles effect to divide your images into rectangular tiles,
and scatter and stack the tiles. You can select or change the Scattered Tiles
options to apply this effect to your image, and save your options as a preset value
for use at another time.
To use the Scattered Tiles effect:
1. On the Edit Panel, click Effects, and then double-click Scattered Tiles.
2. On the Scattered Tiles tab, set the options as described below.
3. Do one of the following:
•
Click Done to accept your changes and close the Scattered Tiles tab.
•
Click Cancel to discard your changes and close the tab.
Scattered Tiles options
Tile size
Specifies the size of the tiles.
Scatter amount
Specifies how much the tiles will move from their original positions.
Background
color
Specifies the color of the background. Click the color picker to select
a different color.
114 | Applying special effects filters
CHAPTER 6: EDITING
Scattered Tiles options
Random Seed
Indicates the random placement of the tiles.
When you apply the Scattered Tiles effect to an image, ACDSee
places the tiles randomly. This makes the effect different every time
you apply the filter. You can define a specific random seed to
generate identical tile patterns.
To generate a new random seed, click Random Seed.
Applying a Sepia effect
You can use the Sepia effect to give your images an antique look.
To add a sepia color to an image:
On the Edit Panel, click Effects, and then double click Sepia.
Applying a Sheet Metal effect
You can use the Sheet Metal effect to turn your images into sheet metal
impressions. You can save your options as a preset value for future use.
To use the Sheet Metal effect:
1. On the Edit Panel, click Effects, and then double-click Sheet Metal.
2. On the Sheet Metal tab, set the options as described below.
3. Do one of the following:
•
Click Done to accept your changes and close the Sheet Metal tab.
•
Click Cancel to discard your changes and close the tab.
Sheet Metal options
Rounding
Specifies the amount of curve in the edges of the impressions.
Detail
Specifies the amount of detail in the impression.
Angle
Specifies the angle of the grain in the sheet metal.
Metal color
Specifies the color of the sheet metal.
Direction
Specifies the direction in which the sheet metal was manipulated.
Select one of the following:
• Indented: stamps the metal from the top side of the image.
• Pushed out: stamps the metal from underneath the image.
Applying special effects filters | 115
CHAPTER 6: EDITING
Applying a Shift effect
You can use the Shift effect to divide your images into bars and shift them in
random directions. You can save your options as a preset value for future use.
To use the Shift effect:
1. On the Edit Panel, click Effects, and then double-click Shift.
2. On the Shift tab, set the options as described below.
3. Do one of the following:
•
Click Done to accept your changes and close the Shift tab.
•
Click Cancel to discard your changes and close the tab.
Shift options
Strength
Specifies the amount of shift between the bars.
Width
Specifies the width of each bar.
Angle
Specifies the angle of the bars.
Background
color
Specifies the background color of the filtered image. Select the Image
check box to use the original image colors, or click the color picker to
select a different color.
Applying a Solarize effect
You can use the Solarize effect to overexpose your images. You can select or
change the Solarize options to apply this effect to your image, and save your
options as a preset value for use at another time.
To use the Solarize effect:
1. On the Edit Panel, click Effects, and then double-click Solarize.
2. On the Solarize tab, drag the Threshold slider to specify the brightness
threshold of the image.
3. In the Effect area, specify which pixels you want to adjust by selecting one
of the following options:
•
Solarize: adjusts pixels located above the specified threshold option.
The effect takes any pixels above the threshold and replaces them with
their negative value. When you solarize an image, a higher threshold
value sets a brighter threshold, and colors need to be brighter to be
overexposed.
116 | Applying special effects filters
CHAPTER 6: EDITING
•
Lunarize: adjusts pixels located below the specified threshold option.
The effect takes any pixels below the threshold and replaces them with
their negative value. When you lunarize an image, a higher threshold
value sets a darker threshold, and colors do not have to be as bright to
be overexposed.
4. Do one of the following:
•
Click Done to accept your changes and close the Solarize tab.
•
Click Cancel to discard your changes and close the tab.
Applying a Sunspot effect
You can use the Sunspot effect to add a bright spot in your images. You can save
your options as a preset value for future use.
To use the Sunspot effect:
1. On the Edit Panel, click Effects, and then double-click Sunspot.
2. On the Sunspot tab, drag the Horizontal and Vertical sliders or click the
image to set the location of the sunspot.
3. Drag the Brightness slider to set the intensity of the sunspot.
4. Do one of the following:
•
Click Done to accept your changes and close the Sunspot tab.
•
Click Cancel to discard your changes and close the tab.
Applying a Swirl effect
You can use the Swirl effect to rotate and stretch people and objects in your
images. You can save your options as a preset value for future use.
To use the Swirl effect:
1. On the Edit Panel, click Effects, and then double-click Swirl.
2. On the Swirl tab, set the options as described below.
3. Do one of the following:
•
Click Done to accept your changes and close the Swirl tab.
•
Click Cancel to discard your changes and close the tab.
Swirl options
Horizontal
position
Specifies the center of the swirl on the horizontal axis. A value of 500
places the swirl in the middle of the image.
Applying special effects filters | 117
CHAPTER 6: EDITING
Swirl options
Vertical
position
Specifies the center of the swirl on the vertical axis. A value of 500
places the swirl in the middle of the image.
Radius
Specifies the size of the swirl effect.
Strength
Specifies the strength and direction of the swirl. Higher values create
a clockwise swirl, while negative values create a counter-clockwise
swirl.
Focus
Specifies the concentration of the swirl. Higher values concentrate the
effect on the center of the swirl, while lower values spread the swirl
across the image.
Background
color
Specifies the background color of the filtered image. Select the Image
check box to use the original image colors, or click the color picker to
select a different color.
Swirl direction
Specifies the direction of the swirl. Select one or both of the
following:
• Swirl horizontally: moves the swirl towards the top and bottom
of the image.
• Swirl vertically: moves the swirl towards the right and left sides
of the image.
Applying a Topographic Map effect
You can use the Topographic Map effect to change the details of your images into
contour lines. You can save your options as a preset value for future use.
To use the Topographic Map effect:
1. On the Edit Panel, click Effects, and then double-click Topographic
Map.
2. On the Topographic Map tab, drag the Rounding slider to adjust the
amount of curve in the counter lines.
3. Drag the Number of lines slider to specify how many contour lines you
want to add.
4. Do one of the following:
•
Click Done to accept your changes and close the Topographic Map
tab.
•
Click Cancel to discard your changes and close the tab.
118 | Applying special effects filters
CHAPTER 6: EDITING
Applying a Wind effect
You can use the Wind effect to add wind lines that make stationary objects in
your image look like they are moving. You can select or change the Wind options
to add wind to your image, and save your options as a preset value for future use.
To use the Wind effect:
1. On the Edit Panel, click Effects, and then double-click Wind.
2. On the Wind tab, select or change the options described below.
3. Do one of the following:
•
Click Done to apply your changes and close the Wind tab.
•
Click Cancel to discard your changes and close the tab.
Wind options
Strength
Determines how strong the wind lines are in the image. The higher the
value, the stronger the wind lines.
Threshold
Determines how sharp an edge must be before the filter will apply
wind. The higher the value, the sharper the edge needs to be.
Chance of Wind Determines the amount of wind lines to place in the image.
Edge detection
Specifies the method used to detect the edges of subjects in the image.
Background
color
Specifies the background color. Select the Image check box to use the
original image colors, or click the color picker to select a different
color.
Wind color
Specifies the color of the wind lines. Select the Image check box to
use the original image colors, or click the color picker to select a
different color.
Wind angle
Specifies the angle of the wind lines.
Random Seed
Indicates the random placement of the wind lines.
When you apply the Wind effect to an image, ACDSee places the
wind lines randomly. This makes the wind lines different every time
you apply the filter. You can define a specific random seed to
generate identical wind lines.
To generate a new random seed, click Random Seed.
Applying special effects filters | 119
CHAPTER 6: EDITING
Creating a custom effect filter
You can use the User Defined Convolution filter to create your own special
effects. You can apply your custom made effect to your image and save your
options as a preset value for future use.
To create a custom effect filter:
1. On the Edit Panel, click Effects, and then double-click User Defined
Convolution.
2. On the User Defined Convolution tab, set the options as described below.
3. Do one of the following:
•
Click Done to accept your changes and close the User Defined
Convolution tab.
•
Click Cancel to discard your changes and close the tab.
User Defined Convolution options
Convolution
matrix
Specifies the formula to use when altering the image.
Division factor
Specifies the fractional coefficient of the matrix.
Type numbers in the matrix fields to change the pixels in the image.
Using a mathematical formula, the color value of each pixel in an
image is multiplied by the numbers in the matrix to produce an effect.
Type a number into the Division factor field to use fractional
coefficients in the matrix. The product of the convolution matrix is
divided by the division factor before being applied to a pixel.
Bias
Specifies the brightness of the image.
Type a number into the Bias field to change the brightness of the
image. The bias number is added to the RGB values of each pixel. A
positive number brightens the image, while a negative number
darkens the image.
Clear matrix
Resets the matrix.
Sample filters
Loads a sample effect to use as a starting point for creating your own
effect.
120 | Applying special effects filters
CHAPTER
7
ORGANIZING
AND MANAGING
In addition to its browsing, viewing, and editing capabilities, ACDSee features
integrated management tools you can use to better organize and sort your images
and media files. These tools include batch functions, category and rating systems,
and a powerful database to hold all of your important image information.
You can use ACDSee’s batch operations to rename, resize, rotate, add EXIF
information, and adjust the exposure of a single image, a group of images, or the
contents of an entire folder all at once. With the category and rating systems, you
can create a virtual folder structure, and find related images and media files with a
single click, or instantly locate all of the images you have stored on your hard
drive.
| 121
CHAPTER 7: ORGANIZING AND MANAGING
ACDSee displays file properties and image information in an easily accessible
Properties pane that you can use to directly add and edit file information,
including metadata and database content. You can add an author, description,
notes, and keywords to your files, and adjust the category and rating assignments
at the same time.
The following sections describe how to use ACDSee’s management tools to
organize your images and media files, and how to manage and maintain your
database information.
About the ACDSee database
The ACDSee database stores image and media file information while you browse
your folders. The database increases the speed with which you can browse your
computer, and you can use the information stored in the database to sort,
organize, search, and filter your images and media files. You can also backup,
restore, and share database information.
You can add and edit the following information for each image or media file on
your computer, and store it in the database:
•
Cached thumbnail previews
•
Categories
•
Notes
•
Keywords
•
Authors
•
Dates
•
Ratings
•
Captions
You can also choose to exclude folders from the database, and keep the contents
separate from your other images and media files.
Copying, moving, or renaming your files using other programs, such as Windows
Explorer, causes the loss of database information.
122 |
CHAPTER 7: ORGANIZING AND MANAGING
Using the Properties pane
The Properties pane displays the database information associated with your files.
It also displays file properties, such as file size, creation date, and read-only or
hidden status, and EXIF metadata. You can use the Properties pane to add,
change, or delete database information, and edit the metadata for image and
media files.
To open the Properties pane:
In the Browser or Viewer, click View | Properties.
The Properties pane is located by default on the right side of your screen in both
the Browser and the Viewer.
Properties pane areas
Depending on the type of file or folder you have selected, the Properties pane
contains up to three tabs: Database, File, and EXIF.
Database tab
The Database tab displays the database information associated with the currently
selected file or folder. You can edit any of the fields on the Database tab to add or
change the database information.
Database tab fields
Caption
Type a brief description of the file to store in the database.
Date/Time
Specify the date and time you want to associate with the file and store in
the database. Click the Date/Time drop-down list to locate and save a date
from a calendar.
Author
Type the name of the author or photographer that you want to store with
the file in the database.
Rating
Select a rating from 1 to 5 to apply to the file, or click X to remove the
current rating. You can use the rating to sort and search for files in the
database. For more information about assigning and using ratings, see
“Classifying files” on page 127.
Notes
Type any descriptive or additional text you want to store with the file in
the database. You can add up to 4,095 characters of free-form text.
Keywords
Type any keywords you want to associate with the file, or click the
Keyword Picker button to choose from the Master Keyword List.
Separate multiple keywords with a comma. For more information about
using keywords, see “Creating and managing keywords” on page 124.
Using the Properties pane | 123
CHAPTER 7: ORGANIZING AND MANAGING
Database tab fields
Organize
Select the check box next to any category or categories to which you want
to assign the file. To create a new category, right-click the Categories
field and select New Category. For more information about creating and
managing categories, see “Managing categories” on page 127.
File tab
The File tab displays detailed file information and image attributes for a selected
file or files. You can set or change the Read-Only and Hidden properties of a file
or folder, and view a summary of any EXIF information contained in a file.
Select or clear the Read only or Hidden check boxes to toggle the read-only and
hidden status for the file or folder.
You can also click the Located in link to open the file or folder’s parent folder in
the File List pane.
EXIF tab
The EXIF tab displays EXIF metadata information that is stored with an image
created by a scanner or digital camera. Metadata is embedded in the file, and can
be retained by ACDSee when you edit an image. You can edit any tag marked in
the Properties pane with a pencil icon.
To edit metadata:
Double-click the metadata tag you want to edit.
You can add metadata to an image or a group of images with the Batch Set EXIF
Information tool. For more information, see “Adding EXIF information” on
page 152.
Creating and managing keywords
In ACDSee you can create a master list of keywords and store the list in the
database. By using a master list, you can reduce the number of duplicate or
misspelled keywords, and improve your search returns and image management.
The database automatically updates the keywords assigned to files with any
changes you make to the keywords in the master list.
To create and maintain the master keyword list:
1. In the Properties pane, click the Keyword Picker button beside the
Keywords field.
2. In the Keyword Picker dialog box, click Edit List.
124 | Using the Properties pane
CHAPTER 7: ORGANIZING AND MANAGING
3. In the Keyword List Configuration dialog box, do one of the following:
•
To create a new keyword, type a new keyword into the New Keyword
field, and then click Add.
•
To delete a keyword, select a keyword in the Keyword List field, and
then click Remove.
•
To rename a keyword, select a keyword in the Keyword List field.
Click Rename, type a new name for the keyword, and press ENTER.
4. To assign keywords to your files, select one or more keywords in the
Available Keywords list and click Assign.
5. To remove a keyword from your files, select a keyword in the Assigned
Keywords list and then click Remove.
6. When you are satisfied with your changes, click OK to close the Keyword
Picker dialog box.
Using the Organize pane
The Organize pane displays a list of categories, ratings, and other classification
tools to which you can assign your images and media files. You can use the
classifications to organize your images and media files without moving them
from folder to folder — categories and ratings work independently of file
location.
To view organized files:
Select one or more categories, ratings, or other classifications. Files
assigned to those classifications are displayed in the File List pane.
The Contents bar at the top of the File List pane displays your currently selected
categories or classifications. You can browse through specific classifications
within specific folders using the Selective Browsing pane. For more information
about selective browsing, see “Using selective browsing” on page 161.
Selecting multiple organize methods
Easy-Select bars are vertical columns of check boxes on the left side of the
Folders and Organize panes. You can use the Easy-Select bars to select multiple
categories or classifications, and display their contents in the File List pane.
To use the Easy-Select bar:
In the Organize pane, select the check box to the left of each classification
with contents you want to display.
Using the Organize pane | 125
CHAPTER 7: ORGANIZING AND MANAGING
Organize pane classifications
The Organize pane contains four classification areas: Categories, Disc Creation,
Ratings, and Special Items. For more information about assigning files to
categories and ratings, see “Classifying files” on page 127.
Categories
You can use categories to create groups of files without creating extra copies, or
moving files into different folders. You can create new categories, rename or
delete existing categories, and assign files to multiple categories.
Disc Creation
You can assign files from multiple locations to the Write Disc category in the
Disc Creation area in preparation for recording a CD or DVD with the Create
Disc Wizard. Using the Write Disc category saves you from having to move or
copy all of your files into a separate location. For more information, see “Creating
a CD or DVD” on page 170.
Ratings
You can assign a numerical rating from 1 to 5 to your images and files, and store
the ratings in the database. Once you have assigned ratings, you can search, sort,
and organize your files based on the ratings.
Special Items
You can use the two classifications in the Special Items area to quickly view all of
your uncategorized images, or all of the images in your database. Select one of
the following items:
• Image Well: displays all images cataloged in the ACDSee database. If you
have a substantial image collection, it may take a few moments to gather
all of the information.
• Uncategorized: displays any images cataloged in the database that have
not been assigned to a category.
You can assign any type of file to a rating or category, but the two options in the
Special Items area only apply to images.
126 | Using the Organize pane
CHAPTER 7: ORGANIZING AND MANAGING
Managing categories
You can use the Organize pane to create, rename, delete, and move your
categories.
To create a category:
1. In the Organize pane, right-click a category and select New Category.
2. In the Create Category dialog box, select one of the following:
•
Create a new, top-level category
•
Create a sub-category within the current selection
3. Type a name for the new category in the Name field.
4. If you are creating a top-level category, select an icon from the Icon dropdown list. (Sub-categories automatically use the same icon as their parent
category.)
5. Click OK.
To manage your categories:
In the Organize pane, select a category and do one of the following:
•
To move the category, drag it to the new location.
•
To rename a category, right-click it and select Rename.
•
To delete a category, right-click the selected it and select Delete.
Classifying files
You can assign files to a rating, or one or more categories, without relocating the
file.
To assign files to a category or rating:
1. In the File List pane, select the files you want to categorize.
2. Do one of the following:
•
Drag the selected files to a category or rating in the Organize pane.
•
Right-click one of the selected files, select Set Categories, and then
click the category to which you want to assign the files.
•
Right-click one of the selected files, select Set Rating, and then click
the rating to which you want to assign the files.
Using the Organize pane | 127
CHAPTER 7: ORGANIZING AND MANAGING
Removing files from classifications
You can remove a file from a category or rating without moving or deleting the
original file, or affecting any other files assigned to that classification.
To remove files from a category or rating:
1. In the File List pane, select the files you want to remove.
2. Do one of the following:
•
Right-click a selected file, and then select Set Rating | Clear Rating.
•
Right-click a selected file, select Set Categories, and then select the
name of the category from which you want to remove the file.
•
Right-click a category or rating in the Organize pane, and select
Remove Items.
Customizing the Organize pane
You can customize the Organize pane to specify which confirmations you want to
be prompted for while working with categories, and choose whether to show the
Easy-Select bar.
To set the Organize pane options:
1. Click Tools | Options, and then select Organize.
2. On the Organize page, set or change the options as described below.
3. When you are satisfied with your changes, click OK.
Organize options
Category
deletion
Confirm if category
has assigned files
Prompts you for confirmation when deleting
a category with assigned files.
Confirm if category
has sub-categories
Prompts you for confirmation when deleting
a category containing sub-categories.
File removal
Confirm file removal
from category
Prompts you for confirmation when
unassigning files from a category.
Easy-select
Show Easy-Select
Displays an Easy-Select bar in the Organize
pane, which you can use to select multiple
categories, special items, and ratings.
Enable Easy-Select
tooltip
Displays a tool-tip when you place your
mouse pointer over the Easy-Select bar.
128 | Using the Organize pane
CHAPTER 7: ORGANIZING AND MANAGING
Managing database information
With the ACDSee database, you can store information about your images and
media files to help you better manage your file collection. The following sections
explain how to manage and maintain your database information, and include
instructions on adding, sharing, backing up, and optimizing your database.
To retain all of your database information and the proper association with your
files, use ACDSee exclusively when managing your files. Copying, moving, or
renaming your files using other programs, such as Windows Explorer, causes the
loss of database information.
Setting database options
You can adjust settings in the ACDSee Options dialog box to display reminders,
control database information, and specify a location on your hard drive where you
want to store your database files and cached thumbnails.
Database options
Database location
Specifies the location to store the ACDSee database. Click
the Browse button to locate a folder on your hard drive.
Display backup
reminder
Automatically reminds you to back up your ACDSee
database. Click the Every drop-down list and select how
often you would like to be reminded.
Excluded Folders
Opens the Excluded Folders List dialog box, where you can
specify which folders you want to exclude from the ACDSee
database.
Set Database date
Automatically adds the last-modified date of files to the
ACDSee database when you catalog the contents of a folder.
Select one of the following to specify which date you want to
store as the database date:
• Exif date
• File modified date
• Specific date
Import EXIF metadata
Automatically imports any Exif information into the
ACDSee database whenever you catalog the contents of a
folder.
Managing database information | 129
CHAPTER 7: ORGANIZING AND MANAGING
Cataloging files
ACDSee automatically adds file information and thumbnails to the database as
you browse. You can use the Catalog Files Wizard to add groups of files to the
database without having to first browse the folders. This can be particularly useful
when using ACDSee for the first time, and when browsing or managing large
collections of images to reduce the loading time required for these folders.
The Catalog Files Wizard starts automatically the first time you run ACDSee. At
this point, it is recommended that you catalog the contents of your My Pictures
folder to create the ACDSee database.
To catalog your files:
1. Click Database | Catalog Files.
2. On the Welcome page, select which folders you want to catalog. Click
Next when you are ready to continue.
3. If you chose to catalog specific folders, on the Select folders to catalog
and Add database information pages, add the folders to catalog in the
database, specify the information to add to the database, and customize the
caption, notes, author, and date fields. Click Next when you are ready to
catalog your files.
Adding EXIF information to the database
You can use ACDSee's Copy EXIF Information Wizard to copy EXIF
information for selected files to and from the database. The wizard will guide you
through the process of copying image EXIF information to populate the database,
or database information to populate EXIF fields.
To copy EXIF information:
1. Select one or more files.
2. Click Database | Copy EXIF Info.
3. On the Choose Copy Direction page, select whether you want to copy the
images' EXIF information and place it in the database, or copy the
database information and use it to populate the images' EXIF fields. Click
Options to control how the wizard handles default settings. Click Next
when you are ready to continue.
130 | Managing database information
CHAPTER 7: ORGANIZING AND MANAGING
4. On the Choose Source and Destination Fields page, select one field
containing the data you would like to copy, and one field in which you
would like to place the copied data. If you would like to overwrite any data
that currently exists in the recipient field, select Replace existing data. If
you would like to add the copied data to any data that currently exists in
the recipient field, select Append to existing data. Click Next when you
are ready to continue.
Rebuilding thumbnails
Situations can develop in which your images will be out of sync with the
thumbnail images displayed in the File List pane. You can use the Rebuild
Thumbnails tool to immediately regenerate the thumbnails for selected images.
To rebuild thumbnails:
1. Do one of the following:
•
Select one or more thumbnails in the File List pane.
•
Select a folder in the Folders pane.
2. Click Database | Rebuild Thumbnails.
Excluding folders from the database
You can choose to exclude folders from the database, and keep the contents
separate from your other images and media files. By default, the Program Files
and Windows folders on your hard drive are automatically excluded from the
database.
To manage your excluded folders settings:
1. Click Database | Excluded Folders Settings.
2. In the Excluded Folders dialog box, do one of the following:
•
To exclude a folder from the database, click Add. Browse to a folder
on your hard drive, and then click OK.
•
To remove a folder from the excluded folders list, select a folder in the
list and then click Remove.
•
To reset your excluded folders list to the default settings, click Reset
to Defaults.
3. When you are satisfied with your choices, click Close to return to
ACDSee.
Managing database information | 131
CHAPTER 7: ORGANIZING AND MANAGING
Converting an older ACDSee database
You can use the ACD Database Convert Wizard to take database information
from previous versions of ACDSee or ACD mPower Tools and add it to your
current database. This ensures that any information associated with your files
using a previous version of ACDSee is referenced properly in the current
database.
If you have already added information to your current ACDSee database, it is
recommended that you create a backup of your database before converting an
older ACDSee database. For more information, see “Backing up database
information” on page 135.
To convert an older database:
1. Click Database | Convert Database.
2. On the Welcome page, click Next to select your conversion options.
3. On the Database Convert Options page, specify the version of the
database file you want to convert, as well as its location on your hard
drive. Click Next when you are ready to continue.
4. To automatically rebuild image thumbnails and EXIF information after the
conversion process is complete, select the Rebuild Thumbnails and
EXIF data check box.
5. To automatically update your database after converting, select the
Optimize database files after convert check box.
6. Click Next when you are ready to continue.
7. On the Summary page, review your selections, and then click Next to
convert your database.
Exporting database information
You can use the ACD Database Export Wizard to save selected database
information in a compressed format, and then store it as a backup, or share it with
other ACDSee users. You can also choose to export your category and keyword
definitions to a text file.
Exporting your database information differs from creating a backup in that you
can choose to export only the parts of your database that you want to share or
store with specific files, such as those on a CD. Other ACDSee users can import
your information without affecting their existing database.
132 | Managing database information
CHAPTER 7: ORGANIZING AND MANAGING
To create a backup of your entire database, including image or media files, use
the ACD Database Backup Wizard. For more information, see “Backing up
database information” on page 135.
To use the ACD Database Export Wizard:
1. If you want to export your database information for a specific group of
images or media files, select the files in the File List pane.
2. Click Database | Export, and then select Database.
3. On the Welcome page, click Next to begin using the wizard.
4. On the Content and Format Options page, specify how you want to export
your database information by selecting one of the following options, and
then click Next:
•
Export entire ACDSee database to a read-only, compressed
version: exports the entire contents of your ACDSee database to a
compressed version that can be shared with other ACDSee users.
•
Export database information for selected items to a read-only,
compressed version: exports all of your database information for the
images selected in the File List pane.
•
Export database information to a text file: exports the selected
information to an XML-based text file. Select the check boxes next to
the information you want to include.
5. On the Location options page, specify a location for the exported
information, and a name for the text file, if necessary, and then click Next.
6. On the Summary page, review your choices. You can click Back to make
changes, or click Next to begin exporting your database information.
7. Click Finish to close the wizard and return to ACDSee.
Importing database information
You can use the ACD Database Import Wizard to import archived database
information, or to import database information that was sent to you with images
and media files from another ACDSee user. After you import the information,
ACDSee associates it with the appropriate files.
If you have already added information to your current ACDSee database, it is
recommended that you create a backup of your database before converting an
older ACDSee database. For more information, see “Backing up database
information” on page 135.
Managing database information | 133
CHAPTER 7: ORGANIZING AND MANAGING
To use the ACD Database Import Wizard:
1. Click Database | Import, and then select Database.
2. On the Welcome page, click Next to start the wizard.
3. On the Import options page, select the type of exported database
information you want to import. You can import image information from a
compressed database version, or information from an XML-based text file.
4. Click the Browse button to locate the database you want to import, and
then click OK.
5. Select the Optimize database files after import check box to optimize
the database after exiting the wizard, and then click Next.
6. On the Summary page, review your selections. Click Back to make
changes, or click Next to begin importing the database information.
7. Click Finish to close the ACD Database Import Wizard.
If you are importing database information sent to you by another ACDSee user,
ensure that the files to which the information applies are in an identical location
and folder structure on your hard drive.
Importing file information from other sources
You can import file information into your database from other sources, including
Photo Discs and files from previous versions of ACDSee.
Importing Photo Discs
Previous versions of ACDSee (versions 4.0 and 5.0) created separate database
files with a .ddf file extension for Photo Discs. You can import the Photo Disc
database files into your ACDSee database.
To import a Photo Disc:
1. Click Database | Import, and then select Photo Disc.
2. In the Browse for Photo Disc dialog box, locate and select the photo disc
file you want to import.
3. Click Open.
To import the information from Photo Discs created with ACDSee 6.0 or later,
you must convert and import the entire database. For more information, see
“Converting an older ACDSee database” on page 132.
134 | Managing database information
CHAPTER 7: ORGANIZING AND MANAGING
Importing albums
In previous versions of ACDSee, you could create albums in an .ais file format
that consisted of organized shortcuts to your images. Now you can use categories
to create albums of images that do not require a separate file extension. You can,
however, import your albums from previous versions of ACDSee, and add the
information from the albums to the database. ACDSee creates a new category for
each album you import.
To import album information into the database:
1. Click Database | Import, and then select Album.
2. In the Open dialog box, select the .ais file you want to import.
3. Click Open.
Importing descript.ion files
In previous versions of ACDSee, file descriptions were stored in a separate
descript.ion file in each folder that contained images. ACDSee now stores file
descriptions as captions in the database, along with other file information such as
notes and keywords.
You can use the Descript.ion tools to import your old descript.ion files and add
the information to the database, or export your existing file captions to a
descript.ion file.
To import a descript.ion file:
1. Click Database | Import, and then select Descript.ion File.
2. In the Open dialog box, locate and select the descript.ion file you want to
import.
3. Click Open.
To export captions to a descript.ion file:
1. Click Database | Export, and then select Decript.ion File.
2. In the Save As dialog box, type a name for the descript.ion file in the File
name field.
3. Click Save.
Backing up database information
You can use the ACD Database Backup Wizard to back up all of your database
information, which you can then restore in the case of a system failure or other
Managing database information | 135
CHAPTER 7: ORGANIZING AND MANAGING
event. You can also choose to backup your image, media, or archive files along
with the relevant database information.
The Database Backup Wizard creates a series of files in a specified location that
contain your entire database. The backup is generated using your folder structure
and is unique to your computer. To back up portions of your database, or to share
database information with another ACDSee user, use the ACD Database Export
Wizard. For more information, see “Exporting database information” on
page 132.
To back up your database information:
1. Click Database | Back Up Database.
2. On the Welcome page, select whether you would like to create a new
backup, or append an existing backup. Click Next when you are ready to
continue. If you choose to update an existing backup, please go to step #5.
3. On the New Backup page, select the information you would like to back
up, as described below. Click Next when you are ready to continue.
4. On the Backup Location page, click Browse and specify a location for
your backup, and type a name for the backup file. Click Next when you
are ready to continue.
5. On the Backup Summary page, review your settings. If you chose to
update an existing backup, click the Backup to update drop-down list and
select the existing backup. Click Next when you are ready to continue.
Backup information options
Do not include
thumbnails
Excludes thumbnails from the backup, saving a substantial
amount of storage space on your disc or hard drive.
Include thumbnails for
offline files
Includes only thumbnails for files that do not reside on your
hard drive, such as PhotoDiscs.
Include thumbnails
Includes all thumbnails in the database. This will require
more space on your hard drive or disc to store the backup.
Backup files of type
Backs up the specified file types with the database
information. Select from the following file types:
• Image: includes image files in the backup.
• Media: includes audio and video files in the backup.
• Archive: includes archive files in the backup.
All files of specified types Backs up all specified files on your hard drive.
on your local hard drives
136 | Managing database information
CHAPTER 7: ORGANIZING AND MANAGING
Backup information options
All files of specified types Backs up all specified files on your hard drive and network
on local and network
drives.
hard drives
All files of specified types Backs up all specified files in a specified folder. Click the
in a folder
Browse button and select the folder to back up.
If your disc burner uses packet software to format re-writable CDs and DVDs,
ACDSee will not be able to burn your backup to a disc. Instead, ACDSee will
recognize your burner as a hard drive, which you can select on the Backup
Location page.
Restoring database information from a backup
You can use the ACD Database Restore Wizard to restore previously backed up
database information. If you saved your backup to disc, and the backup spanned
multiple discs, you can restore from any disc in the sequence. This can be
particularly useful if a disc is lost or damaged but you would like to recover the
remaining information.
To restore database information:
1. Click Database | Restore Database.
2. On the Welcome page, click Next to select the backup.
3. On the Restore Options page, select the backup and date from which you
want to restore, or browse to the location of your backup and select a .bkup
file. Click Next when you are ready to restore your database.
When restoring a backup from a series of discs or backup files, ACDSee will only
restore the information included in and prior to the selected disc or backup file.
Therefore, unless required, it is recommended that you select the last disc or file
in the backup sequence.
Quarantining files
If ACDSee has trouble reading a corrupted or incomplete image or media file, or
a file causes a plug-in to generate an error, ACDSee will quarantine that file. You
can view a list of quarantined files, and remove a file from the list.
To view quarantined files:
1. Click Database | Quarantined Files.
2. To remove a file, select it in the list, and then click Remove.
Managing database information | 137
CHAPTER 7: ORGANIZING AND MANAGING
3. To disable the Quarantine feature, clear the Enable Quarantine check
box.
4. Click OK to close the Quarantine Files dialog box and return to ACDSee.
Maintaining the database
It is recommended that you regularly perform database maintenance and
optimization to increase hard drive space, remove redundant or extraneous
information, and increase overall ACDSee performance.
You can use the tools in the Database Maintenance dialog box to update folders,
or to identify folders whose thumbnails and database information you would like
to delete. The Database Maintenance dialog box displays a list of the folders on
your system, and uses icons to indicate the status of database information within
specific folders.
Database content icons
Indicates a folder which contains files with cached thumbnails stored in the
database.
Indicates a folder which contains files that were changed without a database
update. For example, a folder or file was renamed or moved outside of
ACDSee.
To perform database maintenance:
1. Click Database | Database Maintenance.
2. In the Database Maintenance dialog box, browse for folders marked with
the database content icons. If there are no marked folders, you do not need
to perform database maintenance, and can exit the Database Maintenance
dialog box.
3. Select a folder and click one of the following buttons to identify the
maintenance you want to perform on that folder:
•
Remove Thumbnails: removes all thumbnail information for the
selected folder.
•
Remove All DB Info: deletes all database information for the selected
folder.
•
Remove Orphan Folders: deletes any out-of-date or broken
references to missing files or information for the selected folder.
•
Change Binding: changes all location references for the selected
orphaned folder to another folder, and retains all database information.
138 | Managing database information
CHAPTER 7: ORGANIZING AND MANAGING
4. The Database Maintenance tools will delete records. creating unused space
in your database. To reclaim the unused space, click Optimize Database
and follow the instructions in the wizard.
5. Click Close.
Working with multiple images
You can use ACDSee’s batch operations features to rename, resize, and rotate
groups of images, and change the date or image exposure of a single file, a group
of files, or the contents of an entire folder all at once. You can also add EXIF
information to multiple images, or convert them all to another file format.
Converting images to another format
You can convert images to any supported file format. You can set the options for
each format individually, specify how to handle multiple-page images, and apply
the conversion defaults automatically. The Convert File Format Wizard guides
you through the process.
For a complete list of supported file formats, see “Appendix 2: Supported File
Formats” on page 184.
To convert an image to another file format:
1. Do one of the following:
•
In the Browser, select one or more images, and click Tools | Convert
File Format.
•
In the Viewer, click Modify | Convert File Format.
2. On the Select a format page, select a new format for your image or images
from the list displayed on the Format tab. Click the Advanced Options
tab to change the settings for this wizard, or click Next to continue.
3. On the Set output options page, identify where you want to place the
converted images, and specify how you want the wizard to handle any file
name conflicts by selecting one of the following options from the
Overwrite existing files drop-down list:
•
Ask: prompts you when overwriting a file.
•
Skip: cancels the operation if there is a file with the same file name
and extension.
•
Replace: overwrites the file without prompting for confirmation.
•
Rename: prompts you to rename the file.
Working with multiple images | 139
CHAPTER 7: ORGANIZING AND MANAGING
4. On the Set multiple-page options page, you can specify how you want to
handle any multiple-page images you are converting. If you did not select
any multiple-page images to convert, and did not specify a multiple-page
image format as your output file format, you can skip the options on this
page.
5. When you are satisfied with your choices, click Start Convert, and wait a
few seconds while the wizard converts your images.
Rotating or flipping images
You can rotate or flip an image or a group of images in the Browser or a single
image in the Viewer.
To rotate or flip an image:
1. Do one of the following:
•
In the Browser, select one or more image and click Tools | Rotate /
Flip Images.
•
Open an image in the Viewer, and then click Modify | Rotate / Flip.
2. In the Rotate/Flip Images dialog box, select the angle of rotation you want
to apply, as described below.
3. If you selected an image with multiple pages and want to apply the
selected angle of rotation to all of the pages, select the Apply to all pages
of the current image check box.
4. Do one of the following:
•
Click Next Image to move onto the next selected image.
•
If you selected multiple images and you want to apply the same angle
of rotation to all of them, select the Apply to all selected images
check box.
5. Click Options to specify how you want to save and store the images.
6. When you are ready to apply the rotations to your images, click Start
Rotate.
Rotate / Flip angles
Rotates the image counter-clockwise 90 degrees.
Rotates the image 180 degrees.
140 | Working with multiple images
CHAPTER 7: ORGANIZING AND MANAGING
Rotate / Flip angles
Rotates the image clockwise 90 degrees.
Rotates the image according to any EXIF orientation data contained within
the image. (Does not affect images without EXIF information.)
Flips the image along the vertical axis.
Flips the image along the horizontal axis.
Flips the image along the vertical axis, and then rotates it counter-clockwise
90 degrees.
Flips the image along the vertical axis, and then rotates it clockwise 90
degrees.
You can also use the Rotate tool in Edit Mode to rotate an image using a custom
angle of rotation. For more information, see “Rotating an image” on page 103.
Setting file options for the Rotate/Flip Images tool
You can change the settings in the Rotate/Flip Options dialog box to control
where ACDSee places modified images, how to handle file duplication conflicts,
and specify whether you want to preserve the last-modified date of the file.
Rotate/Flip file options
Force lossless JPEG Rotates JPEG images without decompressing and recompressing
operations
the JPEG information. As a result, the image does not lose quality
when rotated or flipped.
You can perform lossless JPEG operations on images with
dimensions that are divisible by 16. If you rotate or flip an image
with dimensions that are not divisible by 16, the program
removes pixels from the outer edge of the image.
Working with multiple images | 141
CHAPTER 7: ORGANIZING AND MANAGING
Rotate/Flip file options
File options
Specifies where to place the new images. Select one of the
following three options:
• Remove/replace original files: overwrites the original file
with the new image.
• Rename modified images and place in source folder: adds
identifying labels to the image names and places them in the
same folder as the originals.
• Place modified images in the following folder: places the
converted image in a folder that you can specify. Click the
Browse button and select a folder.
Overwrite existing
files
Determines how ACDSee should handle overwriting files. Select
one of the following options from the drop-down list:
• Ask: prompts you when overwriting a file.
• Skip: cancels the operation if there is a file with the same
file name and extension.
• Replace: overwrites the file.
• Rename: prompts you to rename the file.
Preserve lastmodified dates
Retains the date and time properties of the file.
Remember and
apply the last
rotation performed
Automatically applies the same rotation settings the next time
you rotate images with the Rotate/Flip Images tool.
Auto-close progress
dialog if all
operations succeed
Automatically closes the dialog box after all images have been
adjusted.
Save current
settings as default
Stores the current settings and applies them the next time you use
the Rotate/Flip Images Wizard.
Resizing images
You can resize a group of images by specifying their dimensions in pixels,
specifying a percentage of their original size, or by constraining them to a
physical print size. The Resize Images tool guides you through the process.
You can also resize a single image, and choose which resampling filter to use, in
Edit Mode. For more information, see “Resizing an image” on page 100.
142 | Working with multiple images
CHAPTER 7: ORGANIZING AND MANAGING
To resize a group of images:
1. In the Browser, select one or more images, and then click Tools | Resize
Images.
2. In the Resize Images tool, select one of the following options:
•
Percentage of original: resizes the images to a percentage of their
original size.
•
Size in pixels: resizes the images to a specific size in pixels.
•
Actual/Print size: resizes the images to specific printed dimensions.
3. Set the options for your selection as explained in the table below.
4. Click Options to specify how you want to save and store the images.
5. When you are satisfied with your choices, click Start Resize.
Resize options
Percentage
of original
Size in
pixels
Percentage
Specifies how to resize the images.
Enter a percentage less than 100 to reduce the
images, and greater than 100 to enlarge them.
Apply to
Specifies whether the resize is applied to the height,
width, or both.
Width
Specifies the new width for the images in pixels.
Height
Specifies the new height for images in pixels.
Resize
Specifies how to scale the images. Select one of the
following options:
• Enlarge only: Resizes only those images that
are smaller than the specified height and width.
• Reduce only: Resizes only those images that
are larger than the specified height and width.
• Enlarge and reduce: Resize all images to the
specified height and width.
Preserve original
aspect ratio
Retains the width to height ratio of the original
images.
Fit within
Specifies whether the aspect ratio is maintained
based on the specified width. For more information
about how the different combinations affect the
images, see “Pixel resize options and resulting
action” on page 145.
Working with multiple images | 143
CHAPTER 7: ORGANIZING AND MANAGING
Resize options
Actual/
Print size
Units
Specifies the units of measurement.
Width
Specifies the new width for the images.
Height
Specifies the new height for the images.
Resolution
Specifies the print resolution for the images.
Preserve original
aspect ratio
Retains the width to height ratio of the original
images.
Fit within
Specifies whether the aspect ratio is maintained
based on the specified width. For more information
about how the different combinations affect the
images, see “Pixel resize options and resulting
action” on page 145.
Setting file options for the Resize Images tool
You can change the settings in the Options dialog box to control where ACDSee
places modified images, how to handle file duplication conflicts, and specify
whether you want to preserve the last-modified date of the file.
Resize file options
File options
Specifies where to place the new images. Select one of the
following three options:
• Remove/replace original files: overwrites the original file
with the new image.
• Rename modified images and place in source folder:
adds identifying labels to the image names and places them
in the same folder as the originals.
• Place modified images in the following folder: places the
converted image in a folder that you can specify. Click the
Browse button and select a folder.
Overwrite existing
files
Determines how ACDSee should handle overwriting files. Select
one of the following options from the drop-down list:
• Ask: prompts you when overwriting a file.
• Skip: cancels the operation if there is a file with the same
file name and extension.
• Replace: overwrites the file.
• Rename: prompts you to rename the file.
Preserve lastmodified dates
144 | Working with multiple images
Retains the date and time properties of the file.
CHAPTER 7: ORGANIZING AND MANAGING
Resize file options
Auto-close progress
dialog if all
operations succeed
Automatically closes the dialog box after all images have been
adjusted.
Save current settings Stores the current settings and applies them the next time you use
as default
the Resize Images Wizard.
Pixel resize options and resulting action
The following table explains the results of resizing an image using the Size in
pixels or the Actual/Print size methods in the Resize Images tool.
Resize
options
Fit within
options
Resulting action
Enlarge
only
Width only
Resizes the image if the specified dimensions are larger
than the image's original dimensions. The width is
increased to the specified value and the height is
increased to maintain the aspect ratio.
Height only
Resizes the image if the specified dimensions are larger
than the image's original dimensions. The height is
increased to the specified value and the width is
increased to maintain the aspect ratio.
Width and
height
Resizes the image if the specified dimensions are larger
than the image's original dimensions. The width and
height are increased as close to the specified value as
possible, while maintaining the aspect ratio.
Width or
Resizes the image if the specified dimensions are larger
height (largest than the image's original dimensions. The width or
image)
height are increased as close to the specified value as
possible to maximize the size of the image, while
maintaining the aspect ratio.
Working with multiple images | 145
CHAPTER 7: ORGANIZING AND MANAGING
Resize
options
Fit within
options
Resulting action
Reduce
only
Width only
Resizes the image if the specified dimensions are
smaller than the image's original dimensions. The width
is decreased to the specified value and the height is
decreased to maintain the aspect ratio.
Height only
Resizes the image if the specified dimensions are
smaller than the image's original dimensions. The height
is decreased to the specified value and the width is
decreased to maintain the aspect ratio.
Width and
height
Resizes the image if the specified dimensions are
smaller than the image's original dimensions. The width
and height are decreased as close to the specified value
as possible, while maintaining the aspect ratio.
Width or
Resizes the image if the specified dimensions are
height (largest smaller than the image's original dimensions. The width
image)
or height are decreased as close to the specified value as
possible to minimize the size of the image, while
maintaining the aspect ratio.
Enlarge or
reduce
Width only
Resizes the width to the specified value and resizes the
height to whatever value is necessary to maintain the
aspect ratio.
Height only
Resizes the height to the specified value and resizes the
width to whatever value is necessary to maintain the
aspect ratio.
Width and
height
Resizes the image within the specified width and height.
The width and height are resized as close to the specified
value as possible while maintaining the aspect ratio.
Width or
Resizes the image within the specified width and height.
height (largest The width or height are resized as close to the specified
image)
value as possible to maximize (or minimize) the size of
the image, while maintaining the aspect ratio.
Adjusting the exposure of multiple images
In ACDSee, you can lighten or darken the colors of an image or a group of
images with the Adjust Image Exposure Wizard. You can adjust each image
individually and preview the changes before applying, or make your adjustments
to a single image and automatically apply the same changes to all of the images
you selected.
146 | Working with multiple images
CHAPTER 7: ORGANIZING AND MANAGING
You can also adjust your image's exposure and color levels in Edit Mode. For
more information, including an explanation of each of the image exposure
options, see “Adjusting image light levels” on page 89.
To adjust image exposure:
1. In the Browser, select one or more images, and then click Tools | Adjust
Image Exposure.
2. In the Adjust Image Exposure tool, do one or more of the following:
•
To adjust your images' exposure automatically, select the Auto
Exposure tab and set the options.
•
To adjust your images' brightness, contrast and gamma level, select
the Brightness tab and adjust the options.
•
To precisely adjust the contrast and light levels in your images, select
the Levels tab and set the options.
•
To precisely adjust the RGB color channels in your image, select the
Curves tab and set the options.
3. Do one of the following:
•
Click Next Image to move on to the next image and repeat step 2 for
each image you want to adjust.
•
Select the Apply settings to all selected images check box to apply
the current settings to all of the images you selected.
4. Click Options to specify how you want to save and store the images.
5. Click Filter All Images.
Working with multiple images | 147
CHAPTER 7: ORGANIZING AND MANAGING
Setting file options for the Adjust Image Exposure tool
You can change the settings in the Options dialog box to control where ACDSee
places modified images, how to handle file duplication conflicts, and specify
whether you want to preserve the last-modified date of the file.
Adjust Exposure file options
File options
Specifies where to place the new images. Select one of the following
three options:
• Remove/replace original files: overwrites the original file with
the new image.
• Rename modified images and place in source folder: adds
identifying labels to the image names and places them in the
same folder as the originals.
• Place modified images in the following folder: places the
converted image in a folder that you can specify. Click the
Browse button and select a folder.
Overwrite
existing files
Determines how ACDSee should handle overwriting files. Select
one of the following options from the drop-down list:
• Ask: prompts you when overwriting a file.
• Skip: cancels the operation if there is a file with the same file
name and extension.
• Replace: overwrites the file.
• Rename: prompts you to rename the file.
Preserve lastmodified dates
Retains the date and time properties of the file.
Auto-close
Automatically closes the dialog box after all images have been
progress dialog if adjusted.
all operations
succeed
Save current
settings as
default
Stores the current settings and applies them the next time you use the
Adjust Image Exposure Wizard.
Changing the date and time properties of your files
You can use the Adjust Time Stamp tool to change the date and time properties of
a file in the Browser or in the Viewer.
148 | Working with multiple images
CHAPTER 7: ORGANIZING AND MANAGING
To change the date and time properties of a file:
1. Do one of the following:
•
In the Browser, select one or more files, and click Tools | Adjust
Image Time Stamp.
•
In the Viewer, click Modify | Adjust Image Time Stamp.
2. On the Choose time stamp to change page, select the file property that you
want to change. Click the Advanced Options tab to set the options for the
Adjust Image Time Stamp tool as described below, and then click Next to
continue.
3. On the Choose new time stamp page, select one of the following options:
•
Use date and time from another file property: replaces the selected
date and time with another time stamp property from the same file.
Select the file property you want to use from the Change date and
time to drop-down list.
•
Use specific date and time: changes the selected time stamp in each
file to specific date and time. Type the new date and time for the time
stamp in the Date and Time fields.
•
Shift to a new starting date and time: replaces the earliest time
stamp with a date and time you specify, and shifts all later time stamps
ahead accordingly. Specify the time stamp for the earliest file in the
Date and Time fields.
•
Shift date and time by a specific number of hours (adjust time
zone): shifts all the time stamps either forwards or backwards by a
specific number of hours. Select either Shift forward or Shift
backward and type a value into the Number of hours spin box.
4. Click Adjust Time Stamp.
Working with multiple images | 149
CHAPTER 7: ORGANIZING AND MANAGING
Advanced Options tab
Accept defaults
and start
conversion
Accepts the default settings for the new time stamp options. To start
changing the date and time of your images, click Adjust Time
Stamp.
Automatically
close wizard
when finished
Closes the Adjust Image Time Stamp Wizard as soon as the process
is complete.
Save current
settings as
defaults
Remembers the current settings and applies them the next time you
change time stamps.
Renaming a group of files
You can use the Batch Rename tool to rename a group of files. You can specify a
template with a numerical or alphabetical sequence, save your template for future
use, replace specific characters or phrases, and insert file-specific information
into each new file name.
You cannot rename any file on a read-only file system, such as a CD-ROM.
To rename a group of files:
1. In the Browser, select one or more files and click Tools | Batch Rename.
2. In the Batch Rename dialog box, do one or more of the following (see the
table below for an explanation of the options on each tab):
•
Select the Template tab to specify the Template options.
•
Select the Search and Replace tab to set the Search and Replace
options.
•
Select the Advanced Options tab to adjust the settings for the Batch
Rename tool.
3. Review your changes to the file names in the Preview field.
4. Click Start Rename.
150 | Working with multiple images
CHAPTER 7: ORGANIZING AND MANAGING
Batch Rename options
Template
tab
Select the Use Template to rename files check box to create a
renaming template. You can specify a numerical or alphabetical
sequence for the new file names, and use the original file names, new
names, or names based on image metadata.
Use numbers to
replace #'s
Replaces any number signs (#) in the template
with sequential numeric characters.
Use letters to
replace #'s
Replaces any number signs (#) in the template
name with sequential alphabetic characters.
Start at
Specifies the first letter or number of the
sequence.
Insert Metadata
Inserts file-specific information into the file
name template.
Position the cursor in the Template field, and
then click Insert Metadata to open the Choose
Property dialog box. Select the metadata you
want to insert and click OK.
Template
Displays the template to use to rename the files.
Type an asterisk (*) to insert the original file
name into the template. Use one or more number
signs (#) to insert numeric or alphabetic
characters, depending which options you
selected.
Click the arrow on the drop-down list to select a
recently-used template.
Search and
Replace tab
Clear Templates
Clears the recently-used templates from the
Templates drop-down list.
File name case
Specifies upper or lower case for file names and
file format extensions.
Select the Use Search and Replace to rename files check box to
replace certain letters or words in the file names. You can replace
spaces with underscores, or change upper case letters to lower case,
and combine your changes with any naming template.
Search for
Identifies the characters you want to replace in
the file names.
Replace with
Identifies the characters to use in place of the
original text.
Case sensitive
Indicates whether you want to limit the search to
the same case you typed in the Search for field.
Working with multiple images | 151
CHAPTER 7: ORGANIZING AND MANAGING
Batch Rename options
Advanced
Options tab
Select any of the Advanced Options to adjust the behavior of the Batch
Rename tool.
Automatically close Closes the Batch Rename dialog box when the
wizard when
renaming process is complete.
finished
Save current
settings as defaults
Stores the current settings and loads them the
next time you rename files.
Automatically
resolve naming
conflicts
Automatically resolves any naming conflicts by
adding an underscore and a sequential number to
the end of each file name.
Adding EXIF information
You can use ACDSee's Set EXIF Information Wizard to add customized EXIF
information to your images, or change existing EXIF information.
To add EXIF information to your images:
1. Select one or more images.
2. Click Tools, and then select Batch Set EXIF Info.
3. On the Set values page, type the information, and set the dates and times
you would like added to the files' EXIF information. If the selected images
already contain EXIF information, the information is displayed in the
applicable field. If you want to leave a field blank, clear the field or check
box.
4. Click Next when you are ready to continue. The wizard displays a
progress bar as it adds the information to your images.
Comparing images
You can use ACDSee's Compare Images tool to compare a group of images. The
tool highlights both the similarities and the differences in the properties,
metadata, and pixel intensity levels of images you select. You can save your
preferred images to a new location on your hard drive, or tag images you would
like selected in the Browser so you can alter or work with them later.
152 | Comparing images
CHAPTER 7: ORGANIZING AND MANAGING
Compare Images toolbar
Zoom In
Increases the magnification of the selected image.
Zoom Out
Reduces the magnification of the selected image.
Zoom menu
Opens a menu of zoom options. Select from the following
options:
• Actual Size: displays the image at its original size.
• Fit Image: displays the image at the largest
magnification that fits in the Compare Images Viewer.
• Fit Width: displays the image to fit between the left
and right sides of the Compare Images Viewer.
• Fit Height: displays the image to fit between the top
and bottom of the Compare Images Viewer.
• Zoom Lock: displays all images at the zoom option of
the current image. If the zoom is adjusted, the new
zoom level is applied to all images that you view.
• Zoom To: opens a dialog box where you can select a
zoom option.
Pan Lock
Locks the panned image area, so that when you zoom and
pan an image to a specific area, the Compare Images Viewer
displays the same area for all images you view.
Under exposure Indicates pixels that may be underexposed. Click the arrow
warning
to open a dialog box where you can adjust the threshold
values.
Over exposure
warning
Indicates pixels that may be overexposed. Click the arrow to
open a dialog box where you can adjust the threshold values.
Properties
Displays properties for each image in the Compare Images
Viewer.
Histogram
Displays a histogram for each image in the Compare Images
Viewer.
Metadata Setup Opens a dialog box where you can select the metadata to
display for each image in the Compare Images Viewer.
One Image
Displays one image in the Compare Images Viewer.
Two Images
Displays two images in the Compare Images Viewer.
Comparing images | 153
CHAPTER 7: ORGANIZING AND MANAGING
Compare Images toolbar
Three Images
Displays three images in the Compare Images Viewer.
Four Images
Displays four images in the Compare Images Viewer.
Help
Opens the Help file.
Using the Comparison list
The Comparison list displays thumbnails of the images you select in the ACDSee
Browser. In the Comparison list, you can right-click an image to display a
shortcut menu of commands, and hide or show the list.
To compare other selected images:
Do one of the following:
•
In the Comparison list, right-click an image, and select Send to Active
View.
•
Drag an image from the Comparison list to the Compare Images
Viewer.
Once you are satisfied with the compared images, you can tag which ones you
want to work with.
To tag images:
1. In the Comparison list, select the check box in the upper-left corner of the
desired thumbnails.
2. Click OK. The Compare Images dialog box closes and the tagged images
are selected in the File List pane. You can now delete, move, rename, or
alter the images.
Creating archives of your files
You can use the Archive Creator plug-in to create archives of your images and
media files. Archive Creator supports multiple archive formats, and helps you
manage your files using compression, encryption, and password protection tools.
To create an archive:
1. In the File List pane, select a folder or group of files.
2. Click Create | Create Archive.
154 | Creating archives of your files
CHAPTER 7: ORGANIZING AND MANAGING
3. In the Create Archive dialog box, in the Options area, click the Archive
Type drop-down list and select the archive format you want to create.
Some archive formats have additional settings that you can adjust by
clicking the Settings button.
4. Do any of the following:
•
To include the contents of any subfolders you selected, select the
Include subfolders check box.
•
To include any hidden files in your archive, select the Include Hidden
Files check box.
•
To remove the selected files and folders from your hard drive once
they have been added to the archive, select the Delete files after
archiving check box.
•
To protect the contents of your archive with a password, select the
Password Protect Archive check box, and type a password into the
field beside it. Note that not all archive types support passwords, and
some formats require them.
5. Type a path and file name into the Output File field, or click Browse to
locate a folder on your hard drive.
6. Select one of the following:
•
Add to existing archive: adds your files to an existing archive. This
option is only available if the archive specified in the Output File field
already exists.
•
Overwrite existing archive: replaces any existing archive with the
archive you are creating. This option is only available if the archive
specified in the Output File field already exists.
7. When you are satisfied with your choices, click Create to begin archiving
your files.
Creating archives of your files | 155
CHAPTER 7: ORGANIZING AND MANAGING
Generating file lists
You can generate a text file that lists all of the files in the folder currently
displayed in the File List pane. The text file places the file name, size, image file
format, modified date, image properties, caption, and rating for all of the files in
the folder into a table, and creates a single text file.
To generate a list of your files:
Click Database | Export, and then select Generate File Listing.
ACDSee automatically opens the text file in your default text editor, which you
can then use to edit or save the file listing.
156 | Generating file lists
CHAPTER
8
SEARCHING
ACDSee includes a number of ways to search your computer for files and folders.
You can use the Search pane to search by file name, keywords, or image
properties. You can create advanced searches to locate files that fall within a date
or rating range, or use the Duplicate Finder to locate and manage identical files.
Also, you can use the Organize pane to quickly locate and list all images on your
hard drive, or to locate any files in a folder that have not been categorized. If
you’re working with larger image collections, you can use Selective Browsing to
specify broad or narrow criteria for the images you want to display in the File List
pane.
| 157
CHAPTER 8: SEARCHING
The following sections explain how to use ACDSee’s Search and Selective
Browsing panes to search your database, how to locate and view images quickly,
and how to find and manage duplicate files with the Duplicate Finder plug-in.
Finding images quickly
You can select Special Items in the Organize pane to quickly locate all of the
images in your database, or list all of the images that you have not yet assigned to
a category.
To find all of your images at once:
1. In the Browser, open the Organize pane by clicking View | Organize.
2. In the Organize pane, under Special Items, click Image Well.
To locate uncategorized images:
1. In the Browser, open the Organize pane by clicking View | Organize.
2. In the Organize pane, under Special Items, click Uncategorized.
The Image Well and Uncategorized features only display images that have been
cataloged in the database; they do not search your hard drive for specific file
types.
Using the Search pane
You can use the Search pane in the Browser to search for files and folders on your
computer. You can do basic searching by file name or keyword phrase, and create
advanced searches to narrow your results by folders, categories, and image
properties. You can also search using file name patterns and wild cards.
The ACDSee Search pane locates files and folders by searching the database for
items that match the criteria you specify. The Search pane does not return results
for folders that have not been cataloged in the ACDSee database. For instructions
on how to catalog files and folders, see “Cataloging files” on page 130.
Search pane areas
The Search pane contains three areas to help divide your search criteria into
distinct elements. When creating a search, remember that the search tool will only
return files that match all of the specified criteria.
158 | Finding images quickly
CHAPTER 8: SEARCHING
Quick Search area
In the Quick Search area, you can identify what you are searching for, and where
you want to search for it.
Search for files
and folders
named
Type a portion of the file or folder name for which you want to search,
or select a previous search term from the drop-down list.
You can also use wild cards to search for file name patterns, as
described in the following section.
To exclude all non-image files, click the right-arrow button beside the
field and select Images only.
With the text
Type the text you want to search for within the ACDSee database.
This can include portions of a caption or keyword, or even the name
of a folder or category that might contain the files you want to find.
When you search by both file name and a keyword, items are
displayed in the search results only when they include both criteria.
To specify what parts of the database you want to search, and indicate
how to treat the text you type in the field, click the right arrow next to
the field and select any of the following options:
• Find all words: only returns files that match all of the words you
enter.
• Find whole words only: only returns files that contain the entire
word, exactly as you type it.
• Search in Caption: searches the Caption field of files in the
database.
• Search in Keywords: searches the Keyword field of files in the
database.
• Search in Notes: searches the Notes field of files in the database.
• Search in Categories: searches the Category assignments of
files in the database.
• Search in Folders: searches the names of folders in the database.
Search in
Select one of the following options:
• Entire database: performs a search on the entire ACDSee
database. Note that any folders on your computer that have not
been cataloged are not included in the search results.
• Specific folders and categories: performs the search only within
the categories and folders you specify. Selecting this option
opens the Categories and Folders area, where you can select the
location and categories in which you want to search.
Sync to browser Imports the current Browser settings, including Selective Browsing
settings
settings, into the search pane. Note that this may also remove criteria
from the Search pane.
Using the Search pane | 159
CHAPTER 8: SEARCHING
Categories and Folders area
In the Categories and Folders area, you can specify the location and categories
you want to search.
To specify folders and categories:
1. In the Quick Search area, select Specific folders and categories.
2. Below the Categories or Folders fields, click Add.
3. Browse to the folder or category you want to add and click OK.
4. To remove a category or folder from the search, select it and click
Remove.
Properties area
In the Properties area, you can identify file properties that you want to search for,
and describe ranges of values to include or exclude from your search.
To use the Properties area:
1. Below the Search file properties for field, click Add.
2. In the Add Search Criteria dialog box, select one or more properties on
which to base your search.
3. Click OK.
4. In the Properties area, click the hyperlinks to define conditional statements
for each property.
5. Click Start to perform the search.
Searching with file name patterns
You can type a text pattern into the Search pane's Search for files and folders
named field to search for file names. You can search simple patterns such as
portions of file names, or more advanced patterns that include wild cards.
File name pattern wild cards
Wild card Result
Example
?
Matches any single character in
the file name.
ca?.jpg results in cat.jpg, cap.jpg, and
car.jpg, but not cats.jpg
*
Matches zero or more characters cat* results in cat.jpg, cats.jpg, and
in the file name.
cathy.jpg
[...]
Matches any of the enclosed
characters.
160 | Using the Search pane
ca[tr] results in cat.jpg or car.jpg, but not
cap.jpg
CHAPTER 8: SEARCHING
File name pattern wild cards
[!...]
Matches any character not
enclosed.
cat[!0] results in cata.jpg and catb.jpg, but
not cat0.jpg
[...-...]
Matches any character in the
specified range.
cat[a-f0-9] results in cata.jpg, catb.jpg,
catf.jpg and cat0.jpg, cat1.jpg, ..., cat9.jpg
\
Blocks the use of other wild
card characters that are also
characters permitted in a file
name, such as square brackets:
[ ]. The * and ? characters are
not permitted in file names so
this function does not work with
them.
Because square brackets are wild cards, if
you wanted to search for a file name that
contains a bracket, you can precede the
bracket with a backslash:
ACD\[123\] results in ACD[123].gif
Patterns are not case-sensitive.
To use multiple patterns, separate the names with spaces or semicolons.
To match a pattern containing a space or semicolon, enclose the pattern in double
quotation marks.
If you do not include the * wild card in your pattern, the pattern is matched as a
sub-string. For example, cat would match cat, cathy and bobcat, and is equivalent
to the pattern *cat*.
Using selective browsing
You can use selective browsing to browse for files that are located in a specific
folder, assigned a specific date, and/or assigned to a specific Organize
classification. By adjusting the selective browsing criteria, you can quickly
include or exclude files from the File List pane, and view only those files you
want to browse.
To get the most out of selective browsing, it is recommended that you catalog and
organize your files in the ACDSee database. The more information you input for
your files, the more helpful you will find the selective browsing feature.
To use selective browsing:
1. Open the Selective Browsing pane by clicking View | Selective Browsing.
2. In the Selective Browsing pane, identify the files you want to display by
setting the criteria.
3. Close the Selective Browsing pane to return to normal browsing mode.
Using selective browsing | 161
CHAPTER 8: SEARCHING
Setting selective browsing criteria
The Selective Browsing pane is divided into three areas: Folders, Organize, and
Calendar, each of which corresponds to the Browser pane of the same name.
When the Selective Browsing pane is open, the Contents bar in the File List pane
is replaced by the Selective Browsing bar, which lists all of the current browsing
criteria:
When you add a folder, date range, or organize method to the Selective Browsing
pane, ACDSee excludes any files that do not match that criteria. You can add or
remove criteria to narrow or broaden your results.
To add selective browsing criteria:
With the Selective Browsing pane open, do any of the following:
•
In the Folders pane, select one or more folders.
•
In the Organize pane, select one or more organize methods.
•
In the Calendar pane, select one or more date ranges.
As each criteria is added to the Selective Browsing pane, ACDSee searches its
database for files in that folder, that match the date range, and are assigned to the
classifications, and displays them in the File List pane. You can then select those
files and use ACDSee's features to edit, share, move, and view them however you
want.
You can also adjust or refine your criteria in the Selective Browsing pane:
• To remove a selected criteria from the Selective Browsing pane, rightclick any of the criteria, and then select Remove From Scope.
• To exclude all of a certain type of criteria, click the bar above the list, and
toggle the option to include that type in the scope. For instance, to exclude
the listed folders from the scope, click the Folders bar, and then click
Include Folders in Scope. The folders you selected will still be displayed
in the Selective Browsing pane, but will not factor in the results.
• To remove all criteria of a certain type, click the bar above the list, and
select Clear All.
• The default behavior for categories in the Selective Browsing pane is to
display files that match any of the categories listed. You can refine your
results by choosing to display only those files that are assigned to all of the
specified categories. To toggle between behaviors, right click the bar
above the categories you selected, and select Match Any or Match All.
162 | Using selective browsing
CHAPTER 8: SEARCHING
Tips for selective browsing
When you add a criteria to the Selective Browsing pane, you are indicating that
the files you want to browse must have that attribute. For example, if you select a
folder in the Folders pane, then ACDSee displays only files in that folder. If you
select a rating in the Organize pane, ACDSee displays only files assigned to that
rating.
You can combine criteria to refine your selective browsing even further. For
example, if you select a category and a date range, then ACDSee displays only
those files that belong to both the category and date range you selected. ACDSee
does not display items that fall within the date range unless they are also assigned
to the correct category, and does not display files assigned to that category unless
they also match the date range.
Hiding the Selective Browsing pane
You can use the Auto Hide button to automatically hide the Selective Browsing
pane and give more space to the File List pane. When the pane is set to auto-hide,
it rolls away when you click outside of it, leaving only an edge displayed. You
can access the pane again by moving the mouse pointer over the edge.
The Auto Hide button's appearance on the pane’s title bar reflects its current
setting:
A horizontal pushpin indicates that the pane is set to automatically hide
when you click outside of it.
A slanted pushpin indicates that the pane is fixed and will remain visible
even if you click outside of it.
To set or remove auto-hide:
Click the Auto Hide button on the pane's title bar so that it displays a
slanted or horizontal pushpin.
Using selective browsing | 163
CHAPTER 8: SEARCHING
Finding duplicate files
You can use the Duplicate Finder plug-in to search for duplicate files on your
hard drive. Once you locate any duplicates, you can rename or delete them to
better manage your file collection.
The following steps are a basic overview of how to use the Duplicate Finder.
There is also extensive context-sensitive Help in the application to provide you
with additional information.
To find duplicate files:
1. In the Browser, click Tools | Find Duplicates.
2. In the Select Search Type dialog box, add the files and folders you want to
search.
3. Do one of the following:
•
To find duplicates within the files and folders you added to the list,
select Find duplicates within this list of files.
•
To compare files between the list you created and another group of
files, select Find duplicates between these files and another list.
4. Click Next.
5. If you are comparing the files with another list, add the files or folders you
want to compare to the second list, and then click Next.
6. On the Search Parameters page, specify whether you want to find exact
duplicates, or just files with the same name. You can also choose to search
for image files only. When you are ready to perform the search, click
Next.
7. If no duplicates are found, refine your search or click Cancel to exit the
Duplicate Finder.
8. If duplicates were found, specify from which list you want to delete the
duplicates, and then select the check box next to the files you want to
delete. You can also right-click a file name to open, rename, or delete a
file.
9. Click Next to review your changes, and then click Finish to perform the
operation.
164 | Finding duplicate files
CHAPTER
9
SHARING
ACDSee makes it easy to share your images with friends and family. You can
email images right out of the File List, post images on the Internet with ACD
Systems’ secure SendPix servers, and create your own Web pages with the
HTML Album plug-in.
ACDSee also includes a CD and DVD recording wizard, to help you burn your
images safely onto a disc. You can also create slide shows and screen savers that
you can give to anyone with a computer — they don’t need ACDSee to view
them. You can even publish your images to your TiVo, and view them on your
television screen.
| 165
CHAPTER 9: SHARING
The following sections guide you through the various ways to share your images
with ACDSee, and explain how you can use the sharing features to organize your
own image collections.
Emailing images
You can use the Email Image Sharing Wizard to send images directly from
ACDSee without opening an external email application. To use the Email Image
Sharing Wizard, you will need an active email account, and have a default email
application set up on your computer or access to an SMTP server.
To email your images:
1. In the File List pane, select the images you want to share, and then click
File | Email Images.
2. In the Email Image Sharing Wizard, click Next.
3. On the Add images and adjust options page, you can add or remove
images from the list, and set the options to specify a maximum email size,
and the image size and compression. When you are satisfied with your
changes, click Next.
4. On the Select your email client page, specify whether you want to use your
default email application, or send the images through an SMTP server. If
you are not sure which method you should use, try the default email client
option. Click Next to continue.
5. Do one of the following:
•
On the Sending your images page, wait while the wizard formats your
images and prepares the email message for sending. Once the wizard
opens the email message, you can specify who you want to send the
message to, and add text to the email before you send it. Click Finish
to close the wizard and return to ACDSee.
•
On the Select and create SMTP accounts page, click the Create
Account button to create a new SMTP account or select an account
from the drop-down list, and then click Next. On the Enter email
information page, specify the recipients, the subject of the email
message, and the text you want to include in the message. Click Next
to send the email message.
The Email plug-in does not support Internet-based email applications such as
Hotmail or Yahoo.
166 | Emailing images
CHAPTER 9: SHARING
Creating an online SendPix album
ACDSee includes SendPix, a free digital image sharing service. You can create
albums of your images to share with your friends and family. The albums you
create are stored on ACD Systems’ secure servers for 30 days. SendPix sends an
email to selected recipients who can then view your albums using a standard Web
browser — no special software is required.
To share your images with SendPix:
1. In the File List pane, select the images you want to share.
2. Click File | SendPix Album.
3. Follow the instructions in the SendPix Image Sharing Wizard. For help
with any of the controls or features, click the Help button in the wizard.
Publishing images to TiVo
You can use ACDSee to publish your images to your TiVo. To use the TiVo
Publish Wizard, you must have a TiVo box, and have installed the TiVo Publisher
desktop software on your computer. For more information, visit TiVo.com.
To publish your images to TiVo:
1. In the File List pane, select the images you want to share.
2. Click File | Publish to TiVo.
3. On the Welcome page of the TiVo Publish Wizard, select one of the
following:
•
Publish to a New Album: creates a new album in your TiVo Desktop
folder. Click Next to give the new album a name.
•
Publish to an Existing Album: adds the selected images to an
existing album in your TiVo Desktop folder. Click Next to select an
album from a list.
•
Publish to the Root of your Tivo: adds the images directly to your
TiVo Desktop folder.
4. Click Next to review your choices, and click Next again to publish your
images.
Creating an online SendPix album | 167
CHAPTER 9: SHARING
Creating a slide show you can share
You can use ACDSee to create slide shows that you can share. The Create Slide
Show Wizard arranges your images into executable files that you can give to your
friends and family — and they won't need special software to view them.
For full audio support when creating slide shows, please download and install the
free ACD Media Support Package from myACD. For more information, see
“Installing the ACD Media Support Package” on page 16.
To create a slide show:
1. In the File List pane, select the images you want to share.
2. Click Create | Create Slide Show.
3. On the Welcome page, select one of the following options to specify what
type of slide show you want to create, and then click Next:
•
Standalone slide show: creates a single executable file (.exe)
containing all of your images and everything needed to view them.
You can share this type of file with anyone who has a computer, even
if they don't own ACDSee.
•
Windows screen saver: creates a standard Windows-system screen
saver file (.scr) that can be stored and used on any Windows-based
system.
•
Macromedia Flash: creates a compact Macromedia Flash file (.swf)
that you can display on a Web site.
4. On the Choose your images page, you can view the images included in
your slide show, in the default order they will be displayed. Click Add or
Remove to change the images, and use the arrow buttons to reorder them.
Click Next when you are ready to continue.
5. On the Set file specific options page, click the underlined words beside
each thumbnail to set the individual options for each image. These include
text captions, transitions, and audio files to play when the image is
displayed. Note that the options available depend on your choice of output
file format, and not all formats support all options. Click Next when you
are ready to continue.
6. On the following pages, set the options for your selected slide show or
screen saver format. For assistance with any of the options, click the
What's This Help button at the top right corner of the wizard, and then
click on an option for more information.
168 | Creating a slide show you can share
CHAPTER 9: SHARING
7. Finally, select a location on your hard drive to place the file, and wait a
few moments while ACDSee generates your slide show. When complete,
you can launch your slide show, exit the wizard, or start the Create Disc
Wizard to burn your slide show onto a CD or DVD.
Creating a PDF
You can use ACDSee to combine your images into PDF (portable document
format) files. The Create PDF Wizard will guide you through the process of
creating one or more PDF files from your images, or adding images to a PDF
slide show.
To create a PDF:
1. In the File List pane, select the images you want to share.
2. Click Create | Create PDF.
3. In the Create PDF Wizard, select one of the following, and then click
Next:
•
Create a PDF slide show: combines all of your images into a single
PDF file that you can view as a slide show.
•
Create one PDF file containing all images: combines all of the
selected images into a single PDF file with multiple pages.
•
Create one PDF file for each image: converts each image into a
separate PDF file.
4. On the Choose images page, you can change the selected images, and use
the arrow buttons to reorder them. Click Next to continue.
5. Do one of the following:
•
If you selected to create a PDF slide show, set or change the transition
options by clicking the hyperlink next to each image. Click Next to set
the order, color, and file name options for your slide show. Click Next
when you are ready to continue.
•
If you selected to create one or more PDF files, specify a file name and
location, and then click Next.
6. Click Finish to close the wizard and return to ACDSee.
Creating a PDF | 169
CHAPTER 9: SHARING
Creating a CD or DVD
You can use the Create Disc Wizard to archive your images and media files onto
a CD or DVD. You must have a disc writer device installed on your computer to
use the Create Disc Wizard.
To create CDs and DVDs, please download and install the free ACD Media
Support Package from myACD. For more information, see “Installing the ACD
Media Support Package” on page 16.
To use the Create Disc Wizard:
1. Do one of the following:
•
Locate the files you want to copy, and assign them to the Write Disc
category using the Organize pane. (Note that you can create subcategories within the Write Disc category, and use them as the basis
for a folder structure on the newly created disc.)
•
Locate the files you want to copy, and select them in the File List pane.
(Note that you can also select folders in the File List pane, and the
Create Disc Wizard will include all files contained within those
folders, including any subfolders.)
•
Place the files you want to copy into the Image Basket.
2. Click Create | Create Disc.
3. On the Welcome page of the Create Disc Wizard, specify which files you
want to add to the disc, and then click Next.
4. On the Set disc options page, select one of the following options:
170 | Creating a CD or DVD
•
Create a standard disc using the source file formats: records your
images and media files to a regular CD or DVD that can be accessed
by anyone using a computer, as well as most DVD players. The Create
Disc Wizard preserves the format of your original files.
•
Create a HighMAT compatible disc: records your images and media
files to a disc that can be accessed by a HighMAT compatible device.
A HighMAT disc contains a graphical interface to help viewers access
your files, but may alter your files, or convert them to a different
format.
•
Create an MPV compatible disc: records your images and media
files to a disc that can be accessed by an MPV compatible device. An
MPV disc contains a graphical interface to help viewers access your
files, but may alter your files, or convert them to a different format.
CHAPTER 9: SHARING
5. If you selected to create a standard disc, you can include any of the
following features:
•
Add a catalog of all database information for the source files:
creates a catalog of all ACDSee database information associated with
the selected files, and stores it on the disc. With this feature, you can
retain the database information with your archived files, and share it
with other ACDSee users. Note that to access the data, the new disc
must be added as a Photo Disc, and the files then moved or copied
using ACDSee.
•
Add an HTML slide show to run automatically: creates an HTML
slide show of all your images, and stores it on the disc. The slide show
is then set to start whenever the disc is placed in a CD or DVD drive.
•
Add the created disc to ACDSee as a Photo Disc: copies all of the
image information to ACDSee in the Offline Media section. You can
then browse thumbnails and view database information for the images
on the disc without needing to access the disc itself. If you want to
remove the original files from your hard drive after copying them to
disc, select the Delete original source files check box.
6. Select the Advanced Options tab to specify the following settings:
•
Create a directory tree based on existing folder or category
structure: creates a directory structure on the disc based on your own
categories or folder list. If you clear this check box, the Create Disc
Wizard will copy all files to the disc's root directory.
•
Create Disc Wizard temporary folder: specifies the location of the
temporary files created by the Create Disc Wizard while recording
your files. Click Browse to change the folder.
7. When you are ready to continue, click Next.
8. If you selected to include an HTML slide show, the Create Disc Wizard
automatically converts all of your images to JPEG format to ensure they
are compatible with your viewers' Internet browsers. On the Set slide show
options page, specify the maximum resolution for the converted images,
and then click Next.
9. On the Select disc writer page, specify a disc label, and then follow the
instructions in the drive status area to specify which device you want to
use to create your disc, and set the disc writer options. When you are
satisfied with your choices, click Next.
10. On the Summary page, review your selections, and then click Next to
begin creating your disc.
11. Click Finish to close the wizard and return to ACDSee.
Creating a CD or DVD | 171
CHAPTER 9: SHARING
Creating an HTML album
You can use the HTML Album Generator plug-in to prepare photo collections for
posting on the Internet. The Web page album includes slide show controls and a
thumbnail display.
To create an HTML album:
1. In the File List pane, select the images you want to share.
2. Click Create | Create HTML Album.
3. On the Welcome page of the Create HTML Album wizard, select an album
style from the drop-down list, and then click Next.
4. On the Page Settings page, specify titles, links, fonts, and colors for your
Web page. When you are satisfied with your choices, click Next.
5. On the Thumbnail Settings page, adjust the appearance, format, and layout
of your thumbnails. When you are satisfied with your choices, click Next.
6. On the Captions page, specify which file-specific information to display
with thumbnails and images. When you are satisfied with your choices,
click Next.
7. On the Image Settings page, specify the maximum image size, adjust
compression, and convert your images to the Web-friendly JPEG format.
Click Next to continue.
8. On the Output Settings page, specify the output folder, whether thumbnail
and image names should have prefixes, and how thumbnails and their
related images are linked. Select the Advanced tab to set the options for
this wizard.
9. Click Next to create your album and wait a few moments while ACDSee
generates the thumbnails and creates the HTML page.
10. Click Finish to exit the wizard and return to ACDSee.
Creating a contact sheet
You can create contact sheets - thumbnail previews of your images arranged on
pages - that you can use to organize and share your images. You can use the
Create Contact Sheet utility to save your contact sheets in multiple image formats,
and as HTML image maps.
The size of the thumbnails depends on how many columns and rows the contact
sheet displays, and how much space is displayed between them.
172 | Creating an HTML album
CHAPTER 9: SHARING
To create a contact sheet:
1. In the File List pane, select the images you want to include and click
Create | Create Contact Sheet.
2. In the Contact sheet format area, set the Contact sheet format options.
For more information, see “Setting contact sheet options” on page 177.
3. In the Output Settings area, set the Output Settings options as described
below.
4. Select the Caption, Header, or Footer tab to specify the text options for
your contact sheet. For more information about the text options, see
“Adding text to pages” on page 179.
5. Click OK.
If you do not specify an output file path, the Create Contact Sheet utility places a
file named Contact Sheet.<ext> in your default image folder. For multiple-page
contact sheets, the utility adds a number to the file name; for example, Contact
Sheet3.bmp.
Output Settings options
Page size
Margins
Output
format
Output file
path
Image map
options
Width
Specifies the page width in pixels.
Height
Specifies the page width in pixels.
Horizontal
Specifies the horizontal page margin in pixels.
Vertical
Specifies the vertical page margin in pixels.
Format dropdown list
Specifies the image format for the contact sheet.
Settings
Opens the Options dialog box for the selected format,
if available.
Path dropdown list
Displays the current file path to which ACDSee will
save the contact sheet file. You can select a previously
used path from this list.
Browse
Specifies the output file path. In the Save As dialog
box, type a name and click Save.
Output an
HTML image
map
Creates an HTML image map. You can click a
thumbnail to view the full-sized image. The image
map, contact sheet, and original images must all be in
the same folder.
Path dropdown list
Displays the current file path to which ACDSee will
save the image map. You can select a previously used
path from this list.
Browse
Specifies the output file path. In the Save As dialog
box, type a name and click Save.
Creating a contact sheet | 173
CHAPTER
10
PRINTING
With the ACDSee print utility, you can print your images on any size of paper, in
any orientation, and at any resolution your printer can support. You can also use
the print utility to create and print contact sheets, complete with headers, footers,
and captions specific to each image.
As you change the options in the Print dialog box, you can view a dynamically
updated preview of the image and its position on the page. You can adjust the
output size, print multiple copies of each image, and change the orientation of the
images on each page.
| 175
CHAPTER 10: PRINTING
Printing images in ACDSee
You can use the ACDSee print utility to print your images from the Browser or
the Viewer, and create full page layouts or contact sheets.
To print your images:
1. Select the image or images you want to print, or open an image in the
Viewer, and then click File | Print.
2. Under Print Layout, do one of the following:
•
Select Full page, and then choose a print size from the Format list, or
click Add to create a custom format.
•
Select Contact Sheet, and then set the Contact sheet format options.
For more information see “Setting contact sheet options” on page 177.
3. Select your preferred measurement units from the Units of measurement
drop-down list.
4. On the Printer Options tab, specify the number of copies, the resampling
filter, and the printer you want to use. For more information, see “Setting
printer options” on page 178.
5. On the Page Settings tab, specify the size and positioning of your images.
For more information, see “Adjusting page settings” on page 179.
6. Using the Caption, Header, and Footer tabs, set the text options for your
pages. For more information, see “Adding text to pages” on page 179.
7. Click Print.
Creating a custom print format
You can create your own custom full page print formats and store them in the
Print dialog box for future use.
To create a custom format:
1. In the Format area of the print dialog box, click Add.
2. In the Add Custom Format dialog box, select a measurement unit from the
drop-down list.
3. Enter the dimensions for the new format in the Format width and Format
height fields.
4. Click Add.
5. To remove a custom format, select it in the Format list, and click Delete.
176 | Printing images in ACDSee
CHAPTER 10: PRINTING
Setting contact sheet options
The Contact sheet format area of the print utility contains settings you can adjust
to control the appearance, layout, and size of your thumbnails.
Contact sheet format options
Thumbnail
settings
Frame
options
Thumbnail
options
Page
background
options
Size
Specifies the number of columns and rows to create on
each page.
Spacing
Specifies the amount of space between rows or
columns. In the Horizontal and Vertical spin boxes,
type a value to indicate the amount of space to display.
Use thumbnail
frame
Creates a frame around each thumbnail.
Margin
Specifies the width of the frame.
Solid color
Specifies the frame's color. Click the color picker to
define a color.
Tiled image
Specifies an image to use as a frame. Click Browse to
locate the image you want to use.
Colored drop
shadow
Creates a drop shadow effect around each thumbnail.
Click the color picker to define a color.
Colored edge
fade
Creates a fading frame effect around the image. Click
the color picker to define a color.
Colored matte
Creates a matte effect around each thumbnail. Click
the color picker to define a color.
Bevelled edges
Creates a bevelled edge effect on each thumbnail. This
effect is not displayed in the Preview window.
Solid color
Uses a solid color as a background for the page. Click
the color picker to define a color.
Tiled image
Uses a tiled image as the background for the page.
Click Browse to locate the picture you want to use.
Printing images in ACDSee | 177
CHAPTER 10: PRINTING
Setting printer options
When printing your images with ACDSee, you can specify which printer you
want to use, and set the printer options.
Printer options
Printer
Specifies the printer you want to use.
Select a printer from the drop-down list and click the Properties button to
set its options. Refer to the printer manufacturer's manual or Help file for
more information.
Copies
Specifies the number of copies you want to print.
Print range
Select one of the following options:
• All: prints all of the pages in the document.
• Pages from: prints a range of pages. Specify the first and last pages
of the range in the fields.
Resolution
Specifies a resolution in pixels-per-inch (PPI) for the image. The higher
the value, the more dots per inch, and the higher the resolution of the
printed image. For example, 600 PPI is 360,000 (600 x 600) pixels per
square inch.
Filter
Specifies the resampling filter. Click the drop-down list and select one of
the following:
• Box: displays considerable tiling or jaggies when you resize an
image.
• Triangle: produces good results for image reduction and
enlargement, but displays sharp transition lines.
• Bicubic: produces good results with photo-realistic images and with
images that are irregular or complex. Uses interpolation to minimize
the raggedness normally associated with image expansion.
• Bell: smoothes the image.
• B-Spline: produces smooth transitions, but may cause excessive
blurring.
• Lanczos: produces the sharpest images, but may also introduce some
ringing artifacts.
• Mitchell: produces smooth transitions when enlarging photo-realistic
images. This filter is good compromise between the ringing effect of
Lanczos and the blurring effect of other filters.
Use gamma Applies gamma correction to the printed images.
correction
Type a number from 0.10 to 3.00 in the Gamma value field to adjust the
gamma of the image. Higher values make the image appear brighter, while
lower values make the image appear darker.
178 | Printing images in ACDSee
CHAPTER 10: PRINTING
Printer options
Use EXIF
Automatically checks for and uses the EXIF 2.2 metadata encoded within
2.2 printing certain images to ensure accurate color reproduction.
when
This option does not affect images without EXIF 2.2 printing.
available
Adjusting page settings
You can use the options on the Page Settings tab to control the size of your
printed images, and adjust the positioning of images on each page.
Page Settings options
Page position
Specifies where to place the image on each page.
Margins
Specifies the size of the margins. Type a value or click the arrows in
the Top, Bottom, Left, and Right spin boxes.
Number of prints Specifies how many copies of each image to print. The print utility
per image
adds pages as required.
Automatically
rotate picture
based on print
format
Specifies whether you want the print utility to determine
automatically which orientation to use for each image. If you select
the check box, the print utility changes each page's orientation to
best suit the image you are printing.
Maintain aspect
ratio
Specifies whether you want the print utility to maintain the original
image's aspect ratio. Select one of the following options to indicate
how the print utility should handle the aspect ratio for oversized
images:
• Crop image to fit print format: prints only the part of the
image that fits within the print format.
• Shrink image to fit print format: prints the entire image,
reduced to fit inside the print format.
Adding text to pages
You can add headers and footers to pages, and captions beneath your images. You
can insert automatic page numbers into the header and footer, and file-specific
information to display in the caption for each image.
To add captions to your printed images:
1. In the Print dialog box, select the Caption tab.
2. Select Use caption text.
3. Click Font to open the Font dialog box and set the font options.
Printing images in ACDSee | 179
CHAPTER 10: PRINTING
4. In the text field, type the text you want the caption to display.
5. Click Insert Metadata to insert file-specific information into the caption
for each image.
6. In the Text alignment drop-down list, select the caption positioning.
7. To set the maximum number of text lines for each caption to display,
select the Number of lines check box and specify a number in the field.
To add headers and footers to your printed pages:
1. Do one or both of the following:
•
Click the Header tab and select Use header text.
•
Click the Footer tab and select Use footer text.
2. Click Font to open the Font dialog box and set the font options.
3. In the text field, type the text you want the caption to display.
4. To insert the current page number or the total number of pages into the
text, click Insert Page Number and select an option from the menu.
5. In the Text alignment drop-down list, select the header or footer
positioning.
6. To set a maximum number of text lines, select the Number of lines check
box and specify a number in the field.
Ordering prints online
Enjoy the benefits of ordering photographic prints online from a reliable photo
service provider partnered with ACD Systems. You can have prints of your
favorite photos delivered right to your door, in the sizes and number of duplicates
you want.
To order prints online:
In the Browser, click Create | Prints and Gifts.
The Order Prints tool opens in a new pane in the Browser. Follow the instructions
in the pane to order your prints.
180 | Ordering prints online
APPENDIXES
The following sections contain additional resources to help you make the most of
ACDSee.
Included in the appendixes are: information on how to contact ACD Systems; a
complete list of supported file formats, and an explanation of the different plug-in
types; keyboard and mouse shortcuts; the default toolbar layouts for the Browser
and Viewer; and a guide to the advanced system administrator options.
| 181
APPENDIX 1: CONTACTING ACD SYSTEMS
Appendix 1: Contacting ACD Systems
By purchasing this product, you receive ongoing, preferred treatment by our
technical support team, should the need arise. If you have any technical related
questions or general feedback, please visit our Web site at:
www.acdsystems.com/English/Support/
To view languages other than English, click the Site Language drop-down list
and select the desired language.
Telephone
If you are unable to take advantage of our online contact options, you can call to
speak with a company representative.
North America
(English)
Hours of operation
Telephone
Monday to Friday
(250) 544-6701
7am to 5pm
Pacific Standard Time
Europe
Monday to Friday
0049 (0) 1805-223743
8am to 6pm
Central European Time
International
(All other languages)
Monday to Friday
(250) 544-6700
8am to 4pm
Pacific Standard Time
Please note that telephone calls for North American and International support are
subject to international rates if calling from outside of Canada, and/or long
distance charges if calling from within Canada.
Mail
Contact us by mail at:
International:
ACD Systems Ltd.
PO Box 36
Saanichton, BC
V8M 2C3, Canada
182 | Appendix 1: Contacting ACD Systems
United States:
ACD Systems Ltd.
1150 NW 72 Ave, Suite 180
Miami, FL USA
33126
APPENDIX 1: CONTACTING ACD SYSTEMS
About the ACDInTouch Service
ACDInTouch is a data exchange service. When you connect, information is sent
to you so that you can read up-to-date information directly in the ACDInTouch
pane. This information is relevant to your product, such as upgrades, plug-ins,
and related software from ACD Systems that may also be of interest to you.
For information on ACD Systems' Privacy Policy, visit our Web site at:
www.acdsystems.com/english/company/privacy.htm
Appendix 1: Contacting ACD Systems | 183
APPENDIX 2: SUPPORTED FILE FORMATS
Appendix 2: Supported File Formats
ACDSee supports over 50 different file formats. The files that you can view or
edit and save with ACDSee depend on which file format support plug-ins are
installed on your computer, and associated with ACDSee. For even more
supported file formats, you can download plug-ins from myACD or from our
Web site:
www.ACDSystems.com
For more information about plug-ins, see “Working with plug-ins” on page 189.
Image formats
ACDSee supports the following image formats. For full file format support, see
“System requirements” on page 4.
Image read support formats
ANI
Windows
animated cursor
Shows cursor animation
ART
AOL ART
Still images
BMP
Windows Bitmap Windows and OS/2; 2/8/16/24/32 bpp; RLE and
uncompressed
CNV
Canvas
CR2
Canon RAW
CR2
CRW
Canon RAW
CRW
CUR
Windows cursor
CVX
Canvas
DCR
Kodak RAW
DCR
DCX
Multiple-page
PCX
DJV
DjVu
EMF
Enhanced
Metafile Format
Win32 enhanced placeable metafiles
EPS
Encapsulated
PostScript
Displays embedded thumbnail (TIFF formats) and
first page only
FPX
FlashPix
Multiple resolution support
184 | Appendix 2: Supported File Formats
Thumbnails only
Thumbnails only
All sub-types and multiple pages supported
APPENDIX 2: SUPPORTED FILE FORMATS
Image read support formats
GIF
Graphics
Interchange
Format
Single page and animated; 87a and 89a
ICN
AT&T ICN
ICO
Windows icon
Shows multiple resolutions as separate pages
IFF
EA/Amiga
Interchange File
Format
1-24 bpp, including HAM and HAM8; multiple pages
and animations not supported
JP2
JPEG2000
48-bit support
JPC
JPEG2000
48-bit support
JPG
JPEG JFIF
JFIF and Adobe CMYK
KDC
Kodak KDC
Reads both the full image and the embedded
thumbnail
MAG
MAG
All sub-types supported
MRW
Konica Minolta
RAW
NEF
Nikon RAW
ORF
Olympus RAW
PBM
Portable BitMap
PCD
Kodak PhotoCD
Up to 3072x2048 resolution (16BASE)
PCX
ZSoft Publishers
Paintbrush
All sub-types supported
PEF
Pentax RAW
PEF
PGM
Portable
GrayMap
PIC
SoftImage PIC
PCT
Macintosh PICT
PDF
Adobe Acrobat
documents
Can read all pages.
PIX
Alias PIX
24 bpp
PNG
Portable Network All sub-types supported
Graphics
PPM
Portable PixMap
PS
Adobe Postscript First page only
All sub-types supported
Appendix 2: Supported File Formats | 185
APPENDIX 2: SUPPORTED FILE FORMATS
Image read support formats
PSD
PSP
Adobe
PhotoShop
Document
RGB, grayscale, duotone, paletted and bi-level
Paint Shop Pro
Version 5 and version 6
Support for Apple QuickTime still image codecs
Lab color interpreted as grayscale only
Quick-Time
.qtif, .qif, .qfi
RAF
Fujifilm RAW
RAS
Sun Raster
RAW
Pentax RAW,
Leica RAW,
Contax RAW,
Casio RAW
RSB
Red Storm image All sub-types are supported
format
SGI
SGI Image
Format
8-32 bpp; no colormaps; RLE or uncompressed
TGA
Targa TGA
All sub-types supported
TIFF
Tag Image File
Format
1/2/4/8/12/16 bits per sample, 1-4 samples per pixel
Uncompressed and RLE compressed
Bilevel/RGB/Paletted/CMYK/YCrCb/LOGL/
LOGLUV; Uncompressed/PackBits/LZW//
ThunderScan/ SGILog/CCITT/ZIP/NEXT/New-JPEG
(no v6.0 JPEG support)
Support for multi-page documents
Kodak RAW TIFF, Canon RAW TIFF
WBMP
Wireless Bitmap
WMF
Windows
Metafile Format
X3F
Sigma RAW
X3F
XBM
X bitmap
XPM
X pixmap
Win 3.x placeable metafiles
Image write support formats
BMP
Windows Bitmap Windows 1/8/24 bpp
GIF
Graphics
Interchange
Format
186 | Appendix 2: Supported File Formats
Non-interlaced GIF 89a only
APPENDIX 2: SUPPORTED FILE FORMATS
Image write support formats
IFF
EA/Amiga
Interchange File
Format
1-24 bpp, including HAM and HAM8; multiple pages
and animations not supported
JP2
JPEG2000
JPEG
JPEG JFIF
PCX
ZSoft Publisherís 8 and 24 bpp; RLE compressed
Paintbrush
PNG
Portable Network 1/4/8 bpp colormapped; 24 bpp RGB
Graphics
PSD
Adobe
PhotoShop
Document
RGB, grayscale, duotone, paletted and bi-level
RAS
Sun Raster
Uncompressed and RLE compressed
RSB
Red Storm image All sub-types supported
format
SGI
SGI Image
Format
WBMP
Wireless Bitmap
TGA
Targa TGA
8 and 24 bpp. RLE and uncompressed, Top-down and
bottom-up
TIFF
Tag Image File
Format
1/8/24 bits per pixel, single-page; Uncompressed,
CCITT3, CCITT4, LZW, Deflate (ZIP), and JPEG
compression; Adjustable DPI tags
8 and 24 bpp. Progressive and baseline; Adjustable
compression factor, subsampling, smoothing and
Huffman code optimization
Lab color interpreted as grayscale only
8-32 bpp; no colormaps; RLE or uncompressed
Archive formats
ACDSee supports the following archive file formats. For full file format support,
see “System requirements” on page 4.
Archive read support formats
ARJ
ARJ archive
ARJ format
CAB
CAB archive
Microsoft CAB file format
GZ
GZ archive
Unix GZIP (GnuZIP)
LHA
LHA and LZH
archives
Lhd, lz4, lh0, lh1, lh4, lh5, lh6, lh7, Lzh
RAR
RAR archive
RAR format
Appendix 2: Supported File Formats | 187
APPENDIX 2: SUPPORTED FILE FORMATS
Archive read support formats
TAR
TAR archive
Unix TAR format
TGZ
TGZ archive
TAR format compressed with GZIP
UU
UU archive
UUEncoded files
ZIP
ZIP archive
Store and Deflate
Archive write support formats
LHA
LHA and LZH
archives
Lhd, lz4, lh0, lh1, lh4, lh5, lh6, lh7, Lzh
ZIP
ZIP archive
ZIP format
Video and audio formats
ACDSee supports the following multimedia file formats. For full file format
support, see “System requirements” on page 4.
Video and audio read support formats
AIF
Audio Interchange File Format
AIFC
Audio Interchange File Format
AIFF
Audio Interchange File Format
ASF
Active Streaming File - HoTMetaL Pro
AU
A sound file format used on Sun Microsystems or other UNIX computers
AVI
AVI movie format
GSM
Global System for Mobile Audio
M15
Apple MPEG-1 Video
M1A
Apple MPEG-1/2 Audio
M1V
Apple MPEG-1 Video
M2A
Apple Mpeg-1/2 Audio
M3U
MP3 Playlist files
M75
Apple MPEG-1 Video
MOV
QuickTime movie
MP2
MPEG Layer II compressed audio
MP3
MPEG Layer III compressed audio
MPA
Apple MPEG-1/2 Audio
MPEG
MPEG movie or animation file
188 | Appendix 2: Supported File Formats
APPENDIX 2: SUPPORTED FILE FORMATS
Video and audio read support formats
MPG
MPEG encoded file
MPV
Apple MPEG-1 Video
QCP
Qulacomm PureVoice
QTPF
QuickTime PreFlight Text
SD2
Sound Designer II
SMI
Synchronized Multimedia Integration Language
SMIL
Synchronized Multimedia Integration Language
SML
Synchronized Multimedia Integration Language
SND
Sound file
SWA
MPEG layer III audio
SWF
Macromedia Flash 4
ULW
ULAW - Sun/NeXT
VFW
Video for Windows
WAV
Sound file
WMV
Windows Metafile
Working with plug-ins
A plug-in is a software module that adds functionality to a larger program.
ACDSee comes standard with many different plug-ins and you can download
new plug-ins from our Web site.
To access the Plug-in Settings dialog box:
Click Tools | Plug-in Settings.
There are six types of plug-ins:
• Image Decode: allows ACDSee to display images of many different file
formats. The files that you can view with ACDSee depend on which
decoding plug-ins are installed on your computer.
• Image Encode: allows ACDSee to save (or convert) images to many
different file formats. The files that you can edit and save with ACDSee
depend on which encoding plug-ins are installed on your computer.
• Archive: allows ACDSee to display and save archives of many different
file formats. The archives that you can view and create with ACDSee
depend on which archive plug-ins are installed on your computer.
• Camera: allows ACDSee to browse images on certain older digital
cameras and transfer them to a folder on your hard drive. Most newer
Appendix 2: Supported File Formats | 189
APPENDIX 2: SUPPORTED FILE FORMATS
camera models connect to your computer with drivers or as a mass storage
device, and do not require a camera plug-in. If you are using an older
model digital camera, you can download free camera plug-ins from our
Web site.
• Command Extension: adds functionality to ACDSee. For example, there
is a plug-in that you can use to share your images over the Internet.
• Pane Extension: adds a pane to the ACDSee Browser where you can
perform tasks like order prints of your digital images.
We cannot ensure the quality of plug-ins that are not certified by ACD Systems. As
with any other piece of software, you are trusting that the plug-in is free from
viruses and that the company that produced the plug-in is trustworthy.
Viewing plug-in properties
You can view and set properties for certain plug-ins.
To view plug-in properties:
1. In the Plug-in Settings dialog box, select one of the Plug-in tabs.
2. Select a plug-in in the Plug-ins list.
3. Click the Properties button.
Disabling and prioritizing plug-ins
Some file formats are supported by more than one plug-in. You can control which
plug-in is used to read or write a file format by changing the order of the plug-ins
in the list, or by disabling plug-ins that you don’t want ACDSee to use.
The order that plug-ins appear in the Plug-in Settings dialog box is the order in
which ACDSee uses the plug-ins.
To change the plug-in order:
1. In the Plug-in Settings dialog box, select one of the Plug-in tabs.
2. Select a plug-in name in the Plug-ins list.
3. Do one of the following:
•
Click the Move up button to move the plug-in higher in the list.
•
Click the Move down button to move the plug-in lower in the list.
4. Click OK.
Susie plug-ins do not have the features and speed of ACD Systems' plug-ins.
Therefore, it is recommended that you give Susie plug-ins a low priority to
prevent them from being used instead of an ACD Systems' plug-in. Also, you can
disable Susie plug-ins that overlap the file formats that ACD Systems' plug-ins
support.
190 | Appendix 2: Supported File Formats
APPENDIX 3: DEFAULT TOOLBAR LAYOUTS
Appendix 3: Default toolbar layouts
The Browser and the Viewer have toolbars that provide shortcuts to commonly
used tools and commands. This section describes the buttons and their functions
on the default toolbar for each part of ACDSee. For information on changing the
buttons included in each toolbar, see “Customizing toolbars” on page 11.
Browser default toolbar layout
Back
Returns to the previous folder you browsed in the File List
pane.
Forward
Returns to the folder you last moved back from in the File List
pane.
Up
Moves the focus of the File List pane up one level in the folder
tree.
Search
Opens the Search pane.
Acquire
Launches the Acquire Wizard, which you can use to acquire
images from devices such as digital cameras.
Send
Displays a menu you can use to send your images via email,
create a SendPix album, or publish to TiVo.
Create
Displays a menu you can use to create slide shows, discs,
albums, and contact sheets.
Modify
Displays a menu you can use to apply editing tools to multiple
images.
Slide Show
Launches the ACDSee Slide Show.
Print
Opens the current image in the Print utility dialog box.
Edit
Opens the current image in Edit Mode, or in your default image
editing application.
ACDInTouch
Connects to the ACDInTouch service.
myACD
Opens the myACD Control Panel, which you can use to enter
license numbers, view the status of the ACD Systems products
installed on your system, and purchase additional software.
Help
Opens the ACDSee Help file.
Appendix 3: Default toolbar layouts | 191
APPENDIX 3: DEFAULT TOOLBAR LAYOUTS
Viewer default toolbar layout
Edit Mode
Opens Edit Mode, in which you can adjust and enhance your
current image.
Open
Opens the Open files dialog box, in which you can select one or
more items to open in the Viewer.
Browse
Closes the Viewer and returns you to the Browser window.
Save As
Opens the Save Image As dialog box so you can save your
changes, or rename your file.
Previous
Displays the previous image.
Next
Displays the next image.
Auto Advance Starts the Auto Advance slide show.
Scroll
Moves images that are larger than the display area so that you
can see hidden areas. The mouse pointer changes to a hand you
can use to grab and drag the image.
Select Tool
Selects a rectangular area of the image.
Zoom Tool
Zooms in on the image area you click.
Rotate Left
Rotates the image counter-clockwise in 90-degree increments.
Rotate Right
Rotates the image clockwise in 90-degree increments.
Zoom In
Increases the magnification of the current image.
Zoom Out
Reduces the magnification of the current image.
Zoom Menu
Opens a menu of Zoom options.
Print
Opens the Print utility.
Set Wallpaper Sets the current image as your desktop wallpaper.
192 | Appendix 3: Default toolbar layouts
APPENDIX 3: DEFAULT TOOLBAR LAYOUTS
Viewer default toolbar layout
Image Audio
Opens the Image Audio menu, in which you can play, stop, edit,
record, and delete embedded and associated image audio.
Move To
Opens the Move Files dialog box, in which you can move files
to existing or new folders.
Copy To
Opens the Copy Files dialog box, in which you can copy files to
existing or new folders.
Delete
Deletes the current image to the desktop Recycle Bin.
Properties
Opens the Properties pane, in which you can view, change, and
add to an image’s properties and metadata.
Help
Opens the ACDSee Help file.
Appendix 3: Default toolbar layouts | 193
APPENDIX 4: KEYBOARD SHORTCUTS
Appendix 4: Keyboard shortcuts
You can use keyboard shortcuts for many of the tasks that you perform in
ACDSee to help increase your efficiency.
The keyboard shortcuts available depend on which part of ACDSee you are
currently using.
Browser keyboard shortcuts
You can use the following keyboard shortcuts when working in the Browser.
Browser keyboard shortcuts
Shortcut
Resulting action
` (grave accent)
Toggles image audio on or off.
- (minus sign)
Sorts the contents of the File List pane in reverse order.
+ (plus sign)
Sorts the contents of the File List pane in forward order.
ALT + <LEFT ARROW>
Returns to the previous folder you browsed in the File List
pane.
ALT + <RIGHT ARROW> Returns to the folder you last moved back from in the File
List pane.
ALT + A
Opens the Acquire Wizard.
ALT + C
Copies one or more selected files to a folder you specify.
ALT + COMMA
Opens the previous tab in the Properties pane.
ALT + ENTER
Opens or closes the Properties pane.
ALT + F4
Closes ACDSee.
ALT + I
Opens the Filters dialog box where you can specify the types
of files displayed in the File List pane.
ALT + M
Moves one or more selected files to a folder you specify.
ALT + O
Opens the Options dialog box.
ALT + P
Opens the Copy EXIF Information Wizard.
ALT + PERIOD
Opens the next tab in the Properties pane.
ALT + SHIFT + F
Maximizes the File List pane.
ALT + W
Restores your desktop wallpaper to the settings you were
using before you applied an ACDSee wallpaper.
ALT + X
Removes the selected item from the Image Basket.
BACKSPACE
Moves up one level in the folder tree.
194 | Appendix 4: Keyboard shortcuts
APPENDIX 4: KEYBOARD SHORTCUTS
Browser keyboard shortcuts
Shortcut
Resulting action
CTRL + NUMBER (0 - 5) Assigns a rating to the currently selected item. Use only the
numeric keypad for these shortcuts. Press CTRL + 0 to
remove a rating.
CTRL + PLUS SIGN (+)
Automatically sizes the columns in the current view mode.
CTRL + A
Selects the entire contents of the current folder.
CTRL + B
Adds the selected items to the Image Basket.
CTRL + C
Copies the selected items to the Clipboard.
CTRL + D
Opens the Edit Caption dialog box.
CTRL + E
Opens the currently selected image in the default editor.
CTRL + ENTER
Opens or closes the Properties pane.
CTRL + F
Opens the Convert File Format dialog box.
CTRL + G
Generates a file listing as a text document.
CTRL + I
Selects all images in the current folder.
CTRL + INSERT
Copies selected items to the Clipboard.
CTRL + J
Opens the Rotate/Flip Images dialog box.
CTRL + K
Places the cursor in the Keywords field of the Properties
pane.
CTRL + L
Opens the Adjust Image Exposure dialog box.
CTRL + N
Opens a second instance of the ACDSee Browser.
CTRL + O
Opens the Open files dialog box, in which you can select one
or more images to open in the Viewer.
CTRL + P
Opens the currently selected image or images in the ACDSee
Print utility.
CTRL + R
Opens the Resize Images dialog box.
CTRL + S
Creates a slide show from the currently selected images.
CTRL + T
Opens the Adjust Image Time Stamp dialog box.
CTRL + TAB
Moves the focus of the Browser between the currently
displayed panes.
CTRL + V
Pastes the contents of the Clipboard.
CTRL + W
Closes ACDSee.
CTRL + X
Cuts the currently selected items to the Clipboard.
CTRL + SHIFT + 1
Opens or closes the Folders pane.
CTRL + SHIFT + 2
Opens or closes the Organize pane.
Appendix 4: Keyboard shortcuts | 195
APPENDIX 4: KEYBOARD SHORTCUTS
Browser keyboard shortcuts
Shortcut
Resulting action
CTRL + SHIFT + 3
Opens or closes the Search pane.
CTRL + SHIFT + 4
Opens or closes the Calendar pane.
CTRL + SHIFT + 5
Opens or closes the Image Basket.
CTRL + SHIFT + A
Selects all files in the current folder.
CTRL + SHIFT + B
Displays or hides the status bar.
CTRL + SHIFT + C
Copies the currently selected image to the Clipboard.
CTRL + SHIFT + D
Clears your current selection.
CTRL + SHIFT + E
Opens the current file in the default system application or
opens a dialog box where you can select an application.
CTRL + SHIFT + F
Toggles the full-screen view for the File List pane.
CTRL + SHIFT + I
Inverts your current selection.
CTRL + SHIFT + L
Opens or closes the Selective Browsing pane.
CTRL + SHIFT + M
Toggles the main Browser menu.
CTRL + SHIFT + O
Opens the file using the system application associated with its
file extension.
CTRL + SHIFT + P
Opens or closes the Preview pane.
CTRL + SHIFT + S
Displays or hides the context-sensitive toolbar.
CTRL + SHIFT + T
Displays or hides the main Browser toolbar.
CTRL + SHIFT + TAB
Moves the focus of the Browser between the currently
displayed panes.
CTRL + SHIFT + W
Sets the selected image as a tiled desktop wallpaper.
DELETE
Deletes the selected items to the Recycle Bin.
F1
Opens the ACDSee Help file.
F2
Renames one or more selected files.
F3
Opens the Search pane.
F4
Displays the Contents bar drop-down list.
F5
Refreshes the Browser.
F6
Changes the File List to Thumbs+Details view mode.
F7
Changes the File List to Filmstrip view mode.
F8
Changes the File List to Thumbnails view mode.
F9
Changes the File List to Tiles view mode.
F10
Changes the File List to Icons view mode.
196 | Appendix 4: Keyboard shortcuts
APPENDIX 4: KEYBOARD SHORTCUTS
Browser keyboard shortcuts
Shortcut
Resulting action
F11
Changes the File List to List view mode.
F12
Changes the File List to Details view mode.
SHIFT + DELETE
Removes the selected item from your hard drive.
SHIFT + F5
Refreshes the File List pane.
SHIFT + INSERT
Pastes the contents of the Clipboard.
SHIFT + TAB
Moves the focus of the Browser to the previous pane or tool
in sequence.
TAB
Moves the focus of the Browser to the next pane or tool in
sequence.
Appendix 4: Keyboard shortcuts | 197
APPENDIX 4: KEYBOARD SHORTCUTS
Viewer keyboard and mouse shortcuts
You can use the following keyboard and mouse shortcuts while working in the
Viewer.
Viewer keyboard shortcuts
Shortcut
Resulting action
\ (backslash)
Zooms the image to actual size.
= (equal sign)
Increases the magnification of the current image (zooms in).
` (grave accent)
Toggles image audio on or off.
- (minus sign)
Decreases the magnification of the current image (zooms
out).
ALT + <DOWN ARROW>
Zooms the image to fit the height within the Viewer window.
Does not enlarge, only reduces.
ALT + <RIGHT ARROW> Zooms the image to fit the width within the Viewer Window.
Does not enlarge, only reduces.
ALT + BACKSLASH (\)
Engages the zoom lock.
ALT + C
Copies current file to a folder you specify.
ALT + COMMA
Moves the focus in the Properties pane to the previous tab.
ALT + D
Opens the Edit Caption dialog box.
ALT + ENTER
Opens or closes the Properties pane.
ALT + F4
Closes the Viewer window.
ALT + O
Opens the ACDSee Options dialog box.
ALT + PERIOD
Moves the focus in the Properties pane to the next tab.
ALT + R
Opens the Rename File dialog box.
ALT + S
Starts or stops the Auto Advance slide show.
ALT + SHIFT + L
Displays the previous image in sequence.
ALT + W
Restores your desktop wallpaper to the settings you were
using before you applied an ACDSee wallpaper.
ALT + X
Removes currently displayed item from the Image Basket.
B
Displays or hides the status bar.
BACKSPACE
Displays the previous item in the slide show, Auto Advance,
or Viewer sequence.
CTRL + A
Displays or hides headers and footers.
CTRL + B
Adds currently displayed item to the Image Basket.
CTRL + C
Copies the currently displayed file to the Clipboard.
198 | Appendix 4: Keyboard shortcuts
APPENDIX 4: KEYBOARD SHORTCUTS
Viewer keyboard shortcuts
Shortcut
Resulting action
CTRL + D
Opens the Edit Caption dialog box.
CTRL + E
Opens the current image in the default editing application.
CTRL + F
Opens the Convert File Format dialog box.
CTRL + F4
Closes the current item.
CTRL + INSERT
Copies the selected portion of an image to the Clipboard.
CTRL + J
Opens the Rotate/Flip Images dialog box.
CTRL + L
Opens the current image in Edit Mode, and activates the
Adjust Exposure tool.
CTRL + M
Moves the current item to a folder you specify.
CTRL + MINUS SIGN (-)
Reduces the magnification of the area inside the Magnifying
Glass pane.
CTRL + O
Opens the Open files dialog box, in which you can select one
or more images to open in the Viewer.
CTRL + P
Opens the current image in the ACDSee Print utility.
CTRL + PLUS SIGN (+)
Increases the magnification of the area inside the Magnifying
Glass pane.
CTRL + Q
Clears the current selection.
CTRL + R
Opens the current image in Edit Mode, and activates the
Resize tool.
CTRL + S
Opens the Save Image As dialog box, in which you can save
you image with a different name or file format.
CTRL + SLASH (/)
Engages the zoom lock.
CTRL + T
Opens the Change Image Time Stamp dialog box.
CTRL + V
Pastes the contents of the Clipboard.
CTRL + W
Closes the Viewer window.
CTRL + X
Cuts the current item to the Clipboard.
CTRL + Y
Redo previously undone operation.
CTRL + Z
Undo previous operation.
CTRL + ALT + <LEFT
ARROW>
Rotates the current image 90-degrees counterclockwise.
CTRL + ALT + <RIGHT
Rotates the current image 90-degrees clockwise.
ARROW>
CTRL + SHIFT + A
Opens or closes the Magnifying Glass.
CTRL + SHIFT + B
Displays or hides the status bar.
Appendix 4: Keyboard shortcuts | 199
APPENDIX 4: KEYBOARD SHORTCUTS
Viewer keyboard shortcuts
Shortcut
Resulting action
CTRL + SHIFT + C
Copies the currently displayed image to the Clipboard.
CTRL + SHIFT + F
Toggles full screen mode.
CTRL + SHIFT + F4
Closes all images.
CTRL + SHIFT + G
Removes tiled image from the background of the Viewer
window.
CTRL + SHIFT + H
Opens or closes the Histogram pane.
CTRL + SHIFT + L
Opens the previous image.
CTRL + SHIFT + M
Displays or hides the main menu bar.
CTRL + SHIFT + P
Prints all currently selected images, or all images in the
current folder.
CTRL + SHIFT + Q
Opens the Edit Header/Footer dialog box, in which you can
specify the text to display on your images in the Viewer.
CTRL + SHIFT + S
Opens or closes the Navigator pane.
CTRL + SHIFT + T
Displays or hides the main Viewer toolbar.
CTRL + SHIFT + V
Toggles the Page View pane while viewing multiple page
images
CTRL + SHIFT + W
Sets the selected image as a tiled desktop wallpaper.
DELETE
Deletes the current image to your Recycle Bin.
END
Displays the last of your selected items, or the last item in the
current folder
ENTER
Closes the Viewer and returns to the Browser.
ESC
Closes current dialog box, or closes the Viewer and returns to
the Browser.
F
Toggles full screen mode.
F1
Opens the ACDSee Help file.
F2
Opens the Rename File dialog box.
F5
Refreshes the Viewer window and reloads the current image.
HOME
Displays the first of your selected items, or the first item in
the current folder.
INSERT
Opens the Open files dialog box, in which you can select one
or more images to open in the Viewer.
L
Toggles the pan lock.
PAGE DOWN
Displays the next item.
PAGE UP
Displays the previous item.
200 | Appendix 4: Keyboard shortcuts
APPENDIX 4: KEYBOARD SHORTCUTS
Viewer keyboard shortcuts
Shortcut
Resulting action
PAUSE
Stops or starts the Auto Advance slide show.
SHIFT + 1
Changes the image color depth to black and white.
SHIFT + 2
Changes the image color depth to 16 grays.
SHIFT + 3
Changes the image color depth to 256 grays.
SHIFT + 4
Changes the image color depth to 16 colors.
SHIFT + 5
Changes the image color depth to 256 colors.
SHIFT + 6
Changes the image color depth to Hicolor.
SHIFT + 7
Changes the image color depth to Truecolor.
SHIFT + BACKSPACE
Displays the previous page in a multiple-page image.
SHIFT + DELETE
Removes the current item from your hard drive.
SHIFT + E
Opens the current file in the default system application or
opens a dialog box where you can select an application.
SHIFT + END
Displays the last page of the current multiple-page image.
SHIFT + ENTER
Closes the Viewer and returns to the Browser.
SHIFT + ESC
Minimizes the Viewer window.
SHIFT + F1
Activates the image scrolling tool.
SHIFT + F2
Activates the selection tool.
SHIFT + F3
Activates the zoom tool.
SHIFT + HOME
Displays the first page of the current multiple-page image.
SHIFT + INSERT
Pastes the contents of the Clipboard.
SHIFT + L
Opens the file using the system application associated with its
file extension.
SHIFT + PAGE DOWN
Displays the next page in a multiple-page image.
SHIFT + PAGE UP
Displays the previous page in a multiple-page image.
SHIFT + SPACEBAR
Displays the next page in a multiple-page image.
SHIFT + TAB
Moves the focus of the Properties pane to the previous field.
SHIFT + Z
Activates the Select tool, and zooms into the selected area.
SPACEBAR
Displays the next item in the slide show, Auto Advance, or
Viewer sequence.
T
Displays or hides the main Viewer toolbar.
TAB
Moves the focus of the Properties pane to the next field.
Z
Opens the Set Zoom Level dialog box.
Appendix 4: Keyboard shortcuts | 201
APPENDIX 4: KEYBOARD SHORTCUTS
Viewer keyboard shortcuts
Shortcut
Resulting action
Note:
Use the numeric keypad for the following Viewer keyboard shortcuts.
* (asterisk)
Automatically zooms the image to fit within the Viewer
window.
- (minus sign)
Reduces the magnification of the image (zooms out).
+ (plus sign)
Increases the magnification of the image (zooms in).
/ (slash)
Zooms the image to its actual size.
1
Displays the last item in the current folder.
3
Displays the next item.
7
Displays the previous item.
9
Displays the last item in the current folder.
Viewer mouse shortcuts
Shortcut
Resulting action
Double-click
Closes the Viewer and returns to the Browser.
Right-click
Opens the Viewer shortcut menu.
Left + Right-click
Toggles full screen mode.
Middle click
Toggles full screen mode (on 3-button mouse).
Wheel click
Toggles full screen mode.
Wheel up
Displays the previous item.
Wheel down
Displays the next item.
CTRL + Wheel up
Increases the magnification of the image (zooms in).
CTRL + Wheel down
Decreases the magnification of the image (zooms out).
SHIFT + Wheel up
Displays the previous page of a multiple-page image.
SHIFT + Wheel down
Displays the next page of a multiple-page image.
202 | Appendix 4: Keyboard shortcuts
APPENDIX 5: SYSTEM ADMINISTRATOR OPTIONS
Appendix 5: System administrator options
ACDSee provides several options to assist system administrators, including the
ability to enter command lines, and support for the the DDE command, “open”.
Command line arguments
Command lines can be entered from the Start | Run command in Windows.
Default behavior (no arguments)
When no command line arguments are given, ACDSee opens the Browser to the
default folder.
Specifying images to view
You can supply ACDSee with one or more image files as a command line
argument. Wildcards are permitted.
For example, to start ACDSee and have it view all the .JPG files in the
c:\images folder: acdsee7 c:\images\*.jpg
If any file name includes spaces, you must enclose the file name in quotation
marks:
For example, acdsee7 “Metal Links.bmp”
For example, acdsee7 “C:\My Pictures\Spot.psd” D:\Downloads\*.jpg
Browsing a particular folder or archive
You may browse a particular folder or archive using a command-line argument:
For example, acdsee7 c:\images\ starts the ACDSee browser in the
c:\images folder.
Starting in View mode (with no images)
You can start ACDSee in View mode, without an image, by specifying the /v
command line switch:
For example, acdsee7 /v
ACDSee ignores all other command-line arguments when the /v switch is present.
Appendix 5: System administrator options | 203
APPENDIX 5: SYSTEM ADMINISTRATOR OPTIONS
Printing
You can use ACDSee to print one or more images and exit by specifying the /p
command line switch:
For example, acdsee7 /p “C:\My Pictures\Spot.psd”
“D:\Downloads\*.jpg”
You can bypass the printer selection and print setup dialog boxes that normally
appear by adding an exclamation mark (!) to the /p switch.
For example, acdsee7 /p! “Gloxina.jpg”
Slide show
Use the /ss command-line switch to specify that ACDSee should start a slide
show on startup.
Use the /seq:forward, /seq:reverse or /seq:random to specify the order of the
slide show.
Include the path to the folder and the images to be used in the slide show.
For example, acdsee7 /ss /seq:random “d:\images\*.jpg”
Full-screen mode
Use the /fullscreen command-line switch to start ACDSee in full-screen mode.
Synchronize to folder
Use the /sync <folder> command-line switch to synchronize ACDSee to the
specified folder.
DDE interface
ACDSee is a DDE server application. The only supported DDE command is
"open," which is used by the Windows shell to open image files using ACDSee.
Syntax
Server cmd-line: Acdsee7.exe /v
Service: ACDSee
Topic: System
Command: [open[-add | -noadd][-viewall | -noviewall](“<image-file-1>”,
“<image-file-2>”,...)]
204 | Appendix 5: System administrator options
APPENDIX 5: SYSTEM ADMINISTRATOR OPTIONS
The Add option
add
Add the specified images to the current image sequence.
noadd
Replace the current image sequence with the specified images.
<default>
Add or replace according to the Startup option found in the Tools |
Options, Viewer page.
The Viewall option
viewall
Add all images in the folders containing the specified images to the
image sequence.
noviewall
Only add the specified images to the image sequence.
<default>
View all according to the View all images in folder option found in
the Tools | Options, Viewer page.
Command examples
[open-add("c:\images\apple.jpg", "c:\images\quince.jpg")]
[open-noadd-viewall("c:\images\animals\dog.jpg")]
[open-noadd("c:\images\animals\*.jpg")]
[open-noadd("c:\images\animals.ais")]
Sample
The following sample illustrates how a client can use the Open command with
ACDSee.
#include <ddeml.h>
/***********
* DDEView *
***********/
static HDDEDATA CALLBACK DdeCallback(UINT, UINT, HCONV,
HSZ, HSZ, HDDEDATA,
DWORD, DWORD)
{
return (HDDEDATA)NULL;
}
int DDEView(const char* pszAppPath,
// path to acdsee7.exe (can just use "acdsee7.exe" if
ACDSee is installed correctly)
Appendix 5: System administrator options | 205
APPENDIX 5: SYSTEM ADMINISTRATOR OPTIONS
const char* pszFiles, // path to image file(s) - each file
must be enclosed in quotes and separated by a space
int fAdd, // 0=>replace, 1=>add, -1=>according to options
setting
int fViewAll) // 0=>view all in folder, 1=>only this,
-1=>options setting
{
DWORD idDDE=0;
UINT err = DdeInitialize(&idDDE, (PFNCALLBACK)
DdeCallback,
APPCLASS_STANDARD | APPCMD_CLIENTONLY, 0);
if (err == DMLERR_NO_ERROR)
{
HSZ hszDDEService, hszDDETopic;
HCONV hconv;
hszDDEService = DdeCreateStringHandle(idDDE, "ACDSee",
CP_WINANSI);
hszDDETopic = DdeCreateStringHandle(idDDE, "System",
CP_WINANSI);
hconv = DdeConnect(idDDE, hszDDEService, hszDDETopic,
NULL);
if (!hconv &&
DdeGetLastError(idDDE)==DMLERR_NO_CONV_ESTABLISHED)
{
int rc = (int)ShellExecute(NULL, NULL, pszAppPath,
"/v", "", SW_SHOWDEFAULT);
if (rc <= 32) return rc;
// try to connect to server every 50 ms for up to 1 second
// (give server a chance to start up)
for (int i=0 ; i<20 && !hconv ; i++)
{
206 | Appendix 5: System administrator options
APPENDIX 5: SYSTEM ADMINISTRATOR OPTIONS
hconv = DdeConnect(idDDE, hszDDEService, hszDDETopic,
NULL);
if (!hconv) err = DdeGetLastError(idDDE);
Sleep(50);
}
}
if (hconv)
{
char* pszCmd;
char szVerb[80] = "open";
if (fAdd != -1) lstrcat(szVerb, fAdd ? "-add" : "-noadd");
if (fViewAll != -1) lstrcat(szVerb, fViewAll ? "-viewall" :
"-noviewall");
pszCmd = (char*)malloc(lstrlen(szVerb) + lstrlen(pszFiles)
+ 5);
// wsprintf does not work with >1024 character strings
wsprintf(pszCmd, "[%s(", szVerb);
lstrcat(pszCmd, pszFiles);
lstrcat(pszCmd, ")]");
DdeClientTransaction((BYTE*)pszCmd, lstrlen(pszCmd)+1,
hconv, 0, 0,
XTYP_EXECUTE, TIMEOUT_ASYNC, NULL);
err = DdeGetLastError(idDDE);
free(pszCmd);
}
DdeFreeStringHandle(idDDE, hszDDEService);
DdeFreeStringHandle(idDDE, hszDDETopic);
DdeUninitialize(idDDE);
}
Appendix 5: System administrator options | 207
APPENDIX 5: SYSTEM ADMINISTRATOR OPTIONS
return err;
}
void main()
{
DDEView("acdsee7.exe", "\"c:\images\cat.jpg\",
\"c:\images\dog.jpg\"", 0, 0);
}
208 | Appendix 5: System administrator options
GLOSSARY
The following is a list of some of the more technical terms used in this manual,
and within ACDSee. Also contained within the Glossary are some common
digital imaging terms and their definitions, with which beginning or novice users
may be unfamiliar.
Glossary | 209
A
ACDInTouch
A data exchange service for staying in touch with new developments from
ACD Systems.
acquire
An ACD Systems method of:
•
locating images on peripheral devices (such as scanners and digital
cameras) and adding the images to your hard drive;
•
taking screen captures.
album
A collection of images. Albums contains shortcuts to where the images are
stored on your hard disk drive. Albums in previous versions of ACDSee
were saved using the .ais file extension.
aliasing
When smooth lines and curves in a digital image become distorted due to
low resolution.
anchor
A method of fixing an object to the screen or page. When anchoring a
selection of an image, the marquee disappears from around the selection.
antialiasing, anti-aliasing
A software technique for reducing jagged lines and curves by using shades
of gray and color to smooth out the contrast between neighboring pixels.
While this technique may result in a loss of overall image clarity, it greatly
reduces the appearance of jaggies.
aspect ratio
The ratio of width to height of an image. An image with an aspect ratio of
3:1 has a width 3 times as large as the height.
archive
A collection of files gathered and often compressed for storage. You can
use archiving software, such as ACDSee and ACDZip, to create and view
archives.
210 | Glossary
azimuth
The angle of the shadows that extend from the edges of details in an
image. You can control azimuth in images using the Emboss filter.
B
background processing
Tasks or programs that execute without user intervention, freeing you to
work on other tasks.
banding
A disruption in the gradation of colors in a digital image. Banding can also
occur when printing images on a multi-pass color printer.
bandwidth
The amount of data that can be sent through a network connection in a
fixed amount of time. Bandwidth is measured in Kilobits per second
(Kbps).
batch processing
Operations performed to more than one image at a time. For example,
resizing a group of images.
blackpoint
The blackest area of an image. You can control the intensity of the black in
an image by adjusting the blackpoint.
brightness
The light intensity of an image. You can make an image appear brighter or
darker by adjusting the brightness.
C
cache
A high-speed storage mechanism. The ACD Systems database is a cache.
caption
Free form text associated with a file, or a comment or description added to
a printed image.
Glossary | 211
Clipboard
A Microsoft Windows tool that you can use to copy data from one source
to another. To place something on the Clipboard, you can use the Cut or
Copy tools. To take something from the Clipboard, you can use the Paste
tool.
CMYK
A color model that uses cyan, magenta, yellow, and black as its primary
colors.
codec
A technology that compresses and decompresses data. A codec can be
used to compress files for transport over a network, the Internet, or to
decrease size for storage. The codec then expands files to their original
size so that they can be played or viewed on a computer. Stands for
compressor/decompressor.
color calibration
The process of setting up your computer so that the color output from your
printer matches the colors you see on your monitor.
command line
A line in an application where the system prompts you for a command.
compression
The process or result of converting data to a storage format that requires
less space than the original data.
contact sheet
A sheet of paper that contains a series of small images.
contrast
A measure of the differences of color and brightness in an image.
convert
To change a file from one format to another.
cropping
A digital method of removing unwanted areas of an image.
212 | Glossary
D
database
An electronic filing system where a computer can quickly access data.
More specifically, the ACD Systems Database contains two parts: a
cached thumbnail file and an information file. The cached thumbnail file
contains small copies (thumbnails) of the images on your system. The
information file contains more specific information about the files on your
system, such as descriptions, dates, authors, notes, keywords, and
categories.
database date
A date that you apply to the properties of a file and save in the ACD
Systems database.
DDE (Dynamic Data Exchange)
A multiple process communication system used by Macintosh and
Windows operating systems. With DDE, two active applications can share
the same data.
decode
To read (or view) a file format.
descriptions
Free form text associated with a file. Previous versions of ACDSee stored
descriptions in a hidden file called descript.ion. One descript.ion file was
generated for each folder that contains files with descriptions. File
descriptions in ACDSee 6.0 are referred to as captions.
dithering
Adjusting the appearance of colors and shades in an image by varying the
size and shape of the pixels.
dock
To attach a toolbar, window, or dialog box to different areas of the screen.
DPI (dots per inch)
A measurement of the resolution of a displayed image. The more dots per
inch, the higher the resolution, and therefore quality of the image. For
example, 92 DPI means 92 dots horizontally and 92 dots vertically, which
equals 8464 dots per square inch.
Glossary | 213
E
editor, image
See "image editor".
elevation
The height of an imaginary light source over an image. The elevation of
the light works in conjunction with azimuth to generate a threedimensional emboss effect.
encode
To write (or save) a file format.
encryption
A method of converting data into a secure format. You need a password or
key to read an encrypted file.
EXIF (Exchangeable Image File)
A standard for storing information, primarily with images that use JPEG
compression. Most digital cameras create EXIF information. EXIF
information is embedded in the image file.
export
To move data from one application to another. The data is placed in a
format that the other application understands.
F
feather
To soften the edges of an image so that the image blends into the
background.
file listing
A report of the files currently displayed in the ACDSee Browser.
file name collision
An action that results from moving or copying an item to a folder or drive
that already contains an item with the same file name.
214 | Glossary
file format
A medium for encoding information in a file. Each type of file has a
different file format that specifies how the information is organized.
filter
A program that can add an effect to an image.
footer
A comment or description added to the bottom of an image. Also referred
to as a caption.
frame
A single still image in a film or video.
frame rate
The rate at which frames are displayed in a film or video. Frame rate is
measured in Frames per Second (FPS).
G
gamma
The range of color values a monitor, scanner, or printer can display.
Adjusting this value increases or decreases the intensity of the light
spectrum. A gamma corrected image simulates the adjusted display value
when it is saved.
gray scale
An image composed of different shades of gray.
H
header
A comment or description added to the top of an image. Also referred to as
a caption.
hue
The predominant color in an image.
Glossary | 215
I
image editor
A program, such as ACDSee or ACD Photo Editor, that you can use to
create and edit images.
image optimizer
A program that you can use to make your images more suitable for the
Internet. For example, RealOptimizer.
image resolution
Refers to the quality of the details and colors in an image. It is also used to
describe the quality of monitors and printer output.
image viewer
A program that displays images. For example, ACDSee.
import
To bring data into an application from another using a format that the
receiving application understands.
interpolation
When resizing an image, a process that uses nearby pixels to estimate the
color of new pixels added to the larger image.
J
jaggies
Individual pixels displayed in an image with low resolution. The
appearance of pixels in an image cause lines and curves to look jagged.
L
lossless compression
A form of compression where no data is lost, and therefore, does not affect
image quality.
lossless rotation
The rotation of a JPEG image without the loss of image quality. This
works best on images with dimensions that are a multiple of 8 or 16.
216 | Glossary
lossy compression
A form of compression that attempts to discard unnecessary data. This
data loss can affect the quality of the image.
luminance
The brightness, darkness, and contrast information of an image.
M
marquee
A frame displayed by a dashed line that identifies a selected portion of an
image. Depending on the tool you use, you can resize or move a marquee
with or without changing the underlying image.
metadata
Information about an image. For example, metadata with images from
digital cameras can contain the date and time the picture was taken, the
shutter speed, the exposure settings of the camera, and if a flash was used.
monochrome
An image containing a single color.
multiple page image
An image that contains more than one image in a single file. For example,
images that use the .tif file extension can have multiple pages.
N
newsreader
An application for reading and posting messages on Internet newsgroups
(online discussion groups).
noise
The effect produced when a variety of pixel colors are used in the same
color region. Noise is often produced when an image is resize or converted
to another format.
P
photo album
See "album".
Glossary | 217
photo editor
See "image editor".
picture viewer
See "image viewer".
pixel (PICture ELement)
The smallest piece of a digital image, arranged in rows and columns.
PPI (pixels per inch)
A measurement of how an image is displayed. The greater the number of
pixels per inch, the higher the quality of the image.
plug-in
A software module that adds functionality to a larger program.
primary colors
Colors that can produce other colors by mixing them together. For
example, in the RGB color model, red, green, and blue are primary colors.
R
raster image
An image composed of a rectangular grid of pixels. Each pixel contains a
defined value about its color, size, and location in the image. Therefore,
resizing the image can affect its quality.
recursive
A program or task that can repeat itself indefinitely. For example, a slide
show.
render
To draw images to your screen.
resampling filters
A mathematical method of smoothing images during resizing or printing.
A filter estimates how missing or dropped pixels should appear in the
image, and replaces them with an approximate color.
218 | Glossary
resolution
The quality and clarity of an image, measured in pixels, dots per inch, or
pixels per inch.
RGB
A color model that uses red, green, and blue as its primary colors.
S
sample
An audio wave, measured in bits. The more bits in a sample, the better the
clarity and fidelity.
sample rate
The number of samples used per second to digitally represent a sound,
measured in Hertz (Hz - cycles per second). The more samples taken per
second, the more accurate the digital representation of the sound. The
sample rate of an audio recording is one of the factors that determines the
overall sound quality.
sample size
The size of each sample, measured in bits.
saturation
The purity of a color. The more a color is saturated, the more gray it
contains.
selection
A portion of an image highlighted by a marquee.
shell
Another term for user interface. In ACD Systems software, shell refers to
your operating system or parent application. You can use shell commands
to access other programs or applications from within ACD Systems
software.
shell command
A command sent to the operating system or parent application by another
program or application.
Glossary | 219
shortcut menu
A menu that appears when you right-click an area of a program.
Sometimes referred to as a context menu.\
slide show
An automated sequential display of images. You can use slide show
software, such as ACDSee, to create and display slide shows of your
images.
streaming
Playing an audio or video file as it downloads from the Internet.
T
thumbnails
A small preview of a full-sized image.
timestamp
The dates and times associated with a file.
transitions
Special effects used when displaying an image or video. You can add
transitions to slide shows, screen savers, and videos.
TWAIN
Interface standard for scanners and certain digital cameras.
U
USB (Universal Serial Bus)
A computer port for connecting peripheral devices, such as mouse devices,
keyboards, cameras, and scanners.
V
vector image
An image made up of individual objects instead of pixels. The objects are
defined by mathematical equations. You can adjust the size of a vector
image and the image remains clear and of high quality.
220 | Glossary
viewer, image
See "image viewer".
W
watermark
Font or graphics added to an image, usually to provide copyright
protection.
whitepoint
The whitest area of an image. You can control the intensity of the white in
an image by adjusting the whitepoint.
X
XML (Extensible Markup Language)
A standard language for documents on the Web.
Glossary | 221
Index
ACD Media Support Package, 16
ACD Systems
about, 1
contacting, 182
ACDInTouch, 183
ACDSee
checking for updates, 14
converting from older versions, 132
customizing, 11
first run, 8
getting Help, 17
installing, 5
Media Support Package, 16
myACD, 15
opening a second instance, 6
starting, 6
system requirements, 4
user interface, 8
Acquire Wizard, 48
acquiring
about, 47
automatically, 52
Device Detector, 50
from a CD, 49
from a mobile phone, 55
from a removable device, 48
renaming, 49
screen capture, 55
albums
definition, 210
importing, 135
archives
associating with ACDSee, 10
creating, 154
supported file formats, 187
audio
adding to images, 72
associated, 72
associating file formats, 10
embedded, 72
playing, 69
playing automatically, 69
recording, 73
supported file formats, 188
Auto Advance, 78
Auto-Hide
Edit Panel, 87
Selective Browsing, 163
back up
creating, 135
restoring, 137
batch functions
about, 139
converting, 139
date and time, 148
EXIF information, 152
exposure, 146
flipping, 140
renaming, 150
resizing, 142
rotating, 140
blur
Edit Mode, 96
types, 97
brightness
definition, 211
Edit Mode, 90
multiple images, 146
Browser
about, 8
customizing panes, 21
default toolbar, 191
keyboard shortcuts, 194
options, 23
panes, 20
refreshing, 45
resetting layout, 22
toolbars, 22
Calendar pane
about, 20
navigating, 42
options, 43
Index | 223
shortcuts, 43
using, 41
disc, 170
HTML album, 172
keywords, 124
PDF, 169
SendPix album, 167
shareable slide shows, 168
camera plug-ins, 189
cataloging files, 130
categories
assigning, 127
managing, 127
viewing assigned files, 125
Write Disc, 170
CD creation, 170
classifications
assigning, 127
special items, 158
types, 126
viewing assigned files, 125
color cast, 93
color depth, 68
columns
selecting, 27
sorting by, 29
Compare Images
about, 152
toolbar, 153
contact sheet
adding text, 179
options, 177
sharing, 172
contacting ACD Systems, 182
context-sensitive
Help, 17
toolbar, 22
converting
color depth, 68
database, 132
file formats, 139
copying
files, 37
files to the Clipboard, 38
images, 38
creating
contact sheet to share, 172
custom print format, 176
224 | Index
cropping an image, 102
custom sort, 29
customizing
Browser, 23
Browser panes, 21
Calendar pane, 43
Details view mode, 27
Device Detector, 51
Edit Panel, 86
File List pane, 30
File Management, 36
Folders pane, 35
general options, 14
Organize pane, 128
Preview pane, 33
toolbars, 11
Viewer, 59
Viewer display, 60
database
about, 122
adding EXIF information, 130
backing up, 135
cataloging files, 130
converting, 132
creating, 8
excluding folders, 131
exporting, 132
importing, 133
maintaining, 138
managing, 129
quarantining files, 137
restoring, 137
date
changing file properties, 148
displaying files by, 42
default start folder, 23
deleting
device profile, 54
folders, 34
using the Recycle Bin, 37
Details view mode, 27
Device Detector
about, 8
options, 51
starting, 51
using, 50
device profile
acquiring from, 54
creating, 52
deleting, 54
Device Synchronization Wizard, 52
digital camera
See removable devices
disabling animated images, 14
downloading
ACD Media Support Package, 16
from a mobile phone, 55
updates, 14
Duplicate Finder, 164
DVD creation, 170
Easy-Select bar
Folders pane, 34
Organize pane, 125
Edit Mode
about, 9
auto color, 93
blurring, 96
brightness, 90
closing, 89
color cast, 93
cropping, 102
curves, 92
exposure, 90
flipping, 104
hiding the Edit Panel, 87
HSL, 94
light levels, 91
noise, 98
Preview bar, 88
red-eye, 95
resizing, 100
RGB, 94
rotating, 103
saving images, 89
sharpness, 95
special effects, 104
Unsharp Mask, 96
using, 86
editing
database information, 123
images, 85
metadata, 124
editors
See image editors
emailing images, 166
embedded audio, 72
EXIF
adding to multiple images, 152
adding to the database, 130
printing, 179
viewing on Properties pane, 124
exporting database information, 132
exposure
Edit Mode, 90
multiple images, 146
Favorites, 35
file formats
associating with ACDSee, 10
converting, 139
supported types, 184
File List pane
about, 20
changing view modes, 26
custom sort, 29
filters, 26
full screen, 31
maximizing, 31
options, 30
selecting files, 29
sorting files, 28
using, 24
Index | 225
files
batch rename, 150
cataloging, 130
classifying, 127
opening in the Viewer, 58
pasting, 38
quarantining, 137
renaming, 39
replacing, 39
flipping
Edit Mode, 103
multiple images, 140
folders
creating, 34
excluding from database, 131
renaming, 39
synchronizing with the Viewer, 82
Folders pane
about, 20
Easy-Select bar, 34
options, 35
using, 34
full screen mode
File List pane, 31
Viewer, 58
gamma
adjusting in video, 70
automatically correcting, 14
generating file lists, 156
getting started, 7
Help system, 17
hiding
Edit Panel, 87
image text, 67
Selective Browsing pane, 163
images
acquiring, 47
adding audio, 72
adding noise, 98
adjusting colors, 93
adjusting exposure, 146
associating with ACDSee, 10
batch functions, 139
blurring, 96
brightness, 90
brightness curves, 92
color depth, 68
comparing, 152
copying, 38
cropping, 102
disabling animation, 14
editing, 85
emailing, 166
exposure, 90
finding all, 158
flipping, 104
light levels, 91
panning, 64
printing, 176
publishing to TiVo, 167
removing a color cast, 93
removing noise, 99
removing red-eye, 95
resizing, 142
resizing in Edit Mode, 100
rotating, 103
rotating and flipping, 140
setting as wallpaper, 81
sharpness, 95
supported file formats, 184
viewing, 58
zooming, 61
zooming automatically, 63
Image Basket
about, 20
using, 44
importing
albums, 135
database information, 133
descript.ion files, 135
photo discs, 134
image editors
configuring, 13
opening images in, 86
installing
ACD Media Support Package, 16
ACDSee, 5
HTML album, 172
226 | Index
keyboard shortcuts
Browser, 194
Viewer, 198
Viewer mouse, 202
keywords
searching, 159
using, 124
License Manager
See myACD
Magnifying Glass, 65
managing
file options, 36
folders, 34
keywords, 124
media files
adjusting gamma, 70
opening, 69
supported file formats, 188
metadata
definition, 217
editing, 124
mobile phone, 55
moving
files, 37
panes, 21
myACD, 15
Navigator pane, 65
noise
adding, 98
definition, 217
removing, 99
online prints, 180
opening
images in Edit Mode, 86
second instance of ACDSee, 6
options
File Management, 36
General, 14
Organize pane
about, 21
classifications, 126
customizing, 128
Image Well, 158
Uncategorized, 158
using, 125
panes
about, 20
Calendar, 41
customizing, 21
File List, 24
Folders, 34
Image Basket, 44
moving, 21
Organize, 125
Preview, 33
Properties, 123
resetting, 22
Search, 158
Selective Browsing, 161
stacking, 22
PDF, 169
plug-ins
about, 189
disabling, 190
viewing, 190
Preview bar, 88
Preview pane
about, 20
audio and video, 69
options, 33
using, 33
printing
about, 175
adding text, 179
contact sheet options, 177
images, 176
ordering prints online, 180
page settings, 179
printer options, 178
Properties pane
about, 20
using, 123
Viewer, 66
rebuilding thumbnails, 131
red-eye, 95
redo, 88
Index | 227
refreshing the Browser, 45
removable devices
about, 48
acquiring images from, 48
profiling, 52
synchronizing, 52
removing
files from classifications, 128
noise, 99
renaming
files, 39
folders, 39
multiple images, 150
while acquiring, 49
replacing a file, 39
resampling filters
about, 101
Viewer default, 59
resize results, 145
resizing
in Edit Mode, 100
multiple images, 142
restoring database, 137
rotating
Edit Mode, 103
multiple images, 140
scanner
See removable devices
screen capture
options, 56
taking, 55
screen saver
creating, 79
sharing, 168
Search pane
about, 21
Categories and Folders area, 160
Properties area, 160
Quick Search area, 159
using, 158
using file name patterns, 160
228 | Index
searching
about, 157
categories and folders, 160
duplicate files, 164
file properties, 160
instant searches, 158
selecting
files, 29
multiple folders, 34
part of a media file, 70
part of an image, 68
Selective Browsing pane
about, 21
hiding, 163
setting criteria, 162
tips, 163
using, 161
SendPix, 167
sharing
about, 165
CD or DVD, 170
contact sheet, 172
email, 166
HTML album, 172
PDF, 169
SendPix, 167
TiVo, 167
shortcuts
Calendar pane, 43
keyboard, 194
slide show
Auto Advance, 78
options, 75
sharing, 168
starting automatically, 77
viewing, 74
sorting files, 28
special effects
about, 104
Bathroom Window, 104
Blinds, 105
Bulge, 105
Colored Edges, 106
Contours, 107
Crosshatch, 107
custom, 120
Dauber, 108
Edge Detect, 108
Emboss, 109
Furry Edges, 109
Mirror, 110
Negative, 111
Oil Paint, 111
Pencil Drawing, 111
Pixel Explosion, 112
Pixelate, 112
Posterize, 113
Ripple, 113
Scattered Tiles, 114
Sepia, 115
Sheet Metal, 115
Shift, 116
Solarize, 116
Sunspot, 117
Swirl, 117
Topographic Map, 118
Wind, 119
starting
ACDSee, 6
ACDSee for the first time, 8
Auto Advance, 78
Device Detector, 51
slide shows automatically, 77
synchronizing
removable devices, 52
Viewer with a folder, 82
system administrator options, 203
system requirements, 4
technical support, 182
text
adding to printed pages, 179
displaying in Viewer, 66
thumbnails
customizing, 31
rebuilding, 131
time stamp, 148
TiVo, 167
tool presets, 87
toolbars
Browser, 22
Browser default, 191
Calendar pane, 41
Compare Images, 153
Context Sensitive, 22
customizing, 11
hiding, 11
Media player, 70
resetting, 12
Viewer default, 192
undo, 88
uninstalling, 5
updates
checking, 14
Help, 17
USB mass storage device
See removable devices
user interface
about, 8
customizing, 11
video
adjusting gamma, 70
associating file formats, 10
extracting frames as images, 71
playing, 69
playing automatically, 69
supported file formats, 188
view modes
changing, 26
customizing, 27
Viewer
about, 9
closing, 83
comparing images, 152
default toolbar, 192
displaying text, 66
file properties, 66
keyboard shortcuts, 198
Magnifying Glass, 65
mouse shortcuts, 202
Navigator pane, 65
opening files, 58
options, 59
Index | 229
panning images, 64
playing media automatically, 69
playing media files, 69
synchronizing to a folder, 82
zooming images, 61
viewing
full screen mode, 58
images, 57
images with Auto Advance, 78
organized files, 125
slide show, 74
wallpaper
automatically stretching, 14
creating, 81
restoring, 82
Welcome to ACDSee, 3
What’s This Help, 17
zooming
automatically, 63
images, 61
options, 64
setting a zoom level, 62
230 | Index
Notes
Notes
Notes
Notes