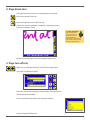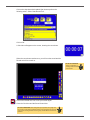
1
ACTIVprimary
Training Manual
COPYRIGHT INFORMATION
Activprimary Training Manual
Issue 1
© 2007 Promethean Limited. All rights reserved.
If this guide is distributed with Activprimary software, it may only be reproduced for use within the institution to which the software
is licensed. For use outside of your institution, no part of this guide may be reproduced, transmitted, stored in a retrieval system
or translated into any other language without the prior permission of Promethean Limited. Please note that the content in this
guide is protected under copyright law, even if it is not distributed with software that includes an end user licence agreement.
Please remember that existing artwork or images that you may want to include in your Activprimary projects
may be protected under copyright law. The unauthorized incorporation of such material into your flipcharts could
be a violation of the rights of the copyright owner; please be sure to obtain any permissions required.
Although every care has been taken in the compilation of this training manual, Promethean Limited accepts no responsibility
for errors or omissions, or for damages resulting from the use of information contained within the following pages.
Trademark acknowledgements
Promethean Limited would like to acknowledge the following trademark material:
Microsoft Word® word processing software and Microsoft Excel® spreadsheet software is a registered trademark of the
Microsoft Corporation in the United States and other countries.
Microsoft product screen shot(s) reprinted with permission from Microsoft Corporation.
Google™ search engine and Google Image Search™ search service are trademarks of Google Technology.
Contents
Introduction
5
1. Getting started i 9
2. Getting started ii 17
3. Working with text 27
4. Working with the Resource Library
35
5. Working with drawing tools
45
6. Working with images 53
7. Working with numbers
67
8. Working with other applications
79
9. Finishing your flipcharts
83
10. Working with presentation tools
91
Bonus tutorial: Activote
Activprimary
107
Training Manual
© 2007 Promethean Ltd
activprimary
Training Manual
© 2007 Promethean Ltd
Introduction
Welcome to �Activprimary Training Manual�. In this book we will introduce you
to some of Activprimary’s most important features, helping you to create
excellent Activboard lessons. We hope that these tutorials show you how
Activprimary can transform your classes, helping your students to learn more
effectively.
What are the benefits of using Activprimary?
Help with creating lessons
Activprimary has been created to help make preparing lessons easy.
Once you’ve designed your lesson, it can be refined, reused and
shared.
Help with teaching lessons
A range of presentation tools and techniques exist to help you make
your lessons more interesting and interactive.
Help with learning
By incorporating color, images and interactivity, lessons can be
tailored for your students’ needs, helping to keep them engaged in
what is being learned.
Note: This manual was written for Activprimary version 3 and above.
Activprimary
Training Manual
© 2007 Promethean Ltd
activprimary
Training Manual
© 2007 Promethean Ltd
Before you begin
In this manual we focus on Activprimary software. We assume that your
hardware is ready to use and that Activprimary is installed on your computer.
You can install Activprimary on the computer you use for preparing lessons as
well as the computer you use in class.
If you are learning how to use Activprimary away from your Activboard, you
can get started with the tutorials right away. Please turn to the first tutorial.
If you are learning Activprimary on an Activboard, here are some tips for your
day-to-day use of the board:
1. Using your Activboard
Turn on your Activboard before starting your computer. The power
indicator light, in the top-left corner of your board, should be
illuminated when the Activboard is turned on.��
When both your Activboard and your computer are fully started, hold
the Activpen lightly on the board, without pushing in the nib. The
cursor, on screen, should line up with the Activpen’s tip. If it doesn’t,
you need to calibrate the board.
2. Calibrating your Activboard
Hover the tip of your Activpen over the power indicator light, in the
top-left corner of your board. Be careful not to press in the Activpen’s
nib. Wait a few seconds then follow the instructions that appear on the
board.
Activprimary
Training Manual
© 2007 Promethean Ltd
Tips for using the Activpen
If this is the first time using an Activpen, try experimenting with the
techniques below:
The Activpen is just like a mouse.
Moving the cursor
Hold the pen nib lightly on the board; don’t push in the pen nib. Move
the pen around. The cursor will follow your pen.
Left-click
Tap the pen nib firmly but quickly into the Activboard.
Right-click
Hover the pen nib over the Activboard, less than one quarter inch
away from the board. Press the barrel button on the side of the pen.
Click and drag
Click on the object you want to move, hold the pen nib down on the
Activboard and then move the pen. The object you have clicked will
move with the pen.
Double-click
Two firm but quick taps with the Activpen’s nib performs the same
action as a double-click with a mouse.
activprimary
Training Manual
© 2007 Promethean Ltd
1. Getting started (i)
‘Flipchart’ is the name we give to an Activprimary presentation. Like a
traditional paper-based flipchart, an Activprimary flipchart can contain as
many pages as you want. However, unlike a traditional flipchart, you can
incorporate a number of different media forms into your flipcharts, including
sound files, videos, animations, interactive activities and web-links. The only
real limit is your imagination!
In this tutorial we will create your first flipchart page, giving you an instant
introduction to some of Activprimary’s most important tools.
1. Launching Activprimary
When your computer is turned on, you will see the Activprimary icon
on your display.
Double-click on the Activprimary icon with the Activpen.
Note: How to double-click
Two firm but quick taps with the Activpen’s nib performs the same
action as a double-click with a mouse.
Click OK, or the check, on any messages until you see Activprimary’s
Dashboard.
The Dashboard is your launch pad to open your files and organize
Activprimary just how you want it. When you have finished this
manual, explore the Dashboard for further training ideas and software
updates.
On the Dashboard, click on New Flipchart.
You’re ready to begin!
The Did You Know box may appear. Click OK.
Activprimary
Training Manual
© 2007 Promethean Ltd
Getting started (i)
2. Tool tips
A blank flipchart page opens.
On the right-hand side of your display is the Main toolbox. Across the
bottom of your screen is the Tool Tray.
Move the Activpen lightly on the Activboard without pressing in the pen
nib. The computer’s cursor will follow your movement.
If you hover the pen over one of the tools or buttons on the Main
toolbox a tool tip will appear.
Tool tips remind you of a button’s function. Hover over the tool shown
here. If using an Activpen make sure to keep the pen still.
You’ll see it is called the Pens, Highlighters and Erasers tool.
10
activprimary
Training Manual
© 2007 Promethean Ltd
Getting started (i)
3. Pens, Highlighters and Erasers tool
The Pens, Highlighters and Erasers tool is red, showing it is active.
To select a pen, click on one of the icons in the Tool Tray.
Write the word ‘Welcome’ at the top of the page. Don’t worry if you
don’t get it right first time, just move on to the next section.
4. Undo tool and Redo tool
Most changes made in Activprimary can be reversed.
Click on the Undo tool. This will reverse your last action.
Click on it several times. Your previous actions will be reversed.
Now click on the Redo tool. This will restore actions cancelled with the
Undo tool.
Click on the Redo tool until the full text appears on the page again.
Activprimary
Training Manual
© 2007 Promethean Ltd
11
Getting started (i)
5. Color palette
The color palette contains a range of colors for you to use. Click on
any color to select it. We have chosen blue.
Choose a different pen width by clicking on a different pen in the Tool
Tray.
Write ‘to’ underneath the word ‘�Welcome�’.
Change the color of the pen and width again.
Write ‘Activprimary’ at the bottom of the page. If you make a mistake,
just move on to the next section.
In the classroom:
Keep changing the pen
width and the colors
you use to help keep
your lessons colorful
and interesting. Let your
students pick their own color
when they write at the board.
6. Clear tool
Now we will show you one way to delete items.
Click on the Clear tool.
A menu will appear asking you what you want to delete. Select the
Clear Screen icon use tool tips to help if necessary. Everything will be
deleted from the page.
Click on the Undo tool to restore the text.
12
activprimary
Training Manual
© 2007 Promethean Ltd
��������������������
Getting started (i)�
7. Marquee Select tool
Click on the Marquee Select tool.
The Marquee Select tool is used to select and manipulate items on
the page.
Hover the cursor over the letter ‘�y� ’ of Activprimary until a cross
appears. The cross shows that the item can be selected. Click on the
letter. When you click correctly a box will appear, showing you what is
selected.
Your selection depends on how you wrote the word ‘�Activprimary�’.
8. Flipchart Trashcan
Click on the Flipchart Trashcan to delete the item.
The letters will disappear from the page.
The Flipchart Trashcan is another useful way to delete items from
the page.
Click on the Undo tool.
9. Eraser tool
You can also delete lines using erasers.
Click on the Pens, Highlighters and Erasers button.
Select one of the Eraser icons in the Tool Tray.
Draw over the word ‘�Welcome’� to make it disappear.
Click on the Undo tool to make the word reappear.
Activprimary
Training Manual
© 2007 Promethean Ltd
13
Getting started (i)
10. Highlighter tool
Before finishing this tutorial, we will show you one of Activprimary’s
most important presentation tools: the highlighter.
In the Tool Tray, select a Highlighter tool.
Select a color.
Write over the word ‘�Welcome�’ to highlight it.
In the classroom:
The Highlighter tool is
useful when presenting
text with your students.
Your students can take
control of the highlighter to
show you the key words in a
text.
You’ve already finished your first flipchart page!
11. Saving the flipchart
Before finishing this tutorial we will save the flipchart.
Click on the Teacher Tools Menu button and select Save a Flipchart.
Select Save to My Flipcharts
14
activprimary
Training Manual
© 2007 Promethean Ltd
��������������������
Getting started (i)�
A box opens containing your save options. The text in the ‘File name’
box is already selected.
Using your computer’s keyboard, type the name ‘Activprimary 1’ in the
‘File name’ box.
Make sure that you save to the My Flipcharts folder.
Click on Save.
Click on the Exit button to close Activprimary.
In the classroom:
With pre-prepared flipcharts, some teachers like to resave the flipchart
with a different name when the lesson is over. This gives them a record of
what students have learned, including the students’ own comments and
annotations. Resaved flipcharts are also useful for revision.
Summary
In this tutorial you created your first flipchart page using some
of Activprimary’s most important tools.
Activprimary
Training Manual
© 2007 Promethean Ltd
15
16
activprimary
Training Manual
© 2007 Promethean Ltd
2. Getting started (ii)
In the previous tutorial we showed you how you can launch Activprimary and
begin writing immediately in front of your class. As a comprehensive teaching
software, however, Activprimary offers many tools to help you prepare lessons
in advance. In this tutorial we will introduce you to Activprimary’s Design
Mode, showing you some time-saving techniques which are useful when
preparing multi-page flipcharts for your lessons.
1. Opening a previously saved flipchart
Launch Activprimary as you did in the previous tutorial.
In the Dashboard, your recent flipcharts are displayed under the
heading: ‘Open a recent flipchart’. Click on the flipchart ‘�Activprimary
1’�. to open it.
Click OK on the Did You Know box.
2. Design Mode and Presentation Mode
The Teacher Tools Menu button, at the top of the Main toolbox, is
yellow. This shows that you are currently in Presentation Mode.
Presentation Mode is best used when you are teaching in front of your
students.
Click on the Teacher Tools Menu button and select the Design Mode
button.
The Teacher Tools Menu button turns red. Design Mode is best used
when creating flipcharts. More design options are available and all
links are inactive.
Activprimary
Training Manual
© 2007 Promethean Ltd
17
3. Page selector
Currently your flipchart has just one page. To confirm this, click on the
Page Selector button, which shows the current page number.
The Tool Tray changes to show thumbnail images of all your flipchart
pages. At this point there’s just one thumbnail image in the panel.
4. Next Page button and Previous Page button
Click on the Next Page button.
This adds a new page to the end of your flipchart. There are now two
pages in the Page Selector panel. Page 2 is the active page.
In the classroom:
Spread exercises over
many pages in your
flipcharts, helping you
to control the pace of
the lesson.
Click twice more on the Next Page button to create two more pages.
In the Page Selector panel, click on the first page to make it active.
18
activprimary
Training Manual
Note: You can also
use the Previous
Page button to get
back to the first page.
© 2007 Promethean Ltd
5. Use the Marquee Select tool to select many items
Click on the Marquee Select tool.
We want to select all the words on the page.
To do this:
1.
Click on the page, to the top-left of all the items.
2. Click and drag diagonally to the bottom-right of all the items on
the page. A box will expand as you move, showing you what is
selected.
3. Release the Activpen or the left mouse button when everything
is selected..
A dotted rectangle and pick-up boxes will surround the letters,
showing that they have been selected.
Activprimary
Training Manual
© 2007 Promethean Ltd
19
Getting started (ii)
6. Pick-up boxes
Pick-up boxes are the boxes that surround selected items.
Clicking and moving these boxes changes the size and location of the
selected object.
Try moving these boxes to see what they do.
When you have finished, click on the Undo tool until the text is back to
its original state.
Make sure everything on the page is selected before moving on.
7. Duplicate button
Hover the cursor over one of the text’s lines until you see a cross.
Double-click on the text.
The Object Edit toolbox will open.
20
activprimary
Training Manual
© 2007 Promethean Ltd
The Object Edit toolbox contains many design options.
Click on the Duplicate button once to create a copy of the text. Don’t
click on the page yet.
8. Moving items between pages
The duplicated text will automatically be selected. Hover the cursor
over the text so that you see a cross. Click on the text and drag it to
the second thumbnail in the panel.
When you release the pen, a menu will appear with two options: Move
Here and Copy Here. In this case select Move Here.
Page two will become the active page. The text will be pasted here.
Note: Any moveable item on a page can be moved or copied onto other flipchart
pages in this way, helping you to create multiple pages in an instant.
Activprimary
Training Manual
© 2007 Promethean Ltd
21
Click and drag on the page to select the word ‘�Activprimary�’.
Click on the Flipchart Trashcan to delete this word, leaving you with
‘�Welcome to�’.
9. A closer look at pick-up boxes
Click and drag around the words ‘�Welcome to�’ to select them.
Click and drag on the bottom right pick-up box.
Note how this box changes the size but not the proportions of the text.
Shrink the text to around a half its original size.
22
activprimary
Training Manual
© 2007 Promethean Ltd
Click and drag on the Freely Move Object pick-up box. This box offers
one way to move items around the page.
Place the text neatly in the top-left corner of the page.
Don’t forget that the Undo tool is always available if you make any
mistakes.
10. Copying items between pages
With the whole text selected, drag the text over to page three. When
the menu appears, select Copy Here.
The text will be copied onto the page three thumbnail, which will
become the active page. Note, however, that when you select Copy
Here rather than Move Here, the text will also return to its original
position on page two.
Select the whole text again and copy it onto page four.
Activprimary
Training Manual
In the classroom:
Using this technique
you only have to find
one excellent image for
your lesson. You can
then repeat it many times over
many pages in your classes
as your students analyze
it using different colored
pens, highlighters or other
presentation tools.
© 2007 Promethean Ltd
23
Optional
To finish the flipchart we will use the headings from the introduction to
this manual.
On pages 2,3 and 4 of the flipchart, underneath the ‘�Welcome to�’ text
write the headings shown below. Take the opportunity to explore the
range of colors and pen widths available.
‘help with creating lessons’
‘help with teaching lessons’
‘help with learning’�
When you have finished, click on the Teacher Tools Menu button and
select Save a Flipchart.
Select Save to My Flipcharts
Give the flipchart the name ‘�Activprimary 2’�.
Click on Save.
Use the Previous Page and Next Page button to browse through the
four pages you have created.
Congratulations, you’ve created your first multi-page flipchart!
Click on the Exit button to close Activprimary.
24
activprimary
Training Manual
In the classroom:
Throughout this manual
we will show you ideas
on creating resources
from scratch. It can be
easier to take other people’s
flipcharts and edit them. Visit
www.prometheanplanet.com
for a range of ready prepared
flipcharts for you to adapt.
© 2007 Promethean Ltd
Summary
In this tutorial we showed you how to manipulate your text using
pick-up boxes. We also showed you how items on a page can
be copied and placed on a number of pages, making it easier to
create many pages in an instant.
Activprimary
Training Manual
© 2007 Promethean Ltd
25
26
activprimary
Training Manual
© 2007 Promethean Ltd
3. Working with text
With Activprimary it’s easy to create neat, typed text on an Activboard. Once
the text is on the page, you can manipulate it in many ways, making it easy to
create professional-looking, flexible lessons which can be repeated and refined
over time.
In this tutorial we will show you a range of text options available.
Launch Activprimary.
In the Dashboard, select New Flipchart.
Using the Pen tool, write ‘�Working with text’� towards the top of the
board.
Select the Marquee Select tool.
1. Text tool
To type text on the page, you just have to hover the cursor on the
page and start typing. We will demonstrate this now:
Click on the page, underneath ‘�Working with text�’.
Using your computer’s keyboard, type: ‘�creating typed text’�.
Note how the Text tool is automatically selected in the Main toolbox.
The Tool Tray changes to show options for editing text.
Activprimary
Training Manual
© 2007 Promethean Ltd
27
2. Text options
Click on the Current Font box. A menu will appear. Click on one of the
fonts to select a different font.
Click on the page under the previous text.
Type: ‘�Change font’�.
Note: Don’t worry if you realize that you’ve made a mistake in the text after
finalizing it on the page. We will show you how to correct text later in this tutorial.
In the Tool Tray, click in the field containing the number - the font size.
Click on the drop-down arrow and select 20. Press enter on your
keyboard.
Click underneath the previous text.
Type: ‘�Change font size’�.
28
activprimary
Training Manual
© 2007 Promethean Ltd
Click on the page beneath the text you just typed.
In the Tool Tray, select a different color.
Type: ‘�Change color’�.
Click on the Marquee Select tool and arrange your text boxes on the
page.
In the classroom:
Take full advantage of
the wide range of fonts
available to keep your
students interested in
what is being learned.
Click on:
for more fonts
3. Copying text styles
This section can only be done at a PC. Move on to the next section,
Editing text, if you are at an Activboard.
If you like the look of a text on the page, you may want to copy its
style to other text boxes. This is done using the Color Picker tool and
the Fill tool.
Select the Fill/Color Picker icon from the Main toolbox.
Click on the Color Picker icon in the Tool Tray.
Press the Ctrl button on your keyboard and, with the Ctrl key pressed,
click on one of the text boxes. In this way you copy the style of a text.
Activprimary
Training Manual
© 2007 Promethean Ltd
29
Click on the Color Picker icon again to deselect it. The Fill tool will now
be active.
Press the Ctrl key and click on all the other typed words on the page to
standardize their style.
Note: When using the text format painter, if the text increases in size some of the
text could disappear. If this happens, use the Marquee Select tool to change the
size of the text box, making the whole text visible.
4. Editing text
To edit any typed text on the page:
Click on the text with the Marquee Select tool selected, then quickly
click on the text again.
You need to get the correct technique for this to work. Click too slowly
and nothing will happen; click too fast and the Object Edit toolbox will
appear.
When you have clicked correctly, the Tool Tray will change to show the
text editing options.
Note: If the Object
Edit toolbox appears,
click on the Edit Text
tool to edit the text. This is an
alternative way to edit text.
Click and drag on the sentence to select it
Retype the sentence, or correct any sentences on the page.
Before moving on, rearrange the words, if necessary, using the
Marquee Select tool.
Leave space for another line of text towards the bottom of the page.
30
activprimary
Training Manual
In the classroom:
The recommended
minimum font for text
on a flipchart is 18.
© 2007 Promethean Ltd
5. Floating Keyboard tool
Click on the Text tool in the Main toolbox.
Click on the Floating Keyboard icon in the Tool Tray.
A floating keyboard will appear on the page.
In the classroom:
The floating keyboard
is useful if the computer
keyboard is a long way
from the Activboard or if
you want to get students up to
the board.
Note: Right-click on the
floating keyboard for an adult
keyboard.
You can move the floating keyboard around the page by clicking and
dragging on any area of the keyboard which doesn’t contain an icon.
With the Text tool still selected, click on the page beneath the
previous lines of text, to show where your text will begin.
On the floating keyboard, click on the caps lock button so that the
first letter you type will be upper case. When you’ve typed the first
letter, click on the caps lock button again and continue the phrase:
Clicking on the floating keyboard, type: ‘�Using the floating
keyboard’�.
Close the floating keyboard.
Note: How would you make
the text the same style as the
other pieces of text on the
page?
Use the Marquee Select tool to arrange the text.
Activprimary
Training Manual
© 2007 Promethean Ltd
31
6. Recognition tool
Select the text you wrote with the Pen tool: ‘�Working with text�’.
Click on the Flipchart Trashcan to delete it from the page.
Now, we will re-create this text using the Recognition tool.
The Recognition tool takes your handwriting and turns it into typed
text.
Click on the Special Tools icon.
In the Tool Tray, select the Recognition tool.
The Recognition toolbox opens above your Tool Tray.
IN THE CLASSROOM:
The Recognition tool is
great for putting names
on maps or diagrams.
Students love using
the Recognition tool – it
particularly encourages young
learners to write clearly.
In the panel headed ‘Write one or more words’, write the phrase:
‘�Working with text’�.
Click on the Verify Input button.
32
activprimary
Training Manual
© 2007 Promethean Ltd
If the text has not been correctly recognized, either click on the Start
Again button or use your keyboard to correct the text.
When the word has been correctly recognized, click on the Add To
Flipchart Page button.
Close the Recognition toolbox.
Use the Marquee Select tool to place the phrase neatly on the page.
Optional
To finish the flipchart, change the size of the words you just created
using the Recognition tool, turning them into a large title for this
flipchart. Experiment with other text options.
Save the flipchart, calling it ‘�Activprimary 3’�. Try using the floating
keyboard to do it.
Exit Activprimary.
Activprimary
Training Manual
© 2007 Promethean Ltd
33
Summary
In this text tutorial, we introduced you to many ways to put text
on a page. Starting with the Text tool, we showed you where to
find the Floating Keyboard if your computer’s keyboard is not
available.
You can use the Recognition tool to turn handwritten text into
typed text. The Edit Text tool is available when you want to
modify any text boxes you already have on the page.
34
activprimary
Training Manual
© 2007 Promethean Ltd
4. Working with the Resource Library
The Resource Library contains a huge range of images and other resources
for you to use in your flipcharts. It’s also the place to store any of your own
resources you want to save for future use. In this tutorial we will introduce you
to some of the Resource Library’s main features.
Launch Activprimary.
On the Dashboard, click on New Flipchart.
Using a Pen tool, write ‘Working with the Resource Library’.
If the Teacher Tools Menu button is not red, click on the Teacher
Tools Menu button and select Design Mode.
1. The Resource Library button
Click on the Resource Library button, which is located in the Main
toolbox, towards the bottom right-hand corner of the display.
2. Categories browser
The Tool Tray will change to include a thumbnails panel and a
Categories button.
Click on the Categories button. The Categories browser will open.
There are two main sections in the Categories browser:
Shared Resource Library and My Resource Library.
The Shared Resource Library area contains all the resources that
were installed with Activprimary. My Resource Library can be used to
store any resources you create yourself.
Make sure that the Shared button is selected.
Activprimary
Training Manual
© 2007 Promethean Ltd
35
3. Resource Tree
The Resource Tree is a list of all the available folders of resources.
Click on the plus signs to open up further subfolders.
Click on the minus signs to close the subfolders.
Click and drag down on the scroll bar to see further folders.
Click on a folder and any contents are displayed in the Tool Tray.
Click on the plus sign next to Animals, to open more subfolders.
Scroll down to look through the list of Animals folders. Click on the
Mammals folder.
Note: Different versions of
Activprimary contain different
Resource Library structures.
If your Resource Library structure is different to the one shown here,
browse through the folders to find a Mammals folder.
36
activprimary
Training Manual
In the classroom:
Thousands of
resources are available
for you to use. If you
don’t find the resource
you want here, don’t forget
that you can use the internet,
or your own resources, in your
lessons.
© 2007 Promethean Ltd
4. Resource Library Tool Tray
A number of images will appear in the Tool Tray.
Click on the More Images button to see the full range of images.
Click on the Previous Images button to return to the first images in the
folder.
Click one of the images in the thumbnails panel to place it on the
page.
Close the Categories browser.
Use the Marquee Select tool to reduce the size of the image.
Activprimary
Training Manual
© 2007 Promethean Ltd
37
5. Rubber Stamp
Select the Rubber Stamp tool.
Scroll through the thumbnails of animals. Click on an animal.
Don’t click on the page.
Note how the animal is attached to your cursor as you move it around
the page.
Click on the page three times, in different places.
Each time you click, another copy of the image will be added to the
page.
Click on the Rubber Stamp tool again to deselect it.
38
activprimary
Training Manual
© 2007 Promethean Ltd
6. Backgrounds
Click on the Backgrounds button in the Main toolbox.
Click on the Categories button in the Tool Tray.
In the Resource Tree, scroll down through the options.
Open the Scenes folder.
A number of backgrounds will appear in the Tool Tray.
Click on a background to add it to the page.
It will appear behind everything else on the page.
In the classroom:
A good background
really makes your
flipchart come alive.
One good background
can be used over many pages,
helping you to create a strong
visual impact for a topic.
Click on the Next Page button.
Activprimary
Training Manual
© 2007 Promethean Ltd
39
7. Shared Flipchart Pages
Click on the Resource Library button.
Click on the Categories button.
With the Shared button selected, select the Flipchart Pages button.
In the Resource Tree, the Flipchart Builder folder should be open.
The folders here contain a huge range of templates to help you create
professional-looking flipcharts quickly.
Explore the folders. Thumbnails of the pages will appear in the Tool
Tray.
Click on one of the thumbnails in the Tool Tray to add the page to your
flipchart.
Close the Categories browser.
Click on one of the template’s text boxes to change it.
Useful tools are often available on these pages. Click on the pen icons,
for example, to launch the Pen tool in your lessons.
40
activprimary
Training Manual
© 2007 Promethean Ltd
In the classroom:
Explore the templates here to help save lesson preparation time.
8. My Resource Library
Go back to the first page of the flipchart.
Click on the Resource Library button.
Select the Categories button.
In the Categories browser, click on the Personal button and the
Library button to access the main My Resource Library area.
This area of the Resource Library lets you organize and store your
own resources.
Now you’ve added some images to the page, you may want to store
them as one item in your area, so you have quick access to all of
them.
Click and drag around the images on the page to select them all.
Activprimary
Training Manual
© 2007 Promethean Ltd
41
Make sure you are in Design Mode.
Click and drag the images into the thumbnails panel.
A box appears headed: ‘Enter a name of this object’.
Type a name for the collection of images.
Note: Click on the
Floating Keyboard icon
if a computer keyboard
is not available.
Click on the Accept Your Input button.
A thumbnail of the collection of images will appear in the thumbnails
panel.
In the classroom: Using this technique you can save any resource
you want into the Resource Library. By building up this area of the
Resource Library, lesson creation can be simpler and more creative.
Remember to share your best resources with your colleagues.
42
activprimary
Training Manual
© 2007 Promethean Ltd
9. Resource Library folders
As your collection of resources grows, you will want to create your
own folders in the My Resource Library area.
Open the Categories browser.
Click on the Create New Folder button.
A box will appear headed: ‘Enter a name of your new category’.
Using your computer’s keyboard, give your folder the name ‘Training’.
Click on the Accept Your Input button.
Click on the Training folder. It should currently be empty.
You have laid the foundations of your own Resource Library structure!
Save the flipchart you created in this tutorial, giving it the name
‘Activprimary 4’.
Close Activprimary.
In the classroom:
When you’ve build up
your resources, create
your own Resource
Library structure,
to keep all your best ideas
instantly at hand.
Summary
We showed you the Resource Library and its wide range of
resources. We also demonstrated how the library can be used
to create and organize your own resources. This tutorial also
introduced you to backgrounds.
Activprimary
Training Manual
© 2007 Promethean Ltd
43
44
activprimary
Training Manual
© 2007 Promethean Ltd
5. Working with drawing tools
Clear, interactive graphs can be produced with just a few clicks in
Activprimary. In this tutorial we’ll show the range of options available for
drawing lines and shapes in Activprimary. We’ll bring them together to draw a
graph. While doing this we’ll show you some options which increase the colors
you can use in your flipcharts.
Launch Activprimary.
Open a new flipchart.
Using the Pen tool, write ‘Working with drawing tools’ on the page.
Click on the Next Page button.
We will use Presentation Mode in this tutorial. Make sure that the
Teacher Tools button is yellow.
Activprimary
Training Manual
© 2007 Promethean Ltd
45
1. Grids
Click on the Grids button.
In the Tool Tray, select the Categories button.
Make sure that the Shared button is selected.
A number of folders should appear in the Resource Tree.
Make sure that Shared Grids is selected in the Resource Tree.
Click on the grid shown here and to add it to the page.
Close the Categories browser.
Using this grid, we will draw a bar chart.
In the classroom: Grids are useful both when creating charts and
when designing lessons, helping to arrange items on a page.
When you’ve finished the page, make the grid invisible using the
Grid Mask tool.
2. Snap to Grid
When using grids, the Tool Tray contains options to increase or
decrease the grid’s size, and to delete the grid from the page. We will
now explore another option: select the Snap to Grid tool.
The Snap to Grid tool is an important design tool.
Now, when you draw lines or move any item on the page they will
automatically line up with the grid. This helps to create neat flipcharts.
46
activprimary
Training Manual
In the classroom: Using
Snap to Grid is great when
working with students whose
motor skills are not fully
developed. Snap to
Grid lets them line up
pictures in a pictogram
or blocks in a block
graph neatly.
© 2007 Promethean Ltd
3. Pen Modifier toolbox
Click on the Pens, Highlighter and Erasers tool.
Click on the Pen Modifier toolbox icon in the Tool Tray.
The Pen Modifier toolbox will open. This contains a range of tools for
drawing lines and shapes. Using the tools in this box we will draw a
bar chart.
Click and drag on the blue area to move the toolbox to the top right of
the page.
4. Horizontal Line tool
Click on the Horizontal Line tool. Select an appropriate pen thickness
and color for the axes of a graph. Click and drag a horizontal line on
the bottom of the flipchart page. As you are using Snap to Grid, the
axis lines up perfectly with the grid. This will be the bottom axis of the
chart.
Activprimary
Training Manual
© 2007 Promethean Ltd
47
5. Vertical Line tool
Click on the Vertical Line tool. Draw the vertical axis for the bar chart.
Close the Pen Modifier toolbox.
6. Shapes tool
Click on the Shapes button in the Main toolbox. Click on the yellow
color. Click on rectangle to add it to the page.
Move the rectangle to its own space.
Add two more rectangles to the page, changing the color each time.
Place the rectangles on the horizontal axis, changing its length if
necessary.
You’ve finished the bar chart!
Now we’ll show you some color options when working with
Activprimary.
48
activprimary
Training Manual
© 2007 Promethean Ltd
7. Fill tool
The Fill tool lets you add blocks of color to the page. We will use the
Fill tool to change the color of one of the rectangles.
Click on the Fill/Color Picker tool in the Main toolbox.
Click on blue in the Color Palette.
Click inside one of the shapes to fill it with color.
In the classroom:
Students enjoy using
the Fill tool to add
blocks of color instantly
to a page. This can
make any lesson instantly
more creative. You can always
use the Undo tool if you don’t
like the result.
8. More color options
For more color options, right-click on one of the blank color swatches.
Select a color from the box which appears.
The color in the Color Palette will change to show the color you have
chosen.
The Fill tool is still active. Click on one of the rectangles to change its
color to your chosen color.
Activprimary
Training Manual
© 2007 Promethean Ltd
49
9. Color Picker tool
The Color Picker tool lets you select any color you want from an image
on the page.
Open the Resource Library and put any colorful image you like onto
the page.
Click on the Fill/Color Picker icon.
Select the Color Picker icon in the Tool Tray.
Select one of the blank color swatches.
Click on the image you added to the page.
Its color will be placed in the swatch.
Deselect the Color Picker tool.
Click on one of the rectangles to change its color to the one selected
with the color picker
Save the flipchart with the name ‘Activprimary 5’.
Exit Activprimary.
50
activprimary
Training Manual
In the classroom:
Once you’ve created
a chart, save it to the
Resource Library so
you don’t have create
it again.
© 2007 Promethean Ltd
Optional
Explore the color, text and image options to complete the graph.
Summary
In this tutorial we showed you how to create a graph using
Activprimary. We introduced you to the Pen Modifier toolbox
and showed a number of different options when working with
color.
Activprimary
Training Manual
© 2007 Promethean Ltd
51
52
activprimary
Training Manual
© 2007 Promethean Ltd
6. Working with images
Used with the internet and other sources of images, Activprimary opens up
many possibilities, making your classes more colorful and more in tune with
your students’ lives. Using the techniques described in this tutorial, you can
take any image you want and place it in your flipcharts.
Note: You will need to be connected to the internet for some of this tutorial.
Launch Activprimary.
In the Dashboard, click on New Flipchart.
We will begin this tutorial using Design Mode. If the Teacher Tools
Menu button is yellow, click on the button and select Design Mode
from the Teacher Tools menu.
Using the Pen tool, write ‘Working with images’ on the flipchart.
Click on the Next Page button.
To demonstrate the ways you can work with images, we will use the
Resource Library.
Click on the Resource Library button.
Click on the Categories button to open the Categories browser.
Make sure the Shared button is selected.
Activprimary
Training Manual
© 2007 Promethean Ltd
53
Using the Resource Tree:
Click on the arrow next to Shared Images to view all the available
folders.
Open the Animals subfolder and click on the ‘Mammals’ folder.
Note: Different versions of
Activprimary contain different
Resource Tree structures.
1. Stacking
Click and drag on any image to add it to the page.
Add two other animals to the page. Place the animals roughly on top of
each other, as shown in the image. Note how the last image you add to
the page appears on top of the other images.
Close the Categories browser.
There are three layers in Activprimary: bottom, middle and top. All
images – such as the animals in this case – are placed on the middle
layer.
You can change this order of these images:
54
activprimary
Training Manual
© 2007 Promethean Ltd
Right-click on the last animal you added to the page.
Select To Back.
The image will now appear beneath the other animal images.
Note that you’ve changed the order of the images, but they all
remain on the middle layer. Working with images in this way is called
stacking. It becomes important when arranging lots of images and text
boxes on a page.
Note: You can also use the Object To Front and Object To Back
button, in the Object Edit toolbox, to change the stacking order of
images.
2. Layers
Click on the Shapes button.
Click on the Categories button to open the Categories browser.
Click on Shared Shapes in the Resource Tree.
Click on the rectangle in the Tool Tray to add it to the page three
times. Give each rectangle its own space.
Close the Categories browser.
Activprimary
Training Manual
© 2007 Promethean Ltd
55
When shapes are placed on the page, they are also put on the middle
layer. As we create this exercise, we want to be sure that the shapes
will all be above any animals on the page.
Right-click on a rectangle.
Select Top Layer.
Repeat for the other two rectangles.
Using pick-up boxes, change the images’ size and move each one into
its own space. Cover each image with a rectangle.
You’ve used layers to create a basic ‘guess what?’ exercise.
In the classroom:
This technique is the
basis of a huge range
of interactive exercises.
You can hide the
answers to questions, or hide
the next part of an exercise,
letting you choose the moment
when students are given the
answers.
When you want to show a student an animal as part of a classroom
exercise you could just move the rectangle, or you could use the
following technique:
Right-click on a rectangle.
From the menus, select Bottom Layer.
56
activprimary
Training Manual
© 2007 Promethean Ltd
The rectangle will now appear behind the animal.
Click on the Next Page button.
Click on the Backgrounds button.
Click on the Categories button to open the Categories browser.
Select the Shared icon.
Use the Resource Tree to find any background you like.
Add it to the page.
Note: Backgrounds cannot
be selected. To delete them,
use the Delete button in the
Backgrounds Tool tray.
Such backgrounds appear on a layer of their own, and always appear
behind everything else on a page.
Click on the Resource Library button. The previous folder you used
should still be selected.
Add one animal to the page. Place it in the center of the page.
Activprimary
Training Manual
© 2007 Promethean Ltd
57
3. Increase Object Size button and Decrease Object Size button
You can change an item’s size using the Increase Object Size button
and the Decrease Object Size button.
Double-click on the animal to open the Object Edit toolbox.
Click on the Duplicate button two times to create a total of three copies
of the image.
Move each animal into its own space. Open the Object Edit toolbox
again on one of the animals.
Click on the Increase Object Size button. The size of the object will
increase by 10%.
Click on the Decrease Object Size button three times.
Change the size of the other images so they are all different.
Close the Object Edit toolbox.
Note how stacking makes each copy appear on top of the previous
one.
Using pick-up boxes, create a group of images similar to the one
shown here.
58
activprimary
Training Manual
© 2007 Promethean Ltd
4. Mirror
We want a copy of the animal to face the other way.
Right-click on an image. Select �Mirror in Y Axis�.
Using the Marquee Select tool, place the image neatly on the page.
Activprimary
Training Manual
Note: Other right-click
options help you create flipped
images of your pictures.
© 2007 Promethean Ltd
59
5. Grouping
Currently, all the images appear as individual items. We want them
all to exist as one item, so it is easier to move and manipulate them in
future. To do this we will group the images.
Using the Marquee Select tool, click and drag to select all four images.
Click on the Grouped icon.
Now you can click and drag on the images as one item, making then
easier to manipulate.
In the classroom:
When you’ve finished
any diagram which
includes many
resources, group it and
save it to the Resource Library
so you don’t have to create it
again.
6. Using images from the internet
Click on the Next Page button.
Until now we’ve shown you how to use images from the Resource
Library. The internet is always available, however, if you can’t find an
image you want in the Resource Library. If you find an image you like
on the internet, store it in your part of the Resource Library so you can
use the image as often as you want.
Click on the Teacher Tools Menu button.
Select the Web Browser icon.
In the Address bar, type ‘www.google.com’. Click Enter on your
keyboard.
In the Google web page, click on Images.
60
activprimary
Training Manual
© 2007 Promethean Ltd
In the search field, type ‘�elephant’�.
Click on Search Images. As you will see, while the Resource Library
contains many images, the internet infinitely increases the number of
images you have available.
Click on an image you like.
Select ‘See full-size image’ to see the full image.
7. Camera tool
When you’ve found an image you like, click on the Special Tools icon.
Select the Camera tool in the Tool Tray.
A Camera toolbox appears on the page.
Click on the Define Rectangular Area button.
A marquee and a set of pick-up boxes appear on the page along with
a Photograph toolbox.
Activprimary
Training Manual
Note: You can use the arrow
keys on your keyboard to move
the marquee.
© 2007 Promethean Ltd
61
Click and drag on the boxes to surround your chosen photo.
When ready, click on the To Current Flipchart Page button.
The image will be sent to the current page of your flipchart.
Close the Web Browser. Close the Camera toolbox.
The elephant image should be on the page.
Using the Marquee Select tool, place the image neatly on the page.
62
activprimary
Training Manual
Note: You can use the
Camera tool to take a
snapshot of any image on your
screen, including images from
your own digital camera.
© 2007 Promethean Ltd
8. Lock
Using the Previous Page button, go back to the second page of the
flipchart, containing the three rectangles.
With the Marquee Select tool selected, right-click on one of the
rectangles which still covers an animal.
Select Lock.
In Design Mode the rectangle is not locked; it is locked in Presentation
Mode.
Before moving on, save the flipchart with the name ‘�Activprimary 6’�.
We will now demonstrate how the Lock feature has affected the
rectangle.
Click and drag on the rectangle; it should move. Place it back over the
animal.
Enter Presentation Mode.
Now, click and drag on the shape. The animal will be dragged from
behind the rectangle. The rectangle, however, is locked in place.
In the classroom:
Place many images or text boxes behind one locked image to create the
‘resource bucket’ presentation technique. Students click and drag items
from the bucket. Items can include coins from a purse; questions from a
question bank; images to be discussed etc.
Activprimary
Training Manual
© 2007 Promethean Ltd
63
9. Page Reset button
Click on the Teacher Tools Menu button.
Click on the Page Reset button.
The flipchart will return to how it was when it was last saved.
In the
classroom: The
Reset Page button is
the teacher’s life-saver.
As long as you have
previously saved the flipchart,
you can always click on the
Page Reset button to restart
an exercise or to have another
try at explaining something.
10. Lock on background
Enter Design Mode.
So far we have worked with two of the rectangles. Right-click on the
remaining rectangle.
Select Lock on Background.
The rectangle will be placed on the bottom layer, making the image
visible.
You won’t be able to move the rectangle in either Design Mode or
Presentation Mode, but you will be able to move the animal.
64
activprimary
Training Manual
© 2007 Promethean Ltd
To move the rectangle, right-click and select Unlock All
Background Objects.
In the classroom:
When preparing lessons, use Lock on Background on any images or text
boxes you won’t be moving in the lesson. This makes it easier to work with
your flipchart in lessons, so you won’t accidentally move the item while
teaching.
Save the flipchart, overwriting the previous ‘�Activprimary 6’�.
Close Activprimary.
Summary
We showed you a number of ways to manipulate images. We
also introduced you to the Camera tool, showing you how it can
be used to take snapshots of any image you have on screen.
Remember to take copyright issues into account when taking
any resources from the internet.
Activprimary
Training Manual
© 2007 Promethean Ltd
65
66
activprimary
Training Manual
© 2007 Promethean Ltd
7. Working with numbers
Activprimary contains a number of tools to help you work with numbers. We’ve
been very broad in our definition of number tools, however, so the tools in this
tutorial can be useful for teaching many subjects.
Launch Activprimary. On the Dashboard, click New Flipchart.
Using the Pen tool, write ‘�Working with numbers’� at the top of the
flipchart.
Click on the Next Page button.
Using the Pen tool, write: ‘�Rulers and protractors’� at the top of the
page.
1. Ruler tool
Click on the Special Tools button.
Click on the Ruler tool in the Tool Tray.
A menu will open showing different units of measurement.
Select cm.
A ruler appears on the flipchart.
Activprimary
Training Manual
© 2007 Promethean Ltd
67
Click on the Marquee Select tool.
Hover your cursor over the ruler just below the measurements.
The cursor will change to include a cross.
This means that you can move the ruler. Move the ruler to the bottom
of the screen.
Move the cursor towards the top of the calibrated area and the cursor
will change again. This means you can rotate the ruler.
Rotate the ruler.
The degree of rotation is displayed in the center of the ruler.
Rotate the ruler back to 0º.
In the classroom:
The Ruler tool, and
similar tools, offer an
ideal way for teachers
to model mathematical
concepts.
68
activprimary
Training Manual
© 2007 Promethean Ltd
2. Math toolbox
Double-click on the ruler to open the Math toolbox.
Click on the Increase Object Size button until the ruler is over 16
centimeters long.
Close the Math toolbox.
3. Using the ruler
Click on the Pens, Highlighters and Erasers tool, and select a thin pen
width. Move the cursor to just above the top ruler line. The pen cursor
should change to include a line. This means any line you draw will
follow the edge of the ruler.
Move the cursor to the zero point on the ruler, then click and drag to
the right. Draw a line 16 centimeters long.
Hover the cursor towards the top of the calibrated area and rotate the
ruler to 40º above the first line.
Activprimary
Training Manual
© 2007 Promethean Ltd
69
From zero, draw another 16 centimeter line.
Drag the zero point of the ruler to the end of the second line.
Rotate the ruler so you can complete the triangle.
Draw another line with the ruler to make a triangle.
Double-click on the ruler to open the Math toolbox.
Click on the Delete button to delete the ruler from the page.
Note: Experiment with the Point to Point tool, in the Pen Modifier toolbox,
for another way to create triangles.
70
activprimary
Training Manual
© 2007 Promethean Ltd
4. Protractor tool
Select the Special Tools icon.
Click on the Protractor icon in the Tool Tray.
Select Half Protractor.
A protractor will appear on the page.
As with the ruler, the protractor has several regions which do different
things.
If you hover the cursor over the inner area of the protractor, the
cursor will change signifying that you can click and drag it around the
flipchart.
Move the protractor so you can measure one of the angles.
Activprimary
Training Manual
© 2007 Promethean Ltd
71
Like the ruler, you can also rotate the protractor by clicking on the
outer areas and dragging. Rotate the protractor and measure the top
angle.
5. Creating filled segments
Double-click on the protractor to open the Math toolbox.
Click on the Decrease Object Size button until the protractor is small
enough just to fill one corner of the triangle.
Close the Math toolbox.
Click on the Pens, Highlighters and Erasers tool. Select a thin pen
width.
Now, with the pen, draw a line around the curved edge of the
protractor as you did with the ruler.
When you have finished, however, a filled segment will be created.
Move the protractor and draw two more segments in the other angles,
changing the pen color each time.
72
activprimary
Training Manual
© 2007 Promethean Ltd
When you have finished, delete the protractor from the page using the
Math toolbox.
In the classroom:
Teachers like to create filled segments in this way in Math lessons so they
can move the segments together to show how the three angles of the
triangle add up to 180º. Similar techniques can be used to demonstrate
that alternate angles or opposite angles are equal.
Click on the Next Page button.
Using the Pen tool, write ‘Compasses and the XY Origin Tool’ on the
page.
6. Compass tool
Click on the Special Tools icon.
In the Tool Tray, click on the Compass tool.
A compass appears on the page.
Activprimary
Training Manual
© 2007 Promethean Ltd
73
Click and drag on the top of the compass or the point arm to move the
compass to the center of the page.
Click and drag the pen arm, but not the pen, to rotate the compass
without drawing a circle.
Click on the pen holder to open and close the compass points.
Click and drag on the pen and draw a full circle.
Double-click on the compass to open the Math toolbox.
Click on the Delete icon to delete the compass from the page.
In the classroom:
If you ever need a
circle on the page, the
compass is the tool to
use.
74
activprimary
Training Manual
© 2007 Promethean Ltd
7. XY Origin tool
Click on the Marquee Select tool and click on the circle to select it.
Click and drag on the Rotate Object pick-up box.
Note how the circle rotates on the spot.
Next we will show you how you can change the rotation point of an
item on the page.
The Special Tools icon should still be selected.
Click on the XY Origin icon in the Tool Tray
An icon appears on the page. This is the page’s center of rotation.
Everything will now rotate around this point.
Move the XY Origin towards the left of the page.
Activprimary
Training Manual
© 2007 Promethean Ltd
75
Using the Marquee Select tool, select the circle and click on the Rotate
Object pick-up box.
in the classroom:
The XY Origin tool is
particularly useful when
demonstrating rotation
in math lessons.
Rotate the circle and note how the circle now rotates around the icon.
Click on the XY Origin icon in the Tool Tray to turn the tool off.
Click on the Next Page button.
8. Dice tool
Using the Pen tool write on the page ‘�Dice, the floating calculator and
fractions’�.
Click on the Special Tools icon.
Click on the Dice tool.
The Dice Roller box appears.
Select the number of dice you want to roll using the drop-down arrow.
76
activprimary
Training Manual
© 2007 Promethean Ltd
Click on the Roll the Dice button.
In the classroom:
While the Dice tool is
most obviously used in
the place of real dice, it
is also, more generally,
a useful random number
generator. Teachers, for
example, use the dice to help
them decide who will answer
the next question, or to decide
which question should be
answered next. Put a student
in charge of the Roll the Dice
button.
An animation will show the dice rolling.
Click on the Add Dice Total to Flipchart Page button to put the total
number on the page.
Close the Dice Roller before moving on.
9. Floating calculator
Click on the Floating Calculator button.
The floating calculator works just like the floating keyboard.
Right-click on the calculator for a menu showing an option to display
an adult calculator.
Another option lets you add the calculation to the flipchart.
Close the floating calculator before moving on.
In the classroom:
The ‘Add Calculation to Flipchart Page’ feature is great when used with a
page of equations - for example multiplications and number boards.
Activprimary
Training Manual
© 2007 Promethean Ltd
77
10. Fraction Creator toolbox
The last number tool in this tutorial is the Fraction Creator toolbox.
With the Special Tools icon selected, click on the Fraction Creator
Toolbox icon
note: This tool will only
work if a board or slate are
connected to your computer
The Fraction Creator toolbox offers a way to put fractions on the page.
You can create fractions comprising numbers, letters or both numbers
and letters.
Using the Pen tool, write the number ‘�1’� in the top box and the number
‘�2’� in the lower box.
Click on the Add to Flipchart Page button and the fraction will appear
on the flipchart – you might have to move the Fraction Creator toolbox
to see it.
Close the Fraction Creator toolbox when you have finished.
Save the flipchart with the name ‘�Activprimary 7’�.
Close Activprimary.
Summary
In this tutorial we showed you some tools which help when
working with numbers.
78
activprimary
Training Manual
© 2007 Promethean Ltd
8. Working with other applications
When using Activprimary, you don’t have to work with flipcharts. Activprimary
lets you work directly with other applications at the Activboard. In this tutorial
we will show you three ways in which you can interact with other programs.
Launch Activprimary. Close the Dashboard.
1. Transparent flipcharts
Click on the Desktop Mode button.
The flipchart disappears and Activprimary’s Desktop toolbox appears
on the desktop.
Click on the Pen tool and write ‘�Working with other applications’� on
your desktop.
In this way you can annotate any item on your display.
Activprimary
Training Manual
© 2007 Promethean Ltd
79
Click on the Marquee Select tool.
Now you can click on the text and move it around the display.
With the Marquee Select tool, however, you can click through the
transparent flipchart onto the display. Click on your desktop and open
any application.
The application will open. Your text will stay on the invisible flipchart,
on top of the application.
You can use the application while the transparent flipchart covers your
screen.
Before moving on, close any windows.
Click on the Clear Screen button in the Desktop toolbox.
80
activprimary
Training Manual
In the classroom:
This technique is most
useful showing live
demonstrations of the
software. Use it to
annotate an image of your
students’ work or to introduce
students to a computer
program.
© 2007 Promethean Ltd
2. Using the Floating Keyboard
In this example, we will show you how to use Activprimary with Word®.
The same technique can be used with many programs.
Launch Word®, open a blank page.
Click on the Floating Keyboard tool.
Click in the Word® document to activate it. You can now use the
Floating Keyboard to type in the Word® document.
Write: ‘�Typing in a document’�.
Press Enter on the Floating Keyboard.
Close the Floating Keyboard when you have finished.
Activprimary
Training Manual
© 2007 Promethean Ltd
81
3. Using the Recognition tool
You can use the Recognition tool, also, to work with other applications
Set the Recognition tool:
1.
Click on the Recognition icon.
2. In the Recognition toolbox, click on the Recognition Mode icon
until you see the icon for recognizing letters.
3. Click on the Add Space button in the Recognition toolbox.
note: This tool will only
work if a board or slate are
connected to your computer
Write the word ‘�Writing’�. Wait for it to be recognized. It will be placed in
the document and a space will automatically added so you can add the
next word.
Use the Alternatives button if the word is not recognized correctly.
Write: ‘�in’�
Write: ‘�a’�
Write: ‘�Word’�
Write: ‘�document’�.
When you have finished, close Word® and close Activprimary without
saving any changes.
Summary
In this tutorial we showed you two ways you can work with other
applications. You can use transparent flipcharts to write over
your desktop. Alternatively, you can use the floating keyboard
and the Recognition tool to write in other programs.
82
activprimary
Training Manual
© 2007 Promethean Ltd
9. Finishing your flipcharts
In the first part of this tutorial we will look at the page organizer, showing you
how it can be used to copy or delete pages. Later in this tutorial we will focus
on links, which are another useful final touch to add to a flipchart. You can link
to videos, sound files, Word ® or Excel® documents and to many other types of
file.
We will then demonstrate how you can print your flipchart, so students perform
the same exercise on their desk that they see on the Activboard. Finally, we will
show you how to add page notes to a flipchart.
Note: You need to be connected to the internet for some of this tutorial.
Launch Activprimary.
Click on New Flipchart.
We will use Design Mode in this tutorial: if the Teacher Tools Menu
button is yellow, click on the Teacher Tools Menu button and select
Design Mode.
Using the Pen tool, write the following headings over four pages.
‘Page Organizer’
‘Create Links’
‘Printing’
Activprimary
Training Manual
© 2007 Promethean Ltd
83
‘Page Notes’
Make sure you are on page 1 of your flipchart before moving on.
1. Inserting pages
Click on the Marquee Select tool.
Right-click on the page and select Insert Page Before Current Page.
On this page, use the Pen tool to write ‘Inserting pages’.
In the classroom:
This is useful when you are using your flipchart at the board. You may
want to insert an extra page to give further explanation of a subject. Note,
however, that right-click menus are only available in Design Mode.
84
activprimary
Training Manual
© 2007 Promethean Ltd
2. Page Organizer
Click on the Page Selector button.
In the Tool Tray, click on the Page Organizer button.
You will now be able to see thumbnails of all your pages. A Page
Organizer toolbox is also available.
Select a page and click on the Duplicate button in the Page Organizer
toolbox.
You can rearrange the order of the pages by clicking and dragging the
page into the place you want.
Drag the new page so that it is the third page in the sequence.
Activprimary
Training Manual
© 2007 Promethean Ltd
85
Select this page and click on the Delete button to delete it.
When you have finished, click on the third page: Create links.
Click on the button called: ‘Close and go to selected page’.
In the classroom:
If you create a page
layout that’s going to
be used on several
pages, create it once
then duplicate the page in the
page organizer.
3. Create a link
Right-click on the page.
From the menu, select Insert Link Object.
From the menu, select Web Site Link.
86
activprimary
Training Manual
© 2007 Promethean Ltd
A box will open called the Create a Link Object box. Type ‘�www.
prometheanworld.com’� in the box headed: ‘Enter a Web Site link to’.
Click on OK.
Select the Marquee Select tool. You are in Design Mode, so the link is
not active. Click on the text. Move it to the center of the page.
Click again and change the text to: Promethean.
Enter Presentation Mode.
Now when you hover the cursor over the link, an arrow will appear
showing that it is active.
Click on the link to launch the website.
In the classroom:
Creating links in this
way means you can
display the exact web
page you want at the
precise part of the lesson you
want.
Close the web browser before moving on.
Note: This is just one way to create links. For other ways to create links to
documents, or links to other pages in your flipchart, see our Further Skills manual
or consult the help files.
Activprimary
Training Manual
© 2007 Promethean Ltd
87
5. Printing
Click on the Next Page button to get to the page headed: ‘�Printing�’.
When you have finished a flipchart, containing interactive exercises
for your students, you may want to print out some pages, to create
handouts.
Click on the Teacher Tools Menu button.
Select the Print button.
A range of options are available here. When you have decided how
you want to print your flipchart, click on the Print button if you want to
print the flipchart. Otherwise select Cancel.
Click on the Next Page button.
88
activprimary
In the classroom:
Print out your flipcharts
to create handouts for
exercises, homework
or revision.
Training Manual
© 2007 Promethean Ltd
6. Page Notes tool
Page notes are an essential final touch for any flipchart if you intend
to reuse or share it. When you’ve carefully prepared a flipchart and
then returned to it a few months later, you’ll soon find out why they are
essential! The same applies when you want to find out how someone
else’s flipchart works.
You can add page notes to every page of a flipchart. We recommend
that you, at least, add page notes to the first page of a flipchart.
Click on the Teacher Tools Menu button.
Click on the Page Notes button.
The Page Notes box appears.
Write notes for this flipchart here, such as:
‘This flipchart can be used to introduce some important final touches
to flipcharts’�.
When you close the box your page notes will automatically be saved
with the flipchart. An icon will be placed on the page so you know
notes are available. Click on the icon to open your Page Notes.
Save the flipchart as ‘�Activprimary 9’�.
Exit Activprimary.
Summary
In this tutorial we showed you how to delete and copy pages
using the page organizer. We explained how to create links on
your flipcharts, we showed you how to print your flipcharts and
introduced you to page notes.
Activprimary
Training Manual
© 2007 Promethean Ltd
89
90
activprimary
Training Manual
© 2007 Promethean Ltd
10. Working with presentation tools
Activprimary contains many tools which help you to make your flipcharts more
interesting and interactive when you are teaching with your students.
In this tutorial we will show you some of Activprimary’s presentation tools,
demonstrating how you could use these tools to give focus and pace to your
lessons.
Launch Activprimary. Open a new flipchart.
Using the Pen tool, write ‘Presentation tools’ on the flipchart.
1. Gesture tools
Activprimary’s Gesture tools are designed to help make working at an
Activboard easier. We will show you one useful option here but you
will need to experiment with the settings to make Gesture tools fit with
your style of working with an Activpen and an Activboard.
Click on the Teacher Tools Menu button.
Click on the Menu button and select Settings. The Activprimary
Settings box will open.
Activprimary
Training Manual
© 2007 Promethean Ltd
91
Click on Gesture Wheel in the left-hand section.
Check the box headed Enable Gestures. This turns on the Gesture
tools.
In the Gesture list you can currently see three of the set gestures:
10 Pen Tool On/Off
30 Next Page
50 Color Selector
In the classroom:
Many gestures and
actions are available
here. You could use
a gesture to turn the
page or to open Page Notes.
Scroll down the list and you will see one more set of gestures:
70 Previous Page
Note: You can assign any action in the Action list to gestures in the Gesture list.
Click OK to return to the flipchart.
Now, if you look carefully at your cursor, you’ll see it’s surrounded by
dots. This is a guide to show you how to perform the gesture:
92
activprimary
Training Manual
© 2007 Promethean Ltd
While doing the gesture you should hold the Activpen close to the
board. Don’t touch the board with the Activpen.
1. Hold the cursor still.
2. Move your Activpen to the top dot and back to its starting point.
When you perform the gesture correctly the pen will be selected.
Try experimenting with the Gesture tool using the other three dots
before moving on.
Click on the Teacher Tools Menu button.
Click on the Menu button and select Settings. The Activprimary
Settings box will open.
Click on Gesture Wheel in the left-hand section. Uncheck the Enable
Gestures box.
Click OK.
Activprimary
Training Manual
© 2007 Promethean Ltd
93
2. Page Zoom tool
The Page Zoom tool can be use to magnify parts of your page.
Click on the Special Tools icon.
Select the Page Zoom tool in the Tool Tray.
Click on the word ‘Presentation’ to magnify it. Hold the pen on the
board as it increases in size.
IN THE CLASSROOM:
Use the Page Zoom
tool to focus in on a
particular part of the
flipchart. When the
Page Zoom tool is selected,
you can also move the page
by clicking and dragging.
Double-click on the page to return to the page’s original size.
3. Page turn effects
Right-click on either the Next Page or the Previous Page button.
The Page Turn Effect box opens.
In this box you can tell Activprimary how you want your pages to turn.
Various effects are available.
Click on the Effect drop-down arrow and select Random.
Close the Page Turn Effect box.
94
activprimary
Training Manual
© 2007 Promethean Ltd
Click on the Next Page button.
The page turn effect will be applied. You might like to fill the pages
with different colors while you are experimenting with the effects, to
see the transition from one page to another more clearly.
When you finish, return to the first page of your flipchart.
4. Reveal tool
Click on the Special Tools icon.
In the Tool Tray, click on the Reveal tool.
Your page should become blank.
Activprimary
Training Manual
© 2007 Promethean Ltd
95
Click on the Next Page button on the Main toolbox.
You are now on page two, even though you can’t see it.
As you move the cursor around the page you’ll see that it is shaped
like a pull-tag.
Click towards the top of the page and drag down. The blank area will
be pulled away to show the flipchart beneath.
In the classroom:
Use this tool to show
text one line at a time,
helping your students
to focus on the text line
by line.
Note: The Reveal tool also
works from left-to-right, rightto-left and bottom-to-top.
Click on the Reveal icon to cancel the reveal function.
Return to the first page of the flipchart.
96
activprimary
Training Manual
© 2007 Promethean Ltd
5. Eraser tool
Using the Text tool, type the following sentence in the center of the
page.
‘The capital of Spain is Madrid’�.
Select all the text, if necessary, and change the font size, so that the
text can clearly be seen.
Click on the Pens, Highlighters and Erasers button.
Choose a thick pen and write over the word Madrid, to hide it.
Now click on an Eraser tool.
Erase the hidden word to reveal the answer.
Activprimary
Training Manual
In the classroom:
This technique is the
starting point for a huge
range of ‘erase and
reveal’ exercises, one
of the most useful features of
Activprimary when creating
lessons. Such techniques let
teachers control when and
how their students discover the
answers to questions.
© 2007 Promethean Ltd
97
6. Understanding the eraser
The Eraser tool works by pasting an eraser image on the page. This
image makes anything on the top layer invisible. It doesn’t make
anything on other layers invisible. This is why the line you drew with
the pen tool (on the top layer) became invisible but the typed text (on
the middle layer) remained visible.
The eraser image can be moved around the page.
To illustrate this:
Select the Marquee Select tool and click the area you have just
erased.
When it is selected, click and drag on the eraser image to move it. The
Pen tool’s lines will become visible again.
Move the eraser shape back over the pen line.
It will become invisible again.
Note: Move any item, such as a photo, onto the top layer and it can be made
invisible using the Eraser tool. Using this technique you can erase a photo from
the page to reveal something beneath.
7. Spotlight tool
Click on the Special Tools icon.
Click on the Spotlight tool in the Tool Tray.
Four options are available for you to explore.
In this case, select Circular Spotlight.
The page should become black, except for one circle showing the
flipchart beneath.
98
activprimary
Training Manual
© 2007 Promethean Ltd
Move the pen around the page without pushing in the nib. In this way
you can show parts of the flipchart page.
Click and drag on the page to increase or decrease the size of the
spotlight.
Decrease the size of the spotlight to show just one word on this page.
In the classroom:
On this page, you
could use the spotlight
to encourage your
students to read the
question one word at
a time. The Spotlight tool lets
students build up concepts
from individual fragments, ideal
for starter exercises.
Click on the Spotlight icon to turn off the spotlight.
Note: As with the Reveal tool, you can turn the page after turning on the
spotlight, so students don’t see the full screen until you choose.
Activprimary
Training Manual
In the classroom:
Spotlights are
particularly useful for
odd-one-out exercises
or memory games.
© 2007 Promethean Ltd
99
8. Make tickertapes
In the classroom:
Tickertapes are an
easy way to make
a sentence more
memorable.
Make sure you are in Design Mode.
Right-click on the text you just wrote: ‘The capital of Spain is Madrid’.
Select Make Tickertape.
The Text will begin to scroll across the top of your page.
You can change the speed of the tickertape using the scroll bar.
Click on the cross to close the tickertape.
100
activprimary
In the classroom:
Use tickertapes to
display instructions as
students come in to
the lesson, so students
know what they should be
doing right away.
Training Manual
© 2007 Promethean Ltd
9. Tickertape tool
More options are available if you create tickertapes in another way.
Make sure you are in Design Mode.
Click on the Teacher Tools Menu button.
Click on the Tickertape tool.
Select �New>Define�.
The Tickertape Definer box will appear on the screen.
In the box headed ‘Enter the Tickertape message’, type:
‘Activprimary’s presentation tools’. Experiment with the options
available using the text.
Close the tickertape and the Tickertape Definer box when you have
finished.
Don’t save any changes.
Activprimary
Training Manual
© 2007 Promethean Ltd
101
10. Clock tool
Click on the Special Tools icon.
Click on the Clock tool in the Power Tools toolbox.
Five clock options will become available.
The top three options display a range of standard clocks.
The other two options display different stopwatches.
Select the Count Down button. The Count Down From box appears on
the screen.
There are many settings to explore here.
Type ‘�10’� in the Seconds box.
Click on the drop-down box headed ‘After timeout, play the following
sound’. Select ‘bong.wav’.
102
activprimary
Training Manual
© 2007 Promethean Ltd
Click on the drop-down box headed ‘After timeout perform the
following action’. Select ‘Start Reveal Tool’.
Click on OK.
A Clock box will appear on the screen, showing the count down.
When the count down reaches zero, you will hear the sound and the
Reveal tool will be turned on.
In the classroom:
This is an ideal way of
creating timed exercises
on the board.
Click on the Reveal tool icon to see your screen again.
Close the Clock box and the Sound Control box.
In the classroom: When doing tests put a question on a page. Set
the clock to count down and set the action to turn the page. This is a very
good way of showing students how long they should take to answer each
question.
Activprimary
Training Manual
© 2007 Promethean Ltd
103
11. Notes and Pointers
Notes and pointers are messages which can be placed on your display
for the whole time Activprimary is open.
Click on the Teacher Tools Menu icon.
Select the Notes and Pointers tool from the menu. Three options are
currently available: New Note; New Pointer and Open From. Select
New Note.
A box called ‘Edit your Desktop Note’ will appear along with the Text
Edit toolbox.
Type the date in the box.
Change the text’s style if you want. Click on OK and the message will
be pasted on your display.
Click and drag the Note to the top of the screen. You can change the
size of the note by double-clicking on the note and dragging the edge
to the size you want.
Now click on the Next Page button repeatedly and you will see that the
Note stays on the screen.
104
activprimary
Training Manual
In the classroom:
Use Notes to display
the title of a lesson or a
mathematical formula,
so that it can remain on
the screen as the pages of the
flipchart are turned.
© 2007 Promethean Ltd
Click on the Teacher Tools Menu button.
Click on the Notes and Pointers button and select Close.
Click on the cross when asked if you want to save the Note. You can
also remove the Note from the display by right-clicking or barrelclicking on the screen and selecting Remove.
Save the flipchart with the name ‘Activprimary 10’.
Exit Activprimary.
Summary
We showed you that Activprimary contains a number of
presentation tools that can be used to make your flipcharts
more engaging and interactive.
Activprimary
Training Manual
© 2007 Promethean Ltd
105
106
activprimary
Training Manual
© 2007 Promethean Ltd
Bonus tutorial: Activote
This tutorial is a brief introduction to Activote, the on-the-spot assessment
system that works alongside Activprimary. With Activote, teachers ask
questions and students select their answer using an Activote device. If your
organization has Activote devices, try this tutorial to get you started.
We assume that your hardware is set up and ready to use Activote. We
assume, in particular, that you are working at an Activboard. If you are not at
an Activboard, you must have a device called an Activhub connected to your
computer for Activote to work. For more detailed instructions on setting up
Activote, please refer to the Activote Quick Start Guide which was supplied with
your voting set.
For this tutorial we will use the Activote devices numbered one to five, so have them
ready on your desk. If your devices are not numbered, you can number the back of the
devices using a pen.
1. Registering the devices
Before voting devices can be used, the computer needs to know they
exist.
Open Activprimary.
In the Dashboard, click on the Configure tab.
Under the heading Setup Activote, click on Register Devices.
Activprimary
Training Manual
© 2007 Promethean Ltd
107
This will open a Device Registration box. This is used to tell the
computer that your devices exist.
Note: We are assuming that no devices are registered. If some devices are
listed under the Device Name heading, click Remove All and confirm that you
want to remove them. Check with whoever registered them before doing this!
Click on the drop-down arrow under the heading ‘Select the country in
which you are to use Activote’. Select USA.
108
activprimary
Training Manual
© 2007 Promethean Ltd
Device registration is a timed process, so read through the following
steps before trying them out:
1.
Click on the Register button in the Device Registration program.
2.
Take the device labeled 1.
�
a)� Press the central Register button on your device. Hold the
button down for a few seconds.
C
�
b)� On screen, the voting device will be added to the Registered
Devices list and given a name (A1, A2 etc).
3.
Now register the other devices, in order, using steps 2a-2b.
4.
When you have finished, click on the Device Registration
program’s Stop button, which will have replaced the Register
button on the display.
Close the box when you have finished. This will save the devices we
have registered.
The devices will remain registered until you remove them.
Troubleshooter: You can tell the device is communicating with the
computer if the red, then the green button on the device flashes. If only the red
button flashes, your device is not able to communicate with the Activboard or
Activhub for some reason. This could be because the device’s batteries are
running low or your Activboard isn’t turned on. If you are using an Activhub, make
sure it is plugged in and the central button is lit.
Activprimary
Training Manual
© 2007 Promethean Ltd
109
2. Creating an ad hoc question
Use the Pen tool to write ‘What do you want to do today?’ on the top of
your flipchart page.
Complete the question as shown in the diagram:
3. The Session box
Now we will conduct the vote.
As this is the first time we are voting on this flipchart, we need to tell
the computer the type of vote we are doing and the number of devices
we will use. We do this using the Session box.
110
1.
Click on the Activote icon in the Main toolbox. The Session box
appears. This allows you to select different voting modes.
2.
Select Anonymous Mode. Anonymous refers to the fact that we
haven’t applied a student’s name to each device.
activprimary
Training Manual
© 2007 Promethean Ltd
3.
Make sure that 5 is selected in the menu next to the heading:
‘Select the number of devices to be used in this session’.
4.
Click on OK.
4. Conducting the vote
Now we will conduct the vote:
The next five steps are a timed process, so read them through before
giving them a try.
1.
Click on the Activote button.
2.
A bar will appear at the top of the flipchart page, showing a box
for each device.
3.
Answer the question by pressing either a letter on all five
devices.
C
4.
On the display, the boxes turn yellow when an answer is
received from a device.
5.
Activprimary
When answers have been received from all the devices,
click on the Activote icon to end the vote.
Training Manual
© 2007 Promethean Ltd
111
The Activote Results box will then appear with the results from the
vote. Various views of the results are available for you to explore.
Close the Activote Results box when you have finished. It will be saved
with the flipchart.
An icon will appear on the page letting you access the results directly.
Save the flipchart to My Flipcharts, calling it ‘Activprimary bonus’.
Close Activprimary.
112
activprimary
Training Manual
© 2007 Promethean Ltd
Well done!
You’ve finished Activprimary Training Manual!
In this manual we have introduced you to some of the most
important features of Activprimary. We’ve shown you to the
software’s principal toolboxes and we’ve demonstrated some of
the tools you may find most useful in your lessons.
Good luck with your future lessons – we hope you enjoy using
Activprimary.
Activprimary
Training Manual
© 2007 Promethean Ltd
113
Ten quick tips
We’ve shown you the basics, now try to create your first flipchart
for a lesson. Activprimary helps you include images, color and
interactivity into your lessons. Here are some ideas on how to
make the most of the software:
1.������������������������������������������������������������
Make the most of the colors, fonts and images available.�
Keep the creativity flowing by constantly changing the fonts and
colors that you use.
2.��������������������
Use many pages.� Spread exercises over a number of pages to
help you control the pace of lessons.
3.���Re-save
�������������������������
your flipcharts.� When you teach your flipcharts you
will customize them for each class. Re-save the flipchart with a
different name when you have finished teaching the lesson and
distribute the flipchart to students.
4.��������������������������
Print your flipcharts.� Use the pages as handouts.
5.���������������������������
Use presentation tools.� Take advantage of Activprimary’s
presentation features to make lessons more creative and
engaging. Dice add an element of chance; clocks add pace;
spotlights add focus.
6.���������������������������������������������������
Make your flipcharts relevant to your students.� Include
photos of favorite celebrities and of your students’ local area.
7.����������������������������������
Prepare your flipcharts well.� A well-prepared flipchart is
easier to teach. You can also reuse and share a well-structured
flipchart.
8.�������������������������������������
Make your flipchart interactive.� Encourage students to do
presentations at the board; let them create their own pages; let
them take control of the tools.
9.�����������������������������������������������������������
Incorporate your current resources into the flipchart.� If
you already use CD-ROMs, use them with your flipcharts.
Use scanners to copy handouts you’ve already created – but
remember to take advantage of Activprimary’s opportunities for
interactivity.
10.���������������������������������������������
Keep the focus on what is being learned.� Activprimary offers
excellent opportunities for flexible teaching, making it look like
you’re being spontaneous while sticking strictly to the plan laid
out in the flipchart.
114
activprimary
Training Manual
© 2007 Promethean Ltd
Where to go from here
Explore the training and online sections of the Dashboard for
many more training ideas.
Promethean Learning
For more training ideas, visit Promethean’s training website:
http://www.prometheanlearning.com.
Promethean Planet
Promethean Planet is a free, online community designed with one
goal - supporting teachers.
Visit: http://www.prometheanplanet.com
Activprimary
Training Manual
© 2007 Promethean Ltd
115
ACTIV
BOArD
pen
SOFTWArE
support:
1-888-652-2848 option 3
678-762-1800
For Spanish
678-336-8100
[email protected]
http://www.prometheanworld.com/us
Promethean Inc, 1165 Sanctuary Parkway, Suite 400, Atlanta, GA 30004
SLATE
VOTE
SUppOrT