1
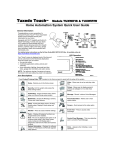
2. Set the background Wallpaper: select a photo from the file list and select Set Wallpaper
Use the icons to: Play Image
˃ view Previous Image
˃ go to Next Image
.
˃ Deselect Image
.
Add Z-Wave Devices
To use Z-Wave devices, they first must be added (“included”) in the system.
Control installed Z-Wave devices such as lights, thermostats door locks, etc., automatically based on scenes you define (see
below). Or, manually control devices from the Device List screen; select Automation
.
Each device must be installed according to the manufacturer’s instructions. Before starting, make sure power switch on devices
are ON, door locks are assembled and have their batteries installed, and thermostats are installed and operating.
1. Select Automation ˃ Z-Wave Setup
˃ Add Device
.
2. At the Z-Wave device, select the Function Key (depending on the device being added).
3. Follow the on-screen messages until “Device added successfully” is displayed.
4. To rename a device, select the device and select Edit Name.
Light, Switch, or Outlet Module / Sensor or Motion Detector Note:
• Make sure power switch on devices are turned ON.
Door Lock Notes:
• Be sure the door lock orientation/handedness is correct.
• Enroll the door lock within 5 feet of the controller.
• Program the selected user code into the door lock. (program the user code in the control panel first).
Thermostat Notes: If not using a Honeywell thermostat, the procedure may vary. Refer to the Thermostat instructions.
• On the Honeywell thermostat select Thermostat; set the “Time/Date” and follow the instructions in the thermostat Installation
Guide for enrollment.
• To complete, select Done. select Exit to return to normal operation.
To verify activation, on the controller, select Back
; wait 30 seconds. Select Refresh
; the new device is displayed.
Create Scenes (define up to 30 scenes)
The Scene feature is used to control a single device, or multiple devices based on pre-set “Conditions,” “Triggers,” and “Actions.”
When a trigger/condition occurs, the defined action is executed. To program a scene:
1. Select Automation ˃ Scene Setup
˃ Add
.
2. Select the Scene Name field; enter a “name” and select OK.
3. Add the “Condition,” “Trigger,” and “Action” that you want to occur (see below). After each selection select Save !!
Note: Determine if you need a Condition. The Condition is a ‘condition’ set to occur prior to a trigger event. See example below.
Example: Turn the lights on when the system disarms, but only at night.
(Condition): “only at Night”
- Set TIME Condition (enter Start Time/ Duration).
(Trigger): when the “system disarms” – Set the trigger to SECURITY: System Disarm.
(Action): Turn the “lights ON” - Set the Action to LIGHT: ON.
Scene Rules
•
•
•
•
•
Triggers and Conditions include: Time setting, Security mode, Thermostat setting, and Door status.
Actions include: Occupancy/Security, Lights On/Off, Thermostat, Door.
Each Trigger event can have up to 3 Actions.
A Trigger event and Condition cannot be the same (i.e., if setting a Trigger event for Occupancy, you cannot set a
Occupancy Condition).
On commercial panels the programming option for “Global Keypad” must be set to “0” for some Scenes to work
properly.
Display & Audio Setup
1. Select Setup; slide the Brightness / Volume bar up or down to change settings. Select Yes to save.
2. Select Disp & Audio
; highlight the field for each option and use the Up/Down arrows to select the desired settings.
- Select Chime, Voice or Voice Chime operating mode (when using Security option only).
- To clean the controller screen, select the Clean Screen icon; select Continue, or select Cancel to exit.
-4-