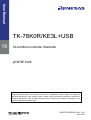
1
User Manual TK-78K0R/KE3L+USB 16 16-bit Microcontroller Starterkit µPD78F1026 All information contained in these materials, including products and product specifications, represents information on the product at the time of publication and is subject to change by Renesas Electronics Corp. without notice. Please review the latest information published by Renesas Electronics Corp. through various means, including the Renesas Technology Corp. website (http://www.renesas.com). www.renesas.com R20UT0010ED0100, Rev. 1.00 July 2010 Notice 1. All information included in this document is current as of the date this document is issued. Such information, however, is subject to change without any prior notice. Before purchasing or using any Renesas Electronics products listed herein, please confirm the latest product information with a Renesas Electronics sales office. Also, please pay regular and careful attention to additional and different information to be disclosed by Renesas Electronics such as that disclosed through our website. 2. Renesas Electronics does not assume any liability for infringement of patents, copyrights, or other intellectual property rights of third parties by or arising from the use of Renesas Electronics products or technical information described in this document. No license, express, implied or otherwise, is granted hereby under any patents, copyrights or other intellectual property rights of Renesas Electronics or others. 3. You should not alter, modify, copy, or otherwise misappropriate any Renesas Electronics product, whether in whole or in part. 4. Descriptions of circuits, software and other related information in this document are provided only to illustrate the operation of semiconductor products and application examples. You are fully responsible for the incorporation of these circuits, software, and information in the design of your equipment. Renesas Electronics assumes no responsibility for any losses incurred by you or third parties arising from the use of these circuits, software, or information. 5. When exporting the products or technology described in this document, you should comply with the applicable export control laws and regulations and follow the procedures required by such laws and regulations. You should not use Renesas Electronics products or the technology described in this document for any purpose relating to military applications or use by the military, including but not limited to the development of weapons of mass destruction. Renesas Electronics products and technology may not be used for or incorporated into any products or systems whose manufacture, use, or sale is prohibited under any applicable domestic or foreign laws or regulations. 6. Renesas Electronics has used reasonable care in preparing the information included in this document, but Renesas Electronics does not warrant that such information is error free. Renesas Electronics assumes no liability whatsoever for any damages incurred by you resulting from errors in or omissions from the information included herein. 7 . Renesas Electronics products are classified according to the following three quality grades: “Standard”, “High Quality”, and “Specific”. The recommended applications for each Renesas Electronics product depends on the product’s quality grade, as indicated below. You must check the quality grade of each Renesas Electronics product before using it in a particular application. You may not use any Renesas Electronics product for any application categorized as “Specific” without the prior written consent of Renesas Electronics. Further, you may not use any Renesas Electronics product for any application for which it is not intended without the prior written consent of Renesas Electronics. Renesas Electronics shall not be in any way liable for any damages or losses incurred by you or third parties arising from the use of any Renesas Electronics product for an application categorized as “Specific” or for which the product is not intended where you have failed to obtain the prior written consent of Renesas Electronics. R20UT0010ED0100 Rev. 1.00 User Manual 2 The quality grade of each Renesas Electronics product is “Standard” unless otherwise expressly specified in a Renesas Electronics data sheets or data books, etc. “Standard”: Computers; office equipment; communications equipment; test and measurement equipment; audio and visual equipment; home electronic appliances; machine tools; personal electronic equipment; and industrial robots. “High Quality”: Transportation equipment (automobiles, trains, ships, etc.); traffic control systems; anti-disaster systems; anti- crime systems; safety equipment; and medical equipment not specifically designed for life support. “Specific”: Aircraft; aerospace equipment; submersible repeaters; nuclear reactor control systems;medical equipment or systems for life support (e.g. artificial life support devices or systems), surgical implantations, or healthcare intervention (e.g. excision, etc.), and any other applications or purposes that pose a direct threat to human life. 8. You should use the Renesas Electronics products described in this document within the range specified by Renesas Electronics, especially with respect to the maximum rating, operating supply voltage range, movement power voltage range, heat radiation characteristics, installation and other product characteristics. Renesas Electronics shall have no liability for malfunctions or damages arising out of the use of Renesas Electronics products beyond such specified ranges. 9. Although Renesas Electronics endeavors to improve the quality and reliability of its products, semiconductor products have specific characteristics such as the occurrence of failure at a certain rate and malfunctions under certain use conditions. Further, Renesas Electronics products are not subject to radiation resistance design. Please be sure to implement safety measures to guard them against the possibility of physical injury, and injury or damage caused by fire in the event of the failure of a Renesas Electronics product, such as safety design for hardware and software including but not limited to redundancy, fire control and malfunction prevention, appropriate treatment for aging degradation or any other appropriate measures. Because the evaluation of microcomputer software alone is very difficult, please evaluate the safety of the final products or system manufactured by you. 10.Please contact a Renesas Electronics sales office for details as to environmental matters such as the environmental compatibility of each Renesas Electronics product. Please use Renesas Electronics products in compliance with all applicable laws and regulations that regulate the inclusion or use of controlled substances, including without limitation, the EU RoHS Directive. Renesas Electronics assumes no liability for damages or losses occurring as a result of your noncompliance with applicable laws and regulations. 11.This document may not be reproduced or duplicated, in any form, in whole or in part, without prior written consent of Renesas Electronics. 12.Please contact a Renesas Electronics sales office if you have any questions regarding the information contained in this document or Renesas Electronics products, or if you have any other inquiries. (Note 1) “Renesas Electronics” as used in this document means Renesas Electronics Corporation and also includes its majority- owned subsidiaries. (Note 2) “Renesas Electronics product(s)” means any product developed or manufactured by or for Renesas Electronics. R20UT0010ED0100 Rev. 1.00 User Manual 3 General Precautions in the Handling of MPU/MCU Products The following usage notes are applicable to all MPU/MCU products from Renesas. For detailed usage notes on the products covered by this manual, refer to the relevant sections of the manual. If the descriptions under General Precautions in the Handling of MPU/MCU Products and in the body of the manual differ from each other, the description in the body of the manual takes precedence. 1. Handling of Unused Pins Handle unused pins in accord with the directions given under Handling of Unused Pins in the manual. The input pins of CMOS products are generally in the high-impedance state. In operation with an unused pin in the open-circuit state, extra electromagnetic noise is induced in the vicinity of LSI, an associated shoot-through current flows internally, and malfunctions occur due to the false recognition of the pin state as an input signal become possible. Unused pins should be handled as described under Handling of Unused Pins in the manual. 2. Processing at Power-on The state of the product is undefined at the moment when power is supplied. The states of internal circuits in the LSI are indeterminate and the states of register settings and pins are undefined at the moment when power is supplied. In a finished product where the reset signal is applied to the external reset pin, the states of pins are not guaranteed from the moment when power is supplied until the reset process is completed. In a similar way, the states of pins in a product that is reset by an on-chip power-on reset function are not guaranteed from the moment when power is supplied until the power reaches the level at which resetting has been specified. 3. Prohibition of Access to Reserved Addresses Access to reserved addresses is prohibited. The reserved addresses are provided for the possible future expansion of functions. Do not access these addresses; the correct operation of LSI is not guaranteed if they are accessed. 4. Clock Signals After applying a reset, only release the reset line after the operating clock signal has become stable. When switching the clock signal during program execution, wait until the target clock signal has stabilized. When the clock signal is generated with an external resonator (or from an external oscillator) during a reset, ensure that the reset line is only released after full stabilization of the clock signal. Moreover, when switching to a clock signal produced with an external resonator (or by an external oscillator) while program execution is in progress, wait until the target clock signal is stable. 5. Differences between Products Before changing from one product to another, i.e. to one with a different part number, confirm that the change will not lead to problems. The characteristics of MPU/MCU in the same group but having different part numbers may differ because of the differences in internal memory capacity and layout pattern. When changing to products of different part numbers, implement a system-evaluation test for each of the products. R20UT0010ED0100 Rev. 1.00 User Manual 4 How to Use This Manual (1) Purpose and Target Readers This manual is designed to provide the user with an understanding of the hardware functions and electrical characteristics of the MCU. It is intended for users designing application systems incorporating the MCU. A basic knowledge of electric circuits, logical circuits, and MCUs is necessary in order to use this manual. The manual comprises an overview of the product; descriptions of the CPU, system control functions, peripheral functions, and electrical characteristics; and usage notes. Particular attention should be paid to the precautionary notes when using the manual. These notes occur within the body of the text, at the end of each section, and in the Usage Notes section. The revision history summarizes the locations of revisions and additions. It does not list all revisions. Refer to the text of the manual for details. The following documents apply to the xxx/xx Group. Make sure to refer to the latest versions of these documents. The newest versions of the documents listed may be obtained from the Renesas Electronics Web site. Document Type Data Sheet User’s manual for Hardware Description Hardware overview and electrical characteristics Hardware specifications (pin assignments, memory maps, peripheral function specifications, electrical characteristics, timing charts) and operation description. Note: Refer to the application notes for details on using peripheral functions. Document Title Document No. xxx/xx Group Datasheet R01DSxxxxEJxxxx xxx/xx User’s manual for Hardware This User’s manual R01USxxxxEJxxxx User’s manual for Software Description of CPU instruction set xxx/xx Series User’s manual for Software Application Note Information on using peripheral functions and application examples. Sample programs. Information on writing programs in assembly language and C. Available from Renesas Electronics Web site. Renesas Technical Update Product specifications, updates on documents, etc. R20UT0010ED0100 Rev. 1.00 User Manual 5 (2) Notation of Numbers and Symbols Conventions Data significance: Higher digits on the left and lower digits on the right Active low representations: ××× (overscore over pin and signal name) Note: Footnote for item marked with Note in the text Caution: Information requiring particular attention Remark: Supplementary information Numerical representations: (3) Binary ...×××× or ××××B Decimal ...×××× Hexadecimal ...××××H List of Abbreviations and Acronyms Abbreviation CS78K EW78K I/O LSB MSB SFR USB Acronyms Full Form C-Spy for 78K Embedded Workbench for 78K Input/Output Least Significant Bit Most Significant Bit Special Function Register Universal Serial Bus Full Form All trademarks and registered trademarks are the property of their respective owners. R20UT0010ED0100 Rev. 1.00 User Manual 6 (4) Related Documents The related documents indicated in this publication may include preliminary versions. However, preliminary versions are not marked as such. Doc. Number R01AN0009ED0100 R01AN0008ED0100 Document Title 78K0R/KE3-L(USB) USB HID (Human Interface Device) Class Driver 78K0R/KE3-L(USB) USB CDC (Communication Device Class) Driver User’s Manual 78K0R/Kx3-L 16-bit Single-Chip Microcontrollers Table 1 Related Documents U20024EJ2V0UD00 R20UT0010ED0100 Rev. 1.00 User Manual 7 Table of Contents Chapter 1 Introduction 12 Chapter 2 Preparation 13 2.1 2.2 Development Tools / Software.........................................................................13 Installation of Development Tools....................................................................14 2.2.1 2.2.2 2.2.3 2.2.4 2.3 USB Driver Installation ....................................................................................29 2.3.1 2.3.2 2.3.3 2.4 Installation on Windows XP ...............................................................................................30 Installation on Windows 2000............................................................................................32 Completion of USB Driver Installation ...............................................................................35 Sample Programs............................................................................................36 Chapter 3 3.1 3.2 3.3 3.4 3.5 3.6 3.7 3.8 3.9 3.10 3.11 Experiences 37 Start Embedded Workbench for 78K ...............................................................38 What is ‘Embedded Workbench for 78K’ ? ......................................................39 Open Workspace.............................................................................................41 Build Application ..............................................................................................43 Tool Configuration ...........................................................................................44 Check Board Settings......................................................................................46 Start C-Spy Debug Session.............................................................................47 Run Application Program.................................................................................49 Stop Application Program................................................................................51 Close C-Spy Debug Session........................................................................52 Close Embedded Workbench ......................................................................53 Chapter 4 4.1 4.2 4.3 Installation Package ..........................................................................................................14 Installation of Development Tools .....................................................................................14 Installation of WriteEZ5 Flash Programmer ......................................................................24 Installation of Sample Applications....................................................................................27 Hardware Specification 54 Layout of hardware functions ..........................................................................55 Layout of solder-short pad and test pad ..........................................................55 Hardware Functions ........................................................................................56 4.3.1 4.3.2 4.3.3 4.3.4 4.3.5 4.3.6 4.3.7 4.3.8 4.3.9 4.3.10 4.3.11 SW1, SW4 .........................................................................................................................56 SW2 (INTP0) .....................................................................................................................57 SW3 (RESET SW).............................................................................................................57 SW5 (Filter)........................................................................................................................57 JP1.....................................................................................................................................57 JP2, JP3 ............................................................................................................................58 JP4.....................................................................................................................................58 LED1 (POWER).................................................................................................................58 U1, U2 (7-segment LED) ...................................................................................................59 CN1, CN2 ......................................................................................................................60 CN3 ...............................................................................................................................60 R20UT0010ED0100 Rev. 1.00 User Manual 8 4.3.12 4.3.13 4.3.14 4.3.15 4.3.16 4.3.17 Chapter 5 5.1 5.2 Chapter 6 62 "Can not communicate with Emulator..." (F0100 or A0109)..............................................62 "Incorrect ID Code." (Ff603) ..............................................................................................62 "On-chip debug function had been disabled in the device.” (F0c79) ................................63 Other Information 64 Create a new Workspace ................................................................................64 Add one or multiple Projects to a new Workspace ..........................................65 Add additional Source Files to a Project..........................................................69 Debugger Tips .................................................................................................70 6.4.1 6.4.2 6.4.3 6.4.4 6.4.5 6.4.6 6.4.7 6.5 6.6 Troubleshooting If you cannot find USB driver when connecting the kit.....................................62 Error when you start the debugger ..................................................................62 5.2.1 5.2.2 5.2.3 6.1 6.2 6.3 6.4 J1...................................................................................................................................60 VR1 ...............................................................................................................................60 USB1 .............................................................................................................................60 USB2 .............................................................................................................................60 FP1 ................................................................................................................................60 Solder-short pad label ...................................................................................................60 Set/delete breakpoints.......................................................................................................70 Display global Variables ....................................................................................................72 Display global Variables while Application is running .......................................................73 Display local Variables ......................................................................................................74 Display Memory Content ...................................................................................................75 Display Memory Content while Application is running.......................................................76 Display of CPU- and I/O-Register Content........................................................................77 Erase microcontroller built-in flash memory.....................................................78 Circuit Diagrams ..............................................................................................83 R20UT0010ED0100 Rev. 1.00 User Manual 9 List of Figures Figure 1 Debug Configuration........................................................................................12 Figure 2 USB Connection ..............................................................................................29 Figure 3 Device Manager Entry .....................................................................................35 Figure 4 Sample Directories ..........................................................................................36 Figure 5 Overall Steps to Start a Debug Session ..........................................................37 Figure 6 EW78K Start-Up ..............................................................................................38 Figure 7 EW78K Main Windows ....................................................................................39 Figure 8 EW78K Open Workspace................................................................................41 Figure 9 EW78K Open Workspace File Selection Dialogue ..........................................42 Figure 10 EW78K Workspace Loaded...........................................................................42 Figure 11 EW78K Make.................................................................................................43 Figure 12 EW78K Message Window .............................................................................43 Figure 13 EW78K General Project Options ...................................................................44 Figure 14 EW78K Compiler Options ..............................................................................44 Figure 15 EW78K Linker Options ..................................................................................45 Figure 16 EW78K Debugger Options ............................................................................45 Figure 17 TK-78K0RKE3L+USB Jumper & Switches ....................................................46 Figure 18: IAR Embedded Workbench Download and Debug .......................................47 Figure 19 C-Spy Hardware Setup Dialogue...................................................................48 Figure 20 C-Spy Debug Session ...................................................................................48 Figure 21 C-Spy 'Go' Button ..........................................................................................49 Figure 22 C-Spy Application Control Buttons Run Mode ...............................................49 Figure 23 C-Spy Application Control Buttons Stop Mode ..............................................49 Figure 24 TK-78K0RKE3L+USB USB connector USB1 ................................................50 Figure 25 TK-78K0RKE3L+USB switch SW2 ................................................................50 Figure 26 Notepad Editor...............................................................................................51 Figure 27 C-Spy 'Break' Button......................................................................................51 Figure 28 C-Spy 'Stop Debugging' Button .....................................................................52 Figure 29: IAR Embedded Workbench Close ................................................................53 Figure 30 Troubleshooting .............................................................................................55 Figure 31 TK-78K0RKE3L+USB pads ...........................................................................55 Figure 32 SW5 Filter Setting..........................................................................................57 Figure 33 7-Segment LEDs ...........................................................................................59 Figure 36 Security ID entry area at the start of debugger ..............................................62 Figure 35 EW78K Create new Workspace ....................................................................64 Figure 36 EW78K Add existing Project ..........................................................................65 Figure 37 EW78K Add Existing Project Dialogue ..........................................................65 Figure 38 Create New Project........................................................................................66 Figure 39 EW78K Create New Project Dialogue ..........................................................66 Figure 40 EW78K Untitled Workspace ..........................................................................67 Figure 41 EW78K Save All ............................................................................................67 Figure 42 EW78K Save Workspace As Dialogue ..........................................................68 Figure 43 EW78K Add Files...........................................................................................69 Figure 44 EW78K Add Files Dialogue ..........................................................................69 Figure 45 C-Spy active Breakpoint ................................................................................70 Figure 46 C-Spy Breakpoint Window .............................................................................71 Figure 47 C-Spy deactivated Breakpoint .......................................................................71 Figure 48 C-Spy display global Variables ......................................................................72 Figure 49 C-Spy display global Variables while Application is running ..........................73 Figure 50 C-Spy display local Variables ........................................................................74 R20UT0010ED0100 Rev. 1.00 User Manual 10 Figure 51 C-Spy display of Memory Content .................................................................75 Figure 52 C-Spy Display of Memory Content while Application is running.....................76 Figure 53 C-Spy Display of CPU- and I/O-Register Content..........................................77 Figure 54 C-Spy Register Window.................................................................................77 Figure 57 WriteEZ5........................................................................................................78 Figure 56 TK-78K0RKE3L+USB Jumper & Switches ....................................................79 Figure 59 WriteEZ5 Setup Button ..................................................................................80 Figure 58 WriteEZ5 Device Setup Dialogue ..................................................................80 Figure 59 WriteEZ5 Parameter File Selection Dialogue.................................................81 Figure 60 WriteEZ5 COM-Port Selection .......................................................................81 Figure 61 WriteEZ5 Erase Button ..................................................................................82 Figure 62 WriteEZ5 Erase completed successfully........................................................82 R20UT0010ED0100 Rev. 1.00 User Manual 11 TK-78K0R/KE3L+USB Introduction Chapter 1 Introduction TK-78K0R/KE3L+USB is the evaluation kit for development with sound systems using "78K0R/KE3-L", Renesas Electronics 16bit all flash microcontroller. The user only needs to install the development tools and USB driver, and connect the host machine with the target board to start the code development, build, monitoring the output, and debugging code. (This demonstration kit uses the on-chip debug feature from the microcontroller itself, without emulator connection) Figure 1 Debug Configuration Overview This manual consists of the following contents.Read chapter 2 and 3 first for installing the development tools and using the sample programs. Read chapter 4-6 for customizing the sample programs and the hardware. Chapter 2: Preparations Install the development tools Chapter 3: Experiences Experience the basic operations of integrated development environment (Embedded Workbench) and integrated debugger (C-Spy) with using sample programs. Chapter 4: Hardware Specifications Explain the hardware of TK-78K0R/KE3L+USB Chapter 5: Troubleshooting Describe how to solve troubles you may face, such as errors when starting the integrated debugger (C-Spy) Chapter 6: Other Information Introduce other information, such as how to create a new workspace (project) on integrated development environment (Embedded Workbench, how to register additional source file, and some useful tips of the integrated debugger. The circuit diagrams of demonstration kit are included in this chapter. Reader This manual is intended for development engineers who wish to become familiar with the development tools for the 78K0R. It is assumed that the readers have been familiar with basics of microcontrollers, C and Assembler languages, and the WindowsTM operating system. Purpose This manual is intended to give users an understanding of the features, hardware configurations, development tools for the 78K0R. R20UT0010ED0100 Rev. 1.00 User Manual 12 TK-78K0R/KE3L+USB Preparation Chapter 2 Preparation This chapter describes following topics: - Overview and installation of development tools - Installation of development tools - Overview and preparation of sample programs Users can experience the development flow such as coding, build, debugging, and test, by using the development tools bundled with TK-78K0R/KE3L+USB. 2.1 Development Tools / Software Integrated Development Environment (IDE) Embedded Workbench for 78K V4.70 The IDE works on Windows operation system. Users can develop a system efficiently by using the editor, compiler, and debugger. C Compiler ICC78K0R V4.70.1 (code size limited version) C compiler for the 78K0R microcontrollers. The object code size is limited to 4 KB. This compiles C code for 78K0R and ANSI-C code program into object code. Assembler RA78K0R V4.70.1 Assembler for the 78K0R microcontrollers. This convert the assembler code for 78K0R into object code. Integrated Debugger CS78K V4.70 This is the tool for debugging the object program generated by C compiler and assembler. The debugger enables to do C source level debugging. With the debugger, you can debug the code easily and efficiently by referring and changing variables, using step-in debugging function, and so on. Starter Kit USB Driver This is a software driver for PC to access to the USB interface of the kit. HID Class Sample Program / USB Human Interface Device Class Sample Driver The 78K0R/KE3-L is detected as the HID device.This sample program behaves as a keyboard. And it is used in [chapter 2].Please refer to the "USB HID (Human Interface Device) Class Driver application note" for further details. CDC Class Sample Program / USB Communication Device Class Sample Driver The 78K0R/KE3-L is detected as the CDC device.This sample program behaves as a COM port. Please refer to the "USB CDC (Communication Device Class) Driver application note" for further details. R20UT0010ED0100 Rev. 1.00 User Manual 13 TK-78K0R/KE3L+USB Preparation 2.2 Installation of Development Tools 2.2.1 Installation Package The attached CD-ROM includes the development tools and documentations. Users can use the installer to install those development tools and documentations 2.2.2 Installation of Development Tools 1) Please insert the CD-ROM in the drive. The installer will show up automatically. If it does not start automatically, please initiate it by double clicking ‘Aurorun.EXE’. 2) Click ‘Install IAR Embedded Workbench for 78K’ R20UT0010ED0100 Rev. 1.00 User Manual 14 TK-78K0R/KE3L+USB 3) Click Install IAR Embedded Workbench for 78K’ 4) Click ‘IAR online Registration’ R20UT0010ED0100 Rev. 1.00 User Manual Preparation 15 TK-78K0R/KE3L+USB 5) Preparation Complete the form and submit the registration. Within some minutes you will get the following email. R20UT0010ED0100 Rev. 1.00 User Manual 16 TK-78K0R/KE3L+USB 6) Preparation Click the Hyperlink to get your requested license key to continue the installation. R20UT0010ED0100 Rev. 1.00 User Manual 17 TK-78K0R/KE3L+USB 7) Click ‘Install IAR Embedded Workbench’ 8) Click ‘Next’ R20UT0010ED0100 Rev. 1.00 User Manual Preparation 18 TK-78K0R/KE3L+USB 9) 10) Preparation Read the license agreement, accept the terms and click ‘Next’ Complete the form and click ‘Next’ R20UT0010ED0100 Rev. 1.00 User Manual 19 TK-78K0R/KE3L+USB Preparation 11) Enter the license key by copy and paste, please take care that no linefeed character is included in the license key. Click ‘Next’ 12) Select ‘Complete’ and click ‘Next’ R20UT0010ED0100 Rev. 1.00 User Manual 20 TK-78K0R/KE3L+USB 13) Use the default installation folder or choose any other folder and click ‘Next’ 14) Click ‘Next’ R20UT0010ED0100 Rev. 1.00 User Manual Preparation 21 TK-78K0R/KE3L+USB Preparation 15) This is the last possibility to modify the installation options. Click ‘Install’ to start the installation. 16) At the end of a successful installation please select whether you would like to read the release notes and/or to start the IAR Embedded Workbench. Click ‘Finish’ to close the installation tool. R20UT0010ED0100 Rev. 1.00 User Manual 22 TK-78K0R/KE3L+USB Preparation 17) Click ‘Back’ to go to the IAR Installation Overview Window. Please feel free to test also the IAR Systems Visual State Design tool. 18) Click ‘Exit’ to close the IAR Installation tool. R20UT0010ED0100 Rev. 1.00 User Manual 23 TK-78K0R/KE3L+USB Preparation 2.2.3 Installation of WriteEZ5 Flash Programmer 1) Click ‘Install WriteEZ5 Programmer’. 2) Click ‘Yes’ to continue the installation R20UT0010ED0100 Rev. 1.00 User Manual 24 TK-78K0R/KE3L+USB Preparation 3) Click ‘I Agree’ to confirm that you accept the license agreement. 4) Accept the default installation folder or use the ‘Browse’ function to select any other folder of your choice. Click ‘Install’ to start the installation. R20UT0010ED0100 Rev. 1.00 User Manual 25 TK-78K0R/KE3L+USB Preparation 5) Click ‘Next’ to continue the installation. 6) As the programmer shall not be started now, please unmark ‘Run WriteEZ5’ and click ‘Finish’ to close the installer. R20UT0010ED0100 Rev. 1.00 User Manual 26 TK-78K0R/KE3L+USB Preparation 2.2.4 Installation of Sample Applications 1) Click ‘Install TK-78K0RKE3L+USB’ Sample Programs’. 2) Read the license agreement and click ‘I Agree’ to accept the terms. R20UT0010ED0100 Rev. 1.00 User Manual 27 TK-78K0R/KE3L+USB 3) Please select the installation folder of the samples and click ‘Install’ 4) Click ‘Close’ to finish the installation. R20UT0010ED0100 Rev. 1.00 User Manual Preparation 28 TK-78K0R/KE3L+USB Preparation 2.3 USB Driver Installation "NEC Electronics Starter Kit Virtual UART" USB driver must be installed on PC before you start using the TK-78K0R/KE3L+USB. Please, follow the instruction below to install the driver. "Starter Kit USB Driver" must be installed on the PC. The driver is included in the Embedded Workbench package, please refer to "2.2 Installation of Development Tools" to install the Embedded Workbench first. CAUTION: Do not use a USB hub for connecting TK-78K0R/KE3L+USB. First, connect the TK-78K0R/KE3L+USB USB2 to PC with USB cable. Figure 2 USB Connection Depending on the version of Windows OS, the installation will be differed. Please check your Windows version, and follow the instructions - Windows XP -> Chapter 2.3.1 Installation on Windows XP - Windows 2000 -> Chapter 2.3.2 Installation on Windows 2000 After the installation, go to Chapter 2.3.3 Completion of USB Driver Installation R20UT0010ED0100 Rev. 1.00 User Manual 29 TK-78K0R/KE3L+USB Preparation 2.3.1 Installation on Windows XP 1) Select ‘Install from a list or a specific location (Advanced)’ and click ‘Next’. 2) Mark ‘Include this location in the search’ and select the subfolder ‘78Kdrivers/renesas/MINICUBE’ of your Embedded Workbench installation folder. Click ‘Next’ R20UT0010ED0100 Rev. 1.00 User Manual 30 TK-78K0R/KE3L+USB 3) Click ‘Continue Anyway’ to continue the installation. 4) Click ‘Finish’ to close the installation wizard. R20UT0010ED0100 Rev. 1.00 User Manual Preparation 31 TK-78K0R/KE3L+USB Preparation 2.3.2 Installation on Windows 2000 1) Click ‘Next’ to continue. 2) Select ‘Search for a suitable driver for my device’ and click ‘Next’ R20UT0010ED0100 Rev. 1.00 User Manual 32 TK-78K0R/KE3L+USB Preparation 3) Mark ‘Specify a location’ and click ‘Next’ 4) Select the subfolder ‘78Kdrivers/renesas/MINICUBE’ of your Embedded Workbench installation folder using the ‘Browse’-function and click ‘OK’. R20UT0010ED0100 Rev. 1.00 User Manual 33 TK-78K0R/KE3L+USB 5) Confirm the found driver by clicking ‘Next’ 6) Click ‘Finish’ to close the installation wizard. R20UT0010ED0100 Rev. 1.00 User Manual Preparation 34 TK-78K0R/KE3L+USB Preparation 2.3.3 Completion of USB Driver Installation Check that the USB driver is installed correctly. Start "Device Manager", and find "NEC Electronics Starter Kit Virtual UART" (without "?" mark) under the "Ports (COM & LPT)". Figure 3 Device Manager Entry The screen above shows that the COM port number is "COM8". If IC-Spy is not in use, you can use this port number for connecting TK-78K0R/KE3L+USB. When you change the USB port connection, the COM port number will be changed as well. CAUTION Do not do “Hardware Modification Scan” when you communicate with the target device. R20UT0010ED0100 Rev. 1.00 User Manual 35 TK-78K0R/KE3L+USB Preparation 2.4 Sample Programs This section explains the overview and preparation of sample programs. For details about the sample programs, see the two corresponding application notes: Application Note USB HID (Human Interface Device) Class Driver Application Note USB CDC (Communication Device Class) Driver The sample programs consist of following directories: Figure 4 Sample Directories include: include file folder src: source file folder EW78K_project: project file folder (*.ewp: project file, *.eww Workspace file) inf: CDC USB driver folder R20UT0010ED0100 Rev. 1.00 User Manual 36 TK-78K0R/KE3L+USB Experiences Chapter 3 Experiences In this chapter, you will experience how to use the development tools with using the sample programs. The development tools are: - Integrated Development Environment (IDE), Embedded Workbench for 78K - Integrated Debugger, C-Spy for 78K You will use the programs that you prepared in "2.2.4 Installation of Sample Applications”, as the sample programs for TK-78K0R/KE3L+USB. You will be able to understand how to use the development tools and the concept of project files which you need for producing application programs. The overall steps are as follows: Figure 5 Overall Steps to Start a Debug Session R20UT0010ED0100 Rev. 1.00 User Manual 37 TK-78K0R/KE3L+USB Experiences 3.1 Start Embedded Workbench for 78K Let's start using the development tools. First, start the Embedded Workbench Select "Windows Start Menu" -> "Program" -> "IAR Systems" -> "Embedded Workbench for Renesas 78K V4.70 Kickstart". EW78K starts... Figure 6 EW78K Start-Up R20UT0010ED0100 Rev. 1.00 User Manual 38 TK-78K0R/KE3L+USB Experiences 3.2 What is ‘Embedded Workbench for 78K’ ? In EW78K, application programs and environment setting are handled as a single project, and series of actions such as program creation using the editor, source management, build, and debugging are managed. One or more projects can be combined in one workspace. The same project may also be included in different workspaces. A workspace is a collection of projects containing on information about the configuration of each project. Menu Bar Tool Bar Editor Window Workspace Window Figure 7 EW78K Main Windows Message Window Workspace window: A window in which project names, source files, include file and generated output files are displayed using a tree structure. Message window: A window in which the build execution messages are displayed. Editor window: A window to create all kind of source files. R20UT0010ED0100 Rev. 1.00 User Manual 39 TK-78K0R/KE3L+USB Experiences What is a project? A project is the unit that is managed by EW78K. A project refers to an application system and environment development based on EW78K. EW78K saves project information in a "project file". What is a project file? A project file contains project information that includes the source files, device name, tool options for compiler, assembler, linker and debugger. The file name format is "xxxxx.ewp". Project files are created in the directory you specify when creating a new project. What is a workspace? A workspace is the unit used to manage all the projects required for one application system. A workspace file contains one or more project files. The file name format is "xxxxx.eww". Workspace files are created in the directory you specify when creating a new project. R20UT0010ED0100 Rev. 1.00 User Manual 40 TK-78K0R/KE3L+USB Experiences 3.3 Open Workspace In this section, you will use the workspace that you created in "2.2.4 Installation of Sample Applications" For creating a new workspace, refer to "Chapter 6 Other Information". Select ‘File -> Open -> Workspace…’ on the menu bar. Then, select " 78K0R_Kx3L(HID).eww " under the directory " TK-78K0RKE3L+USB\Samples78K0R Kx3L USB(HID) \EW78K_Project". Figure 8 EW78K Open Workspace R20UT0010ED0100 Rev. 1.00 User Manual 41 TK-78K0R/KE3L+USB Experiences Figure 9 EW78K Open Workspace File Selection Dialogue Figure 10 EW78K Workspace Loaded R20UT0010ED0100 Rev. 1.00 User Manual 42 TK-78K0R/KE3L+USB Experiences 3.4 Build Application To build the application use either the ‘Make’ button of the tool bar, select the menu item ‘Project -> Make’ or use the keyboard and press ‘F7’ key. Figure 11 EW78K Make All build messages can be seen in the Messages Window. Figure 12 EW78K Message Window What is the difference between Make and Rebuild? Make and Rebuild are functions creating an executable file from source files in a project. Compiling, assembling, linking, and other processing actions are performed automatically. To reduce the time for the build, make detects and compiles/assembles only the files that have been updated from the previous build process, whereas rebuild compiles and assembles all the source files. R20UT0010ED0100 Rev. 1.00 User Manual 43 TK-78K0R/KE3L+USB Experiences 3.5 Tool Configuration After getting familiar with the development environment you can modify the configuration according to your needs. All options for the assembler, compiler, linker, and debugger can be modified in the menu ‘Project->Options’. Figure 13 EW78K General Project Options Figure 14 EW78K Compiler Options R20UT0010ED0100 Rev. 1.00 User Manual 44 TK-78K0R/KE3L+USB Experiences Figure 15 EW78K Linker Options Figure 16 EW78K Debugger Options R20UT0010ED0100 Rev. 1.00 User Manual 45 TK-78K0R/KE3L+USB Experiences 3.6 Check Board Settings Before connecting the PC and the TK-78K0R/KE3L+USB with USB, you should check the setting of switch and jumper pin on the board. Set the switch and the jumper pin on the TK-78K0R/KE3L+USB as follows. Jumper Position JP1 short JP2 1-2 short JP3 1-2 short JP4 Short SW4 Debug Writer Table 2 TK-78K0RKE3L+USB Jumper Setting 1 ON 2 ON 3 ON SW1 4 5 ON ON 6 7 8 OFF OFF OFF Table 3 TK-78K0RKE3L+USB Switch SW1 Setting Figure 17 TK-78K0RKE3L+USB Jumper & Switches After the switch settings are completed, connect the PC to USB2 on TK-78K0R/KE3L+USB with USB cable. If the "Found New Hardware Wizard" is started, install USB driver with referring "2.3 USB Driver Installation". R20UT0010ED0100 Rev. 1.00 User Manual 46 TK-78K0R/KE3L+USB Experiences 3.7 Start C-Spy Debug Session To start the C-Syp debugger use either the ‘Download and Debug’ button of the tool bar, or select the menu item ‘Project -> Download and Debug’ or use the keyboard and press ‘STRG+D’. Figure 18: IAR Embedded Workbench Download and Debug In case of starting a debug session for the first time, the following C-Spy Hardware Setup Dialogue is opened automatically. Later you can modify the configuration only in the debug session selecting the menu ‘ Emulator->Hardware Setup…’. R20UT0010ED0100 Rev. 1.00 User Manual 47 TK-78K0R/KE3L+USB Experiences Figure 19 C-Spy Hardware Setup Dialogue Figure 20 C-Spy Debug Session After the download the application, is started automatically and stopped at the beginning of the main function. To disable the automatic start and run to main, please unmark this feature in the debugger options setting (see Figure 16). R20UT0010ED0100 Rev. 1.00 User Manual 48 TK-78K0R/KE3L+USB Experiences 3.8 Run Application Program To run the application program either press the ‘Go’ toolbar button, select the menu ‘Debug->Go’ or use the keyboard and press ‘F5’ Figure 21 C-Spy 'Go' Button When the application is running, the ‘Go’ button and all single step buttons are disabled: Figure 22 C-Spy Application Control Buttons Run Mode Figure 23 C-Spy Application Control Buttons Stop Mode R20UT0010ED0100 Rev. 1.00 User Manual 49 TK-78K0R/KE3L+USB Experiences Connect the PC to USB1 on TK-78K0R/KE3L+USB with USB cable while the application is running. Figure 24 TK-78K0RKE3L+USB USB connector USB1 Start the Windows Notepad editor or any other text editor of your choice. The alphabet is entered by "SW2" operation to the up side; pushing "SW2" starts the new paragraph as follows. Figure 25 TK-78K0RKE3L+USB switch SW2 R20UT0010ED0100 Rev. 1.00 User Manual 50 TK-78K0R/KE3L+USB Experiences Figure 26 Notepad Editor Entering characters similar to Figure 25 confirms that the application is working correctly. For more information about the functions that are used in those sample program, see "USB HID (Human Interface Device) Class Driver application note". 3.9 Stop Application Program To stop the application program either press the ‘Break’ toolbar button or select the menu ‘Debug->Break’. Figure 27 C-Spy 'Break' Button R20UT0010ED0100 Rev. 1.00 User Manual 51 TK-78K0R/KE3L+USB Experiences 3.10 Close C-Spy Debug Session To close a debug-session please press the ‘Stop Debugging’ toolbar button. Figure 28 C-Spy 'Stop Debugging' Button After closing the debug session, the Embedded Workbench is back in ‘Edit Mode’ R20UT0010ED0100 Rev. 1.00 User Manual 52 TK-78K0R/KE3L+USB Experiences 3.11 Close Embedded Workbench To close the Embedded Workbench please use the menu ‘File -> Exit’. Figure 29: IAR Embedded Workbench Close R20UT0010ED0100 Rev. 1.00 User Manual 53 TK-78K0R/KE3L+USB Hardware Specification Chapter 4 Hardware Specification In this chapter, the hardware of TK-78K0R/KE3L+USB will be explained. Microcontroller µPD78F1026 (78K0R/KE3-L) External main system clock: 20MHz Clock Subsystem clock: 32.768KHz Internal oscillation clock: 20, 8, 1MHz PWM output Filter:LMV324M:NS(U13) AMP:LM4865M:NS(U14) Audio Speaker:0.3W (for simplified monitoring) Jack:3.5mm monaural Filter ON/OFF Switchable (SW5) Output Volume (VR1) USB MINI B (USB1) USB Function Interface USB MINI B (USB2) Debug/Serial communication Expansion connector 50Pin socket x2 pad only(CN1,CN2) Connecter for MINICUBE2 (FP1) Power Supply Voltage Input/output for operation check use The name in brackets is the name printed on the board 5V (USB or AC adapter) ·4 ways + center-push switch (SW2) ·Dip switch (SW1) ·7Seg-LED (U1,U2) ·Reset switch (SW3) Table 4 TK-78K0RKE3L+USB Hardware Overview R20UT0010ED0100 Rev. 1.00 User Manual 54 TK-78K0R/KE3L+USB Hardware Specification 4.1 Layout of hardware functions Figure 30 Troubleshooting 4.2 Layout of solder-short pad and test pad Figure 31 TK-78K0RKE3L+USB pads R20UT0010ED0100 Rev. 1.00 User Manual 55 TK-78K0R/KE3L+USB Hardware Specification 4.3 Hardware Functions 4.3.1 SW1, SW4 The bit 1-3 on SW1 are for debug mode settings, bit 4,5 are for mode settings and bit 6-8 are DIP switches connected to P41,P42,P17 pins in microcontroller. 1) In case of using the C-Spy debugger use following settings: 1 2 ON / ON OFF 3 SW1 4 5 6 7 8 ON X X X X X SW4 Debug/Writer Side Table 5 C-Spy Debug Configuration SW1:1 ON: The microcontroller runs the programs stored in the flash memory as soon as it gets power supply. OFF: The microcontroller stays being reset until C-Spy started. 2) In case of running the programs stored in built-in flash memory without using C-Spy debugger or debugging the microcontroller with MINICUBE2, use following settings and re-supply power. 1 OFF 2 OFF 3 OFF 4 ON SW1 5 X SW4 6 X 7 X 8 X K0R-K0R USB Side or center Table 6 Standalone Configuration Set switch SW4 in position ‘center’, if you use P11 and P12 on the Expansion connector 3) 4) 5) Bit4 is the switch for POWER LED. ON: If CPU is supplied power, LED1 is turned on. OFF: If CPU is supplied power, LED1 isn't turned on. Bit5 is the switch for the audio mute. ON: Audio output is muted by P31output low. OFF: Non audio mute The bits 6-8 are connected to P41, P42, P17 pins of the microcontroller. ON means "Low" and OFF means "Open". When you need to use this, you need to set the microcontroller built-in pull-up resistor option registers (PU1, PU4) to ON. For details about settings of microcontroller built-in pullup resistor option registers, refer to 78K0R/KE3-L User's Manual (U19878E). 6 P42 SW1 7 P43 8 P17 Table 7 SW1 Bit 6-8 R20UT0010ED0100 Rev. 1.00 User Manual 56 TK-78K0R/KE3L+USB Hardware Specification 4.3.2 SW2 (INTP0) SW2 is a 4 ways + center-push switch. When the switch is moved to one of 4 ways or is pushed down, it sends the signal of "Low". When it is released, it becomes "Open" again. You need to set the pull-up resistor option register ON for this function. (For more information about the pull-up resistor option register, refer to the 78K0R/KE3-L user's manual, U19878E). SW2 Signal Name MCU Pin Name Operation 1pin P70 P70 / KR0 UP 2pin P71 P71 / KR1 CENTER PUSH 3pin P72 P72 / KR2 LEFT 4pin P74 P74 / KR4 / INTP8 RIGHT 5pin GND GND 6pin P73 P73 / KR3 DOWN Table 8 SW2 Pin Functions (ALPS SKRHADE010) 4.3.3 SW3 (RESET SW) This is the reset switch. You can reset the microcontroller by pressing this switch. 4.3.4 SW5 (Filter) SW5 is the slide switch to select use/not use of the Filter (LMV324M). When it sets to "OFF", it does not use the Filter and it inputs sound signals from microcontroller to AMP. Figure 32 SW5 Filter Setting 4.3.5 JP1 JP1 is the jumper switch pin for connecting the microcontroller and the filter. Please set the jumper switch pin short circuit. Please refer to the circuit diagram for further details. R20UT0010ED0100 Rev. 1.00 User Manual 57 TK-78K0R/KE3L+USB Hardware Specification 4.3.6 JP2, JP3 JP2, JP3 are jumper switch pin for selecting the power supply to the CPU. JP2 JP3 1-2 short 1-2 short USB power supply from USB2 connecter 2-3 short 2-3 short USB power supply from USB1 connecter - 2-3 short AC adapter power supply from CN3 connecter. Table 9: Power Supply Configuration 4.3.7 JP4 JP4 is the jumper switch pin for supplying the power to the audio circuit. Please set the jumper switch pin short circuit. Please refer to the circuit diagram for further details. 4.3.8 LED1 (POWER) This is the POWER LED. It is lighted when it gets power supply. You can turn off the LED by setting the bit4 OFF on SW1. R20UT0010ED0100 Rev. 1.00 User Manual 58 TK-78K0R/KE3L+USB Hardware Specification 4.3.9 U1, U2 (7-segment LED) U1and U2 are 7-segment LED. By setting the 7-segment LED output data in P20-P23 and setting P50P53 from Low to High, the data is latched and the 7-segment LED displays the data. Figure 33 7-Segment LEDs To display "1" on U1 and "2" on U2: P11_bit.no1 = 0; P11_bit.no1 = 1; // Set P111 to Low, then High P2 = 0xa4; P5 = 0xa4>>4; // Set data for "2" in P2 and P5 P11_bit.no0 = 0; P11_bit.no0 = 1; // Set P110 to Low, then High P2 = 0xf9; P5 = 0xf9>>4; // Set data for "1" in P2 and P5 PM11_bit.no0 = 0; PM11_bit.no1 = 0; // Set P110, 111 to output mode PM5 = 0xf0; // Set lower 4bit of P5 to output mode PM2 = 0xf0; // Set ower 4bit of P2 to output R20UT0010ED0100 Rev. 1.00 User Manual 59 TK-78K0R/KE3L+USB 4.3.10 Hardware Specification CN1, CN2 These are the connecters for expansion connections. The connecter is not installed. (HIROSE ELECTRIC CO., LTD. HIF-3H-50DA-2.54DSA). 4.3.11 CN3 This is the connector for AC adapter. Please, connect the bundled AC adapter (+5V). Support plug: 2.1mm DC jack (center plus). 4.3.12 J1 This is the jack for external speakers. Connect a speaker when you play sound. Support jack: 3.5mm (monaural). 4.3.13 VR1 This is the audio output volume control. If the audio mute is set, then audio is not output. 4.3.14 USB1 This is the USB connecter for the USB function controller. 4.3.15 USB2 This is the USB connecter for the debug / serial communication. It is found as “NEC Electronics Starter Kit Virtual UART”. 4.3.16 FP1 This is the interface for connecting MINICUBE2. 4.3.17 Solder-short pad label With using the solder-short pad to cut the circuit, users can customize the circuit. The solder-short pad looks like the picture below. To open, use cutter to cut the dent part. To short, put solder on the pad. Solder-short pad Solder-short pad (Open) (Short) R20UT0010ED0100 Rev. 1.00 User Manual 60 TK-78K0R/KE3L+USB Solder-short pad name P120 Hardware Specification Before shipment short P16 short P31 short AVREF short EVDD short P110, P111 P20~P23, P50~P53 RIGHT short short open Connection short P120 connected to USB1 bus power detecting signal open P120 used as multipurpose I/O short P16 is connected to audio circuit. open P16 used as multipurpose IO. short P31 is connected to audio muting circuit. open P31 used as multipurpose IO. short VDD = AVREF open AVREF is separated from VDD short VDD = EVDD open EVDD is separated from VDD short P110 and P111 are connected to 7-Segment LED data latch circuit. open P110 and P111 used as multipurpose I/O short These ports are connected to 7-Segment LED data latch circuit. open These ports used for multipurpose IO short External speaker output connecter J1 is connected as stereo connecter. open Connection for the monaural connecter Table 10 Solder Short Pad Description Note: All ground signals are connected. R20UT0010ED0100 Rev. 1.00 User Manual 61 TK-78K0R/KE3L+USB Troubleshooting Chapter 5 Troubleshooting 5.1 If you cannot find USB driver when connecting the kit Check Point 1 If you use USB hub, do not use it. (USB hub is not supported) Check Point 2 Check if you installed "Starter Kit USB Driver" in "2.3 USB Driver Installation ". If not, install the driver. Check Point 3 If above two check points are confirmed, disconnect the USB cable from PC and reconnect again. It should show the "Found New Hardware Wizard" wizard. Operate the installation with referring to "2.3 USB Driver Installation". After the installation, make sure you go through "2.3.3 Completion of USB Driver Installation" to confirm the USB driver installation 5.2 Error when you start the debugger There could be several reasons to make errors happen. The solving processes differ depending on errors. Please check the error message first. 5.2.1 "Can not communicate with Emulator..." (F0100 or A0109) Check Point 1 If you use USB hub, do not use it. (USB hub is not supported) Check Point 2 Check if the settings of switches on the kit are correct with referring "3.6 Check Board Setting". Check Point 3 Confirm the USB driver installation with referring to "2.3.3 Completion of USB Driver Installation". Check Point 4 If above three check points are confirmed, close the debugger and disconnect the USB cable from PC. Re-connect USB cable properly to both the PC and the kit, and then restart the debugger. 5.2.2 "Incorrect ID Code." (Ff603) This error occurs when the security ID stored on microcontroller built-in flash memory is different from the ID code you entered at the start of debugger. Figure 34 Security ID entry area at the start of debugger Check Point 1 Enter correct security ID and click OK on the configuration window. Check Point 2 If you forgot the security ID, you have to erase the microcontroller built-in flash memory. Before erasing, check if you actually set the security ID in your application. Also remember the code you set for the security ID. After this, erase the flash memory with referring to "5.4 Erase microcontroller built-in flash memory". R20UT0010ED0100 Rev. 1.00 User Manual 62 TK-78K0R/KE3L+USB Troubleshooting 5.2.3 "On-chip debug function had been disabled in the device.” (F0c79) This error occurs when the value at address 00C3H (On-chip debug option byte) in microcontroller built-in flash memory is incorrect. You need to erase the flash memory. Check Point 1 Check if you actually set the correct on-chip debug option byte in your application. If it is not correct, then set correctly. Check Point 2 Erase the flash memory with referring to "5.4 Erase microcontroller built-in flash memory” R20UT0010ED0100 Rev. 1.00 User Manual 63 TK-78K0R/KE3L+USB Other Information Chapter 6 Other Information This chapter explains some useful operation techniques of development tools and circuit diagram of the kit for developing of user programs. 6.1 Create a new Workspace Now, create a new workspace and project. The Embedded Workbench allows you to create a new workspace with following "New Workspace" dialog. Select "File -> New Workspace...": Figure 35 EW78K Create new Workspace R20UT0010ED0100 Rev. 1.00 User Manual 64 TK-78K0R/KE3L+USB Other Information 6.2 Add one or multiple Projects to a new Workspace After creating a new workspace you can one or multiple existing projects or create a new project Select "Project -> Add existing Project...": Figure 36 EW78K Add existing Project Select the project-file (*.ewp) of the project you want to add: Figure 37 EW78K Add Existing Project Dialogue R20UT0010ED0100 Rev. 1.00 User Manual 65 TK-78K0R/KE3L+USB Other Information Alternatively you can create a new project by selecting ‘Project->Create New Project…’ Figure 38 Create New Project In following dialogue you can select a template used for the new project. If you want to create a new project from scratch manually, please ‘Empty Project’ Figure 39 EW78K Create New Project Dialogue After adding an existing project or creating a new project you have an titled Workspace which has to be saved by ‘File All”: R20UT0010ED0100 Rev. 1.00 User Manual 66 TK-78K0R/KE3L+USB Other Information Figure 40 EW78K Untitled Workspace Figure 41 EW78K Save All In the following Dialogue you can specify the workspace name and the location where it shall be stored: R20UT0010ED0100 Rev. 1.00 User Manual 67 TK-78K0R/KE3L+USB Other Information Figure 42 EW78K Save Workspace As Dialogue R20UT0010ED0100 Rev. 1.00 User Manual 68 TK-78K0R/KE3L+USB Other Information 6.3 Add additional Source Files to a Project To add an additional source file to an existing project, please select ‘Project -> Add Files…’. Figure 43 EW78K Add Files In the following dialogue you can specify the source file to be added. Please keep mind that only files listed according to the selected extension filter: Figure 44 EW78K Add Files Dialogue R20UT0010ED0100 Rev. 1.00 User Manual 69 TK-78K0R/KE3L+USB Other Information 6.4 Debugger Tips 6.4.1 Set/delete breakpoints A breakpoint at a specific source line can be defined either by - moving the cursor to the source code line and pressing the key ‘F9’ or - moving the cursor to the source code line, open the pop-menu by right mouse button click and selecting “Toggle Breakpoint (CODE)”. or - using the Breakpoint Definition Dialogue An active breakpoint is marked by a filled red circle in the first row Figure 45 C-Spy active Breakpoint You get an overview about all defined breakpoints by selecting “View -> Breakpoints” R20UT0010ED0100 Rev. 1.00 User Manual 70 TK-78K0R/KE3L+USB Other Information Figure 46 C-Spy Breakpoint Window Breakpoints can be delected or deactivated in Pop-up menu of the Breakpoint Window. A deactivated breakpoint is marked as a non-filled red circle in the source code window. Figure 47 C-Spy deactivated Breakpoint R20UT0010ED0100 Rev. 1.00 User Manual 71 TK-78K0R/KE3L+USB Other Information 6.4.2 Display global Variables Global variables are displayed in the Watch Window (select menu “View-> Watch”). Variables can be added either by entering the variable name manually, or by selecting the variable and using the Pop-up menu ‘Add to watch” or by simple “drag & drop” the symbol name from Source Code Window to Watch Window. Figure 48 C-Spy display global Variables R20UT0010ED0100 Rev. 1.00 User Manual 72 TK-78K0R/KE3L+USB Other Information 6.4.3 Display global Variables while Application is running The C-Spy Watch Window is not updated while the application is running. To display global variables while the application is running please use the Live-Watch Window (select menu “View -> Live Watch”). Figure 49 C-Spy display global Variables while Application is running R20UT0010ED0100 Rev. 1.00 User Manual 73 TK-78K0R/KE3L+USB Other Information 6.4.4 Display local Variables Local Variables are displayed automatically in the Local Watch Window (select menu ‘View -> Locals”). The variable list can not be modified manually, but is an automatically generated list according the currently executed function. Figure 50 C-Spy display local Variables R20UT0010ED0100 Rev. 1.00 User Manual 74 TK-78K0R/KE3L+USB Other Information 6.4.5 Display Memory Content The complete memory area (Flash and RAM area) is displayed in the memory window (select menu ‘View -> Memory). Changed values since the last break are marked in red. Figure 51 C-Spy display of Memory Content R20UT0010ED0100 Rev. 1.00 User Manual 75 TK-78K0R/KE3L+USB Other Information 6.4.6 Display Memory Content while Application is running Like the Watch Window the Memory Window is also only updated when the application is stopped. To display the memory content while the application is running the Live Memory Window has to be used (select Emulator -> Live Memory). Instead of the compete memory only up to 16 byte can be displayed. Figure 52 C-Spy Display of Memory Content while Application is running R20UT0010ED0100 Rev. 1.00 User Manual 76 TK-78K0R/KE3L+USB Other Information 6.4.7 Display of CPU- and I/O-Register Content The content of CPU- and I/O registers is displayed in the Register Window (select “View -> Register”). Figure 53 C-Spy Display of CPU- and I/O-Register Content Please use the list box at the top of the Register Window to select the registers to be displayed. Figure 54 C-Spy Register Window R20UT0010ED0100 Rev. 1.00 User Manual 77 TK-78K0R/KE3L+USB Other Information 6.5 Erase microcontroller built-in flash memory If the On-Chip Debug Option Byte is set to "Do not erase data of flash memory in case of failures in enabling on-chip debugging" and if you forget the security ID, you need to erase the flash memory completely. To erase the flash memory, please follow the steps below. WriteEZ5 is installed at "2.2.3 Installation of WriteEZ5 Flash Programmer". 1) Start WriteEZ5 by selecting "Windows Start" menu, "Programs", "Renesas Electronics Tools", "WriteEZ5", "V1.00", and "WriteEZ5". Figure 55 WriteEZ5 R20UT0010ED0100 Rev. 1.00 User Manual 78 TK-78K0R/KE3L+USB 2) Other Information Set the switch and the jumper pin on the TK-78K0R/KE3L+USB as follows. 1 ON 2 ON 3 ON SW1 4 5 ON ON 6 OFF 7 OFF 8 OFF Table 11 WriteEZ5 Configuration Jumper Position JP1 short JP2 1-2 short JP3 1-2 short JP4 Short SW4 Debug Writer Table 12 WriteEZ5 Jumper Setting 3) Then, please connect the PC to “USB2” on the TK-78K0R/KE3L+USB with the USB cable. Figure 56 TK-78K0RKE3L+USB Jumper & Switches R20UT0010ED0100 Rev. 1.00 User Manual 79 TK-78K0R/KE3L+USB 4) Other Information Push the "Setup" button. Figure 57 WriteEZ5 Setup Button 5) Push the "PRM File Read" button. Figure 58 WriteEZ5 Device Setup Dialogue R20UT0010ED0100 Rev. 1.00 User Manual 80 TK-78K0R/KE3L+USB 6) Other Information Please select the file “78F1026.prm” in the CD-ROM directory “WriteEZ5\PRM78F1026_V100” . Figure 59 WriteEZ5 Parameter File Selection Dialogue 7) "Port" selects the COM port number where TK-78K0R/KE3L+USB is allocated. Only the COM port number that the personal computer has is displayed in this pull-down menu. Figure 60 WriteEZ5 COM-Port Selection R20UT0010ED0100 Rev. 1.00 User Manual 81 TK-78K0R/KE3L+USB 8) Other Information "Erase": The deletion of the flash memory begins when the button is pushed. Figure 61 WriteEZ5 Erase Button 9) If Flash EEPROM has been erased successfully, “chip erase finish.” will be displayed. Figure 62 WriteEZ5 Erase completed successfully R20UT0010ED0100 Rev. 1.00 User Manual 82 TK-78K0R/KE3L+USB Other Information 6.6 Circuit Diagrams Please find the schematics attached to this document. To open the attachments view in the Adobe Reader press the paper clip in the lower left corner of the window. To open the attachment, double click the TK-78K0R_KE3L+USB_schematics.pdf. R20UT0010ED0100 Rev. 1.00 User Manual 83