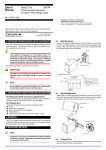
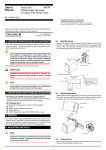
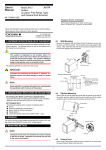
1
8.1
Position of selection switch
0
1
2
5
7
Rotating direction of adjustment switch
Items to be adjusted
No function
Zero adjustment of output
Span adjustment of output
Wiring resistance correction
ON/OFF of RJC
Action to be adjusted
Increase of output adjusted value, execution of
Clockwise
wiring resistance correction and ON of RJC
Decrease of output adjusted value, reset of wiring
Counterclockwise
resistance corrected value and OFF of RJC
Setting Thermocouple Type
Set the thermocouple type connected to the input in [D08: TC TYPE].
8.2
Display
Measuring Range Measuring Display
span
Measuring Range Measuring
span
TYPE K
TYPE E
TYPE J
TYPE T
-270 to 1372 C
TYPE R -50 to 1768 C
3mV TYPE S -50 to 1768 C
3mV
-270 to 1000 C
-210 to 1200 C minimum TYPE B
0 to 1820 C minimum
-270 to 400C
TYPE N -270 to 1300 C
Setting Temperature Unit
Set the temperature unit of the input range in [D19: UNIT].
[Adjusted volume by adjustment switch]
One click changes about 0.005% of the output range.
8.3
7.3.1 Adjusting output using the switches on the front panel
Setting Burnout Action
Set the burnout action in [D43:BURN OUT].
Set "OFF", "UP", or "DOWN."
(1) Zero adjustment of output
Turn the selection switch to “1”. Rotate the adjustment switch
clockwise to increase the output, and counterclockwise to decrease the output.
(2) Span adjustment of output
Turn the selection switch to “2”. Rotate the adjustment switch
clockwise to increase the output, and counterclockwise to decrease the output.
NOTE
● Changing the input range and the burnout action
direction resets the input adjusted value and the wiring
resistance corrected value.
● Execute the wiring resistance correction when the
burnout action direction or input wiring is changed.
7.3.2 Correcting wiring resistance using the switches on the front panel
When an error occurs due to the influence of the input wiring resistance, perform the wiring as the figure below, apply a stable input, and
execute the following operations. Then the wiring resistance can be
corrected automatically.
8.4
Setting Input Range
Set the input range 0% in [D27:INPUT1L_RNG], and the input range
100% in [D28:INPUT1H_RNG].
8.5
JT11
Correcting Wiring Resistance
Correct the wiring resistance in [P01:WIRING R].
Select “EXECUTE” for correction, and “RESET” for resetting the corrected value.
Perform wiring as the figure shown in Subsection 7.3.2, “Correcting
wiring resistance using the switches on the front panel” before correcting the wiring resistance.
Short-circuit at the cable end.
Be sure to rotate the adjustment switch counterclockwise to reset the
corrected value before executing the wiring resistance correction.
(1) Executing the wiring resistance correction
Turn the selection switch to “5”, and rotate the adjustment switch
clockwise. Then the wiring resistance is adjusted after 1 second
automatically.
(2) Resetting the wiring resistance corrected value
Turn the selection switch to “5”, and rotate the adjustment switch
counterclockwise. Then the adjusted value is reset after 1 second.
7.3.3 Turning on/off the RJC using the switches on the
front panel.
Turn the selection switch to “7”. Rotate the adjustment switch
counterclockwise to turn off the RJC sensor after 1 second. Rotate the adjustment switch clockwise to turn on the RJC sensor after 1 second.
NOTE
● Make sure to turn the selection switch back to the
position "0" after each adjustment. The positions other
than "0" mean the adjustment modes, and it may cause
a wrong operation.
● When the selection switch is turned to the positions
other than "0", setting through the setting tool is
impossible.
● The RJC is turned on when the power is turned on again
after turned off.
8. SETTING PARAMETERS
Set the parameters through a PC (VJ77 Parameter Setting Tool) or the
Handy Terminal. For details how to set, see Chapter 10, “List of Parameters”, User’s manual “VJ77 PC-based Parameter Setting Tool”
(IM 77J01J77-01E), or User’s manual “JHT200 Handy Terminal” (IM
JF81-02E). The description in the [ ] indicates the parameters.
3
IM 77J03T01-01E
1st Edition
Apr.19 2004-00