Download User`s Manual
Transcript
User's Manual
3. Safety.
1.5" ,1,9" LCD VIDEO BABY MONITOR
.
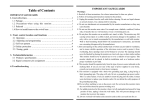
Contents List
To prevent short circuits, this product should only be used inside and only in dry
spaces. Do not expose the components to rain or humidity.
o
This product is designed for use with standard
Do not connect to other sources of power.
1.
2.
3.
4.
5.
6.
Welcome
Warnings
Safety
Product content
Product features
Camera set-up & operation
7.
8.
9.
Monitor set-up & operation
AVconnection
Technicalinformation
10. Troubleshooting
11. Warranty
12. EU Environmental Protection
I.Welcome
Congratulations on choosing to buy a Baby product.
This Baby product is manufactured to the highest standards of performance
and safety. As part of our philosophy of customer service and satisfaction this
product is backed by a comprehensive 1 year warranty.
We hope you will enjoy using your purchase for many years to come.
1 1
0v-240v AC power.
.
Never connect an adaptor or power cord when it is damaged.
o
Avoid extreme ambient temperatures and strong vibrations
.
Do not disassemble any part ofthe product: the device contains live parts and
no user-serviceable parts are inside.
4. Product Content
Check that you have received the following parts:
l$
O
1
xcamera
lxLCDmonitor
6
@
t xAVcable
lxUser'smanual
@ 2xPoweradaptors
@ 2 x Lithium ion batteries
(INBUiLT, NOT
'HOWN)
2.Warning!
For carefree and safe use ofthis product, please read this manual and safety
information carefully and follow all instructions. This product is approved to
Australian standards. lnternal manipulation of this product or any modification
to this product is forbidden, due to safety, security and electrical authority
approval issues.
ln case of improper usage or ifyou have opened, altered and repaired the
product yourself, all warranties expire. The supplier does not accept
responsibility for additional damage other than covered by the legal product
responsibility.
Young children should use the device only under adult supervision. No
guarantee or liability will be accepted for any damage caused due to incorrect
use of the equipment supplied, other than indicated in this owner's manual
and the included warranty card.
o
4ft I
,#
;Wr
6. Camera set up &
5. Product features
I
2
3
4
5
6
7
I
9
I
lnfra-red led
Lens
Antenna
DC
input
Light sensor
Channel switch
Microphone
Clip
Flexible hose
ru
i
I
I
:€
Monitor
P,. {.
L
0*
w
\6
* \rt
'I
2
3
4
5
6
, 7
8
9
Power button
monitor
Voice control tune
Channel indicator
LowpowerindicatorLED
-
lmage Bright
lmage Dim
Charge indicator
10 Channel button
11 ACadapter5VDCinput
12 A/VOutput
l3
7.
-
Volume button
TFT-LCD
-
Stand
14 Batterycompartment
15 Voice control switch
{lo.ated behind battery)
Before use
1.5",1.8" Baby Monitor is pre-installed with rechargeable batteries. Before use
fully recharge the batteries in the Monitor and Camera. The camera and monitor
can be operated while recharging the battery or left connected to the DC power
adaptors for use.
operation
Connect6VACadaptorwith(4)
Ensurethatthechannel switch (6) is settochannel
Make(8)of the comera fired well
Place camera on a firm surface facing the baby
1
upordowntofacethe baby
The camera will automatically switch to night vision in a dark environment.
.
.
When in night vision mode the picture will appear in black and white.
Night vision mode will switch off as soon as the camera is exposed to light.
Monitor set up & operation
Press
the power button
(1) to
turn on
lf the CH'l LED (5) is not lit press the CH button (10) until it is
Ensure that the camera is recharged and turned on. The image from the camera
will be shown on the monitor
Use the Bri - (7) & Bri+ (8) buttons to adjust the brightness of the image
Open the stand (13) and place in a location suitable for viewing
Adjust camera to show baby if required
Use dial (2)to adjust volume
lf the image is subject to interference try moving the location of the monitor or
changing the transmission channel by pressing the CH button (1 0)
o Once the channel is changed on the monitor it is necessary to change the
channel on the camera using the Channel Switch (1 0)
The voice control function can be turned on or off with switch (1 5)
o This function will allow the camera to switch to standby power saving mode
after a short period oftime if no sound is detected.
o The camera will switch back to active mode after sound is detected
Use the Voice Control Tune dial (4) to adjust the sensitivity of the voice control
feature.
.
I
\
8. AV Connection
The monitor can be connected to a TV or other visual display by using the AV cable
-
Connect the AV cable 3.5mm jack to the AV output (1 2) on the monitor
Connect the Yellow and red RCA jacks to an AV input on the TV or visual display.
Use the colour coding of the RCA jacks to match the colour coding on theTV
or visual display
Use the AV or source select on the TV or visual display to select the channel that
the monitor is connected to and display the image.
.
9. Technical
information.
Camera frequency
:
2.4GHz
Channel frequencies: CH1 241 4MHz,
CH2 2432MH2, CH3 245OMHz,
CH42468MHz.
A/V modulation method: FM
Antenna: Built in omni-directional
lmage sensors: 1/3 coms
Effective pixels: NTSC
PAL 628(h)xs82(v)
51
0(h\xa92(v)/
11.
Lens: F6.0mm, F1.8
Night vision distance: 3-5m
Camera power:DC6V
Monitor Power: DC5V or lithium ion battery
Operating temperature: 0-40*C/32-1 04*F
Monitor frequen
cy :
Display inch: 'l .5"
tr
2.4GHz
,
1
.8"
tr
Warranty
1.5' ,1.8" Baby Monitor is warranted against faulty workmanship for a period of
12 months from the date of purchase. Suppliert liability is limited to replacement of
the product and claims for associated or consequential loss or damage will not be
accepted by supplier's. Warranty is void and does not apply if, at supplier's discretion,
the product has been damaged or rendered faulty by accident, abuse, misuse,
incorrect application or if the product has been modified or tampered with. Proof
of purchase is required to validate warranty claims. All claims outside the warranty
period will be rejected.
Display: Full colour
Receiver sensitivity: -83DBM
Recharging time:2 to 3hrs
10. Trouble shooting
No picture or sound
Ensure both the camera and the monitor are turned on. Confirm the power
indicator light (4) on the camera and one of the channel lights (5) on the monitor
are lit.
Make sure low power indicator lights are off.
lfthey are on, the batteries need to be recharged
lf no lights on the camera or monitor come on batteries need to be recharged
Adjust the Bri + (8) button, the brightness may be set to low.
The monitor may be in standby mode due to the voice control feature
Turn voice control function off using the switch (15) on the monitor or;
Adjust the voice control tune (4) on the monitor
-
.
.
.
Image interference
This may be caused by other 2.4GHz products operating in the area, mobile
phones, appliances or other electrical devices
-
Change the channel on the camera and monitor to find a channel that is not
affected
Move the location of the monitor
. Ensure that no metal barriers or reinforced concrete walls are between the
monitor and the camera
Try turning off devices that may be causing interference to identify the device
causing the problem
12. EU Environmental Protection
Waste electrical products should not be disposed of with
household waste. Please recycle where facilities exist. Check
with your Local Authority or retailer for recycling advice.
X
I


