1
4. Additional Processes
4.1 Enabling DVD Archiving
When recording storage space is limited, the Contact Recorder for IP Office automatically deletes recordings on a first in
first out (FIFO) basis. To avoid this and to conserve space on the server, Contact Recorder for IP Office can archive older
recordings to a DVD+RW disc (single layer), to a Blu Ray -R disc (single layer) or to network attached storage.
This section covers using the server's own DVD drive as the archive destination. For other options, refer to the
Administering Contact Recorder for IP Office manual 12 .
Process Summary
1. Identifying the drive path and udi
56
2. Disabling the media detection service
57
3. Entering the drive in Contact Recorder for IP Office
58
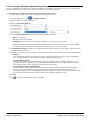
4.1.1 Identifying the Drive Path and UDI
The file path for DVD drives, for example /dev/sr0, can vary between servers. The process below determines the drive
path and udi for the drive.
To identify the DVD drive name:
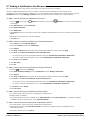
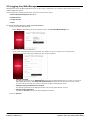
1. At the physical server, start its desktop:
a. Enter the command startx.
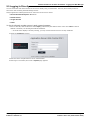
b. From the list of users for logging in click Other... .
c. Enter root as the Username.
d. Enter the root user's password.
e. If a warning appears about logging in as the root super user, click Close.
2. We need to obtain a list of all the drives mounted on the server:
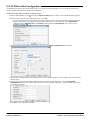
a. Click Applications and select System Tools | Terminal. This starts a command line window.
b. In the terminal window, enter lshal -l > hal.txt. This outputs the details of all the mounted drives to a text
file.
3. We can now identify the details of the DVD drive:
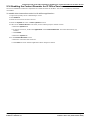
a. Double click on root's home to open the folder for root's files.
b. Locate the file hal.txt and double-click on it. The file opens in the gedit file editor.
c. Use the find function to search for cdrom. If this fails, try searching for cdrom1 or dvd.
d. The file consists of section of data, each starting with udi =. Locate the first such section containing your
search string and containing a line similar to block.device = '/dev/sr0' (string).
4. We can test whether the value shown for block.device is the path for the DVD drive.
a. In the terminal window, enter the path as part of an eject command. For our example, enter eject /dev/sr0.
The drive tray should open.
b. Enter eject -t /dev/sr0 to close the drive tray.
5. If necessary, continue searching the hal.txt file for the correct path for the drive.
6. Once you have identified the drive, note the udi value shown above block.device. This will be something like
/org/freedesktop/Hal/devices/storage_model_DVD_RW_DW_Q30A. For example, udi =
'/org/freedesktop/Hal/devices/storage_model_DVD_RW_DW_Q30A'.
7. This value is needed in the following process, highlight the value (the part between the ' ' marks) and select Edit |
Copy.
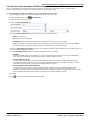
8. Having identified the drive path and obtained the drive's udi, see Disabling the Media Detection Service
Installing Avaya IP Office™ Platform Contact Recorder for IP Office
IP Office™ Platform 9.1
57
.
Page 56
15-601011 Issue 10x (02 November 2015)