1
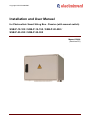
Copyright ELECTROINVENT Installation and User Manual for Photovoltaic Smart String Box - Passive (with manual switch) SSB-P-10-100 / SSB-P-15-150 / SSB-P-20-200 / SSB-P-25-250 / SSB-P-30-300 Manual 50608 (Revision B1) Version 2.01 Copyright ELECTROINVENT Contents 1 2 3 4 5 6 7 Introduction ........................................................................................................... 4 1.1 Disclaimer ..................................................................................................... 4 1.2 IMPORTANT SAFETY INSTRUCTIONS ..................................................... 4 1.3 Scope of Delivery ......................................................................................... 5 1.4 Type Label .................................................................................................... 5 Warnings and Notes ............................................................................................. 6 Installation ............................................................................................................. 7 3.1 Fuse Selection .............................................................................................. 8 3.2 Location Selection ........................................................................................ 8 3.3 Mechanical Installation ................................................................................. 9 3.4 Opening the SSB-P ...................................................................................... 9 3.5 Turning Off the SSB-P................................................................................ 10 3.6 Electrical Installation ................................................................................... 11 3.6.1 Overview of the Electrical Connections ...................................... 12 3.6.2 Overview of the Cable Glands .................................................... 13 3.6.3 Schematic Example of a PV installation with SSB-Ps ................ 13 3.6.4 Power connections to the inverter .............................................. 13 3.6.5 Communication Connections for Multi-String Monitoring (MSM) ......................................................................................... 15 3.6.6 PV strings connections ............................................................... 16 Commissioning ................................................................................................... 18 4.1 String Box Communication Configuration .................................................. 18 4.2 Turning On the SSB-P................................................................................ 18 4.3 Turning Off the SSB-P................................................................................ 19 Replacing defective fuse links and surge arresters ....................................... 20 5.1.1 Replacing a Fuse ........................................................................ 20 5.1.2 Changing a Surge Arrester ......................................................... 21 EC – Declaration of Conformity ........................................................................ 22 Data Sheet SSB-P ............................................................................................... 23 Manual 50608 (Revision B1) 3/25 IUM SSB-P EN V2.01 0415 Copyright ELECTROINVENT 1 Introduction This high-quality ELECTROINVENT photovoltaic string box is intended to connect up to 30 PV module strings (depending on the type). The box is also used to disconnect the DC from the inverter. The Smart String Box (SSB) measures the current of each string and sends data to the inverter. This feature is essential for diagnostics and maintenance of PV-panels and cabling. The SSB-P is powered directly by the PV strings. 1.1 Disclaimer ELECTROINVENT delivers optimized tested equipment such as inverters and string boxes for Photovoltaic Power Plants. The correct integration and interconnection of the equipment must be made according to the manuals and datasheets of ELECTROINVENT and is the responsibility of the System Integrator. ELECTROINVENT does not accept liability for system design, dimensioning of system related parts, installation or the performance of the system. The content of this manual is regularly reviewed for compliance with the hardware and software operation and any corrections are included in later editions. Every effort is made to ensure the details in this manual are accurate. Warranty claims will not be accepted in case of violation of the installation instructions and we do not accept liability in case of accidents caused by inappropriate handling or work performed by unauthorized personnel which results in personal injury or damage to devices, or any other subsequent damages. 1.2 IMPORTANT SAFETY INSTRUCTIONS READ AND SAVE THESE INSTRUCTIONS! This manual contains important safety and operating instructions for photovoltaic string box type SSB-P-XX-XXX. Keep it with or near the equipment at all times. Photovoltaic installations operate with lethal voltages and the work described here should only be performed by authorized personnel familiar with the installation, mounting, commissioning, and the operation of PV installations. This manual must be fully read and understood before installing or commissioning is performed. The product must only be used for its intended purpose and unauthorized personnel are not allowed to open it. The faultless and safe operation of the product assumes appropriate transport, specialized storage, installation and mounting as well as correct operation and maintenance. The relevant regional and country-specific regulations and instructions must be obeyed as well as requirements described in this document including placement and installation instructions (e.g. connection profiles, torque settings, etc.) Symbols and warning signs used: WARNING WARNING indicates a hazardous situation which, if not avoided, could result in death or serious injury. NOTICE NOTICE refers to address practices not related to personal injury. Failure to observe could lead to property damage. Manual 50608 (Revision B1) 4/25 IUM SSB-P EN V2.01 0415 Copyright ELECTROINVENT 1.3 Scope of Delivery Table 1.1 Scope of delivery 1.4 Quantity Article 1 pcs Smart String Box SSB-P 1 pcs Wall mounting kit (4 parts) 1 pcs Angled screwdriver 2 pcs Spare fuses for the strings 1 pcs Spare fiber optic connector (if the default communication interface is used) Type Label The type label with the product identification is located on the inner left side of the box. 1 2 3 Figure 1.1 SSB-P type label 1 - Product identification (see also Figure 1.2) 2 - Valid electrical circuit diagram 3 - Serial number of the string box The product identification (type code) [Figure 1.1-1] description is shown in Figure 1.2. Figure 1.2 Product identification description (see Figure 1.1-1) Manual 50608 (Revision B1) 5/25 IUM SSB-P EN V2.01 0415 Copyright ELECTROINVENT 2 Warnings and Notes WARNING The local installation standards must be obeyed. WARNING The device must only be installed, operated and maintained by qualified personnel. WARNING The device carries lethal voltages! The PV module strings can be live even when the string box’s switch is turned off and the string protections are removed. WARNING The DC line toward the inverter can be live even when the string box’s switch is turned off. Consider the inverter capacitors discharge time of 10 minutes! WARNING The string box is a part of an entire PV installation. Consider all safety instructions displayed on the string box and on all the equipment connected to it and in the installation and user manuals! Beware that an automatic restart can follow a grid or photovoltaic voltage failure. WARNING If any information is unclear, please refer to ELECTROINVENT Service Centre. NOTICE Loss of warranty. The box must not be damaged and no holes are allowed to be drilled in the cabinet. Any transport damage must be reported to ELECTROINVENT. Manual 50608 (Revision B1) 6/25 IUM SSB-P EN V2.01 0415 Copyright ELECTROINVENT 3 Installation Figure 3.1 Example view of a photovoltaic installation with SOLO inverter, smart string boxes and grid transformer A different number of PV strings can be connected depending on the string box model. The positive poles of the separate power feeds are protected individually, while the fuses on the negative poles are optional. The type of the fuses must correspond to the maximum PV module string current. The separate string currents are brought together through coupling joints and the manual switch toward the two DC output terminals. The PV string currents are monitored and the data is sent to the inverter via serial interface (the default fiber optical or the optional RS485). If an overvoltage occurs the accruing energy is discharged thorough a surge arrester. Figure 3.2 Circuit diagram of SSB-P-20-200-1-0 (Example of an SSB-P with fuses on PV (+) inputs only) Manual 50608 (Revision B1) 7/25 IUM SSB-P EN V2.01 0415 Copyright ELECTROINVENT Figure 3.3 Circuit diagram of SSB-P-30-300-2-0 (Example of an SSB-P with fuses on PV (+) and PV (-) inputs) Note: Check the circuit diagram of your model on the inner right side of the SSB-P. 3.1 Fuse Selection The fuses have to be selected according to Table 3.1 following the rule: - Rated current of the fuse must be higher or equal than: 1.6 x I SC at standard conditions (STC) (ISC – short circuit current of panel). Table 3.1 Fuse selection ISC: short circuit Rated current of current of panel the fuse [A] at STC [A] ≤2A ≤3A ≤5A ≤6A ≤8A ≤ 10 A 4A 6A 8A 10 A 12 A 16 A Size [mm] Pre-arching Joule integral 2 [A s] L/R=2ms 10x38 3.3 5.5 8 11 23 35 Operating Joule 2 integral [A s] L/R=2ms 28 45 62 88 180 270 Note: The fuses are factory pre-installed according to the client’s requirements (for specified current). 3.2 Location Selection The SSB-P is suitable for outdoor installation. The SSB-P should be positioned as close as possible to the PV modules. The string box must be easily accessible for operation and maintenance. A location without direct sun irradiation should be chosen. The string box should be mounted in a way, minimizing or preventing collection of water and dirt and growth of moss. Manual 50608 (Revision B1) 8/25 IUM SSB-P EN V2.01 0415 Copyright ELECTROINVENT 3.3 Mechanical Installation The string box must be mounted vertically on a wall or on a stand, with the cable glands [Figure 3.4] on the bottom side, using the supplied fitting materials where possible. No liquid (water, oil, etc.) should ever enter into the cabinet, not even during installation. Check the dimensions of your model in the datasheet (last chapter of this manual). Note: The two climate valves [Figure 3.4] must not be covered. They ensure the air circulation inside the SSB-P. Figure 3.4 Climate valves of the SSB-P (bottom view) 3.4 Opening the SSB-P WARNING Opening of the string box must only be performed by authorized personnel. The absence of voltages (PV lines and DC side) must be ensured at all times. The SSB-P door is closed by means of its handle. Opening the door is done by pulling and swiveling the handle to the right (see Figure 3.5). Figure 3.5 SSB-P opening Manual 50608 (Revision B1) 9/25 IUM SSB-P EN V2.01 0415 Copyright ELECTROINVENT 3.5 Turning Off the SSB-P WARNING Potentially Lethal Voltage! Even if the manual switch is turned off the PV lines and the DC side might have lethal voltage. NOTICE It is recommended that first the inverter should be turned off before carrying out the following activities (string box not being on load). Open the door of the SSB-P and set the manual switch to “OFF” position [Figure 3.6]. Figure 3.6 Manual switch of the SSB-P Manual 50608 (Revision B1) 10/25 IUM SSB-P EN V2.01 0415 Copyright ELECTROINVENT 3.6 Electrical Installation WARNING The installation of the string box must only be performed by authorized personnel. The absence of voltages (PV and DC lines) must be ensured at all times. WARNING The device carries lethal voltages! The PV module strings can be live even when the string box’s switch is turned off and the string protections are removed. WARNING The DC line toward the inverter can be live even when the string box’s switch is turned off. Consider the inverter capacitors discharge time of 10 minutes! NOTICE The communication lines must be mounted in a way that won’t allow them to be damaged by rodents. NOTICE The electrical lines must not come in contact with flammable materials. Manual 50608 (Revision B1) 11/25 IUM SSB-P EN V2.01 0415 Copyright ELECTROINVENT 3.6.1 Overview of the Electrical Connections The locations of the electrical connections are shown in Figure 3.7 and Figure 3.8 1 8 7 2 3 6 5 4 Figure 3.7 Location of the electrical connections in the SSB-P-20-200-1-0 (Example of an SSB-P with fuses on PV (+) inputs only) . 1 - Overvoltage protection 2 - DC (+) output busbar 3 - DC (-) output busbar 4 - PE 5 - PV (+) string input terminals 6 - Fuse holders 7 - PV (-) string input terminals 8 - Communication interface (fiber optic) 1 9 8 7 2 3 4 6 5 Figure 3.8 Location of the electrical connections in the SSB-P-30-300-2-0 (Example of an SSB-P with fuses on PV (+) and PV (-) inputs) 1 - Overvoltage protection 2 - DC (+) output busbar 3 - DC (-) output busbar 4 - PE 5 - PV (+) string input terminals 6 - Fuse holders PV (+) 7 - PV (-) string input terminals 8 - Fuse holders PV (-) 9 - Communication interface (fiber optic) Manual 50608 (Revision B1) 12/25 IUM SSB-P EN V2.01 0415 Copyright ELECTROINVENT 3.6.2 Overview of the Cable Glands 6 5 1 4 2 3 Figure 3.9 SSB-P cable glands (exterior bottom view) 1 - PE 2 - DC (+) output 3 - DC (-) output 4 - Communication interfaces 5 - PV (-) strings inputs 6 - PV (+) strings inputs Note: See the labels on the inside. 3.6.3 Schematic Example of a PV installation with SSB-Ps Figure 3.10 Schematic example of a PV installation with Smart String Boxes SSB-P Manual 50608 (Revision B1) 13/25 IUM SSB-P EN V2.01 0415 Copyright ELECTROINVENT 3.6.4 Power connections to the inverter 1. Open the string box door (see Chapter 3.4). 2. Turn the manual switch off (see Chapter 3.5). 3. Loosen the two screws [Figure 3.11-4] completely and remove the protective transparent plate. 1 4 2 3 Figure 3.11 Power connections of SSB-P 1 - DC (+) output busbar 2 - DC (-) output busbar 3 - PE 4 - Screws of the protective transparent plate 4. First, connect the grounding cable (PE) to the corresponding screw terminal [Figure 3.11-3] using a cable lug. 5. Then, execute the power connections to the inverter following the sequence in Table 3.2 using cable lugs. Observe the corresponding screw terminals (see Figure 3.11-2 and -1). Table 3.2 Power connections to the inverter (see Figure 3.11) Terminal PE 6. Function Specifications Grounding DC- Negative pole DC+ Positive pole Connection type: M10 Fastening torque: 18 Nm Cable gland: 7…13 mm Connection type: M10 Fastening torque: 18 Nm Cable gland: 22…32 mm Mount back the protective transparent plate. Manual 50608 (Revision B1) 14/25 IUM SSB-P EN V2.01 0415 Copyright ELECTROINVENT 3.6.5 Communication Connections for Multi-String Monitoring (MSM) NOTICE Make sure that the sequence is followed and the PV strings are not connected. The string box monitoring communication can be done using the fiber optic interface (default) or RS485 (optional). The fiber optic interface [Figure 3.12] requires a ring topology between the inverter and the string boxes. Starting from the inverter the ring has to be connected from string box to string box and ending back to the inverter. Figure 3.12 Glass fiber transmitter and receiver on MSM board (default communication interface) Table 3.3 Serial glass fiber optic interface specification Terminal TX RX Function Specification Fiber optic Cable type: Outdoor, UV light resistant, armored Fiber type: Multimode 62,5/125 or 50/125 Cable end port ST type Transmit data (output) Fiber optic Receive data (input) Recommended: A-VQ(BN)H 1x4, Corning Cable Systems Cable gland: 4.5…10 mm Note: Instead of glass fiber optic, RS485 [Figure 3.13] interface is available on request. Table 3.4 RS485 serial interface Terminal Function Specification Cable type: Outdoor, UV light resistant Separable screw terminals RS485 Cu-cross section: 0.5 … 1 mm B, A, GND 2 Recommended: UNITRONIC® Li2YCYv(TP) 2x2x0,5 or 3x2x0,5, Lapp Kabel Cable gland: 4.5…10 mm Note: The optional RS485 has to be realized as a bus terminating in the last string box with the termination resistance (shift the white switches [Figure 3.13-1] to “ON” position). Manual 50608 (Revision B1) 15/25 IUM SSB-P EN V2.01 0415 Copyright ELECTROINVENT 1 2 Figure 3.13 RS485 communication interface (optional) 1 2 3.6.6 On/Off termination resistance activation RS485 connections PV strings connections NOTICE Respect the correct PV polarity. Wrong polarity of the PV inputs might cause damage to the string box and the PV modules. NOTICE Never feed a DC inlet with voltages higher than 1000V. Higher voltages lead to box damage. Improper operation of string box may lead to the warranty being void, and no liability for consequential damages will be undertaken. WARNING In case of wrong poled strings, never break the current flow by removing the fuses from the fuse holders. WARNING A fuse holder must only be opened if no current is flowing. The PV strings connections have to be performed according to the following sequence: 1. Remove the fuses out of the fuse holders [Figure 3.7-6 or Figure 3.8-6 and -8] 2. Connect the PV string cables according to Table 3.5 and Table 3.6. NOTICE The connection points of user contact clamping spring-cage terminals (Table 3.5) are opened and closed using the supplied angled screwdriver (see Figure 3.14 and Figure 3.15). After the conductor has been inserted into the terminal compartment, it automatically makes contact. Manual 50608 (Revision B1) 16/25 IUM SSB-P EN V2.01 0415 Copyright ELECTROINVENT Figure 3.14 Opening a clamping spring-cage terminal for PV (-) string connection without fuse protection Figure 3.15 Closing a clamping spring-cage terminal for PV(-) string connection without fuse protection Table 3.5 PV (-) strings connections without fuse protections (see Figure 3.7-7) Terminal PV1… PV30- Function Specifications PV1(-) … 30(-) Clamping spring-cage terminals: 2 1.5 …16 mm (negative pole) Cable gland: 4.5…10 mm Note: If the model of the SSB-P includes fuse protections on the negative poles, then the terminals specification is the same as for the positive poles (Table 3.6). Observe the terminals labeling! Table 3.6 PV (+) strings connections (see Figure 3.7-5) Terminal PV1+ … PV30+ Function Specifications PV1(+) … PV30(+) Fastening torque nominal/maximal: 1.5/1.8 Nm (positive pole) Cu-cross section: 0.5 …10 mm Cable gland: 4.5…10 mm 3. Measure the string voltage and check the polarity. 4. Insert the fuses again. Manual 50608 (Revision B1) 17/25 2 IUM SSB-P EN V2.01 0415 Copyright ELECTROINVENT 4 Commissioning 4.1 String Box Communication Configuration Each SSB-P has a unique 16-bit address which is the S/N of the MSM unit [Figure 4.1-2]. The addresses of the SSB-Ps are configured on the VCU of the inverter. For more information see the Installation and User Manual of the SOLO inverter. 1 2 Figure 4.1 MSM unit 1 - LED indicators 2 - SSB-P address Check the two LEDs on the MSM unit [Figure 4.1-1]: - The green (left) one shows power supply presence. - The red (right) one shows communication status. This LED is blinking during transmission. Note: Each box issues an automatic identification message on the bus if there is not a single request to that box in a time range of 2-3 min. Communication bus fault detection in a ring network: The nodes before the fault receive requests and send responses – their red LEDs are blinking more frequently than those of the nodes after the fault as they do not receive requests but only transmit automatic identification messages every 2-3 min. 4.2 Turning On the SSB-P Make sure that the PV (+), PV (-), DC (+), DC (-), PE and communication cables are correctly installed. Check if the fuse links are rated for the correct current. The fuse rating must comply with the rules defined in Chapter 3.1. NOTICE Wrong rated fuse link can lead to damages both to the SOLO String Box and the PV strings. WARNING Potentially Lethal Voltage! Assure that the four protective transparent plates against direct contact are mounted before proceeding with the commissioning. Manual 50608 (Revision B1) 18/25 IUM SSB-P EN V2.01 0415 Copyright ELECTROINVENT When the PV modules, power cables, ground and communication lines in the PV installation are connected correctly, the string box is ready for operation. NOTICE Observe the instructions supplied in the user manual accompanying your photovoltaic inverter. To connect the PV modules to the photovoltaic inverter, turn the manual switch on, and then close the door of the SSB-P. NOTICE The door must be closed properly in order to prevent the penetration of dust and humidity. NOTICE Contaminations on the rubber seal must be avoided. Damaged rubber seals must be replaced immediately. 4.3 Turning Off the SSB-P In order to separate the PV modules from the inverter, first turn the inverter off, then open the string box and set the manual switch to “OFF” position. NOTICE Observe the instructions supplied in the user manual accompanying your photovoltaic inverter. Manual 50608 (Revision B1) 19/25 IUM SSB-P EN V2.01 0415 Copyright ELECTROINVENT 5 Replacing defective fuse links and surge arresters WARNING The works described below must only be performed by electricians trained for PV installation. WARNING The device carries lethal voltages! The PV module strings can be live even when the string box’s switch is turned off and the string protections are removed. WARNING The DC line toward the inverter can be live even when the string box’s switch is turned off. Consider the inverter capacitors discharge time of 10 minutes! NOTICE Use only fuses intended for use in photovoltaic applications. Otherwise, the protection of the installation will no longer be secured. 5.1.1 Replacing a Fuse NOTICE Observe the instructions in the user manual accompanying your photovoltaic inverter. 1. Check on the inverter VCU or in the Web portal which string is not producing current. This can be an indication of a damaged fuse. 2. Open the string box door (see Chapter 3.4). 3. Turn the manual switch off (see Chapter 3.5). 4. Pull the string fuse holder out (see Figure 5.1) Figure 5.1 Fuse link opened Manual 50608 (Revision B1) 20/25 IUM SSB-P EN V2.01 0415 Copyright ELECTROINVENT 5. Replace the fuse link with the correct rated one complying with the rules defined in Chapter 3.1. NOTICE A wrong rated fuse link can lead to damages both to the SOLO String Box and the PV strings. 5.1.2 6. Close the string fuse holder. 7. Turn the manual switch on. The string is in operation again. 8. Close the string box door. Changing a Surge Arrester The green indicator of the surge arrester (10U1) changes its colour to red when it is tripped (also visible via communication interface). Figure 5.2 Surge arrester (see also Figure 3.7-1) The surge arrester is monitored by auxiliary potential free contacts. 1. Open the SOLO String Box door (see Chapter 3.4). 2. Turn the manual switch off (see Chapter 3.5). 3. Remove the defective surge arrester(s) by pulling it out of the fuse holder and place a new one (see Figure 5.3). Figure 5.3 Removing a damaged surge arrester 4. Turn the manual switch on. 5. Close the string box door. Manual 50608 (Revision B1) 21/25 IUM SSB-P EN V2.01 0415 Copyright ELECTROINVENT 6 EC – Declaration of Conformity Figure 6.1 EC – Declaration of Conformity Manual 50608 (Revision B1) 22/25 IUM SSB-P EN V2.01 0415 Copyright ELECTROINVENT 7 Data Sheet SSB-P SSB-P Type 10-100 15-150 20-200 25-250 30-300 Electrical Data Maximum operating voltage UDC Fuses 1000 VDC PV(+) or PV(+) and PV(-) Maximum output DC current IDCmax Maximum number PV inputs (strings) 100 A 150 A 200 A 250 A 300 A 10 15 20 25 30 Maximum input DC current per string ISTRmax 10 A String current measurement range ISTR 0 A to 10 A Reverse string current measuring ISTR rev Yes Surge arrester Type II Test voltage 2.5 kV, 50 Hz, 1 min Power supply Directly from PV strings 300 VDC (starting voltage) / 100-1200 VDC (operating voltage) Maximum power consumption 5W Mechanical Data Dimensions See on next page Weight 28 kg 30 kg with fuses PV+ only with fuses PV+ and 29 kg 35 kg 30 kg 36 kg 47 kg 49 kg 49 kg 51 kg PVColour RAL 7035 (light grey) Enclosure material Glass-fiber-reinforced and halogen-free polyester Protection class according to EN 60529 IP54 (outdoor) Impact strength according to EN 62262 IK10 Maximum air humidity Ambient temperature range UV proof 95 % Tamb –20 °C ... +60 °C Yes Monitor Interface Type Multi-string monitor (MSM) Status feedback (reverse current, manual switch on/off, surge arrester fault indication) Yes, via communication interface String current monitoring Yes, via communication interface String voltage monitoring Yes, via communication interface Box temperature monitoring Yes, via communication interface Communication Interface Fiber optical interface (default) Ring type serial interface connection RS 485 serial interface (optional) Separable screw terminal with 6 pins for easy bus wiring. Galvanically isolated from monitoring electronic. Standards CE conformity / EMC Manual 50608 (Revision B1) Yes / EN 61000-6-2, EN 61000-6-4 / EN 50178 23/25 IUM SSB-P EN V2.01 0415 Copyright ELECTROINVENT Available versions SSB-P Type Fuses Dimensions SSB-P-10-100-1 PV(+) 750 mm 500 mm 540 mm 550 mm 800 mm 290 mm SSB-P-10-100-2 PV(+) and PV(-) 750 mm 500 mm 540 mm 550 mm 800 mm 290 mm SSB-P-15-150-1 PV(+) 750 mm 500 mm 540 mm 550 mm 800 mm 290 mm SSB-P-15-150-2 PV(+) and PV(-) 750 mm 750 mm 540 mm 800 mm 800 mm 540 mm SSB-P-20-200-1 PV(+) 750 mm 500 mm 540 mm 550 mm 800 mm 290 mm SSB-P-20-200-2 PV(+) and PV(-) 750 mm 750 mm 540 mm 800 mm 800 mm 540 mm SSB-P-25-250-1 PV(+) 1000 mm 750 mm 790 mm 800 mm 1050 mm 540 mm SSB-P-25-250-2 PV(+) and PV(-) 1000 mm 750 mm 790 mm 800 mm 1050 mm 540 mm SSB-P-30-300-1 PV(+) 1000 mm 750 mm 790 mm 800 mm 1050 mm 540 mm SSB-P-30-300-2 PV(+) and PV(-) 1000 mm 750 mm 790 mm 800 mm 1050 mm 540 mm B H N M P O Ordering Information For technical or commercial information please contact the ELECTROINVENT sales office (see Contacts on last page of this user manual). Manual 50608 (Revision B1) 24/25 IUM SSB-P EN V2.01 0415 Copyright ELECTROINVENT Contacts Office Tel.: +(359 2) 862 14 06; 868 70 65 43 „Cherni Vrah” blvd. Fax: +(359 2) 962 52 63 1407 Sofia, PO Box 74 E-Mail: [email protected] Bulgaria Web site: http://www.electroinvent.com/ Sales Tel.: +(359 2) 862 14 06; 868 70 65 43 „Cherni Vrah” blvd. Fax: +(359 2) 962 52 63 1407 Sofia, PO Box 74 E-Mail: [email protected] Bulgaria Web site: http://www.electroinvent.com/ Hot line: +(359) 894 66 11 37 43 „Cherni Vrah” blvd. E-Mail: [email protected] 1407 Sofia, PO Box 74 Web site: http://www.electroinvent.com/ Service Bulgaria Manual 50608 (Revision B1) 25/25 IUM SSB-P EN V2.01 0415