1
3. INSTALLATION OF THE MACHINE
Before use
Several checks are necessary before using the unit to ensure good performance of the machine:
- Check the electrical line voltage: it should be 400V, 3 phases, with a 32A delayed circuit breaker, curve D (or aM type
fuse).
- Check the cross section of the cable going from the main electrical board to the socket where the machine will be plugged in
to: it should be 4x6 mm2. If the cable is longer than 10m, use a 10mm² conductor. If you are using an electrical extension
cord, use a 6mm² conductor (use 10mm² if the total length of the electrical line + extension cord is greater than 10m).
- Connect a 3 phase plug with earth (minimum 32A) to the power cable.
- Caution: in order to avoid voltage drops which can generate bad welding spots, do not overload the electricity supply, do not
use cables with insufficient diameter/cross seciton. Do not use a mains socket that is located too far from the circuit breaker.
- If the machine is not sufficiently powered, it will not be possible to ensure a good quality weld.
- Check that the compressed air network can deliver a minimum of 7 bars (dry air), then connect the compressed air
network to the back of the machine.
The machine must not be used on a compressed air network with a pressure lower to 3 bars.
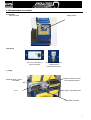
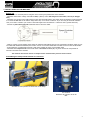
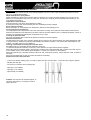
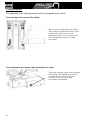
Assembling the clamp handle and the air connector
Assemble the clamp handle on the left side of the clamp
Air connector
Attach the air connector to the air
filter.
5