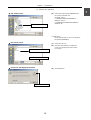
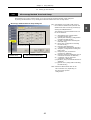
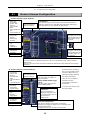
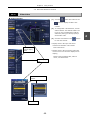
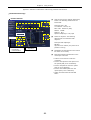
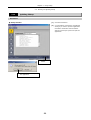
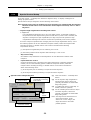
1
M323 E ECLIPSE-i Series Microscopes i Series Support Tools (Software for ECLIPSE-i series microscopes) Software Manual 04.3.CF.2 (2/2) Introduction Thank you for purchasing this Nikon product. This manual describes how to install and use the i Series Support Tools software for ECLIPSE-i series microscopes. To ensure correct use, please read this manual carefully before operating the product. Refer to the hardware manual for detailed information on how to connect your microscope and discussions of the system configuration. • Copyright laws prohibit the copying of this manual, in whole or in part, without written permission from Nikon. • The contents of this manual are subject to change without notice. • Although every effort has been made to ensure the accuracy of this manual, errors or inconsistencies may remain. If you note any points that are unclear or incorrect, please contact your nearest Nikon representative. • Read the instruction manuals provided with your microscope and computer. Prerequisite knowledge This manual assumes a basic familiarity with Windows. If you come across unfamiliar terms or operations while reading through this manual, consult the user's manual for your version of Windows. About the example screens used in the manual This manual describes various operations in Windows 2000/XP using Windows 2000 screens as examples. Procedures are virtually identical for Windows 2000 and XP. Depending on the specific OS type or version, the actual appearance of the screen or operations may not correspond precisely to the example screens shown at various points throughout the manual. For information on operations or screens specific to your OS version, please consult the OS user's manual. Trademarks Microsoft and Windows are registered trademarks of Microsoft Corporation in the U.S. and other countries. Pentium is a registered trademark of Intel Corporation in the U.S. and other countries. Other company and product names occurring in this manual are the trademarks or registered trademarks of their respective companies. This manual omits trademark indications such as TM and ® for various trademarks or registered trademarks. Contents Contents Introduction Chapter 1 Preparations ........................................................................................ 6 1.1 1.2 1.3 Hardware and Software Requirements ................................................................... 6 1.1.1 Checking Available RAM ........................................................................... 7 1.1.2 Checking the Free Hard Disk Space ........................................................... 8 Installing the Application...................................................................................... 9 1.2.1 Closing All Other Applications.................................................................... 9 1.2.2 Running the Setup Wizard ...................................................................... 10 1.2.3 Installing the Driver............................................................................... 13 Uninstalling the Application ................................................................................ 17 Chapter 2 i Series Support Tools Configuration .......................................................18 Chapter 3 Using iEZSetup....................................................................................19 3.1 iEZSetup Workflow ............................................................................................ 19 3.1.1 3.2 3.3 3.4 3.5 3.6 3.7 Settable Item List.................................................................................. 20 Starting and Quitting iEZSetup ........................................................................... 21 3.2.1 Starting Up........................................................................................... 21 3.2.2 Quitting ............................................................................................... 22 Screen Configuration of iEZSetup ........................................................................ 23 Setting Up the iEZSetup Environment .................................................................. 24 3.4.1 Entering the Name of the Microscope System ........................................... 24 3.4.2 Selecting Setup Mode ............................................................................ 25 Setting Up the Objective .................................................................................... 29 3.5.1 Objective Mounting Setup ...................................................................... 30 3.5.2 Registering New Objectives .................................................................... 31 3.5.3 Special Control Setup ............................................................................ 32 Setting Up the Filter Cube .................................................................................. 33 3.6.1 Filter Cube Mounting Setup..................................................................... 34 3.6.2 Registering New Filter Cubes .................................................................. 35 3.6.3 Registering Item Names......................................................................... 36 Setting Up the Condenser Module ....................................................................... 37 3.7.1 Condenser Module Mounting Setup .......................................................... 37 3.7.2 New Condenser Module Registration ........................................................ 38 3.8 Control-Related Setup ....................................................................................... 39 3.9 Setting Up the Interlock..................................................................................... 40 3.9.1 Microscopy Method Interlock Setup ......................................................... 41 3.9.2 Objective, Optical Path Switching, and Optical Zoom Interlock Setups............... 42 3.9.3 Compensation Setup during Interlocking .................................................. 42 3.10 Setting Up the Up/down Focus Motion.................................................................. 43 3.11 END Processing................................................................................................. 44 Chapter 4 Using iControl .....................................................................................45 4.1 4.2 iControl Workflow.............................................................................................. 45 Starting and Quitting iControl ............................................................................. 46 4.2.1 Starting Up........................................................................................... 46 2 Contents 4.2.2 Quitting iControl.................................................................................... 47 4.3 iControl Screen Configuration ............................................................................. 48 4.4 Connection....................................................................................................... 49 4.5 4.4.1 Starting Communications ....................................................................... 49 4.4.2 Obtaining the Status of the Microscope System......................................... 50 4.4.3 Terminating Communications.................................................................. 50 Setting ............................................................................................................ 51 4.5.1 Information Setting ............................................................................... 51 4.5.2 Setting Up Arbitrary Microscopy Methods (Setting Up the Profile) ................ 52 4.5.2.1 Aperture Diaphragm, Field Diaphragm, and ND Filter Control Methods .............. 54 4.5.2.2 Condenser Module Control Method........................................................... 55 4.5.3 4.6 Setting Up the Focus Position for Up/Down Motion..................................... 56 Information ...................................................................................................... 57 4.6.1 Confirmation of Event Logs..................................................................... 57 4.6.2 Confirming Versions............................................................................... 57 4.7 Changing the Optical Path Light Color .................................................................. 58 4.8 Motorized Attachment Controls ........................................................................... 59 4.8.1 Shutter ................................................................................................ 60 4.8.2 Analyzer............................................................................................... 61 4.8.3 Optical Path Switching ........................................................................... 62 4.8.4 Episcopic Field Diaphragm ...................................................................... 63 4.8.5 Diascopic Field Diaphragm...................................................................... 64 4.8.6 Diascopic Aperture Diaphragm ................................................................ 65 4.8.7 ND Filter .............................................................................................. 66 4.8.8 Optical Zoom ........................................................................................ 67 4.8.9 Diascopic Illumination Lamp ................................................................... 68 4.8.10 Filter Cube ........................................................................................... 69 4.8.11 Objective ............................................................................................. 70 4.8.12 Condenser Module ................................................................................. 71 4.8.13 Up/Down Focus Motion .......................................................................... 72 4.9 Switching Microscopy Methods ............................................................................ 73 Appendix Standard Combinations of Microscopy Methods and Interlock........................ 74 Appendix Description of the Autofocus Function ........................................................ 81 Chapter 5 Using iSetup .......................................................................................83 5.1 iSetup Workflow................................................................................................ 83 5.1.1 5.2 5.3 5.4 5.5 Settable Item List.................................................................................. 84 Starting and Quitting iSetup ............................................................................... 85 5.2.1 Starting Up........................................................................................... 85 5.2.2 Quitting iSetup...................................................................................... 86 iSetup Screen Configuration ............................................................................... 87 Starting Communications with the Microscope System ........................................... 88 5.4.1 Initiating Communications and Changing the Destination in iSetup .............. 88 5.4.2 Starting Communication from iControl ..................................................... 88 Selecting Setup Modes....................................................................................... 89 5.5.1 Loading Microscope System Information and Making Corrections Only Where Necessary ........................................................................... 90 3 Contents 5.5.2 Loading and Correcting an Existing File .................................................... 91 5.6 Entering the Name of a Microscope System .......................................................... 92 5.7 Setting Up the Objective .................................................................................... 93 5.8 5.9 5.7.1 Objective Mounting Setup ...................................................................... 94 5.7.2 Registering New Objectives .................................................................... 95 5.7.3 Special Control Setup ............................................................................ 96 Setting Up the Filter Cube .................................................................................. 97 5.8.1 Filter Cube Mounting Setup..................................................................... 98 5.8.2 Registering New Filter Cubes .................................................................. 99 5.8.3 Registering Item Names....................................................................... 100 Setting Up the Condenser Module ..................................................................... 101 5.9.1 Condenser Module Mounting Setup ........................................................ 101 5.9.2 New Condenser Module Registration ...................................................... 102 5.10 Setting Up the Interlock................................................................................... 103 5.10.1 Microscopy Method Interlock Setup ....................................................... 104 5.10.2 Objective, Optical Path Switching, and Optical Zoom Interlock Setups ....... 105 5.10.3 Compensation Setup during Interlocking ................................................ 105 5.11 Control-Related Setup ..................................................................................... 106 5.11.1 Setting Up the Up/Down Focus Motion ................................................... 107 5.11.2 Other Setup........................................................................................ 108 5.12 Reflecting and Saving Settings.......................................................................... 109 5.12.1 Transmission to the Microscope System ................................................. 109 5.12.2 Saving Microscope System Information .................................................. 109 4 Contents 5 1 Preparations This chapter describes hardware and software requirements for i Series Support Tools and how to install and uninstall the software. Hardware and Software Requirements 1.1 Caution • Before installing i Series Support Tools, confirm that your computer meets the minimum requirements given below for memory and available hard disk space. • Install the application before connecting your computer and microscope system (90i, DIH-E/M). Personal computer main unit Item Condition CPU Pentium III 1 GHz or higher Memory 256 MB or more Hard disk Minimum of 100 MB free space Motherboard At least one empty PCI slot Video RAM 16 MB or more OS Windows 2000 (Japanese or English version) Note: Use Windows 2000 Professional Service Pack 4 or later. Windows XP (Japanese or English version) Note: Use Windows XP Professional Service Pack 1 or later. Other i Series Support Tools is supplied in CD-ROM. A CD-ROM drive is required to read and install the software. Display Item Resolution Condition 1,024 x 768 pixels. A monitor/video card capable of True Color output is recommended. i Series Support Tools is not guaranteed to be compatible with all personal computers. Please contact your distributor for detailed compatibility information. 6 Chapter 1 Preparations 1.1 Hardware and Software Requirements 1 Checking Available RAM 1.1.1 Use the System Properties dialog box to check the amount of free RAM. [Memory requirements] Minimum of 256 MB Procedure Start menu (2) Choose Settings, then Control Panel. (1) Click the Start button. (2) Choose Settings, then Control Panel to display the Control Panel window. (3) Double-click the System icon to display the System Properties dialog box. (4) Click the General tab of the System Properties dialog box. (5) Check free memory. (6) Click OK or Cancel button to close the System Properties dialog box. (1) Click the Start button. Control Panel window (3) Double-click the System icon. System Properties dialog box (4) Click the General tab. (5) Check free memory here. (6) Click OK or Cancel button. 7 Chapter 1 Preparations 1.1 1.1.2 Hardware and Software Requirements Checking the Free Hard Disk Space The free hard disk space can be confirmed in the My Computer window. If you have insufficient hard disk space, remove any unnecessary applications from the hard disk to increase available free space. [Hard disk] Must have 100 MB or more free space. Procedure Desktop (1) Double-click the My Computer icon to display the My Computer window. (2) Right-click on the Drive icon in the My Computer window to which you want to install the application. (3) Click Properties in the context menu to display the Properties dialog box for the selected drive. (4) Click the General tab of the Properties dialog box. (5) Check the amount of free space on the hard disk. (6) Click OK or Cancel button to close the (Drive) Properties dialog box. (1) Double-click the My Computer icon. My Computer window (2) Right-click on the Drive icon. (3) Click Properties. (Drive) Properties dialog box (4) Click the General tab. (5) Check the amount of free hard disk space. (6) Click OK or Cancel button. 8 Chapter 1 Preparations 1.2 Installing the Application 1 1.2 Installing the Application You are now ready to install i Series Support Tools. CAUTION • Install the application before connecting the personal computer and microscope system. • To install the i Series Support Tools, you must log-in to your computer as an authorized user, under Administrator. 1.2.1 Closing All Other Applications Before installing i Series Support Tools, close all system-resident programs such as the screensaver and anti-virus utility. Closing the screensaver: Context menu on the desktop (1) Right-click on the desktop. (1) Right-click on the desktop to display a context menu. (2) Click Properties in the context menu to display the Display Properties dialog box. (3) Click the Screensaver tab of the Display Properties dialog box. (4) Click the Screensaver text box and select None from the list. (5) Click OK button. (2) Click Properties. Display Properties dialog box (3) Click the Screensaver tab. (4) Select None. (5) Click OK button. 9 Chapter 1 Preparations 1.2 Installing the Application 1.2.2 Running the Setup Wizard To install the application, run the setup wizard from the CD-ROM and follow the on-screen instructions. CAUTION • To install i Series Support Tools, you must log in with administrator rights. • For information on uninstalling i Series Support Tools, refer to Section 1.3, “Uninstalling the Application.” Normally, the setup wizard runs automatically when you insert the CD-ROM into the CD-ROM drive of your computer. If the setup wizard does not start, follow the procedure given below to start it. Starting the setup wizard Desktop (1) Double-click the My Computer icon to display the My Computer window. (2) Double-click the CD-ROM icon to display the CD-ROM window. (3) Double-click the Setup icon to launch the setup wizard. (1) Double-click the My Computer icon. My Computer window (2) Double-click the CD-ROM icon. CD-ROM window (3) Double-click the Setup icon. 10 Chapter 1 Preparations 1.2 Installing the Application Startup screen (4) Select [Install Nikon i Series Support Tools]. Installation procedure Setup wizard startup screen The Setup Menu opens automatically when you insert the CD-ROM into the CD-ROM drive of your computer. (1) Click the Next button. (2) Specify the folder in which to install i Series Support Tools. The default folder is C:\Program Files\Nikon\i Series Support Tools\. To install to a different folder, click the Browse button and select from the displayed list. (3) Click the Next button. (1) Click the Next button Installation folder setup screen (2) Specify the folder in which to install the application files. (3) Click the Next button. 11 1 Chapter 1 Preparations 1.2 Installing the Application Configuration screen (4) Click the Next button. The application will be installed in the default or selected folder. (5) After installing i Series Support Tools, the setup wizard displays the screen shown at left. Click the Close button to exit the wizard. (4) Click the Next button. Screen for installation in progress Screen when installation is complete You have finished installing i Series Support Tools. (5) Click the Close button. 12 Chapter 1 Preparations 1.2 Installing the Application 1.2.3 1 Installing the Driver After installing i Series Support Tools, connect your computer and microscope system. If you are connecting the system to your computer for the first time at this point, the Add New Hardware Wizard will launch automatically. Follow the screen messages displayed to install the driver. CAUTION • To install i Series Support Tools, you must log in with administrator rights. • For information on uninstalling i Series Support Tools, refer to Section 1.3, “Uninstalling i Series Support Tools.” USB connector (1) USB A connector Plug the USB A connector of the USB cable into the connector on your computer and the other end into the USB connector of the microscope system (inside at the back). Note: When the 90i is included in the system configuration, plug the other end into the USB connector of the 90i. When the 80i is used together with the DIH (digital imaging head), plug the other end into the USB connector of the DIH. Wizard startup screen (2) Select the option “Search for a suitable driver for my device (Recommended).” (3) Click the Next button. 13 (2) Select the option “Search for a suitable driver for my device (Recommended).” (3) Click the Next button. Chapter 1 Preparations 1.2 Installing the Application Screen while search for driver is underway The wizard searches for the necessary driver information. Note: If the search fails, select the option in the wizard “Display a list of the known drivers for this device so that I can choose a specific driver.” Normally, select C:\WINNT\INF for Windows 2000 or C:\WINDOWS\INF for Windows XP. Screen after searching for the driver (4) When the necessary driver information is found, a screen like the one shown at left is displayed. Click the Yes button. (5) You need to specify the folder in which the driver file (lmicusb.sys) is located. Select the system folder from the Copy From pulldown list. If the system folder does not exist in the list, click the Browse button. (4) Click the Yes button. Screen for specifying file location (5) Select the system folder from the pulldown list. 14 Chapter 1 Preparations 1.2 Installing the Application File select screen (6) (6) Select DRIVERS. Select the system folder DRIVERS from the Look In pulldown list. Normally, select C:\WINNT\SYSTEM32\DRIVERS for Windows 2000 or C:\WINDOWS\SYSTEM32\DRIVERS for Windows XP. ♦ Supplement Some backup files are also in C:\Program Files\Shared\DRIVERS. File select screen (7) Select lmicusb.sys. (8) Click the Open button to display the screen for specifying the file location once again. (9) Click OK button. (7) Select lmicusb.sys. (8) Click the Open button. Screen for specifying file location (9) Click OK button. 15 1 Chapter 1 Preparations 1.2 Installing the Application Screen while installing The driver will be installed. (10) When the wizard has finished installing the driver, the screen shown at left is displayed. Click the Finish button to exit the wizard. Screen when installation is complete You have finished installing the driver. (10) Click the Finish button. 16 Chapter 1 Preparations 1.3 Uninstalling the Application 1 Uninstalling the Application 1.3 If you no longer need i Series Support Tools and wish to uninstall it (remove it from the hard disk), use the Add/Remove Programs Control Panel utility. CAUTION • Once uninstalled, the application cannot be used until it has been reinstalled. Uninstalling Start menu (2) Choose Settings, then Control Panel. (1) Click the Start button. (2) Choose Settings, then click the Control Panel to display the Control Panel window. (3) Double-click the Add/Remove Programs icon to display the Add/Remove Programs dialog box. (4) Choose Nikon i Series Support Tools from the list. (5) Click the Remove button to run Uninstall and remove the selected application from the hard disk. (1) Click the Start button. Control Panel window (3) Double-click the Add/Remove Programs icon. Add/Remove Programs dialog box 4) Choose Nikon i Series Support Tools. (5) Click the Remove button. 17 2 i Series Support Tools Configuration If you installed i Series Support Tools, the following three applications are installed on your hard disk: • iEZSetup If you are connecting your computer and microscope system for the first time, use this tool to set information for the microscope system and to send that information to the microscope system side to have it stored in memory. For more information, refer to Chapter 3, “Using iEZSetup.” • iControl This tool lets you operate the microscope system from your computer. It also enables you to monitor the current status of the microscope system visually. For more information, refer to Chapter 4, “Using iControl.” • iSetup This tool lets you change the relevant information for a microscope system when the system configuration has been changed. For more information, refer to Chapter 5, “Using iSetup.” CAUTION • If you are using i Series Support Tools for the first time, write the information for the microscope system to memory using iEZSetup. • Although the transmitted information is stored in memory on the microscope system side, transmitting new information will overwrite information previously stored in memory. We recommend saving setup information made in iEZSetup or iSetup (including registration information) to a file after assigning the file an appropriate name. • If you turn the microscope system OFF and then ON while using iSeries Support Tools, always quit the application and start it again. • If multiple microscope systems are connected to a single PC and if there are two systems of the same configuration, the PC will fail to recognize such systems. Be sure to connect microscope systems that have different configurations. 18 3 Using iEZSetup If you are connecting your computer to the microscope system for the first time, use the iEZSetup to set information for the microscope system. Send the information you set here to the microscope system side to store information on constituent elements and the system name in memory on the system side. iEZSetup Workflow 3.1 3 Shown below is the iEZSetup workflow when setting information for the microscope system. Start microscope system Connect the USB cable to the PC and the microscope system, and turn on the power for the microscope system. (Maximum 40 sec required for initializing the microscope system) Note: Refer to the microscope's instruction manual for the microscope system's USB connection and startup. Start Environmental setup Launch iEZSetup at the completion of the microscope system initialization. Enter the name of the microscope system first. Then select the Setup mode appropriate for the type of microscope system information to be set. Set microscope system information Set the objective or filter cube used in the microscope system and other necessary information. (Settable items vary depending on the microscope system configuration.) Send setup content Send the name of the microscopy system and other information just set to the microscope system side. (The information is saved to memory on the microscope system side, overwriting any previous information.) Save information setup file Save the name and other microscope system information settings just made to a file after assigning the file an appropriate name. (Although you will be allowed to quit without doing so, we recommend saving this data to a file before quitting the application; information stored in memory on the microscope system side is subject to overwriting.) End Quit iEZSetup. 19 Chapter 3 Using iEZSetup 3.1 iEZSetup Workflow Settable Item List 3.1.1 Shown below is a list of items that can be set: SystemName (3.4) ― Microscope system name setup Objective (objective setup) (3.5) ― Objective: Objective mounting setup (3.5.1) ― Optional Obj: Objective registration (3.5.2) ― Limit Control: Special control setup for objective switching (3.5.3) ― High magnification switching limit control ― Skip control ― Liquid immersion control Filter Cube (filter cube setup) (3.6) ― Filter Cube: Filter cube mounting setup (3.6.1) ― Optional Cube: Filter cube registration (3.6.2) ― Optional Item: Item name registration (excitation/barrier/mirror) (3.6.3) Condenser (condenser module setup) (3.7) ― Condenser: Condenser module mounting setup (3.7.1) ― Optional Data: Condenser module registration (3.7.2) Control (control-related setup) (3.8) ― Other: Manual setup, buzzer setup, switch setup Interlock (interlock setup) (3.9) ― Observation: Microscopy method interlock setup (3.9.1) ― Other: Objective interlock setup/zoom interlock setup/optical path switching interlock setup (3.9.2) ― Offset: Compensation setup during interlocking (3.9.3) ― Diascopic field diaphragm ― Diascopic aperture diaphragm ― ND value Z Focus (up/down focus motion setup) (3.10) ― Compensation mode selection ― Lower limit setup 20 Chapter 3 Using iEZSetup 3.2 Starting and Quitting iEZSetup Starting and Quitting iEZSetup 3.2 You can start and quit iEZSetup in several ways. A general method is explained here, using the Start menu to start and the Cancel button in the operation window to quit. 3.2.1 Starting Up 3 Procedure Start menu (1) Click the Start button. Confirm that the microscope is connected before starting the computer. (2) Choose Programs – Nikon – iSeriesTools, then click iEZSetup. iEZSetup window 21 (1) Click the Start button. (2) From the Start menu, select Programs – Nikon – iSeriesTools, then click iEZSetup to display iEZSetup. Chapter 3 Using iEZSetup 3.2 Starting and Quitting iEZSetup 3.2.2 Quitting Procedure iEZSetup window (1) Click Cancel button. 22 (1) Click Cancel button. (2) "Are you sure you want to quit Setup?" (or similar message) is displayed. Click the OK button to quit the application. Chapter 3 Using iEZSetup 3.3 Screen Configuration of iEZSetup Screen Configuration of iEZSetup 3.3 The iEZSetup window consists of a flow of setup items, an explanatory text box, and a setup screen. iEZSetup window 3 Setup screen Explanation text box Setup item flow Setup item flow The flow of setup items shown on the left side of the window has items arranged from top to bottom in order of setup. Follow this sequence when setting items. (1) Click the button for a setup item. (1) When you click the button for any setup item, the middle part of the window changes to a setup screen for that item. ♦ Supplement Depending on the system configuration, some items here may not need to be set, in which case the buttons for the items are disabled. 23 Chapter 3 Using iEZSetup 3.4 Setting Up the iEZSetup Environment 3.4 Setting Up the iEZSetup Environment Before making various settings with iEZSetup, enter the name of the microscope system. If multiple microscope systems are connected to a single PC, assign a name to each of the systems for identification purposes. When you finish, select the Setup mode corresponding to the type of microscope system information to be set. 3.4.1 Entering the Name of the Microscope System When iEZSetup is launched, a dialog box for entering the name of the microscope system shown below is displayed in the center of the screen. In this dialog box, enter the name of the microscope system. Dialog box for entering the name of the microscope system (1) Enter the name of the microscope system here. A microscope system configuration list is displayed. 24 (1) Enter the name of the microscope system in the System Name text box. (You can enter up to 15 single-byte alphanumeric characters.) Chapter 3 Using iEZSetup 3.4 Setting Up the iEZSetup Environment 3.4.2 Selecting Setup Mode Click the Next button in the dialog box for entering the name of the microscope system (shown above) to display the Setup mode select dialog box (shown below). In this dialog box, select the Setup mode appropriate for the type of microscope system information to be set. Setup mode select dialog box (1) (1) Select the mode suitable to the item you want to set. There are three setup modes: Standard, Custom, and File. Each mode is detailed below. Select the mode suitable to the item you want to set. - Standard setup Depending on the microscope system configuration, the application will choose the minimum required setup items. - Custom setup Will display all setup items for the user to choose from. - File Lets you load a data file for microscope system information if the file is already available and if you want the same setup as with that information. Select a mode suitable to the items you want to set. 25 3 Chapter 3 Using iEZSetup 3.4 Setting Up the iEZSetup Environment 1. Standard setup If you select Standard, the default setup items are displayed in a list box. These setup items cannot be changed. Setup mode select dialog box ♦ Supplement Setup items vary depending on the system configuration. (1) Select Standard. • Setup items for a combination of 90i + DIH-E or DIH-M - Objective (objective setup) Note: Only if a motorized or intelligent nosepiece is attached - Objective Limit Control (special control setup for objective switching) Note: Only if a motorized nosepiece is attached The default setup items are displayed. - Filter Cube (filter cube setup) - Condenser (condenser module setup) Note: Only if a motorized universal condenser is attached - Z focus (up/down focus motion setup) • Setup items for a combination of 80i + DIH-E - Objective (objective setup) Note: Only if a motorized or intelligent nosepiece is attached - Filter Cube (filter cube setup) • Setup items for a combination of 80i + DIH-M - Objective (objective setup) Note: Only if a motorized or intelligent nosepiece is attached - Filter Cube (filter cube setup) 26 Chapter 3 Using iEZSetup 3.4 Setting Up the iEZSetup Environment 2. Custom setup If you select Custom, all setup items are displayed in a list box. To add a setup item, select any item from this list (by clicking the corresponding check box). Setup mode select dialog box - Objective (objective setup) (1) Select Custom. - Objective Limit Control (special control setup for objective switching) Note: Only if a motorized nosepiece is attached - Filter Cube (filter cube setup) (2) Select the desired setup item. - Condenser (condenser module setup) Note: Only if a motorized universal condenser is attached - Control (control-related setup) - Interlock (interlock setup) - Z Focus (up/down focus motion setup) 27 3 Chapter 3 Using iEZSetup 3.4 Setting Up the iEZSetup Environment 3. File read setup You can load a data file for microscope system information if the file is already available. Loaded microscope system information can be edited in iEZSetup. Setup mode select dialog box. (1) Select File in the Setup mode select dialog box to display a file select dialog box. (2) Select a file (***.xml) and click the Open button. This loads the data and reflects the settings saved in the file in iEZSetup. (1) Select File. File select dialog box (2)-1 Select a file. (2)-2 Click the Open button. 28 Chapter 3 Using iEZSetup 3.5 Setting Up the Objective Setting Up the Objective 3.5 Setting up the objective lets you monitor the status of the microscope system at a glance and have microscopy method switching and objective switching interlocked. The following information items can be set for the objective: • Objective mounting setup (possible only if the motorized or intelligent nosepieces is attached to the microscope): Set information on the objectives mounted at each nosepiece address (hole). • New objective registration (possible only if the motorized or intelligent nosepieces is attached to the microscope): Register information on new objectives that are not registered in the list box (up to nine pcs.) • Special control setup (possible only if the 90i is included in the system configuration and if the motorized and intelligent nosepieces are attached to the microscope): Set up the special control when changing objectives. 29 3 Chapter 3 Using iEZSetup 3.5 Setting Up the Objective 3.5.1 Objective Mounting Setup After finishing setup for the iEZSetup environment, go to the objective mounting setup dialog box by clicking the Next button, or by clicking the Objective button in the flow of setup items. In the objective mounting setup dialog box, set information on the objectives mounted at each nosepiece address. Objective mounting setup dialog box (1) Select an address. The type, magnification, working distance, numerical aperture, and indicated name of the objective are displayed. (1) From the tab, select an address for which you want to set objective information. (2) Select the desired objective series from the series list box. (3) When you select a series, the selected items of the objective information change. Select the desired objective information from the objective information list box. When you select any objective information, the type, magnification, working distance, numerical aperture, and indicated name of the objective are displayed in the Type, Mag., W.D., N.A., and NAME text fields. (4-1) When you go on to set objective information for another address, go back to Step (1) and repeat the setup procedure. (2) Select an objective series. Change to objective setup. (4-2) To quit objective setup, click the Next button. (3) Select objective information. ♦ Supplement Quit objective setup. 30 To register new objective information not registered in the series list box, click the Optional Obj. button. This changes the dialog box to the one used to register new objective information. See the next page for more information. Chapter 3 Using iEZSetup 3.5 Setting Up the Objective 3.5.2 Registering New Objectives New objective registration is needed to register new objective information not registered in the series list box. Click Optional Obj. – a subsetup item button for objective setup – to display a dialog box for registering new objective information. This dialog box allows you to register up to nine new objectives. When registering a new objective, you can register all six information items: indicated name, series, magnification, type, numerical aperture, and working distance. New objective registration dialog box (1) Click the Optional Obj. button. (2) Select a number. (7) Enter a numerical aperture and working distance. (3) Enter a name. (4) Select a series. (5) Select a type. (6) Select a magnification. (1) Click the Optional Obj. button – a subsetup item button. (2) From the tab, select a number for which you want to register objective information. (3) Enter the name of the objective in the Name text box (using up to 15 single-byte alphanumeric characters). (4) Select the objective series from the Series list box. (5) Select the objective magnification from the Mag list box. (6) Select the objective type from the Type list box. (7) Enter the numerical aperture and the working distance of the objective in the N.A. and the W.D. text fields, respectively (up to 4 single-byte alphanumeric characters each). The newly registered objective is added to the selectable items in the list box in the objective mounting setup dialog box. 31 3 Chapter 3 Using iEZSetup 3.5 Setting Up the Objective Special Control Setup 3.5.3 Click Limit Control – a subsetup item button for objective setup – to display a dialog box for setting up special control. Special control setup is designed to set the following control items: Note: Special control setup is enabled only when objectives are switched with the objective interlock turned ON. For more information on the objective interlock, refer to "4.8.11 Objective." • Objective high magnification switching limit control ♦ Supplement Low-magnification objectives have a very long depth of focus, occasionally resulting in the specimen and the objective being close to each other. If, under such a condition, the objective is changed to one of higher magnification, its edge may touch the specimen. High magnification switching limit control is carried out to proactively avoid such a problem. As for the nosepiece operation when changing from low to high magnification lenses, one of the following options can be set: inhibit the nosepiece rotation, rotate the nosepiece after retracting the stage, or disable control. Limit control is activated if the following requirements are met: (1) The objective magnification prior to switching is 2x or less. (2) The working distance of the objective after switching is 1 mm or less. • Skip control setup Set whether to skip addresses at which objectives are not attached for rotation of the nosepiece. • Liquid immersion control If a liquid immersion lens is provided in the optical path during or following nosepiece rotation, set one of the following options: inhibit the nosepiece rotation, rotate the nosepiece after retracting the stage, or disable control. Limit control is activated in either of the following cases: (1) If the objective prior to switching is a liquid immersion objective (2) If the objective following switching is a liquid immersion objective Special control setup dialog box (1) Click the Limit Control box. (2) Set the objective high magnification switching limit control. (3) Set the skip control. (4) Set the liquid immersion control. 32 (1) Click Limit Control – a subsetup item button. (2) For the objective high magnification switching limit control, select Free (default), No Rotation or Rotate After Stage Going Down. (3) To enable skip control, select Skip. To disable, select Use (default). (4) For the switching limit control for liquid immersion objective, select Free (default), No Rotation or Rotate After Stage Going Down. Note: The stage moves downward 5 mm as its retract motion. In the absence of a 5-mm margin, the stage will retract to its lowest possible position. Chapter 3 Using iEZSetup 3.6 Setting Up the Filter Cube Setting Up the Filter Cube 3.6 Setting up the filter cube lets you monitor the status of the microscope at a glance and interlock the filter cube when switching microscopy methods. The following filter cube information items can be set (if the DIH-M or DIH-E is included in the microscope system configuration): • Filter cube mounting setup: Set information on the filter cubes positioned at each filter cube address (filter cube bay). • New filter cube registration: Register a combination of excitation filter, dichroic mirror, and barrier filter as well as the name of a filter cube comprised of that combination. • Name registration: Register the names of the excitation filter, dichroic mirror, and barrier filter. 33 3 Chapter 3 Using iEZSetup 3.6 Setting Up the Filter Cube 3.6.1 Filter Cube Mounting Setup After finishing setting up the objective, go to the filter cube mounting setup dialog box by clicking the Next button or by clicking the Filter Cube button in the flow of setup items. In this dialog box, set information on the filter cubes attached at each filter cube address (filter cube bay). Note: DIA (open) is selected for address 6 as initial setting. The interlock with microscopy method switching is conducted based on this initial setting. For more information, refer to "Standard Combinations of Microscopy Methods and Interlock" in the appendix of Chapter 4. Filter cube mounting setup dialog box (1) Select an address. The names of the excitation filter, dichroic mirror, and barrier filter are displayed. (1) From the tab, select an address for which you want to set filter cube information. (2) Select a filter cube name from the list box. When you select the filter cube name, the names of the excitation filter, dichroic mirror, and barrier filter are displayed in the Exciter, Dichroic, and Barrier text boxes, respectively. (3-1) To set information for another address, go back to Step (1) and repeat the setup procedure. (3-2) To quit filter cube setup, click the Next button. ♦ Supplement (2) Select a filter cube name. Change to filter cube setup. (3-2) Quit filter cube setup. To register a new combination of excitation filter, dichroic mirror, and barrier filter, click the Optional Cube button. The dialog box changes to the one used for registering a new filter cube. See the next page for more information. To register a new excitation filter, dichroic mirror, or barrier filter individually, click the Optional Item button. The dialog box changes to the one used for registering item names. See Section 3.6.3 for more information. 34 Chapter 3 Using iEZSetup 3.6 Setting Up the Filter Cube Registering New Filter Cubes 3.6.2 New filter cube registration is required to register a new combination of excitation filter, dichroic mirror, and barrier filter. Clicking Optional Cube – a subsetup item button for filter cube setup – displays a dialog box for registering new filter cubes. This dialog box lets you register up to nine combinations of excitation filters, dichroic mirrors, and barrier filters, and the names of up to nine filter cubes, each comprised of the combination thus specified. New filter cube registration dialog box (1) Click the Optional Cube button. (2) Select a number. (3) Enter the name of a filter cube. (4) Select the name of an excitation filter. (5) Select the name of a dichroic mirror. (6) Select the name of a barrier filter. (1) Click the Optional Cube button – a subsetup item button. (2) From the tab, select a number for which you want to register new filter cube information. (3) Enter the name of the filter cube you want to set in the Name text box (up to 10 single-byte alphanumeric characters). (4) Select the name of the excitation filter you want to set from the Exciter list box. (5) Select the name of the dichroic mirror you want to set from the Dichroic list box. (6) Select the name of the barrier filter you want to set from the Barrier list box. The newly registered filter cube is added to the selectable items in the list box in the filter cube mounting setup dialog box. ♦ Supplement To register a new excitation filter, dichroic mirror, or barrier filter individually, click the Optional Item button. The dialog box changes to the one used for registering item names. See the next page for more information. 35 3 Chapter 3 Using iEZSetup 3.6 Setting Up the Filter Cube 3.6.3 Registering Item Names Item name registration is needed to register a new excitation filter, dichroic mirror, or barrier filter individually. Click Optional Item – a subsetup item button for filter cube setup – to display a dialog box for registering item names. This dialog box lets you register names for up to nine excitation filters, nine dichroic mirrors, and nine barrier filters. Item name registration dialog box (1) Click the Optional Item button. (2) Enter names. 36 (1) Click the Optional Item button – a subsetup item button. (2) In the Exciter, Dichroic, and Barrier text boxes here, enter the name of the excitation filter, dichroic mirror, and barrier filter you want to set (using up to 10 single-byte alphanumeric characters). The newly registered names are added to the selectable items in the list box in the new filter cube registration dialog box. Chapter 3 Using iEZSetup 3.7 Setting Up the Condenser Module Setting Up the Condenser Module 3.7 Condenser module setup lets you monitor the status of the microscope system at a glance and interlock the condenser module when switching microscopy methods or objectives. The following condenser module information items can be set (only if the motorized universal condenser module is attached): 3.7.1 • Condenser module mounting setup: Set information on the condenser modules attached at each condenser turret address (condenser module bay). • New condenser module registration Register the desired name of a condenser module. Condenser Module Mounting Setup After setting up the filter cube, go to the condenser module mounting setup dialog box by clicking the Next button or by clicking the Condenser button in the flow of setup items. In this dialog box, set information on the condenser modules attached at each condenser turret address (condenser module bay). Condenser module mounting setup dialog box (1) Select an address and condenser module name. (1) Select the name of a condenser module from the combo box of the address for which you want to register condenser module information. (2-1) To set another address, go back to Step (1) to repeat the setup procedure. (2-2) To quit condenser module setup, click the Next button. ♦ Supplement To register a new condenser module, click the Optional button. The dialog box changes to the one used for registering a new condenser module. See the next page for more information. Change to condenser module setup. (2-2) Quit condenser module setup. 37 3 Chapter 3 Using iEZSetup 3.7 Setting Up the Condenser Module 3.7.2 New Condenser Module Registration New condenser module registration is needed to register a new condenser module. Click Optional – a subsetup item button for condenser module setup – to display a dialog box for registering new condenser modules. This dialog box lets you register up to nine condenser modules. Condenser module name registration dialog box (1) Click the Optional button. (2) Enter a name. 38 (1) Click the Optional button – a subsetup item button for condenser module setup. (2) Enter the name of a condenser module (using up to 10 single-byte alphanumeric characters). The newly registered name is added to the selectable items in the combo box in the condenser module mounting setup dialog box. Chapter 3 Using iEZSetup 3.8 Control-Related Setup Control-Related Setup 3.8 The following control-related information items can be set: • Focus knob operation mode setup (only if the 90i is included in the microscope system configuration): Set whether to change, on the system side, the travel per rotation of the focus knob according to the objective currently in the optical path (AUTO mode), or arbitrarily change the setting (coarse/fine/extra fine) (MANUAL mode) when controlling the up/down focus motion using the focus knob. • Buzzer setup (only if the 90i or DIH-E is included in the microscope system configuration): Set whether to sound the buzzer when operating the switches on the microscope or if an error occurs. • Switch setup: Set whether to enable/disable operations of switches on the microscope. Control-related setup dialog box (1) (1) Select an operation mode. (2) Select a buzzer setup. (3) Select a switch setup. Change to control-related setup. (4) Quit control-related setup. 39 Select the focus knob operation mode (AUTO/MANUAL [default]). Note: When you select AUTO, auto switching of travels per rotation according to objective information is enabled only if the objective interlock is set to ON. (If the objective interlock is OFF, the travel per rotation remains unchanged from the previous setting.) For the objective interlock, refer to Section 4.8.11, "Objective. " (2) Set the Buzzer to ON (default) or OFF. (3) Set the Switch to ON (default) or OFF. (4) To quit control-related setup, click the Next button. 3 Chapter 3 Using iEZSetup 3.9 Setting Up the Interlock Setting Up the Interlock 3.9 Interlock is designed to tailor various motorized attachments of the microscope system to the control conditions that best fit the microscopy method or objective used. The following interlock information items can be set: • Microscopy method interlock setup (only if the 90i or DIH-E is included in the microscope system configuration): Set whether to interlock each of the motorized attachments with switching of microscopy methods (ON/OFF). • Objective interlock setup (only if the 90i is included in the microscope system configuration): Set whether to interlock each of the motorized attachments with switching of objectives (ON/OFF). • Optical path switching interlock setup (only if the DIH-E is included in the microscope system configuration): Set whether to interlock the episcopic field diaphragm with switching of optical paths. • Optical zoom interlock setup (only if the DIH-E is included in the microscope system configuration): Set whether to interlock the episcopic field diaphragm with switching of optical zoom magnifications. • Compensation setup Control values can be compensated for across the board when the diascopic field diaphragm, diascopic aperture diaphragm, ND value, and episcopic field diaphragm are controlled through interlock. Set this compensation value. 40 Chapter 3 Using iEZSetup 3.9 Setting Up the Interlock Microscopy Method Interlock Setup 3.9.1 After finishing the control-related setup, go to the microscopy method interlock setup dialog box by clicking the Next button or by clicking the Interlock button in the flow of setup items. Microscopy method interlock setup dialog box (1) (2) (3) (4) (5) (6) (7) (8) (9) (10) (11) Change to interlock setup. (1) Set whether to turn ON or OFF each of the motorized attachments (interlock the attachments with microscopy method) by clicking the ON/OFF button. The following motorized attachments can be set to interlock: (1) Illumination lamp (configuration including the 90i only) (2) Optical path switching (configuration including the DIH-E only) (3) Shutter (configuration including the DIH-E/M only) (4) Filter cube (configuration including the DIH-E only) (5) Diascopic field diaphragm (configuration including the 90i only) (6) Analyzer (configuration including the DIH-E only) (7) Nosepiece (only if motorized nosepiece is attached) (8) Diascopic aperture diaphragm (only if motorized condenser is attached) (9) Condenser (only if motorized condenser is attached) (10) ND filter (only if motorized ND filter is attached) (11) Optical zoom (configuration including the DIH-E only) (1) Click the ON/OFF button for each motorized attachment. Note: Motorized attachments that can be set to interlock vary depending on the microscope system configuration. 41 3 Chapter 3 Using iEZSetup 3.9 Setting Up the Interlock 3.9.2 Objective, Optical Path Switching, and Optical Zoom Interlock Setups After finishing the microscopy method interlock setup, go to the interlock setup dialog box for others by clicking the Next button or by clicking Other – a subsetup item button for microscopy method interlock setup. Interlock setup dialog box for objective, optical path switching, and optical zoom (2) Click the ON/OFF button for each motorized attachment. (1) Click the Other button. (1) (2) (3) (4) (1) Click Other – a subsetup item button. (2) Set whether to turn ON or OFF each of the motorized attachments (interlock the attachments with objective) by clicking the ON/OFF button. The following motorized attachments can be set: (1) ND filter (only if a motorized ND filter is attached) (2) Diascopic field diaphragm (configuration including the 90i only) (3) Condenser (only if a motorized condenser is attached)) (4) Diascopic aperture diaphragm (only if a motorized condenser is attached) (5) Up/down focus motion (configuration including the 90i only) (5) (3) Click the ON/OFF button. (3) Set whether to turn ON or OFF the episcopic field diaphragm (interlock the diaphragm with switching of optical paths) by clicking the ON/OFF button (configuration including the DIH-E only). (4) Set whether to turn ON or OFF the episcopic field diaphragm (interlock the diaphragm with optical zoom) by clicking the ON/OFF button (configuration including the DIH-E only). (4) Click the ON/OFF button. 3.9.3 Compensation Setup during Interlocking After finishing the interlock setups for objective, optical path switching, and optical zoom, go to the compensation setup dialog box by clicking the Next button or by clicking Compensation – a subsetup item button for microscopy method interlock setup. Compensation setup dialog box (1) Click Compensation – a subsetup item button. (2) Select an interlock compensation value from the combo box for each of the motorized attachments. (1) Click the Compensation button. Note: This setup applies to the interlocks with microscopy method switching and objective switching. (2) Select a compensation value from the combo box for each of the motorized attachments. 42 Chapter 3 Using iEZSetup 3.10 Setting Up the Up/down Focus Motion Setting Up the Up/down Focus Motion 3.10 The following up/down focus motion information items can be set (only if the 90i is included in the microscope system configuration): • Parfocal compensation mode setup: ♦ Supplement While all objectives are manufactured with a constant parfocal distance, the focus position is subtly different from one objective to another, resulting in a difference. Such a difference in focus position must be compensated for. Parfocal compensation is designed to store the subtle difference in focus position, thus achieving accurate reproduction. Set whether to compensate for parfocal distance deviation. • Software lower limit setup: ♦ Supplement The initial lower limit setting along the Z-axis, initially set to -15mm to avoid the polarizer from touching the XY stage during its mounting, can be changed to -25mm as when you want to observe a thick specimen. Exercise caution if you set the lower limit to -25mm as no mechanism is provided to avoid collision with the polarizer. Set the XY stage lower limit (15 mm/25 mm) if no attachment (e.g., a condenser turret) is attached under the XY stage. After finishing the interlock setups, go to the up/down focus motion setup dialog box by clicking the Next button or by clicking the Focus Drive button in the flow of setup items. Up/down focus motion setup dialog box (1) (1) Select a compensation mode. Select the parfocal compensation mode (ON [default]/OFF). Note: To set a focus position, use Focus Setting under Setting, one of the iControl menu items. See "4.5.3 Setting Up the Up/down Focus Motion" for more information. (2) Software limit (settable only if the motorized universal condenser module is not attached) Select -15 mm (recommended) or -25 mm for the lower limit position. (3) To quit the up/down focus motion setup, click the Next button. Note: The lower limit is automatically set to -15mm when the motorized universal condenser module is attached. (2) Select a software lower limit. (3) Quit up/down focus motion setup. 43 3 Chapter 3 Using iEZSetup 3.11 3.11 END Processing END Processing After completing the setup procedure, go to the END processing dialog box by clicking the Next button. In END processing, send the name of the microscope system and the information you've set to the microscope system. The transmitted name and information are stored in memory on the microscope system side. The information you've set can be saved to a file, if desired. END processing dialog box (1) All of the information you've set is displayed in this dialog box, so check the displayed contents. If the contents you've set are correct, click the Send to Microscope button. This completes the settings, and the information set is sent to the microscope system. The transmitted name and information are stored in memory on the microscope system side. When the software has finished sending, a save select dialog box is displayed. ♦ Supplement Click the Previous button to correct the contents you've set and to display the setup dialog box for the last item in the flow of setup items once again. If the set contents are correct, click the Send to Microscope button. Save select dialog box (2) To save the set information to a file, click the OK button. Select a file (***.xml) from the file select dialog box displayed The set information is saved to the selected file, after which iEZSetup is closed. If you do not want to save set To save the set information to a file, click the OK button. If you do not want to save the set information to a file, click the Cancel button. information to a file, click the Cancel button. iEZSetup is closed immediately. File select dialog box 44 4 Using iControl iControl, one of the i Series Support Tools, lets you monitor the status of the microscope system at a glance while performing microscopy. It also lets you operate motorized attachments. iControl Workflow 4.1 The following flow shows how to control your microscope system using the iControl application. Start microscope system Connect the USB to the PC and the microscope system, and turn on the power for the microscope system. (Maximum 40 sec required for initializing the microscope system) Note: Refer to the microscope's instruction manual for microscope system's USB connection and startup. Start Select a microscope Initiate communications with the microscope system Obtain microscope status Observe (operate the microscope) End Launch iControl at the completion of the microscope system initialization. Select the name of the microscope system you want to control. Initiate communications with the microscope system. Obtain the status of the microscope system. (Status here includes information on the objective and filter cube currently in the optical path and the open/closed status of the shutter. However, obtainable control status information items vary depending on the microscope system configuration and the motorized attachments connected.) Operate the microscope from the PC. (Information on the objective and filter cube currently in the optical path and other information are displayed when appropriate.) Quit iControl. Use iSetup during observations to change settings. For more information, refer to Section 4.5.1. 45 4 Chapter 4 Using iControl 4.2 Starting and Quitting iControl Starting and Quitting iControl 4.2 You can start and quit iControl in several ways. A general method is described here, using the Start menu to start and the Cancel button in the operations windows to quit. 4.2.1 Starting Up Procedure Start menu (1) Click the Start button. Confirm that the microscope system is connected to your computer before starting the computer. (1) Click the Start button. (2) From the Start menu, choose Programs – Nikon – iSeriesTools, then click iControl to display the iControl window. (2) Choose Programs – Nikon – iSeriesTools, then click iControl. Microscope system select dialog box If multiple microscope systems are connected: iControl window 46 (1) A microscope system select dialog box is displayed. Select a desired system from the list. (2) Click the OK button. The iControl window is displayed. Chapter 4 Using iControl 4.2 Starting and Quitting iControl 4.2.2 Quitting iControl Procedure iControl window (1) Click the Exit button. Communications with the microscope system are terminated, closing the application. 4 (1) Click the Exit button. 47 Chapter 4 Using iControl 4.3 4.3 iControl Screen Configuration iControl Screen Configuration iControl window (open window) • Select the microscope system with which to communicate. Start communications. End communications. Close button Click this button to close the window. Control dialog box display buttons for individual motorized attachments Click the icon button representing a motorized attachment to display a dialog box for controlling that motorized attachment. This dialog box lets you operate the attachment. Barrier filter The light color in the optical path after the barrier filter can be changed. • Start iSetup. • Save/load a desired microscopy method. • Acquire event log. • Version information • Change microscopy methods. Excitation filter The light color in the optical path after the excitation filter can be changed. • Quit iControl. Current control status indications and motorized attachment operation buttons The current status is displayed adjacent to the icon representing each of the motorized attachments. Press ∇ to view the names of optical components attached to other addresses and change addresses. iControl window (closed window) • Select the microscope system with which to communicate. Start communications. End communications. • Start iSetup. • Save/load microscope control status. • Acquire event log. • Version information • Change microscopy methods. • Quit iControl. Open button Click this button to open the window. Analyzer IN/OUT toggle button Click this button to toggle the analyzer IN/OUT. Shutter OPEN/CLOSE toggle button Click this button to toggle the shutter OPEN/CLOSE. Current control status indications A closed window consists of the icons representing each motorized attachment (i.e., subwindow display buttons) and status indications. Click any icon to display a subwindow for the corresponding motorized attachment. To reverse the window, click the Open button. The current status is displayed adjacent to the icon representing each of the motorized attachments. Control dialog box display buttons for individual motorized attachments Click the icon button representing a motorized attachment to display a dialog box for controlling that motorized attachment. his dialog box lets you operate the attachment. 48 Chapter 4 Using iControl 4.4 Connection 4.4 Connection 4.4.1 Starting Communications Before you can monitor or control the status of the microscope system, you must first initiate communications between the microscope system and the computer. Menu (1) Click Connection, then d to display a combo box. (1) Click Connection, then d. (2) From the list box, select a microscope system you want to monitor or control.。 (2) Select the microscope system for communication. Menu (3) Click Connection, then Open. 49 (3) Click Connection, then Open. The software will initiate communications with the selected microscope system. (4) To communicate with another microscope system, click Connection, then Select to select the appropriate microscope system. The software will automatically terminate communications with the previous microscope system and initiate communications with the newly selected microscope system. 4 Chapter 4 Using iControl 4.4 Connection 4.4.2 Obtaining the Status of the Microscope System If you changed the objective or filter cube mounting setup through the iSetup or iEZSetup after starting the iControl, you must acquire the present status of the microscope system. Menu (1) Click Connection, then Read Status to acquire the current status of the microscope system. (1) Click Connection, then Read Status. 4.4.3 Terminating Communications Communications with the microscope system can be terminated from iControl. Menu (1) (1) Click Connection, then Close. 50 Click Connection, then Close. The software terminates the session with the microscope system. Chapter 4 Using iControl 4.5 Setting 4.5 Setting 4.5.1 Information Setting Setting lets you invoke iSetup from within iControl to quickly set information for objectives or filter cubes. Menu (1) Click Setting, then Setup to start iSetup. (1) Click Setting, then Setup. 4 iSetup window (2) Set the necessary information. (3) Click the Send button. (2) Set the necessary information in iSetup. For more information, refer to Chapter 5, "Using iSetup." (3) After completing setup, click the Send button in iSetup. The settings just made are sent to the microscope system. (The new information is thereby stored in memory on the microscope system side.) (4) Click the Exit button to terminate iSetup. (5) Click Connection, then Read Status. The software will reacquire the status of the microscope system. (4) Click the Exit button. (5) Click Connection, then Read Status. 51 Chapter 4 Using iControl 4.5 Setting 4.5.2 Setting Up Arbitrary Microscopy Methods (Setting Up the Profile) A total of 12 different microscopy methods are available to choose from in this application, namely, bright-field observation, DIC observation, DIC/epi-fl observation, epi-fl observation, phase contrast observation, dark-field observation, and User Options 1 to 6. Of these, microscopy method names and methods can be arbitrarily set in User Options 1 to 6. The set microscopy methods can be saved to a file or the microscope system. Note: You cannot set up arbitrary microscopy methods if the system consists of the 80i and the DIH-M. (In this case, the Profile button is disabled.) Arbitrary microscopy method data registered in the microscope system loads only when the profile setup window is displayed by clicking Profile. To display registered data again, close the profile setup window and then display the window again. Menu (1) (1) Click Setting, then Profile. 52 Click Setting, then Profile to display the profile setup window. Chapter 4 Using iControl 4.5 Setting Profile window (1) (2) From the tab, select a microscopy method. To acquire the current control information, click the Receive button. While the Profile setup window is displayed, load the data registered in the microscope system. The loaded data will be reflected in the setup window. Note: Setup information will be reflected only for the motorized attachments connected. (1) (2) (3) (4) (5) (6) (7) (2) From the tab, select the microscopy method you want to set. (3) Set the following information: (1) Name of the microscopy method (2) Nosepiece address (3) Condenser module control method (4) Lamp voltage (8) (9) (11) (5) Diascopic aperture diaphragm control (10) method (12) (6) Diascopic field diaphragm control method (7) ND filter control method (3) Set the required information. (8) Optical path (9) Filter cube address (10) Shutter Open/Close (4) To register a microscopy method, click the Send button. To acquire the saved data, click the Read button. (11) Zoom magnification (5) Terminate the setup. (12) Analyzer IN/OUT (4) Click the Send button to register the microscopy method in the microscope system. When you want to register all microscopy methods, check ALL, then click the Send button. (5) Click the Close button to quit the arbitrary microscopy method setup. To save the setup data, click the Save button. Acquiring current control information ♦ Supplement Loading current control information Click the Receive button. This will load the information from the microscope, reflecting the information in the setup window. Acquiring saved data and saving setup data ♦ Supplement Loading saved data Click the Read button to display a file select window. Select a file (***.CSV) to load the information and reflect it in the setup window. Saving setup data Click the Save button to display a file select window. Select a file (***.CSV) to save the information. 53 4 Chapter 4 Using iControl 4.5 Setting 4.5.2.1 Aperture Diaphragm, Field Diaphragm, and ND Filter Control Methods Menu (1) Select a setup item. Click the list boxes for aperture diaphragm, field diaphragm, and ND filter control methods in the Profile window to select a control method. • Not Move Cancels the interlock with switching of microscopy methods. Auto control is disabled after a change in microscopy method. • Objective Performs control by the same method as for the interlock with switching of objectives. Control position registered with the Memory function • User Memory Performs control using the values saved, in association with the microscopy method and the nosepiece address, using the Memory function on the aperture diaphragm, field diaphragm, and ND filter controls. Note: To register a control position using the Memory function, refer to Sections 4.8.5 to 4.8.7. • All Open (aperture and field diaphragms only) Selects the maximum diaphragm diameter. 54 Chapter 4 Using iControl 4.5 Setting 4.5.2.2 Condenser Module Control Method Menu (1) Click the list box for condenser module control method/position to select a control method. • Not Move Cancels the interlock with switching of microscopy methods. Auto control is disabled after a change in microscopy method. Select a setup item. • BF, DF, DIC, and Ph Specify a control method by selecting a microscopy method. Note: Interlock is disabled if the selected microscopy method does not match the objective type registered for the selected nosepiece address. • Condenser module address (1-7) Specify the condenser module control method with an address. 55 4 Chapter 4 Using iControl 4.5 Setting 4.5.3 Setting Up the Focus Position for Up/Down Motion The compensation amount the slight difference in focus position between different objectives is stored to enable accurate reproduction. In the focus position setup for up/down motion, the current Z-axis absolute position (focus position) is saved in association with a nosepiece address. Note: Focus position setup is possible only if the 90i is included in the system configuration (Focus Setting button enabled). Menu (1) Click Setting, then Focus Setting to display a dialog box for setting up focus position. (2) To set up a focus position in association with a nosepiece, select an objective first. To change addresses, click the desired address button. (3) Move the stage to the focus position using the focus knob on the microscope or the up and down keys for moving the stage along the Z-axis. (4) Click Memory to register the focus position. (1) Click Setting, then Focus Setting. (2) Click an address button. (5) Click the Close button to quit. (3) Adjust to the focus position using the Z-axis position controls. (5-1) To set another address, go back to Step (2) to repeat the setup procedure. (5-2) To quit focus position setup, click the Close button. (4) Click the Memory button. 56 Chapter 4 Using iControl 4.6 Information 4.6 Information 4.6.1 Confirmation of Event Logs Event logs for the microscope system let you confirm operations performed during the last 100 sessions. Menu (1) Click Information, then Event Log to display an event log confirmation popup. (1) Click Information, then Event Log. Event log confirmation popup 4 (2) (2) Click the Yes button. 4.6.2 Click the Yes button in the confirmation popup to write event logs for the selected microscope system to "Event.txt." "Event.txt" is created in C:\ProgramFiles\iSeriesTools, when the application installs the default settings. Confirming Versions iControl lets you confirm version information for iSeries Support Tools and the firmware incorporated into each attachment. Menu (1) Click Information, then Version to display a version information dialog box. (2) This dialog box shows the following information: (1) Click Information, then Version. Version Information dialog box • Version of the application iSeries Support Tools • 90i firmware • DIH firmware • Z drive firmware 57 Chapter 4 Using iControl 4.7 Changing the Optical Path Light Color Changing the Optical Path Light Color 4.7 Virtually any color can be selected for the light in the optical path by adjusting the wavelength of the light exiting the excitation or barrier filter placed in the optical path during setup. ♦ Supplement If a filter registered by initial setting in iSetup and iEZSetup is selected, the light color in the optical path will be automatically changed according to the filter wavelength. iControl window (1) To change the color of the light passing through the excitation filter, click the excitation filter icon in the window to display a window for the light color in the optical path. Likewise, to change the color of the light passing through the barrier filter, click the icon for the barrier filter. (2) The color bar shows the color of the wavelength range of the filter. Click on the color bar to change the color. (3) Or click the Barrier filter Excitation filter Window for the light color in the optical path Color bar Color palette window to open a color palette window. Specify the desired color in this dialog box. The color of the circle changes accordingly, as a preview, changing the light color in the iControl window. (4) 58 Colors set in this way are automatically written to the application. The set colors are reproduced automatically the next time you launch the application. Chapter 4 Using iControl 4.8 Motorized Attachment Controls Motorized Attachment Controls 4.8 In this application, controllable attachments vary depending on the microscope system configuration. The following shows a list of controllable attachments for each configuration: • 90i + DIH-E - Shutter (4.8.1) - Analyzer (4.8.2) - Optical path switching (4.8.3) - Episcopic field diaphragm (4.8.4) - Diascopic field diaphragm (4.8.5) - Diascopic aperture diaphragm (if motorized universal condenser module is attached) (4.8.6) - ND filter (only if motorized ND filter is attached) (4.8.7) - Optical zoom (4.8.8) - Illumination lamp (4.8.9) - Filter cube (4.8.10) - Nosepiece (only if motorized nosepiece is attached) (4.8.11) - Condenser module (if motorized universal condenser module is attached) (4.8.12) - Up/down focus motion (4.8.13) • 90i + DIH-M - Shutter (4.8.1) - Diascopic field diaphragm (4.8.5) - Diascopic aperture diaphragm (if motorized universal condenser module is attached) (4.8.6) - ND filter (only if motorized ND filter is attached) (4.8.7) - Illumination lamp (4.8.9) - Nosepiece (only if motorized nosepiece is attached) (4.8.11) - Condenser module (if motorized universal condenser module is attached) (4.8.12) - Up/down focus motion (4.8.13) • 80i + DIH-E - Shutter (4.8.1) - Analyzer (4.8.2) - Optical path switching (4.8.3) - Episcopic field diaphragm (4.8.4) - Optical zoom (4.8.8) - Filter cube (4.8.10) • 80i + DIH-M - Shutter (4.8.1) 59 4 Chapter 4 Using iControl 4.8 4.8.1 Motorized Attachment Controls Shutter iControl window (1) Click the shutter button to toggle the shutter open or closed. If closed, the shutter shuts off the optical path to the Epi-illumination. ♦ Meanings of the indications in the open window Optical path shown: Shutter open Shutter icon shown with optical path shut off: Shutter closed ♦ Meanings of the indications in the closed window Open: Shutter open Close: Shutter closed Shutter button 60 Chapter 4 Using iControl 4.8 4.8.2 Motorized Attachment Controls Analyzer iControl window (1) Click the analyzer button to toggle the analyzer IN or OUT. ♦ Meanings of the indications in the open window Analyzer icon shown in optical path: Analyzer IN Analyzer icon not shown: Analyzer OUT ♦ Meanings of the indications in the closed window IN: Analyzer IN OUT: Analyzer OUT Analyzer button 61 4 Chapter 4 Using iControl 4.8 4.8.3 Motorized Attachment Controls Optical Path Switching iControl window (1) Click an optical path selector button to switch optical paths. (2) Click the optical path controls display button to display the optical path controls. Click an optical path selector button on the optical path controls to change optical paths. (3) Check or uncheck the Link checkbox to toggle the optical path switching interlock ON or OFF. To interlock the episcopic field diaphragm with switching of optical paths, check the Link checkbox. To control optical path switching independently, uncheck the checkbox. (4) Click the Close button to close the controls. (1) Optical path selector buttons (2) Optical path controls display button ♦ Meanings of the indications in the open and closed windows and the optical path controls Binocular: Binocular section Front P: Front port Rear P: Rear port (3) Optical path switching interlock setup check box (4) Close button 62 Chapter 4 Using iControl 4.8 4.8.4 Motorized Attachment Controls Episcopic Field Diaphragm iControl window (1) Click the episcopic field diaphragm controls display button to display the controls. (2) To adjust the field diaphragm diameter, move the scroll bar or click the enlarge and reduce buttons. (The enlarge and reduce buttons let you adjust the diameter in minimum steps.) (3) Click the Close button to close the controls. ♦ Display item in the open and closed windows and the episcopic field diaphragm controls Field diaphragm diameter Display button for episcopic field diaphragm controls (2) Scroll bar, and enlarge and reduce buttons for adjusting the field diaphragm diameter (3) Close button 63 4 Chapter 4 Using iControl 4.8 4.8.5 Motorized Attachment Controls Diascopic Field Diaphragm iControl window (1) Click the diascopic field diaphragm controls display button to display the controls. (2) To adjust the field diaphragm diameter, move the scroll bar or click the enlarge and reduce buttons. (The enlarge and reduce buttons let you adjust the diameter in minimum steps.) (3-1) Memory function (enabled when an arbitrary microscopy method is selected) Diascopic field diaphragm controls display button This function saves the current diaphragm diameter. When saved, the stored position is indicated by the icon on the scroll bar. (The current position is saved in association with the current microscopy method and nosepiece address.) Memory button Reset button ♦ Supplement If User Memory is selected as the control method for the diascopic field diaphragm while using an arbitrary microscopy method (User Options 1 to 6), control will be performed based on this saved value. (2) Scroll bar, and enlarge and reduce buttons for adjusting the field diaphragm diameter (4) Close button For setting up selectable control methods, refer to Section 4.5.2.1. Note: The value stored for an arbitrary microscopy method using the Memory function is saved to the microscopy system. (3-2) Reset function Click the Reset button to reset to the saved diaphragm diameter. (4) Click the Close button to close the controls. ♦ Display item in the open and closed windows and the diascopic field diaphragm controls Field diaphragm diameter 64 Chapter 4 Using iControl 4.8 4.8.6 Motorized Attachment Controls Diascopic Aperture Diaphragm iControl window (1) Click the diascopic aperture diaphragm controls display button to display the controls. (2) To adjust the aperture diaphragm diameter, move the scroll bar or click the enlarge and reduce buttons. (The enlarge and reduce buttons let you adjust the diameter in minimum steps.) (3-1) Memory function (enabled when an arbitrary microscopy method is selected) Diascopic aperture diaphragm controls display button This function saves the current diaphragm diameter. When saved, the stored position is indicated by the icon on the scroll bar. (The current position is saved in association with the current microscopy method and the nosepiece address.) Memory button Reset button ♦ Supplement If User Memory is selected as the control method for the diascopic aperture diaphragm while using an arbitrary microscopy method (User Options 1 to 6), control will be performed based on this saved value. (2) Scroll bar, and enlarge and reduce buttons for adjusting the aperture diaphragm diameter For setting up selectable control methods, refer to Section 4.5.2.1. (4) Close button Note: The value stored for an arbitrary microscopy method using the Memory function is saved to the microscopy system. (3-2) Reset function Click the Reset button to reset to the saved diaphragm diameter. (4) Click the Close button to close the controls. ♦ Display item in the open and closed windows and the diascopic aperture diaphragm controls Aperture diaphragm diameter 65 4 Chapter 4 Using iControl 4.8 4.8.7 Motorized Attachment Controls ND Filter iControl window (1) Click the ND filter controls display button to display the controls. (2) To adjust the ND filter, move the scroll bar or click the enlarge and reduce buttons. (The enlarge and reduce buttons let you adjust the ND value in minimum steps.) (3-1) Memory function (enabled when an arbitrary microscopy method is selected) ND filter controls display button This function saves the current ND value. When saved, the stored position is indicated by the icon on the scroll bar. (The current position is saved in association with the current microscopy method and the nosepiece address.) Memory button Reset button ♦ Supplement If User Memory is selected as the control method for the ND filter while using an arbitrary microscopy method (User Options 1 to 6), control will be performed based on this saved value. For setting up selectable control methods, refer to Section 4.5.2.1. (2) Scroll bar, and enlarge and reduce buttons for adjusting the ND filter (4) Close button Note: The value stored for an arbitrary microscopy method using the Memory function is saved to the microscopy system. (3-2) Reset function Click the Reset button to reset to the saved ND value. (4) Click the Close button to close the controls. ♦ Display item in the open and closed windows and the ND filter controls ND value (%) 66 Chapter 4 Using iControl 4.8 4.8.8 Motorized Attachment Controls Optical Zoom iControl window (1) Click the optical zoom controls display button to display the controls. (2) To adjust the optical zoom, move the scroll bar in the iControl window or that on the optical zoom controls, or click the enlarge and reduce buttons. (The enlarge and reduce buttons let you adjust the optical zoom in minimum steps.) (3-1) Check or uncheck the Link checkbox to toggle the optical zoom switching interlock ON or OFF. To interlock the episcopic field diaphragm with optical zoom, check the Link checkbox. To control optical zoom independently, uncheck the checkbox. Optical zoom controls display button Link checkbox Note: Interlock with optical zoom is enabled only when Rear P is selected as the optical path. (3-2) Click the 1x button to change the zoom magnification to 1x. (4) Click the Close button to close the controls. ♦ Display item in the open and closed windows and the optical zoom controls (2) Scroll bar, and enlarge and reduce buttons for adjusting the optical zoom 1x button (4) Close button 67 Magnification 4 Chapter 4 Using iControl 4.8 4.8.9 Motorized Attachment Controls Diascopic Illumination Lamp iControl window (1) Click the illumination controls display button to display the controls. (2) To turn ON or OFF the power for the illumination lamp, use the On button or the ∇ button in the iControl window. (3-1) To adjust the lamp voltage, move the scroll bar or click the up and down buttons on the illumination lamp controls. (The up and down buttons let you adjust the voltage in minimum steps.) Illumination lamp controls display button (3-2) Click the Preset button to change to the preset voltage. (2) On button (4) Click the Close button to close the controls. ♦ Display item in the open and closed windows and the illumination lamp controls Lamp voltage Scroll bar, and up and down buttons for adjusting the lamp voltage Preset button (4) Close button 68 Chapter 4 Using iControl 4.8 4.8.10 Motorized Attachment Controls Filter Cube iControl window (1) Click the filter cube button or the button to display the filter cube controls. (2) (3) To change filter cube addresses, click an address button. The address buttons are in one-to-one correspondence with the addresses, letting you directly specify a desired filter cube. Click the Close button or the button to close the controls. ♦ Display items in the open and closed windows and the filter cube controls Filter cube controls display button Filter cube names ♦ Display items in the tool-tip text (place the mouse cursor over the name display text to display) Names of the excitation filter, dichroic mirror, and barrier filter Name display text Filter cube address buttons Close button 69 4 Chapter 4 Using iControl 4.8 4.8.11 Motorized Attachment Controls Objective iControl window (1) Click the objective controls display button or the button to display the objective controls. (2) To change nosepiece addresses, click an address button. The address buttons are in one-to-one correspondence with the addresses, letting you directly specify a desired objective. (3) Interlock with switching of objectives Check or uncheck the Link checkbox to toggle the objective switching interlock ON or OFF. To control the attachments while switching nosepiece addresses, check the Link checkbox. To switch nosepiece addresses independently, uncheck the checkbox. Objective controls display button For information on the attachment interlocks, refer to Section 5.10. (4) Name display text Click the Close button or the button to close the controls. ♦ Display items in the open and closed windows and the objective controls Objective names, magnifications ♦ Display items in the open window and in the tool-tip text of the controls (place the mouse cursor over the name display text to display) Nosepiece address buttons Working Distance Numerical Aperture ♦ Display items in the tool-tip text of the closed window (place the mouse cursor over the name display text to display) Objective names, W.D., N.A Link checkbox Link checkbox Close button 70 Chapter 4 Using iControl 4.8 4.8.12 Motorized Attachment Controls Condenser Module iControl window (1) Click the condenser module controls display button or the button to display the controls. (2) To change condenser turret addresses, click an address button. The address buttons are in one-to-one correspondence with the addresses, letting you directly specify a desired condenser module. (3) Click the Close button or the button to close the controls. ♦ Display item in the open and closed windows and the objective controls Condenser module names Condenser module controls display button Condenser module address buttons Close button 71 4 Chapter 4 Using iControl 4.8 4.8.13 Motorized Attachment Controls Up/Down Focus Motion iControl window (1) Click the up/down focus motion controls display button to display the controls. (2-2) Moving the stage To adjust the focus position, move the scroll bar on the controls or click the up and down buttons. (2-2) Retracting/restoring the stage Click the Escape button to move the stage to the retract position. After retraction, the button changes to "Return." Up/down focus motion controls display button Click the Return button to restore the stage to its initial position. (2-3) AF button Note: The stage makes its escape motion only when there is a 5.5-mm margin or more from the current position to the lower limit. The stage does not make the escape motion if the available margin is less than 5.5 mm. (2-3) Autofocus (AF) Click the AF button to autofocus the image. (2-1) Scroll bar, and up and down buttons for adjusting the Z-axis position (2-2) Escape button (3) Close button Note: The AF button is enabled when the 90i and the DS-U1 camera are connected. If you use the AF button for the first time after specimen replacement, always use an objective of 4x or less. Also be sure that the target under observation is at the center of the view field. ♦ Supplement For more information on the connecting method of 90i and DS-U1 camera as well as the autofocus function, see the "Description of the Autofocus Function" in the appendix. (3) Click the Close button to close the controls. ♦ Display item in the open and closed windows and the Focus Drive controls Z-axis position 72 Chapter 4 Using iControl 4.9 Switching Microscopy Methods 4.9 Switching Microscopy Methods Microscopy method selector buttons in the iControl window let you change microscopy methods. Note: Interlock with any of the six microscopy methods, namely, bright-field observation, DIC observation, DIC/epi-fl observation, epi-fl observation, phase contrast observation, and dark-field observation, is enabled only with a combination of 90i + DIH-E + motorized nosepiece + motorized universal condenser module. Interlock with any of the arbitrary microscopy methods is unavailable only with the combination of 80i + DIH-M. It can be enabled with all other combinations. Microscopy method menu (1) Click a microscopy method button. ♦ Supplement For control positions of each of the motorized attachments during microscopy method switching, refer to "Standard Combinations of Microscopy Methods and Interlock" in the appendix. (1) Click a microscopy method button. Arbitrary microscopy methods display button Arbitrary microscopy method text Arbitrary microscopy method menu (2) To change to an arbitrarily registered microscopy method, click the button. (3) (3) Click an arbitrary microscopy method name button. Click an arbitrary microscopy method name button. The selected microscopy method name is displayed in the arbitrary microscopy method text. Note: To change to an arbitrary microscopy method, you need to register a microscopy method in the arbitrary microscopy method setup (Profile setup) window. Refer to "4.5.2 Setting Up Arbitrary Microscopy Methods." 73 4 Chapter 4 Using iControl Appendix Standard Combinations of Microscopy Methods and Interlock Standard Combinations of Microscopy Methods and Interlock Appendix Shown below is a table listing operations of motorized attachments interlocked with a microscopy method. 90i Diascopic lamp ND filter Universal condenser Nosepiece Field diaphragm Z-axis Turret DIH-E Aperture Switching diaphragm Filter cube Field Optical path Shutter Analyzer Zoom diaphragm switching Brightfield ON Interlocked Interlocked Interlocked w/ objective w/ objective w/ objective BF/ 2-4x Interlocked w/ objective - Address 6 (DIA) - CLOSE OUT - - DIC ON Interlocked Interlocked Interlocked w/ objective w/ objective w/ objective DIC 1/2 Interlocked w/ objective - Address 6 (DIA) - CLOSE IN - - DIC/ epi-fl ON Interlocked Interlocked Interlocked w/ objective w/ objective w/ objective DIC 1/2 Interlocked w/ objective - Address 1 Interlocked w/ zoom OPEN IN - - Epi-fl OFF Interlocked w/ objective Interlocked w/ objective BF/ 2-4x - - Address 1 Interlocked w/ zoom OPEN OUT - - Phase contrast ON Interlocked Interlocked Interlocked w/ objective w/ objective w/ objective Ph 1/2/3 Fully open - Address 6 (DIA) - CLOSE OUT - - Dark-field ON Interlocked Interlocked Interlocked w/ objective w/ objective w/ objective DIC2/ 2-4x Fully open - Address 6 (DIA) - CLOSE OUT - - - "-" means not interlocked. Fixed: Not user-changeable Triggers the interlock Interlocked w/ objective: Sets appropriate status according to the selected DIH optical path and the total magnification combining those of the objective and the zoom (interlocked with objective alone in the absence of the DIH). Interlocked w/ zoom: Sets appropriate status according to the selected zoom status. 74 Chapter 4 Using iControl Appendix Standard Combinations of Microscopy Methods and Interlock • Bright-field microscopy iControl window (1) Click the microscopy method (Bright Field) button. The following attachments are interlocked: Diascopic lamp ON U-Condenser BF/2-4x Filter cube Address 6 (DIA) Shutter CLOSE Analyzer OUT (2) (1) Click the microscopy method button. Select an objective. The following attachments are interlocked with objective: Diascopic field diaphragm Diascopic aperture diaphragm ND filter Up/down focus motion (only if the focus position is set up) (2) Change objectives. (3) Manipulate the attachments in the broken line frame as necessary. (4) Make the following adjustments on the microscope main unit: • Achieve focus with and center the condenser. • Remove the objective's DIC prism from the optical path (if one is attached). • Remove the polarizer from the optical path (if one is attached). • Remove the lambda plate from the optical path (if one is attached). • Attach and detach the ND and NCB filters. 75 4 Chapter 4 Using iControl Appendix Standard Combinations of Microscopy Methods and Interlock • DIC microscopy iControl window (1) Click the microscopy method (DIC) button. The following attachments are interlocked: Diascopic lamp ON U-Condenser DIC1/2 Filter cube Address 6 (DIA) Shutter CLOSE Analyzer IN (2) (1) Click the microscopy method button. Select an objective. The following attachments are interlocked with objective: Diascopic field diaphragm Diascopic aperture diaphragm ND filter Up/down focus motion (only if the focus position is set up) (2) Change objectives. (3) Manipulate the attachments in the broken line frame as necessary. (4) Make the following adjustments on the microscope main unit: • Achieve focus with and center the condenser. • Bring the objective's DIC prism into the optical path. • Bring the polarizer into the optical path. • Adjust the polarizer orientation. • Bring the lambda plate into the optical path (if necessary). • Attach and detach the ND and NCB filters. 76 Chapter 4 Using iControl Appendix Standard Combinations of Microscopy Methods and Interlock • DIC/epi-fl microscopy iControl window (1) Click the microscopy method (DIC / FL) button. The following attachments are interlocked: Diascopic lamp ON U-Condenser DIC1/2 Filter cube Address 1 Shutter OPEN Analyzer IN (2) (1) Click the microscopy method button. Select an objective. The following attachments are interlocked with objective: Diascopic field diaphragm Diascopic aperture diaphragm ND filter Up/down focus motion (only if the focus position is set up) (2) Change objectives. (3) Manipulate the attachments in the broken line frame as necessary. (4) Make the following adjustments on the microscope main unit: • Center the lamp for episcopic light source • Achieve focus with and center the condenser. • Bring the objective's DIC prism into the optical path. • Bring the polarizer into the optical path. • Adjust the polarizer orientation. • Bring the lambda plate into the optical path (if necessary). • Attach and detach the ND and NCB filters. 77 4 Chapter 4 Using iControl Appendix Standard Combinations of Microscopy Methods and Interlock • Epi-fl microscopy iControl window (1) Click the microscopy method (Flourescence) button. The following attachments are interlocked: Diascopic lamp OFF U-Condenser BF/2-4x Filter cube Address 1 Shutter OPEN Analyzer OUT (2) Select an objective. The following attachments are interlocked with objective: ND filter Up/down focus motion (only if the focus position is set up) (1) Click the microscopy method button. (2) Change objectives. (3) Manipulate the attachments in the broken line frame as necessary. (4) Make the following adjustments on the microscope main unit: • Center the lamp for episcopic light source • Remove the objective's DIC prism from the optical path (if one is attached). • Remove the lambda plate from the optical path (if one is attached). 78 Chapter 4 Using iControl Appendix Standard Combinations of Microscopy Methods and Interlock • Phase contrast microscopy iControl window (1) Click the microscopy method (Phase contrast) button. The following attachments are interlocked: Diascopic lamp ON U-Condenser PH1/2/3 Filter cube Address 6 (DIA) Shutter CLOSE Analyzer OUT Aperture diaphragm Fully open (2) (1) Click the microscopy method button. Select an objective. The following attachments are interlocked with objective: Diascopic field diaphragm ND filter Up/down focus motion (only if the focus position is set up) (2) Change objectives. (3) Manipulate the attachments in the broken line frame as necessary. (4) Make the following adjustments on the microscope main unit: • Center the Ph annular diaphragm. • Remove the objective's DIC prism from the optical path (if one is attached). • Remove the polarizer from the optical path (if one is attached). • Remove the lambda plate from the optical path (if one is attached). • Attach and detach the ND and NCB filters. 79 4 Chapter 4 Using iControl Appendix Standard Combinations of Microscopy Methods and Interlock • Dark-field microscopy iControl window (1) Click the microscopy method (Dark Field) button. The following attachments are interlocked: Diascopic lamp ON U-Condenser DIC 2/2-4x Filter cube Address 6 (DIA) Shutter CLOSE Analyzer OUT Aperture diaphragm Fully open (2) (1) Click the microscopy method button. Select an objective. The following attachments are interlocked with objective: Diascopic field diaphragm ND filter Up/down focus motion (only if the focus position is set up) (2) Change objectives. (3) Manipulate the attachments in the broken line frame as necessary. (4) Make the following adjustments on the microscope main unit: • Achieve focus with and center the condenser. • Remove the objective's DIC prism from the optical path (if one is attached). • Remove the polarizer from the optical path (if one is attached). • Remove the lambda plate from the optical path (if one is attached). • Attach and detach the ND and NCB filters. 80 Chapter 4 Using iControl Appendix Description of the Autofocus Function Description of the Autofocus Function Appendix The following shows precautions for using the autofocus function, announcement messages appearing while the function is used, and the connection of 90i and DS-U1. • If you use the AF button for the first time after specimen replacement, always use an objective of 4x or less. (High magnification will narrow the autofocus search area.) Also be sure to use the AF button with the target under observation located at the center of the view field. • If you are unable to focus the image, move the specimen to display a high contrast area of the specimen at the center of the view field, then click the AF button again. • In addition to the above, the following conditions are essential for autofucusing. Applicable specimen Cover-glass-attached specimen slide (slide glass + specimen slice thickness: 0.9mm min. 1.7mm max.) The autofocusing may fail on some low contrasted samples due to insufficient contrast. Applicable slide glass Thickness: 1.2mm max. (compliant with JIS R3703-1998 or ISO 8037) Applicable cover glass Thickness: No. 1=0.17mm, No. 1-S=0.18mm max. (compliant with JIS R3702-1996 or ISO 8255) Applicable objective 1x – 100x (NA 0.03 – 0.95) (phase contrast, liquid immersion, polarizing, Hoffman, multi-immersion, and industrial objectives not allowed) Microscopy method Bright-field microscopy DS-U1 + ACT-2U settings Scene mode: BF Exposure time: Under AE setting, the exposure time should come within 1/120 to 1/350 (in 1.3 Mp display mode) when the sample is nearly in focus. (Adjust with ND filters, etc.) Autofocus Message Table Message Now Focusing Description Autofocusing now. Do not change the microscopy conditions. Complete Autofocusing complete. Complete Low Contrast Sample lacking sufficient contrast for autofocusing. Slight focal difference may take place in some conditions. Perform manual focusing if this happens. 81 4 Chapter 4 Using iControl Appendix Description of the Autofocus Function Message Warning Exposure Over Description Microscopy condition is too bright. Focusing stops at the original position for the autofocus. Use the autofocus function under following conditions set on the DS-U1 + ACT-2U (when the sample is nearly in focus). Scene mode: Exposure time: BF Under AE setting, the exposure time should come within 1/120 to 1/350 (in 1.3 MP display mode) when the sample is nearly in focus. (Adjust with ND filters, etc.) Check the camera settings (such as Scene mode and Display mode) on the ACT-2U (the application software for digital cameras). Warning Exposure Under Microscopy condition is too dark. Focusing stops at the original position for the autofocus. Use the autofocus function under following conditions set on the DS-L1 + ACT-2U (when the sample is nearly in focus). Scene mode: Exposure time: BF Under AE setting, the exposure time should come within 1/120 to 1/350 (in 1.3 MP display mode) when the sample is nearly in focus. (Adjust with ND filters, etc.) Check the camera settings (such as Scene mode and Display mode) on the ACT-2U (the application software for digital cameras). Error In the event of an error, one of the status codes (00–FF) will be displayed on the screen. (For more information, refer to the 90i Microscopy manual, "Troubleshooting.") Connection of 90i and DS-U1 The autofocusing function can be used only when 90i and DS-U1 are connected as follows. 82 5 Using iSetup iSetup lets you modify microscope system information only where changes are made to the microscope system setups. iSetup Workflow 5.1 Shown below is the iSetup workflow required to set information for the microscope system. Start Initiate communications with the microscope system Launch iSetup. Initiate communications with the microscope system. 5 Obtain information on the microscope system Load information directly from the microscope system or from an existing file. Set microscope system information Set the objective or filter cube used in the microscope system and other necessary information. (Settable items vary depending on the microscope system configuration.) Send setup content Send the name of the microscopy system and other information just set to the microscope system side. (The information is saved to memory on the microscope system side, overwriting any previous information.) Save information setup file Save the name and other microscope system information settings just made to a file after assigning the file an appropriate name. (Although you will be allowed to quit without doing so, we recommend saving this data to a file before quitting the application; information stored in memory on the microscope system side is subject to overwriting.) End Quit iSetup. 83 Chapter 5 Using iSetup 5.1 5.1.1 iSetup Workflow Settable Item List Shown below is a list of items that can be set: System Name (5.6) ― Microscope system name setup Objective (objective setup) (5.7) ― Objective: Objective mounting setup (5.7.1) ― Optional Obj: Objective registration (5.7.2) ― Limit Control: Special control setup for objective switching (5.7.3) ― High magnification switching limit control ― Skip control ― Liquid immersion control Filter Cube (filter cube setup) (5.8) ― Filter Cube: Filter cube mounting setup (5.8.1) ― Optional Cube: Filter cube registration (5.8.2) ― Optional Item: Item name registration (excitation/barrier/mirror) (5.8.3) Condenser (condenser module setup) (5.9) ― Condenser: Condenser module mounting setup (5.9.1) ― Optional Data: Condenser module registration (5.9.2) Interlock (interlock setup) (5.10) ― Observation: Microscopy method interlock setup (5.10.1) ― Other: Objective interlock setup/zoom interlock setup/optical path switching interlock setup (5.10.2) ― Offset: Compensation setup during interlocking (5.10.3) ― Diascopic field diaphragm ― Diascopic aperture diaphragm ― ND value Control (other setups) (5.11) ― Focus Drive: Up/down focus motion setup (5.11.1) ― Compensation mode selection ―Focus position setup ― Other: Manual setup, buzzer setup, switch setup (5.11.2) 84 Chapter 5 Using iSetup 5.2 Starting and Quitting iSetup Starting and Quitting iSetup 5.2 You can start and quit iSetup in several ways. A general method is described here, using the Start menu and the Cancel button in the operations window to quit. To start iSetup from within iControl, refer to Section 4.5.1. 5.2.1 Starting Up Procedure Start menu (1) Click the Start button. Confirm that the microscope is connected to your computer before starting the computer. (2) Choose Programs – Nikon – iSeriesTools, then click iSetup. iSetup window 85 (1) Click the Start button. (2) From the Start menu, choose Programs – Nikon – iSeriesTools, then click iSetup to display the iSetup window. 5 Chapter 5 Using iSetup 5.2 Starting and Quitting iSetup Quitting iSetup 5.2.2 Procedure iSetup window (1) Click the Exit button. (2) Click the OK button to quit the application. 86 (1) Click the Exit button. (2) A conformation message box is displayed asking if you want to quit the application. Click OK to terminate communications with the microscope system and quit the application. Chapter 5 Using iSetup 5.3 5.3 iSetup Screen Configuration iSetup Screen Configuration The iSetup window consists of the main setup item buttons, subsetup item buttons, and a setup screen. iSetup window Subsetup item buttons Setup screen 5 Main setup item buttons Main setup item buttons (1) (1) Click a setup item button. If you click the button for any setup item, the middle part of the window changes to a setup screen for that item. ♦ Supplement Depending on the system configuration, some of the items here do not need to be set. If so, the corresponding buttons are disabled. 87 Chapter 5 Using iSetup 5.4 Starting Communications with the Microscope System 5.4 Starting Communications with the Microscope System Before you can send information that has been set using iSetup to the microscope system, you must first initiate communications with the microscope system. You must also initiate communications with the microscope system to load the current status of the microscope system into iSetup. The microscope system information just set should be sent to the microscope system to have it written to memory on the microscope system side. You can also save this information to a file. 5.4.1 Initiating Communications and Changing the Destination in iSetup Microscope system select dialog box (1) (1) Select a system name. 5.4.2 Click the Select button to display a microscope system select dialog box. In this dialog box, select the name of the microscope system for which you want to obtain information. The software will begin communication with the selected microscope system. If the software was in mid-session with another microscope system, it automatically closes that session and opens communications with the newly selected microscope system. Starting Communication from iControl If you invoked iSetup from iControl, you can use the iControl menu to initiate communications. For more information, refer to Section 4.4, "Connection." 88 Chapter 5 Using iSetup 5.5 Selecting Setup Modes 5.5 Selecting Setup Modes You can set information in iSetup in two ways. Choose the one best suited to your purpose. 1. Load microscope system information and make corrections only where necessary (if information has been already set with iEZSetup). 2. Load and correct an existing file. 5 89 Chapter 5 Using iSetup 5.5 Selecting Setup Modes 5.5.1 Loading Microscope System Information and Making Corrections Only Where Necessary iSetup window (1) Click the Receive button. The information stored in the memory of the microscope system is loaded and reflected in the iSetup window. (2) Click the button for the main setup item that needs corrections on the left side of the window and make corrections in the setup screen. (3) After modifying the information, click the Send button to send the information just set to the microscope system. The transmitted name and information are stored in memory on the microscope system side. (This overwrites all information that can be set, not just the specific items that were changed.) (4) Choose Save from the File menu of the window to save the set information to a file. (2) Set information on each item. (1) Click the Receive button. (3) Click the Send button. (4) Choose Save from the File menu to write the set information to a file. 90 Chapter 5 Using iSetup 5.5 Selecting Setup Modes 5.5.2 Loading and Correcting an Existing File You can load any existing microscope system information data file into iSetup for correction or modifications. iSetup window (1) Choose Open from the File menu, then select the file containing the microscope system information you want to view or change. The information saved in the file is loaded and reflected in the iSetup window. (2) Click the button for any main setup item on the left side of the window. In the ensuing dialog box, set the information you want to correct for that item. Set information on other applicable items. (3) After modifying the information, click the Send button to send the information just set to the microscope system. The transmitted name and information are stored in memory on the microscope system side. (This overwrites all information that can be set, not just the specific items that were changed.) (4) Choose Save from the File menu of the window to save the set information to a file. (2) Set information on each item. (1) Choose Open from the File menu. (3) Click the Send button. (4) To save the set information to a file, choose Save from the File menu. 91 5 Chapter 5 Using iSetup 5.6 5.6 Entering the Name of a Microscope System Entering the Name of a Microscope System If multiple microscope systems are connected to a single PC, assign a name to each of the systems for identification purposes. Clicking the System Name button in the iSetup window displays a dialog box for entering the name of a microscope system. Use this dialog box to enter the name of a microscope system. Microscope system name input dialog box (1) Click the System Name button. (2) Enter the name of a microscope system. 92 (1) Click the System Name button. If you loaded information from a microscope system, the status of any peripheral motorized attachments connected to the system is also displayed. (2) Enter the name of a microscope system in the System Name text box (using up to 15 single-byte alphanumeric characters). Chapter 5 Using iSetup 5.7 Setting Up the Objective Setting Up the Objective 5.7 Setting up the objective lets you monitor the status of the microscope system at a glance and have microscopy method switching and objective switching interlocked. The following information items can be set for the objective: • Objective mounting setup (possible only if the motorized or intelligent nosepiece is attached): Set information on the objectives mounted at each nosepiece address (hole). • New objective registration (possible only if the motorized or intelligent nosepiece is attached): Register information on new objectives that are not registered in the list box (up to nine pcs.) • Special control setup (possible only if the 90i is included in the system configuration and if the motorized or intelligent nosepiece is attached to the microscope): Set up the special control when changing objectives. 93 5 Chapter 5 Using iSetup 5.7 Setting Up the Objective 5.7.1 Objective Mounting Setup Clicking the Objective button – a main setup item button – displays the objective mounting setup dialog box. In the objective mounting setup dialog box, set information on the objectives mounted at each nosepiece address. Objective mounting setup dialog box (1) Select Objective. (2) Select an address. The type, magnification, working distance, numerical aperture, and indicated name of the objective are displayed. (1) Click the Objective button – a main setup item button. (2) From the tab, select an address for which you want to set objective information. (3) Select the desired objective series from the series list box. (4) When you select a series, the selected items of the objective information change. Select the desired objective information from the objective information list box. When you select any objective information, the type, magnification, working distance, numerical aperture, and indicated name of the objective are displayed in the Type, Mag., W.D., N.A., and NAME text fields. (5) When you go on to set objective information for another address, go back to Step (2) and repeat the setup procedure. ♦ Supplement (3) Select an objective series. To register new objective information not registered in the series list box, click the Optional Obj. button– a subsetup item button. This changes the dialog box to the one used to register new objective information. See the next page for more information. (4) Select objective information. 94 Chapter 5 Using iSetup 5.7 Setting Up the Objective 5.7.2 Registering New Objectives New objective registration is needed to register new objective information not registered in the series list box. Click the Optional Obj. button – a subsetup item button in the objective mounting setup dialog box – to display a dialog box for registering new objective information. This dialog box allows you to register up to nine new objectives. When registering a new objective, you can register all six information items: indicated name, series, magnification, type, numerical aperture, and working distance. New objective registration dialog box (1) Click the Optional Obj. button. (2) Select a number. (7) Enter a numerical aperture and working distance. (3) Enter a name. (4) Select a series. (5) Select a type. (6) Select a magnification (1) Click the Optional Obj. button – a subsetup item button. (2) From the tab, select a number for which you want to register objective information. (3) Enter the name of the objective in the Name text box (using up to 15 single-byte alphanumeric characters). (4) Select the objective series from the Series list box. (5) Select the objective magnification from the Mag list box. (6) Select the objective type from the Type list box. (7) Enter the numerical aperture and the working distance of the objective in the N.A. and the W.D. text fields, respectively (up to 4 single-byte alphanumeric characters each). The newly registered objective is added to the selectable items in the list box in the objective mounting setup dialog box. 95 5 Chapter 5 Using iSetup 5.7 Setting Up the Objective Special Control Setup 5.7.3 Click Limit Control – a subsetup item button for objective setup – to display a dialog box for setting up special control. Special control setup is designed to set the following control items: Note: Special control setup is enabled only when objectives are switched with the objective interlock turned ON. For more information on the objective interlock, refer to "4.8.11 Objective." • Objective high magnification switching limit control ♦ Supplement Low-magnification objectives have a very long depth of focus, occasionally resulting in the specimen and the objective being close to each other. If, under such a condition, the objective is changed to a high magnification, its edge may touch the specimen. High magnification switching limit control is carried out to proactively avoid such a problem. As for the nosepiece operation when changing from low to high magnification lenses, one of the following options can be set: inhibit the nosepiece rotation, rotate the nosepiece after retracting the stage, or disable control. Limit control is activated if the following requirements are met: (1) The objective magnification prior to switching is 2x or less. (2) The working distance of the objective after switching is 1 mm or less. • Skip control setup Set whether to skip addresses at which objectives are not attached for rotation of the nosepiece. • Liquid immersion control If a liquid immersion lens is provided in the optical path during or following nosepiece rotation, set one of the following options: inhibit the nosepiece rotation, rotate the nosepiece after retracting the stage, or disable control. Limit control is activated in either of the following cases: (1) If the objective prior to switching is a liquid immersion objective (2) If the objective following switching is a liquid immersion objective Special control setup dialog box (1) Click the Limit Control button. (1) (2) Set the objective high magnification switching limit control. (3) Set the skip control. (4) Set the liquid immersion control. 96 Click Limit Control – a subsetup item button. (2) For the objective high magnification switching limit control, select Free (default), No Rotation or Rotate After Stage Going Down. (3) To enable skip control, select Skip. To disable, select Use (default). (4) For the switching limit control for liquid immersion objective, select Free (default), No Rotation or Rotate After Stage Going Down. Note: The stage moves downward 5 mm as its retract motion. In the absence of a 5-mm margin, the stage will retract to its lowest possible position. Chapter 5 Using iSetup 5.8 Setting Up the Filter Cube Setting Up the Filter Cube 5.8 Setting up the filter cube lets you monitor the status of the microscope system at a glance and interlock the filter cube when switching microscopy methods. The following filter cube information items can be set (if the DIH-M or DIH-E is included in the microscope system configuration): • Filter cube mounting setup: Set information on the filter cubes positioned at each filter cube address (filter cube bay). • New filter cube registration: Register a combination of excitation filter, dichroic mirror, and barrier filter as well as the name of a filter cube comprised of that combination. • Name registration: Register the names of the excitation filter, dichroic mirror, and barrier filter. 5 97 Chapter 5 Using iSetup 5.8 Setting Up the Filter Cube 5.8.1 Filter Cube Mounting Setup Clicking the Filter Cube button – a main setup item button – displays the filter cube mounting setup dialog box. In this dialog box, set information on the filter cubes attached at each filter cube address (filter cube bay). Note: DIA (open) is selected for address 6 as initial setting. The interlock with microscopy method switching is conducted based on this initial setting. For more information, refer to "Standard Combinations of Microscopy Methods and Interlock" in the appendix of Chapter 4. Filter cube mounting setup dialog box (1) Click the Filter Cube button. (2) Select an address. (1) Click the Filter Cube button – a main setup item button. (2) From the tab, select an address for which you want to set filter cube information. (3) Select a filter cube name from the list box. When you select the filter cube name, the names of the excitation filter, dichroic mirror, and barrier filter are displayed in the Exciter, Dichroic, and Barrier text boxes, respectively. (4) To set information for another address, go back to Step (2) and repeat the setup procedure. ♦ Supplement To register a new combination of excitation filter, dichroic mirror, and barrier filter, click the Optional Cube button. The dialog box changes to the one used for registering a new filter cube. See the next page for more information. (3) Select a filter cube name. The names of the excitation filter, dichroic mirror, and barrier filter are displayed. 98 To register a new excitation filter, dichroic mirror, or barrier filter individually, click the Optional Item button. The dialog box changes to the one used for registering item names. See Section 5.8.3 for more information. Chapter 5 Using iSetup 5.8 Setting Up the Filter Cube Registering New Filter Cubes 5.8.2 New filter cube registration is required to register a new combination of excitation filter, dichroic mirror, and barrier filter. Clicking Optional Cube – a subsetup item button in the filter cube mounting setup dialog box – displays a dialog box for registering new filter cubes. This dialog box lets you register up to nine combinations of excitation filters, dichroic mirrors, and barrier filters, and the names of up to nine filter cubes, each comprised of the combination thus specified. New filter cube registration dialog box (1) Click the Optional Cube button. (2) Select a number. (3) Enter the name of a filter cube. (4) Select the name of an excitation filter. (5) Select the name of a dichroic mirror. (6) Select the name of a barrier filter. (1) Click the Optional Cube button – a subsetup item button. (2) From the tab, select a number for which you want to register new filter cube information. (3) Enter the name of the filter cube you want to set in the Name text box (up to 10 single-byte alphanumeric characters). (4) Select the name of the excitation filter you want to set from the Exciter list box. (5) Select the name of the dichroic mirror you want to set from the Dichroic list box. (6) Select the name of the barrier filter you want to set from the Barrier list box. The newly registered filter cube is added to the selectable items in the list box in the filter cube mounting setup dialog box. ♦ Supplement To register a new excitation filter, dichroic mirror, or barrier filter individually, click the Optional Item button. The dialog box changes to the one used for registering item names. See the next page for more information. 99 5 Chapter 5 Using iSetup 5.8 Setting Up the Filter Cube 5.8.3 Registering Item Names Item name registration is needed to register a new excitation filter, dichroic mirror, or barrier filter individually. Click Optional Item – a subsetup item button in the filter cube mounting setup dialog box– to display a dialog box for registering item names. This dialog box lets you register names for up to nine excitation filters, nine dichroic mirrors, and nine barrier filters. Item name registration dialog box (1) Click the Optional Item button. (2) Enter names. 100 (1) Click the Optional Item button – a subsetup item button. (2) In the Exciter, Dichroic, and Barrier text boxes here, enter the name of the excitation filter, dichroic mirror, and barrier filter you want to set (using up to 10 single-byte alphanumeric characters). The newly registered names are added to the selectable items in the list box in the new filter cube registration dialog box. Chapter 5 Using iSetup 5.9 Setting Up the Condenser Module Setting Up the Condenser Module 5.9 Condenser module setup lets you monitor the status of the microscope system at a glance and interlock the condenser module when switching microscopy methods or objectives. The following condenser module information items can be set (only if the motorized universal condenser module is attached to the microscope): 5.9.1 • Condenser module mounting setup: Set information on the condenser modules attached at each condenser turret address (condenser module bay). • New condenser module registration Register the desired name of a condenser module. Condenser Module Mounting Setup Clicking the Condenser button – a main setup item button – displays the condenser module mounting setup dialog box. Condenser module mounting setup dialog box (1) Click the Condenser button – a main setup item button. (1) Click the Condenser button. (2) Select the name of a condenser module from the combo box of the address for which you want to register condenser module information. ♦ Supplement To register a new condenser module, click the Optional Data button. The dialog box changes to the one used for registering a new condenser module. See the next page for more information. (2) Select an address and condenser module name. 101 5 Chapter 5 Using iSetup 5.9 Setting Up the Condenser Module 5.9.2 New Condenser Module Registration New condenser module registration is needed to register a new condenser module. Click Optional Data – a subsetup item button – to display a dialog box for registering new condenser modules. This dialog box lets you register up to nine condenser modules. Condenser module name registration dialog box (1) Click the Optional Data button. (2) Enter a name. 102 (1) Click the Optional Data button – a subsetup item button. (2) Enter the name of a condenser module (using up to 10 single-byte alphanumeric characters). The newly registered name is added to the selectable items in the combo box in the condenser module mounting setup dialog box. Chapter 5 Using iSetup 5.10 Setting Up the Interlock Setting Up the Interlock 5.10 Interlock is designed to tailor various motorized attachments of the microscope system to the control conditions that best fit the microscopy method and objective used. The following interlock information items can be set: • Microscopy method interlock setup (only if the 90i or DIH-E is included in the microscope system configuration): Set whether to interlock each of the motorized attachments when switching microscopy methods (ON/OFF). • Objective interlock setup (only if the 90i is included in the microscope system configuration): Set whether to interlock each of the motorized attachments when switching objectives (ON/OFF). • Optical path switching interlock setup (only if the DIH-E is included in the microscope system configuration): Set whether to interlock the episcopic field diaphragm when switching optical paths. • Optical zoom interlock setup (only if the DIH-E is included in the microscope system configuration): Set whether to interlock the episcopic field diaphragm when switching optical zoom magnifications. • Compensation setup Control values can be compensated for across the board when the diascopic field diaphragm, diascopic aperture diaphragm, ND value, and episcopic field diaphragm are controlled through interlock. Set this compensation value. 103 5 Chapter 5 Using iSetup 5.10 Setting Up the Interlock Microscopy Method Interlock Setup 5.10.1 Clicking the Interlock button – a main setup item button – displays the microscopy method interlock setup dialog box. Microscopy method interlock setup dialog box (1) (2) (3) (4) (5) (6) (7) (8) (9) (10) (11) (1) Click the Interlock button. (1) Click the Interlock button – a main setup item button. (2) Set whether to turn ON or OFF each of the motorized attachments (interlock the attachments with microscopy method) by clicking the ON/OFF button. The following motorized attachments can be set to interlock: (1) (2) Click the ON/OFF button for each of the motorized attachments. Illumination lamp (configuration including the 90i only) (2) Optical path switching (configuration including the DIH-E only) (3) Shutter (configuration including the DIH-E/M only) (4) Filter cube (configuration including the DIH-E only) (5) Diascopic field diaphragm (configuration including the 90i only) (6) Analyzer (configuration including the DIH-E only) (7) Nosepiece (only if motorized nosepiece is attached) (8) Diascopic aperture diaphragm (only if motorized condenser is attached) (9) Condenser (only if motorized condenser is attached) (10) ND filter (only if motorized ND filter is attached) (11) Optical zoom (configuration including the DIH-E only) Note: Motorized attachments that can be set to interlock vary depending on the microscope system configuration. 104 Chapter 5 Using iSetup 5.10 5.10.2 Setting Up the Interlock Objective, Optical Path Switching, and Optical Zoom Interlock Setups Clicking Other – a subsetup item button in the microscopy method interlock setup dialog box – displays the interlock setup dialog box for others. Interlock setup dialog box for others (1) Click the Other button. (2) Click the ON/OFF button for each motorized attachment. (1) (4) (2) (3) (1) Click Other – a subsetup item button. (2) Set whether to turn ON or OFF each of the motorized attachments (interlock the attachments with objective) by clicking the ON/OFF button. The following motorized attachments can be set: (1) (5) (2) (3) (3) Click the ON/OFF button. (4) (5) (4) Click the ON/OFF button. 5.10.3 ND filter (only if motorized ND filter is attached) Diascopic field diaphragm (configuration including the 90i only) Condenser (only if a motorized condenser is attached) Diascopic aperture diaphragm (only if a motorized condenser is attached) Up/down focus motion (configuration including the 90i only) (3) Set whether to turn ON or OFF the episcopic field diaphragm (interlock the diaphragm with switching of optical paths) by clicking the ON/OFF button. (4) Set whether to turn ON or OFF the episcopic field diaphragm (interlock the diaphragm with optical zoom) by clicking the ON/OFF button. Compensation Setup during Interlocking Clicking Compensation – a subsetup item button in the microscopy method interlock setup dialog box – displays the compensation setup dialog box. Compensation setup dialog box (1) Click the Compensation button. (1) Click Compensation – a subsetup item button. (2) Select an interlock compensation value from the combo box for each of the motorized attachments. Note: This setup applies to the interlocks with microscopy method switching and objective switching. (2) Select a compensation value from the combo box for each of the motorized attachments. 105 5 Chapter 5 Using iSetup 5.11 Control-Related Setup Control-Related Setup 5.11 The following control-related information items can be set: • Up/down focus motion setup (only if the 90i is included in the microscope system configuration): Set a parfocal compensation mode and software lower limit. • Focus knob operation mode setup (only if the 90i is included in the microscope system configuration): Set whether to change, on the system side, the travel per rotation of the focus knob (AUTO mode) or arbitrarily change the setting (coarse/fine/extra fine) (MANUAL mode) when controlling the up/down focus motion using the focus knob. • Buzzer setup (only if the 90i or DIH-E is included in the microscope system configuration): Set whether to sound the buzzer when operating the switches, etc., on the microscope. • Switch setup: Set whether to enable/disable operations of switches on the microscope. 106 Chapter 5 Using iSetup 5.11 Control-Related Setup Setting Up the Up/Down Focus Motion 5.11.1 The following up/down focus motion information items can be set (only if the 90i is included in the microscope system configuration): • Parfocal compensation mode setup: ♦ Supplement While all objectives are manufactured with a constant parfocal distance, the focus position is subtly different from one objective to another, resulting in a difference. Such a difference in focus position must be compensated for. Parfocal compensation is designed to store the subtle difference in focus position, thus achieving accurate reproduction. Set whether to compensate for parfocal distance deviation. • Software lower limit setup: ♦ Supplement The initial lower limit setting along the Z-axis, initially set to -15mm to avoid the polarizer from touching the XY stage during its mounting, can be changed to -25mm as when you want to observe a thick specimen. Exercise caution if you set the lower limit to -25mm as no mechanism is provided to avoid collision with the polarizer. Set the XY stage lower limit (15 mm/25 mm) if no attachment (e.g., a condenser turret) is attached under the XY stage. Up/down focus motion setup dialog box (2) Select a compensation mode. (1) Click the Control button – a main setup item button. (2) Select the parfocal compensation mode (ON [default]/OFF). Note: To set a focus position, use Focus Setting under Setting, one of the iControl menu items. See "4.5.3 Setting Up the Focus Position for Up/down Motion " for more information. (3) Software limit (settable only if the motorized universal condenser module is not attached) Select -15 mm (recommended) or -25 mm (max. lower limit position) for the lower limit position. Note: The lower limit is automatically set to -15mm when the motorized universal condenser module is attached. (1) Click the Control button. (3) Select a software lower limit. 107 5 Chapter 5 Using iSetup 5.11 Control-Related Setup Other Setup 5.11.2 Clicking Other – a subsetup item button – displays a setup dialog box for other control. The following control-related information items can be set (only if the 90i or DIH-E is included in the microscope system configuration): • Focus knob operation mode setup (only if the 90i is included in the microscope system configuration): Set whether to change, on the system side, the travel per rotation of the focus knob according to the objective currently in the optical path (AUTO mode), or arbitrarily change the setting (coarse/fine/extra fine) (MANUAL mode) when controlling the up/down focus motion using the focus knob. • Buzzer setup (only if the 90i or DIH-E is included in the microscope system configuration): Set whether to sound the buzzer when operating the switches on the microscope or if an error occurs. • Switch setup: Set whether to enable/disable operations of switches on the microscope. Control-related setup dialog box (1) Click the Other button. (2) Select an operation mode for up/down focus motion. (3) Select a buzzer setup. (4) Select a switch setup. 108 (1) Click the Other button – a subsetup item button. (2) Select the focus knob operation mode (AUTO/MANUAL [default]). Note: When you select AUTO, auto switching of travels per rotation according to objective information is enabled only if the objective interlock is set to ON. (If the objective interlock is OFF, the travel per rotation remains unchanged from the previous setting.) For the objective interlock, refer to Section 4.8.11, "Objective." (3) Set the Buzzer to ON (default) or OFF. (4) Set the Switch to ON (default) or OFF. Chapter 5 Using iSetup 5.12 Reflecting and Saving Settings 5.12 Reflecting and Saving Settings To enable information set with iSetup, you need to send all the information to the microscope system. The microscope system will overwrite any previous information, saving the transmitted information. The information you've set can be saved to a file if desired. 5.12.1 Transmission to the Microscope System When you thoroughly finish setting up necessary information, send it to the microscope system for storage in memory on the microscope system side. iSetup window (1) (1) Click the Send button. 5.12.2 Click the Send button. The name of the microscope system and all related information will be sent to the microscope system side. The transmitted name and information are stored in memory on the microscope system side, thus overwriting any previous information. Saving Microscope System Information You can save microscope system information you’ve set with iSetup to a file for later use. iSetup window (1) (1) Click the Save button. ▼ File select dialog box 109 Click the Save button. A file select window is displayed. Select a file (***.xml) and save the setup information. 5