1
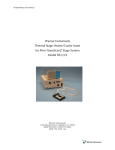
PC-505B Manual, Rev. 050816
Warner Instruments
Whole Cell/Patch Clamp Amplifier
Model PC-505B
Warner Instruments
1125 Dixwell Avenue, Hamden, CT 06514
(800) 599-4203 / (203) 776-0664
(203) 776-1278 - fax
PC-505B Manual, Rev. 050816
Table of Contents
INTRODUCTION....................................................................................................................................... 4
NOMENCLATURE.................................................................................................................................... 5
Text conventions ..................................................................................................................................... 5
Device panel abbreviations .................................................................................................................... 5
Signal polarity conventions.................................................................................................................... 5
Membrane current (Im)......................................................................................................................... 5
Membrane potential (Vm) ..................................................................................................................... 6
CONTROL DESCRIPTION...................................................................................................................... 7
Front panel .............................................................................................................................................. 7
COMMANDS block.................................................................................................................................. 7
FAST CAP COMP (fast capacitance compensation) command block ..................................................... 8
WHOLE CELL command block ............................................................................................................... 9
OUTPUT command block .................................................................................................................... 10
METER section .................................................................................................................................... 11
Front and rear panel BNC’s and connectors ..................................................................................... 12
Headstage........................................................................................................................................... 14
Electrode holders ............................................................................................................................... 15
Model Cell .......................................................................................................................................... 15
SETUP AND INITIAL TEST .................................................................................................................. 16
Line voltage ........................................................................................................................................... 16
Instrument grounding .......................................................................................................................... 16
Headstage precautions ......................................................................................................................... 16
Headstage preparation ......................................................................................................................... 17
Test Procedures .................................................................................................................................... 17
Initial connections .............................................................................................................................. 17
Initial configuration ........................................................................................................................... 17
Headstage inputs: OpenRMS noise checkout............................................................................. 18
RMS noise checkout............................................................................................................................ 19
Im output checkout .............................................................................................................................. 19
Junction zero checkout ....................................................................................................................... 19
Internal DC voltage command checkout ............................................................................................ 20
External DC Voltage command checkout........................................................................................... 21
Internal AC voltage command checkout............................................................................................. 21
Auto Zero control checkout ................................................................................................................ 21
ΣVc commands checkout..................................................................................................................... 22
Cap Comp checkout............................................................................................................................ 22
PC-505B Manual, Rev. 050816
Current clamp checkout ..................................................................................................................... 23
THEORETICAL CONSIDERATIONS ................................................................................................. 25
Chloriding silver wire........................................................................................................................... 25
Chloriding by electrolysis .................................................................................................................. 25
Chloriding chemically ........................................................................................................................ 25
Electrode holders .................................................................................................................................. 25
Care and use of holders...................................................................................................................... 26
Cleaning and storage ......................................................................................................................... 26
Replacing holder parts ....................................................................................................................... 26
Reference electrodes ............................................................................................................................. 26
APPENDIX................................................................................................................................................ 28
Specifications......................................................................................................................................... 28
Accessories and replacement parts ..................................................................................................... 30
Warranty and service........................................................................................................................... 31
Warranty............................................................................................................................................. 31
Service notes....................................................................................................................................... 31
Recommended reading......................................................................................................................... 32
Certifications......................................................................................................................................... 33
Glossary ................................................................................................................................................. 36
4
PC-505B Manual, Rev. 050816
The Warner model PC-505B Whole Cell/Patch Clamp Amplifier is an extremely low noise
resistive-feedback patch clamp amplifier designed for whole-cell, single channel, and bilayer
applications. The unique circuitry and dedicated design of this amplifier allows Warner
Instruments to present a superior quality instrument at a cost significantly below that of many
of our competitors.
Principal features of the PC-505B include:
9
Low noise levels of 0.038 pA RMS at 1 kHz
9
Built-in RMS noise monitor
9
Voltage and current clamp modes with independently selectable Vhold and Ihold
9
Bandwidth to 25 kHz
9
Internal 4-pole low-pass Bessel filter with rear panel filter telegraph
9
Built-in test generator
9
Automatic junction potential compensation
9
Two-range fast capacitance compensation
9
Series resistance and C-slow capacitance compensation
9
% Correction circuitry
9
Adjustable duration zap circuit for whole cell membrane penetration
9
Output gain selection with rear-panel gain telegraph
9
Front/rear panel controls and connectors are color coded and organized for quick
reference and convenient operation
THIS EQUIPMENT IS NOT DESIGNED NOR INTENDED
FOR USE ON HUMAN SUBJECTS
Warner Instruments
A Harvard Apparatus Company
5
PC-505B Manual, Rev. 050816
NOMENCLATURE
Text conventions
This manual refers to amplifier controls at three functional levels; control blocks, specific
controls within a block, and settings of specific controls. To minimize the potential for
confusion, we have employed several text conventions which are specified below. Since our goal
is to provide clarity rather than complexity, we welcome any feedback you may wish to provide.
¾
Warner Instrument product numbers are presented using bold type.
¾
References to instrument panel control blocks are specified using
¾
References to specific controls within a block are specified using
¾
References to individual control settings are specified using italic type.
¾
Special comments and warnings are presented in highlighted text.
UNDERLINED SMALL CAPS.
SMALL CAPS.
Any other formatting should be apparent from context.
Device panel abbreviations
Many controls on the PC-505B have abbreviations associated with them. Several of these
abbreviations are listed here for quick reference. In addition, these and other terms have been
collected and are included in a Glossary at the back of this manual.
Term
Meaning
Sections
CAP COMP
capacitance compensation
FAST CAP COMP
Im
output current
OUTPUT, METER, REAR PANEL
Vm
membrane voltage
OUTPUT, METER, REAR PANEL
Vc
COMMAND IN
voltage
OUTPUT, METER, REAR PANEL
ΣVc
Vc + h
sum of all command and
compensation voltages
IN
Vc plus
P STAT
HOLDING
voltage
potentiostat mode
METER
METER
OUTPUT, REAR PANEL
Signal polarity conventions
Membrane current (Im)
Im is indicated as positive when cations flow outward from the pipet tip, through the
cell membrane and into the bath, and/or when anions flow from the bath into the pipet.
With outside-out patch and whole cell preparations, this corresponds to the conventional
Warner Instruments
A Harvard Apparatus Company
PC-505B Manual, Rev. 050816
6
physiological definition of outward transmembrane current. With inside-out or cellattached patches, the physiological transmembrane current equals minus the indicated Im.
Membrane potential (Vm)
Membrane potential is defined as pipet potential minus bath potential. With outsideout patch and whole cell preparations, this corresponds to the conventional physiological
definition of transmembrane potential. With inside-out or cell-attached patches, the
physiological transmembrane potential equals minus the indicated Vm.
Warner Instruments
A Harvard Apparatus Company
PC-505B Manual, Rev. 050816
7
CONTROL DESCRIPTION
The instrument front panel is divided into several control blocks. Controls within these
blocks are dedicated towards a common functional purpose. Each control block is outlined in
blue and is clearly labeled as COMMANDS, FAST CAP COMP, WHOLE CELL, and OUTPUT. A final section
contains the LCD METER, as well as the METER SELECT and POWER switches. This section will be
referred to as the METER block.
Front panel
COMMANDS block
The
contains
block
VOLTAGE
and
CURRENT HOLDING controls, the
JUNCTION ZERO controls, and a
COMMAND SELECT toggle switch
selecting internal or external
command inputs. This block
also contains several controls
for adjusting the sensitivity of
input commands, as well as
controls for the ZAP function.
COMMANDS
the
Voltage and current commands
The VOLTAGE and CURRENT
HOLD controls provide independent modification of holding potential and holding current
settings within the ranges ± 200 mV and ± 1.0 nA, respectively. A MODE toggle switch in the
OUTPUT command block is used to select between voltage clamp (Vc) or current clamp (Ic)
modes. Placing the instrument in current or voltage clamp mode activates either the
VOLTAGE or CURRENT HOLD controls, respectively. This structure allows switching between
voltage and current clamping configurations without the need to readjust settings.
VOLTAGE and CURRENT HOLD controls are not attenuated by COMMAND SENSITIVITY settings.
Internal command, external command, and command sensitivity
The COMMAND SELECT toggle switch selects between an internally generated (internal
command) or an externally generated (external command) command applied to the
COMMAND IN BNC located on the instrument rear panel.
The COMMAND SENSITIVITY controls are comprised of an on/off toggle and a sensitivity
selector. The SENSITIVITY SELECTOR attenuates the internally generated TEST PULSE signal
and any externally generated command voltages (connected to the COMMAND IN input BNC)
by factors of x0.1, x0.01, and x0.001. Internal or external commands are activated by
moving the COMMAND SENSITIVITY toggle into the on position. When switched off, these
modifiers are disconnected from the COMMAND pathway.
Warner Instruments
A Harvard Apparatus Company
PC-505B Manual, Rev. 050816
8
When internal command is selected, a 1 V p-p, line frequency (50/60 Hz) square wave
(TEST PULSE) is generated by the instrument. The TEST PULSE is attenuated as described
above and is available for adjustment of capacitance compensation, measurement of pipet
resistance, or for monitoring the formation of a gigohm seal at the electrode tip.
When external command is selected, the TEST PULSE circuitry is disabled and
commands appearing at the COMMAND IN BNC are attenuated and available to be applied to
the headstage.
Junction Zero and Auto Zero
These controls set the pipet current to zero after the pipet is placed in the test solution
and prior to seal formation. This circuitry is used to compensate for electrode potentials,
liquid junction potentials and other offset voltages, and establishes a zero baseline
reference potential. The 10-turn JUNCTION ZERO control manually adjusts Im between ±120
mV with immediate response.
With the AUTO ZERO toggle switch in the on position (auto zero LED on) depressing the
associated pushbutton zeros the current automatically. The settling time is rapid when
used with MΩ pipet resistances, but can take several seconds if used with GΩ resistances.
For complete compensation, hold the pushbutton in until Im on the METER reads zero.
NOTE: With AUTO ZERO turned on, the manual junction control remains active. In this
mode, depressing the auto zero pushbutton will zero any manual setting, holding
potential, and time-averaged test pulse or command voltage present. Switching AUTO ZERO
off restores the uncompensated current and voltages. To re-zero, repeat using either
manual or auto zeroing.
Zap
The ZAP function generates an internal +1.5 V pulse
which is applied to the headstage. The pulse duration
may be adjusted from 0.1 to 10 ms as indicated. A
safe/active toggle switch arms the circuitry and the
pulse is initiated when the ZAP button is depressed.
FAST CAP COMP (fast capacitance compensation)
command block
The two pairs of controls, C-FAST 1/FAST τ1 and CFAST 2/FAST τ2, are used to adjust the amplitude and time
constant (tau) of the circuitry that compensates for
capacitative currents due to the pipet and other stray
capacitances. This is achieved by applying an
appropriate capacitative countercurrent to the headstage
input. These controls are disabled in current clamp
mode.
Warner Instruments
A Harvard Apparatus Company
9
PC-505B Manual, Rev. 050816
When properly adjusted, FAST CAP COMP controls have two important functions: 1) to
closely align the voltage clamp waveform at the cell membrane to the command signal
waveform, and 2) to minimize large current transients associated with rapid changes in
applied membrane potential. These effects, if uncompensated, can drive the headstage
amplifier into saturation, which can result in the loss of several ms of data while the
headstage recovers.
WHOLE CELL command block
The WHOLE CELL command block contains controls
for C-SLOW, SERIES R, % CORRECTION, and LEAK
SUBTRACTION. These controls are used to compensate
for the effects of membrane capacitance and access
resistance when the amplifier is used in whole cell
mode. With the exception of LEAK SUBTRACTION, these
controls are only available when the PROBE RESISTER
(in the OUTPUT command block) is in low mode.
C-Slow
This control is used to compensate for the whole–
cell membrane capacitance. The compensated
capacitance can be read directly from the lockable 10turn control. The associated toggle switch disables C–SLOW allowing comparison with the
uncompensated signal.
This control is not available in patch mode since the
address capacitances in this mode.
FAST CAP COMP
circuitry is used to
Series R
Series resistance compensation is used to compensate for the voltage drop across the
electrode and access resistance in the experimental setup. This control is used to adjust
the time constant of the C–SLOW control facilitating measurement of membrane resistance
which can be read from the dial.
This control is not available in single channel recording mode since series resistances
are negligible when compared with cell membrane and single channel resistances.
% Correction
% Correction is used to apply voltage compensation to the amplifier to correct for the
voltage drops due to the series resistance. This control is adjusted until the output signal
just begins to oscillate at the leading edge (ringing) of the TEST PULSE during experimental
setup. The control is activated by a toggle switch.
Leak subtraction
Leak subtraction is used to compensate for leakage currents to the bath through the
pipet/membrane seal resistance (RS) or through the membrane patch. For ‘leaky’ seals (RS
~1 GΩ) it is important to correct for the error caused by the shunt resistance of the leak.
Warner Instruments
A Harvard Apparatus Company
10
PC-505B Manual, Rev. 050816
This error can usually be ignored with ‘tight’ seals
counterclockwise rotation of this control switches it off.
(RS
~10-100
GΩ).
Fully
NOTE: Do not use LEAK SUBTRACTION if using % CORRECTION in whole cell mode. The
interaction between these two controls can introduce a systematic error into your data!
OUTPUT command block
The
OUTPUT
command
block
contains controls for selecting different
operating
modes
and
headstage
resistors. The instrument gain and
filter controls can also be found here.
Probe resistor select
The headstage resistor is selected
with the PROBE RESISTOR select switch.
The high position selects the 50 GΩ
resistor for both patch and bilayer
headstages (models LC-201, HC-202, and
HB-205, respectively). The low position
is used for whole cell recording and selects the 500 MΩ resistor in the LC-201 headstage
and the 50 MΩ resistor in the HC-202 headstage. It is not available in the HB–205
headstage.
The low resistor is automatically selected when in current clamp mode,
Clamp mode switch
In voltage clamp mode (MODE switch in upper position), all command controls are
active with the exception of the CURRENT HOLD command (in COMMANDS block). The range of
voltage clamp potentials at the headstage input is ± 200 mV.
Zero current mode (MODE switch in center position) is a transition mode between
voltage clamp and current clamp. It disengages all commands and functions from the
headstage with the exception of the ZAP controls.
The primary uses for zero current mode are: 1) to protect the preparation when
switching between voltage and current clamp modes, and 2) to preset the voltage hold or
current hold settings prior to switching to voltage or current clamp modes, respectively.
In current clamp mode (MODE switch in lower position), all commands are again active.
The current range at the preparation is limited by the ± 10 V input maximum and the
headstage resistor, as follows:
•
± 20 nA with the 500 MΩ resistor
•
± 200 nA with the 50 MΩ resistor
NOTE: Current clamp mode does not operate with the PROBE SELECT toggle set to high. The
low headstage resistance is automatically selected when in current clamp mode.
Warner Instruments
A Harvard Apparatus Company
PC-505B Manual, Rev. 050816
11
Gain
The GAIN control selects the amplifier gain in units of mV/pA. The gain scale on this
control is modified by the PROBE RESISTOR select toggle (x0.1 or x1.0 for the low setting, and
x10 for the high setting).
LED’s indicate the selected gain scale modifier. The clipping LED lights when the
instrument Im output exceeds the amplifier limits.
4-Pole Bessel filter
The Im output signal can be filtered using the internal low–pass 4-pole Bessel filter
selectable from 50 Hz to 20 kHz in 9 steps. The full amplifier bandwidth of 25 kHz is
available by selecting bypass with the ACTIVE/BYPASS toggle switch. The filtered Im signal is
present at two BNC outputs labeled Im located at both the front and rear panels.
Voltammetry
The PC-505B can be used as a potentiostat for voltammetric measurements. A rear
panel POTENTIOSTAT SWITCH increases maximum output of the VOLTAGE HOLD control (in the
COMMANDS block) to ± 1 V and increases the maximum COMMAND IN signal to ± 2 V. The P
STAT LED lights to indicate on status for this switch.
METER section
The six METER switch settings interact with other
controls as noted. Due to the limiting bandwidth of the
meter display, any high frequency signals presented will
be reported as its DC time average value.
Junction zero :
This selection reports the voltage
supplied by the JUNCTION ZERO control used to
compensate offset voltages present in the setup. Full
scale reading is ± 120 mV.
Vc+h IN: This selection reports the sum of the COMMAND
IN voltage (Vc; after attenuation by command sensitivity)
and the internal holding voltage (h). Full scale reading is
± 200 mV.
NOTE: To read h alone (in order to set the holding voltage or holding current) turn
COMMAND SENSITIVITY off or set the external signal to zero.
ΣVc: This selection reports the sum of all command voltages. Mathematically, ΣVc = (Vc+
h IN) + JUNCTION ZERO + AUTO ZERO + SERIES R. It does not include LEAK SUBTRACTION. Full
scale range is ± 200 mV.
Vm: This selection reports the transmembrane potential when in current clamp mode. Full
scale range is ± 200 mV.
Im: This selection reports the transmembrane current when in voltage clamp mode. Full
scale range is ± 1999 pA.
Warner Instruments
A Harvard Apparatus Company
12
PC-505B Manual, Rev. 050816
RMS noise: This selection reports the root mean square (RMS) value of the noise filtered to
a bandwidth of 1 kHz. This reading is valid only when the PROBE RESISTOR select is set to
high since the amplifier gain changes for other settings. The expected reading for the 50
GΩ resistor (with open input and properly shielded from 60 Hz interference) is
approximately 0.040 pA. Full scale range is 1.999 pA RMS.
Front and rear panel BNC’s and connectors
The PC-505B has input and/or output BNC’s on both front and read panels. These
include Im and Vm outputs, Vc x10 and Vm x10 outputs, GAIN and FILTER TELEGRAPHS, Im/Vm
mode telegraph, SYNC OUTPUT, and COMMAND INPUT.
Front and rear panel layouts are described below. With the exception of the rear panel
COMMAND IN BNC, all connector sleeves are connected to circuit ground and are insulated
from the chassis.
Front panel BNC’s
Vc x10 – Output BNC reporting the sum of all voltages applied to the headstage input.
Vm x10 – Output BNC reporting the transmembrane potential (active only in current
clamp mode).
Im – Output BNC reporting membrane current in both voltage and current clamp modes.
Rear panel BNC’s
Im/Vm OUT– Output BNC reporting membrane current when instrument is in voltage
clamp mode, and Vm x10 when instrument is in current clamp mode.
Im/Vm TELEGRAPH – Provides TTL logic to indicate voltage clamp or current clamp mode.
0=I clamp, 1= V clamp
– Differential input BNC for voltage command from external sources (e.g.
signal generator or computer). Since the center pin and sleeve are the (+) and (-)
inputs, respectively, the sleeve is not grounded. The applied voltage is attenuated
by the COMMAND SENSITIVITY switch and is available in both voltage and current
clamp modes.
COMMAND IN
The COMMAND IN input BNC is disengaged when TEST PULSE is active (internal
command), when the COMMAND SENSITIVITY toggle switch is off, or when the amplifier
is in zero current mode (MODE selector switch set to Io).
– Output BNC reporting Im gain as a combination of the GAIN switch
selection and the gain multiplier (x0.1, x1.0 or x10) dependent on the headstage in
use. Telegraphs range from 0.5 to 7.0 V in 0.5 V steps as shown below.
GAIN TELEGRAPH
Warner Instruments
A Harvard Apparatus Company
13
PC-505B Manual, Rev. 050816
Gain telegraph settings
Im gain (mV/pA)
telegraph out (V)
0.05
0.5
0.1
1.0
0.2
1.5
0.5
2.0
1.0
2.5
2.0
3.0
5.0
3.5
10
4.0
20
4.5
50
5.0
100
5.5
200
6.0
500
6.5
1000
7.0
– Output BNC reporting the filter setting in use. Telegraphs range from
0.2 to 2.0 V in 0.2 V steps as shown below.
FILTER TELEGRAPH
Filter telegraph settings
Frequency (Hz)
telegraph out (V)
50
0.2
100
0.4
200
0.6
500
0.8
1k
1.0
2k
1.2
5k
1.4
10k
1.6
20k
1.8
Bypass
2.0
– Sync out provides a TTL pulsed output for synchronizing an oscilloscopes or
other equipment with the internally generated 50/60 Hz TEST PULSE or SPEED TEST
signal.
SYNC OUT
Warner Instruments
A Harvard Apparatus Company
PC-505B Manual, Rev. 050816
14
Rear panel connectors and controls
In addition to input and output BNC’s, the instrument rear panel also contains the
headstage cable connector, calibration trimmers, and selector/function switches for PSTAT
and SPEED TEST modes.
Headstage cable connector – The headstage connects to the instrument via an 8–pin
DIN connector.
switch – The PC–505B is converted to operate as a potentiostat for voltammetric
measurements by a clockwise rotation of this switch. When switched on, the front
panel PSTAT indicator LED will light. In this mode, the maximum electrode voltage
hold potential is increased to ± 1 V and the COMMAND IN attenuator is modified to
allow command inputs up to ± 2 V.
PSTAT
is used to re–adjust the rear panel boost trimmers, normally only required
when replacing a headstage. These adjustments are factory set for the headstage
supplied with the instrument.
SPEED TEST
CMR, BOOST,
and GAIN trimpots are factory set. User adjustment may be required if a
headstage is replaced. Adjustments instructions are provided with the new
headstage.
Grounds – Circuit and chassis ground connectors (black and green, respectively) are
binding posts supplied with a shorting link. For most recording situations, the
shorting link can remain connected with no detrimental effect in amplifier
performance. However, there are occasions where line noise can be reduced if the
two grounds are isolated from each other. We recommend that you test both
connected and unconnected configurations to determine which is best for your
setup.
Headstage
The headstage, or probe, is a low leakage current, solid state, current-to-voltage
converter which is switch selectable between two feedback resistors.
The headstage input terminal is a 1 mm jack connector that accepts a 1 mm pin on
the electrode holder. Pin jacks on the side of the headstage provide for grounded and/or
driven shield applications.
The headstage housing is a metal enclosure which serves as a shield which is driven
by the command signal. The attached metal rod is used for mounting to a
micromanipulator and is insulated from the headstage housing. A 2.5 m cable with 8-pin
DIN connector attaches the headstage to the mating connector on the instrument rear
panel.
NOTE: Due to the requirement of maintaining the lowest possible instrument noise,
headstage input protection cannot be employed. As such, strict handling precautions are
necessary to avoid damage to the headstage by static discharge. (See page 18 for details.)
Warner Instruments
A Harvard Apparatus Company
15
PC-505B Manual, Rev. 050816
Headstage types, applications and features
Headstage Types
Application
LC-201
Patch / Whole Cell
Features
50 GΩ/500MΩ headstage.
Single channel currents up to ± 200 pA.
Whole cell currents up to ± 20 nA.
HC-202
Patch / Whole Cell
50 GΩ/50MΩ headstage.
Single channel currents up to ± 200 pA.
Whole cell currents up to ± 200 nA.
HB-205
Bilayer studies
50 GΩ headstage for bilayer.
Currents up to ± 200 pA.
Bilayer capacitance up to 250 pF.
Electrode holders
Electrode holders connect the glass micropipet electrode to the headstage. A fine
chlorided silver wire, the actual electrode, makes electrical contact between the headstage
input and the electrolyte solution in the micropipet.
Holders are machined from polycarbonate to minimize electrical noise and are custom
bored to accommodate various diameter pipet electrode glasses. The micropipet is secured
with a rubber gasket and a polycarbonate screw–cap matching the OD of the pipet glass. A
1 mm pin makes electrical contact with the silver wire and plugs the holder onto the
headstage. A 1/16” OD access port is provided for applying suction to seal the pipet tip to
the cell membrane.
NOTE: The standard holder used with the PC–505B is type QSW-AxxP (straight body) where
"xx" specifies the glass OD in mm.
Model Cell
A model cell is included with the instrument. This model cell has three connectors,
one to simulate the bath (10MΩ to ground), one each to simulate a membrane patch, and
one to simulate a whole cell application. An additional model cell is included with the HB205 bilayer headstage to simulate a planar lipid bilayer membrane.
The model cell is used in the following familiarization instructions and is a valuable
tool in troubleshooting problems with actual setups.
Warner Instruments
A Harvard Apparatus Company
16
PC-505B Manual, Rev. 050816
SETUP AND INITIAL TEST
Line voltage
Power line voltage requirements for the PC-505B are specified on the serial number
nameplate attached to the chassis rear. They are wired for either 100-130 VAC or 220-240 VAC
at either 50 or 60 Hz. Check to be sure the PC-505B is wired for the line voltage and frequency
to be used.
Instrument grounding
The power cord is fitted with a three-prong grounding type plug and should be plugged
into a properly wired three-wire grounded receptacle. This internally grounds the PC-505B
chassis to the power receptacle ground and insures safe operation of the equipment.
Headstage precautions
The PC-505B headstage is a high-impedance, static-sensitive device as noted on the
protective envelope in which it is shipped. The device can be seriously damaged by static
discharge or inadvertent grounding. Therefore, to insure proper operation and long life, we
recommend you follow these precautions:
1.
Always discharge static electricity from your body before handling the headstage.
Your body has a capacitance of around 100-200 pF to ground and can acquire enough
static charge (by handling Styrofoam, touching the face of a video monitor, walking across
a dry carpet, wearing polyester clothing, etc) to alter your electric potential by as much as
10 kV relative to ground. A discharge of this magnitude through the headstage can render
it useless. We recommend that you electrically discharge yourself either by firmly
contacting a securely-grounded part of the setup with a lightly moistening a finger, or by
wearing a grounded wrist strap available from any electronics store.
2.
Do not ground or apply a low-impedance signal the headstage input connector pin.
3.
Do not ground the headstage case when the power is on. This includes allowing the
headstage case to inadvertently contact any grounded components, This is necessary since
the case is both isolated from ground and is driven at the command potential.
4.
Two 1 mm pin jacks are provided on the side of the headstage for grounded and/or driven
shield applications.
The circuit ground pin jack is insulated from the case and is identified by a black collar. It
is intended to be used for the bath ground and/or shielding around the electrode and
holder. It is not intended as a general equipment ground.
The uninsulated pin jack makes direct contact with the headstage case and is driven at
the command potential. It can be used to drive any additional guard shielding such as a
foil covering or conductive paint applied to the pipet electrode. Insure that the guard
shielding never touches ground.
Warner Instruments
A Harvard Apparatus Company
17
PC-505B Manual, Rev. 050816
Headstage preparation
Using the proper handling precautions described above, connect the headstage cable
connector into the rear panel probe receptacle and connect the Im output BNC to an
oscilloscope. The headstage probe normally requires a grounded enclosure (Faraday cage) to
shield it from 50/60 Hz line interference.
The shield should be grounded to the (black) circuit ground jack on the rear of the PC-505B
chassis. Place the headstage into the shield enclosure and run the grounding cable to the
amplifier in the same bundle as the headstage cable.
NOTE: As a general rule, cables and wires running to the same location should be bundled to
minimize stray capacitances.
Test Procedures
To perform the following tests of the instrument you will need these tools and components.
•
The PC–505B amplifier
•
The headstage mounted into a shielded enclosure
•
An oscilloscope with BNC cables
•
An adjustable DC voltage source
•
The model cell shipped with the instrument
Initial connections
Place the amplifier on a counter and make the following connections between the
instrument and oscilloscope.
1.
Connect the Im output BNC on the instrument front panel to the oscilloscope.
2.
Connect the DC voltage source to the
panel.
3.
Connect the headstage to the amplifier and place the headstage into the shielded
enclosure (Faraday cage). Do not make attachments to the headstage inputs at
this time. Insure that the Faraday cage is grounded as described above.
4.
Plug the amplifier, voltage source, and oscilloscope in.
5.
Power up the voltage source and oscilloscope.
COMMAND IN
BNC on the instrument rear
Initial configuration
Set all controls on the PC–505B to the values specified in the following table. With the
exception of the power switch, this initial configuration will be used to return the amplifier
to a known condition to begin each sub–section during the instrument checkout.
Warner Instruments
A Harvard Apparatus Company
18
PC-505B Manual, Rev. 050816
Begin each checkout section by returning the PC–505B to this known configuration.
Front panel controls:
Control
POWER
Control block
METER
Initial setting
off
VOLTAGE HOLD
COMMANDS
fully CCW, toggle switch off
CURRENT HOLD
COMMANDS
fully CCW, toggle switch off
COMMAND SELECT
COMMANDS
external command
COMMAND SENSITIVITY
COMMANDS
off, x0.1
COMMANDS
zero mV
COMMANDS
off
JUNCTION ZERO
control
AUTO ZERO toggle
ZAP
toggle
COMMANDS
safe
ZAP
control
COMMANDS
0.1 ms
C–FAST
1
FAST CAP COMP
fully CCW
C–FAST
2
FAST CAP COMP
fully CCW
FAST τ1
FAST CAP COMP
fully CCW
FAST τ2
FAST CAP COMP
fully CCW
C–SLOW
WHOLE CELL
fully CCW
WHOLE CELL
off
WHOLE CELL
fully CCW
LEAK SUBTRACTION
WHOLE CELL
fully CCW, click off
% CORRECTION
WHOLE CELL
fully CCW
% CORRECTION toggle
WHOLE CELL
off
C–SLOW
SERIES
toggle
R
OUTPUT
high
MODE
OUTPUT
Vc
GAIN
OUTPUT
10 mV/pA
FILTER
OUTPUT
10 kHz
PROBE RESISTOR
select
FILTER
toggle
OUTPUT
active
METER
select
METER
Im
Oscilloscope setup:
Control
Time base
Voltage base
Trigger
Setting
2 ms/div
1 V/div
line triggered
Connect Im output on instrument front panel to the
oscilloscope
Headstage inputs: Open
Warner Instruments
A Harvard Apparatus Company
19
PC-505B Manual, Rev. 050816
RMS noise checkout
1.
Set the
2.
Check for a noise reading on the METER at or below 0.038 pA. If the value reported is
high, then relocate or adjust the headstage and shielding to minimize noise inputs.
METER SELECT
switch to the RMS noise position.
Im output checkout
1.
Set scope voltage base to 0.5 V/div.
2.
Set
3.
Set FILTER to 1 kHz.
4.
Check that the
5.
Switch PROBE
within ± 0 pA
6.
Switch
7.
Check that oscilloscope reads 0.0 ± 0.5 pA (i.e. within 1 div of zero on oscilloscope for
this setting.)
8.
Set
PROBE RESISTER
9.
Set
FILTER
GAIN
to 100 mV/pA
METER
reads ± 0 pA.
toggle from high to low. Verify that the
RESISTER
PROBE RESISTER
METER
reading stays
toggle from low to high.
toggle from high to low.
to 50Hz.
10. Set oscilloscope voltage base to 50 mV/div.
11. Again, check that oscilloscope reads 0.0 ± 0.5 pA (i.e. within 1 div of zero on
oscilloscope for this setting.)
12. Set
PROBE RESISTER
13. Set
FILTER
toggle from low to high.
to 1 kHz.
14. Set oscilloscope voltage base to 0.5 V/div.
15. Move oscilloscope cable from IM
instrument rear panel.
OUTPUT
on instrument front panel to IM/VM
OUTPUT
on
16. Redo steps 7–11.
17. Return amplifier to initial settings.
Junction zero checkout
1.
Set the
2.
Adjust the
3.
Verify that Vm and ΣVc on the
Junction Zero (10 mV).
4.
Set
5.
Place
METER SELECTOR
switch to the Junction Zero
JUNCTION ZERO
METER SELECT
to Vc+h
METER SELECT
control (COMMANDS block) until the meter reading is 10 mV.
IN
METER SELECTOR
and check that the
switch give the same meter reading as
METER
reads zero.
switch in Junction Zero position.
Warner Instruments
A Harvard Apparatus Company
20
PC-505B Manual, Rev. 050816
6.
Adjust the
7.
Check that the
settings.
8.
Adjust the
9.
Check that
10. Set
JUNCTION ZERO
METER
METER SELECT
11. Adjust
reads ≥ 120 mV for Junction Zero, Vm, and ΣVc
JUNCTION ZERO
METER
control to its maximum setting (fully CW).
METER SELECT
control to its minimum setting (fully CCW).
reads ≤ 120 mV for Junction Zero, Vm, and ΣVc METER SELECT settings.
to Junction Zero.
until METER reads zero.
JUNCTION ZERO
12. Return amplifier to initial settings.
Internal DC voltage command checkout
1.
Connect oscilloscope to Vc x10 BNC on front panel.
2.
Set scope to 50 mV/div .
3.
Set the METER SELECT switch to the Junction Zero setting and adjust meter reading to
10 mV with the JUNCTION ZERO control.
4.
Verify that scope reads 10 times the panel
5.
Using
6.
Set the
7.
Set
8.
Adjust
9.
Verify the
control adjust
JUNCTION ZERO
METER SELECT
METER
reading (2 div at these settings).
to 0 mV.
switch to the ΣVc position. Verify that
VOLTAGE COMMAND
VOLTAGE HOLD
METER
METER
METER
reads zero.
toggle to positive (+).
control fully CW.
reads a minimum of ± 200 mV.
10. Set oscilloscope to 1 V/div. Verify that scope reads 10x the meter reading. (e.g. 2 V for
a meter reading of 200 mV).
11. Switch
VOLTAGE HOLD
toggle to minus (–). Redo steps 9 and 10.
12. Switch
VOLTAGE HOLD
toggle to positive (+).
13. Using
VOLTAGE HOLD
control, adjust until meter reads 150 mV.
14. Switch
METER SELECT
15. Adjust
JUNCTION ZERO
16. Set
METER SELECT
to Junction Zero.
until
to Vc+h
METER
IN.
reads +100 mV.
Verify that
METER
reads holding potential of 150 mV.
17. Set METER SELECT to ΣVc. Verify that meter reads sum of holding potential and junction
offset (250 mV).
18. Set METER SELECT control to Vc+h IN. Verify that the adjustment of
control does not affect the meter reading.
19. Set the
VOLTAGE HOLD
JUNCTION ZERO
toggle to off.
Warner Instruments
A Harvard Apparatus Company
21
PC-505B Manual, Rev. 050816
20. Set the
METER SELECTOR
switch to Junction Zero and adjust the
METER
to zero.
21. Return amplifier to initial settings.
External DC Voltage command checkout
1.
Apply a +1 VDC signal to
2.
Connect oscilloscope to Vc x10 output BNC on instrument front panel.
3.
Set the
4.
Set
COMMAND SELECT (COMMANDS
5.
Set
COMMAND SENSITIVITY
6.
Turn
7.
Set oscilloscope to 0.5 V/div.
8.
Verify that
settings).
9.
Set
METER SELECT
COMMAND IN
switch to ΣVc.
block) to external command.
to x0.1.
COMMAND SENSITIVITY
METER
BNC on instrument rear panel.
toggle to on.
reads 100 ± 1 mV and that oscilloscope reads 1 V (2 div at these
COMMAND SENSITIVITY
toggle to x0.01.
10. Set oscilloscope to 50 mV/div.
11. Verify that
settings).
12. Set
METER
reads 10 mV and that oscilloscope reads 100 mV (2 div at these
COMMAND SENSITIVITY
toggle to x0.001.
13. Set oscilloscope to 5 mV/div.
14. Verify that
settings).
METER
reads 1 mV and that oscilloscope reads 10 mV (2 div at these
15. Return amplifier to initial settings.
Internal AC voltage command checkout
1.
Set
COMMAND SELECT (COMMANDS
block) to internal command.
2.
Set
COMMAND SENSITIVITY
to x0.1
3.
Set
COMMAND SENSITIVITY
toggle to on.
4.
Connect Vc x10 output BNC to oscilloscope.
5.
Set oscilloscope voltage base to 0.5 V/div and time base to 5 ms/div.
6.
Verify that oscilloscope displays appropriate square wave (1 V p–p at line local
frequency of 50 or 60 Hz).
7.
Return amplifier and oscilloscope to initial settings.
Auto Zero control checkout
1.
Disconnect voltage source from
COMMAND IN
BNC.
Warner Instruments
A Harvard Apparatus Company
22
PC-505B Manual, Rev. 050816
2.
Connect model cell to headstage in patch mode.
3.
Set
METER SELECT
4.
Set
PROBE RESISTER
5.
Set
COMMAND SENSITIVITY
6.
Set
COMMAND SELECT (COMMANDS
7.
Use
8.
Switch
AUTO ZERO
on and press
9.
Switch
AUTO ZERO
off.
to Im.
JUNCTION ZERO
to high
toggle to off.
block) to external command.
control to set Im output on
METER
AUTO ZERO BUTTON
to +10 pA.
until meter reads zero.
10. Re–zero Im output using manual JUNCTION ZERO control.
11. Return amplifier to initial settings.
ΣVc commands checkout
1.
Connect model cell to headstage in patch mode.
2.
Connect Im output BNC to oscilloscope.
3.
Set oscilloscope to 1 V/div.
4.
Set
5.
Verify
6.
Set
COMMAND SELECT
7.
Set
COMMAND SENSITIVITY
8.
Set
VOLTAGE HOLD
9.
Use VOLTAGE HOLD to set Im output to +10 pA on
should give positive current output).
10. Set
METER
to Im.
PROBE RESISTER
GAIN
is set to high.
to external command.
toggle to off.
to positive (+).
METER
(positive hold adjustment
to 10 mV/pA.
11. Verify that oscilloscope reads +1 V (1 div at these settings)
12. Set
VOLTAGE HOLD
13. Verify that
METER
to negative (–).
reads –10 pA.
14. Verify that oscilloscope reads –1 V (1 div at these settings)
15. Return amplifier to initial settings
Cap Comp checkout
1.
Connect model cell to headstage in patch mode.
2.
Set
PROBE RESISTOR
3.
Set
VOLTAGE HOLD
to high
control to off.
Warner Instruments
A Harvard Apparatus Company
23
PC-505B Manual, Rev. 050816
4.
Set scope to 5 V/div.
5.
Set
COMMAND SELECT
6.
Set
COMMAND SENSITIVITY
7.
Scope should now display large amplitude positive and negative pulses. Clipping LED
will be lit.
8.
Using FAST CAP COMP controls, minimize amplitude and duration of pulses. (Leading
edge transients will remain due to characteristics of model cell.)
9.
Set
PROBE RESISTER
to internal command.
toggle to on.
to low.
10. Connect model cell to headstage in whole cell mode.
11. Turn C–SLOW toggle switch on.
12. Adjust C–SLOW and SERIES R controls until leading edge of square wave transitions
smoothly from one peak to the other. Full transition should take approximately 1 ms.
Remaining leading edge transients can be minimized by small adjustments to the FAST
CAP COMP controls.
13. Turn % CORRECTION toggle switch on. Verify that control decreases transition time
without increasing amplitude of spike.
14. Turn % CORRECTION off.
15. Turn
LEAK SUBTRACTION
on.
16. Verify that control adjusts amplitude of square wave.
17. Remove model cell from headstage.
18. Return amplifier to initial settings.
Current clamp checkout
1.
Attach model cell to headstage in bath mode.
2.
Set
MODE
3.
Set
METER SELECT
4.
Using
5.
Set
METER SELECT
to Vc+h
6.
Set
CURRENT HOLD
toggle to positive (+)
7.
Adjust
8.
Set
9.
Verify that
toggle to Io.
to Vm.
JUNCTION ZERO
CURRENT HOLD
METER SELECT
METER
10. Set
MODE
11. Set
METER SELECT
control adjust
METER
to 0 mV.
IN
control until
METER
reads 50 mV.
to Vm.
reads 0 mV. (e.g. CURRENT HOLD command is disabled in Io mode.)
toggle to Ic.
to Im.
Warner Instruments
A Harvard Apparatus Company
24
PC-505B Manual, Rev. 050816
12. Adjust
13. Set
CURRENT HOLD
METER SELECT
control until
METER
reads 500 pA.
to Vm.
14. Verify that meter reads 5 ± 1 mV (corresponding to the holding potential required to
pass a 500 pA current through a 10 MΩ resister).
15. Return amplifier to initial settings.
This completes the functional checkout of the instrument.
Please contact our technical support staff if you have any questions or experience any
problems.
Warner Instruments
A Harvard Apparatus Company
25
PC-505B Manual, Rev. 050816
THEORETICAL CONSIDERATIONS
Chloriding silver wire
Silver-silver chloride electrodes act as signal transducers by converting ionic currents in
solution to an electric current within a wire. This is achieved by utilizing a reversible
oxidation/reduction reaction between the electrode and Cl- ions in solution. The chemical
reaction is:
Cl- + Ag ⇔ AgCl + eThe potential developed by one electrode is proportional to the standard electrochemical
potential for Ag/AgCl plus the Cl- concentration at the solution/electrode interface. Since this
potential is dependent on Cl-, a voltage bias will be introduced by changing the solution Clconcentration. Therefore, we recommend that Ag/AgCl electrodes be connected to the bath
through agar salt bridges to maintain a constant Cl- concentration near the electrode. In
addition, the isolation provided by the agar bridge will prevent Ag+ ions from contaminating the
baths.
First clean the wire by wiping with a clean tissue wet with alcohol or a standard laboratory
detergent, then rinse well with distilled water. Wiping in this way can help to straighten the
wire. If using alcohol or similar solvent, avoid getting it onto the polycarbonate holder body as
this can weaken the structure.
Chloriding by electrolysis
Dip the Ag wire to the required depth in a solution of 0.1m NaCl or KCl, optionally
made slightly acidic with HCl, and arrange to pass positive current from the Ag into the
solution. For the indifferent electrode in the solution, a cleaned carbon rod from a
discarded 6 V lantern battery works well. Another, thicker, Ag wire will also work, but
most other metals are likely to contaminate the AgCl coat. Pass current at a density of
about 1 mA/cm2 for about 1 minute or until adequately plated. For a 2 cm length of 0.01"
wire, this is about 150 µA. When well plated, the surface should be uniformly light grey.
Reversing the current polarity occasionally while plating, ending with the Ag positive, tends
to make a more stable electrode. If available, a low-frequency signal generator at about 0.1
Hz, with a slight positive bias is convenient. The electrolyte solution can be saved and
reused indefinitely.
Chloriding chemically
Immerse the clean Ag wire in Clorox solution until the wire is uniformly light gray,
about 1-10 min. Rinse well with tap water, then with distilled.
Electrode holders
The standard holder supplied with PC-505B is the QSW-AxxP (straight body style). It uses a
0.010" diameter, 99.99% pure silver wire to couple the signal from the micropipet solution to
Warner Instruments
A Harvard Apparatus Company
PC-505B Manual, Rev. 050816
26
the input pin of the headstage amplifier. Before use, the wire must be plated with silver
chloride (AgCl) to within 2-3 mm of the end cap which secures the micropipet.
A 2 mm OD port on the side of the holder is used for applying pressure or suction through
standard 1/16" ID flexible plastic tubing. Each holder is made to accommodate a single
specified diameter of pipet electrode glass, designated by "xx" in the part number, where
xx=10x the OD in mm. For example, QSW-A15P specifies 1.5 mm OD pipets.
Care and use of holders
Both ends of the pipet tubing should be lightly fire polished before pulling micropipets,
in order to avoid scraping AgCl from the wire surface and to prolong the life of the rubber
gasket that holds the pipet in place.
Fill pipets with only enough electrolyte to cover several mm of the AgCl coating when
inserted into the holder. This minimizes stray capacitance and the noise level while
recording. Take care to avoid getting pipet filling solutions onto exposed bare silver above
the AgCl coating in the pipet, within the body of the holder, into the suction port, or
especially onto the pin jack which could damage the headstage. Should this happen,
disassemble the holder, rinse thoroughly with distilled water, dry thoroughly, and
reassemble.
Cleaning and storage
After use, rinse any deposits from the holder body, the Ag wire, pin jack, and suction
port and allow to dry. To protect the silver wire from getting bent in storage, the holder can
be capped with a short piece of 3/8" ID plastic tubing, or a 50 x 10 mm ID plastic vial with
a small nylon set screw.
Replacing holder parts
The rubber seal at the pipet end of the holder can be replaced if it becomes damaged
with repeated pipet insertions. A spare is supplied with the holder and additional gaskets
can be ordered as required. The gasket is easily removed with a small pair of blunt forceps.
The silver wire is also replaceable. Replacement is necessary when the wire becomes
hopelessly kinked or badly jammed, as by carelessly inserting into pipets.
To replace the wire, unscrew the pin connector and remove the rubber seal. Pull the
wire from the small hole in the center of the seal and replace it with a new piece about 6
cm long. Insert the wire through the seal from the pipet side so that 5 mm extends beyond
the pin connector side. Bend this end by 90° at the seal and fold the end of the wire back
across the seal to insure good contact with the pin connector. Reassemble the wire and
seal into the holder taking care that the seal sits squarely in the hole and that the wire
doesn't jam in the holder on its way through.
Reference electrodes
A reference electrode in the recording chamber maintains the bath at circuit ground
potential, the reference potential for all measurements. It is also the return path for currents
Warner Instruments
A Harvard Apparatus Company
PC-505B Manual, Rev. 050816
27
from the pipet electrode. A variety of Ag-AgCl reference electrodes are available from Warner
Instruments.
A simple reference electrode can be made from a silver wire. Use wire somewhat thicker
than the one in the pipet electrode holder. The end applied to the bath should be chlorided as
described on page 26 such that the Ag-AgCl coating can be submerged with no bare Ag
exposed to solution. The free end is connected to circuit ground.
Any exposed Ag surface that could potentially contact the bathing solution should be
insulated with a waterproof coating of epoxy cement, insulating varnish, or similar durable
waterproof coating. This precaution provides a stable baseline as long as the bath solution is
not changed.
When bath solutions are to be changed during an experiment, a KCl salt bridge can be
used to minimize changes in the junction potential that accompany these solution changes. A
small glass or plastic U tube filled with saturated or 3 M KCl in warmed 2% agar gel is usually
employed for this purpose. The AgCl reference electrode goes into one end of the tube and the
other end is applied to the bath.
Warner Instruments
A Harvard Apparatus Company
28
PC-505B Manual, Rev. 050816
APPENDIX
Specifications
HEADSTAGES
LC-201B Headstage
(50 GΩ/500 ΜΩ)
single channel currents to 200 pA
whole cell currents to 20 nA.
HC-202B Headstage
(50 GΩ/50 ΜΩ)
single channel currents to 200 pA
whole cell currents to 200 nA
HB-205B Bilayer Headstage
(50 GΩ modified)
for artificial bilayer capacitances up to 250 pF
currents to 200 pA
Noise (referred to input)
Measured with an 8-pole Bessel
filter, input open, 50 GΩ resistor:
DC to 1 k Hz
DC to 5 k Hz
Bandwidth
25 kHz
0.038 pA RMS
0.170 pA RMS
VOLTAGE CLAMP COMMANDS
Command In
± 10 V maximum, AC or DC
applied to input
Voltage Hold
± 200 mV with 10-turn control
Junction Zero
± 100 mV with 10-turn control
Internal Test Pulse
1 Volt 50/60 Hz (line frequency) square wave
attenuated by COMMAND SENSITIVITY
Command Sensitivity
attenuates at x0.1, x0.01, and x0.001
Zap
1.0 Volt Pulse
adjustable duration from 0.1 to 10 ms
CURRENT CLAMP COMMANDS
Command In
±1000 pA maximum with Command Sensitivity @ x0.1
±100 pA maximum with Command Sensitivity @ x0.01
±10 pA maximum with Command Sensitivity @ x0.001
Current Hold
± 1 nA with 10-turn control
Internal Test Pulse
1 nA 50/60 Hz square wave
Command Sensitivity
attenuates at x0.1, x0.01, and x0.001
CAPACITANCE COMPENSATION
C–FAST 1
(Voltage Mode)
0.1 to 1.75 µs
0 to 5 pF
(Voltage Mode)
0.33 to 8.5 µs
0 to 15 pF
C–SLOW
0 to 100 pF with 10–turn control
Series R
0 to 10 MΩ with 10–turn control
% Correction
0 to 90% of series R
Leak Subtraction
50 GΩ Headstage Resistor: ∞ to 50 GΩ
C–FAST 2
500 MΩ Headstage Resistor: ∞ to 500 MΩ
Warner Instruments
A Harvard Apparatus Company
29
PC-505B Manual, Rev. 050816
50 MΩ Headstage Resistor: ∞ to 50 ΜΩ
FRONT PANEL OUTPUTS
I m (membrane current)
gains of 0.05 to 10 mV/pA with 50 ΜΩ headstage resistor
gains of 0.5 to 100 mV/pA with 500 ΜΩ headstage resistor
gains of 5 to 1000 mV/pA with 50 GΩ headstage resistor
Vc x10
summation of all commands amplified by 10
Vm x10
membrane voltage amplified by 10
I m Output Low-Pass Filter
(4-Pole Bessel -3 dB points)
0.05, 0.1, 0.2, 0.5, 1, 2, 5, 10, and 20 kHz
Bypass allows full bandwidth
Panel Meter
3-1/2 digit LCD
(full scale reading)
Junction Zero
± 199.9 mV
Vc + h IN
sum of all commands and V hold
± 199.9 mV
ΣVc
Sum of all commands
± 199.9 mV
Vm
membrane voltage in current clamp mode
± 199.9 mV
Im
membrane current
± 1999 pA
RMS noise
1.999 pA
REAR PANEL OUTPUTS
Gain Telegraphs *
0.5 to 7.0 V in 0.5 V steps
Filter Telegraphs *
0.2 to 2.0 V in 0.2 V steps
Im/Vm telegraph
TTL logic
0=I clamp mode
1=V clamp mode
Sync Out
TTL signal for synchronization oscilloscope with test pulse
OPERATING CONDITIONS:
Equipment is intended to be operated in a controlled
laboratory environment.
Temperature: 0-40 °C
Altitude: sea level to 2000 m
Relative humidity: 0-95%
PHYSICAL DIMENSIONS
Power Requirements
110 - 130 or 220 - 250 VAC, 50/60 Hz
Main Unit
9 x 42 x 30 cm (H x W x D)
Headstage:
1.9 x 3.5 x 5.7 cm (H x W x L)
with 1.8 m cable
Headstage Mounting Rod:
6.3 mm x 6.3 cm (Dia. x L)
Shipping Weight:
11.4 kg
Warranty
Three years, parts and labor
* Axon pClamp and Instrutech Pulse.
Warner Instruments
A Harvard Apparatus Company
30
PC-505B Manual, Rev. 050816
Accessories and replacement parts
Model Number
Order Number
Description
Headstages: When ordering additional or replacement headstages, please reference the serial
number of your PC-505B.
LC-201
HC-202
HB-205
64-0004
50 GΩ/500 MΩ feedback resistors
64-0005
50 GΩ/50 MΩ feedback resistors
64-0006
50 GΩ/500 MΩ feedback resistors, modified for bilayer
Standard cable length is 1.8 meters. Lengths up to 3.05 meters (10') are available.
Electrode Holders: One electrode holder is supplied with each headstage. The standard model is
QSW-AxxP (straight). Holder part numbers are completed by replacing the "xx" with 10x the
OD (in mm) of the pipet glass to be used.
for 1.0 mm OD pipette glass
QSW-A10P
64-0821
for 1.2 mm OD pipette glass
QSW-A12P
64-0822
for 1.5 mm OD pipette glass
QSW-A15P
64-0823
for 1.65 mm OD pipette glass
QSW-A17P
64-0978
for 2.0 mm OD pipette glass
QSW-A20P
64-0824
Other style holders (such as 90°, 45° and microperfusion) are available.
Contact our Sales Department for complete details on holders, capillary tubing and replacement
parts.
Warner Instruments
A Harvard Apparatus Company
31
PC-505B Manual, Rev. 050816
Warranty and service
We recommend that all questions regarding service be referred to our Support Department.
Normal business hours are 8:30 AM to 5:30 PM (EST), Monday through Thursday and
8:30 AM to 5:00 PM on Friday. Our offices are located at 1125 Dixwell Avenue, Hamden, CT
06514, and we can be reached by phone at (800) 599-4203 or (203) 776-0664. Our fax number
is (203) 776-1278. In addition, we can be reached by e-mail at [email protected] or
through our Web page at http://www.warneronline.com.
Warranty
The model PC-505B is covered by our Warranty to be free from defects in materials and
workmanship for a period of three years from the date of shipment. If a failure occurs
within this period, we will either repair or replace the faulty component(s). This warranty
does not cover instrument failure or damage caused by physical abuse or electrical stress
(inputs exceeding specified limits).
In the event that instrument repairs are necessary, shipping charges to the factory are
the customer's responsibility. Return charges will be paid by Warner Instruments, Inc.
This warranty is not extended to electrode holders since these items are considered
disposable.
Service notes
A) If the instrument POWER light fails to light, check the fuse at the rear panel. If the fuse
is found to be defective replace it with a 3AG 1/2 amp normal blow fuse (1/4 amp for
facilities using 220-240 V line voltages). If the replacement fuse also fails, please call
Warner Instruments for assistance.
B) Occasionally, a knob on the front panel will loosen after long use. These are "collet"
style knobs and are tightened with a screw located under the knob cap. To gain access
to the adjustment screw, pry the cap off with a thin bladed screwdriver or similar tool.
C) Should service be required, please contact the factory. The problem may often be
corrected by our shipping a replacement part. Factory service, if required will be
expedited to minimize the customer inconvenience.
D) Instruments are inspected immediately upon receipt and the customer is notified if the
repair is not covered by the warranty. Repairs can often be completed in 1-2 days from
our receipt of the instrument.
If factory service is required, please observe the following instructions:
1) Package the instrument with at least 3 inches of cushioning on all sides. Use the original
shipping carton if it is available.
2) Insure the shipment for its full value.
3) Include with the shipment an explanation of the problem experienced.
Warner Instruments
A Harvard Apparatus Company
32
PC-505B Manual, Rev. 050816
IMPORTANT: CUSTOMERS OUTSIDE OF THE U.S.
Please be sure to contact us before return shipping any goods. We will provide instructions so
that the shipment will not be delayed or subject to unnecessary expense in clearing U.S.
Customs.
Recommended reading
Sakmann and Neher, Single-channel Recording, Plenum Press, 1983
Hamill, Marty, Neher, Sakmann, and Sigworth (1981) Pflugers Archiv 391: 85-100.
Warner Instruments
A Harvard Apparatus Company
33
PC-505B Manual, Rev. 050816
Certifications
Declaration of Conformity
CE MARKING (EMC)
Application of Council Directive: 89/336/EEC
Standards To Which Conformity
Is Declared:
EN55022 Class A
EN61000-3-2
EN61000-3-3
EN50082-1:1992
EN61000-4-2
EN61000-4-3
ENV50204
EN610000-4-4
EN610000-4-8
EN610000-4-11
Manufacturer’s Name:
Warner Instruments, LLC
Manufacturer’s Address:
1125 Dixwell Avenue
Hamden, CT 06514
Tel: (203) 776-0664
Equipment Description:
Instrument Amplifier
Equipment Class:
ITE-Class A
Model Numbers:
PC-505B
I the undersigned, hereby declare that the equipment specified
above, conforms to the above Directive(s) and Standard(s).
Place: Hamden, Connecticut USA
Signature:
Full Name: Burton J. Warner
Position: President
Warner Instruments
A Harvard Apparatus Company
34
PC-505B Manual, Rev. 050816
Declaration of Conformity
CE MARKING (LVD)
Application of Council Directive: 73/23/EEC
Standards To Which Conformity Is
Declared:
EN61010-1:1993
Manufacturer’s Name:
Warner Instruments, LLC
Manufacturer’s Address:
1125 Dixwell Avenue
Hamden, CT 06514
Tel: (203) 776-0664
Equipment Description:
Equipment Class:
Instrument Amplifier
Safety requirements for electrical
equipment for measurement and
laboratory use
Class I
Model Numbers:
PC-505B
I the undersigned, hereby declare that the equipment specified
above, conforms to the above Directive(s) and Standard(s).
Place: Hamden, Connecticut USA
Signature:
Full Name: Burton J. Warner
Position: President
Warner Instruments
A Harvard Apparatus Company
PC-505B Manual, Rev. 050816
35
Warner Instruments
A Harvard Apparatus Company
36
PC-505B Manual, Rev. 050816
Glossary
A/D converter – Analog to Digital converter. Computers are inherently digital while the voltage or current
output from an amplifier is analog. Therefore, a signal must be first converted to a digitized form
before a computer or its software can accept it. Desirable features in an A/D converter include rapid
signal conversion, small-step resolution and low noise.
analog – Continuous or non-discrete. Often dynamically varying. Compare to: digital.
bandwidth – The range of frequencies a device is capable of processing with minimal distortion. A
bandwidth of 1 Hz indicates that the device can faithfully process a signal occurring once per second
(1 Hz). The larger the bandwidth, the faster the device.
Bessel filter – A device used to attenuate the high frequency components of a signal. The cutoff
frequency of a filter is normally defined as the frequency at which the amplitude of the signal is
attenuated by 3 dB. A higher order filter (i.e., 8-pole vs. 4-pole) will attenuate the high frequency
components more rapidly. An 8-pole Bessel filter attenuates at 14 dB per octive.
BNC connector – A type of connector used to connect coaxial cables to high frequency electronic
equipment.
CAP COMP
– See: capacity compensation.
capacitance – A capacitor can be represented by a small break in a conducting pathway bounded by two
parallel plates. The electric field generated across the space between the plates in the presence of
an applied voltage maintains a charge density on each plate. The numerical measure of a capacitor’s
ability to maintain charge separation at a given potential is its capacitance. Capacitors effectively
block DC currents while passing AC currents. Has units of Farad (F).
capacity compensation – The process wherein the current generated when charging a capacitor is
subtracted (or compensated) from the output signal.
channel conductance – See: unitary channel conductance
chassis ground – A connection used to link the amplifier chassis to an external potential.
circuit ground – The potential to which all other potentials within the circuit are referenced. Also, a
connection used to link the reference potential of the amplifier circuit to an externally defined
potential.
– Command Input. An external input into the amplifier allowing the application of user defined
command voltages to the headstage. Connection is usually via BNC.
CMD IN
command sensitivity – Selectable scaling of
and x0.001.
CMD IN
input. Attenuation values of
CMD IN
are x0.1, x0.01,
command voltage – The voltage applied to the headstage resulting in a desired transmembrane
potential in the system under study.
control blocks – Organization of controls on the amplifier into functional groups. Blocks are delineated
by titled blue boundaries.
Warner Instruments
A Harvard Apparatus Company
PC-505B Manual, Rev. 050816
37
current-voltage relationship – A measure of the way in which the current varies as a function of the
applied voltage. In an Ohmic device (obeys Ohm’s law or V=IR), this relationship is linear. An
understanding of the current-voltage relationship of a channel yields information about that channel’s
function.
depolarization – A biological membrane in which charge separation has resulted in transmembrane
voltage is termed ‘polarized’. Electrically, depolarization refers to any action which tends to reduce
the degree of polarization. Biophysically, a polarized membrane has a resting transmembrane
potential between –40 and –90 mV, relative to the inside of the cell. An action which tends to
increase the polarization (e.g., increase the transmembrane potential to, say, -100 mV) is termed
hyperpolarization, while depolarization refers to any action which decreases the transmembrane
potential. (It should be noted that by this definition, a transmembrane potential of +100 mV is still
depolarized.)
digital – Quantized or discrete. Normally refers to information manipulated by a computer. All processes
within a computer are discrete and are composed of 0’s and 1’s. The universe we interact with is
functionally analog, therefore information we wish to manipulate with a computer must be digitized
prior to use by the computer.
DIN connector – Deutsche Industrie Norm. A German standard for electronic and industrial products.
DIN connectors can be 3 to 6 pin plugs with the same outer diameter and appearance.
electrode – One terminal of a voltage source which can either supply or collect current.
electromagnetic – From physics. An electric current induces a magnetic field and a changing magnetic
field induces an electric current. Therefore, these two entities are related to each other and are
combined into electromagnetism.
electrophysiologist – A scientist who combines the disciplines of physics, electrical engineering, and
physiology to the study biological systems.
Faraday cage – A grounded conducting enclosure which shields its interior from external electric fields.
Named after Michael Faraday, who first described it in 1875.
gain – The numerical value of the amplification of a signal by an amplifier. User selectable in the OUTPUTS
block of the amplifier.
gain telegraph – A defined voltage dependent on the gain setting appearing at the associated BNC at
the rear of the amplifier. Used to communicate the gain setting to external devices.
ground loop – A loop formed from multiple connections into the circuit ground plane by the same device.
The flux of magnetic fields through this loop can induce small currents within the ground plane
resulting in increased noise in the circuit. Careful consideration of the interconnection between
several devices is often required to identify ground loops.
headstage – A low gain amplifier placed as close to the preparation as possible. Used to amplify small
currents to a range sufficient for the main amplifier to accept.
Im – A measure of the current passed through an open channel in the presence of a driving force.
Operationally, the current appearing at the Im OUTPUT of the amplifier.
Warner Instruments
A Harvard Apparatus Company
38
PC-505B Manual, Rev. 050816
intracellular – Situated or occurring within a cell.
junction potential – A difference in conductivity between two dissimilar materials will appear as a small
voltage when the two materials are brought into contact. This voltage is termed the junction potential.
LED – Light Emitting Diode. The red, green or yellow lighted indicators on the front of many devices.
LED’s are preferred indicator light sources due to their low power consumption.
mean closed time – The average length of time a gating channel will remain in the closed state.
mean open time – The average length of time a gating channel will remain in the open state.
mini-jack – A small plug on the headstage to which the electrodes are attached.
model cell – An electric circuit designed to model the electrical characteristics of a biological membrane.
open probability – The calculated probability of finding a channel open at time t, given that the channel
is in a closed state at time t=0.
oscilloscope – A device used to monitor voltages within an electrical circuit.
output current – See Im
– A pulsed signal appearing at the OUTPUT SYNC BNC on the instrument rear panel. Used to
synchronize the PULSE GENERATOR or CAP TEST signal to an external device such as an oscilloscope.
OUTPUT SYNC
periodic – That which repeats itself at regular intervals.
perfusate – The solution being perfused.
perfusion – The exchange of one solution with another.
plasma membrane – The surface membrane of a cell. Contrast with an intracellular membrane which is
a membrane contained entirely within the cell.
potentiometer – A single- or multi-turn dial used to make a continuously varying selection with a range.
In its heart this is a variable resistor.
pulse code modulator – A device which converts an analog signal into a form acceptable for storage on
VCR tape. Also converts data previously stored on VCR tape back into an analog signal.
signal polarity – Defined as the sign applied to a current generated through a membrane in the presence
of an applied holding potential. The electrophysiological definition is determined by the membrane
such that an outward directed current and a depolarizing potential are both positive.
single channel – Refers to a solitary channel protein functioning within a measurement milieu.
step potential – A functionally instantaneous change in potential from one value to another.
time constant – In a system governed by exponential kinetics this is the time required for a value to
change to 1/e of its initial value, where e=2.71828 is the base of the natural logarithm.
transient – Momentary.
transmembrane – That which spans a membrane or is referred from one side of a membrane to the
other.
Warner Instruments
A Harvard Apparatus Company
39
PC-505B Manual, Rev. 050816
trim pot – An adjustable variable resistor used for making fine adjustments to a circuit.
TTL – Transistor, Transistor Logic. Voltage ranges used to define an on or off state in binary devices. 00.8 V defines a logic 0 state and 2.4-5.0 V defines a logic 1 state.
unitary channel conductance – A measure of the ability of a channel to pass an ion from one side of the
membrane to the other. An intrinsic property of a single channel which depends on the ionic species
under consideration. Determined by measuring the current through an open channel in the presence
of a driving force (transmembrane potential) at different potentials. Measurements made within the
Ohmic range of the channel’s response will graph as a straight line. The slope of this line when
plotted as current (I) vs. potential (V) will yield the conductance (or inverse resistance) of the channel
under these conditions.
Vm
– The transmembrane potential generated by the amplifier and applied to the headstage. This
driving force appears in addition to any other driving forces which may be present.
HOLD
Vc – The user selected potential set in the COMMANDS APPLIED TO REFERENCE block of the amplifier.
Warner Instruments
A Harvard Apparatus Company