1
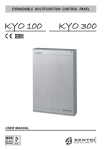
USER MANUAL
MADE
IN
ITALY
OHSAS 18001 OHSAS 18001
9192.BSEC
IT - 60983
ISO 14001
9191.BNT2
ISO 14001
IT-52588
ISO 9001
9105.BNT1
ISO 9001
IT-52587
This control unit supports the fo llowing keyp ads a nd ke y readers:
PREM IUM , CLA SSIKA, M IA series, ALISO N se ries, O M N IA /TAST-R, NC 2/TAST, ICO N/KP, EC LIPSE , EC LIPSE2
To kee p thin gs sim ple, this instruction m anual refers only
to the PREM IUM and CLASS IK A keyp ads a nd ECLIP SE2 key readers.
If you require further inform ation relating to the other types of keypa d/K ey R ead er sup ported by this control un it,
the previous ve rsion o f th is instruction m an ual ma y be dow nlo aded from the w eb address www.ben telsecurity.com
KYO 4 M – KYO 8 M – KYO 8W M – KYO 32 M – KY O 4 P – KY O 8 P – KYO 8W P – KYO 32 P
KYO 8GW P-SW 1 – KYO 8GW P-SW 2 – KYO 8GW L-SW 1 – KY O 8GW L-SW 2
KYO 8G P-S W1 – KYO 8G P-SW 2 – KYO 32G P-SW 1 – KYO 32G P-S W2
KYO 8G L-SW 1 – KYO 8G L-SW 2 – KY O 32G L-SW 1 – KYO 32G L-SW 2
KYO16D
For all the Control Panels the performance level is II (unless otherw ise specified).
The KYO 16D perform ance level is I
H ereby, B entel Se cu rity, declares the above m entioned Control Pa nels to be in com plia nce w ith the
esse ntia l requ irem e nts and other releva nt provisio ns of 19 99/5/E C D ire ctive .
The com plete R &TTE D ecla ration of C onform ity for ea ch Panel can be found a t
w ww.bentelse curity.com /dc.htm l.
T hese Co ntrol P ane ls co m ply w ith C EI 79-2 2 ed. 1993 .
a
Installation of the se system s m ust be ca rrie d out strictly in a ccordance with th e instructions
described in this m a nual, and in com pliance w ith th e loca l laws and b ylaw s in force .
T he a bove m e ntio ned C ontrol pane ls have be en de signed and m ade
to the highe st stan dards of qu ality and p erform ance.
T he m anufactu re r recom m end s th at the installe d system sho uld be com p lete ly tested a t le ast once a m onth .
BE N T EL S EC U RIT Y S rl shall n ot assu m e th e responsib ility
for da m age arisin g from im p ro per app lication o r use .
T he a bove m e ntio ned C ontrol pane ls have no user-frien dly com po nents, the re fore,
BENTEL SECURITY srl reserves the right to modify the technical specifications of this product without prior
notice.
®
3
TABLE OF CONTENTS
Introduction ............................................................... 5
The Control Panel .................................................................... 5
Glossary .................................................................................. 7
Operating from a Keypad ......................................... 8
Introduction ...................................................................................
Keypads ..................................................................................
LED Keypads .................................................................................
‘View Trouble’ mode .................................................................
‘View Partition Status’ mode .....................................................
LCD Keypads .................................................................................
Viewing Troubles .....................................................................
Viewing Trouble Details ...........................................................
Adjusting Brightness, Contrast and Volume ...............................
Buzzer ............................................................................................
Superkeys ......................................................................................
Basic Operations ...........................................................................
Global Arming (Code + ON) .....................................................
Global Disarming (Code + OFF) ..............................................
A or B Mode Arming (Code + A or Code + B) ...........................
Notes on Arming from Keypads ...............................................
Silencing Alarm Devices from Keypads ...................................
Wrong Code ............................................................................
User Menu and Main User Menu .................................................
Reset Alarm or Clear Alarm Memory .......................................
Arming and Disarming your System ........................................
Overtime Request ...................................................................
Teleservice Request ................................................................
Turning ON your System Automatically ....................................
Enable/Disable Teleservice ......................................................
Enable/Disable Buzzer ............................................................
Enable/Disable Answer Function .............................................
Output Control .........................................................................
Programming Telephone Numbers ..........................................
Programming Codes ...............................................................
Programming the Date and Time .............................................
Test Siren .................................................................................
Zones Status ............................................................................
View Logger .............................................................................
Clear Call Queue .....................................................................
8
8
9
9
10
11
12
12
13
14
14
15
15
16
16
17
17
17
18
19
20
21
22
23
24
25
26
27
28
29
30
31
32
34
35
Using Digital Keys and Cards .................................. 36
Introduction ................................................................................... 36
Readers ................................................................................... 36
Digital Keys/Cards ................................................................... 37
®
4
Multifunction Control Panel
The Reader LEDs ..........................................................................
No Key/Card at Reader ............................................................
Key/Card at Reader .................................................................
The PROXI Buzzer ........................................................................
Multiple Systems ...........................................................................
Digital Key/Card operations .........................................................
Disarm (Turning OFF your system) .........................................
Arm — Global Mode (Turning ON your system) .......................
Arm — A Mode .........................................................................
Arm — B Mode ........................................................................
Silencing Alarm Signalling Devices ..........................................
38
38
38
40
40
40
41
41
41
41
42
Operating the System from a Telephone ................ 44
Remote Telephone Access via ‘Dialler’ mode ............................
Remote Telephone Access via ‘Answer’ mode ..........................
Entering Your Telephone Access Code (DTMF) ........................
Teleservice Enabled .................................................................
Teleservice Disabled ................................................................
Entering Commands .....................................................................
Cancel Command ...................................................................
Stop Alarm / On Hook ...............................................................
Remote Talk / Listen-in ............................................................
Remote 2Way Talk / Listen-in ..................................................
Turning Appliances ON/OFF (Reserved Outputs) ....................
Arm / Disarm ...........................................................................
System Status Enquiry ............................................................
Enable / Disable Telephone Access Code ...............................
44
44
45
45
45
46
46
46
46
46
46
47
47
48
The Wireless Key ...................................................... 49
Introduction ...................................................................................
Using the Wireless key .................................................................
Global Mode .............................................................................
Disarm Global ..........................................................................
A Mode Arming .........................................................................
B Mode Arming or Superkey 2 ..................................................
49
49
49
49
50
50
®
Introduction
5
INTRODUCTION
The Control Panel
This Manual is designed for anyone using a Control panel from the KYO
range. Most of the features described in this Manual are included on all
KYO Control panels. However, some features are included on certain models
only, in such cases, the name of the Control panel will be specified.
About Your Security Your Installer has set up your system with your premises in mind. You may not
System need all the features descibed in this Manual, therefore, your Installer will have
programmed only the features you need.
Controlling Your The functions on KYO4 and KYO8 (4 Partition Control panels) and KYO32 (8
System Partition Control panel) can be controlled from Keypads and Digital Readers (see
Figures 1, 2, 3 and 4).
The Digital This Manual provides step-by-step instructions for each function. This Control
Communicator panel has an intergrated Digital Communicator, that allows your system to send
Alarm, Trouble and Emergency messages to the Central Station, This feature also
allows your Installer to carry out remote maintenance (Teleservice).
The NC2/VOX If your system is equipped with an NC2/VOX Voice board (accessory item), your
Voice Board Digital communicator will be able to send voice messages.
NOTE - The KYO16D Control Panel DOES NOT ACCEPT the Voice board.
The VRX32-433 Series 32, 8W, 8GW and 16D Control panels accept VRX32-433 or Vector/RX8
and Vector/RX8 Receivers. Installation of a VRX32-433 or Vector/RX8 Receiver will allow the
Wireless Receiver control panel to manage Wireless security devices (Detectors, Magnetic Contacts,
etc.) and Wireless Keys.
Read this guide thoroughly to learn how to use your system. See the Glossary to
learn about the words used in the instructions.
®
6
Multifunction Control Panel
Prem ium
BKP-LED
Prem ium
BKP-LCD
Figure 1 - PREMIUM Keypads
Classika
BKB-LED
Classika
BKB-LCD
Figure 2 - CLASSIKA Keypads
PROXI
ECLIPSE2
PROXY-CARD
SAT
M INIPRO XY
Figure 3 - Readers
Figure 4 - Digital Key
®
Introduction
7
Glossary
Alarm Zone A limited area of the premises monitored by detectors (e.g. Motion detectors,
Door/Window contacts, etc.).
BPI Device A peripheral device connected to the Control panel by a 4 pin conductor.
Beep An audible signal emitted by the Keypad each time a key is pressed, or when
requested operations have been completed.
Buzz An audible signal emitted by the Keypad to indicate that a requested operation is
impossible, or has been denied (for example, automatic exit from the User Menu at
a LED keypad).
Buzzer An audible signalling device inside Keypads and PROXI Readers.
Central Station A private Security Company your Control panel will send Alarm, Trouble and
Emergency messages to (that is, if remote monitoring is enabled).
Detector A device which signals alarm conditions (e.g. Glassbreak, Forced entry, etc.).
Dialler An optional device which sends voice message to programmed phone numbers.
Digital An integrated on-line device that sends digital signals.
Communicator
Digital Key An electronic control key (see Figure 4) with a random code (selected from over
4 billion combinations).
Display An alphanumeric screen on the LCD Keypads.
LCD Keypad A command keypad with a display. Your Control panel can be programmed and
controlled via LCD Keypads.
LED A small coloured light on the Keypads and Readers.
LED Keypad A command keypad with LEDs. Your Control panel can be controlled via LED
Keypads.
Logger A list of the last 256 events on Series 32 Models.
A list of the last 128 events on Series 4-8 Models.
Partition A section of the premises. Each Partition can have its own Times, Code PINs and
Digital Keys/Cards, etc.
Reader A peripheral control device (see Figure 3) which accepts commands from Digital
Keys/Cards (e.g. PROXI Proximity Reader, ECLIPSE2 Readers).
Real-time Instant Audible/Visual signals or communications.
Telemonitoring A remote-monitoring service provided by a Central Station. This feature will allow
the Control panel to transmit real-time events (e.g. Forced entry, Tamper, Alarms,
etc.) to the Central station.
Teleservice A remote-maintenance service provided by your Installer. The Teleservice feature
allows the Installer to operate on your system over the phone.
®
8
Multifunction Control Panel
OPERATING FROM A KEYPAD
Introduction
Keypads
This Control panel accepts LCD Keypads and/or LED Keypads (see Figure 1 and 2).
LEDs
Red
Red
Yellow
Green
Red
Red
Amber
Amber
Red
. ... .
DESCRIPTION
OFF - All the Keypad Partitions are Disabled
ON - At least one of the Keypad Partitions is Armed
OFF - No Alarms in Memory
Slow Blinking - At least one Alarm in Memory
Fast Blinking - Alarm in course
OFF - No Trouble
ON - At least one Trouble condition is present or at least one Wireless Zone
Detector is Missing or has a Low battery: check system via 'View Trouble'
Slow Blinking - 'View Trouble' mode active
OFF - At least one Unbypassed Alarm Line is in Alarm or Tamper status
ON - Ready to Arm: All the Unbypassed Alarm Lines are in Standby status
Fast Blinking - This will occur when:
a) The Control panel is in 'Test' status
b) A Digital Key in inserted into an ECLIPSE Reader
c) A Digital Key/Card is present at a PROXI Reader
OFF - NoTamper
Slow Blinking - At least one Tamper condition in Memory
Fast Blinking - Tamper in course
OFF - Control panel Closed
ON - Control panel Open
OFF - All the zones of the Keypad Partitions are Unbypassed,
OFF - and not in 'Test' status
ON- At least one of the zones of the Keypad Partitions is Bypassed
Slow Blinking - At least one zone is in 'Test' status
Fast Blinking - At least one zone is Unbypassed, and one in 'Test' status
OFF - The Teleservice option is Disabled
ON - The Teleservice option is Enabled
Slow Blinking - Programming in course
Fast Blinking - User menu accessed
OFF - Zone in 'Normal' status
Slow Blinking - The Zone has logged at least one violation (Alarm)
Fast Blinking - The Zone has been violated (refer to the 'Zones Status' section)
®
Operating from a Keypad
9
LED Keypads
Table 3 shows the meaning of the real-time signals on the Keypad LEDs.
‘View Trouble’ mode
Table 4 shows how the Keypad lights will signal the various Troubles.
Press ENTER to access the ‘View Trouble’ mode from ‘Normal’ status (Control panel Armed or Disarmed)
Press ESC to exit the ‘View Trouble’ mode
The ‘View Trouble’ mode will end automatically after 15 seconds of inactivity.
Exit will be confirmed by an audible signal (Buzz).
LEDs
Amber
Red
Red
Red
Red
!
Red
#
Red
"
Meaning
Slow Blinking - 'View Trouble' mode active. Only the LED on the keypad in
use will blink
ON - indicates Blown fuse (the fuse protecting the power supply to the
detectors)
ON - indicates 220 V Mains failure
ON - indicates Low Battery, Battery Trouble or Blown Fuse
This type of Trouble will be signalled with a 4 minute delay
ON - indicates that all Codes are set at Factory Default
Slow Blinking - Indicates Wireless Receiver Trouble (if installed).
Fast Blinking - Indicates that both the above conditions are present
ON - Ongoing call
Slow blinking - Line down
Fast blinking - Ongoing call after 'Line-down' event
ON - BPI Trouble (e.g. one of the control or signalling devices is out-ofservice)
ON: indicates that at least one Wireless Zone Detector is Missing.
Red
.
To view the Zone concerned, press . The RED LED of the Zone concerned
will go ON
Press
to go back to Standby.
ON: indicates that at least one Wireless Zone Detector has a Low Battery.
Red
.
To view the Zone concerned, press . The RED LED of the Zone concerned
will go ON
Press
to go back to Standby.
®
10
Multifunction Control Panel
‘View Partition Status’ mode
Table 5 shows how the Keypad lights will signal the status of the Partition.
Press ON to access the ‘View Partition Status’ mode from ‘Normal’ status (Control panel is Armed or Disarmed)
Press ESC to exit the ‘View Partition Status’ mode.
The ‘View Partition Status’ will exit automatically after 15 seconds of inactivity.
Exit will be confirmed by an audible signal (Buzz).
Red
!"#$#%
Fast blinking - Indicates 'View partition Status' active"
Red
LEDs 1 to 8
. ... .
OFF - Partition Disarmed
ON - Partition Armed
®
11
Operating from a Keypad
LCD Keypads
The keypad display (see Figure 6) will provide information on the system status.
During ‘Normal’ status, the top line of the display will show the Date and Time,
and the bottom line will show the Armed/Disarmed status of the partitions (refer
to Table 6), and Trouble events and information regarding the Control panel (refer to Table 7).
To view the partition status, press ON: the status of each partition (and
relative descriptions) will be shown at 2 second intervals.
If the Control panel has Zone Alarm or Tamper in memory (LED a blinking),
the top line will show the zone description (Label).
If Tamper or Alarm conditions are present on more than one zone, the relative
zone descriptions will be shown every 2 seconds.
Table 7 shows how the LCD keypad lights and display signal the system status in
real-time.
D ate
Partitions Sta tus
Tim e
Troubles, Tam pers, C ontrols
Figure 6 - The display of an LCD keypad during standby status
&"'
Letter
Mode
Result
$
Away
The corresponding partition will be fully armed, and the system will
monitor all zones
6
Stay
The corresponding partition will be partially armed, and the system will
bypass 'Stay' zones
,
Stay - 0 Delay
The corresponding partition will be partially armed, and the system will
bypass 'Stay' zones and ignore the partition Entry Time
'
1
No Change
Disabled
Disarm
The corresponding partition will turn OFF
The corresponding partition will maintain its current status
The corresponding partition is not a Keypad partition, therefore, cannot
be controlled from the keypad in question
N.B. If the partition has already detected Alarm conditions, the letters will blink.
®
12
Multifunction Control Panel
Viewing Troubles
If the amber G LED turns ON, it means that at least one trouble condition has been
detected. To view current (or stored) ‘Trouble’ details, access the Main User Menu and
select the View Logger option (refer to the ‘View Logger’ paragraph in this section).
Viewing Trouble Details
To view the details of current ‘Troubles’, proceed as follows:
1. From standby status (regardless of whether the system is Armed or Disarmed), press ENTER.
2. The Trouble events will be shown on the second Syst. Troubles ßà
line of the display. Use C and D to scroll the Trou- Mains Fault
bles list. Refer to the Table 8 for the Troubles that the Control panel is able to
detect.
If the Control panel is functioning properly, the Syst. Troubles ßà
display will show the “No Troubles” message. No Troubles
3. Press ESC to exit.
Automatic exit will occur after 30 seconds of keypad inactivity.
Red
Red
Amber
6LJQDOOHG
E\
O FF - All partitions disarm ed
O N - At least one keypad partition arm ed
O FF- No Alarm s in m em ory
Slow Blinking - At least one Alarm In m em ory
Fast Blinking - Alarm in course
O FF - No Trouble, Bypassed or Test zones
ON - At least one Trouble condition present or one Wireless Zone is Missing or has a
Low Battery .
Slow Blinking - At least one zone Bypassed, or in Test status
Fast Blinking - At least one zone in Trouble, and one Bypassed or Test status
O N - Control panel open
Blinking - At least one O pen Panel event in m em ory
O N - Tam per in course
Blinking - At least one Tam per event in m em ory
O N - Tam per in course on at least one of the peripheral devices (Keypad,
Reader, Expander or Receiver)
Blinking - At least one Tam per event in m em ory
O N - A False Key/Card is present at a Reader
Blinking - At least one False Key/Card event in m em ory
O N - A peripheral device (Keypad, Reader, W ireless or Expander) has been
disconnected
Blinking - At least one Peripheral Trouble event in m em ory
O FF - Teleservice disabled
O N -Teleservice enabled
O FF - Answerphone function disabled
O N- Answerphone function disabled
O FF - Line Free
O N - Line Engaged
Blinking - Line Down
®
Operating from a Keypad
13
Adjusting Brightness, Contrast and Volume
To adjust the brightness, the contrast and the volume of the internal buzzer, follow the procedure described below:
BRIGHTNESS
It is possible to adjust the brightness of the keys and, on the LCD version only,
also the brightness of the backlighting of the display. It is possible to adjust the
inactive and the active brightness (the inactive brightness is the brightness to
which the keypad reverts after 10 seconds of inactivity.
To adjust the active brightness, follow the procedure described below:
1a) To increase the brightness, press and keep pressed key A until the desired
level is obtained:
1b) To lower the brightness, press and keep pressed key B until the desired level
is obtained:
2) Press the OFF key to adjust the inactive brightness:
3a) To increase the brightness, press and hold down key A until the desired
brightness is reached:
3b) To reduce the brightness, press and hold down key B until the desired brightness is reached:
4) Press the ON key to adjust the active brightness and return to step 1a), or
press the ENTER key to confirm the chosen levels, or
wait a few seconds for the keypad to return to the inactive state.
CONTRAST (only for the LCD version)
To adjust the contrast of the LCD display, follow the procedure described below:
1a) To increase the contrast, press and keep pressed key D until the desired
level is obtained.
1b) To lower the contrast, press and keep pressed key C until the desired level is
obtained.
2) To confirm the chosen level, press the ENTER key (or wait a few seconds
for the keypad to return to the inactive state).
VOLUME
To adjust the volume of the internal buzzer, follow the procedure described below:
1) Press and keep pressed the ESC key; the internal buzzer will start sounding a series
of beeps in such manner that the operator could hear the sound level in real time.
NOTE - The buzzer will still emit a series of sound alerts at extremely low
volume, even if it has been set to zero.
2a) To increase the volume, press key A for a number of times and/or keep it
pressed until the desired level is obtained:
2b) To lower the volume, press più volte and/or keep pressed key B until the
desired level is obtained.
3) To confirm the chosen level, press the ENTER key (or wait a few seconds
for the keypad to return to the inactive state).
®
14
Multifunction Control Panel
7URXEOH
'HVFULSWLRQ
Mains Fault
The Mains power supply to the Control panel has failed. If it is not a general
Black-Out — Contact your Installer
BPI Fault
A BPI device has failed to respond (Missing) — Contact your Installer
Fuse Fault
Blown fuse — Contact your Installer
The Control panel battery is not recharging properly or is faulty — Contact
your Installer
Battery Fault
Battery Fault Z...
The Battery of a Wireless Zone Device has not been charged properly or it is
down completely or faulty — Contact your Installer. The Zone concerned will
be indicated after the "Z" (Example "Battery Fault Z03").
Tel. Line Fault
Telephone Line trouble — Contact your Installer
Default Codes
This Trouble condition will be present until a User Code is programmed
For Wireless systems, the Wireless Receiver is not functioning properly —
Contact your Installer
WLS Fault
Wireless Jam
Wireless interference has been detected
Missing Device Z...
One or more of the Wireless Zone Devices is not responding — Contact
your Installer. The Zone concerned will be indicated after the "Z" (Example
"Missing Z03")
Buzzer
The Keypad Buzzer will emit an audible signal each time a valid key is pressed
and, if enabled by your Installer, will also signal:
z The Exit Time (signalled by slow beeps)
z The Entry Time (signalled by fast beeps)
z Errors or Invalid requests (signalled by a Buzz)
z Request Accepted or Done (long beep)
z Violation of a ‘Chime’ zone
z Key/Card programming done
z Auto-arm Timeout
Superkeys
If your Installer has set up the 3 Superkeys (, and ), you will be able to
operate your system from the keypad, without using Codes. The ‘Superkeys’ can
be programmed to activate:
z the Digital Communicator – to transmit event codes to the Central Station
Up to 8 Telephone numbers can be programmed for these commands.
z the Dialler – to send a voice message (requires NC2/VOX Voice board). Not
management for KYO16D Control Panel.
Up to 8 Telephone numbers can be programmed for these commands.
z One or more Outputs
A long beep will confirm that the selected facility has been activated.
®
Operating from a Keypad
15
Basic Operations
This section describes how to operate your system from a keypad.
The operations at keypads (refer to Table 9) will only affect the partitions
controlled by the code and keypad concerned.
Changing User
Codes
WARNING - The Factory Default User Codes (0001-0024) must be changed for security reasons (refer to ‘Programming Codes’ in this section).
Global Arming (Code + ON)
This command will Arm all the partitions controlled by the code and keypad.
If you are working from a LED keypad, ensure that the Green LED V is ON.
()
CODE + KEY Sequence
OPERATION ALLOWED
Accepted Codes
Key
<Main User Code>
<User Code>
<Panic Code>
ON
ARM GLOBAL MODE Request
<Patrol Code>
ON
RE-ARM Request (Only the Patrol Code that Disarmed the
Partitions will be allowed to Re-Arm them)
<Main User Code>
<User Code>
<Panic Code>
<Patrol Code>
OFF DISARM Request
<Main User Code>
<User Code>
<Panic Code>
A
A MODE (System Partitioned)
<Main User Code>
<User Code>
<Panic Code>
B
B MODE (System Partitioned)
<User Code>
<Panic Code>
ENTER
<Main User Code>
<Main User Code>
ENTER Accesses Main User Menu (All Options)
ESC Accesses Bypass Zones Menu * (LED Keypads only)
Allows Partition Status viewing
(for LCD Keypads only)
ON
press and hold for 3 seconds
ON
<Partition Number>
Access User Menu (Only for 'Alarm Reset','Overtime' and
'Enable/Disable Buzzer' Requests)
ON
Fast Arming
Fast Arming of a Partition
* For LCD Keypads — this option is on the Main User Menu
Ö Zones Status
®
16
Multifunction Control Panel
Quick Arm To Arm the system in ‘Global’ mode — enter a Main User, User or Panic Code,
then press ON.
Keyboard Partitions If your Installer has enabled the Quick Arm feature, you will be able to Arm the
system from the keypad without using an Access Code, as follows:
1a. Press and hold the ON key for 3 seconds.
2a. Release the key after the audible signal (long beep), the system will Arm
the Keypad Partitions (as programmed by the Installer). This operation will
take about 2 seconds (the Keypad will emit an audible signal when the system
Arms).
Specific Partition
To Arm a specific partition only:
1b. Enter the partition ID Number, then press ON, the keypad will emit an
audible signal when the partition Arms.
Global Disarming (Code + OFF)
This command will Disarm all the partitions controlled by the Code and keypad
concerned.
Disarm under Duress To Disarm the system in ‘Global’ mode — enter a Main User, User, Panic or
Duress Code, then press OFF.
The Duress code will disarm the system and trigger the Digital communicator. If
your installer has set up your system to manage the Digital communicator facility, the
Digital communicator will send a voice message to the Central Station.
If the system is disarmed by a ‘Duress’ code, the keypads will remain mute.
A or B Mode Arming (Code + A or Code + B)
This command will Arm/Disarm the partitions controlled by the Code concerned. During the programming phase, the User Codes will be configured for Stay/
Away arming (A or B Mode). The programmed configuration determines the partitions which will Arm/Disarm when you make an A or B Mode Arming request.
To Arm the system in A or B Mode — enter a Main User, User or Panic Code,
then press A (A Mode) or B (B Mode).
Quick Arm: If your Installer has enabled the Quick Arm feature, you will be able to Arm the
A or B Mode system in A or B Mode from the keypad without using an Access Code, as follows:
1. Press and hold the ON key for 3 seconds.
2. Release the key after the audible signal (long beep), press A or B (A or B
Mode), as required.
If you do not press A or B within 2 seconds, the system will Arm the
keypad partitions (as programmed by the Installer).
Example: A Mode Arming configuration = Arm partitions 1 and 4; Disarm
partitions 2 and 3.
®
Operating from a Keypad
17
Notes on Arming from Keypads
Before your system Arms, your Control panel will check for the following conditions:
Violated zones (zones in Alarm status)
Bypassed zones (zones which have been turned OFF)
LED Keypads If you are operating from an LED keypad, these conditions will be signalled in realtime on the X and V icons (refer to Table 3).
LCD Keypads If you are operating from an LCD keypad, these conditions will be signalled in
real-time on the display.
If Alarm conditions are signalled, DO NOT turn ON your system, as this will
trigger an Alarm.
The example (on the right) shows zone 2 as Bypas- Zone 2
sed (OFF) and zone 4 in Alarm status (Violated).
BypassedNormal å
If Alarms are signalled — press ESC to cancel the Zone 4
Unbypas.Alarm å
Arming request.
Close all doors and windows, and stop all motion in the areas (partitions)
with motion detectors.
If zones have been Bypassed unintentionally — press ESC to cancel the Arming
request.
Access the User Menu, select the ‘Zone status’ option and Unbypass (turn
ON) the unintentionally Bypassed zones.
If your installer has enabled your system, you can view any Violated zones (zones
in Alarm status) on the display even when the system is Disarmed.
Silencing Alarm Devices from Keypads
The quickest way to silence Alarm Signalling Devices (Sirens and Flashers) is to
Disarm the system.
Clear Call Queue IMPORTANT - This operation will not interrupt the ongoing Alarm call, or end the
Alarm call cycle. Therefore, it will be necessary access the User Menu (access allowed
to Main User PINs only), and stop the Alarm calls, via the ‘Clear Call Queue’ option.
Silence Tamper Tamper events, which occur when the system is disarmed, can be silenced via the
Alarms ‘Reset Alarm’ option from the User Menu (access allowed to Main and User PINs).
For further information, refer to ‘Silence Alarm Signalling Devices from Reader’
paragraph in the ‘Using Digital Keys/Cards’ section.
Wrong Code
If a wrong code is entered, the keypad will emit an error signal (buzz), and the
display will show an error message. If your Installer has enabled the ‘lockout’
feature, the keypad will lock for 2 minutes after 5
WRONG CODE
wrong entries.
®
18
Multifunction Control Panel
User Menu and Main User Menu
The display strings in the examples in this section refer to Control panels
with 8 partitions (KYO32 and KYO32G). The display strings in other models
from the KYO range may be slightly different.
Accessing theMenu Enter a User or Main User Code (0001 at default) then
WELCOME
press ENTER to access the Menu (refer to Table 9). User Code 1
The menu will allow you to operate the Control panel in
accordance with the your access level (Main User Code or User Code). If you are
using an LCD Keypad, the display will show a short ‘WELCOME’ message.
You can access the Menu even if the Control panel is Armed.
The Main User Menu provides the following options:
Reset Alarm or Clear Alarm Memory
Arm/Disarm
Overtime Request
Teleservice Request
Enable/Disable Auto-Arm
Enable/Disable Teleservice
Enable/Disable Keypad Buzzer
Enable/Disable Answer Function (Not available for KYO16D series)
Output Control
Program Telephone Numbers (Not available for KYO16D series)
Programming Codes
Program Date/Time
Test Siren
Zones Status
View Logger
Clear Call Queue
Selecting the options When operating from an LCD keypad, use keys C and D to scroll the Menu, and
ENTER to select the required option. When operating from an LED keypad,
you will need to enter your access code and press the command keys.
Exit the Menu Press ESC once or twice as required (depending on the Menu) to Exit the
Menu (in some cases ‘Exit’ is automatic).
Limitations ‘User’ and ‘Panic’ codes can access the User Menu (refer to Table 9) to
make ‘Clear Alarm Memory’, ‘Overtime’ and ‘Enable/Disable Buzzer’ requests. ‘Patrol’ and ‘DTMF’ codes cannot access the User Menu.
The following paragraphs describe the Main User Menu options.
®
19
Operating from a Keypad
Reset Alarm or Clear Alarm Memory
The ‘Reset Alarm’ and ‘Clear Alarm Mem.’ options depend on the system status.
If the system is in Alarm status the Menu will provide the ‘Reset Alarm’ option. This option will allow you to stop the audible and visual signalling devices
(Sirens, Flashers, etc.).
If the system is in Normal status the Menu will provide the ‘Clear Alarm
Mem.’ option. This option will allow you to clear the Alarm messages from the
Keypad display, or turn OFF the keypad lights.
Table 10 shows when and how you will be able perform Reset on Control panels.
To Reset an Alarm, or Clear the Alarm Memory from an LCD keypad, proceed
as follows:
LCD Keypads 1. From the User Menu, using C or D, scroll the
Menu for the Reset Alarm or Clear Alarm
Mem. option, as required.
USER MENU
ßà
Clear Alarm Mem.
2. Press ENTER to Reset Alarm / Clear Alarm USER MENU
ßà
Mem., as required. Acceptance of the command Reset Alarm
will be confirmed by a beep and a short message. Clear Alarm Mem.
Operation done
LED Keypads To Reset an Alarm or Clear the Alarm Memory from an LED keypad, proceed
as follows:
1. Access the User Menu.
Code PIN + ENTER
The P indicator will blink.
2. Press 0 to Reset Alarm / Clear Alarm Mem., as required, or ESC to
cancel the request and, in both cases, exit the Menu.
NOTE: If your installer has enabled the ‘Auto-Reset Memory’ option, your
system will reset automatically at each Arming operation.
Retrieve Alarms If you are using an LED Keypad, you will be able to retrieve any Alarms in the
in Memory Alarm Memory which occurred previous to the last Reset operation. To Check the
Alarm Memory, proceed as follows:
Code PIN + ENTER + 8
If you are using a KYO32 Control panel, this option is available with Alison/
32LP Keypads only.
®
20
Multifunction Control Panel
*+
","!
Reset
Zone Alarm
Reset
Zone Alarm
Memory
Reset
Zone Tamper
Alarm
Reset
Reset Zone
System
Reset System
Tamper Alarm
Tamper Alarm Tamper Alarm
Memory
Memory
,
- ."
YES * or
Disarm
System
YES
-
YES
YES or
Disarm
System
YES
YES *
YES
YES *
YES
,
- .
YES
YES
* - The Alarm Memories will reset automatically.
Arming and Disarming your System
The Arm/Disarm option will allow you to turn the partitions ON and OFF.
LCD Keypads To Arm/Disarm the partitions from an LCD keypad, proceed as follows:
1. From the Main User Menu, using C or D, scroll USER MENU
the menu for the Arm/Disarm option, then press Arm/Disarm
ENTER.
2. Using the partition keys (1 through 8) set the Ar- Arm/Disarm
ming mode of each partition (refer to Table 6).
DDDDDDDD
The setting in the example (to the right) will arm Arm/Disarm
the system partitions as follows:
ASIINDDDD
z Partition 1 -Away mode
z Partition 2 - Stay mode
z Partition 3 and 4 - Stay 0 Delay (I = Instant — NO Delay )
z Partitions 5, 6, 7 and 8 - Disarm (D)
Press ENTER to confirm the setting.
LED Keypads This option is not available on LED keypads.
ßà
®
21
Operating from a Keypad
Overtime Request
If the Auto-Arm option is enabled, and the system is programmed to Arm automatically at a set Time, the Overtime request option will allow you to postpone the
Auto-arming Time.
The Overtime request must be made in steps of 30 minutes.
Overtime requests cannot go past midnight (00:00 on the Timer). If you
attempt to postpone Auto-arming until after midnight, the Control panel will
carry out the request until 23:59 and then will Arm automatically at midnight.
LCD Keypads To make an Overtime request from an LCD keypad, proceed as follows:
1. From the User Menu, using key C or D, scroll the
menu for the Overtime request option, then
press ENTER.
USER MENU
ßà
Overtime request
2. Press ENTER to activate the Overtime re- Overtime request
quest. Acceptance of the command will be con- Operation done
firmed by a beep and a short message.
LED Keypads To make an Overtime request from an LED keypad, proceed as follows:
1. Access the User Menu.
Code PIN + ENTER
The P indicator will blink.
2. Press 3 to activate the Overtime Request, or ESC to quit and, in both cases,
exit the Menu.
NOTE - If the Auto-Arm option has been disabled (refer to ‘Enable/Disable
Auto-arm’ in this section), the Overtime request will be ignored, however, the
LCD keypad will still emit a beep.
®
22
Multifunction Control Panel
Teleservice Request
If your installer has set up the ‘Teleservice’ facility, you will be able to request online service (maintenance which does not require parts or manual work). The
Teleservice option must be enabled (refer to ‘Enable/Disable Teleservice’
paragraph in this section), otherwise, the Control panel will be unable to communicate with the Installer’s terminal.
LCD Keypads To make a Teleservice Request from an LCD keypad, proceed as follows:
1.
From the Main User Menu, using key C or D, USER MENU
ßà
scroll the menu for the Teleservice request op- Teleser.request
tion, then press the ENTER key.
2. Press ENTER to send the Teleservice request. Teleser.request
Acceptance of the command will be confirmed by Operation done
a beep and a short message.
LED Keypads To make an Overtime Request from an LED keypad, proceed as follows:
1. Access the Main User Menu.
Code PIN + ENTER
The P indicator will blink.
2. Press 4 to send the Teleservice Request, or ESC to quit and, in both cases,
exit the Menu.
The Teleservice call will be sent when you press ENTER on LCD keypads, or
4 on LED keypads.
To cancel the Teleservice call — select the ‘Clear Call Queue’ option from the
User Menu (refer to ‘Clear Call Queue’ in this section).
NOTE: The Teleservice telephone number must be programmed by the installer.
®
23
Operating from a Keypad
Turning ON your System Automatically
Your installer may have set up your system to turn ON at a pre-set time. The En./
Dis. Auto-Arm option will allow you to enable/disable the automatic-arming function.
LCD Keypads To Enable/Disable Auto-Arm at an LCD keypad, proceed as follows:
1. From the Main User Menu, using key C or D,
scroll the menu for the Auto-Arm En/Dis. option,
then press ENTER.
USER MENU
ßà
En/Dis. Auto-Arm
2. Press ON to enable or OFF to disable the AutoArm option.
En/Dis. Auto-Arm
ON
<OFF>
3. Press ENTER to confirm and go back to step 1.
LED Keypads To enable/disable Auto-Arm function from an LED Keypad, proceed as follows:
1. Access the Main User Menu.
Code PIN + ENTER
The P indicator will blink.
2. Press 1 to toggle the status — Enable Ö Disable (refer to Table 11).
3. Press ENTER to confirm, or ESC to quit and, in both cases, exit the Menu.
LED
Meaning
Red
.
ON - Auto-Arm ENABLED (*)
OFF - Auto-Arm DISABLED
(*) - The LED will turn ON when you access the Main User Menu.
®
24
Multifunction Control Panel
Enable/Disable Teleservice
If this option is OFF the system will not accept incoming Teleservice calls, and online Installer intervention will not be possible.
LCD keypads To enable/disable Teleservice from an LCD keypad, proceed as follows:
From the Main User Menu, using key C or D,
scroll the menu for the En./Dis. Teleser. option,
then press ENTER.
USER MENU
ßà
En/Dis. Teleser.
2. Press ON to enable or OFF to disable Teleservice.
En/Dis. Teleser.
ON
<OFF>
1.
3. Press ENTER to confirm and go back to step 1.
When the Teleservice is ON, an asterisk ‘*’ will be
shown over the t icon , as illustrated in the example
(to the right).
08/11/2002 14:55
DDDDDDDD
*
LED Keypads To enable/disable Teleservice from an LED keypad, proceed as follows:
1. Access the Main User Menu.
Code PIN + ENTER
The P indicator will blink.
2. Press 2 to toggle the status — Enable Ö Disable (refer to Table 12).
3. Press ENTER to confirm, or ESC to quit and, in both cases, exit the Menu.
The P indicator on LED keypads will turn ON to signal “Teleservice enabled”.
*/'01
LED
Meaning
Red
.
ON - Teleservice ENABLED (*)
OFF - Teleservice DISABLED
+
ON - Teleservice ENABLED (*)
OFF - Teleservice DISABLED
(*) - The LED will turn ON when you access the Main User Menu.
®
25
Operating from a Keypad
Enable/Disable Buzzer
This option will allow you to enable the keypad buzzer to signal the following events:
Entry Time
Exit time
Violation of ‘Chime’ zones
LCD Keypads To enable/disable an LCD keypad buzzer, proceed as follows:
1. From the User Menu, using key C or D, scroll for the
‘En./Dis. Keyp. Buzz. option then press ENTER.
USER MENU
ßà
En/DisKeyp.Buzz.
2. Press ON to enable or OFF to disable the Buzzer.
En/DisKeyp.Buzz.
ON
<OFF>
3. Press ENTER to confirm and go back to step 1.
LED Keypads To enable/disable an LED keypad buzzer, proceed as follows:
1. Access the User Menu.
Code PIN + ENTER
The P indicator will blink.
2. Press 5 to toggle the status — Enable Ö Disable (refer to Table 13).
3. Press ENTER to confirm, or ESC to quit and, in both cases, exit the Menu.
LED
Meaning
Red
.
OFF - Buzzer ENABLED
ON - Buzzer DISABLED (*)
(*) - The LED will turn ON when you acess the User Menu.
®
26
Multifunction Control Panel
Enable/Disable Answer Function
(Not available for KYO16D series).
LCD Keypad To enable/disable the Answer function at an LCD keypad, proceed as follows:
1. From the Main User Menu, using key C or D, USER MENU
ßà
scroll the menu for the En/Dis. Ans.Func option, En/Dis. Ans.Func
then press ENTER.
2. Press ON to enable or OFF to disable the An- En/Dis. Ans.Func
ON
<OFF>
swer Function.
3. Press ENTER to confirm and go back to step 1.
When the Answer function is ON, an asterisk ‘*’ will
be shown over the r icon, as illustrated in the example (to the right).
08/11/2002 14:55
DDDDDDDD
*
LED Keypads To enable/disable Answer Function from an LED keypad, proceed as follows:
1. Access the Main User Menu.
Code PIN + ENTER
The P indicator will blink.
2. Press 9 to toggle the status — Enable Ö Disable (refer to Table 14).
3. Press ENTER to confirm, or ESC to quit and, in both cases, exit the Menu.
*'"21
LED
Meaning
Green/Red
.
ON - Answer Function ENABLED (*)
OFF - Answer Function DISABLED
(*) - The LED will turn ON when you access the Main User Menu.
®
Operating from a Keypad
27
Output Control
LCD Keypad To enable/disable the OC Outputs at an LCD keypad, proceed as follows:
1. From the Main User Menu, using key C or D, USER MENU
ßà
scroll the menu for the Output Control option, then Output Control
press ENTER.
2. Using keys D through C, scroll the OC Output list Output 1
ON
<OFF>
for the required OC Output, then press ON to enable or OFF to disable it.
Activation of the OC Outputs will be immediate.
3. Press ESC to go back to step 1.
LED Keypad This option is not available on LED keypads.
®
28
Multifunction Control Panel
Programming Telephone Numbers
(Not available for KYO16D series). This option will allow you to change/delete
the telephone numbers (usually programmed by the installer).
LCD Keypads To change/delete a phone number from an LCD keypad, proceed as follows:
1. From the Main User Menu, using key C or D, USER MENU
ßà
scroll the menu for the Program Tel. Num. op- Program Tel.Num.
tion, then press ENTER.
2. Using key C or D, scroll the ‘Phonebook’ for the Program Tel.Num.
required phone number (only the ‘Voice’ related Office 1
phone numbers assigned to the User code concerned will be shown), then press ENTER to change, or ESC to delete the
selected phone number and step back to the Main User Menu.
Changing Telephone 3. If you press ENTER at step 2., the display will Office 1
show the the selected telephone number field.
Numbers
0780____________
To enter a new telephone number, use keys:
A ... B to move the cursor
,’ (for 2 second pauses), ‘*’ or ‘#’.
ON ... OFF to enter ‘,
4. Press ENTER to confirm the new telephone number, or the ESC key to
quit and, in both cases, go back to step 2.
NOTE: This option is available only when:
a) The User code, keypad and telephone numbers are assigned to the
partition concerned.
b) The telephone numbers have the ‘Voice’ attribute.
LED Keypads This option is not available on LED keypads.
®
Operating from a Keypad
29
Programming Codes
The Program Codes option will allow Main Users to program and change the
PINs of all the User codes (enabled by the installer in accordance with the installation requirements), except those of other Main Users. For security reasons, DO
NOT use the Factory Default Codes (0001 through 0024 at default), or obvious
codes, such as 1111 or 1234
1234.
Main Users can change their own PINs. However, Main Users cannot
change the PINs of other Main Users, and cannot program User code PINs
enabled on partitions they are not assigned to.
LCD Keypads To program codes from an LCD keypad, proceed as follows:
1.
From the Main User Menu, using key C or D, USER MENU
ßà
scroll the menu for the Program Codes option, Programm. Codes
then press ENTER.
2. Enter the PIN (4 to 6 digits). For security reasons, Code
02
**---the entered digits will be masked by asterisks (*).
áâ
3. Press ENTER to confirm and go to the successive Code.
Use key A or B, scroll the Codes (01 ... 24).
4. When all the code PINs have been programmed — press ESC to quit and,
in both cases, go back to step 1.
LED Keypads To program code PINs from an LED keypad, proceed as follows:
1
Access the Main User Menu.
Code PIN + ENTER
The P indicator will blink.
2. Press ON to access the code programming phase.
3. Enter the code ID number (1 through 24).
4. Press ENTER.
5. Enter the new PIN (4 to 6 digits).
6. Press ENTER to confirm the new PIN.
7. Press ESC to end the programming session or, if you wish to continue,
repeat the procedure from step 3.
®
30
Multifunction Control Panel
Programming the Date and Time
The Date/Time option will allow you to set the current date and time.
LCD Keypads To program the date and time from an LCD keypad, proceed as follows:
1. From the Main User Menu, use key C or D, scroll
the menu for the Progr. Date/Time option, then press
ENTER.
USER MENU
ßà
Progr. Date/Time
2. Enter the date and time (in accordance with the
programmed format).
Date/Time áâßà
10/09/2002 10:37
To enter the date and time, use keys:
C ... D to move the cursor
A ... B to insert the digits
3. Press ENTER to confirm and go back to step 1.
LED Keypads This option is not available on LED keypads.
®
31
Operating from a Keypad
Test Siren
This option will allow you to test the Siren.
The Test will activate all the audible/visual signalling devices (connected to
the Alarm Outputs) for 2 seconds.
LCD keypads To test the alarm signalling devices from an LCD keypad, proceed as follows:
1. From the Main User Menu, using key C or D, USER MENU
scroll the menu for the Test Siren option, then press Test Siren
ENTER.
ßà
2. Press ENTER to start the Test: acceptance will Test Siren
be confirmed by a beep and a short message.
Operation done
The menu will go back automatically to step 1. when the Test ends.
LED Keypads To Test the alarm signalling devices from an LED keypad, proceed as follows:
1. Access the Main User Menu.
Code PIN + ENTER
The P indicator will blink.
2. Press 7 to activate the Test, or ESC to quit and, in both cases, exit the Menu.
NOTE - Some alarm output devices, such as Telephone Communicators, will
be active for more than 2 seconds, therefore, you must stop the Test procedure manually. The Telephone Communicator can be stopped via the ‘Clear
Call Queue’ option (refer to ‘Clear Call Queue’ in this section).
®
32
Multifunction Control Panel
Zones Status
This option will allow you to:
a) View the zone ztatus (normal or alarm);
b) Bypass/Unbypass zones.
LCD Keypads To program/view the zones from an LCD keypad, proceed as follows:
1. From the Main User Menu, using key C or D USER MENU
scroll the menu for the Zone Status option, then Zones Status
press ENTER.
2. To unbypass/bypass or view the zones, use keys:
ßà
Zone 1
BypassedNormal
C or D
to Select the zone.
ON
to unbypass the selected zone
OFF
to bypass the selected zone
3. Press ENTER to confirm the operation and go back to step 1.
If your installer has set up your system to signal zone alarms, the zones will
be shown at 2 seconds intervals.
LED Keypads To manage, bypass/unbypass zones from an LED keypad, proceed as follows:
1. Enter a Main User Code then press the ESC key.
Code PIN + ESC
After entering the Zone Exclusion Menu and depending on the number of
zones excluded, one or more of the red indicator lights (numbered 1 to 8)
may be illuminated.
In LED keypads, the zone status is only displayed for the first 8 zones.
If the red indicator light is illuminated, this indicates that the zone has been
excluded..
Unbypassed/ 2. Enter the number of the zone you wish to exclude/include (the value should
always be entered in a 2-digit format, for example 01, 02, 12, etc.), making
Bypassed Zones
sure you observe the limits dictated by the control unit used..
3. Press ENTER to confirm and exit the Bypass Zones menu.
®
33
Operating from a Keypad
Enable/Disable This enabled/disabled status of this option effects ONLY the keypad concerned.
If this option is enabled, the status of the zones will not be signalled on the
Hide Zone Status
keys 1 ... 8. To enable/disable this option, proceed as follows.
1. Access the Main User Menu:
Codice PIN + ENTER
2. Press 6 to toggle the status — Enable Ö Disable (refer to Table 15).
3. Press ENTER to confirm, or ESC to quit and, in both cases, exit the Menu.
*'3
LED
Meaning
Red
.
OFF - Viewing ENABLED
ON - Viewing DISABLED (*)
(*) - The . key will turn ON when you access the 'Main User Menu'.
®
34
Multifunction Control Panel
View Logger
This option will allow you to view all the alarms recorded in the system memory. The
Logger is circular and holds 256 events (128 on Kyo4/8/8G Models). Once the
Logger is full, the oldest events will be deleted to make space for new events.
The following information will be provided for each event:
z
z
z
z
Ev. - Event number
Date/Time - Date and Time of the event
Event Type - Event description
Identifier - Event details
LCD Keypads To access the Event Logger from an LCD keypad, proceed as follows:
1.
From the Main User Menu, using key C or D, USER MENU
scroll the menu for the View Logger option, then View Logger
press ENTER.
ßà
2. The top line of the Logger shows the number of the Event 115 áâßà
last event, and the bottom line the event type.
Part. disarm.
To view the Events list, use keys:
A or B to scroll the list for the required event;
C or D to view the date and time, and the event
identifier.
3. Press ESC to go back to step 1.
LED Keypads This option is not available on LED keypads.
Event
035 áâßà
Recogniz.code
Event
035 áâßà
User Code 1
Event
035 áâßà
10/09/2002 17:45
®
35
Operating from a Keypad
Clear Call Queue
If an alarm occurs,the Control panel will trigger a series of calls to contact Telephone Numbers (programmed by the installer). This option will allow you to interrupt the ongoing call, and clear the call queue in the event of a false alarm.
LCD Keypads To clear the Call Queue from an LCD keypad, proceed as follows:
1. From the Main User Menu, using key C or D,
scroll the menu for the Clear Call Queue option.
USER MENU
ßà
Clear Call Queue
2. Press ENTER to stop the calls, and step back.
Acceptance of the command will be confirmed by Clear Call Queue
a beep and a short message.
Operation done
LED Keypads To llear the call queue from an LED keypad, proceed as follows:
1. Access the Main User Menu.
Code PIN + ENTER
The P indicator will blink.
2. Press ON to interrupt the outgoing calls.
3. Press ESC to quit and exit the menu.
NOTE: The Control panel will not quit the CLEAR CALL QUEUE phase
until you press ESC.
®
36
Multifunction Control Panel
USING DIGITAL KEYS AND CARDS
Introduction
The digital keys/cards will allow you to perform all the basic operations from
enabled Readers.
Readers
Readers have 3 System status LEDs (Red, Green and Amber).
This Control panel manages:
PROXI-READER Proximity Reader – This Reader detects the presence of
SAT Digital Keys or PROXI-CARD and MINI-PROXY Cards. This wallmounted reader has a sensitive area, in front of which the SAT device or Card
should be passed. The sensitive area is identified by a ring, located underneath the lights.
ECLIPSE2
SAT
M INI-PROXY
®
PROXY CARD
PROXY-R EAD ER
Figure 7 - Digital Keys, Cards and Readers
®
Using Digital Keys and Cards
37
ECLIPSE2 Reader – Similar to the previous device, but offers recessed installation.
This Control panel supports up to 16 Readers.
The installer will program the following parameters for each Reader:
The partitions the Reader can control (Reader partitions)
A Mode Arming (AMBER)
B Mode Arming (GREEN)
Digital Keys/Cards
This Main Unit can manage three different types of Digital Keys:
SAT Activation Device
PROXI-Card
MINI-PROXY-Card
When a SAT or Card is passed in front of the sensitive area of a Reader, the
procedures described in this section can be carried out.
Each key/card has a random code — selected from over 4 billion combinations.
Your installer will assign an ID Number and label (Description) to the first 16
keys/cards. The number will be recorded in the logger each time the key/card
operates on the system.
Each key/card can be programmed to operate on specific partitions.
G The term “Digital Key” is used throughout this manual, to denote the SAT
Activation Device as well as the PROXI Cards, while the term “Reader” is used
for the ECLIPSE2 Reader as well as the PROXI-READER Proximity Reader,
unless otherwise specified.
®
38
Multifunction Control Panel
The Reader LEDs
The ECLIPSE2 and PROXI-READER simplify system control by replacing User
PINs with high Security Digital keys or cards. The Readers have 3 LEDs, this
section describes how the LEDs work.
No Key/Card at Reader
When there is no key/card at the Reader, the LEDs will signal as per Table 16.
The partitions which are not controlled by the Reader will not affect the LEDs.
If the configuration of the Armed partitions does not match A or B Mode (for
example, when one of the Reader partitions has been Armed at a keypad), neither
the Amber nor Green LED will turn ON.
Your installer can program the Reader LEDs to signal the system status at
all times, or alternatively, only in response to a valid key/card (LEDs OFF
when no Key/Card is present).
Key/Card at Reader
When a key/card is present at the Reader, the LEDs will signal as follows.
a) Fast Blinking on 1 LED - Before arming the partitions, the Control panel
will check the status of the unbypassed (ON) and Instant zones. If a zone is
‘Violated’ (e.g. door or window open), the LED, associated with the selected
Arming Mode, will blink quickly. If this occurs, DO NOT ARM the System,
as arming will provoke a false alarm.
NOTE: The Control panel takes about 2 seconds to check all the zones.
False alarms can be stopped by simply disarming the system (refer to ‘Digital
Key/Card Readers Operations’ in this section). If a false alarm occurs, inform
your Central Station and prevent the operator from taking unnecessary action.
*& 4',
ON
Fast Blinking
RED
OFF
Slow Blinking
ON
YELLOW
OFF
ON
GREEN
OFF
!
At least one of the Reader partitions is armed
If the partitions are armed, at least one alarm has been detected on
one of the Reader partitions
None of the Reader partitions are armed
If the Partitions are disarmed, at least one alarm has been detected on
one of the Reader partitions
The Reader partitions are armed in Type A mode
The armed/disarmed status of the Reader partitions does not match
Type A mode
The Reader partitions are armed in Type B mode
The armed/disarmed status of the Reader partitions does not match
Type B mode
®
Using Digital Keys and Cards
39
b) Fast Blinking on all 3 LEDs - This will occur when a false key/card is
present at the Reader.
d) Red LED ON - The system will arm when you remove the key/card from
the Reader.
e) Amber LED ON - The system will arm in A Mode when you remove the
key/card from the Reader.
f) Green LED ON - The system will arm in B Mode when you remove the
key/card from the Reader.
NOTE: Your installer may have disabled the Reader LEDs, therefore,
they will not turn ON even when a valid key/card is used.
®
40
Multifunction Control Panel
The PROXI Buzzer
The PROXI buzzer (if enabled) will signal:
z The Exit Time (double beep at 2 second intervals);
z The Entry Time (continuous fast beeps)
z Violation of ‘Chime’ Zones (a few fast beeps)
Multiple Systems
The digital keys/cards can be programmed (by the installer) to operate on more
than one system, and to manage different partitions on each system.
Digital Key/Card operations
The digital keys/cards can:
z
z
z
z
Arm — Global Mode
Disarm
Arm — A Mode
Arm — B Mode
Fig. 8 - Arm/Disarm operations at an ECLIPSE2 Reader
®
Using Digital Keys and Cards
41
Disarm (Turning OFF your system)
This operation will Disarm all the Partitions controlled by the Digital Key/Card and
Reader in use.
To Disarm the System (all LEDs OFF), proceed as follows:
1. Hold the proximity Key/Card near the sensitive field of the Reader — until all
the LEDs turn OFF (see Figure 8a).
2. Remove the Key/Card to Disarm the System.
Arm — Global Mode (Turning ON your system)
This operation will Arm all the Partitions controlled by the Digital Key/Card and
Reader in use.
To Arm the System in Global Mode (Red LED ON), proceed as follows:
1. Hold the proximity Key/Card near the sensitive field of the Reader — until the
Red LED turns ON (see Figure 8b).
2. Remove the Key/Card to Arm the System in Global Mode.
Arm — A Mode
This operation will Arm or Disarm the Partitions in accordance with the A Mode
Arming configuration (programmed by the Installer).
To Arm the System in A Mode (Amber LED ON), proceed as follows:
1. Hold the Proximity Key/Card near the sensitive field of the Reader. The
LEDs will light in turn (at 2 second intervals).
2. Remove the Key/Card when the Amber LED turns ON. At this point, the Red
LED will also turn ON and the System will Arm in A Mode.
Arm — B Mode
This operation will Arm or Disarm the Partitions in accordance with the B
Mode Arming configuration (programmed by the Installer).
To Arm the System in B Mode (Green LED ON), proceed as follows:
1. Hold the Proxomity Key/Card near the sensitive field of the Reader. The
LEDs will light in turn (at 2 second intervals).
2. Remove the Key/Card when the Green LED turns ON. At this point, the
Red LED will also turn ON and the System will Arm in B Mode.
®
42
Multifunction Control Panel
Silencing Alarm Signalling Devices
To silence an Alarm which is sounding, simply disarmer the system.
WARNING - Silencing an Alarm will not stop any active or queued telephone
calls. To stop telephone calls as well, the system needs to be disarmed using a Key
(SAT or PROXI-CARD) which has been specifically enabled (by the Installer,
during programming) for telephone call queue cancellation.
On disarming, Key (SAT or PROXI-CARD) will normally be able to reset all
Alarms except those resulting from System Tampering (e.g. opening of the Main
Unit).
®
Operating the System from a Telephone
43
®
44
Multifunction Control Panel
OPERATING THE SYSTEM FROM A TELEPHONE
This functions is not management for KYO16D Control Panel.
If your system is equipped with a NC2/VOX Voice board (accessory item), and
your Installer has programmed Telephone Access Codes, you will be able to
control your system via any touch-phone.
NOTE - The KYO16D Control Panel DOES NOT ACCEPT the Voice board.
The Telephone Access Codes are not the same as 4-6 digit System Access
Codes (Main User Code, User Code, etc.). These codes control the system
via telephone only. Each Telephone Access Code can be programmed to
control specific functions and Partitions.
You can access the system over the phone:
a)
after receiving a call from the Control panel;
b)
after calling the Control panel and activating the Answering function.
Remote Telephone Access via ‘Dialler’ mode
If your Installer has set up your system to manage the Dialler facility, your system will be able to call programmed telephone numbers and send voice messages to alert contact persons of Alarm events (this control panel manages up to 8
Telephone Numbers).
If you receive a Dialler call, you will be able to access your system during the
call, by entering your Access Code on the telephone pad.
You can enter your Telephone Access Code while the message is playing, or
during the pauses between message announcements.
The following paragraphs provide step-by-step instructions for each function.
Remote Telephone Access via ‘Answer’ mode
The ‘Answering function’ can be Enabled by means of a Main User Code
(refer to Enable/Disable Answer Function).
G You cannot access your system via remote telephone when the ‘Answering
function’ is Disabled. For security reasons, DO NOT Arm or Disarm your
system from a telephone with a redial button.
If you call your system when the ‘Answering function’ is Enabled, two situations are possible:
Teleservice Enabled
Teleservice Disabled
®
Operating the System from a Telephone
45
Teleservice Enabled
If the ‘Answer’ and ‘Teleservice’ functions are both enabled (refer to ‘Enable/
Disable Teleservice’ in the ‘OPERATING FROM KEYPADS’ section) your
system will answer your call after the programmed number of rings. It will emit
a high-pitch audible signal (beep), wait 35 seconds, then emit 5 beeps to
indicate that it is ready to accept your Telephone Access Code.
Teleservice Disabled
If the ‘Teleservice’ function is disabled, your system will answer your call after
the programmed number of rings. It will emit 5 beeps to indicate that it is
ready to accept your Telephone Access Code.
Entering Your Telephone Access Code (DTMF)
Via Dialler If you are accessing your system via Dialler Function Mode, you can enter
FunctionMode your Telephone Access Code while the Answering message is playing, or during
the pauses between message announcements.
Via Answer If you are accessing your Answer Function Mode, you must enter your TeleFunction Mode phone Access Code after the 5 beeps.
In both cases:
You must press , after entering your Telephone Access Code.
If your system recognizes your code, it will emit an audible feedback signal
(short high-pitched beep), and will accept commands.
If your system DOES NOT recognize your code, it will emit an error signal
(buzz).
The system will end the call automatically, if no valid code is entered within 30
seconds.
To cancel wrong digits, and restart press .
®
46
Multifunction Control Panel
Entering Commands
Once your Telephone Access Code has been recognized, you can enter the
Command Codes. If you enter a wrong Command Code the system will emit an
audible feedback signal (buzz).
NOTE - The system will end the call automatically, if no Key is pressed
within 1 minute.
Cancel Command
Press to cancel the Command, and step back to the Enter data phase.
Press to cancel entered digits: the system will emit an audible feedback
signal (2 beeps) to confirm that the data has been cancelled.
Stop Alarm / On Hook
If you are accessing your system via ‘Answer’ mode, press to end the call.
If you are accessing your system via ‘Dialler’ mode (after receiving an
Alarm message), press to stop the ongoing Alarm, and Alarm calls.
Remote Talk / Listen-in
Press to start the Remote Listen-in session. Press again to start the
Remote Talk session. Press again to switch from Talk to Listen mode
as required. This feature will allow you to listen to what is happening on the
protected premises (via the microphone on the NC2VOX board), and talk to
whoever is present.
Remote 2Way Talk / Listen-in
Press to start the Remote Listen-in session, then press to start the
Remote 2way Talk / Listen-in session. This feature will allow you to listen
to what is happening on the protected premises (via the microphone on the
NC2VOX board), and talk to whoever is present, without switching from
Talk to Listen mode. This feature is useful in Emergency situations, especially where elderly people are concerned, as it can be activated by Panic
Pendants.
Turning Appliances ON/OFF (Reserved Outputs)
If your installer has set up your system to manage electrical appliances, this
features will allow you to turn them ON and OFF over the phone.
Press to access Appliances Management session.
Use keys through to turn the corresponding Appliance (Output) ON or OFF.
The status will be indicated by a feedback signal:
1 beep Ö Output OFF
3 beeps Ö Output ON
®
Operating the System from a Telephone
47
Press to confirm the selected status and step back.
Press to exit.
Arm / Disarm
Press to access Arm/Disarm management.
This following keys will allow you to Arm / Disarm the system as required.
Ö The system will Disarm
Ö The system will Arm in Global mode
Ö The system will Arm A Mode
Ö The system will Arm B Mode
After pressing the required key (as above), the system will wait for you to end
the communication.
Press to end the call.
For further information, refer to the next ‘System Status Enquiry’ paragraph.
System Status Enquiry
To make a system status enquiry, press key (to access Arm/Disarm management) then press : the Control panel will signal the status as follows:
1 buzz Ö Disarmed
1 beep Ö Armed in Global Mode
2 beeps Ö Armed in A Mode
3 beeps Ö Armed in B Mode
3 buzzes Ö Arming Mode “Not Recognised” — this occurs when the Control panel has been Armed by a User Code with a different configuration to
the one making the enquiry.
System status enquiries and response signals DO NOT effect the System status.
®
48
Multifunction Control Panel
Enable / Disable Telephone Access Code
This command will allow you to Disable the Telephone Access Code after
using it to access the system.
This is a toggle command, therefore, you can Disable then Re-Enable the Telephone Access Code during the same call:
Press to Disable the Telephone Access Code, the code will be Disabled when the call ends.
Press again to Enable the Telephone Access Code, the code can still
be used for future actions via telephone.
The status will be indicated by a feedback signal:
1 beep Ö Access Code Enabled
3 beeps ÖAccess Code Disabled
Press to confirm the selected status.
G This security feature will allow you to protect your system against
unauthorized access via Telephone. If you disable a Telephone Access Code
via telephone, it cannot be used again until you Re-Enable it via the User
Menu.
To Re-Enable a Telephone Access Code (Disabled via telephone), use the
‘Program Codes’ option from the User Menu (access allowed to Main User
Codes only).
®
The Wireless Key
49
THE WIRELESS KEY
Introduction
If your system is equipped with a Wireless Receiver, it will be possible to control all
the main functions from remote locations by means of Wireless Keys (see Figure
9). Each Wireless Key is assigned to one of two Codes (Code 0023 or 0024), and
will be able to operate the system in accordance with the attributes and access
level of the selected Code.
This section describes the functions that can be controlled by Wireless Keys.
Using the Wireless key
Global Mode
Press the
button for approximately two seconds, to Arm all the Partitions
of the Code (0023 or 0024) of Wireless Key in use.
This operation will have the same effect as entering <Code> + ON at a Keypad.
Disarm Global
Press the
button for approximately two seconds, to Disarm all the Parti-
tions of the Code (0023 or 0024) of Wireless Key in use.
This operation will have the same effect as entering <Code> + OFF at a
Keypad.
Fig. 9 - The ARC20 Wireless Key
®
50
Multifunction Control Panel
A Mode Arming
This operation will Arm or Disarm the Partitions in accordance with the A Mode
Arming configuration (programmed by your Installer).
Press the
button for approximately 2 seconds, to Arm the system in A Mode
— in accordance with the Code (0023 or 0024) of the Wireless Key in use.
This operation will have the same effect as entering <Code> + A at a Keypad.
B Mode Arming or Superkey 2
This operation will Arm or Disarm the Partitions in accordance with the B Mode
Arming configuration (programmed by your Installer).
Press the
button for approximately 2 seconds, to Arm the system in B Mode
— in accordance with the Code (0023 or 0024) of the Wireless Key in use.
This operation will have the same effect as entering <Code> + B at a Keypad.
If your Installer has set up number key 2 as a Superkey 2 (refer to the ‘Superkeys’ in the ‘Operating from a Keypad’ section), you will not be able to Arm your
system in B Mode by means of Wireless Keys.
G The operations performed by Wireless Key will not be confirmed by any
type of feed back signal (audible or visual), unless done in the vicinity of a
Reader, Keypad or feed back signal device set up by the installer.
BENTEL SECURITY S.r.l. - Via Gabbiano, 22 - Z.I. Santa Scolastica - 64013 CORROPOLI - TE - ITALY
Tel.: +39 0861 839060 - Fax: +39 0861 839065
www.bentelsecurity.com - [email protected]
Recycling information
BENTEL SECURITY recommends that customers dispose of their used equipments (panels, detectors,
sirens, and other devices) in an environmentally sound manner. Potential methods include reuse of parts
or whole products and recycling of products, components, and/or materials.
For specific information see: http://www.bentelsecurity.com/index.php?o=environmental
Waste Electrical and Electronic Equipment (WEEE) Directive
In the European Union, this label indicates that this product should NOT be disposed of with household waste.
It should be deposited at an appropriate facility to enable recovery and recycling.
For specific information see: http://www.bentelsecurity.com/index.php?o=environmental
ISTUSBLEUNKYO 5.0 061211 P70