1
English
CBK
wheel user manual
WHEEL INSTALLATION
ASSEMBLING AND INSTALLING THE QUICK RELEASE
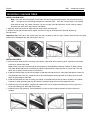
1. Unthread the adjusting nut from the end of the quick release skewer and remove the tension spring closest
to the adjusting nut.
2. Slide the quick release skewer shaft through the hub axle from the non-drive side. Re-install the tension
spring with the narrow end toward the hub axle and thread the adjusting nut a few turns onto the skewer.
Front Wheel
3.
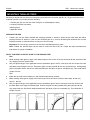
Check that the quick release skewer lever is in the open position. Check that the brake quick release
mechanism is open.
4. Install the front wheel between the dropouts with the quick release lever positioned on the non-drive side of
the bike. Check that the wheel axle is fully seated in the fork dropouts and clear of any safety tabs.
Note: If your front tire has directional arrows, take note of the direction of rotation and install so that the
quick release lever is on the non-drive side of the bicycle, and the tire rotates in the proper direction.
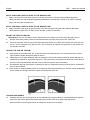
5. Close the quick release half way, with the quick release lever parallel to the hub axle.
6. Tighten the quick release adjusting nut so that it contacts the dropout. When closing the lever, tension
should be felt when the quick release lever is in the horizontal position (90 degrees to the fork), but you
should still be able to reach the fully closed position (90 degrees to the hub axle). The quick release lever
should leave a clear impression on your hand. If the quick release lever does not leave a clear imprint on
your hand, tension is insufficient. To increase tension, open the quick release lever and tighten the quick
release adjusting nut in small increments until proper tension is achieved. When closed, the quick release
lever should be positioned just behind the non-drive side fork leg. Reposition the lever as necessary to
achieve this orientation.