1
RESMED
CONTENTS
INTRODUCTION
,
,
AUTOSET T COMPONENTS
3
&
5
WARNINGS
CAUTIONS
5
INDICATIONS
CONTRAINDICATIONS
5
DEFINITION OF TERMS
6
9
ASSEMBLy
WITHOUT
A HUMIDIFIER
9
WITH A HUMIDIFIER
11
DAILY OPERATION
,
15
,
17
STOPPING TREATMENT DURING THE NIGHT
1·
LCD DISPLAY FEATURES
19
USE IN DIFFERENT COUNTRIES
23
CLEANING AND SERVICING
,,
DAILY
25
25
PERIODICALLY
26
REPLACING THE AIR FILTERSTRIP
27
SERVICING
27
,
,
US 4944310,
2068555, GB
.
29
31
SYSTEM SPECIFICATIONS
', !.'.:
25
WEEKLY
TROUBLESHOOTING
r
1
..
.-'
:.'
"'~."',
.
INTRODUCTION
This manual is intended for patients. Information for clinicians and health
professionals is contained in a separate clinical manual.
Normally during sleep, the muscles that control the tongue and soft palate hold
the upper airway open. Obstructive Sleep Apnea (OSA) occurs when the muscles
of the upper airway relax too much during sleep. The airway becomes narrower,
often causing snoring and sometimes breathing difficulties. If these muscles relax
too much, the airway can become completely blocked, preventing breathing. This
is Obstructive Sleep Apnea.
The most common treatment for OSA is nasal Continuous Positive Airway
Pressure, commonly known as CPAP. CPAP devices deliver a constant air pressure
into your upper airway via a nasal mask. This pressurized air acts as a type of
"splint" holding your airway open so that you can breathe freely all night long.
CPAP is designed to deliver the maximum pressure that you might need to control
all respiratory events.
However, each patient's pressure needs can change, both short- and long-term.
Pressure requirements can vary according to sleep position, sleep stage, changes
in weight, or even alcohol consumption that evening.
The AutoSet T is a computer-controlled
positive airway pressure device which
monitors your breathing and adjusts the pressure as required while you sleep.
When AutoSet T detects the onset of obstructive events such as snoring, narrowing
of the airway, or apnea, it will gradually increase the pressure to prevent these
events from occurring. When there are no signs of obstruction and breathing is
normal, the AutoSet Twill slowly decrease the pressure to ensure that you receive
the lowest pressure you need at that time.
So unlike CPAP that will only deliver one pressure all night long, AutoSet Twill
customize the pressure to match your needs at every single moment during the
night. AutoSet T prevents apneas from occurring and delivers lower overall
pressures than conventional CPAP.
AutoSet Talso records detailed respiratory data. Your physician can monitor the
success of your treatment by downloading this data to a computer and reviewing
the information gathered by the AutoSet T.
.-
., ~-.'
.
;,."
,
'1J/~~t~~<.j;i·:~.-¢~~ii~.·::;. L.":~::,:,.·~:
••:,;-,.~~~:..:~·,o
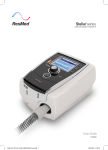
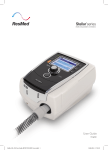
AUTOSET T COMPONENTS
Please take a moment to go over the diagram below and familiarize yourself with
the components
of the AutoSet T
AutoSet T
flow generator
Power cord
1
Long tube 6' (2m)
Pressure sensor line
-f------
Carry bag
.....
:
~~/~»i",:.;,~.,~·;~~~~~"~7P~':?";';;·"~::~2~,,~·;;.~~~'~t
';,'-"
,·.:·,-c·-- /
;'::'.
',,:'
,
.
II
.: -:..
, ;.';.._',>,.c0J'~J.;j~;ili;~~~~
You
WILL ALSO NEED
A ResMed mask system (supplied
separately).
AutoSet T is compatible with the following mask systems:
Mirage®
Full Face Mask
Mirage® Mask
WARNING
&
OPTIONAL
Only ResMed masks are compatible
mask systems.
(0
r
•
Modular Mask
for use with AutoSet T Do not use any other
ACCESSORIES
HumidAire
WARNING
Ultra Mirage® Mask
T.
ResMed Passover humidifier
heated humidifier
Extra long 9' (3m)
Medium tube
Short tube
air tubing
20.8" (for use
with humidifier)
7.5" (for use
Only ResMed humidifiers are compatible
other humidifier systems .
with HumidAire)
for use with AutoSet T Do not use any
WARNINGS
& CAUTIONS
INDICATIONS
The AutoSet T system is intended for the treatment of Obstructive Sleep Apnea
(OSA) in adult patients.
Data collection capabilities also assist in the management
pressure treatment.
of positive airway
CONTRAINDICATIONS
15k
Nasal CPAP therapy should be used with caution in subjects with the following
conditions:
other
•
Existing respiratory failure (risk of increased work of breathing, due either to
incomplete reversal of upper airway obstruction, or to breathing at high lung
volume, leading to worsening respiratory failure)
•
Pneumothorax
•
Emphysematous
pneumothorax)
•
Decompensated cardiac failure or hypotension, particularly if associated with
intravascular volume depletion (risk of further hypotension or reduction in
cardiac output)
i
•
Massive epistaxis or previous history of massive epistaxis (risk of recurrence)
f
•
Pneumoencephalus,
recent trauma, or surgery (for example, pituitary or
nasal) that may have produced cranio-nasopharyngeal
fistula (risk of entry of
air or other material into the cranial cavity)
•
Acute sinusitis, otitis media, or perforated
I
I
or pneumomediastinum
bullae, or past history of pneumothorax
(risk of
ear drum
The clinician should assess on a case-by-case basis the relative risks and benefits
of nasal CPAP therapy in subjects with these conditions.
any
.". -·i ..
As with fixed pressure nasal CPAP, AutoSet Tmay not work:
in the presence of severe mask leaks. Furthermore, in the case of leaks
exceeding 0.7 Lisee, some or all reported parameters may be inaccurate, and
either insufficient or excess pressure may be delivered in some cases.
•
with subjects who breathe predominantly or exclusively through the mouth,
due to loss of pressure via the mouth. Furthermore, some or all reported
parameters may be inaccurate, and either insufficient or excess pressure may
be delivered in some cases.
•
in subjects with lung disease, because AutoSet Twill treat only the upper
airway obstruction, and there may be residual hypoxemia or hypoventilation
due to the lung disease.
DEFINITION
OF TERMS
This manual contains special terms and icons which appear in the margins to draw
the reader's attention to specific and important information.
WARNING
Alerts the user to possible injury.
&
1"·
CAUTION
&
An informatit:e
WARNING
•
In the USA, Federal law restricts this device to sale by, or on the order of, a
physician.
•
THIS IS NOT A LIFE SUPPORT DEVICE. It may stop operating due to power
interruption or a device fault.
•
Explosion hazard - do not use in the vicinity of flammable anesthetics.
•
The air flow for breathing produced by this device can be as much as 11°F
(6°C) higher than the temperature of the room. Caution should be exercised if
the room temperature is warmer than 90°F (32°C).
•
The AutoSet T system must only be used with mask systems as supplied by
ResMed .
&
••
comment
associated
u-itb device featu res.
NOTE
e
r
Alerts the user to possible device problems.
.- .. -
.~
-.
'.
-
.'-: -: '--::~':~'~i::::--):~-:::~~.;::';:{
~-;~l~~f.~;f:?~·
':;~
.":;
''''''
.
•
, and
A nasal mask should not be worn unless the machine is turned on and
operating properly. The vent holes associated with the mask should never be
blocked.
Explanation: this device is intended to be used with special masks which
have vent holes to allow continuous flow of air out of the mask. When the
device is turned on and functioning property, new air from the device flushes
the exhaled air out through the mask vent holes. However, when the device
is not operating, enough fresh air will not be provided through the mask, and
the exhaled air may be rebreathed. Rebreathing of exhaled air for longer than
several minutes can, in some circumstances, lead to suffocation.
,uth,
J
may
-r
•
arion
At low pressures, the flow through the exhalation ports may be inadequate
clear all exhaled gas from the tubing. Some rebreathing may occur.
to
OXYGEN USE
WARNING
) draw
&
If oxygen is used with this device, the oxygen flow must be turned off when the
device is not operating.
Explanation: when the device is not in operation and the oxygen flow is left on,
oxygen delivered into the ventilator tubing may accumulate within the device
enclosure and create a fire risk.
Oxygen supports combustion. Oxygen should not be used while smoking or in
the presence of an open flame. Always turn on the Auto.Set Tflow generator before
turning on the oxygen flow. Always turn off the oxygen flow before turning off
the Autoset T flow generator.
t
f
I
!
)f, a
ower
!
I
NOTE
At a fixed flow rate of supplemental oxygen flow, the inhaled oxygen
concentration tcill vary depending on the pressure settings, patient breathing
pattern, mask selection, and leak rate.
CAUTION
Do not open the flow generator
e
case or attempt to adjust the unit.
(£)
AIR TUBE
WARNING
(£)
Use only the 6' (Zm) or 9' C3m) air tubing supplied by ResMed. Use of other air
tubing will result in the incorrect operation of the AutoSet T flow generator.
by
I
,t
ASSEMBLY
CAUTION
To ensure proper functioning, always assemble your AutoSet T as shown below.
&
WITHOUT
A HUMIDIFIER
1
Fit the air outlet connector onto the air outlet of the flow generator.
Air outlet
Air outlet connector
Pressure port
1
2
Fit the pressure port connector to the pressure port and turn it clockwise.
Pressure port connector
3
Fit the free end of the mask air tubing to the air outlet connector.
Air outlet connector
r
II
, ...;. ...
.:
. .'
..'
~,
..
", -:",2~j<i;iY~t4Maiit4&¥.1i~·,
•
Use only the same type of mask, tubing, and humidifier that have been set on
the AutoSet T menu. Using types of masks, tubing, and humidifiers not set on
the Auto Set T menu may alter the pressure you actually receive, reducing the
effectiveness of your treatment
•
The AutoSet T must only be used with mask systems recommended or
supplied by ResMed. A mask should not be used unless the machine is turned
on and operating properly. The mask vent holes should never be blocked.
•
At low pressures, the flow through the exhalation ports may be inadequate
clear all exhaled gases from the tubing. Some rebreathing may occur.
WARNlNG
&
4
-.:
to
Make sure the main power switch on the flow generator is off (0). Plug the power
cord into the power inlet at the back of the flow generator. Plug the other end of
the power cord into a power outlet.
'
,~~~---~
<,
Main
power
Power
inlet
.:
switch
'~~
)
5
Turn the main power switch at the back of the flow generator on (1). The AutoSet T
will then be ready for operation.
WARNING
CD
CAUTION
&
1
Make sure the power cord and plug are in good condition and the equipment
is not damaged.
•
The air flow for breathing produced by this device can be as much as 11°F
(6°C) higher than the temperature of the room. Caution should be exercised if
the room is warmer than 90°F C32°C).
•
Place the Auto.Set T on a table close to the head of your bed. Position it so that
it will not be bumped from the table during the night.
•
Make sure the area around the flow generator is kept dry and clean. Dust and
foreign particles drawn into the unit can affect treatment.
•
Keep the flow generator clear of articles such as clothing, bedding, or towels,
Any obstruction to the air inlet at the back of the flow generator could cause
overheating and damage the unit.
•
Do not place the flow generator near a source of hot or cold air.
, f
.
1
1
..
set
0••
•et on
"
-. ,. ... ,;...~."..
~.
WITH A HUMIDIFIER
g the
WARNING
urned
cd.
late to
oower
nd of
CD
NOTE
o
1
Only the ResMed HumidAire
and Passover humidifiers
are compatible
for use with
AutoSet T Do not use any other humidifier.
•
The medium and short air tubing, and the HumidAire and Passover
humidifiers are available as accessoriesfor the AutoSet T
•
Fill your HumiciAire or Passover as instructed in the user manual supplied
with your humidifier.
HumidAire users: open the lid of the HumidAire. Connect the short (7.5") air tube
to the left-hand humidifier connector port and the medium size (20.8") air tube to
the right-hand humidifier connector port as shown below. Then close the lid.
Passover users: connect the medium size (20.8") air tube to the left-hand
humidifier connector port as shown below.
in
ver
rch
1
oSet T
oment
HumidAire
o that
st and
,wels.
ause
2
Passover
Place AutoSet T next to or on top of the humidifier. Never place the flow generator
underneath the humidifier, as you risk spilling water into the flow generator.
3
Connect the medium size (20.8") air tube to the air outlet of the flow generator.
HumidAire
4
Passover
users: take the pressure sensor line and press the air outlet connector
onto the short air tube that is connected to the humidifier.
HumidAire
Passover users: take the pressure sensor line and press the air outlet connector onto
the outlet connector on the right-hand side of the humidifier.
.
1
HumidAire
5
Twist the pressure port connector firmly onto the pressure port of the flow
generator.
HumidAire
II
r
Passover
Passover
,,
6
If.
Connect the long air tube to the air outlet connector and your mask system to the
free end of the air tube .
...•.~
.....
,
HumidAire
..
'''
"
,,"
,.
"
.,
.
Passover ..
The final assembly should look like this:
~
i~
HumidAire
Passover
1
J
I
r
WARNING
•
Use only the same type of mask, tubing, and humidifier that have been set on
the AutoSet T menu. Using types of masks, tubing, and humidifiers not set on
the Autoset T menu may alter the pressure you actually receive, reducing the
effectiveness of your treatment.
•
The Autoset T must only be used with mask systems recommended or
supplied by ResMed. A mask should not be used unless the machine is
turned on and operating properly. The mask vent holes should never be
blocked.
•
At low pressures, the flow through the exhalation ports may be inadequate to
clear all exhaled gases from the tubing. Some rebreathing may occur .
0)
•
[I
8
Make sure the main power switch on the flow generator is off (0). Plug the power
cord into the power inlet at the back of the flow generator. Plug the other end of
the power cord into a power outlet.
Main
power
Power
switch
inlet
9
WARNING
&
'
Turn the main power switch at the back of the flow generator on (D. The Autoset T
will be ready for operation.
•
Make sure the power cord and plug are in good condition and the equipment
is not damaged.
•
The air flow for breathing produced by this device can be as much as 11°F
(6°C) higher than the temperature of the room. Caution should be exercised if
the room is warmer than 90°F (32°C).
•
Place the AutoSet T on a table close to the head of your bed. Position it so that
it will not be bumped from the table during the night.
•
Make sure the area around the flow generator is kept dry and clean. Dust and
foreign particles drawn into the unit can affect treatment.
•
Keep the flow generator clear of articles such as clothing, bedding, or towels.
Any obstruction to the air inlet at the back of the flow generator could cause
overheating and damage the unit.
..
CAUTION
&
•
r
•
Do not place the flow generator
near a source of hot or cold air .
:·1
o
t
i
11
, ..
--J-
-
•. ..~.
.
DAILY OPERATION
)wer
d of
1
Set up your AutoSet Tsystem as described in "Assembly" on page 9.
2
Fit your mask, as described in your mask system user instructions.
3
, I
»Set T
,... -."
!
Lie down and adjust the long air tube so it is free to move if you turn in your sleep.
Do not leave long lengths of tubing around the top of your bed as they could twist
around your head or neck during sleep.
You can place the air tubing over the top of your headboard to reduce drag on
the mask, or you may prefer to run the tubing across your shoulder.
-rnent
J
that
;t and
* this configuration
not possible with a
Mirage mask
wels.
ause
4
o
To start treatment, simply press the Start/Stop button
or, if your clinician has
enabled SmartStart, simply breathe into the mask and treatment will begin.
SMARTSTART
AutoSet Thas a function called Sman'Start which can be enabled by your clinician.
If SmartStart is enabled, AutoSet r will start automatically when you breathe into
the mask and will stop automatically when you take the mask off. This means you
do not have to press the Start/Stop button to begin or end treatment.
If you have set a ramp time, then the pressure will slowly increase over the time
you have set (see Ramp Time in the table on page 20).
,
".:.::,;i.'.,.:.:;t:i
NOTE
e
.'
Some masks or mask valve combinations may affect the operation of the
SmartStart feature. In the event that SmartStart does not trigger the operation
of the flow generator, start the flow generator by pressing the Start button.
USING THE MASK-FITTING
FEATURE
The mask-fitting feature helps you to fit your mask properly. It will deliver the
highest pressure that you are likely to receive during treatment that night Cbased on
the previous night's treatment) so that you can make sure your mask won't develop
an air leak once the pressure increases. Also, if you are using a Bubble Cushionf
(Modular or standard mask), the flow generator needs to be running to inflate the
cushion before it can be securely positioned against your face. The mask-fitting
feature is designed to help you with this task too.
1.
With your headgear on, position the mask on your face and press the maskfitting button. This is the ~ button on the front panel of your Autoset T.
The flow generator will begin to deliver air at pressure.
l'
2.
Adjust the cushion until you have a comfortable
3.
With the mask in place, lie down in your normal sleeping position. Adjust the
headgear straps so that the mask sits comfortably with the forehead pads
lightly touching your forehead and so that there are no excessive leaks.
',-
Do not overtighten
4.
fit.
the straps.
After three minutes, the pressure will drop to the set minimum pressure and
begin your treatment for the evening.
If you do not wish
mask-fitting button
and treatment will
Ramp Time in the
to wait the three minutes before treatment begins, press the
again. The pressure will drop to the set minimum pressure
begin. This will include any ramp time you have set (see
table on page 20).
To stop the mask-fitting feature at any time, simply press the Start/Stop button.
NOTE
e
II
~'-.'
:'.
,
~
'1j-~·j~;bi";;~/f.dir~~24~·
•
The Mask Type must have previously been selected using the AutoSet Tmenus.
See "LCDDisplay Features" on page 19.
•
Mirage Mask systems may befitted without the use of the mask-fitting feature.
However, this feature can help you to check whether the Mirage mask will leak
at operating pressure.
,
w·-:·
,
.. ,
',
.
'.
STOPPING TREATMENT DURING THE NIGHT
e
-rauon
'In,
If you wake during the night and need to stop the flow generator, press the Start/
Stop button, or simply remove your mask if SmartStart is enabled. To start the flow
generator again, reposition your mask and headgear and press the Start/Stop
button, or breathe into the mask if SmartStart is enabled. You may also restart the
AutoSet Tby using the mask-fitting feature, described above.
-the
ased on
develop
lshion®
-1ate the
:itting
You may find it easier to disconnect the main air tubing from your mask instead
of removing your mask and headgear.
When you return to bed, simply reconnect the main air tubing to the mask and
restart the flow generator.
masktT
Ultra Mirage® Mask
just the
.ds
'.
1
e and
Long air tubing
ress the
-ressure
. (see
, button.
tenus.
I
tture.
ill leak
_
:'. ,.,
.
......
II
-r .
LCD DISPLAY FEATURES
You can adjust certain features of the AutoSet T as described in the table on the
following page. Simply press the "Accept" button on the display panel to scroll
through the menu items available. Press the "Change" button to adjust a given
menu item, then press the "Accept" button to move to the next item in the menu.
You can hold down the "Change" button to change a value more quickly. If you
do not wish to change a value for a given menu item, simply press the "Accept"
button to skip to the next item in the menu. If left alone for 60 seconds, the LCD
will return to the standard display.
BACK-LIGHT
To assist you in adjusting your Autoset T flow generator, the LCD display is
equipped with a back-light. To turn on the LCD back-light, simply press the
"Change" button while the standard LCD display is shown. The light will remain
on for 60 seconds.
LCD Display
1
Start/Stop button
Mask-fitting button
"Change" button
'Accept" button
.
._ ._,.~•._-l
AutoSet
or
Manual
menu
Ramp Time:XX min
Change
Accept
(Note: this will only appear if your
clinician has set the
AutoSet T to Manual Mode.)
Hwnidifier:
No
Change
Accept
Depending upon the
treatment mode your
clinician has set for you,
either "AutoSet" or
"Manual" will appear asthe
default screen on the LCD.
From this screen you can
access the menu items.
Pressthe "Change" button to turn
on the LCD back-light.
If you set a 'ramp time'
Pressthe "Change" button to
increase Ramp Time in 5 min
increments up to the limit set by
your clinician.
AutoSet T will start at a low,
comfortable pressure and
slowly build up to the
prescribed treatment
pressure over the time you
select.
If you wish to go straight to
treatment pressure, set
Ramp Time to O.
Adjusts the system for
treatment with or without a
humidifier.
Pressthe "Accept" button to
access the first item in the menu.
Pressthe "Accept" button to select
the displayed value and move to
the next item in the menu.
Pressthe "Change" button to
choose from "HAire"(HumidAire),
"Passov"(passover), or "No"(no
humidifier).
Pressthe "Accept" button to select
the displayed value and move to
the next item in the menu.
Mask Type: Mirage
Change
Accept
Selects your mask type.
Pressthe "Change" button to
choose from "Mirage" (Mirage
mask), "Ultra" (Ultra Mirage
mask), "Standard" (modular
Bubble mask), or "Mir Full"
(Mirage Full Face mask).
Pressthe "Accept" button to select
the displayed value and move to
the next item in the menu.
r_
.
,"
,.'
.
~~;.~':;i.
'~:li~·~::~>:r·
....
;.:
•
TUbe length: 2m
Change
Accept
urn
Selects the length of air
tubing connecting your
mask to the AutoSet T.
Pressthe "Accept" button to select
the displayed value and move to
the next item in the menu.
lU.
Leak Alert: Off
Change
Accept
Turns the Leak Alert buzzer
on or off
Pressthe "Change" button to
choose from "On" or "Off".
Pressthe "Accept" button to select
the displayed value and move to
the next item in the menu.
by
Hour Meter:XX
Accept
lect
to
ire
Pressthe "Change" button to
change the value between "2m"
(6ft) or "3m" (9ft).
Displays the total time of
use.
Pressthe "Accept" button to
return to the starting screen.
1
-lect
to
-lect
-to
""
,
•
:~:.o. -.:::,
'
'
I
l
USE IN DIFFERENT COUNTRIES
!J
~
'!:t
'1
•
'.
~
YourAutoSet Thas a universal power supply, which means it will operate on
the different power supplies in other countries. The unit accepts 110 - 240 V,
50 - 60 Hz,
•
No special adjustment to the unit is necessary but you should use the correct
adapter for the type of power outlet in the country you are visiting, Contact
your equipment supplier for information on a suitable adapter.
•
Always remember to pack the detachable power cord with the rest of the
equipment when you travel.
1
•.
,-:'" r.: -~"":":",' .•' .. .' "
· ....
:.
-- -~:. ,,/
:-
.....•
',~~
.. .;...~
...•...•..•.
,-~'-.'
CLEANING AND SERVICING
WARNING
&
•
The mask system, air tubing, and pressure sensor line must not be re-used on
another person. This is to avoid the risk of cross-infection.
•
Do not wash the pressure sensor line. It is not washable.
•
You should regularly carry out the cleaning and maintenance
this section.
•
Note how the various pieces of your AutoSet T system are assembled
taking it apart for cleaning.
1.
After daily use, wipe the inside and outside of the mask frame and mask
cushion with a clean, damp cloth.
2.
Disconnect the air tubing at the flow generator and hang the tubing and mask
in a clean, dry place until next use.
3.
If using a humidifier, remove the air tubing between it and the flow generator
after each use. Be particularly careful to disconnect the tubing at the flow
generator first to make sure that no water spills down the tubing and into the
flow generator.
4.
Clean and maintain the humidifier in accordance
supplied with it.
1.
Remove the air tubing from the flow generator and from the mask.
2.
Wash the air tubing in lukewarm water using a mild detergent, such as pure
soap. Rinse thoroughly and allow it to dry out of direct sunlight.
3.
Wash the mask and headgear
the mask system.
•
Do not use bleach, chlorine-, alcohol-, or aromatic-based solutions (including
all scented oils), moisturizing, or antibacterial soaps to clean the cushion,
mask, air tubing, or flow generator. These solutions may cause hardening and
reduce the life of the product.
•
Do not hang the air tubing in direct sunlight as the tubing may harden over
time and eventually crack.
described
in
before
DAILY
1
with the operating
manual
WEEKLY
CAUTION
&
by following the user instructions supplied with
PERIODICALLY
CAUTION
6)
1.
All items of the mask and air tubing, including headgear and forehead pads,
are subject to normal wear and tear. Replace those parts of the mask system
that show excessive wear.
2.
Clean the exterior of the flow generator when necessary with a damp cloth,
using a mild detergent. Make sure the flow generator is unplugged before
cleaning, and make sure it is dry before plugging in again.
3.
Change the air filter about every six months. See "Replacing the air filter strip"
on page 27.
•
Do not immerse the unit or power cord in water as serious damage could
result.
•
Do not wash or dry the mask frame in a temperature above 167°F 05°C).
Exposure to higher temperatures may reduce the life of the product.
•
Do not attempt to open the flow generator unit. Repairs and internal servicing
should only be performed by an authorized service agent.
•
Do not drop or insert any objects into the air tubing or air outlet on the flow
generator.
"
I
,,.
*
;f
i•
1
1
r
•
~.
"
...•. _" ... ..;:_.,~\ ..
;"4",_:.
i~.>·:._.c~, ... ··-
.".. '
REPLACING THE AIR FILTER STRIP
Replace the air filter strip in the back of your flow generator every six months or
more often if your unit is in a dusty environment. To do so:
.5,
.n
1.
Pull open the air filter cover at the back of the AutoSet T
1,
rip"
Air filter cover
ing
2.
Remove and discard
the old filter strip.
3.
Insert a new filter strip, with the covered side facing in.
4.
Close the air filter cover.
w
CAUTION
1
Do not wash the filter strip as it will be damaged
and will not function effectively.
&
SERVICING
The flow generator is designed to give years of trouble free operation. It will not
require regular servicing provided that it is cleaned and maintained according to
instructions. If you feel that the unit is not performing properly, check the
troubleshooting
table on page 29.
If it is still not working properly,
authorized service agent.
CAUTION
&
consult your equipment
supplier
or take it to an
Inspection and repair should only be performed by an authorized service agent.
Under no circumstances should you attempt to service or repair the unit yourself.
TROUBLESHOOTING
,
If there is a problem with your AutoSet T, try the following suggestions. If the
problem cannot be solved, contact your equipment supplier or ResMed. Do not
attempt to open the flow generator.
I.
'l'~
.~
,
~
•
~~
(
j
, •
. ~
~'"
...
Insufficient air delivered
from AutoSet T.
AutoSet T does not start
when you breathe into
~~"
~
_) i' \:~."
"
~
'..
I
l
j: '.
,
I..... I "
"
..
..:
l'
.
.'
.•.
,"
j ~.
,
-
t
",
:
Air filter strip is dirty.
Replace air filter strip.
Air tubing is kinked or punctured.
Straighten or replace tubing.
Air tubing not connected properly.
Check air tubing.
Mask and headgear not positioned
correctly.
Adjust position of mask and
headgear.
Plugs missing from access port on
mask.
Replace plugs.
Power cord not connected
properly.
Connect power cord firmly at
both ends.
the mask.
AutoSet T not switched on.
Switch power switch at rear of
T to on (I).
AutoSet
Pressure rises
inappropriately.
No
display.
SmartStart not on.
Ask your clinician to enable
SmartStart.
Talking, coughing, voluntarily
breath-holding (e.g. while rolling
over in bed), or intentionally
breathing in an unusual manner.
Avoid talking with the mask
on, and breathe as normally as
possible.
Nasal cushion is buzzing against the
skin. Cushion seated incorrectly.
Adjust the headgear.
Air tubing is kinked or punctured.
Straighten or replace air
tubing.
Power not connected or switch at
back is not on.
Ensure the power cable is
connected and that the switch
at the back of the unit is in the
on position (I).
Display error message:
The air tubing is loose.
CheCK that the air tubing is
connected securely to your
mask and to the air outlet on
the front of the AutoSet T.
Motor failure.
Return your AutoSet T for
servicing.
Display error message:
System error plus
error number.
Component failure.
Return your AutoSet T for
servicing.
Display error message:
You have experienced excessively
high leak levels during the night.
Check that your air tubing is
connected properly and that
your mask does not leak
excessively (see "Using the
mask-fitting feature" on
page 16). If this message
appears again, contact your
clinician .
Check hoses! !
Key if done
Display error message:
motor not working.
High leak in last
session
-,
.,,:,
..
•
'::" ...
SYSTEM SPECIFICATIONS
AUTOSET
T
PERFORMANCE
Settling time range:
Operating
pressure
DIMENSIONS (H X
5.7"
X
1 to 30 minutes
range:
W
4 to 20 cmH20
X D)
10.2" x 12.4"1 (45 x 260 x 315 mm)
WEIGHT
7.71b 0.5 kg)
POWER SUPPLY
Input range 1l0-240V,
50-60 Hz, 120 VA
HOUSING CONSTRUCTION
1
Injection molded
Noryl® plastic
ENVIRONMENTAL CONDITIONS
Operating temperature:+41°F
(+5°C) to + 104°F( +400C)
Storage and transport temperature: -4 of (-20°C) to + 140°F (+6°c)
Humidity: 15 - 95% non-condensing
AIR FILTERSTRIP
Two layered, powder
bonded,
polyester open cell foam
AIR TUBING
Flexible plastic, 6' 6" Clx2m) length, 20.8" Ox 0.52m) length, 7.5" ClxO.19m) length
IEC
601-1
CLASSIFICATIONS
Class II
Type CF
NOTE
e
The manufacturer reserves the right to change these specifications without
notice.
PRESSURE FLOW CHARACTERISTICS FOR RESMED MASKS
20
18
16 -
,
14 -
6
12 -
E
.s
,
f
~
::::l
~
J:
-+-Mirage
--Modular
10 -
--.-
MirageFullFace
~Ultra
8 -
6 -
4 -
2
-
o
- --.
--
-------o
5
--10
1S
--~.
-------~-------------~-------------.
20
2S
30
3S
40
45
50
55
60
Flow (L/min)
GLOSSARY
Attention, consult accompanying documents/Attention,
consulter les documents d'accompagnement
Type CF applied part/Partie appliquee du type CF
Class II equipment/Materiel
r, ;
de la Classe II
Mirage