1
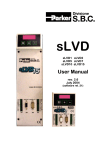
Rev.0
Date: 14th October 2004
Pagina1di 22
SUMMARY:
1. Using the keypad ................................................................................. 3
1.
Restoring default parameters values ........................................................................................5
2. Motion Wiz .......................................................................................... 6
2.
Configuration step (Step1.dat) .................................................................................................6
3. Speed control loop calibration ......................................................... 13
4. OPM 120 Digital lock and positioner .............................................. 17
5. Speed Feedback Change................................................................... 20
Rev.0
Date: 14th October 2004
Pagina2di 22
1. Using the keypad
Field for:
Field for:
Alarms (Er.xxx)
Status (Idle, Run, Def)
Parameters (word & bit)
Cam tables
Comand status (Cmd_sender)
Field for:
Field for:
PLC instruction
Comands
Value
Functions key
Cyclically moves cursor position
to next field
Increments/decrements value
at cursor
Enters the change into drive
Shift – additional/special
functions
Cursor moved by ‘T’
Rev.0
Date: 14th October 2004
Pagina3di 22
For use the key-pad you can see the user’s manual, here we can see only a picture:
With this information we are able to set the drive in the DEF mode
Rev.0
Date: 14th October 2004
Pagina4di 22
1. Restoring default parameters values
1) We assume that the drive is not in DEF mode.
2) Change these bits as follow (look the user’s manual):
- Pb40.9 = 0 or HW enable
- Pb39.13 = 0
- Pb42.12 = 1
- Pb42.14 = 1
- Pb42.15 = 1.
3) Switch off and on the drive… we can see the label DEF on the keypad (Pr23=15). If you
are not able to see all the parameters on the key-pad probably you are in lock mode….
Unlock the key-pad!
Rev.0
Date: 14th October 2004
Pagina5di 22
2. Motion Wiz
In this chapter we learn to use MotionWiz and take familiarity with the drive.
2. Configuration step (Step1.dat)
We build step by step the file named Step1.dat:
1) Open MotionWiz:
2) We can find and see some information (look the pictures):
Rev.0
Date: 14th October 2004
Pagina6di 22
3) Select the drive (HiDrive 2A) and the motor (SMB^60^30^1.4^220).
(You can see the different options between drive and motor type).
After that you can find your choose in the bottom bar:
Push ENTER button and go to the next step (step 4):
Rev.0
Date: 14th October 2004
Pagina7di 22
4) Look at the bar on the top… the file name is “No name*”; is meaning that is nececessary
(not obbligation!) save the file. The star displaies that the user has made some change, we
can understand better in the next steps.
5) Save this file (Step1) on the PC… push “Save” button:
Rev.0
Date: 14th October 2004
Pagina8di 22
Now we can see the result on the main page (the star is not present…):
6) Now we can download the file in the drive: push the button Config and autodetect the serial
configuration. After this operation select OK botton and DON’T PRESS OnLine ikon!
Look the top bar… we can see the star after the file name, it’s meaning that somthing is
changed… the serial configuration parameters are changed!!
Rev.0
Date: 14th October 2004
Pagina9di 22
7) In this step we have the file stored in the MotionWiz memory and have the correct
parameters for establishing the serial comunication between drive and PC.Select Send
button and follow the indication from MotionWiz. Switch off and on the drive, this
procedure is necessary because some parameters actualize their values only after this HW
procedure.
See the key-pad… the drive is not in DEF mode. Go on step 8.
8) Now we can press OnLine ikon without wary about the text inside of the MsgBox that
MotionWiz diplaies:
Rev.0
Date: 14th October 2004
Pagina10di 22
9) See the indications inside of this window:
Comunication
“PC parameters”
“Drive parameters”
At this step the MotionWiz and the drive are match together… if you change some
parameters on the drive the MotionWiz change according to this change and if you change
something on MotionWiz the parameters on the drive change too.Try to menage the
windows on the PC…. Step 10
10) Open the Alarms windows and make some changes like resolver error (disconnect the
Resolver cable) and see the result on the key-pad…Reset Alarms ikon…
Rev.0
Date: 14th October 2004
Pagina11di 22
11) In this step we have the drive in IDLE, the parameters and the Pico-plc in default mode. We
can control the motor… try some actions on the MotionWiz… try to change the Pico-plc
(change Pb90.3 with 90.0 for stop and run the motor…). Remember that is necessary put the
comunications not enable, change the Pico-plc instructions and go in OnLine
Try to make some windows changing and see the motor..
12) At this point we can try to put Step1.dat directly on the drive. For do this operation set the
DEF mode on the drive by the key-pad and restart MotionWiz.
Select Step1.dat from the PC
Set the serial configuration
Send the file on the drive.
Save, switch off and on the drive
….Try to control the motor … OK!!
Rev.0
Date: 14th October 2004
Pagina12di 22
3. Speed control loop calibration
In this chapter we want restore the file named AvantiIndietro.dat, send it to the drive, give some
advise about the Pico-plc confidence with MotionWiz Oscilloscope window.
Before going in OnLine see the Pico-plc, try to put new line comments and print it with some label
like SW revision author etc. (see the pictures):
Be carefull that if you see the Pico-plc after the OnLine action you don’t see the comments…. The
notes are not store in the drive but they are store only in the file!!.
So, if you have restore a file, go OnLine, save the file you have loose the comments!!!
Rev.0
Date: 14th October 2004
Pagina13di 22
See the Oscilloscope window:
This waveform is the result with these parameters values:
Modify these values, for example:
Rev.0
Date: 14th October 2004
Pagina14di 22
The waveform is:
Change the values for have oscillations:
Rev.0
Date: 14th October 2004
Pagina15di 22
Return with the correct values: Pr16=62 and Pr17=800.
If we want the better reaction from the system put Pr16=200:
Chapter End!!
Rev.0
Date: 14th October 2004
Pagina16di 22
4. OPM 120 Digital lock and positioner
In this chapter we see a simple example of position.
1) Put the drive in the DEF mode.
2) Send Step1.dat to the drive
3) Save the file on the drive
4) Switch off and on the drive
5) Go OnLine
Select OPM120:
Confirm the MSGBOX… At this point we have the drive in OPM120 (see the key-pad during this
operation!!):
Rev.0
Date: 14th October 2004
Pagina17di 22
Select speed control, Set point and see the Pr40.2 is automatically change…
Rev.0
Date: 14th October 2004
Pagina18di 22
Return to the main page and select digital lock & positioner,”the arrow”and trapezional profile
generator:
With the HW enable you can put Final Position = 10000 and see the motor… turn clockwise!!
If you put 0 the motor turn unclockwise…
You can see the profile with the Oscilloscope window…(Pr213:212=100000)
Rev.0
Date: 14th October 2004
Pagina19di 22
5. Speed Feedback Change
In this chapter we link another motor to the drive; this motor has a Less Wiring Encoder feedback.
The first operation is connect the motor to the drive at terminal X7 (link together PTC pins…).
Using the key-pad put the drive in DEF mode:
-
Pb39.13 = 0
Pb42.12 = 1
Pb42.14 = 1
Pb42.15 = 1.
Switch off and on the drive
Open MotionWiz, select drive end motor:
Push ENTER button and save these settings in LessWirinig.dat file (Save ikon).
Push Config button and autodetect the serial link.
Send the file on the drive (Send ikon).
Save and switch off and on the drive
Rev.0
Date: 14th October 2004
Pagina20di 22
Go OnLine:
Open the Alarms Window:
You can see error 25 (in the key-pad the message is the same..) and it’s correct because we don’t
have select the feedback. For do this you must go in the speed control window and push feedback:
Rev.0
Date: 14th October 2004
Pagina21di 22
In this window select: LessWiring, -2048 (- is…) and 5V:
Save, switch off and on the drive…. You are in IDLE mode… procedure END!!
At this point you can control the motor how displyed to the top of this document: speed,
positioner,etc…
The same philosophy is implemented for select the feedback position…. See it in the MotionWiz..
Try to download only the Pico-plc from AvantiIndietro.dat…..
I have build this file AvInLessWiring.dat and we try to restore it on the drive in DEF mode…
Rev.0
Date: 14th October 2004
Pagina22di 22