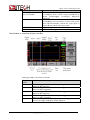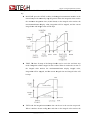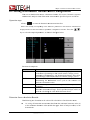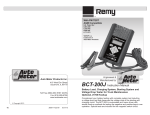
1
P wer meter Pow m r I IT912 21 Serries User U G e Guide Model: IT9121 Noticess © ItechElectroonics, Co., Ltd. 20014 No part of thiss manual may be reproduced in any form orr by any means (inncluding electronic storrage and retrieval or translation intoo a foreign language) without prior permissioon and written coonsent from Itech Electronics, Co., Ltd. as governed g by international copyright c laws. Manual Paart Number IT9121-4021445 Revision 1st Edition: Noovember 12, 20144 Itech Electronics, Co., Ltd. Trademarkks Pentium is U.S S. registered tradeemarks of Intel Corporation. Microsoft, Vissual Studio, Winddows and MS Windows are registered r tradem marks of Microsoft Corrporation in the United U States and/or other coountries and regioons. Warranty The materrials containeed in this document are a provided “aas is”, and is subject to chhange, without prior notice, in future editions. Furtther, to the extent perrmitted by maximum applicable laws, l ITECH disclaims d all warrants, either e express or implied, with regardd to this manu ual and any informationn contained d herein, including buut not limited to o the implied warranties of merchanttability and fitness for a particular purp pose. ITECH shall not be held liable for errors or for incidental or indirect damages d in connection with the furnisshing, use or application of this documeent or of any informationn contained herrein. Should ITECh andd the user enter into a separate written w agreeement with warranty terrms covering the t materials in this doccument that conflict c with these terms, the warranty terms in the separate agrreement shall prrevail. Technologgy Licenses The hardwarre and/or softw ware described herein are fuurnished under a license and may be used or copied only in accordance with the term ms of such license.. Restrictedd Rights Legend U.S. Government Restriccted Rights. Software andd technical data rights granted to the federral government include only those rights customarily pro ovided to end p this user customers. ITECH provides customary commercial license in software and technical dataa pursuant to FAR 12.2111 (Technical Data) and 12.212 (Computer Softwaare) and, for the Departm ment of Defen nse, DFARS 252.227-70115 (Technicaal Data – Commerciall Items) an nd DFARS 227.7202-3 (Rights in Commercial Computer Software orr Computer Software Doocumentation). Copyright © Itech Electronics Co., Ltd.. Safety Nootices A CAUTION sign deno otes a hazard. It calls aattention to an a operating procedure or practice that, if not correctly pperformed or adhered to, could ressult in damaage to the product or loss of imp portant data. Do not proceed beyond a CAUTION N sign until th he indicated conditionss are fully und derstood and met. A WARN NING sign denotes a hazard. It calls atten ntion to an operating procedure or practice that, if noot correctly performed or adhered too, could resultt in personal injury or death. Do not n proceed beyond a W WARNING sign until the indicated conditions are fully understoodd and met. NOTE A NOTE sign denotees important hint. It ccalls attention n to tips or supplemenntary informaation that is essential ffor users to reffer to. . ii IT9121 User'ss Manual Qualitty Certiification n and Assuran A nce We certify that T9121 T power meter meets all the publisshed specificaations. Warraanty ITE ECH warrantss that the prooduct will bee free from defects d in maaterial and wo orkmanship undder normal use u for a periiod of one (1) year from m the date off delivery (ex xcept those described in the Limitation of Warranty beelow). Forr warranty serrvice or repaair, the producct must be reeturned to a sservice centerr designated by ITECH. I The producct returned to ITECH for warranty w service must be sshipped PREP PAID. And ITECH willl pay for retuurn of the prod duct to custom mer. If the produuct is returnedd to ITECH for f warranty service s from overseas, all the freights, duties and other o taxes shhall be on thee account of customer. c Limitaation off Warraanty Thiis Warranty will w be rendereed invalid if the t product iss: Damaged resulting from m customer-w wired circuits or o customer-ssupplied parts or accessoriess; Modified or o repaired byy customer wiithout authoriization; Damaged resulting from m customer-w wired circuits or o use in an eenvironment not n designated by us; The producct model or seerial number is altered, delleted, removeed or made illlegible by customer; Damaged as a a result of accidents, a inccluding but noot limited to llightning, mo oisture, fire, improper use or negligennce. Safetyy Symbools D Direct currentt ON (powerr) A Alternating cuurrent OFF (poweer) Both directt B cuurrent Protective P teerminal and alteernating Power-on sttate earth (ground) Power-off state s E Earth (groundd) terminal Reference terminal t C Caution Positive terrminal Warning (refeer to this man W nual for sppecific Warning or Caution innformation) Negative teerminal A chassis term minal Copyright © Itech Electronics Co., Ltd.. - - i IT9121 User'ss Manual Safetyy Precau utions Thee following safety precaautions must be observedd during all phases of op peration of thiss instrumentt. Failure to comply with w these precautions or specificc warnings elseewhere in thhis manual will w constitu ute a default under safetty standards of design, mannufacture annd intended use u of the in nstrument. IT TECH assum mes no liability for the cusstomer’s failuure to complyy with these precautions.. Do not usee the instrument if it is daamaged. Befoore operationn, check the casing c to see whetheer it cracks orr is not appliied with suffficient plasticcs. Do not op perate the instrumentt in the presence of inflam mmable gasses, vapors orr dusts. The maxim mum operatinng voltage an nd current off the instrumeent are 600V V and 20A respectivelly. Exceedingg these limitss will lead too burnout of tthe instrumeent. Make sure to use the poower cord su upplied by IT TECH. m on thee instrument before b conneecting the insstrument to power p Check all marks supply. Turn off thhe instrumentt and the opeeration system m before connnecting to th he I/O terminal. Do not usee the instrument if the dettachable cover is removeed or loosen. Do not connnect the insttrument to an ny cable or teerminal blocck before selff-testing. To preventt the possibility of accideental injuries,, be sure to uuse the power adapter supplied byy the manufaacturer only. Never use the instrumeent with a lifee-support sysstem or any oother equipm ment subject to safety s requirrements. Failure to use u the instruument as direected by the manufactureer may rendeer its protective features voidd. Always cleean the casinng with a dry cloth. Do noot clean the iinternals. Make sure the vent holle is always unblocked. u Enviroonmenttal Conditions Thee instrument is designed for indoor usse and an areea with low ccondensation n. The table below shows thhe general ennvironmental requirementts for the insttrument. Envvironmental Conditions C Opeerating tempeerature Opeerating humiddity Storage temperaature Altiitude Polllution degreee Requirements 5°C-40°°C humidityy 20%-80% ((non-condenssation) -20°C-550 °C ≤2,000m m Pollution degree 2 NOTE a measurrements, allow the t instrument to t warm up for 30 min. To make accurate Copyright © Itech Electronics Co., Ltd.. ii IT9121 User'ss Manual Regulatory Marking M gs The CE mark indicaates that th he product complies with w all the rrelevant Euro opean legal directives. The specifiic year (if an ny) affixed refers to the year w when the design d was approved. The instruument compplies with the t WEEE Directive (2002/96/EC ( C) marking reequirement. This affix product labbel indicates that you must not discard thhe electricall/electronic product in domestic hoousehold wasste. This symbbol indicates the time perriod during which no hazardous oor toxic subsstances are expected too leak or detteriorate durring normal use. The exxpected usefful life of thee product is 10 years. The producct can be used u safely during the 10-year Envvironment Frriendly Use Period (EF FUP). Upon eexpiration off the EFUP, the producct must be im mmediately reecycled. d Electrronic Equimen nt (WEE EE) Dirrective Wastee Electrrical and 2002/96/E EC Waste Eleectrical and Electronic E Eqquipment (W WEEE) Directive This produuct complies with the WE EEE Directivve (2002/96//EC) marking reequirement. This affix prroduct label iindicates that you must not discardd the electriccal/electronicc product in ddomestic hou usehold waste. Product Category With referrence to the equipment e cllassificationss described in n the Annex 1 of o the WEEE E Directive, thhis instrumennt is classifieed as a “Monitorinng and Contrrol Instrument”. To return this t unwanteed instrumentt, contact youur nearest IT TECH office. Declarrations of Com mpliancee IT99120 Power Meter complies c with w the foollowing E EMC (electrromagnetic com mpatibility), safety and ennvironmentaal standards: EC Declarationn of Conform mity - EMC Thee instrumennt meets inttent of EC Directive 2004/108/EC C for electrromagnetic com mpatibility (E EMC). Comppliance was demonstrateed to the folloowing speciffications as listed in the Offficial Journall of the European Commuunities: N 61326-1 20006 Electriccal equipment for meassurement, coontrol and laboratory l EN usee - EMC req quirements.¹²³ CISPR 11: 2003 Radiaated and cond ducted emisssions, Group 1, Class A E discharge d im mmunity. IEC 610000-4-2:2001 Electrostatic IEC 610000-4-3:2002 Radiofrequen R cy electromaagnetic field immunity4. Copyright © Itech Electronics Co., Ltd.. iii IT9121 User'ss Manual IEC 610000-4-4:2004 Electrical E fastt transient/buurst immunityy. IEC 610000-4-5:2001 Power line surrge immunitty. IEC 610000-4-6:2003 Immunity y to conduucted distuurbances in nduced by radiofrequeency5. IEC 610000-4-11:2004 voltage dip ps, short intterruptions aand voltage variations immunity6. EN N 61000-3-2:2006 Harmoonic emissio on on AC poower line. EN N 61000-3-3:1995 Voltagge change, fluctuation an nd flicker 1 The T product iss intended for use in non--residential/noon-domestic eenvironments. Use of the prodduct in residenntial/domesticc environmentts may cause electromagnet e tic interferencce. 2 Connection C off the instrumeent to a test object o may prroduce radiations beyond th he specified limiit. 3. Use U high-perfoormance shiellded interface cable to ensuure conformityy with the EM MC standards listeed above. 4 Trace T bloom not n exceedingg 4 divisions pk-to-pk p mayy be induced under the tesst conditions speccified in IEC 61000-4-3. 5 Trace T bloom not n exceedingg 1 division pk-to-pk p may be induced uunder the tesst conditions speccified in IEC 61000-4-6. 6 This T specificatiion C is appliied to 70% vo oltage drop in 25 cycles andd 0% voltage interruption in 250 2 cycles subbject to IEC 611000-4-11. Copyright © Itech Electronics Co., Ltd.. iv IT9121 User'ss Manual TableeofCon ntents Quaality Certificaation and Assuurance ..................................................................................................................... 1 Warrranty................................................................................................................................................................. 1 Lim mitation of Waarranty ........................................................................................................................................... 1 Saffety Symbols ...................................................................................................................................................... 1 Saffety Precautionns.................................................................................................................................................. 2 Envvironmental Conditions C ..................................................................................................................................... 2 Reggulatory Markkings ............................................................................................................................................. 3 Waste Electrical and Electronic Equiment (W WEEE) Directive............................................................................. 3 C ................................................................................................................................... 3 Decclarations of Compliance Chapter I Introducttion ........................................................................................................................ 1 1.1 Brief Introduuction............................................................................................................................................. 1 1.2 Introduction of o front panells............................................................................................................................. 2 1.3 Introduction to t keyboard .................................................................................................................................. 2 1.4 Introduction of o Menu Funcction ....................................................................................................................... 3 1.5 Introduction of o Interface Display D Inform mation ............................................................................................... 5 1.6 Introduction of o Interface Symbols .................................................................................................................. 5 1.7 Introduction of o rear panels .............................................................................................................................. 6 Chapter II Measureement Conditions ................................................................................................ 7 2.1 Setting of Meeasurement Raange ....................................................................................................................... 7 2.2 Setting of Meeasurement Innterval ..................................................................................................................... 9 2.3 Setting of Fillter and Crest Factor .................................................................................................................. 10 2.4 Setting of Avveraging Functtion ...................................................................................................................... 12 Chapter III Basic Measureme M nt Function ns ................................................................................... 15 3.1 Basic Conceppts ............................................................................................................................................... 15 3.2 Setting of Meeasurement Fuunction and Innterface Displaay ............................................................................. 16 Chapter IV Wavefoorm Displayy Function ....................................................................................... 19 4.1 Basic Conceppts ............................................................................................................................................... 19 4.2 Adjustment of o Measurement Parameterss ..................................................................................................... 22 4.3 Setting of Triigger Configuuration ................................................................................................................... 22 Chapter V Integral Operation n Function ................... . ..................................................................... 24 5.1 Basic Conceppts ............................................................................................................................................... 24 5.2 Setting of Inttegral Measureement Configuration........................................................................................... 28 5.3 Integration ...................................................................................................................................................... 31 Chapter VI Harmon nic Measurrement Fun nction ............................................................................. 33 6.1 Basic Conceppts ............................................................................................................................................... 33 6.2 Setting of Haarmonic Measuurement Conffiguration ....................................................................................... 36 Chapter VII Routin ne Mainten nance .................................................................................................. 39 7.1 Self-inspectioon ............................................................................................................................................... 39 7.2 Error Informaation Referencces ....................................................................................................................... 39 7.3 Daily maintennance ......................................................................................................................................... 41 7.4 Contact of IT TECH Engineeers ........................................................................................................................ 41 Copyright © Itech Electronics Co., Ltd.. v Chapter I Introduction Chapte C er I In ntrodu uction 1.1 Brrief Intrroductioon Thee IT9121 pow wer meter cann provide the maximum innput of 600Vrrms and 20Arrms and the meaasurement baandwidth off 100KHZ an nd thus can be easily uused for measuring the parametersincludding voltage, current, power, frequency andd harmonics. Standard 232 and LAN N communicaation interfaces and also connfiguration inncludes USB,, GPIB, RS2 the interface foor USB perippherals. The user can stoore the meassured parameeters in the nd current preecision is 0.11%. The instrrument also exteernal storage medium. Thhe voltage an has many integraal functions, such as the active a power. The product can be widely y applied in mottors, househoold appliancess, UPS and otther test fieldds. Features 4.3-inch coolor liquid cryystal display (TFT) ( The numbeer of matrix columns to be displayed on the scrreen and the commonly used measuurement paraameters can be b set freely.. Input rangee:600Vrms/200Arms The voltagge, current, power, p harmo onics and otther parameters can be measured m at the same tiime. The precisiion of voltagee and current measuremennt is up to 0.1% %. It has thee harmonic measuring function f andd can measuure 50-orderr harmonic componentts at most. With the innterface for USB U peripheraals, the user can c store the interface in the t external storage meddium. With many powerful inttegral functions, the boughht/sold electriicity can be calculated. Frequency measuremennt function Built-in US SB, GPIB, RS S232 and LAN N communication interfacces Application advanttages Analysis off UPS power quality: As an impoortant backupp power supplly in the com mmunication iindustry, the steady-state characteristtics, dynamicc characteristtics, power quality q and oother parametters of UPS should be analyzed. With W internal nonlinear eleements, the U UPS power supply will h may affect generate a large numberr of harmonicc componentss during operration, which o the commuunication sysstem. The IT99121 power m meter can meeasure such operation of parameters as the AC/D DC signal, po ower factor, harmonics, ffrequency and distortion prehensively analyze a the pperformance of the UPS factor, and systematicallly and comp power suppply. Test of perrformance off household appliances: a With prom motion of thee concept of using energyy in a rational and environmentally friendly manner, m morre and morre householld appliancees adopt th he variable frequency control technnology to red duce the pow wer consumpption. The IT99121 power meter can measure m the innrush currentt, active poweer, crest factoor, etc. Copyright © Itech Electro onics Co., Ltd. 1 Chapter I Introduction 1.2 Inttroducttion of front f paanels Schhematic Diaggram of Fronnt Panel of IT T9121 Seriess Power Meter and Diagrram of Key Funnctions 1 USB Interface m Display keyy 4. Waveform 7. Integratorr key 10. Hold/Escc key 13 Parameteer setting key 2. Displaay 5 Basic functions fu 8. Settingg knob 11. Enterr key 14. Menuu key 3. Menu M key 6. Harmonic H keey 9. Arrow A keys 12. Image Savee key 15 Power switch 1.3 Inttroducttion to keyboar k rd Thee functions off keys on the front panel of o the IT91211 series power meter are sh hown in the folllowing table. Key tag Name and function f Waveform Display keey When thhis key is pressed,the waveform correspondding to curren nt measurement data willl be displayed d. Harmonic Measuremen M nt key Whenn this key is pressed, thee harmonic measuremeent results and the menu m of haarmonic meeasurement parameter configuration c n will be dispplayed. Basic Measurement keey When thiss key is preessed, the meeasurement data of variious items will be displayyed. Integral Measurement M key When this key iss pressed, th he integral measuremeent results an nd the menu of integral m measurementt parameter configuratioon will be diisplayed. Menu key, used for seetting relevannt measurem ment parameeters of the power meteer. Enter key, used u for saviing the settinngs. Image Savee key Cancel/ESC C key The front panel p keyboarrd can be loccked/unlockeed when the ESC key is constantly pressed p for 5ss. The remote control mode of the poweer meter can be switched to t the panel m when thee ESC key is constantly prressed for 5s.. operation mode Copyright © Itech Electro onics Co., Ltd. 2 Chapter I Introduction Key tag Name and function f Up/Down key k and Left//Right key List Edit: those t lines which are not n displayedd can be displayed by operating thhe Left/Righ ht key. Thosee rows whichh are not dissplayed can be displayeed by operatin ng the Up/Down key. Menu Editt: the prograamming item ms can be roolled by operating the Up/Down key. k Promptss of correspoonding optionns are displaayed on the right and opptions can bee selected viaa the soft keyy. Digit Edit: the programming item ms can be roolled by operating the Up/Down key. The diigit to be eddited is seleected by operating the Left/Right key or via v the knoob. Carryingg can be completed automaticallly. Soft key The T contents on the left of the key aand the men nu function displayed above a the key k on the display screeen may be subject to changes. Knob key, used u for settin ng the value indicated by the cursor, selecting the voltage and current range, adjusting thhe waveform m, etc. 1.4 Inttroducttion of Menu M F Function n Preess this M Menu key to entter the system m menu funcction. Menu is described as follows. Menu seetting Insstrument infformation SYSTEM M INFO Serial Instrumennt model Instrumennt SN Cpu Verrsion Cpu versioon Dsp Verrsion Dsp versioon MAC adddress Network hardware h adddress Socket Port P Port numbber Model COMM M CONFIG BAUD Rate R SYSTEM R232 Parity Chhack Data bit Stop bit USB Type B Connect C GPIB GPIB Adddress IP mode IP Addresss LAN Subnet mask m Gateway SYSTEM M CONFIG G Date (YY Y/MM/DD) system Coommunicatio on coonfiguration Set the com mmunicationn baud rate:4800/9600/19200/338400/57600 0/115200 Communiccation parity check bit: Deefault: NONE Communiccation data biit: 8 (default)) Communiccation stop biit: 1 (default)) Select the USB commuunication interface. The addresss is adjustabble between 1 and 30. IP mode: MANU/DHC M CP IP address setting Set the subbnetmask. Set the gaateway. Syystem configu uration System daate: Year/Monnth/Day Copyright © Itech Electro onics Co., Ltd. 3 Chapter I Introduction Time (hhh:mm:ss) Brightneess Beep SELF TEST T SYSTEM M SELF_TE EST INIITIAL SYSTEM M INITIAL SETUP INFO Averag Sync Soource Line Filtter Update Rate R Freq Filtter Crest Faactor ExSensoor1 ExSensoor2 Rate(V/A A) Rate(mV V/A) SETUP V_Rangge A_Rangge AVERA AG SET State Mode Type Count EXT SE EN SET EXSENSOR 1 Ratio(V//A) EXSENSOR 2 Ratio(m mV/A) OTHER R SET Sync Soource Freq Filtter Line Filtter Crest Faactor Update Rate R System tim me: Hour/Minnute/Second Set the scrreen brightneess. Set the keeyboard sounnd Seelf test Self test Initialize System innitialization Coonfiguration infformation Average Synchroniization Line filterr Data updaating rate Frequencyy filter Crest factoor External current c sensoor 1 (range: CF=3:2.5V V,5V,10V; C CF=6:1.25V, 2.5V,5V.) External current sensor 2 (range: CF=3:50m mV,100mV,200mV,500m mV,1V,2V; CF=6:25 mV,50mV V,100mV,2500mV,0.5V,1V V.) Conversioon ratio of exxternal curren nt sensor 1 Conversioon ratio of exxternal curren nt sensor 2 Voltage raange Current raange Avverage functiion settting Status Mode Loading Type T Counting cycle Exxternal curren nt sensor settting Set the exxternal currennt sensor 1: ON/OFF O Set the coonversion ratiio of the exteernal current sensor 1 Set the exxternal currennt sensor 2: ON/OFF O Set the coonversion ratiio of the exteernal current sensor 2 Otther settings Select the synchronizaation source: U/I/OFF Set the freequency filteer: ON/OFF Set thelinee filter: ON/O OFF Set the creest factor: CF F3/CF6 Set the daata updating rrate: Copyright © Itech Electro onics Co., Ltd. 4 Chapter I Introduction C CAL ZERO O INRUSH H SET State Trig leveel(A) Delay tim me(ms) Measuree time(s) Calibraation Zero C Calibration Z Zero 0.1s/0.25ss/0.5s/1s/2s/55s Inrrush setting Status Trigger leevel Delay tim me Measuringg time Zeero point caliibration Zero poinnt calibration 1.5 Inttroducttion of Interfac I ce Displlay Infoormatioon Thee IT9121 poower meter has h four meaasurement modes. m Below w is the intro oduction of bassic interface information, i with the bassic measurem ment interface as an exam mple. Basic meeasurementt interface Sellect the “Meeter” button, and the iniitial interface of basic m measurementt as shown below will appeear. 1.6 Inttroducttion of Interfac I ce Symb bols Thee interface off the IT9121 power meteer will displayy the followiing symbols.. Sttatus Bar iconn Status descrip S ption T This icon app pears when the line filtter is switch hed o on. This icon ap T ppears whenn the frequuency filter is sw witched on. T icon app This pears when USB U is inserteed. Over-voltage protection icon: this icon appeaars O w when over-vo oltage occurss. Copyright © Itech Electro onics Co., Ltd. 5 Chapter I Introduction Sttatus Bar iconn Status descrip S ption O Over-current protection icon: this icon appeaars w when over-cu urrent occurs. Key Lock: th K his icon appeears when thhe keyboard is loocked. Remote Lock R k: this icon apppears in rem mote operation a then locaal keys fail. and T icon app This pears in remoote network cconnection. 1.7 Inttroducttion of rear r pan nels Schhematic Diaggram of Rearr Panel of IT9121 Power Meter 1. GPIB innterface 4. RS232 interface i 7. Externaal sensor interrface 2 Ethernet E interrface 5. External E syncchronization signal interfface 8. Voltage V inputt terminal Copyright © Itech Electro onics Co., Ltd. 3U USB Interfacee 6 Power interface 9. C Current inputt terminal 6 Chapterr II Measuremeent Conditions Ch hapter II Meeasureement Condiitions Thiis chapter deescribes detaiils of relevan nt work to bee finished beefore use of the IT9121 pow wer meter. 2.1 Setting off Measu urementt Rangee Thee appropriatte measurem ment range (voltage andd current raange) must be set for acccurate measuurement. Thhe selected range is eff ffective for different meeasurement modes, such as waveform display, d integrral measurem ment and harrmonic measu urement. Operation steps 1.In the t “Meter” innterface Presss the soft key y correspondiing to “V-RA ANGE” or “A A-RANGE”, and usee the knob orr “ ” to t select the voltage v or currrent range. 2.Press the “Enterr” key to conffirm the settin ng. The instruument will auutomatically confirm c and exit thee setting in caase of no operation on the interface for more than 5ss. When thhe crest factorr is 6: F Figure: Voltaage Range F Figure: Curreent Range Copyright © Itech Electro onics Co., Ltd. 7 Chapterr II Measuremeent Conditions When thhe crest factorr is 3: F Figure: Voltaage Range F Figure: Curreent Range NOTE m has more current range ooptions. See detaails in When EX1 orr EX2 is installeed, the power meter IT9121 Installation Instructioons. Voltage and a currennt range Sett the measurrement rangee according to the levell of the effeective value. When the volltage or curreent signal is input into th he input unit,, there are tw wo types of range: fixed andd automatic. Fixed rannge Sellect the requiired range frrom a numbeer of options. After selecction, the ran nge will not chaange with thhe input signnal. For the voltage rangge, when the crest facto or is 3, the maxximum optioon is “600V”” and the min nimum optionn is “15V”. W When the creest factor is 6, the t maximum m option is “3300V” and th he minimum m option is “77.5V”. Copyright © Itech Electro onics Co., Ltd. 8 Chapterr II Measuremeent Conditions NOTE d waveform and other non-sinusoidall wave signals, the accuracy During measuurement of the distortion of measuremeent can be improved by selecting the minimum m range on the premise that th he measured value does noot exceed the rannge. Auto-meeasuring sppan Thee range is sw witched autom matically acccording to thhe input signnal. The rang ge types for swiitching are thhe same as thhose of the fiixed range. Prinnciples of auutomatic rangge level increease: Thee range levell is increasedd when any one o of the folllowing condditions is satiisfied. Urms or Irm ms exceeds 110% of the current rangge setting. The crest factor f is 3. Thhe value Upk k or Ipk of thhe input signnal exceeds 330% of the current rannge setting. The crest factor f is 6. The T value Up pk or Ipk off the input signal exceedss 660 % of the currentt range settinng. Prinnciples of auutomatic rangge level decrease: Thee range levell is decreasedd when all off the followinng conditionns are satisfieed. Urms or Irm ms is less thaan or equal to t 30% of thee current meaasurement raange. The crest factor f is 3. The value Upk k or Ipk of thhe input signnal is less thaan 300% of the range at a the followiing level. The crest factor f is 6. Thhe value Upk k or Ipk of thhe input signnal is less thaan 600 % of the range at a the followiing level. NOTE The selected automatic a rangee may change when w the input waveform w is a ppulse waveform m of uncertain cycle. In this case, c the fixed range r should bee selected. 2.2 Setting off Measu urementt Interv val The timee for acquisittion of samppling data is determined d b the measuurement interrval during by measureement. The measurement m interval is determined d byy the data uppdating rate and a synchronnization sourrce. The syncchronization n source provvides referencce signals forr measureement, and thhe data updatting rate deteermines the updating u cyclle of samplin ng data. Measurem ment intervval The meaasurement innterval is deteermined by th he data updaating rate andd synchronization ssource. (see “2.3 “ Setting of o Filter and Crest Factorr” for specific settings) Synnchronizationn IT99121 adopts the t frequencyy measuremeent circuit to test the inpuut signal cyclle set in the measuremennt interval. The T measurem ment intervall is the integeer times of th he test cyccle. The meassured value of o IT9121 is calculated by averaging sampling daata in the meaasurement innterval. The reference r inp put signal useed for defininng the input signal meaasurement innterval is callled the synch hronization source. Measurement innterval for coonventional measurement m t The measuurement interrval of the refference input signal is the time from the t starting parrt of the risinng slope (or descending d s slope) througgh the zero po oint Copyright © Itech Electro onics Co., Ltd. 9 Chapterr II Measuremeent Conditions (intermediaate value of amplitude) a to o the ending point of the rising slope (or descendingg slope) throuugh the zero point (interm mediate value of amplitud de). However, the t measurem ment intervall which deterrmines the m maximum volltage or current is within w the ovverall data up pdating cyclee. Therefore, the measureement of Ipk+, Ipk-, Upk+, Upk--, Ucf and Icf calculated based on thee maximum voltage v and current alsoo adopts the data updatin ng cycle as thhe measurem ment interval. The rising or descendinng edge is sellected autom matically to pprolong the measuremeent interval. If there is only o one or no n rising slop pe or descendding slope w within the dataa updating cycle, the data d updatingg cycle is tak ken as the meeasurement innterval. The input signal s to be used u as the sy ynchronization source caan be set in each unit (for synchrronization wiith the zero point p of that input signal)). The overalll interval of the signaal voltage, cuurrent or dataa updating cyycle can be sselected as th he synchronizzation sourcee for measureement. NOTE Thhe data updatinng cycle refers to t the cycle used for calculatinng sampling data of the measurrement fuunction. It is ideentical to the seet value of the data d updating raate. Thhe slope refers to signal changges from low lev vel to high leveel (rising edge) or from high leevel to low leevel (descendingg edge). Measurement innterval for haarmonic meaasurement At the t samplingg frequency of o harmonic measuremen m nt, the measuurement interrval refers to thhe first pointt 1024 from the t data updating cycle. The T sampling frequency of harm monic measuurement is deetermined au utomatically by the signal cycle set ass the PLL souurce in the insstrument. Thhe sampling data d or measuurement inteerval for calcculation mayy be differennt from the saampling dataa or measurem ment intervall of the meassurement function in convventional meeasurement. 2.3 Setting off Filter and Crrest Factor Operation steps 1.Select “Menu > SET UP > OTHER O SET” and enter thee OTHER connfiguration page. p 2.Press “ ” to select thee parameter to t be configuured (blue fonnt background d), and then Copyright © Itech Electro onics Co., Ltd. 10 Chapterr II Measuremeent Conditions press the t soft key correspondinng to the parameter on thhe right to seet the requireed value, as shown in the follow wing diagram.. Character Syync Source Frreq Filter Liine Filter Crrest Factor Uppdate Rate Function n description n Select thee synchronizzation sourcee: U/I/OFF. The overall interval of the signal voltage, cu urrent or dataa updating cycle can be selected as the synchhronization so ource for meeasurement. Set the status s of the frequency filter. f When “ON” is seelected, the frequencyy filter is turrned on. Wheen “OFF” is selected, thee frequency filter is tuurned off. Set the sttatus of theliine filter. Whhen “ON” is selected, the line filter is turned on. When “O OFF” is seleccted, the linee filter is turn ned off. Set the crrest factor: CF3/CF6 C Data Updating Rate Setting keyy: when thiis key is prressed, the capture innterval of th he voltage, current, c pow wer and otheer data, i.e. data upddating rate, can be set. When the data updatiing rate is increasedd, rapid load changes of the power syystem can be obtained. When the data updaating rate is decreased, relative low w-frequency signals can c be meaasured. Opttions of thee data updating rate: 0.1s/0.25s/0.5s/1s/2s//5s 3.Press the “Enterr” key to savee the settings. Filter Freequency filteer: it is inserrted in the frequency f m measurement circuit and may affect freqquency measurement. Itt can be useed for filteriing high-freqquency com mponents of inteerference to make the measured m frrequency parrameter morre accurate. When the freqquency filterr is switchedd on, the volltage or current of no more than 200 0Hz can be meaasured. The cutoff frequeency is 500H HZ. Linne filter: it iss inserted in the voltage and current measuremennt circuit and d has direct of the voltaage, current and power. When the liine filter is inflluence on measurement m swiitched on, noise n and hiigh-frequency y componennts from thee inverter orr distortion wavveform can be b filtered. The T cutoff freequency is 5000HZ. Copyright © Itech Electro onics Co., Ltd. 11 Chapterr II Measuremeent Conditions Crest facctor Thee crest factoor is the ratiio of the waaveform peakk to the effeective value. The crest facttor of IT91221 is specifieed as the tim mes of the creest value whhich can be input i under the rated input conditions. The T crest facctor CF3 or CF6 C can be sselected in th he interface Menu > SETU UP > OTHER R SET”. “M Crestt factor (CF ) Peak vaalue which ccan be input Meeasurement range The crrest factor caan be set as 3 or 6. The crest factor can be meassured under the following coonditions: Crestt factor(CF F) Measuurement rannge Set vallue of CF (33 or 6) Measured value v (effective value) NOTE The crest c value of thhe input signal must m be no morre than the maxximum allowablle input valuee. Whhen the cresst factor off the measurred signal is i larger thaan the crestt factor in insttrument speccifications (bbased on the crest value of rated inpput), the sign nal with the crest factor largger than the specified s valu ue can be meeasured by seetting a range including the value of thee measured siignal. w CF is seet as 3 but th he measuredd value (effecctive value) is less than Forr example, when 60% % of the rangge, the signall with CF mo ore than 5 caan be measurred. Whhen CF is 3, the signal with CF eq qual to 300 can be meaasured underr minimum effeective input (1% ( of the raange) conditiions. Thee voltage raange, currentt range, effeective input range and measuremen nt accuracy deppend on the set s crest factoor. 2.4 Setting off Averaging Fu unction Thee user can seet the averagiing function via this mennu. When thee input signall frequency is low, l the valuue is displayyed unstably y and cannoot be read eeasily. In this case, the aveeraging functtion can be enabled e to caalculate and display d the aaverage valuee of several meaasurements. Operation steps 1.Select “Menu > SET UP > AVERAG G SET” to enter e the connfiguration page p of the averaging function. 2.Press “ ” to select thee parameter to t be configuured (blue fonnt background d), and then press the t soft key correspondinng to the parameter on thhe right to seet the requireed value, as shown in the follow wing diagram.. Copyright © Itech Electro onics Co., Ltd. 12 Chapterr II Measuremeent Conditions Parametter descriptioons: Chharacter Sttate M Mode Tyype Coount Function desscription F Set the statuus of the averaging funcction. Whenn “ON” is seelected, the a averaging fuunction is en nabled. Whenn “OFF” is selected, thee averaging f function is disabled. d Set the modde of the aveeraging funcction. EXP: index averaging, often u used for anaalysis of the non-stationar n ry process. L LINE: linear averaging, o often used for measureement and analysis a of the stationaary random p process. The deviation relative to the standarrd can be reduced r by i increasing thhe averaging times. Set the lineaar averaging type. MOVIING: movingg averaging REAPEAT: R r repeated aveeraging Set the timees of the aveeraging function. If the m mode of thee averaging f function is seet as EXP (in ndex averagiing), the attennuation consstant can be s set. If the mode m of th he averagingg function iss set as LIN NE (linear a averaging), t averaging the g times can be b set. 3.Press the “Enterr” key to conffirm the settin ng. Averaginng mode Index averagingg: Computting formula: Dn Dn 1 M n Dn 1 k Dn: the value displayyed after the nth n index aveeraging (D1, tthe value disp played after the first averaging, iss equal to M1) Dn-1: thhe value displlayed after the (n-1)th indeex averaging Mn: the nth measuredd data. K: attenuuation constaant (1-64) Linnear averaginng Computting formula: Dn M n m 1 ....M n 2 M n 1 M n m Dn: the value displayyed after lineear averagingg of m valuess from the (n--(m-1))th to Copyright © Itech Electro onics Co., Ltd. 13 Chapterr II Measuremeent Conditions nth valuue Mn-(m-1): the (n-(m--1))th measurred data Mn-2: thhe (n-2)th meeasured data Mn-1: thhe (n-1)th meeasured data Mn: the nth measuredd data. M: the number n of aveerage values (1-64) When m can be diviided exactly by b n, the calcculated valuee is the movin ng average; when thhere is no parrticular relatiionship betweeen m and n, the calculatted value is the repeated average.. N NOTE When inndex averagingg is set, averagin ng is implemennted under the hharmonic measu urement functionn. When liinear averagingg is set, averagin ng can only be implemented inn the conventional measureement function and this mode is not applicable to the harmonic measuremeent function. Averaginng functionn Measurement fuunction in coonventional measurement m t Thee following measurement m t functions arre subject to direct averagging. Data of the folllowing measuurement funcctions are ob btained via opperation in oother modes, and the obtaained measuurement functtion is affectted averagingg. Urms, Umnn, Udc, Urmn, Uac, Irmss, Imn, Idc, Irrmn, Iac, P, S and Q. Ucf, Icf, λ and WPAV are calculateed by operatiion of the aveeraged Urmss, Irms, P and S. Measurement fuunction in haarmonic measurement Thee following measurement m t functions arre subject to direct averagging. Data of the folllowing measuurement funcctions are ob btained via opperation in oother modes, and the obtaained measuurement functtion is affectted averagingg. U(k), A(k),, W(k), S(k) and Q(k). λ(k) is calcculated via opperation of th he averaged W(k) and Q((k). U(%r), A(% %r), W(%r) , U(%f), A(% %f) and W(% %f) are calcullated via opeeration of the averageed U(k), A(kk) and W(k). (k indicates the t harmonic times.) N NOTE When thhe averaging fuunction is enablled, the averagee of a number off measurementss are calculatted and displayeed. Therefore, in i case of drastiic changes of thhe input signal, the measured value will w slowly affecct these changess. For bothh the attenuatioon constant of in ndex averagingg and the numbeer of averaged values v of linear averagiing, the larger the t set value is, the more stablee the measured value is. The folllowing measureement functions will not be aff ffected by averaaging. Convenntional measureement functions:Fu, Fi, Ipk+, Ippk-, Upk+, Upkk-, Time, WP, WP+, W WP-, q+, q-, q and Fsyn. Harmonnic measuremennt functions: φ((k) , φUU(k) annd φII(k) (k indiicates the harmo onic times). Copyright © Itech Electro onics Co., Ltd. 14 Chapter III Baasic Measureme ent Functions Ch hapter III Baasic Measur M rementt Funcctions Thiis chapter deescribes the features f and use of the basic b measurrement functtions of the IT99121 power meter m in detaails. 3.1 Baasic Con ncepts Thee IT9121 pow wer meter haas rich basic power meassurement funnctions and can c be used for accurately measuring the t voltage, current, pow wer, AC/DC C signal, pow wer factor, harrmonics, freqquency, distoortion factorr and other parameters. The reliablle data can proovide a scieentific basis for analysiis of the poower qualityy and perfo ormance of equuipment. Introducttion of soft ft keys on thhe interface Menu soft keyy M V--RANGE A--RANGE RU UN/HOLD RE ESET VIIEW 1 VIIEW 4 VIIEW 12 M MAXHOLD (O OFF/ON) CO ONFIG Instructioon Set the voltage v rangee. Set the cuurrent range. Running/holding Reset sooft key Wheen this key is pressed, the instrument can immediaately carry ou ut measuremeent again. View (1)): displaying 1 large valuee and 6 smalll values. View (4)): displaying 4 large valuee and 6 smalll values. View (2)): displaying 12 large valuues. Maximum m value holding h (OF FF/ON): thee maximum m value (MAX) of o data can be b held. Basic meeasurement configuration c n Measured parameteers Parameeters Param meter descriiptions Parameters Parameterr descriptions Copyright © Itech Electro onics Co., Ltd. Param meters Paraameter desccriptions 15 Chapter III Baasic Measureme ent Functions Parameeters Param meter Parameters Parameterr Param meters descriiptions descriptions Active power Imn Umnn P Average [W] rectified value v the after is current calibratedd to the effective value Reacttive power Idc Q Average Urmnn [var] current S Apparrent power [VA] Ipk+ λ Powerr factor Ipk- φ Phasee difference of vooltage and currennt Synchhronization sourcee frequeency Current effective value [VA] Ipp AC current compoonent Averaage rectifiied current [A] Irush Fsyn Irms Iac Irmn Icf Fi Urms Positive current peak value [A] Negative current peak value [A] Current peak-to-peeak value [A] Current crest factor Current frequencyy (Hz) Inrush currrent Voltage effective value [VA A] Udc Paraameter desccriptions Aveerage recttified value afteer the volttage is caliibrated to the effective valu ue Aveerage recttified value of voltage v [V] Aveerage volttage [V] Uac AC voltage com mponent + Upk+ Positive volttage peak valu ue [V] Neg gative volttage peak valu ue [V] Volttage peak k-to-peak valu ue [V] Volttage crest facttor Volttage freq quency (Hzz) Upk-Upp Ucf Fu 3.2 Setting off Measu urementt Functtion and d Interfface Display Thee power meter m has thhree interfacce display styles s for m measurementt of basic parrameters. Att most five pages are displayed inn each stylee. When on ne or more impportant meassurement parrameter(s) sh hould be highhlighted, the View1 or View4 V mode cann be freely ennabled to deesign the hum mane displayy style. Wheen you need to view all parrameters at thhe same timee in one interrface, the Vieew12 mode ccan be enableed. Takke power meeasurement as a an examplle. The interfface can dispplay four parrameters in the large font foorm: effectivve voltage, efffective current, active ppower and po ower factor. Operating proceedures are ass below: Operation steps 1.In the t “Meter” interface when w the soft key correspponding to “V VIEW 4” is pressed, 10 measurrement param meters can bee displayed in n total, 4 of which are diisplayed in an amplified manner. Other meaasurement paarameters caan be viewed d by pressinng key k to turn pages, as shown inn the figure below. b Copyright © Itech Electro onics Co., Ltd. 16 Chapter III Baasic Measureme ent Functions 2.Wh hen the soft key k correspoonding to “C CONFIG” is pressed, thee measurement function can bee selected andd the interfacce display infformation caan be set. 3.Wh hen the soft key k correspoonding to “FU UNC” is presssed, the measurement fu unction can be seleected. For exxample, whenn the “FUNC”” key is presssed once, thee displayed measurement m functioon will be sw witched once in the W/A/V V sequence. Different m measurement parameters are dissplayed whenn different fuunctions are selected. Ass power meassurement is taken t as an exampple in this opeeration, W iss selected. W (pow wer): P, Q, S, λ, φ and Fsy yn A (curreent): Irms, Im mn, Irmn, Idcc, Iac, Ipk+, Ipk-, Ipp, Icff, Fi and Irussh V (voltaage): Urms, Umn, U Urmn,, Udc, Uac, Upk+, U Upk-, Upp, Ucf an nd Fu 4.Preess the “ ” key annd move the cursor to seelect the paraameter displaayed in the interfaace (blue fonnt backgrounnd). Press thee right soft key k correspoonding to thee parameter to adjuust the param meter displayed at presentt. P, Q, S andd λare set in ssequence. NOTE When the soft ft key corresponnding to the paraameter is presseed once, the parrameter will be selected in sequence. Copyright © Itech Electro onics Co., Ltd. 17 Chapter III Baasic Measureme ent Functions 5.You u can also prress the “INS SERT PAGE E” to add a display d page. At most five pages are allowaable. Press the t “DELET TE PAGE” to t delete thee display paage. At leastt one page shouldd be left. ---E End Copyright © Itech Electro onics Co., Ltd. 18 Chapter IV V Waveform Display Function C Chapte er IV Wavef W form Displa D ay Fun nction Thiis chapter deescribes the features and d use of the waveform ddisplay funcction of the IT99121 power meter m in detaails. 4.1 Baasic Con ncepts Thee IT9121 pow wer meter haas a waveform m display fuunction basedd on sampling data. The volltage and currrent wavefoorm of the in nput unit cann be displayed or hidden n. Only the neccessary waveeform is displayed to facilitate obbservation. T The waveforrm display inteerface includdes the verticcal axis and th he horizontaal axis. Introducttion of soft ft keys on thhe interface Whhen the “ apppears. ” buttonn is pressed,, the initial waveform ddisplay interfface below Desscription of information i o waveform of m display inteerface: Paarameter nam me V__RANGE A__RANGE RU UN/STOP SIINGLE SC COPE(U/A/U UA) Parameterr descriptionns Voltage raange setting: press the sooft key correesponding to this parrameter to seet the voltagee range. Current raange setting:: press the sooft key correesponding to this parrameter to seet the currentt range. Run/stop: press the soft key coorresponding g to this parameterr to run or stoop the wavefform status. Single meeasurement key: k when siingle measurrement is performed d under stop conditions, tthe stop statu us will be enabled again a after onne measurem ment accordiing to the current daata updatingg rate. Whenn single meaasurement is perfo ormed undder runningg condition ns, one measurem ment will bee performed immediately by the instrumen nt and then thhe stop statuss will be enabled. Select thee waveform to be displlayed on thee screen: voltage/cu urrent/voltagge and currennt. Copyright © Itech Electro onics Co., Ltd. 19 Chapter IV V Waveform Display Function Paarameter nam me KN NOB SEL (U U/A/TL/TD/T Td) AU UTO TR RIG SET M MEASURE SE ET Parameterr descriptionns Knob seleection: the foollowing variiables can bee adjusted by rotatin ng the knob: vertical volltage position n/vertical current position/triggger level//trigger deelay/level calibration n. Automaticc adjustmeent key: w when the soft s key correspon nding to this parameter iis pressed, th he power meter willl automaticaally calibrate the input signal to display th he best effectt of the inputt signal. Trigger seetting Measurem ment setting Introducttion of wavveform display interfface ws: Thee trigger statuus is described as follow Trrigger staatus Auuto Auuto? Trrig Trrig? Sttop Instruction When the trrigger mode is set as Autto, the triggeer status Autto will be displayed affter triggering. When the trrigger mode is set as Autto, the triggeer status willl be Auto in the case of o no triggeriing? When the trigger mode is i set as Norm mal, the triggger status Triig will be displayed affter triggering. When the trigger mode is i set as Norm mal, the triggger status wiill be Trig in the case of o no triggeriing? When the “Stop” soft key in thee waveform display intterface is pressed, the trigger statu us Stop will be b displayed.. Copyright © Itech Electro onics Co., Ltd. 20 Chapter IV V Waveform Display Function Vertical calibrationn Whhen the crestt factor CF is 3, the sellected voltagge range andd current ran nge will be subbject to vertical calibratioon (voltage/g grid, currentt/grid). Whenn CF is 6, th he selected volltage range and currentt range willl be subjectt to two-tim me vertical calibration (vooltage/grid, cuurrent/grid). Horizonttal calibratiion Whhen the “KN NOB SEL” soft key is i pressed and a “T/d” iis selected, horizontal caliibration (scaanning speedd) adjusted by rotating the knob. IIn this casee, time/grid infoormation chaanges can bee observed on n the screen by rotating the knob and changing the horizontal (time/grid) ( s setting. Wheen acquisitionn is run, thee sampling rate r can be chaanged by adj djusting the horizontal h calibration knnob. When acquisition is stopped, sam mpling data can c be ampliffied by adjussting the horiizontal calibrration knob. Trigger delay d Whhen the “KNO OB SEL” sooft key is pressed and “TD D” is selecteed, the triggeer delay can be adjusted by rotating thee knob. In th his case, whhen the knobb is rotated, the trigger poiint will movee horizontally and the deelay time willl be displayeed on the scrreen. When the delay timee is changedd, the triggeer point ( ) will movee horizontallly, and the disttance between the triggger point and d the horizoontal center will be indiicated. The triggger point is displayed aloong the top of o the displayy grid. Trigger waveform w Whhen the speccified triggeer conditionss are satisfied, the triggger waveforrm will be dispplayed, and the triggerinng time poin nt is called trigger poinnt. The trigg ger point is gennerally displaayed in the left of the display d screeen. Followingg the triggerr point, the wavveform is displayed on the t display sccreen from left l to right oover time. Beefore using the trigger function, the user needs to co onfigure the following f paarameters: Trigger moode The trigger mode referrs to conditions for updaating the conntents displaayed on the A model and Normaal mode Autto mode: thee displayed screen. Inccluding the Auto waveform is updated in case of triggering in the pause ttime and auttomatically updated inn case of no triggering in n the pause time. Normal mode: thee displayed content is updated u in caase of triggerring and not updated in ccase of no triggering. Trigger souurce The triggerr source is ussed for generrating triggering conditioons. The userr can select the triggerr source from m the input signal of thee input unit and the exteernal clock signal. Trigger sloope The slope refers to siggnal changess from low level l to highh level (risin ng edge) or from highh level to loow level (descending edge). e Whenn used as a triggering condition, the slope is called c trigger slope. Trigger levvel Level of trrigger slope: triggering occurs when the t level of tthe signal off the trigger source reaches the set trigger leveel under the specified trrigger slope conditions. When the “KNOB “ SEL L” soft key is pressed and “TL” is seelected, the trrigger level Copyright © Itech Electro onics Co., Ltd. 21 Chapter IV V Waveform Display Function can be adjuusted by rotaating the kno ob. In this case, the triggeer level can be b changed by rotatingg the knob, and changees in the triggger level caan be observ ved on the screen. 4.2 Ad djustmeent of Measure M ement Paramet P ters Youu can rotate the t knob to adjust a the veertical calibraation, horizoontal calibration, trigger delay and triggeer level of thhe waveform display interrface. Detaileed steps are as follows: Operation steps 1.Preess “ ” to enter the waveform display d interfface. 2.In the t waveform m display innterface Presss the soft keyy correspondiing to the “K KNOB SEL” parameeter and selecct the parameeter to be adj djusted. Whenn “KNOB SE EL” is presseed once, the parameeter to be adjuusted via the knob will be switched in sequence s amoong U/A/TL//TD/Td. 3.Wh hen the param meter is adjuusted by rotatting the knobb, the interface will displlay changes of the correspondinng value. ---E End 4.3 Setting off Triggeer Conffiguratio on Whhen you needd to enable the trigger function, f yoou should sellect the trigg ger source, triggger mode, trrigger slope and a other trig gger-related configuratioon. Detailed steps s are as folllows: Operation steps 1.Preess “ ” to enter the waveform display d interfface. 2.In the t waveform m display intterface Presss the soft keyy corresponding to the “T TIRG SET” parameeter to enter the trigger setting interfaace, as shownn below. 3.Preess the right soft key corrresponding to the param meter to seleect the requiired trigger configuration. Source: triggger source Copyright © Itech Electro onics Co., Ltd. 22 Chapter IV V Waveform Display Function Mode: triggger mode Slope: triggger slope External trigger inpput (Ext) Whhen the triggger source is set as Ext, input the triggger signal iinto the exteernal signal input interfacee (Synchronnous) of th he rear pannel accordiing to the following speecifications. Prrojects Innterface type Innput level M Minimum pulsse width Trrigger delay time t Specification BNC interrface TTL 1µs Within (1μs + 3 sampling cycles) NOTE When the volttage higher thann 0-3.3V is app plied on the exteernal signal input interface (Sy ynchronous), the instrumennt may be damagged. Minimum pullse width: referss to the width of o the high or loow trigger level,, at least 1µs. Trigger delay time: refers to the delay betweeen the appearaance of the triggger level and th he response of CPU, within (1μs ( + 3 sampliing cycles). ---E End Copyright © Itech Electro onics Co., Ltd. 23 Chapter V Integral Operation Function Chaptter V Integr I ral Operatioon Fun nction Thiis chapter describes the features f and use u of the inttegral functioon of the IT9 9121 power metter in details. 5.1 Baasic Con ncepts Thee IT9121 pow wer meter caan be used fo or integral opperation of thhe current an nd power of the input unit. Technical inndicators can n be calculaated. In addiition, the ran nge can be swiitched autom matically in thhe Buy and Sell S modes according a to the input lev vel so as to acccurately compplete integraate measurem ment. Durring operatiion of the air-conditio oner, refrigeerator, inducction cook and other houusehold applliances, the working w statu us will channge frequentlly, resulting in changes of the t working current in a large scale. The T current may m decreasse of dozens of amperes to a few milliaamperes. Orddinary poweer measuringg instrumentss can only be b used for inteegral measurrement withhin one rang ge. If the meeasured valuue exceeds the t current maxximum rangge, the measuurement resu ult is inaccuurate. You neeed to manually switch the range beforre integral measurement. m Integral meeasurement oof equipmentt subject to largge current changes c cannnot be perfo ormed continnuously. Thee IT9120 seeries power metter can autoomatically sw witch the ran nge in the inntegral modde. Thereforee, errors of inteegral measurrement causeed by manu ual range switching can be eliminateed, and the pow wer consumpption of houssehold appliaances can be measured m more accurateely. See the schhematic diagrram below. Introducttion of soft ft keys on thhe interface Whhen the “Inteeg” button iss pressed, th he initial inteegral measurrement interface below willl appear. Copyright © Itech Electro onics Co., Ltd. 24 Chapter V Integral Operation Function Desscription of information i o integral measurement of m interface: Paarameter nam me V__RANGE A__RANGE RU UN/HOLD RE ESET FU UNC(w/q/AV V) LA ARGE(WP/W WP+/WP, q/q+/q-, q WPA AV) ST TART ST TOP SE ETUP Parameter deescriptions P V Voltage rang ge setting: prress the softt key corresp ponding to t parameteer to set the voltage this v rangee. C Current rang ge setting: prress the softt key corresponding to t parameteer to set the current this c rangee. R Run/hold: press the soft key k correspoonding to thiss parameter t run or hold to d the integrall function. R Reset. S Selection of the t integral function: f actiive power in ntegral (W), c current integrral (q) and avverage activee power integ gral (AV). S Selection of the item to be b displayed in a amplified manner: W (watt ho WP our, the sum of positive aand minus watt w hours), W WP+ (the co onsumption of positive watt hours),, WP- (the n negative wattt hours of feedback poweer), q (amperre hour, the s sum of possitive and negative n am mpere hours)), q+ (the c consumption n of positivee ampere hoours), q- (th he negative a ampere hourrs of feedback power) and WPAV V (average a active powerrintegral). I Integral Starrt key In the manual sttart mode, the integral f function can n be enabbled by prressing the soft key c correspondin ng to this paraameter. I Integral Stop p key In the manual sttop mode, th he integral f function can n be disabbled by prressing the soft key c correspondin ng to this paraameter. S relevant parameters Set p o integral meeasurement. of Copyright © Itech Electro onics Co., Ltd. 25 Chapter V Integral Operation Function Integral measureme m ent displayy informatioon m nt information n: Desscription of measuremen Chharacter Fuunction descrription M Mode Diisplay the inntegral startt and stop mode. m Start mode: MAN NUAL and TIIME Sttop mode: MANUAL, M TIIME and TIN NTerval. Sttate Diisplay the cuurrent status of o the integraal function. Sttart: displayeed when the integral i funcction is workiing. Sttop: displayeed when thee integral fuunction is innterrupted, canceled c or stoopped. Reeady: displayyed in the reaady state of the t real-timee start mode. Tiime Up: dispplayed when n it reaches the specifieed time of the t integral tim mer. Reeset: displayyed when thee integral vaalue and inteegral time arre reset via inntegral resettiing. Errror: when the power supply is reecovered, thhe integral function f is stoopped and the t integral result beforee power faillure is displlayed. This inntegral state is called Erro or state. Tiime Diisplay the inttegral time. Stt Diisplay the set integral tim me. Ett Diisplay the set integral end ding time. Tiimer Diisplay the fixxed integral time. t Integral operation o Acttive power inntegral In watt w hour, displayed as WP W (watt hou urs, the sum of o positive annd negative watt w hours), WP P+ (the conssumption of positive wattt hours) andd WP- (the negative waatt hours of feeddback powerr). Currrent integrall In q, q displayed as q (amperee hours, the sum s of posittive and negaative amperee hours), q+ (thee consumptiion of positiive ampere hours) and q- (the negative amperre hours of feeddback powerr) Aveerage active power integrral Copyright © Itech Electro onics Co., Ltd. 26 Chapter V Integral Operation Function In watt, w displayyed as WPAV V (average acctive power inntegral) Inteegration timee Dissplayed as Tiime, in the foormat of hhh hh:mm:ss. Specificaation Savve in case of power failurre Thee integral reesult can be kept in the memory eveen in case oof power faillure during opeeration of thee integral funnction. When n the power supply s is reccovered and the t integral funnction is disaabled, the inntegral resultt before pow wer failure iis displayed. When the pow wer supply is i recoveredd and the inttegral is resst, the integrral function is enabled agaain. Display resolutiion he integral value v is 999999. When the t integral Thee maximum display resoolution of th valuue reaches 100000, 1 the decimal d poin nt will movee automaticallly. For exam mple, when 0.01mwh is addded to 999.999mwh, 1.000 00wh will be displayed. Display in case of overflow owing overfloow conditionns, the integrral function Whhen the integgral value meeets the follo willl be disabledd, and the inttegral time an nd integral value v at this ppoint will be kept. The integraal time reachhes the maxim mum value (10000 hours). The integraal values of WP, W q and WPAV W reach the maximum m/minimum display integral vallues. Maxximum/miniimum displayy integral vallue Active pow wer integral (WP): ( ±9999 99 Mwh Current inttegral (q): ±999999 MAh Average poower integrall (WPAV): ±99999 ± Mw Resstricted impleementation Setttings of the following f funnctions cann not be changeed during inttegral operatiion. Inntegration staatus C Current integgral status Fu unctions related to settiings of meassurement paarameters W Wiring Execu utable Unenforceabble M Measurement range Execu utable Unenforceabble Fiilter Execu utable Unenforceabble Avveraging funnction Execu utable Unenforceabble Syynchronizatioon Execu utable Unenforceabble Daata updating rate Execu utable Unenforceabble In ntegral functtion parameeter setting Inntegral mode Execu utable Unenforceabble Inntegral timer Execu utable Unenforceabble In ntegral operation Inntegral start Execu utable Unenforceabble Inntegral stop Unenforrceable Executablee Inntegral resettiing Execu utable Unenforceabble Other operatiions Saave operationn Execu utable Executablee Hoold operationn Execu utable Executablee Functtion Integral resetting r Copyright © Itech Electro onics Co., Ltd. In ntegral inteerruption Unen nforceable Unen nforceable Unen nforceable Unen nforceable Unen nforceable Unen nforceable Unen nforceable Unen nforceable Exeecutable Unen nforceable Exeecutable Exeecutable Exeecutable 27 Chapter V Integral Operation Function Functtion Siingle opperation m measurement t Integral resetting r Execu utable Inntegration staatus C Current integgral status Executablee In ntegral inteerruption Exeecutable NOTE In addition to the above item ms, other settings (such as self-ttesting and datee/time setting) or o operations with influencee on the integraal cannot be exeecuted; otherwisse, errors may bbe caused. 5.2 Setting off Integrral Meassuremeent Configuratiion Youu can set thee start modee, stop modee, automatic zero setting,, automatic calibration, c wattt-hour integration, current integration n and other parameters p oof integral meeasurement. Speecific steps are a as followss: Operation steps 1.Press “Integ” to enter the inteegral measureement interface. 2.Press the soft key k corresponnding to the “SETUP” “ paarameter in thhe integral measurement m interfacce to enter thhe integral parameter con nfiguration innterface. Presss the “ ” key to select the t required parameter, p as shown in thee figure below w. Paarameter desccriptions: Staart: set in thee MANUAL mode or TIM ME mode viaa the right sooft key. MANUAL L: press the “START” so oft key in thee integral meeasurement interface i in the manuaal start mode to trigger th he manual staart of the inteegral function n. TIME: thee date on whhich the integral mode iss started cann be set in th he real-time start modde. Integratioon will be started on the t set datee. When thee time/date combinatiion is set inn the real-tim me start mode, integratiion will not be started before thee current tim me and date. Integration will be starrted when th he screen is updated onnce at least before b the staart time. Copyright © Itech Electro onics Co., Ltd. 28 Chapter V Integral Operation Function Stoop: set in thee MANUAL L mode, TIM ME mode andd TINTerval mode via th he right soft key. MANUAL L: press the “STOP” “ softt key in theinntegral measuurement interrface in the manual stoop mode tom manually stop p integration. When the integration time reaches the maxim mum integrattion time (10,000 hourss) or the inteegral value reaches r the maximum m/minimum display d valuee, integrationn will be stoopped, and the current integral tim me and integgral value will be kept. TIME: Thhe date for stop s of the integral i modde can be seet in the reaal-time stop mode. Inteegration willl be stopped on the set daate. When itt reaches the set time or the integrral value reaches r the maximum/m minimum ddisplay integ gral value, integrationn will be stoopped, and th he current inntegral time and integrall value will be kept. ment time cann be set in tthe set-time stop mode. TINTervaal: the integraal measurem When it reaches r the set s ending date d and timee or the inteegral value reaches r the Copyright © Itech Electro onics Co., Ltd. 29 Chapter V Integral Operation Function maximum m/minimum display d integ gral value, inntegration w will be stoppeed, and the current inttegral time and a integral value v will be kept. Auuto Clear: used for enabliing (ON) or disabling (O OFF) the funnction of auto omatic zero cleariing of the inttegral. On: integration iss restarted when w the STA ART key is pressed to start integration. OFF: integrration is restarted based on the integgral value at the end of previious integratiion when thee START key y is pressed to t start integgration. Auuto Cal: useed for enablling (ON) or o disabling (OFF) the function off automatic integral calibration. When automatic a in ntegral calibbration is ennabled, zero setting is t power and a current measured juust now are subject to impleemented. In this case, the integration. P type: usedd for selectinng the integrral mode forr positive annd negative watt w hours. WP Theree are four inttegral modess: Charge/Diischarge: useed for measu uring the DC C positive annd negative watt hours (integratioon of samplinng data). Sold/Bougght: used forr measuring the t AC posittive and neggative watt ho ours (value integrationn in each datta updating cycle). c Options of the t current q type: used for selectinng the curreent integratioon mode. O ws: integration mode are as follow rms: Efffective value; mn: Calibration to thhe average reectified valuee of the effecctive value. dc: rmn: ac: Simpple averagingg; Avverage rectifiied value; AC component c ---E End Copyright © Itech Electro onics Co., Ltd. 30 Chapter V Integral Operation Function 5.3 Inttegratioon Whhen the integgral measurem ment functio on is enabledd, you can keeep the curreent integral infoormation andd carry out the t following g operations:: exit, start aand stop. Speecific steps are as follows: Operation steps 1.Press “Integ” to enter the inteegral display interface. 2.In the t integral measuremennt display intterface Presss the soft keey corresponding to the “STAR RT” parametter to start or o recover in ntegral operaation. The S Start status and a integral operatiion value aree displayed inn the interfacce. 3.Wh hen you needd to keep the current integral status annd integral reesult, you caan press the soft keey corresponnding to the “RUN HOL LD” parameeter. Then thhe current sttatus of the integraal result dispplay and com mmunication output will be kept no m matter wheth her integral operatiion is runninng. 4.Wh hen you needd to continuee to implemeent integral operation, o doouble-press th he soft key correspponding to thhe “RUN HO OLD” param meter to exit the t HOLD status. The po ower meter will diisplay the inntegral resultt after exiting g the HOLD D status. Thee schematic diagram of displayy of the HOL LD/RUN inteegral result is shown beloow. 5.Wh hen you needd to suspendd integral opeeration, press the soft keey correspon nding to the “Stop”” parameter to t suspend inntegral operaation. 6.Preess the soft key k corresponnding to the “RESET” parameter p to reset the inttegral value and inntegral time.. The relatioonship diagrram of startt, suspensionn and resettting of the integraal operation status s is show wn below. Auto Cleaar: when ON is selected. Copyright © Itech Electro onics Co., Ltd. 31 Chapter V Integral Operation Function F is selected.. Auto Cleaar: when OFF ---E End Copyright © Itech Electro onics Co., Ltd. 32 Chhapter VI Harmonic Measurem ment Function C Chapte er VI Harm H monic Measu M remen nt Fun nction Thiis chapter deescribes the features and d use of the harmonic h meeasurement function f of the IT9121 pow wer meter in details. d 6.1 Baasic Con ncepts Witth the 100kHZ bandw width, the IT9121 I pow wer meter can realize harmonic meaasurement of o high speeed and widee dynamic raange. The vvoltage, currrent, active pow wer, reactivee power and phase of haarmonics annd total harm monic distorttion (THD) facttor can be teested in the harmonic h mo ode. In additiion, the IT91121 power meter m can be useed for multipple harmoniic measurem ments, 50-ordder harmoniics of the fu undamental freqquency at moost. Thee IT9121 pow wer meter diisplays harm monic parameeters in the list or bar chart form so as to t provide clear analysis of test resultts. Introducttion of soft ft keys on thhe interface ” button,, and the inittial harmonicc measuremeent interface below will Sellect the “ apppear. Desscription of information i o harmonic measuremennt interface: of Paarameter naame V__RANGE Parametter descriptio ons A__RANGE RU UN/HOLD RE ESET FU UNC(W/A/V V) BA AR LIIST SE ETUP Voltage range settin ng: press thhe soft key correspondiing to this parametter to set the voltage rangge. Current range settin ng: press thhe soft key correspondiing to this parametter to set the current rangge. RUN/HOLD: press the soft key correspondiing to this paarameter to run/holdd the harmon nic status. Reset. Functionn options (po ower/currentt/voltage) Displayed in the barr chart form Displayed in the list form Parametter setting. Copyright © Itech Electro onics Co., Ltd. 33 Chhapter VI Harmonic Measurem ment Function Introducttion of harm monic infoormation Descriptionn of harmoniic bar chart interface i When the “BAR” buttton is selecteed in the harmonic measurement intterface, the bar chart of o harmonic measurement m t results willl be displayed. The bar ch hart is used for displayying the perccentage of different harm monics. Harm monics can bee displayed in the whoole sequencee, odd sequeence and eveen sequencee. The follow wing is the whole-sequuence harmoonic bar chartt. Descriptionn of interfacee information n: Total harm monic parameter: includiing the total harmonic ddistortion (TH HD) factor and total harmonic h conntent. When n different measurement m functions arre selected, different harmonic paraameters will be displayedd. When the soft key corrresponding to the “FU UNC” param meter is presssed, differeent measurem ment functio ons can be selected. W/A/U W can be b selected as a the measuurement funcction in sequ uence when this key is pressed oncee. Parameter meanings off different fuunctions are as a follows: h disstortion rate of o power andd total harmo onic power Powerr (W): total harmonic Currennt (A): total harmonic distortion raate of curreent and totall harmonic currennt Voltagge (U): totall harmonic distortion raate of voltagge and totall harmonic voltagge Single-order harmonicc parameterss: displayingg the frequenncy, harmon nic content, harmonic distortion faactor and ph hase of singgle-order harrmonics. Th he user can rotate the knob k to select the singlee-order harmoonics to be ddisplayed. Th he selected harmonics are displayeed in red in th he bar chart form. f Descriptionn of harmoniic list interfaace When the “LIST” buttton is selecteed in the haarmonic measurement intterface, the i used for list of harrmonic meassurement results will be displayed.. This list is showing the t voltage, current, acctive power, reactive poower, phasee and total Copyright © Itech Electro onics Co., Ltd. 34 Chhapter VI Harmonic Measurem ment Function harmonic distortion d (T THD) factor of different harmonics. Harmonic lists l can be displayed in the wholee sequence, odd sequence and evenn sequence. Below B is a whole-sequuence harmoonic list. Harmonic content: thhis list is used u for shhowing all harmonic contents c of single-ordeer harmonicss, including the voltage, current andd power. You u can view other harm monic parameeters by opeerating the Left/Right keyy to turn pag ges. In this case, the line scroll bar b and currrent page are a shown inn bright wh hite circles. Measurement parameteers are descriibed in the foollowing tablle: Abbbreviations Instructionn U((V) Voltage A((mA) W W(W) S((VA) Q((var) λ(() Abbrev viations Instruction φUI(°) Phhase differencce of k-ordeer harmonic vooltage and harrmonic curren nt Ph Current hase differenc ce of harmo onic voltage φUU(°°) U((k) and fundaamental wavee U(1) Active pow wer φII(°) Phhase difference of harmo onic current I(kk) and fundam mental waveI(1) Apparent U(%r)// U(%f) Haarmonic distoortion factor of o voltage power Reactive A(%r)// A(%f) Haarmonic distoortion factor of o current power Power facttor W(%r))/W(%f) Haarmonic disttortion factorr of active poower Harmonic order list: this LIST can c show thhe data of one-order to 50-order harmonic signals. Theese data caan be displaayed in the whole sequ uence, odd sequence and a even seqquence. The rows which are not dispplayed, i.e. single-order harmonic data which are not diisplayed, caan be presennted by opeerating the Up/Down key. In this case, the ro ow scroll baar and currennt page in displayed in bright bluee bars. Copyright © Itech Electro onics Co., Ltd. 35 Chhapter VI Harmonic Measurem ment Function 6.2 Setting off Harmoonic Meeasurem ment Coonfiguration Youu can set thee distortion factor f calculation formulla, PLL sourrce, harmonic sequence andd harmonic analysis a timess of harmoniic measurem ment. Specificc steps are ass follows: Operation steps 1.Preess “ ” to enter the harmonic measurement m interface. 2.Press the soft keey correspondding to the “S SETUP” paraameter in thee harmonic measurement m displayy interface to enter the harrmonic param meter configurration interface. Press thee “ ” key to select the reequired param meter, as sho own in the figgure below. Parrameter descrriptions: Parameteers Instrucction TH HD Formal Distorttion factor caalculation forrmula. % r: ddisplaying haarmonics in the form f of perceentage to thee overall currrent (voltage, power) amplituude of all harrmonics. % f: f displaying harmonics in i the form of perccentage to thee fundamentaal wave currrent (voltage,, power). PL LL Source Select the PLL (Ph hase Lockedd Loop) sourrce: U/I/OFF F. Used for determ mining the fundamental fu wave cyclee as the refference for analysiis of harmon nic orders. Seerial Harmoonic sequen nce: whole sequencce/odd sequ uence/even sequennces Orrder Max Set thee harmonic analysis ordders (1-50). You can specify s the harmonnic measurem ment range. These speciffied analysiss orders are used foor calculating g the value of o the distortiion factor. Distortioon factor caalculation formula: f Thee following two t formulass can be selected for calculation of thhe distortion factor. f %r: using all harmonicc measuremeent data from m the minim mum harmoniic order (0) to the maxximum harmoonic order (w within the uppper limit off analysis ord ders) as the denominator. Copyright © Itech Electro onics Co., Ltd. 36 Chhapter VI Harmonic Measurem ment Function %f: using the t data of fuundamental wave w (1-ordeer) componennts as the den nominator. Thee distortion factor calcuulation form mulas and methods m of different meeasurement funnctions are ass follows: M Measuremen nt function Haarmonic distortion factor of voltagge Haarmonic distortion factor of currennt Haarmonic distortion factor of activee power Tootal harmonicc distortion rate of voltage Tootal harmonicc distortion rate of current Calculation n formula and method %r %f U k U k U Total U 1 I k I k I Total I 1 Pk P k PTotal P1 max m max U k U k U Total U 1 2 k 2 max k 2 max I k I k 2 k 2 2 k 2 I Total Tootal harmonicc distortion rate of active power p 2 I 1 max m max Pk Pk P Total P 1 k 2 k 2 NOTE Total harmoniics are calculateed as follows: U Total m max U k k 0 2 , I Total max I k 2 , k 0 m max PTotal Pk . k indiicates the harmoonic order, and max indicates tthe upper limit of analysis k 0 orders. max iss determined byy the frequency of PLL source automatically, 50 orders at mo ost. PLL sourrce In the t harmonicc mode, IT91121 adopts PLL to multipply the frequeency of the input i signal. Thee frequency multiplicatioon output sig gnal is usedd as the A/D sampling clock in the insttrument so as to achievve the purpose of syncchronous sam mpling. Theerefore, the freqquency of the signal of thhe PLL sourcce can determ mine the A/D D sampling clock c in the insttrument. Hoowever, the quality of the t signal of o the PLL source may affect the stabbility and acccuracy of sam mpling data. PLL sourcee selection Thee voltage or current of the t input uniit can be sellected as thee PLL sourcee. Used for determining thee fundamenttal wave cycle as the reference r forr analysis off harmonic y of the PLL L source is 100Hz to 1.2kH Hz. ordders. The fundamental waave frequency L source Considerattions for seleection of PLL Please select the signal withh the same cy ycle as that of o the harmonnic measurem ment object signnal. In ordeer to stablyy measure harmonics, h s select the innput signal with little disttortion as thhe PLL sourcce. If the fu undamental wave w frequenncy of the PLL P source chaanges or thee fundamenttal wave frrequency cannnot be meeasured as a result of Copyright © Itech Electro onics Co., Ltd. 37 Chhapter VI Harmonic Measurem ment Function wavveform distoortion, accuraate measurem ment results may m not be oobtained. Wh hen the test object is a switcch type pow wer supply an nd the voltagge signal is suubject to less distortion thann the currentt signal, it is recommendeed to use thee voltage as tthe PLL sourrce. Signal leveel of PLL souurce If the t amplitudde level of the t signal in nput into thee unit as thee PLL sourcce is small relaative to the range, r synchhronization with w PLL willl fail. If the crest factor is set as 3, the amplitude level of the PLL P source should s exceeed 50% of thhe range at least during settting of the raange. If the crest c factor iss set as 6, thee amplitude llevel of the PLL P source shoould exceed 100 1 % of thee range at leaast during settting of the raange. NOTE When the funndamental wavee frequency is no more than 2000Hz, the frequeency filter mustt be turned on. When the funndamental wavee frequency is lo ower than 440H Hz and contains high-frequency y components, it i is recommendded to turn on the t frequency fiilter. This filter only applies to the frequency meeasurement circuuit. If the frequenncy of the PLL source s changes,, the correct meeasured value w will be displayed d after data are updated seeveral times. Thhe frequency off the PLL source needs to be teested again via the PLL circuit in the instrument i in caase of changes of the PLL sourrce or its frequeency, the correcct measured value cannot be b obtained at once. o Harmoniic analysis order Thee harmonic analysis a ordeer k is an intteger number ranging froom 0 to the upper u limit of analysis a ordeers. Zero inddicates the DC D componennt. The upperr limit of anaalysis orders is automatically a y determinedd by the freq quency of thhe PLL sourcce. The upper limit of harrmonic analyysis orders can c be determ mined autom matically or set manually y. Take the smaaller value. 50 5 orders at most The reelationship beetween the uupper limit of o harmonic anaalysis orders and the funddamental waave frequencyy of the PLL L source is sh hown in the tablle below. Fu undamentall wave Sampling S ra ate frequency of o PLL Wind dow width soource 100Hz ~ 75Hz f f*1024 1 755 Hz ~ 150 Hz H f f*512 2 1550 Hz ~ 300 Hz f f*256 4 3000 Hz ~ 600 Hz f f*128 8 6000 Hz ~ 12000 Hz f f*64 16 * The upper lim mit of analyssis orders can n be reducedd. Upper limit of analysis orrders * 50 32 16 8 4 NOTE If the analysiss window determ mined by the fu undamental wavve frequency off the PLL sourcce is longer than the data updating u cycle,, no harmonic data d will be deteected. In this caase, the data upd dating cycle should be reduuced. For exam mple, when the fundamental f waave frequency oof the PLL sourrce is 10Hz (cycle: 100mss), the analysis window is one--wave long, andd the data meassurement intervaal is 100ms. In this case, thhe harmonic meeasurement tim me is approximattely more than or equal to 150 0ms (data measurement interval and daata processing tiime). Thereforee, please select the data updatin ng rate of 250ms or morre for measurem ment and displaay of harmonic data. d ---E End Copyright © Itech Electro onics Co., Ltd. 38 Chaptter VII Routine Maintenance C Chapt er VIII Routtine M Mainten nance Thiis chapter describes genneral mainten nance itemss and mainteenance meth hods of the IT99121 power meter. m 7.1 Self-inspeection Thee IT9121 power meter has h a self-insspection funcction. See “P Power-on Seelf-Test” of Chaapter 3 “Inspecting the Insstrument” of IT9121 Instaallation Instruuctions for deetailed steps of self-inspectio s on. 7.2 Errror Infformatioon Refeerences Thee IT9121 pow wer meter haas a detailed error and prrompt inform mation functio on, so as to helpp the user too easily carryy out position ning and meaasurement duuring measurrement and usee. Thiis section describes all errror informattion of the IT T9121 power meter as well w as error cauuses and dispposals. All prrompt inform mation is listeed. Prompt Message M Liist Prrompt inform mation Caal Zero is woorking! Caal Zero is completed! Teest screen Teest dsp Teest beep SeelfTest is finiished! Sooftkey is not available Tiime set ok! M Meter Initializzation Innteg Initializaation Sccope Initializzation Harmonic Inittialization Innrush Initializzation Seetup Initialization Syystem Initialiization Innitialization is finished! Innteg start Innteg stop Innteg time up M page has been reacheed. Max Onne page shouuld exist at leeast Not used in cuurrent state Pllease reset firrst Explanation of o prompt infformation The instrumennt is calibratiing the zero point. p The instrum ment has completed zero z point caalibration. Seelf-inspectioon of LCD sccreen Seelf-inspectioon of DSP. Seelf-inspectioon of the buzzzer. The instrumennt has finisheed the self-teest. The current sooft key is nott available. The time setting is compleeted. In nitialization of o general m measurement In nitialization of o integral fuunction In nitialization of o the oscillooscope functiion In nitialization of o the harmoonic function n In nitialization of o the inrushh function In nitialization of o setup In nitialization of o the system m In nitialization is i finished. In ntegration is started. In ntegration is stopped. The integral tiime is up. Itt displays The maximum page has beeen reached. One O page shouuld exist at least. The current opperation is noot available. Pllease reset fiirst. Copyright © Itech Electro onics Co., Ltd. 39 Chaptter VII Routine Maintenance Error infformation list Errror informattion ussb is not deteected Saave screen faail Sttart time is leess than curreent Ennd time is lesss than curreent Tiimer must bee larger than zero. Harmonic opeen fail Innteg open faill Innteg start fail Innteg stop fail Sccope openfaiil Tiime set fail Caal zero fail Error informaation explanaation [E Error descripption] No US SB peripherall is found. [P Possible causse] No USB pperipheral iss inserted. [D Disposal] Inssert the U dissc type USB B peripheral an nd then copyy the screen. [E Error descriiption] The screen is not saved su uccessfully. [P Possible causse] USB is diisconnected. [D Disposal] Reinsert the US SB peripheraal. [E Error descripption] The staart time is leess than the cu urrent time. [P Possible causse] The integgral setting iss incorrect. [D Disposal] Reset the integrral start timee. [E Error descripption] The ennding time is i less than th he current tim me. [P Possible causse] The integgral setting iss incorrect. [D Disposal] Reset the integrral ending tim me. [E Error descripption] The set time musst be larger th han zero. [P Possible cauuse] The sett integral tiime is not co orrect. [D Disposal] Reset the set inntegral time. [E Error descrription] Thee harmonicc function caannot be enabbled. [P Possible causse] Communnication abno ormality [D Disposal] Chheck the com mmunication cable. c [E Error descripption] The inntegral functtion cannot bee enabled. [P Possible causse] Communnication abno ormality [D Disposal] Chheck the com mmunication cable. c [E Error descripption] The inntegral functtion cannot bee started. [P Possible causse] Communnication abno ormality [D Disposal] Chheck the com mmunication cable. c [E Error descripption] The inntegral functtion cannot bee stopped. [P Possible causse] Communnication abno ormality [D Disposal] Chheck the com mmunication cable. c [E Error description] The oscilloscope function caannot be enabbled. [P Possible causse] Communnication abno ormality [D Disposal] Chheck the com mmunication cable. c [E Error descripption] Time setting fails. [P Possible causse] Time settting is illegall. [D Disposal] Reset the system m time. [E Error descripption] Zero caalibration faiils. [P Possible causse] Communnication abno ormality [D Disposal] Chheck the com mmunication cable. c Copyright © Itech Electro onics Co., Ltd. 40 Chaptter VII Routine Maintenance 7.3 Daaily maiintenan nce Intrroduce basiic maintenaance in daaily use off equipmentt. Such as cleaning, selff-maintenancce allowed too be perform med by the useer, etc. Equipmeent cleaningg Usee dry cloth or o slightly wet w cloth to gently wipee the equipm ment. Do nott arbitrarily wippe the inside of the instruument. Cut offf the power supply beforre cleaning. Initializee Whhen this operration is impplemented, th he system seettings are reecovered to the factory deffault values. 1.Sellect “SYSTE EM > INIT TIAL” in the “Menu”” interface to enter the t system initialiization interfface. See the following figure. 2.Sellect the men nu items to be b initialized d (blue symbbol backgrouund) via key. Menu items with characters c following should be iniitialized; iindicates thaat the items will noot be initializzed. 3.Preess the soft key corresp ponding to the symbol on the rigght of the in nterface to determ mine whether to initializze this men nu item. Or use the sooft key “ initialiization of alll menu items) or “ ” (for ” (no initiaalization for all menu iteems) in the lower part p of the innterface. 4.Preess the “STA ART” soft keyy to initializee system settiings. Press thhe ESC to ex xit. ---E End 7.4 Coontact of o ITEC CH Engiineers Thiis section describes operrations to be carried out by b the user iin case of faiilure of the insttrument. Copyright © Itech Electro onics Co., Ltd. 41 Chaptter VII Routine Maintenance Preparatiion before contact Whhen the insttrument faills, you shou uld make the t followinng preparatio ons before retuurning the innstrument to ITECH I for repair or conttacting enginneers. 1.Cheeck all the items i listed in the “Selff-inspection of o Equipmennt Faults” an nd confirm whetheer there are still s some prooblems. 2.If there t are stilll some probblems, carefu ully read thee contents off warranty seervices and warrannty restrictions in the preeface of the manual. Connfirm that ouur instrumen nt complies with warranty w servvice conditionns. 3.If you y want to send the insttrument to th he manufactuurer for repaair, refer to instructions i in “错误 误!未找到引 引用源。”. ---E End Self-insppection of equipment e faults In case c of failuure of the insstrument, self-inspect thee following iitems. If the instrument faillure can be eliminated e viia simple insspection, thee maintenancce cost and time can be savved. Please chheck the following items before contaacting the enngineer of ITECH. Check wheether the pow wer meter is powered p up. Check wheether the pow wer meter is started s norm mally. Check wheether the insttrument fuse is in good coonditions. Check wheether other connectors c arre in good coonditions andd whether caables, plugs and other parts p are connnected propeerly. Check wheether the systtem configurration of the instrument is correct durring use. Check whether self-innspection of the instrum ment is succeessful and whether w the specificatioons and perfo formance are within the inndicator rangges. Check wheether the insttrument displlays error infformation. Use other instruments i i instead of thiis instrumentt for confirm mation. Collect thhe SN num mber. ITE ECH will coonstantly impprove the prroduct perforrmance, avaiilability and d reliability. Thee service perrsonnel of IT TECH will record r changges of each innstrument. All A relevant infoormation aree marked unniquely accorrding to the serial numbber of each instrument. i Thee equipment returned forr repair must adopt the SN N number as the tracking g ID. Whhen you conttact the enginneer, the effeective SN nuumber of thee instrument will be the effeective guaranntee for effecctive servicee and compleete informatiion. You can n obtain the SN N number of the t instrumennt by the folllowing ways: 1.Preess the “Menu u” key to entter the system m setting pagge of the pow wer meter. 2.Preess the “SYS STEM” to ennter “SYSTE EM INFO” innterface to viiew the prod duct model, producct SN, softwaare version number n and other o informaation. Copyright © Itech Electro onics Co., Ltd. 42