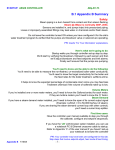
Download Startup Guide For ATP-CO-T2-CTF
Transcript
STARTUP: AEGIS CONTROLLER
ATp-CO-T2-CTF
B.1 Appendix B Summary
Safety:
Sensors are installed in, and pumps inject into pressurized piping.
Loose or improperly assembled fittings may leak water or chemicals.
Do not leave the controller turned ON unless you have configured it for the site’s
water treatment program & verified that the pumps and solenoid are operating.
FYI: inserts ‘For Your Information’ explanations.
Here’s what we’re going to do:
Startup walks you through controller set-up step by step.
We’ll start by verifying each sensor and then
we’ll adjust blowdown and feed setpoints and limit alarms.
We’ll check that the bleed solenoid is operating and that the pumps are pumping.
You’ll need to know and be able to do the following:
You’ll need to be able to measure the cooling water conductivity.
You’ll need to know the target conductivity for the cooling tower and the feed rate for the inhibitor.
You’ll need to know the biocide feed program; when each biocide is fed and for how long.
FYI: Estimating the total volume of water in the tower & it’s piping & knowing your target
biocide concentration and biofeed pump GPH rating, make feed time easy to calculate.
If you’ve installed one or more water meters, you’ll need to know the Gallons/contact for each meter.
If they are turbine meters you’ll need to know the ‘K’ factor.
Knowing the expected tower make-up volume per day and the nominal hours of
tower operation, if not 24/7, will help you set the inhibitor feed rate and biocide timing.
First time users:
Have the controller user manual available to step you through
the calibrate, configure and setpoint sequences.
If you have the ‘LB’ LAN-browser option installed, you can use
a notebook PC & Ethernet crossover cable to startup.
Refer to Appendix ‘C’ of the user manual if you haven’t set-up
your notebook to browse the controller
FYI: Your controller may have been pre-configured for this site.
Skip steps that involve setpoint adjust, feed mode & biocide timing.
Appendix B 7/21/08
-1-
STARTUP: AEGIS CONTROLLER
ATp-CO-T2-CTF
B.2 Minimum Startup Sequence
Unplug Pumps. Valve OFF Bleed. Valve ON flow.: 1
If not hardwired, unplug the chemical pumps and solenoid.
If solenoid hardwired, close the upstream isolation valve.
Open the downstream isolation valve on the sensor – chemical injection piping
and then the upstream isolation valve.
FYI: Always OPEN in this order & CLOSE upstream first.
Check for leaks: 2
Inspect the chemical injection points and the sensor entries for leaks & correct.
If you’ve just installed water meters make sure they are not bypassed
& that the installation fittings are not leaking.
Verify Flowswitch: 3
Plug-in or power up the controller. Scroll UP or DOWN to the ‘S’ Flowswitch_S display
and ensure that within 30 seconds of power ON the flowswitch shows ON.
Don’t proceed until the flowswitch shows ON.
FYI: Thermal flowswitches take time to respond. The CTF type responds within 30 seconds at 1GPM.
Check Temperature: 4
Scroll UP or DOWN to the sensor ‘B’ Temperature_B display & check that
it’s displaying the approximate temperature, +/-10F.
FYI: Temperature doesn’t need to be accurate. We’re only using it to compensate conductivity,
so it has to track, changing when the cooling water changes temperature.
Calibrate Conductivity: 5
Scroll UP or DOWN to the sensor ‘A’ Conductivity_A display
Measure the tower water conductivity at the sensor sample valve
and calibrate the conductivity sensor.
Correct for Time Zone: 6
Key EXIT to the Day – Time display.
If necessary, key ENTER scroll to Time&Date & adjust the time for your time zone.
FYI: Sets the time & date stamp correctly for timed biocide feeds, alarms & data logging.
Configure Water Meters: 7
FYI: Skip 7 if you don’t have a make-up or bleed meter
Scroll UP or DOWN to the meter ‘O’ Makeup_O display
It’s currently a contact head meter @ 100 Gallons/contact.
Key ENTER to Configure if you need to modify the meter type or gallons per contact.
Scroll UP or DOWN to the meter ‘P’ Bleedmeter_P display
It’s currently a contact head meter @ 100 Gallons/contact.
Key ENTER to Configure if you need to modify the meter type or gallons per contact.
Note both water meters current volume display.
Appendix B 7/21/08
-2-
STARTUP: AEGIS CONTROLLER
B.2 Minimum Startup
ATp-CO-T2-CTF
Sequence continued
Set Bleed Setpoints: 8
Scroll UP or DOWN to the ‘2’ Bleed_2 display.
Key ENTER to Setpoints and adjust the Turn ON & TurnOFF setpoints for your treatment program
and make-up chemistry. Typically the two setpoints are 10uS apart.
Verify Bleed & Meters: 9
Plug-in the bleed solenoid in the plug labeled 2 and/or
open the upstream solenoid isolation valve.
If ‘2’ Bleed_2 is not ON, key ENTER and Test-Prime for 15 minutes.
If you can view the tower drain, verify there’s flow when the bleed solenoid is ON.
If you have a ‘P’ Bleed Meter installed, it should measure volume within the Test-Prime time.
Monitor sensor ‘A’ Conductivity_A. Its value should fall as the
tower float drops and turns ON the tower make-up.
If you have an ‘O’ Makeup_O meter installed,
you’ll see it measure increased volume as the tower makes up.
Select Inhibitor Feed Mode: 10
Scroll UP or DOWN to the ‘1’ Inhibitor_1 display.
It’s currently set to feed based on the tower make-up meter volume.
If you don’t have a make-up meter key ENTER to Configure
& Special Control & then select Bleed thenFeed.
Set Feed Setpoints: 11
2.1 Chemical Feed 101, outlines estimating setpoints for
typical feed modes to get a target ppm of inhibitor.
Approximate & correct based on your wet ppm testing after a week of run time.
If this tower has no inhibitor in it now, estimate its volume
& use Prime-Test to get to initial ppm levels.
Scroll UP or DOWN to the ‘1’ Inhibitor_1 display& key ENTER to Setpoints.
If you are using a meter based feed, you’ll enter meter volume & pump ON time setpoints.
If you are using Bleed thenFeed, you’ll setpoint the % of every 5 minutes of bleed time.
Verify Inhibitor Feed: 12
Scroll UP or DOWN to the ‘1’ Inhibitor_1 display.
Plug in the Inhibitor pump to the plug labeled 1.
Key ENTER to Prime-Test & feed for 5 minutes.
Verify that the inhibitor pump primes & feeds.
Appendix B 7/21/08
-3-
STARTUP: AEGIS CONTROLLER
ATp-CO-T2-CTF
B.2 Minimum Startup Sequence continued
Set Inhibitor Feed Limits: 13
Scroll UP or DOWN to the ‘1’ Inhibitor_1 display.
Key ENTER to Alarms-Limits.
Key ENTER & scroll to Minutes/Day. Adjust this feed limit to prevent overfeeding.
FYI: The Inhibitor feed limit is reset @ midnight so that the
same amount of inhibitor is available for each day’s treatment.
The Mins/Actuation limit is seldom used for inhibitor feeds.
Set BiocideA & BiocideB Cycle Days: 14
Scroll UP or DOWN to the ‘4’ BiocideA_4 display.
Key ENTER & scroll to Configure. Key ENTER & scroll to Event Cycle.
A 28 Day cycle is the default. Adjust if your feed program requires a weekly program.
Repeat & set Event Cycle for ‘5’ BiocideB_5.
FYI: Organic biocides are typically fed on a 28 day, 4 week cycle.
Biocides ‘A’ & ‘B’ may be alternated every week or during each week.
Oxidizing biocides like bleach are usually fed 1 to 3 days a week using the ‘7 Days’ Event Cycle.
Set BiocideA & BiocideB Feed Events: 15
Scroll UP or DOWN to the ‘4’ BiocideA_4 display.
Key ENTER & scroll to Biofeed Event. Key ENTER & Add Event.
Repeat & Add Event for ‘5’ BiocideB_5.
FYI: The ‘Add Event’ display shows you how many feed events are set for this pump.
Once you set an event, the controller will prompt you for how often you wish to run the event.
Verify BiocideA Feed: 16
Scroll UP or DOWN to the ‘4’ BiocideA_4 display.
Plug in the BiocideA pump to the plug labeled 4.
Key ENTER to Prime-Test & feed for 5 minutes.
Verify that the biocide pump primes & feeds.
Verify BiocideB Feed: 17
Scroll UP or DOWN to the ‘5’ BiocideB_5 display.
Plug in the BiocideB pump to the plug labeled 5.
Key ENTER to Prime-Test & feed for 5 minutes.
Verify that the biocide pump primes & feeds.
Optional:End Prime-Tests: 18
Scroll UP or DOWN to each priming pump’s display.
Key ENTER & UP or DOWN to Alarms-Limits & ENTER.
Scroll to Clear Alarms & ENTER to ending any active Prime-Test.
FYI: If you noted the make-up and/or bleed water meter volumes in Step 7,
check that the current volumes on each meter reflect the make-up or bleed
that has occurred during Start-up.
Appendix B 7/21/08
-4-
STARTUP: AEGIS CONTROLLER
ATp-CO-T2-CTF
B.3 Startup Sequence Options
Not all sites will require or wish to do the following optional steps.
Refer to the user manual for guidance on selecting and setting.
Set Bleed Limit Alarms: A
Scroll UP or DOWN to the ‘2’ Bleed_2 display.
Key ENTER to Alarms-Limits and adjust both Min/Actuation and Minutes/Day alarms
to flag variation from the expected bleed operation.
FYI: The Bleed limit is set NOT to turn OFF on limit so you get the warning but bleed continues.
Use Min/Actuation to flag a partially blocked bleed and Minute/Day to flag an
increase in make-up conductivity or bleed setpoints set too low.
Set limit times so that nuisance alarms do not occur.
Set Conductivity Alarms: B
Scroll UP or DOWN to the sensor ‘A’ Conductivity_A display
Key ENTER to Alarms and adjust both High Alarm and Low Alarm.
FYI: The Low conductivity alarm can flag a sump or circulation piping water loss.
The High conductivity alarm can flag a failed or blocked bleed.
Use the Delay on Alarm setting to block nuisance alarms.
Set Biocide Prebleed-Lockout: C
Scroll UP or DOWN to the ‘4’ BiocideA_4 display.
Key ENTER & scroll to Configure. Key ENTER & scroll to Special Control.
Key ENTER & scroll to Prebleed-Lock.
Repeat for ‘5’ BiocideB_5.
FYI: IF you able to schedule biocide feeds during the tower’s low load period,
you may not need Prebleed-Lock.
You don’t need to set both PreBleed & Lock-out. Use either or both.
Set Biocide Feed Limits: D
Scroll UP or DOWN to the ‘4’ BiocideA_4 display.
Key ENTER to Alarms-Limits and adjust the Min/Actuation alarm.
Repeat for ‘5’ BiocideB_5.
FYI: The Biocide feed limit is set to turn OFF on limit since overfeeding
biocide usually means an error in setting feed time or an extended Prime-Test period.
Set Make-up Meter Volume/Day Alarm: E
Scroll UP or DOWN to the meter ‘O’ Makeup_O display
Key ENTER to Alarms and adjust High Alarm.
Repeat for ‘P’ Bleedmeter_P.
FYI: If you have a 24/7 site, set the Low Alarm & flag meter failure.
24/7 Sites, Set Flowswitch Alarm: F
Scroll UP or DOWN to the ‘S’ Flowswitch_S display.
Key ENTER to Alarms and adjust No Flow Alarm.
FYI:A No Flow alarm indicates no flow past the measuring sensors & therefore no control.
Appendix B 7/21/08
-5-


