1
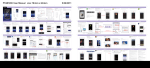
MotionCam
Users Manual
Version 1.0
Release 1.0
March 2006
MotionCam User Manual
Copyright 2006, by AWS Convergence Technologies, Inc.
All Rights Reserved.
Manual Copyright, 2006, by AWS Convergence Technologies, Inc.
All Rights Reserved.
Information in this document is subject to change without notice and does not represent a commitment on
the part of AWS Convergence Technologies, Inc. Inc. The software described in this document is furnished
under a license agreement or non-disclosure agreement. The software may be used or copied only in
accordance with the terms of this agreement. It is against the law to copy AWS Convergence Technologies,
Inc. WeatherBug Camera software on magnetic tape, disk or any other medium for any purpose other than
the purchaser's personal use.
AWS Convergence Technologies, Inc. and WeatherBug Camera are registered trademarks of AWS
Convergence Technologies, Inc. Inc.
Note: This equipment has been tested and found to comply with the limits
for a Class A digital device, pursuant to Part 15 of the FCC Rules. These limits are
designed to provide reasonable protection against harmful interference when the
equipment is operated in a commercial environment. This equipment generates, uses,
and can radiate radio frequency energy, and, if not installed and used in accordance
with the instruction manual, may cause harmful interference to radio
communications. Operation of this equipment in a residential area is likely to cause
harmful interference in which case the user will be required to correct the
interference at his own expense.
Technical Support
For technical support relating to the WeatherBug products, call the WeatherBug
Weather Station Technical Support team at (800) 624-4205.
2
MotionCam User Manual
Table of Contents
INTRODUCTION ..................................................................................................4
SECTION 1: WEATHERBUG MOTIONCAM VIEWER PAGE ............................4
Frame Rate
View Size
Camera Control Panel
Capture Image
Weatherbug Achieve
Broadcaster Image Display
SECTION 2: MOTIONCAM ADMIN....................................................................14
SECTION 3: MAINTENANCE ............................................................................23
LIST OF FIGURES
FIGURE 1 - MotionCam ......................................................................................4
FIGURE 2 - MotionCam Computer .....................................................................4
FIGURE 3 – WeatherBug MotionCam Viewer page ...........................................5
FIGURE 4 – Frame Rate ....................................................................................6
FIGURE 5 – View Size 640 X 480 ......................................................................7
FIGURE 6 – View Size 320 X 240 ......................................................................8
FIGURE 7 – View Size 160 X 120 ......................................................................8
FIGURE 8 – Control Panel..................................................................................9
FIGURE 9 – Zoom bar ........................................................................................10
FIGURE 10 – Before zoom .................................................................................11
FIGURE 11 – After zoom ....................................................................................11
FIGURE 12 – Captured Image............................................................................12
FIGURE 13 – WeatherBug Achieve’s Homepage...............................................13
FIGURE 14 – MotionCam Admin page ...............................................................14
FIGURE 15 – Camera Setting.............................................................................15
FIGURE 16 – System Setting .............................................................................16
FIGURE 17 – User Setting..................................................................................18
FIGURE 18 – Preset Positions............................................................................19
FIGURE 19 –Tour Settings .................................................................................21
FIGURE 20 – Schedule Settings.........................................................................22
3
MotionCam User Manual
Introduction
Congratulations on choosing the Weatherbug MotionCam! The MotionCam tool
has been programmed to help simplify the usability for the camera operator. The
camera operates 24 hours a day, 7 days a week at the site and provides images to
the internet every 5 minutes. The MotionCam is capable of physically rotating to
provide different views, zooming in and out to detailed objects, schedule image
tours and many more. This user’s manual will help show you how to operate the
camera by describing the Weatherbug MotionCam Viewer page.
Your MotionCam purchase comes with a preset computer with all the necessary
applications installed to operate the camera. The MotionCam Viewer page is the
tool needed to control and operate the MotionCam. This page is already set as
your default home page when you open your Internet Explorer browser. Figure 1
& 2 shows a figure of the MotionCam and the MotionCam computer.
FIGURE 1 - MotionCam
FIGURE 2 - MotionCam Computer
SECTION 1: WeatherBug MotionCam Viewer page
Open an Internet Explorer web browser page on your computer and it should
default to displaying the MotionCam Viewer Page. Please DO NOT change the
default setting on the web browser. If the default homepage has been changed on
the MotionCam computer, you can reach the MotionCam Viewer page by typing in
its IP address, http://192.168.213.188. This address will ONLY work from the
MotionCam computer (or computer directly connected to the camera).
If you want access to the MotionCam from another computer, type in the
MotionCam computer’s IP address. This IP address will vary. You can contact
your network administrator and they can provide you with the correct IP address to
the MotionCam computer.
4
MotionCam User Manual
Verify that the picture on the computer monitor is functioning and in focus. View
the Weatherbug MotionCam Viewer page on the monitor. Figure 3 shows the
window display and the following links:
1. Frame Rate – The rate at which the camera transfers the live feed to the
screen.
2. View Size – This selection allows the viewer to adjust the size of the image
on the screen.
3. Camera Control Panel – This panel allow the user to control the direction
and zoom of where the camera is facing.
4. Capture Image – Takes a snapshot of the camera.
5. Weatherbug Achieve – Opens Weatherbug Achieve’s homepage in a new
window.
6. Broadcaster On-Air Display – Opens a new window with the picture that
is shown on the TV stations.
7. SECTION 2: MotionCam Admin – Opens a new window with administrative
options for the MotionCam found in Section 2.
FIGURE 3 – WeatherBug MotionCam Viewer page
5
MotionCam User Manual
Frame Rate
The Frame Rate is the rate at which the camera transfers the live feed to the
screen. Selecting the pull down menu beside Frame Rate gives the following
options shown in Figure 4. The higher the rate is, the more resources the
MotionCam Viewer page will use from your computer and your network. Ask your
network administrator how high you should set your frame rate.
FPS = Frames per Second
1. Fastest
2. 25 FPS
3. 20 FPS
4. 15 FPS
5. 10 FPS
6. 8 FPS
7. 6 FPS
8. 4 FPS
9. 3 FPS
10. 2 FPS
11. 1 FPS
FIGURE 4 – Frame Rate
6
MotionCam User Manual
View Size
This option allows the viewer to adjust the size of the image on the screen
Selecting the pull down menu option beside View Size gives the following options.
1.
2.
3.
4.
Auto (Figure 5)
640 X 480 (Figure 5)
320 X 240 (Figure 6)
160 X 120 (Figure 7)
The view size affects how much virtual memory your computer is using and the
bigger the image size, the more memory it is using from your computer. Unless
there is an issue with memory usage on your computer, it is suggested that you
select Auto to see the best possible image.
FIGURE 5 – View Size 640 X 480
7
MotionCam User Manual
FIGURE 6 – View Size 320 X 240
FIGURE 7 – View Size 160 X 120
8
MotionCam User Manual
Camera Control Panel
The controls in this blue panel will alter the direction or zoom of your picture by
moving your MotionCam within its clear plastic dome.
•
•
•
•
•
Using the Arrows you should be able to move the lens of the camera from
its current positon to the specified direction.
The drop-down menu allows you to point to a preset position. Details on
page 18.
WIDE allows you to zoom out.
TELE allows you to zoom in.
PT MODE allows you to move the camera relative to the center of the
picture
FIGURE 8 – Control Panel
9
MotionCam User Manual
Other Methods of moving the camera
By using a point, click and drag method, you can control where your camera is
facing and zooming into without having to use the control panel. One click at any
point on the image will center the camera angle at that point. If you click and drag
the picture, a red box will appear. When you release the mouse, your picture will
zoom to the size of your box. Figures 10 and 11 shows the before and after
effects of this zoom procedure.
You may also use the zoom bar below the image like in Figure 9.
“T” = Tele = Zoom In
“W” = Wide = Zoom Out
FIGURE 9 – Zoom bar
10
MotionCam User Manual
FIGURE 10 – Before zoom
FIGURE 11 – After zoom
11
MotionCam User Manual
Capture Image
Clicking on this link will take a snapshot of the current camera position and will
open a new window and show the picture as shown in Figure 12. This allows you
to save special images to you computer.
FIGURE 12 – Captured Image
Weatherbug Achieve
Clicking on this link will open the homepage of Weatherbug Achieve as shown in
Figure 13. You can also reach this page with the following address:
http://achieve.weatherbug.com/
WeatherBug planted its roots in the education market in 1992 by installing
professional-grade weather stations at schools allowing teachers to apply realworld weather conditions for math, science and geography. All schools were
networked together and soon after, WeatherBug introduced a rigorous curriculum
that covered grades K-12 meeting national and state education standards.
12
MotionCam User Manual
Today WeatherBug Achieve’s integration of real-life weather conditions with
hands-on classroom curriculum is enhancing learning and interaction with students
and teachers. Studies have shown students of all ages and backgrounds have
benefited both personally and academically from the use of WeatherBug Achieve
when incorporated into text book curriculum.
FIGURE 13 – WeatherBug Achieve’s Homepage
Broadcaster On-Air Display
This link opens a new browser window with the live picture that your local TV
stations have access to. The TV stations may use this feed to air on their live
news broadcast.
13
MotionCam User Manual
SECTION 2: MotionCam Admin
Clicking on this link opens a new browser page containing more camera options
such as Camera and System settings, activity detection, preset positions and
more. See Figure 14. The typical camera user will not need to access this
section. Most options will require a network login and password depending on
your set up preference. The following sections will give you a more in depth view
of the administrative page.
FIGURE 14 – MotionCam Admin page
Camera
This page contains standard camera settings which will alter the color, quality and
sharpness of the image. Your MotionCam has come with default settings which
you may change to your preference. When changing an option, click the “Apply”
or “OK” button on the same row for the changes to take place. Figure 15 shows
the default camera settings.
To prevent shaking images due to windy conditions, turn the Stabilizer “On” and
click “Apply.”
14
MotionCam User Manual
FIGURE 15 – Camera Setting
15
MotionCam User Manual
System
This page contains default settings that are already on your computer system, as
shown on Figure 16. The common camera user will not need to access this page
and administrators should not have to change the features on this page after the
first use.
FIGURE 16 – System Setting
16
MotionCam User Manual
User
This page allows the administrator to password protect the MotionCam program,
which will limit the camera users to certain functions. They can set the user
names and passwords for the Administrator and up to 9 users and their access
level. There are 5 access levels you can grant the user depending on their
UserID. As the levels decrease, your access in the MotionCam program gets
more limited.
Level 4 – Level 4 gives the highest level of access which gives you access to
everything in the MotionCam program. User has full administrative rights. User
can view and move the camera and change any administrative settings in the
MotionCam Admin page.
Level 3 – User can view and move the camera – Performs user authentication
when a user accesses the MotionCam Admin page.
Level 2 – User can only view the camera – Performs user authentication when a
user accesses the MotionCam Admin page.
Level 1 – User has no access to the camera. See table below.
No Access Rights – No access rights – Only use this option when you want to
temporarily prohibit access to the camera.
Please consult your network administrator about accessing the MotionCam
program.
Administrative
Rights & Controls
Control & Move
Camera
View Camera
Level 4
Level 3
Level 2
Level 1
To set up the user, enter the User name, Password, Re-type password and
Access right for each user ID. See Figure 17.
User name – Type a name between 4 and 16 characters
Password – Type a password between 4 and 16 characters
Re-type password – Confirm the password and sure the characters are the same
as the Password
17
MotionCam User Manual
FIGURE 17 – User Setting
Preset Positions & Tour
This page allows the administrator to program the preset camera position by
storing the pan, tilt and zoom positions of the camera in memory (Preset position)
and program the sequenced action of the camera (Tour). You can store up to 16
Preset positions in memory.
How to preset positions:
1. Adjust the pan, tilt and zoom of the camera to the position (view) you want
your camera by using the control panel as describe on page 9.
2. Select a preset number 1 to 16 from the Preset No. drop down list.
3. Type a Preset Position name up to 32 characters.
4. Press the Apply button to store the camera position
5. Check on the Preset position table if the changes have been made.
6. Go to the MotionCam Viewer page and scroll down the list of the Preset
positions to check if the changes have been applied.
18
MotionCam User Manual
FIGURE 18 – Preset Positions
How to program the tour settings:
19
MotionCam User Manual
1. Select a Tour name from among A, B, C, D and E
2. Type in the Stay time, between 1 and 3600 seconds, for the camera to stay
at each preset position.
3. Select the Pan speed from the drop down list from 1 to 19 and Fastest.
The camera pans faster with a higher number setting.
4. Select the Tilt speed from the drop down list from 1 to 15 and Fastest. The
camera tilts faster with a higher number setting.
5. Select the preset position number 1 to 16 for each of the list boxes. The
camera moves to the preset positions stored in the selected preset
numbers in the sequence. The sequence of camera movement starts from
the upper-left list box to the right, then lower list box from left to right. This
sequence is cyclical, after the preset position specified in the last list box,
the camera returns to the first preset position.
6. Press Apply button to store the tour settings.
How to activate a tour:
1. Select the Tour name A to E you want to activate. Select none if you do
not want to activate any tour or if you want to stop the tour in action.
2. Select the Available period for which you can activate the tour.
a. Always: The tour can be activated any time.
b. Use scheduler: The tour is activated according to the Schedule
check selected on the Schedule No. menu. See page 22.
3. When Use Scheduler is selected on the Available period menu, select the
schedule you want to activate the tour.
4. Click to select the check box(es) 1 to 6. You can select multiple schedules.
5. Select the tour activity after it has stopped because you have manually
operated the camera from the camera control section during the tour in
action. If you select On, specify the wait time before the tour restarts,
between 5 and 600 seconds. The tour restarts automatically after the
specified time has elapsed. If you select Off, the tour does not restart and
none is displayed on Selected tour name.
20
MotionCam User Manual
FIGURE 19 –Tour Settings
21
MotionCam User Manual
Schedule Setting
This page allows you to set the schedules for your tours or alarms according to the
time and days of the week.
1. Enter the Start time and End time in 24:00 format.
2. Check the boxes of the days of the week that you want selected.
3. When finished, click OK.
FIGURE 20 – Schedule Settings
FTP Client
The FTP Client page is used to set up for capturing and sending still images to an
FTP server. You can capture a still image at the moment when a trigger occurs by
an external sensor input, the built-in activity detection function or a manual trigger
button. The captured still image(s) is sent to the FTP server.
22
MotionCam User Manual
SMTP
The SMTP page is used to set up for the SMTP function that can capture and
send a still image attached to an E-mail. The captured still image is sent as an
attachment of the E-mail.
SECTION 3: Maintenance
Under normal conditions, very little maintenance is required on the MotionCam
System. The majority of maintenance issues can be evaluated and diagnosed
remotely. Should a part or cable need replacement, all components are “plug and
play”, i.e., the defective component can simply be removed from the system and a
new one installed with the quick disconnect cable connectors.
The window on the camera housing will need periodic cleaning as rain and snow
will leave ‘spots’ on the window. Use a soft damp cloth to clean the window.
NOTE: Do not use products that contain ammonia, this will damage the glass.
23