1
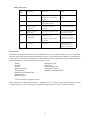
Step by Step Instructions for Meter Operation
Step 1. Press the <ON> Key.
SCREEN: “-E30- ” is displayed followed by the currently selected program (i.e. “A 0-20%”) , then
flashes “-bL-”, and then “tUbE.”
( “-E31-” is the current software version and “-bL-” indicates the instrument is undergoing internal
calibration.)
Step 2. If Program “A” is not the desired program, press the <ON> key to change it by following the procedure
described in “Selecting a Program”.
Step 3. With the meter held upright: Insert the reaction tube into the bottom of the meter until it seats firmly.
Step 4. Press the <READ> Key.
SCREEN: “CALC” flashes,
then:
SCREEN: “A XXXX ”
(Where “A” is the letter designating the current program and “XXXX” is the reading in the units
appropriate for the current program.)
Step 5. Record result, remove reaction tube and insert new sample.
Step 6. Press the <READ> key.
Step 7. Repeat steps 3-6 until all samples have been read.
Step 8. Turn off meter manually or meter will turn off automatically after 5 minutes of non-use.
NOTE: Meter is off when screen is blank.
Analysis Instructions for Each Sample Type and Analysis Program
Program A –> Procedure for Testing Water Content up to 20%
(Reagent System: HS-ORP)
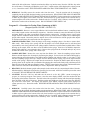
1. PREPARATION: Remove a sampling syringe and a white-capped reaction tube from the reagent box. Check
the contents to ensure that all items are present and intact. Remove the white cap and black septum from the
reaction tube. Carefully remove a green water ampule from the cardboard carton and insert it fully into the top
of the protective ampule sleeve containing the grayish white ampule. Return the protective ampule sleeve to the
reaction tube with the grayish white ampule on the bottom and place the tube into the reagent box.
2. SAMPLE INTRODUCTION: Work the plunger of the empty sampling syringe a few times to ensure that it
slides easily. Place the tip of the syringe into the oil sample to be tested (sample must be well mixed and
representative) and slowly pull back on the plunger until it reaches the stop and cannot be pulled further. When
drawing up the sample, make sure there are no air bubbles in the syringe. If not free of air bubbles, depress the
plunger again and draw a second sample slowly. Remove the syringe from the oil sample and wipe any excess
oil from the outside of the syringe with a tissue wipe. Insert the sampling syringe into the reaction tube and
dispense the oil sample by depressing the plunger. Replace the black septum (hole on top) by pressing down
on the septum with your thumb while gripping the reaction tube firmly using a uniform pressure along the side
of the tube and supporting the bottom. (NOTE: Squeezing the tube to cause a deformation in the sides of the
tube will result in an artificially low result.) Replace the white cap TIGHTLY.
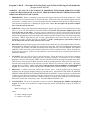
3. REACTION: Break the bottom (grayish white) ampule in the reaction tube by compressing the sides of the tube.
Mix thoroughly by shaking the reaction tube vigorously for 30 seconds. Allow the reaction to proceed for a total
of 2 minutes. DO NOT BREAK THE GREEN AMPULE.
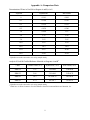
4. ANALYSIS: Press the <ON> key and make sure the meter is set for “A 0-20%” (NOTE: If changing the program,
see “Selecting a Program” in the manual). Once the meter displays “tUbE”, insert the reaction tube into the opening
at the bottom of the meter. The hole in the white cap must be lined up with the metal pin extending from the
5