Download T-316 Manual
Transcript
1
LATIN TECH INC
WWW.LT-AUTOMATION.COM
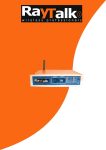
Wi-Fi Ethernet Smart Client
T-316
User’s Manual
Trademarks
The product described in this book is a licensed product of Gemtek Systems, Inc.
Microsoft, Windows 95, Windows 98, Windows Millennium, Windows NT, Windows
2000, Windows XP, and MS-DOS are
registered trademarks of the Microsoft Corporation.
Novell is a registered trademark of the Novell, Inc.
MacOS is a registered trademark of Apple Computer, Inc.
Java is a trademark of Sun Microsystems, Inc.
Wi-Fi is a registered trademark of Wireless Ethernet Compatibility Alliance.
All other brand and product names are trademarks or registered trademarks of their
respective holders.
5209 NW 74 AVE ST. SUITE 202 MIAMI, FL. 33166 USA
1-888-832-7568 Toll free
305 593 8999 Tel
1-775-637-6825 Fax
2
LATIN TECH INC
WWW.LT-AUTOMATION.COM
Contents
1. Introduction
2. Installation
3. Configuring the Wireless Ethernet Client
4. Contents of Web Interface
4.1 Info Page
4.2 Wireless Settings
4.3 Bridging Table
4.4 IP Setting
4.5 Administration
4.6 Security
5. Troubleshooting
6. Technical Specification of Wireless Ethernet Client
5209 NW 74 AVE ST. SUITE 202 MIAMI, FL. 33166 USA
1-888-832-7568 Toll free
3
3
4
5
5
6
7
8
9
10
12
13
305 593 8999 Tel
1-775-637-6825 Fax
3
LATIN TECH INC
WWW.LT-AUTOMATION.COM
1. Introduction
Thank you for purchasing the T316 Wireless Ethernet Smart Client.
This manual will assist you with the installation procedure.
The package you have received contains the following items:
• 11Mbps Wireless Ethernet Client
• Cat.5 Ethernet with USB power extractor cable
• CD
Note: if anything is missing, please contact your vendor.
T316 allows for one Ethernet-enabled device (e.g., Windows/MAC/Linux/UNIX
Desktop PC or laptop) to be instantly connected to an existing 802.11b wireless
network. Taking full advantage of the integrated Web server capability, T316 is
Performed through a simple Web browser user interface for easy configuration.
Besides laptop or desktop environment, T316 is also the ideal solution to make
Other network device such as network printer or camera becomes a wireless
station.
2. Installation
1. Mount T316 Wireless Ethernet Smart Client to your device firmly.
2. Insert the power connector.
3. Attach the Wireless Ethernet Client to the Ethernet network using a UTP
Ethernet cable.
At the front of the Wireless Ethernet Client you will see three LEDs.
If all go well, the Power LED is red and the LINK and ACT LED will be blinking
whenever there is traffic on the wired and wireless networks respectively.
Reset the Wireless Ethernet Client
If you press the reset button for more than four seconds, the Wireless Ethernet
Client will be reset to the default factory settings. All changes you made to the
configuration will be lost.
1. Insert one end of a paper clip into the hole of reset button and keep it pressed
for more than four seconds. LINK LED will be blinking during the process.
2. Release the reset button after ACT LED goes off. All settings will be deleted and
back to the default. You can refer to this manual and reconfigure the Wireless
Ethernet Client by yourself.
5209 NW 74 AVE ST. SUITE 202 MIAMI, FL. 33166 USA
1-888-832-7568 Toll free
305 593 8999 Tel
1-775-637-6825 Fax
4
LATIN TECH INC
WWW.LT-AUTOMATION.COM
3 Configuring the Wireless Ethernet Client
The Wireless Ethernet Client is a ready-to-use device. It is delivered with default
settings that allow you to have access to it without configuring it. When this
message window pops up, press OK to access web configuration page. No user
name and password needed.
You can configure the Wireless Ethernet Client via a JavaScript-enabled
web-browser such as Internet Explorer 4.0 or higher, or Netscape Navigator 4.0 or
5209 NW 74 AVE ST. SUITE 202 MIAMI, FL. 33166 USA
1-888-832-7568 Toll free
305 593 8999 Tel
1-775-637-6825 Fax
5
LATIN TECH INC
WWW.LT-AUTOMATION.COM
4. Contents of Web Interface
4.1 Info Page
The Info window displays the current setup status of the Wireless Ethernet Client.
Communication Quality
Specifies the Communications Quality of the Basic Service Set to which the station
is currently connected. The value for the field of this record is based on signal level
and noise level measurements.
Firmware Version
This indicates the Wireless Ethernet Client’s firmware version.
Current setting of IP Address
It shows IP address of the wireless Ethernet Client.
Non-IP MAC Address
The MAC Address of Ethernet port that bridges to Wireless Ethernet Client.
5209 NW 74 AVE ST. SUITE 202 MIAMI, FL. 33166 USA
1-888-832-7568 Toll free
305 593 8999 Tel
1-775-637-6825 Fax
6
LATIN TECH INC
WWW.LT-AUTOMATION.COM
4.2 Wireless Settings
The settings of the wireless device are displayed here, and you can edit some of
these settings.
Operating Mode:
Infrastructure
This is the default setting. Switch to Ad-Hoc mode when communicating to another
client device without the presence of Access Point.
SSID
The SSID is also known as Service Set ID. This is the name of your wireless
network. Only Wireless Ethernet Clients and clients that share the same SSID are
able to communicate with each other.
P.S. You can leave this blank and then reboot it to scan the environment
You will see what AP available around you at Info page.
Channel
This is the channel that the Wireless Ethernet Client uses to transmit and receive
data. The channel that you select here is restricted to the channels that can be
used within your regulatory domain.
5209 NW 74 AVE ST. SUITE 202 MIAMI, FL. 33166 USA
1-888-832-7568 Toll free
305 593 8999 Tel
1-775-637-6825 Fax
7
LATIN TECH INC
WWW.LT-AUTOMATION.COM
TX rate
The transmit rate identifies the preferred data transmission speed of the Wireless
Ethernet Client. Transmissions at faster rates allow for higher data throughput and
quicker network response times. However, transmissions at lower rates are usually
more reliable and cover longer distances than the higher rates.
Access Point Density
When connecting to the Access Point, it is generally necessary to specify an
Access Point Density. This provides some control over handoff of clients during
roaming between Access Points. Three values, Low, Medium, and High
4.3 Bridging Table
The table lists your device that is bridging with the Wireless Ethernet Client.
5209 NW 74 AVE ST. SUITE 202 MIAMI, FL. 33166 USA
1-888-832-7568 Toll free
305 593 8999 Tel
1-775-637-6825 Fax
8
LATIN TECH INC
WWW.LT-AUTOMATION.COM
4.4 IP Setting
Static
Select Static (recommended) to assign the IP, Subnet Mask and Gateway
Address.
DHCP
If the Wireless Ethernet Client is part of a network with a DHCP server, the DHCP
server will assign the IP settings to the Wireless Ethernet Client automatically.
(This is not recommended because a DHCP-assigned IP Address will change
frequently, making the Wireless Ethernet Client impossible to configure.)
Device Name
Assign the name of the Wireless Ethernet Client.
Allow Upgrade Uploads
Select this checkbox when performing firmware upgrade.
5209 NW 74 AVE ST. SUITE 202 MIAMI, FL. 33166 USA
1-888-832-7568 Toll free
305 593 8999 Tel
1-775-637-6825 Fax
9
LATIN TECH INC
WWW.LT-AUTOMATION.COM
4.5 Administration
Change Username and Password
You can use a password to prevent tampering with the configuration of the
Wireless Ethernet Client. By default, no username and password is required.
However, if you choose to use a password, key in a password that is no more than
15 letters in length. Re-enter the password in the next field, and click Change
Password for the change to take effect.
Reboot Bridge
Click Reboot to restart the Wireless Ethernet Client.
Reset to Factory Defaults
Click on Factory Reset to return all settings to the Factory Default values. (Press
and release the Reset button on the back of the unit to its factory default settings.)
5209 NW 74 AVE ST. SUITE 202 MIAMI, FL. 33166 USA
1-888-832-7568 Toll free
305 593 8999 Tel
1-775-637-6825 Fax
10
LATIN TECH INC
WWW.LT-AUTOMATION.COM
4.6 Security
WEP Enabled
The default setting is Disable. Encryption (WEP)—additional measure of security
on your wireless network which can be achieved by using WEP (Wired Equivalent
Privacy) encryption. When an encrypted frame is received it will only be accepted if
it decrypts correctly. This happens only if the receiver has the WEP Key used by
the transmitter. All devices on the network, and the Wireless Ethernet Client, must
share the same WEP selection – either Enable or Disable.
To enable WEP Encryption, click on WEP Enable.
WEP Key Length
The default Key Length is 64-bit. The WEP key is generated from Hexadecimal
entries that are either 64 or 128-bit in length. (This is also sometimes referred to as
40-bit or 104-bit encryption) When enabling encryption, select the Key Length,
either 64 or 128-bit, and then input the Hexadecimal digits. For 64 bit keys you
must enter 10 hex digits into the key fields, for 128 bit keys you must enter 26 hex
digits. If you leave the key field blank this means a key of all zeros.
Note: Only the following alphanumeric characters are allowed in the entry, which is
0 to 9, a to f.
5209 NW 74 AVE ST. SUITE 202 MIAMI, FL. 33166 USA
1-888-832-7568 Toll free
305 593 8999 Tel
1-775-637-6825 Fax
11
LATIN TECH INC
WWW.LT-AUTOMATION.COM
WEP Key to Use
Use the pull-down menu to select the WEP key. All devices on the network must
use the same key to communicate with one another.
Deny Unencrypted Data
For additional security when WEP is enabled, select Deny Unencrypted Data.
Data received without a WEP key is rejected when Deny Unencrypted Data is
selected.
Authentication Type
You may choose between Open System, Shared Key, and Both. The
Authentication Type default is set to Open System. Shared Key is when both the
sender and the recipient share a secret key. All points on your network must use
the same authentication type. It is recommended that you use the default setting.
5209 NW 74 AVE ST. SUITE 202 MIAMI, FL. 33166 USA
1-888-832-7568 Toll free
305 593 8999 Tel
1-775-637-6825 Fax
12
LATIN TECH INC
WWW.LT-AUTOMATION.COM
5. Troubleshooting
Q: It‘s difficult to connect this device with exist wireless network.
A: There are several possible causes based on the way the Wireless Ethernet
Client is connected to the network.
a. Problems on the wireless side
Always check the status of the LEDs to verify if you have:
• Electricity problems,
• Radio signal problems,
• networking problems.
1. Possible cause: Is the Wireless Ethernet Client powered up?
Solution: Check the power LED. Check if the Wireless Ethernet Client
Is connected.
2. Possible cause: Is the Wireless Ethernet Client is in range of the
Access Point?
Solution: Check the ACT signal LED. Check for possible problems
with respect to range.
3. Possible cause: Is there a network connection? Check the network
LINK LED.
Solution: The Wireless Ethernet Client may take up to a minute to find
An IP address.
b. Problems on the wired side
Always check if your cables and connections are in good order and
properly installed.
1. Possible cause: Has the proper cable been used?
Solution:
• If the Wireless Ethernet Client is connected to a hub, a
“normal” (not a crossover) cable must be used.
• If the Wireless Ethernet Client is connected directly to a
Computer, a crossover cable must be used.
5209 NW 74 AVE ST. SUITE 202 MIAMI, FL. 33166 USA
1-888-832-7568 Toll free
305 593 8999 Tel
1-775-637-6825 Fax
13
LATIN TECH INC
WWW.LT-AUTOMATION.COM
6. Technical Specifications
Standards supported
• IEEE 802.11 standard for Wireless LAN
• All major networking standards (including IP, IPX)
Environmental
Operating temperature (ambient):
• -10 ~ 50°C
Humidity:
• Max. 95% Non-condensing
Power specifications
DC power supply
• Input: DC 100-240 50-60 Hz 2A
• Output: 5V DC 2A converter incl.
Radio specifications
Range:
• per cell indoors approx. 35-75 meters
• per cell outdoors up to 100-250 meters
Transmit power:
• Nominal Temp Range: 15 dBm, 12min.
Frequency range:
• 2.4-2.4835 GHz, direct sequence spread spectrum
Number of Channels:
• Most European countries: 13 (1-13)
• US and Canada: 11 (1-11) (3 non-overlapping)
• France: 4 (10-13) (1 non-overlapping)
• Japan : 14 (1-14)
Specific features
Supported bit rates:
• 11 Mbps : CCK
• 5.5 Mbps : CCK
• 1 Mbps : DBSK
• 2 Mbps : DQPSK
Data encryption:
• 64-bits WEP Encryption
• 128-bits WEP Encryption
Utility Management:
• Web management and TFTP firmware upgrade
5209 NW 74 AVE ST. SUITE 202 MIAMI, FL. 33166 USA
1-888-832-7568 Toll free
305 593 8999 Tel
1-775-637-6825 Fax


