1
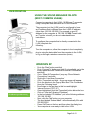
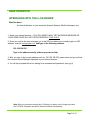
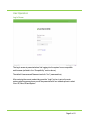
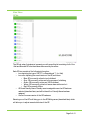
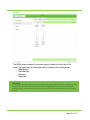
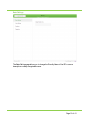
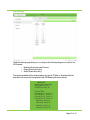
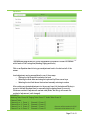
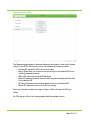
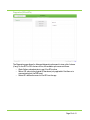
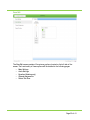
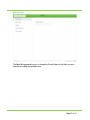
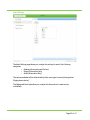
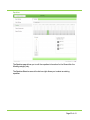
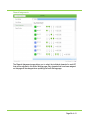
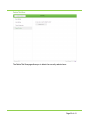
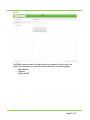
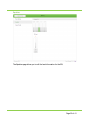
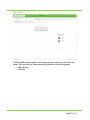
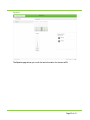
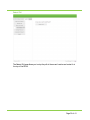
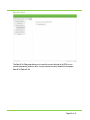
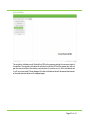
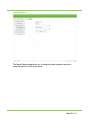
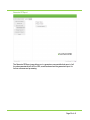
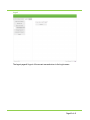
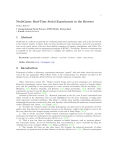
Sound Manager 2.0
User Guide
Version 1.5 – April 22, 2014
TABLE OF CONTENTS
OVERVIEW
COMPATIBILITY
KEYBOARD SHORTCUTS
USER OPERATION
3
3
4-8
ACESSING THE ONLINE SOUND MANAGER FROM A PC/LAPTOP
USING THE SOUND MANAGER ON SITE
INTERFACING WITH THE i.LON SERVER
LOG-IN SCREEN
MAIN MENU/OP TAB
ZONE TAB
SOURCES TAB
SYSTEM TAB
OP EDIT
BASIC SETTINGS
AUDIO SETTINGS
EQUALIZERS
DIAGNOSTICS (ONLINE OP'S)
DIAGNOSTICS (OFFLINE OP'S)
ZONE EDIT
BASIC SETTINGS
AUDIO SETTINGS
EQUALIZER
CHANNEL ASSIGNMENTS
DELETE THIS ZONE
ADD A ZONE
EQ EDIT
BASIC SETTINGS
EQUALIZER
DELETE THIS EQ
SOURCES EDIT
BASIC SETTINGS
EQUALIZER
SYSTEM
EDIT SOURCES NAME
RESTART POLL
SAVE ALL TO FLASH
AUTO-INITIALIZE
CHANGE PASSWORD
GENERATE OP REPORT
LOGOUT
KEYBOARD SHORTCUTS
9
10
11
12
13
14
15
16
17
18
19
20
21
22
23
24
25
26
27
28
29
30
31
32
33
34
35
36
37
38
39
40
41
Page 2 of 41
Overview
Sound Manager 2 can be used to control both the iNet and Emerald version of the
Lencore OP. For this application to work completely, both the DSP and Neuron Firmware
will need to be updated with the latest versions.
Compatibility
The Sound Manager 2 web app utilizes WebSocket technology (protocol RFC6455) which
requires specific web browser versions to function appropriately. The following is a list of
minimum web browser versions required:
• Internet Explorer 10
• Firefox 11 (PC)
• Firefox 11 (Android)
• Chrome 16 (PC, Mobile)
• Safari 6 (Mac, iOS* )
• Opera 12.10 (PC, Mobile)
• Android Browser (Not Supported)
* iOSmust be at least version 6.
Keyboard Shortcuts
In addition to using a mouse, various keyboard shortcuts have been provided to allow
for quickly moving between screens and objects. These shortcuts have been detailed on
the final page of this manual.
Page 3 of 41
USER OPERATION
SPECTRA i.NET’S WEB-BASED ACCESS AND TUNING
CAPABILITIES USING THE SOUND MANAGER
Although most installations do not require extensive changes or re-tuning, some clients prefer
the option of network controls that enable them to make systematic and/or spot changes to
the sound masking system. To enable the clients to do this, Lencore provides a private, webbased user interface with every Spectra i.Net® Networked Sound Masking System called the
Sound Manager.
The Sound Manager is based on an open-architecture software platform that controls and
monitors the finished sys- tem. It can be accessed from any desktop or wireless computer
with an Internet browser.
The Sound Manager user-interface control can be used to:
•
•
•
•
•
•
•
Tune the sound masking system for volume, contour & equalization
Create groups for masking zones, paging zones and music zones
Control volume and equalization for paging and music
Run diagnostics
Set and change group settings for each OP and each sound masking channel
Reset system to factory-set commands
Reset system to last saved settings
ACCESSING THE ONLINE SOUND MANAGER FROM A DESKTOP
PC / LAPTOP
• The Sound Manager interfaces with the sound masking system OP’s through the Echelon
i.LON SmartServer.
• Each i.LON SmartServer is a control server that acts as a miniweb server. The Sound
Manager Program works exactly as a web site and is contained within the i.LON itself.
Note: The i.LON SmartServer does not need Internet access un- less strictly intended
to do so from an outside location.
Page 4 of 41
USER OPERATION
USING THE
USING THE SOUND MANAGER ON-SITE
(MOST COMMON USAGE):
Connect a computer to the i.LON’s 10/100 base T connector
using a computer data cable with an RJ-45 connector.
The computer (not the i.LON) must be configured to have
an IP address that is different from the i.LON’s IP address
(other than 192.168.100.225). For example, a good IP
address for the computer is 192.168.100.200. Consult with
an IT profes- sional if you do not understand these
instructions.
To configure the computer that is directly connected to the
i.LON, complete the
following:
Turn the computer on, allow the computer to boot completely,
plug in using the data cable from the computer to the i.LON,
or log on through a wireless connection (router).
WINDOWS XP
•
•
•
•
•
•
•
IP Address 192.168.100.225
•
•
•
•
•
•
•
Go to the ‘Start’ button and click
Go to ‘Connect To’ button and click (if not available, go to the
control panel and click ‘Networks & Internet Connections’
and click)
Go to ‘Show All Connections’ (may say ‘Show Network
Connections’) and click
Right click ‘Local Area Connection’
Go to ‘Properties’ and click – A pop-up screen will appear
Go to the window in the Pop-up Box titled “This Connection
Uses the Following Items”
Scroll down to the last item in this box and highlight
‘Internet Protocol (TCP/ IP)’
Once highlighted, click the ‘Properties’ button below the box
Click on “Use the Following IP address”
In the box labeled “IP Address:” put in the following address:
192.168.100.200
Next, click the ‘Tab’ button on your computer
The box labeled ‘Subnet Mask:’ will automatically fill in with
255.255.255.0
Press Ok/Close on the box and then close the dialog box
Your computer is now ready to talk to the i.LON
Page 5 of 41
USER OPERATION
WINDOWS VISTA
•
•
•
•
•
•
•
Go to Control Panel
Under Network and Internet, click on “View Network Status and Tasks”
At left menu of next screen, click on “Manage Network Connections”
At next screen, double-click “Local Area Connection”
At next screen (Local Area Connection Status), click on “Properties”
A pop-up window will appear asking you for permission, click on “Continue”
At the next screen in the area where used items are checked, highlight the
selection “Internet Protocol Ver- sion 4” (NOT VERSION 6!), and click “Properties”.
At the next screen (Internet Protocol Version 4 properties), select the option “Use
the following IP address” and complete the following:
• In the IP address section, enter 192.168.100.200
• Press the <Tab> key on the keyboard to jump to Subnet section, leave this area
set to 255.255.255.0
• Press the <Tab> key on the keyboard to jump to the Gateway section. The
computer Gateway must
match the Gateway assigned to the i.LON if a specific gateway was entered.
• Click “OK” to save and exit the screen
Your computer is now ready to talk to the i.LON
•
•
WINDOWS 7/WINDOWS 8
•
•
•
•
•
Go to Control Panel
Under Network and Internet, click on “View Network Status and Tasks”
At next screen, under “active networks”, click “Local Area Connection”
At next screen (Local Area Connection Status), click on “Properties”
At the next screen in the area where used items are checked, highlight the
selection “Internet Protocol Ver- sion 4” (NOT VERSION 6!), and click
“Properties”.
• At the next screen (Internet Protocol Version 4 properties), select the option “Use
the following IP address” and complete the following:
• In the IP address section, enter 192.168.100.200
• Press the <Tab> key on the keyboard to jump to Subnet section, leave this
area set to 255.255.255.0
• Press the <Tab> key on the keyboard to jump to the Gateway section. The
computer Gateway must
match the Gateway assigned to the i.LON if a specific gateway was entered.
IP Address 192.168.100.225
• Click “OK” to save and exit the screen.
• Your computer is now ready to talk to the i.LON
Note: After you are done accessing the i.LON with your laptop, do not forget to go back
into TCP/IPv4 Properties and select “obtain IP address automatically”.
Page 6 of 41
USER OPERATION
INTERFACING WITH THE i.LON SERVER
What You Need:
•
An Internet browser on your computer (Internet Explorer, Mozilla, Netscape, etc.)
1. Open your Internet browser – YOU WILL MOST LIKELY GET AN ERROR MESSAGE AS
YOUR HOME PAGE WILL NOT OPEN PROPERLY! THIS IS O.K.
2. Once you receive the error message, go to the URL box where you normally type in a URL
address, such as www.google.com, and type in the following address:
192.168.100.225
Type in the address exactly, without any www or http.
3. After you type in the correct address such as, 192.168.100.225, press return and you will see
the Lencore Sound Manager displayed in your Internet browser.
4. You will be prompted with a box asking for a username and password. (see pg. 8)
IP Address 192.168.100.225
Note: After you are done accessing the i.LON with your laptop, do not forget to go back
into TCP/IPv4 Properties and select “obtain IP address automatically”.
Page 7 of 41
User Operation
Log-In Screen
The Log-In screen is presented when first logging into the system from a compatible
web browser (as listed in the “Compatibility” section above).
The default Username and Password are both “ilon” (case-sensitive).
After entering the correct credentials, press the “Login” button to enter the main
system selection screen where you will be presented with four tabbed options to select
from: OP, Zone, EQ and System.
Page 8 of 41
Main Menu
OP Tab
The OP tab, when first selected, presents you with a scrolling list consisting of all of the
i.Net and Emerald OP’s that have been discovered by the server.
Each OP item consists of the following information:
• Icon depicting the type of OP (“E” for Emerald and “i” for i.Net)
• Icon color depicting the current status of the OP, as follows:
o Blue: OP is currently online but not initialized
o Grey: OP is currently online and in the process of initializing
o Green: OP is currently online and 100%initialized
o Yellow: OP is currently online but has an alarm attributed to it
o Red: OP is currently offline
• OP # and Friendly Name. Friendly name is assignable once the OP has been
selected (described later) and will be blank if no Friendly Name has been
assigned.
• Current firmware version of the OP hardware.
Selecting one of the OP’s will bring you to the OP Editing screen (described later) which
will allow you to adjust several attributes of the OP.
Page 9 of 41
Zone Tab
Zones are groups of OP channels. They allow you to combine and control multiple
channels at the same time.
The Zone tab, when first selected, presents you with a sub-menu of tabs for each type of
zone available: Masking, Paging or Audio. Selecting any of these tabs will present a list
consisting of all of the zones that have been added to the system for the selected zone
type as well as a button for adding a new zone of the selected type.
Each individual Zone item consists of the following information:
• Grey “Zn” Icon
• Zone # and Friendly Name. Friendly name is assignable once the Zone has been
selected (described later) and will be blank if no Friendly Name has been
assigned.
Selecting one of the Zones will bring you to the Zone Editing screen which will allow you
to adjust several attributes of the zone.
Page 10 of 41
EQ Tab
Saved equalizers can be thought of as “favorites” which allow you to quickly adjust the
equalizer settings for OP’s and Zones.
The EQ tab, when first selected presents you with a list consisting of all of the equalizers
that have been added to the system.
Each equalizer item consists of the following information:
• Icon depicting the type of equalizer (“1/ 1” for 10 Band and “1/3” for 30 Band)
• EQ # and Friendly Name. Friendly name is assignable once the equalizer has been
selected (described later) and will be blank if no Friendly Name has been
assigned.
Selecting one of the equalizers will bring you to the EQ Editing screen (described later)
which will allow you to adjust several attributes of the EQ.
Page 11 of 41
Sources Tab
The Sources tab, when first selected presents you with a list consisting of all of the
available “global” sources for Emerald OP’s in the system.
Each source item consists of the following information:
• Grey “S” Icon
• Source # and Friendly Name. Friendly name is assignable once the source has
been selected (described later) and will be blank if no Friendly Name has been
assigned.
Selecting one of the sources will bring you to the Source Editing screen (described later)
which will allow you to adjust several attributes of the source.
Page 12 of 41
System Tab
The System Tab consists of seven primary options, located on the left side of the screen.
The functionality of these options will be detailed in the following pages.
•
• Edit Source Names
• Restart Poll
• Save All to Flash
• Auto-Initialize
• Change Password
• Generate OP Report
• Logout
Page 13 of 41
OP Edit
The OP Edit screen consists of four primary options, located on the left side of the
screen. The functionality of these options will be detailed in the following pages.
• Basic Settings
• Audio Settings
• Equalizers
• Diagnostics
HOTKEYS
Pressing “Tab” will select the first volume control knob on the page. Keyboard up/down arrows will control.
Pressing “Tab” will move to the next control knob on the page. Keyboard up/down arrows will control.
After “entering” a value in text edit mode, pressing “Tab” will go to the next control with text enter mode
selected.
Page 14 of 41
Basic Settings
The Basic Settings page allows you to change the Friendly Name of the OP to a more
descriptive or easily recognizable name.
Page 15 of 41
Audio Settings
The Audio Settings page allows you to configure the following categories for each of the
OP Channels:
o Masking (Attenuation and Contour)
o Paging (Attenuation Only)
o Audio (Attenuation Only)
The options available will be determined by the type of OP (iNet or Emerald) selected
and which tab is currently being edited (iNet OP/Masking tab shown above).
HOTKEYS
Masking Tabs: Press “M”
Paging Tabs: Press “P”
Audio Tabs: Press “A”
Channel Tabs:
Channel A or 1: Press “1’
Channel B or 2: Press “2”
Channel C or 3: Press “3”
Channel D or 4: Press “4”
Channel 5: Press “5”
Channel 6: Press “6”
Channel 7: Press “7”
Channel 8: Press “8”
Page 16 of 41
Equalizers
The Equalizers page allows you to edit the equalizer information for each OP Channel
within each of the 3 categories (Masking, Paging and Audio)
Click on an Equalizer band to bring up an adjustment level in the bottom left of the
screen.
Level adjustment can be accomplished in one of three ways:
• Clicking the Up/Down buttons below the level
• Selecting the level slider and using the keyboard Up/ Down arrow keys
• Selecting the text field above the level and manually entering in a value
After making any desired adjustments to the current band, hit the keyboard Tab key to
move to the next Equalizer band (or manually click the desired band to move to).
Whichever method of adjustment was last used (Slider/Text Entry) will remain the
method of adjustment (until changed).
HOTKEYS
Masking Tabs: Press “M” Paging Tabs: Press “P” Audio Tabs: Press “A”
Channel Tabs:
Channel A or 1:
Channel B or 2:
Channel C or 3:
Channel D or 4:
Press “1’
Press “2”
Press “3”
Press “4”
Channel 5: Press “5”
Channel 6: Press “6”
Channel 7: Press “7”
Channel 8: Press “8”
*Sources will be numbers for EOP
*Channels will be letters for OP
Page 17 of 41
Diagnostics (Online OP’s)
The Diagnostics page allows for Advanced diagnostic actions and to view a list of alarms
(if any) for the OP. For OP’s that are online, the available options are as follows:
• Initialize OP: queries the OP for the current values
• Save to Flash: allow you to save the current settings for the selected OP to nonvolatile (permanent) memory.
• Reboot OP: reboots the physical OP hardware
• Reset OP: resets and restores values to what had previously been saved to flash
for the selected OP.
• Set Factory Defaults: removes values saved to flash for the selected OP.
• Delete OP: deletes the record of the OP from the app.
Note, any of the above selections, except for Save to Flash, will cause the OP to go
offline.
For OP’s that are offline, the following page details the available options.
Page 18 of 41
Diagnostics (Offline OP’s)
The Diagnostics page allows for Advanced diagnostic actions and to view a list of alarms
(if any) for the OP. For OP’s that are offline, the available options are as follows:
• Check Online: rechecks status to see if the OP is online
• Reboot OP: reboots the physical OP hardware (only applicable if the Neuron is
communicating but the DSP is not)
• Delete OP: deletes the record of the OP from the app.
Page 19 of 41
Zone Edit
The Zone Edit screen consists of five primary options, located on the left side of the
screen. The functionality of these options will be detailed in the following pages.
• Basic Settings
• Audio Settings
• Equalizer (Masking only)
• Channel Assignments
• Delete This Zone
Page 20 of 41
Basic Settings
The Basic Settings page allows you to change the Friendly Name of the Zone to a more
descriptive or easily recognizable name.
Page 21 of 41
Audio Settings
The Audio Settings page allows you to adjust the setting for each of the following
categories:
o Masking (Attenuation and Contour)
o Paging (Attenuation Only)
o Audio (Attenuation Only)
The options available will be determined by which zone type is currently being edited
(Paging shown above).
The Paging and Audio tabs allow you to adjust the Attenuation for each source
individually.
Page 22 of 41
Equalizer
The Equalizer page allows you to edit the equalizer information for the Zone within the
Masking category only.
The Equalizer Selection area at the bottom right allows you to select an existing
equalizer.
Page 23 of 41
Channel Assignments
The Channel Assignments page allows you to select the individual channels for each OP
that will be adjusted in the Audio Settings page. Only channels that have been assigned
on this page will be changed when updating the Audio Settings page.
Page 24 of 41
Delete This Zone
The Delete This Zone page allows you to delete the currently selected zone.
Page 25 of 41
Add a Zone
After selecting the Add Zone button, a second menu will appear in the center of the
page which allows you to select the Zone ID for the newly created zone. Once a Zone ID
has been selected, the new zone will appear in the leftmost menu.
Page 26 of 41
EQ Edit
The EQ Edit screen consists of three primary options, located on the left side of the
screen. The functionality of these options will be detailed in the following pages.
• Basic Settings
• Equalizer
• Delete This EQ
Page 27 of 41
Basic Settings
The Basic Settings page allows you to change the Friendly Name of the EQ to a more
descriptive or easily recognizable name.
Page 28 of 41
Equalizer
The Equalizer page allows you to edit the level information for the EQ.
Page 29 of 41
Delete This EQ
The Delete This EQ page allows you to delete the currently selected EQ.
Page 30 of 41
Sources Edit
The Sources Edit screen consists of two primary options, located on the left side of the
screen. The functionality of these options will be detailed in the following pages.
• Basic Settings
• Equalizer
Page 31 of 41
Basic Settings
The Basic Settings page allows you to change the Friendly Name of the source to a more
descriptive or easily recognizable name.
Page 32 of 41
Equalizer
The Equalizer page allows you to edit the level information for the source EQ.
Page 33 of 41
System
Edit Source Names
The Edit Source Names page allows you to change Friendly Names for each of the six
available sources to more descriptive or easily recognizable names.
Page 34 of 41
Restart Poll
The Restart Poll page allows you to stop the poll at the current location and restart it at
the top of the OP list.
Page 35 of 41
Save All to Flash
The Save All to Flash page allows you to save the current settings for all OP’s to nonvolatile (permanent) memory. Note, if any mutes are currently enabled in the system,
Save All to Flash will fail.
Page 36 of 41
Auto-Initialize
Turning Auto-Initialize on will find all the OP’s in the system and get the current state of
the device. Turning Auto-Initialize off will also find all the OP’s in the system but will not
get the current state of the device, only whether it is online or not. Auto-Initialize is set
to off on a new install. Once changed, the Auto-Initialize state will be saved and remain
at the last selected state until changed again.
Page 37 of 41
Change Password
The Change Password page allows you to change the master password required to
access the system from the Log-In screen.
Page 38 of 41
Generate OP Report
The Generate OP Report page allows you to generate a comma-delimited report of all
the values associated with all the OP’s, as well as download the generated report for
further reference and processing.
Page 39 of 41
Logout
The Logout page will log out of the current user and return to the Log-In screen.
Page 40 of 41
Keyboard Shortcuts
MainOP,Zone,EQ,SourceandSystemtabs
Use the Up/ Down or Left/ Right arrow keys to move between the main OP, Zone, EQ and
System tabs. The currently selected tab will be outlined in blue. Note, a tab must be
selected manually with the mouse before these keyboard shortcuts will work. Pressing
the “Escape” button will unselect the current tab and prevent the keyboard shortcuts
from working until a tab is again selected manually with the mouse.
Masking,PagingandAudiotabs
Use the “M”, “P” and “A” buttons to quickly move between Masking, Paging and Audio
tabs wherever they appear throughout the system.
Channeltabs
Use number buttons to quickly move between channels wherever they appear
throughout the system. Number buttons 1 – 4 will switch between channels A – D where
they appear and number buttons 1 – 8 will switch between channels 1 – 8 where they
appear.
Sourcetabs
Use number buttons to quickly move between sources wherever they appear
throughout the system. Number buttons 1 – 6 will switch between sources 1 – 6 were
they appear.
Audiocontrols
Once a channel has been selected, press the “Tab” button to bring the audio control
slider into focus (it will be outlined in blue). Once in focus, use the up and down arrow
keys to adjust the slider up or down.
Alternatively, clicking on the orange value above the slider will allow you to manually
enter in a value level. Once a value has been input, press “Enter” to save the value. To
exit the text entry mode, press “Escape”.
Equalizers
Press the “Tab” button to bring the next equalizer into focus. Once an equalizer has
been selected, the control slider for that equalizer band will be brought into focus.
Once in focus, use the up and down arrow keys to adjust the slider up or down.
Alternatively, clicking on the orange value above the slider will allow you to manually
enter in a value level. Once a value has been input, press “Enter” to save the value. To
exit the text entry mode, press “Escape”.
Page 41 of 41