1
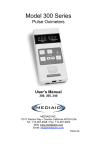
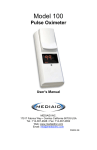
Model 5300 Series
Pulse Oximeter
User’s Manual
Model 5305 & Model 5340
MEDIAID INC.
17517 Fabrica Way • Cerritos California 90703 USA
Tel.: 714-367-2848 • Fax: 714-367-2852
Web: www.mediaidinc.com
Email: [email protected]
Model 5300 Series
Pulse Oximeters
User’s Manual
Model 5305 & Model 5340
0197
EU Authorized Representative
(MDD 93/42/EEC)
Mayer Engineering & Consulting Support GmbH
Anna-Schieber-Weg2, D-73728 Esslingen, Germany
F-9615 Rev 0
Table Of Contents
Contents
Chapter 1:Principles of Operation of the 5300 Series Pulse
Oximeters ..................................................................................................... 1
1.1 Intended Uses ................................................................................................ 1
1.2 Principal Features .......................................................................................... 1
1.3 Modes Of Monitoring ..................................................................................... 2
1.4 Cautions ......................................................................................................... 2
Chapter 2: Keys, Indicators, Symbols and Markings ........................... 5
2.1 Keys and Indicators ....................................................................................... 5
2.2 Additional Features ........................................................................................ 9
2.3 Symbols and Markings ................................................................................10
Chapter 3: Operating the Model 5300 Series .......................................13
3.1 Receiving Accurate Readings .....................................................................13
3.2 Power............................................................................................................14
3.3 Measuring and Displaying Pulse Oximetry.................................................14
3.4 Data Transmission .......................................................................................16
3.5 Tests .............................................................................................................17
3.6 Cleaning Instructions ...................................................................................23
3.7 Troubleshooting ...........................................................................................23
Chapter 4: Equipment Specifications....................................................25
4.1 Oxygen Saturation And Pulse Rate ............................................................25
4.2 Alarms...........................................................................................................25
4.3 General .........................................................................................................25
4.4 Sensors ........................................................................................................26
4.5 Power Source...............................................................................................26
4.6 Environmental ..............................................................................................26
4.7 Equipment Classification .............................................................................26
Chapter 5: Order Information..................................................................29
5.1 Product Information .....................................................................................29
5.2 Contact Information .....................................................................................29
Chapter 6: Mediaid Inc Limited Warranty Information .......................31
6.1 Applicabilty of Warranty...............................................................................31
6.2 What Is Covered By This Warranty ............................................................31
6.3 What Mediaid Inc. Will Do To Correct Problems........................................31
6.4 Owner’s Registration ...................................................................................32
6.5 Product Information .....................................................................................33
Conformity..................................................................................................35
Declaration of Conformity ..................................................................................35
- Contents 1 -
Principles of Operation
Chapter 1:
Principles of Operation of
the 5300 Series Pulse
Oximeters
1.1 Intended Uses
•The Model 5305 is intended for spot
checks.
•The Model 5340 is intended for
continuous monitoring.
1.2 Principle Features
NOTE
Before using the pulse
oximeter, the user should
become thoroughly
familiar with the
information in this manual
and with all information
included with the sensor.
Models 5305 and 5340
•The Mediaid Inc. Model 5300 Series
pulse
oximeters
are
portable,
WARNING
lightweight instruments designed to
monitor arterial oxygen saturation
Do not use the pulse
non-invasively.
oximeter as an infant
•Both models have two bright Light
apnea alarm.
Emitting Diode (LED) displays that
give a constant read-out of oxygen saturation (in %SpO2) and heart rate in
beats-per-minute (BPM).
•Each machine has a front-panel LOW BATTERY INDICATOR that alerts the
user to a low-battery condition.
•Both models perform a functional test at power-on, and diagnostics tests can be
initiated.
•All MEDIAID INC. pulse oximetry sensors with RJ12 connectors are compatible
with the Model 5300 Series.
•Both pulse oximeters can be powered either by standard electric power or an
internal, rechargeable Nickel-Cadmium (NiCad) battery.
Model 5340
•The Model 5340 allows for data transmission through the DATA PORT (when
Serial or Analog Cable is plugged in at power-up), while heart rate and
-1-
Principles of Operation
%SpO2 are displayed on the OXYGEN SATURATION and PULSE RATE
DISPLAYS.
•The Model 5340 has visual and audible alarms for oxygen saturation and pulse
rate monitoring.
•The Model 5340 has an audible tone that sounds with each pulse and varies
with oxygen saturation — falling in pitch with reduced saturation and rising as
saturation increases.
1.3 Modes of Monitoring
Models 5305 and 5340
•Both models in the Mediaid Inc. 5300 Series are designed to measure the
oxygen saturation (%SpO2) of functional hemoglobin.
•A normal (steady) display indicates the pulse oximeter has received at least
three normal, intelligible pulses during the last 30-second period. The display
will be updated each time a normal pulse has been received.
A blinking display indicates the continuous presence (30 seconds or more) of
significant patient movement or light-source interference. In this mode, no
normal pulses are being received, and the last reliable values for %SpO2 and
heart rate are displayed. Monitoring of %SpO2 may be adversely affected.
Model 5340
•A blinking display with a one-second warning tone every 10 seconds indicates
the continuous presence (60 seconds or more) of significant patient
movement or light-source interference. In this mode, no normal pulses are
being received and %SpO2 monitoring may be adversely affected.
1.4. Cautions
•Before using the equipment, the operator should be thoroughly familiar with the
information in the User’s Manual and all accompanying documents.
•Federal (U.S.A.) law restricts this device to use by — or on the order of — a
physician.
•The instrument should not be used in the presence of anesthetics or flammable
agents.
•Do not allow any liquid to penetrate the instrument’s interior.
•The Model 5300 Series Pulse Oximeters are designed to operate in normal,
ambient light conditions.
•Do not use near Magnetic Resonance Imaging equipment.
•To avoid potential effects of electromagnetic interference, maintain a distance of
-2-
Principles of Operation
at least 15 cm. (6") between the oximeter and other devices. Also, maintain a
distance of at least 20 cm. (8") between the Mediaid Inc. wall adaptor and
other devices.
•When used with other equipment, such as a defibrillator, the accuracy of pulse
oximetry readings may be affected.
•In case of abnormal conditions during instrument operation, appropriate
measures (such as powering off instruments) should be taken to insure
patient safety.
•The user should NOT attempt to modify or repair the instrument.
•This device complies with Electromagnetic Compatibility standards EN55011
and EN60601-1-2. If the user experiences interference problems, move the
unit away from other electromagnetic emitting equipment.
•Dispose of this device according to hospital and/or governmental regulations.
-3-
Principe d’Utilisation
-4-
Keys, Indicators, Symbols and Markings
Chapter 2:
Keys, Indicators, Symbols
and Markings
2.1 Keys and Indicators
-5-
Keys, Indicators, Symbols and Markings
A. Power On/Off Key
The unit is powered on with a short depression of the
POWER ON/OFF KEY. A one-second display and
indicator test is performed automatically, and all Light
Emitting Diodes (LEDs) are illuminated. Carefully observe the OXYGEN
SATURATION and PULSE RATE DISPLAYS at the top of the oximeter for
proper operation of all segments of the display; a nonfunctioning segment will
result in an incomplete numeral and possible erroneous reading. A long
depression of the POWER ON/OFF KEY will initiate Internal Confidence and Self
Diagnostics tests (see section 3.5 “Tests”).
B. Pulse Rate Display
Whenever the pulse oximeter receives at least three pulses during a 30-second
period, the right, three-digit LED display shows the patient’s heart rate in beatsper-minute. Any blinking display signals that pulse rate monitoring may be
adversely affected, and indicates the continuous presence (30 seconds or more)
of significant patient movement or light-source interference.
C. Oxygen Saturation Display
Whenever the pulse oximeter receives at least three pulses during a 30-second
period, the left LED display shows the patient’s %SpO2 levels. The display is
updated with every normal pulse. A blinking display signals that %SpO2
monitoring may be adversely affected, and indicates the continuous presence (30
seconds or more) of significant patient movement or light-source interference.
D. Visual Pulse Indicator
As soon as a pulse is found, the heartbeat is indicated by the small green LED
beneath the LED display window. The VISUAL PULSE INDICATOR
simultaneously flashes with the patient’s pulse. It will typically begin to flash a few
seconds before numerical values for oxygen saturation and pulse rate are
shown.
E. Low Battery Indicator
The LOW BATTERY INDICATOR will illuminate when the
battery is near depletion, prompting the user to suspend
operation of the unit and change or recharge the battery (using
the method described in Section 3.2 “Power”). The Pulse oximeter will
-6-
Keys, Indicators, Symbols and Markings
automatically power off shortly after low-battery indication. The acronym bAt LO
will be displayed if power-on is attempted during a low-battery condition.
F. Sensor Cable Connection
All Mediaid Inc. pulse oximetry sensors with RJ12
connectors are compatible with the Model 5300 Series. To connect a sensor to
the pulse oximeter, align the plug with the jack on the oximeter and insert it
gently until an audible “click” is heard — indicating that the plug tab is latched in
place. To remove, squeeze the locking tab on the plug and slide the plug out of
the jack. Always route cords in such a way as to prevent accidental tripping and
subsequent damage to the oximeter.
G. Power Connection
For electric power, plug the adaptor into the pulse oximeter’s
POWER CONNECTION, and then plug the other end of the
adaptor into a standard electrical outlet. All Mediaid Inc. pulse
oximeters were designed to be used with the adaptor provided by Mediaid
Inc. at the time of purchase.
H. Power Indicator
The green LED — located on the bottom of the oximeter adjacent to the POWER
CONNECTION — will illuminate when electric power is connected.
I. Data Port
Model 5340
The DATA PORT is used for serial and analog output. To
eliminate risk of shock, do not touch the DATA PORT 8-pin
connector and the patient simultaneously. The DATA PORT should be used only
for connection to equipment that complies with CSA/IEC/UL601-1. Refer to
section 3.4 for information on data transmission.
J. Alarm Off Key
Model 5340
A short depression of the ALARM OFF KEY silences the
alarm for a period of 60 seconds. A long, three-second
depression of the ALARM OFF KEY will completely disable the audible alarm.
-7-
Keys, Indicators, Symbols and Markings
The LED display will show AL OFF, the ALARM OFF INDICATOR will begin to
flash, and the oximeter will revert to normal monitoring. Silenced alarms can be
reactivated by a short depression of the ALARM OFF KEY. Disabled alarms are
reactivated by a long depression of the ALARM OFF KEY.
K. Alarm Off Indicator
Model 5340
The ALARM OFF INDICATOR will
illuminate and remain on constantly
when audible alarms are silenced, and
will flash when audible alarms are disabled.
NOTE
Visual alarm indicators
cannot be deactivated.
L. Oxygen Saturation Alarm Key
Model 5340
Short depressions of the OXYGEN SATURATION
ALARM KEY will switch the display between the high and
low alarm settings, as shown by the HI/LO ALARM INDICATORS. These alarm
settings can be adjusted with the INCREMENT and DECREMENT KEYS. The
alarm settings will be retained in memory until reset by the user. Exception:
When the low-saturation alarm is set below 80%, it will return to 80% at the next
power-up. The saturation alarm factory settings are: High 100% and Low 85%.
The high-saturation alarm can be disabled by setting it at 100%. The unit reverts
to normal monitoring after a five-second period of key inactivity.
M. Pulse Rate Alarm Key
Model 5340
Short depressions of the PULSE RATE ALARM KEY will
switch the display between the high and low alarm settings as shown by the
HI/LO ALARM INDICATORS. These alarm settings can be adjusted with the
INCREMENT and DECREMENT KEYS. The alarm settings will be retained in
memory until reset by the user. The pulse-rate alarm factory settings are: High
140 BPM and Low 50 BPM. The unit reverts to normal monitoring after a fivesecond period of key inactivity.
-8-
Keys, Indicators, Symbols and Markings
N.
Indrement & Decrement Keys
Model 5340
The pulse-tone volumes can be adjusted using the
INCREMENT and DECREMENT KEYS. There are
three levels of audible (pulse) tone volume, and “off.” The pulse tone volume can
be increased with the INCREMENT KEY, and decreased or silenced with the
DECREMENT KEY. Alarm settings are also adjusted with these keys.
O.
Visual Hi/Lo Alarm Indicators
HI LO
Model 5340
Located beneath the OXYGEN SATURATION ALARM and PULSE RATE
ALARM KEYS, these indicators illuminate when the patient’s oxygen saturation
or pulse rate reaches the preset high or low alarm settings. In order to set
alarms, the appropriate indicator must be illuminated.
2.2 Additional Features
Audible Oxygen Saturatio Indicator
Model 5340
A varying pitch of the audible tone signals a change in the %SpO2 level - a falling
pitch indicates a decreasing %SpO 2 level.
Audible Pulse Rate Indicator
Model 5340
A beeping audible tone signals the heart beat.
Audible Alarm Indicator
Model 5340
The alarm tone is a fixed pitch, and the volume cannot be adjusted. Alarm
conditions are generated only when a pulse has been detected. Alarm tones are
automatically silenced when the alarm condition goes away. HIGH PRIORITY
alarm tones sound continuously at the highest frequency and highest volume.
HIGH PRIORITY alarms are caused by conditions such as: low and high oxygen
saturation and pulse rate; no pulse; excessive ambient light; and other error
conditions. MEDIUM PRIORITY alarm tones sound for 0.75 seconds every five
-9-
Keys, Indicators, Symbols and Markings
seconds at the highest frequency and highest volume. MEDIUM PRIORITY
alarms are cause by measuring problems such as disconnected sensor, too thin
or thick tissue, or a faulty sensor. LOW PRIORITY alarm tones sound for one
second every 10 seconds at the lowest frequency and highest volume. LOW
PRIORITY alarms are caused by excessive patient movement or patient
arrhythmia.
2.3 Symbols & Markings
Symbol
Definition
SpO2
Oxygen Saturation Display
BPM
Pulse Rate Display
Power On/Off Key
Alarm Off KEY
Oxygen Saturation Alarm KEY
Pulse Rate Alarm KEY
Increment Key
Decrement Key
- 10 -
Keys, Indicators, Symbols and Markings
Data Port
Sensor Cable Connection
Power Connection
Low Battery Indicator
Attention: Consult Accompanying Documents
Non-anesthetic Proof
Type BF Applied Part
HI LO
HI/LO Alarm Indicator
- 11 -
Principe d’Utilisation
- 12 -
Operating the Model 5300 Series
Chapter 3:
Operating the Model 5300
Series
3.1 Receiving Accurate Readings
To prevent faulty readings and sensor complications:
•Do not apply the sensor to anything but
a well-perfused extremity.
WARNING
•Do not place the sensor on extremities
To ensure personal safety
with blood pressure cuffs or with
and proper operation of
arterial or venous catheters.
the oximeter, the user
•Avoid extremity positions that may
compress venous return.
should adhere to all
•Keep sensors at heart level whenever
directions, information,
possible.
and cautions stipulated
•Fit
sensors
comfortably
without
within this document.
constricting or compressing digits.
•Make sure elastic tape used to secure
sensor does not restrict circulation.
NOTE
•Trim long fingernails if necessary.
In order to obtain
•Remove artificial nails and thick nail
accurate pulse oximetry
polishes if necessary.
readings, an appropriate
•Check for intravascular dyes, which may
pulse oximeter and
affect pulse oximeter readings.
sensor
need to be chosen
•Turn off very bright lights, such as
according to the intended
xenon lamps, if they interfere with
sensor functioning. In cases where
use. All instructions stated
such lights are unavoidable, cover the
within this manual and
sensor site with an opaque material.
included
with each sensor
•Route sensor cords carefully.
should
be followed.
•Avoid applying excessive tension to the
sensor or sensor cable.
•Consider conditions affecting the hemoglobin dissociation curve when
interpreting pulse oximeter readings.
•Keep patient movement to a minimum.
- 13 -
Operating the Model 5300 Series
3.2 Power
All of these pulse oximeters can be powered by either a power adaptor or the
internal, rechargeable NiCad battery. Battery operation alone will provide the
oximeter with approximately 12 hours of continuous operation. To charge the
internal NiCad battery, connect the Mediaid Inc. power adaptor to the POWER
CONNECTION located at the bottom of the oximeter. Then, plug the adaptor into
an appropriately rated electrical outlet. The green POWER INDICATOR will
illuminate. Once electric power is applied, the battery will charge regardless of
the operational state of the oximeter.
WARNING
All Mediaid Inc. pulse oximeters were designed to be used
with the power adaptor provided by Mediaid Inc. at the time
of purchase. The use of any other adaptor may damage the
oximeter and will void the Mediaid Inc. Warranty. Refer to
the product number of the power adaptor when reordering a
new adaptor. Include the serial number of the unit as this
allows Mediaid Inc. to determine the adaptor needed. Also,
avoid excess tension on the adaptor cable for safe and
continuous operation.
3.3 Measuring and Displaying Pulse Oximetry
3.3.1 Spot-Check Pulse Oximetry
Model 5305
·Choose an appropriate pulse oximeter
and sensor according to the
intended use.
·Place the sensor according to the
instructions included with each
sensor.
·Connect the sensor to the pulse
oximeter with the SENSOR CABLE
CONNECTION.
·Follow all guidelines to prevent faulty
- 14 -
WARNING
Patient movement, lightsource, or any other
interfering events that
occur for more than 30
seconds are indicated by
a blinking display. During
this period, pulse
oximeter readings can be
adversely affected.
Operating the Model 5300 Series
readings, and oximeter or sensor
complications.
·Power on the unit with the POWER
ON/OFF KEY.
·Check that all LEDs illuminate during
the Power-Up test.
·Monitor the flashing of the VISUAL
PULSE INDICATOR.
·Read patient’s oxygen saturation level
and pulse rate from the two LED
displays.
NOTE
The unit powers off
automatically when a
pulse search is
unsuccessful while
operating on battery
power.
3.3.2 Continuous-Monitoring Pulse Oximetry
Model 5340
·Choose an appropriate sensor.
·Place the sensor according to the instructions included with each sensor.
·Connect the sensor to the pulse oximeter with the SENSOR CABLE
CONNECTION.
·Follow all guidelines to prevent faulty readings, and oximeter or sensor
complications.
·Power on the unit with the POWER ON/OFF KEY.
·Check that all LEDs illuminate during the Power-Up Test.
·Monitor the flashing of the VISUAL PULSE INDICATOR.
·Read the patient’s oxygen saturation and heart rate from the two LED
displays.
·Listen to the AUDIBLE OXYGEN SATURATION and PULSE RATE
INDICATOR.
·Adjust the tone volume with the INCREMENT and DECREMENT KEYS.
·Set the VISUAL and AUDIBLE ALARMS to the desired level with the
INCREMENT/DECREMENT KEYS after the OXYGEN SATURATION ALARM
or PULSE RATE ALARM KEYS have been selected.
·Read the alarm settings with the HI/LO ALARM INDICATORS.
·Silence an alarm with the ALARM
OFF KEY.
WARNING
·Reactivate silenced alarms with
Do not silence the audible
the ALARM OFF KEY.
alarms or decrease their
volume if patient safety
could be compromised.
- 15 -
Operating the Model 5300 Series
3.4 Data Transmission
Model 5340
Serial and analog data can be communicated through the data port to a
peripheral device. Analog output of oxygen saturation (0-100 %SpO2) and pulse
rate (0-250 BPM) are each transmitted on a scale of 0.0 to 1.0 V. Serial output of
oxygen saturation (0-100 %SpO2) and pulse rate (0-250 BPM) are transmitted
once per second in a data packet. For tests regarding data transmission and the
data port, please refer to section 3.5 “Tests.”
Pin Number:
2. Serial Line (RX)
3. Pulse Rate Analog Output
6. Oxygen Saturation Analog Output
7. Ground Signal Common
8. Serial Line (TX)
3.4.1. Serial Data Transmission
·Serial data can be transmitted with a Mediaid Inc. Serial Cable.
·Transmission speed is 9600 baud.
·The data field is 8 bits, one stop bit, no parity.
·The data packet output by the Model 5340 is comprised of four data bytes
sent in the following order: the Status byte, the %SpO2 byte, the Pulse Rate
byte, and the Checksum byte.
The Status Byte
The Status byte contains flags as to the operational state of the unit:
Bit 7: Not used.
Bit 6: Pulse is lost, having previously been detected.
Bit 5: Pulse detected, normal monitoring begun.
Bit 4: Error flag, indicating that an error is occurring.
Bit 3 to 0: Number of bytes in the data packet.
The %SpO2 Byte
The %SpO2 byte contains the current oxygen saturation level in %SpO2 and is in
8-bit binary format.
The Pulse Rate Byte
The Pulse Rate byte contains the current pulse rate in BPM and is in 8-bit binary
- 16 -
Operating the Model 5300 Series
format.
The Checksum Byte
The Checksum byte is the complement to the lower eight bits of the bytewise
addition of the Status, %SpO 2 and Rate bytes, plus one.
3.4.2 Analog Data Transmission
·Analog data can be transmitted from the Model 5340 to an analog data
receiving device with a Mediaid Inc. Analog Cable.
·Analog outputs are as follows:
0% Scale
0.000V
NOTE
50% Scale
0.500V
Refer to the manufacturer
100% Scale
1.000V
of the monitoring device
for additional information
on data-receiving devices.
3.5 Tests
Each model can perform a variety of
tests, which are described below. If an error is detected during any given
sequence, the test sequence will be terminated and the characters Err (an
acronym for “error”) will appear in the left display window. The numeral
representing the test during which the error occurred will appear in the right
display window. The instrument must be powered off before testing or monitoring
can continue. If there is a low-battery condition at power-up, the unit will show
bAt LO and the oximeter will power off, prohibiting test functions.
NOTE
Some tests require audible, visual and/or operator
supervision, and/or the connection of an external device
such as a sensor or voltmeter. The absence of required
peripheral devices will result in an error message. Please
read each of the test descriptions carefully.
3.5.1 Model 5305
3.5.1.1 Power-Up Test
A short depression of the POWER ON/OFF KEY initiates a one-second Display
and Indicators Test. All LEDs need to be illuminated for proper LED functioning.
- 17 -
Operating the Model 5300 Series
3.5.1.2 Internal Confidence Tests
A long depression (approximately three seconds) of the POWER ON/OFF KEY
will power on the instrument, test the Display and Indicators, Power Condition
and then display the unit’s Software Version Number.
3.5.1.3 Self Diagnostic Tests
A prolonged (10-second) depression of the POWER ON/OFF KEY is required at
power-on to initiate the self-diagnostic test mode. While pressing the POWER
ON/OFF KEY, the unit cycles through the Internal Confidence Tests, blanks the
display for approximately five seconds, and displays the acronym tSt (an
acronym for “test”). The POWER ON/OFF KEY needs to be released at this time
to initiate automatic testing of Sensor, Reference Voltage, and Set-Up.
SENSOR TEST — Test 1
This test verifies the functionality of the sensor, the oximeter’s LED driver circuit,
and the oximeter’s light-detection circuit. This occurs by the emission of sensor
light at a preset frequency and level, and the monitoring of the received signal
from the sensor detector.
REFERENCE VOLTAGE TEST — Test 2
It takes 10 seconds to determine “Pass” or “Fail,” verifying the unit’s internal
reference voltage. A failure is indicated by a display of Err2 and a pass is
indicated by the next test being performed. If a failure is indicated, refer to the
Mediaid Inc. Warranty for servicing instructions.
SET-UP TEST — Test 3
This test alternately displays %SpO2, pulse rate and internal circuitry set-up
values. As with normal monitoring, initiate the test with a sensor applied to a
subject. The instrument will perform normal set-up and monitoring functions, and
will periodically display single digit set-up numbers — zero for thin tissue, one for
medium tissue, or two for thick tissue. This test can only be exited by powering
off the instrument.
- 18 -
Operating the Model 5300 Series
3.5.2 Model 5340
3.5.2.1 Power-Up Test
A short depression of the POWER ON/OFF KEY initiates a one-second Display
and Indicators Test. All LEDs need to be illuminated for proper LED functioning.
3.5.2.2 Internal Confidence Tests
A long depression (approximately three seconds) of the POWER ON/OFF KEY
will power on the instrument, test the Display and Indicators, Power Condition
and EEPROM, and then display the unit’s Software Version Number. The
instrument will revert to the normal power-on sequence upon release of the
POWER ON/OFF KEY.
3.5.2.3 Diagnostic Tests
Diagnostic tests on the Model 5340 can be run automatically or be initiated
manually. They are initiated by first holding down the ALARM ON/OFF KEY and
then powering on the unit. Upon initialization, the characters tSt will appear in the
left display window and the numeral in the right display window. Any test may be
selected via the INCREMENT or DECREMENT KEYS. The selected test will be
represented by a numeral in the right display window. Upon selection, the
sequence is initiated by the depression of the ALARM ON/OFF KEY. The test
sequence will run and stop
automatically. It must be noted that
NOTE
for a number of these tests visual
Write
down the
and/or audio inspection is required.
While in this test mode, either a
instrument’s software
single test or a batch containing all
version number (in the
of the tests sequentially may be run.
space provided in section
Once testing is complete, the only
6.5 “Product Information”)
way to exit the assurance test mode
of operation is by powering off the
so Mediaid Inc. can better
instrument.
assist you in the future.
GLOBAL TEST — Test 0
This test automatically initiates all of the diagnostic tests, which will run
automatically and in order until either an error is detected or all test sequences
are completed.
- 19 -
Operating the Model 5300 Series
DISPLAY AND INDICATOR TEST — Test 1
The instrument’s LED displays and indicators are tested by this sequence. Upon
initialization of this test, the LED display segments and discrete LED indicators
will be illuminated one at a time. The user should observe proper operation of all
LED segments and indicators. Careful visual inspection is required for this test.
AUDIBLE ANNUNCIATION TEST — Test 2
Both the variable pitch, audible pulse-tone, and audible alarms are annunciated
by the Model 5340’s 8-pitch, 3-volume level audible annunciation system. This
test, when initiated, sequentially sounds all of the eight pitches (frequencies) and
three volume levels. Carefully listen for tone, pitch and volume changes.
AUDIBLE/VISUAL ALARM TEST — Test 3
This sequence tests the instrument’s alarm functions. The alarm tone and the
four HI/LO ALARM INDICATORS are simultaneously activated for a period of
approximately five seconds. Audible and visual observation is required.
CONTROL KEY TEST — Test 4
This test checks the functionality of the front panel control keys, excluding the
POWER ON/OFF KEY. Once initiated, the operator must press the control keys,
one at a time, in the following order: ALARM OFF, OXYGEN SATURATION
ALARM, INCREMENT, DECREMENT, and PULSE RATE ALARM. Do NOT
press the POWER ON/OFF KEY at this time as it will power the unit off. An
internal software routine waits for a signal to be received from each of the keys.
A unique number indicating the internal memory address for each key will be
displayed. Observe the changing values to ensure proper reception of each key’s
signal.
- 20 -
Operating the Model 5300 Series
SENSOR TEST — Test 5
This test verifies the functionality of the sensor, the oximeter’s LED driver circuit,
and the oximeter’s light-detection circuit. This occurs by the emission of sensor
light at a preset frequency and level, and the monitoring of the received signal
from the sensor detector.
SERIAL COMMUNICATIONS PORT TEST — Test 6
This test requires a serial connection with a host system. For every character
sent to the pulse oximeter, the Model 5340 responds with the binary inverse
character. The test is ended by the host sending the oximeter a lower case “g”
character.
REFERENCE VOLTAGE TEST — Test 7
It takes 10 seconds to determine “Pass” or “Fail,” verifying the unit’s internal
reference voltage. A failure is indicated by a display of Err7, and a pass is
indicated by the next test being performed. The display is blank while this test is
run. If a failure is indicated, refer to the Mediaid Inc. Warranty for servicing
instructions.
- 21 -
Operating the Model 5300 Series
ANALOG OUTPUT TEST — Test 8
The use of a voltmeter is required to perform this test. First, connect one lead to
pin 6 (saturation analog output) and the common output lead to pin 7 (ground
signal common). Once initiated, each depression of the ALARM OFF KEY tests
the three saturation values, which are displayed in the left window in ascending
order. Observe the meter display to confirm a proper operation as listed below.
Then connect the first lead to pin 3 (pulse rate analog output) to test the three
pulse rate values as they are displayed in the right window.
Pin Number:
2. Serial Line (RX)
3. Pulse Rate Analog Output
6. Oxygen Saturation Analog Output
7. Ground Signal Common
8. Serial Line (TX)
%Sp02
Pin 6
BPM
Pin 3
0%
= 0.000V ± 0.001
0
= 0.000V ± 0.001
50%
= 0.500V ± 0.010
125
= 0.500V ± 0.010
100%
= 1.000V ± 0.020
250
= 1.000V ± 0.020
INTERNAL MEMORY TEST — Test 9
Upon initiation, this test checks each location of the oximeter’s memory. If all
locations test to be functional, the numeral 128 will be displayed.
SET-UP TEST — Test 10
This test alternately displays %SpO2, pulse rate and internal circuitry set-up
values. As with normal monitoring, initiate the test with a sensor applied to a
subject. The instrument will perform normal set-up and monitoring functions, and
will periodically display single digit set-up numbers - zero for thin tissue, one for
medium tissue, or two for thick tissue. This test can only be exited by powering
off the instrument.
- 22 -
Operating the Model 5300 Series
3.6 Cleaning Instructions
All Mediaid Inc. Model 5300 Series
pulse oximeters can be wiped clean
with isopropyl alcohol or glutaraldehyde. Avoid caustic or abrasive
cleaners that will mar the enclosure or
keypad. Use extra care when cleaning
the red display window to avoid
scratching the finish.
WARNING
Do not clean the
instrument while it is in
operation.
3.7 Troubleshooting
Error Code
Err 5
Possible Causes
Improper sensor application; area of
sensor application too opaque; sensor
problem
Err 135
Ambient light too bright, direct light
onto sensor
Err 1, 11, 13, 16, 17, 18
Internal failure of pulse oximeter
bAt LO
Low battery condition
Err 20
Internal EEPROM failure
Chirping Tone (Model 5340)
Data transmission failure
NOTE
There are no userserviceable parts or
adjustments inside the
instrument.
WARNING
Do not attempt to open
the instrument case —
doing so will void the
Warranty. Always refer to
the Warranty for service
instructions.
- 23 -
Principe d’Utilisation
- 24 -
Equipment Specifications
Chapter 4:
Equipment Specifications
4.1 Oxygen Saturation and Pulse Rate
Display
Resolution
Two 3-digit, 7-segment LED Displays
%SpO2 1%
Range
Pulse
1 BPM
%SpO2 0-100%
Accuracy
Pulse
32-250 BPM
%SpO2 100-70%, ± 2%; 69-60%, ± 3%;
Pulse
Less than 60%, Unspecified
32-250 BPM, ± 2
4.2 Alarms
Model 5340
High %SpO2
51-100%
Low %SpO2
50-99%
High Pulse
31-230 BPM
Low Pulse
30-229 BPM
4.3 General
Size (L x W x H)
7.75 in. x 4.25 in. x 1.50 in
19.7 cm. x 10.5 cm. x 3.8 cm
Weight
Model 5305
15.3 oz
473 g
Model 5340
18.2 oz
516 g
- 25 -
Equipment Specifications
4.4 Sensors
Mediaid Inc. opto-plethysmographic pulse oximeter sensor with RJ12 connector
and extension cable.
Red Light Wavelength
660 nm @ 565 µW
Infrared Light Wavelength
910 nm @ 1.8 nW
4.5 Power Source
Battery Type
Rechargeable
Nickel-Cadmium
(NiCad)
Battery
Battery Life
12 Hours of Continuous Operation
Power Adaptor Type
Radionic SW15100-PL
Power Adaptor Input
100-250 V AC 50/60 Hz O.5 A
Power Adaptor Output
15 V DC 1.0 A
4.6 Environmental Conditions
Acceptable conditions for operating, storage, and transport:
Atmospheric Pressure
770 to 282.45 mm Hg
1026 to 377 hPa
Relative Humidity
5 to 95% (Noncondensing)
Operating Temperature
0° to 40° C (32° to 104° F)
Storage Temperature
-30° to 65° C (-22° to l49° F)
4.7 Equipment Classification
The Mediaid Inc. Model 5300 Series pulse oximeters are designed in accordance
with CAN/CSA C22.2 No. 601.1, EN 60601-1, and UL 2601-1. The oximeters are
classified by IEC 601-1 as follows:
Type of protection against electric shock:
CLASS I AND INTERNALLY POWERED
TYPE BF APPLIED PARTS
Degree of protection against harmful ingress of water:
- 26 -
Equipment Specifications
IPX 0 ACCORDING TO IEC 529
Degree of safety of application in the presence of a flammable anesthetic
mixture with air, or with oxygen or nitrous oxide:
THIS EQUIPMENT IS NOT SUITABLE FOR USE IN THE
PRESENCE OF A FLAMMABLE ANESTHETIC MIXTURE WITH
AIR, OR WITH OXYGEN OR NITROUS OXIDE.
Mode of operation: Continuous Operation
- 27 -
Principe d’Utilisation
- 28 -
Order Information
Chapter 5:
Order Information
5.1 Product Information
Part Number
POX010-5305
Description
Model 5305 Hand-Held Pulse Oximeter
w/Rechargeable Battery
Model 5340 Hand-Held Pulse Oximeter w/Alarms,
Rechargeable Battery, Serial and Analog Output
POX010-5340
5.2 Contact Information
For information on any other Mediaid Inc. products, visit the Mediaid Inc. home
page on the web at www.mediaidinc.com, or contact Mediaid Inc. at:
Customer Service
17517 Fabrica Way, Suite H
Cerritos, CA 90703 USA
Returns Department
17517 Fabrica Way, Suite H
Cerritos, CA 90703 USA
Telephone
714 367 2848
Fax
714 367 2852
Email
[email protected]
- 29 -
Principe d’Utilisation
- 30 -
Mediaid Inc. Limited Warranty Information
Chapter 6:
Mediaid Inc. Limited
Warranty Information
6.1 Applicability of
Warranty
This Warranty covers only the Mediaid
Inc. pulse oximeter Model 5300 Series
and accessories as indicated. It is not
extended
to
other
products
or
components that the customer uses in
NOTE
This product is
manufactured and sold by
Mediaid Inc. under the
warranties set forth
below.
conjunction with Mediaid Inc. products. This Warranty shall not apply if the
manufacturer determines that the product has been damaged due to abuse,
misuse, misapplication, accident, negligence, tampering, or as a result of service
or modification by any other than an authorized Mediaid Inc. service technician.
Opening of the sealed enclosure or altering the serial number will void the
Warranty. Use of equipment contrary to or inconsistent with the User’s Manual
will also void the Warranty.
6.2 What Is Covered By This Warranty
Mediaid Inc. warrants that the Mediaid Inc. product enclosed with this Warranty
will conform to the manufacturer’s specifications, and shall be free from defects
in workmanship and materials for a period of five (5) years from the date of
original purchase. Items excluded from this five-year term are power adaptor,
sensor extension cable, sensors and other accessories.
6.3 What Mediaid Inc. Will Do To Correct
Problems
Should your Mediaid Inc. product prove to be defective, contact Mediaid Inc. for
repair at 714 367 2848. Please have your model and serial numbers available
when calling. Mediaid Inc. will then issue a “Return Authorization Number
- 31 -
Mediaid Inc. Limited Warranty Information
(RAN).” Return your instrument securely packaged in its original shipping carton
(or equivalent packaging), and include your Return Authorization Number.
Mediaid Inc. will repair any faulty workmanship, and either repair or replace (at
our option) any defective part with new or refurbished parts. For non-warranty
repairs, the customer will be charged the current repair rate at the time of receipt
by Mediaid Inc., and all transportation charges shall be the customer’s responsibility.
Mediaid Inc. shall not be liable for any damages including, but not limited to,
incidental damages, consequential damages or special damages. This Warranty
does not cover any damage done to the equipment during shipping, which shall
be the sole responsibility of the transportation company.
ALWAYS READ THE USER’S MANUAL CAREFULLY. The information
included in the User’s Manual will assist the user in preventing equipment misuse
and ensuring patient safety. Operation of the equipment in a manner contrary or
inconsistent with the User’s Manual will void the Warranty.
6.4 Owner’s Registration
To assist Mediaid Inc. in serving you, please complete the Warranty Registration
Card that is included and return it to: Mediaid Inc.; 17517 Fabrica Way, Suite
H; Cerritos, CA 90703, USA.
NOTE
There are no warranties, expressed or implied, which
extend beyond the warranties set forth above. Mediaid Inc.
makes no warranty of fitness for a particular purpose with
respect to the product or parts thereof. This warranty gives
you specific legal rights. You may have other legal rights
which vary from state to state. Mediaid Inc. Will Not Be
liable to the user for incidental or consequential damage or
loss arising out of the user’s inablilty to use this product.
- 32 -
Mediaid Inc. Limited Warranty Information
6.5 Product Information
To better assist customers, Mediaid Inc. recommends all users to write down all
pertinent product and warranty information.
Product Number
Serial Number
Software Version Number
Warranty Expiration Date
- 33 -
Principe d’Utilisation
- 34 -
Delcaration of Conformity
Conformity:
Declaration of Conformity
Appication of European Union Council Directive
93/42/ECC
Manufacturer:
Mediaid Inc.,
Address:
17517 Fabrica Way, Suite H,
Cerritos, CA 90703, USA
Product Description:
Sphygmo-Oxymeter
Type, Model:
Mediaid Palco 5305
Classification:
IIa
Type, Model:
Mediaid Palco 5340
Classification:
IIb
Certification of Quality System
Certificate Number: HD 60006298 0001
Issued by: TUV Rhienland
Product Safety GmbH
st
Date: 31 October 2003
European Authorized
Representative:
Mayer Engineering & Consulting
Support GmbH
Anna-schieber-Weg 2,
D-73728 Esslingen,
Germany
We herewith declare that the above mentioned procuct complies with the
applicable requirements of EC Directive 93/42/EEC. The CE mark will be
affixed on the above mentioned device based on Directive 93/42/EEC
Annex II.
Mahesh.C.Patel
Date
- 35 -
Principe d’Utilisation
- 36 -