1
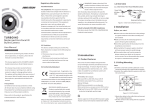
iD1080‐MB 2 MegaPixel IP Mini IR Bullet Camera User Manual Ver1.0 FULL HD NETWORK CAMERA Contents SAFTY WARNING & CAUTION Safty Warning and Caution CHAP 1. -------------- -------------- -------------- 02 -------------- -------------- -------------- -------------- 05 INTRODUCTION 1-1. Features 1-2. Product & Accessories INTRODUCTION -------------- -------------- -------------- 06 1-3. Dimension -------------- -------------- -------------- -------------- 06 1-4. Specification -------------- -------------- -------------- -------------- 07 -------------- -------------- -------------- 08 2-1. Cable Connection -------------- -------------- -------------- -------------- 09 2-2. Network Connection (LAN) -------------- -------------- -------------- 09 2-3. Check Computer Settings -------------- -------------- -------------- 10 1-5. Part Names & Functions CHAP 2. INSTALLATION INSTALLATION 2-4. Typing the IP address directly on Web Browser -------------- 11 2-5. Using UPnP(Universal Plug and Play) function -------------- 12 -------------- -------------- 13 -------------- -------------- -------------- -------------- 14 -------------- -------------- -------------- -------------- 16 -------------- -------------- -------------- -------------- -------------- 16 2-6. Connection of cameras at long distance CHAP 3. SYSTEM OPERATION 3-1. View live video 3-2. MENU - General ● System Info ● User ● Date & Time -------------- -------------- -------------- -------------- 17 3-3. MENU - Video SYSTEM OPERATION ● Camera -------------- -------------- -------------- -------------- -------------- 18 ● Video Stream Setup -------------- -------------- -------------- -------------- 20 3-4. MENU - Network ● TCP/IP Setup -------------- -------------- -------------- -------------- 21 ● RTP -------------- -------------- -------------- -------------- -------------- 22 ● IP Filtering -------------- -------------- -------------- -------------- 23 ● UPnP -------------- -------------- -------------- -------------- 24 -------------- -------------- -------------- -------------- 24 3.5. MENU - Event ● Motion Detection ● Motion Detection Schedule ● Event Server -------------- -------------- -------------- 25 -------------- -------------- -------------- -------------- 25 3-6. MENU - Maintenance ● Upgrade -------------- -------------- -------------- -------------- 27 1 FULL HD NETWORK CAMERA SAFTY WARNING AND CAUTION TO REDUCE THE RISK OF ELECTRICAL SHOCK, DO NOT OPEN COVERS. NO USER SERVICEABLE PARTS INSIDE REFER SERVICING TO QUALIFIED SERVICE PERSONNEL Please be aware of the following precautions before installing the Camera. Avoid any place with moisture, dust, or soot. Avoid any place with direct sunlight or heating appliances. Keep the product away from electric shock or magnetic substances. (Recommended operation temperature is between 0℃ ~ 40℃) Do not place any conductive material through the ventilation. Avoid high or low temperature. Turn off the system before installation. Ensure enough space for cable connections. Place the system on a solid surface with sufficient air ventilation Avoid any surface that vibrates. Do not disassemble the product without assistance from the manufacturer. Do not place any heavy object on the system. The following are warning and caution statements for the safety of the users and for the prevention of any property damage. Please read below thoroughly. Warning and Caution signs Warning Caution If you are not aware of this warning, If you are not aware of this warning, you may be you may be injured or be killed injured or cause property loss. 2 FULL HD NETWORK CAMERA Warning Turn off the system before installing the system. Do not plug in several electric devices to the same outlet. This may cause heating, fire, or electric shock. Prevent power cable from being severely bent or pressed by a heavy object. This may cause fire. Do not place any liquid container on the system, such as water, coffee, or beverage. If liquid is poured onto the system, it can cause a system breakdown or cause fire. Clean the dust around the system on regular basis. When cleaning the system, always use dry cloth. Do not use wet cloth or other organic solvents. This may damage the surface of the system and can cause system breakdown or electric shock. When pulling the power cable from the plug, do so gently. Do not touch the plug with wet hands and avoid using the plug if the holes on the outlet are too loose. This may cause fire or electric shock. Avoid any place with moisture, dust, or soot. This can cause fire or electric shock. Do not attempt to disassemble, repair, or modify, the system on your own. It is extremely dangerous due to high voltage running through the system. This may cause fire, electric shock, or serious injuries. Check for any danger signs such as moist floor, loosened or damaged power cable, or unstable surface. If you encounter any problems, ask for assistance from your dealer. This may cause fire or electric shock Install the system in a cool place without direct sunlight and always maintain room temperature. Avoid candle light and heat‐generating devices such as heater. Keep the system away from places where many people pass. This may cause file. Install the system on a plain surface with sufficient air ventilation. Do not place the system on elevated surface. This may cause system breakdown or serious injuries. 3 FULL HD NETWORK CAMERA Caution Do not install the system in a place with high magnetic, electric wave, or wireless devices such as radio or TV. Install the system in a place with appropriate moisture and temperature level Avoid installing the system with high (over 40℃) or low (under 0℃) temperature. Prevent any substances from being inserted into the system. This may cause system breakdown. Do not place any heavy object on the system. This may cause system breakdown. The system can be damaged from a strong impact or vibration. Avoid throwing objects within the vicinity of the system. Avoid direct sunIight or any heating appliances. The outlet must be placed on the ground. If there is strange sound or smell, unplug the power cable immediately and contact the service center. This may cause fire or electric shock. It is recommended to use AVR (Automatic Voltage Regulator) for stable power supply. In order to maintain stable system performance, have your system checked regularly by the service center. The manufacturer is not held responsible for system breakdown caused by mishandling. It is recommended to coil the core‐ferrite around the connector of the system to avoid electromagnetic Interference. 4 FULL HD NETWORK CAMERA CHAP 1. INTRODUCTION iD1080 Series IP Cameras are high‐definition, feature‐rich megapixel digital cameras designed for superior performance in a wide variety of video surveillance applications. The cameras employ true high‐definition (HD) video and H.264 compression, streaming up to 30 frames per second (fps) at 1080p (1920 x 1080) resolution, offering efficient network utilization with the highest‐quality video. 1‐1. Features Camera ‐ 1/3 inch 2Mega Pixel CMOS Image Sensor Video ‐ High Definition Resolution : Up to 1920 * 1080 @ 30fps ‐ Highly efficient compression algorithm : H.264, MJPEG ‐ Dual Streaming : H.264/H.264, H.264/MJPEG ‐ Resolution : CIF(352x240) – HD(1920x1080) ‐ Adjustable Video Bitrates : 256kbps ~ 10,000kbps ‐ Various Transmission Mode : CBR, VBR ‐ Motion Detection Network ‐ Static IP, Dynamic IP (DHCP) ‐ Various Protocols: TCP/IP, UDP, DHCP, SMTP, HTTP, SNMP, RTP, RTSP, ONVIF ‐ Unicast, Multicast Micro SD Card Slot UPnP PoE 24 IR LED IP66 Grade (Weatherproof) Dimension / Weight : Ø70.2(W) x 169.6(D)mm / 420g 5 FULL HD NETWORK CAMERA CHAP 1. INTRODUCTION 1‐2. Product & Accessories IMAGE NAME QTY REMARK CAMERA 1 CD 1 Manual, Software, etc. QUICK GUIDE 1 SCREW 4 To Install at Ceiling & Wall ANCHOR 4 WRENCH 2MM 1 1‐3. Dimension 6 FULL HD NETWORK CAMERA CHAP 1. INTRODUCTION 1‐4. Specification Description Fetures Image Device / Scanning System Camera Lens Function Network 1/3 inch CMOS / Progressive Scan Effective Pixels array size 1,944(H) X 1,092(V) : 2.1M Min. Illumination 0.1Lux (ICR ON) with 50IRE Quantity of IR LED 24 EA Visual range 25M Focal Length 3.3mm (Fixed Focal Lens) Aperture Ratio F# 2.0 Angular Field of View H : 55° / V : 42° Min. Object Distance 0.5M Day & Night Color, Optical ICR Filter Backlight Compensation ON / OFF Motion Detection ON (5 programmable zones) / OFF White Balance Auto / Indoor / Outdoor Electronic Shutter Speed Auto / Flickerless(ON/50Hz,60Hz) / Manual (1/6~ 1/1000sec) Video Out CVBS : Composite NTSC/PAL, BNC connector Ethernet RJ-45 (10/100BASE-T) Video Compression Format H.264 / MJPEG Max. Resolution @ FPS H.264 / MJPEG : 1920 x 1080 / 1280 x 720 / 704 x 480 / 352 x 240 @ 30 fps Video Quality Adjustment H.264 : Compression Level, Target Bitrate Level Control MJPEG : Quality Level Control (5 step) Bitrates Control Method H.264: VBR, CBR / MJPEG : VBR Streaming Capability Primary, secondary IP DHCP/IPv4 Protocol ONVIF, TCP/IP, UDP/IP, RTP(UDP), RTP(TCP), RTSP, NTP, HTTP, HTTPS, DHCP, FTP, SMTP , ARP, DNS, DDNS Security HTTPS Login Authentication, IP Address Filtering, User access Log Streaming Method Unicast, Multicast Max. User Access 4 users Recording Mode Always/ Motion Detection/ Event/ Schedule Webpage Language Web Viewer Remark ±5% English Supported OS : Windows XP Higher Supported Web Browser : Internet Explorer 7.0 or Higher Others Central Management SW E-VMS (9ch Free Bundle Software) Mobile Viewer M-EYES Operating Temperature / Humidity -10°C ~ +50°C (+14°F ~ +122°F) / 20% ~ 80% RH Dust proof and Weather Proof IP66 Grade(Weatherproof) Power Input PoE, DV12V/700mA Dimension / Weight Ø70.2(W) x 169.6(D)mm / Material : Aluminium / 420g 7 FULL HD NETWORK CAMERA CHAP 1. INTRODUCTION 1‐5. Part Names & Functions NAME FUNCTION 1. POWER Power input jack. Connect to DC12V/450mA. Connect to a PC or a Network via a HUB with a 10/100 cable 2. ETHERNET PORT attached RJ‐45 connector. 8 FULL HD NETWORK CAMERA CHAP 2. INSTALLATION 2‐1. Cable Connection 2‐2. Network Connection (LAN: Local Area Network) 1. Run an internet browser on the local PC. 2. In the address field of your browser, enter the IP address of the camera, please. (Default : 192.168.0.100) 3. Login window appears, enter ID and PW. ID: admin, Password : 1111. 9 FULL HD NETWORK CAMERA CHAP 2. INSTALLATION 2‐3. Check Computer Settings Turn on the computer and run Windows. 1 2 [Start] → [Control Panel] Please, Log in as a 'Administrator'. Select [Network and Sharing Center] → [View your basic network information and set up connections] Check your network connection on menu [View your active networks]. 3 4 If there is no active network connection, 5‐A If network connected properly, Please, check the connection of cables between Computer and Hub or Router. 5‐B Move to the Page 16 <View Live Video>. 10 FULL HD NETWORK CAMERA CHAP 2. INSTALLATION 2‐4. Typing the IP Address directly on Web Browser 1 Please, check if the camera is on. Please, open the Internet Window In case of ‘Window 7’, login as a ‘Administrator’. 2 Enter ID and Password. Default [ID: admin], [PW: 1111] And Chose the Language. Please, Enter the IP address on address bar. Default address is [ 192.168.0.100 ]. 3 4 Live video will be displayed. 5 11 FULL HD NETWORK CAMERA CHAP 2. INSTALLATION 2 ‐ 5. UPnP (Universal Plug and Play) 1 Please, check if the camera is on. 2 [Start] → [All Programs] →[Windows Explorer] → [Network] Choose one of the Camera from [Other Devices], Searched. Live video will be displayed. 3 4 12 FULL HD NETWORK CAMERA CHAP 2. INSTALLATION 2‐6. Connection of cameras at long distance Some settings of Router should be changed in order to check the live view or change the settings of the camera that is connected at long distance. (ex. Address converting) Each manufactures has own way to set up. For more information, please refer to the instruction manual supplied to each router or contact the manufacturer of router. 13 FULL HD NETWORK CAMERA CHAP 3. SYSTEM OPERATION 3 ‐ 1. View live video ‐ View live video on web browser window Live video view will be displayed after entering IP Address on web browser address bar. Click [Set up] in order to change the settings. User level should be same or higher than ‘Administrator’ in case of long distance connection. Default ID: admin / PW : 1111 Enter IP Address. Click [SETUP] Menu. 14 FULL HD NETWORK CAMERA CHAP 3. SYSTEM OPERATION 3 ‐ 1. View live video 1 2 3 1 Select Video Streaming: This camera support Dual Streaming. (Primary Stream / Secondary Stream) 2 Set the connection protocol: Change according to your network protocol. (TCP/ UDP) 3 Adjust the screen size: The size of entire screen will be changed depending on the value you set. ( 100% / 50% / 25% ) 1 2 3 4 5 6 1 D‐Zoom (Digital Zoom) : Choose [D‐Zoom] menu on live video window. A collapsed window appears in the lower‐right corner of the screen. On this collapsed window, you can select zoom ratio menu by clicking right button of a mouse. The screen appears in full size in selected ratio, using the cursor to the desired part in reduced screen. Expanded to a maximum of 16 times digital zoom is available. 2 Capture : The captured image is saved as a Jpeg file. 3 Rec : Instant record on SD Memor Card. 4 Full Screen : Live video will be displayed in full screen. 'ESC' key, or by clicking the mouse twice to return to the previous screen. 5 Spk ON/OFF (Speaker) : Turn on the Speaker or turn off. 6 Mic. ON/OFF: Turn on the Microphone or turn off. 15 FULL HD NETWORK CAMERA CHAP 3. SYSTEM OPERATION 3‐ 2. MENU ‐ General System Info 1 2 1 Camera information is displayed. (Model Name / firmware version / serial number / hardware ID / MAC address) 2 System Setting You can put own Model name and Logo image. * File Name must : ‘logo.png’. First letter should be small ‘L’. * File Format Only ‘.png’. * File Size : 200*50 pixel recommended. User To manage the user name and password to the menu to add a user account, you can delete. <Setting Authority> ‐ Administrator : All menus can be operated ‐ Operator : All menus can be operated except management of user account ‐ User : Only [Video, Audio] of live video mode, can be set ‐ Guest : Only viewing live video 16 CHAP 3. SYSTEM OPERATION 3 ‐ 2. MENU ‐ General FULL HD NETWORK CAMERA Date & Time 1 2 1 Setting the Time Zone : The camera is installed, select the time zone of the place. In most countries, the United Kingdom and the prime meridian of Greenwich ‐ 1 hour for every unit change Each country has its own a broad zone. 2 Synchronize with NTP server : NTP (Network Time Protocol) server using the Network Time Protocol to synchronize time with the camera. NTP server name [NTP Server menu] is sure to be filled. ** What is NTP(Network time protocol)? Network Time Protocol (NTP) is a networking protocol for clock synchronization between computer systems over packet‐switched, variable‐latency data networks. NTP was originally designed by David L. Mills of the University of Delaware, who still develops and maintains it with a team of volunteers. Now, it became the standard in internet. NTP provides Coordinated Universal Time (UTC) including scheduled leap second adjustments. NTP can usually maintain time to within tens of milliseconds over the public Internet can achieve 1 millisecond accuracy in local area networks under ideal conditions. 17 FULL HD NETWORK CAMERA CHAP 3. SYSTEM OPERATION 3 ‐ 3. MENU – Video Camera 1. LENS : It is divided into DC / VIDEO / Manual mode 2. EXPOSURE ‐ ‐ ‐ ‐ ‐ ‐ ‐ ‐ ‐ Divided in to [Auto Shutter Mode] and [Manual Shutter Mode]. Auto Shutter Mode : 1/30 ~ 1/50,000 and x2 ~ x60 Manual Shutter Mode : 1/30 ~ 1/50,000 and x2 ~ x60 AGC (Auto Gain Control) : LOW, MIDDLE, HIGH SENS UP : Sensitivity can be adjusted to OFF / AUTO functions. In [AUTO] mode, it supports up to x2 ~ x30. BRIGHTNESS : Can compensate for the exposure, and supports up to 0‐100. D‐WDR : To shoot the dark and light areas at once and compensate the synthesis image. DEFOG : Correction of fog LOW / MIDDLE / HIGH support. BACKLIGHT COMPENSATION : Supports BLC / HSBLC. ** BLC (Back Light Compensation) As backlight compensation function under backlight conditions when playing the recorded video on the monitor is bright background (white saturation) inability to identify the subject and the subject is dark, to prevent the state function. 3. WHITE BAL (White Balance) ‐ ‐ ‐ ‐ ‐ ATW MODE : Automatically adjust [White Balance] according to the Ambient illumination. AWC SET MODE : Automatically adjust [White Balance] according to the Color Temperature. INDOOR MODE : Automatically adjust [White Balance] according to the Internal illumination. OUTDOOR MODE : Automatically adjust [White Balance] according to the External illumination. MANUAL MODE : [White Balance] is set by the value of the adjustment. 18 4. DAY & NIGHT ‐ ‐ ‐ Auto MODE : AUTO DELAY, DAY ‐> NIGHT, NIGHT ‐> DAY FULL HD NETWORK CAMERA Color MODE : Set to Day mode. B/W MODE : Set to Night mode. 5. NR ( NOIDE REDUCTION ) ‐ ‐ ‐ ‐ 2DNR MODE : 2D method reduce the noise. 3DNR MODE : 3D method reduce the noise. SMART NR MODE : Remove the noise according to the Live View. LEVEL : Adjust the level of noise reduction. 6. SPECIAL ‐ ‐ CAM TITLE : Set the name of the camera. D‐EFFECT . FREEZE : Stop the images. . MIRROR : Reverses the image left or right. . D‐ZOOM : Digital Zoom ( x 2.0 ~ x 64 ) . NEG. IMAGE : Invert the Luminance level of the Image. ‐ ‐ ‐ PRIVACY : By setting a personal secret area will have a selection of images. You can set a total of eight regions, and the location / color can be changed. LANGUAGE : Set the Language of the OSD menu. Support ENGLISH / KOREAN / JAPANESE / CHINESE 1 / CHINESE 2. ‐ ‐ DEFECT : Detect and correction ‘Static dead pixel’ and ‘Dynamic dead pixel’. VERSION : Display setting version of ISP Camera. 7. ADJUST ‐ ‐ ‐ ‐ ‐ SHARPNESS : Adjust the outline of the image to smooth or to sharpen. It is adjustable from 0 to 100. MONITOR TYPE : Support LCD and CRT, depending on your use. OSD : Set the status of color of OSD characters and border line between channels. LSC : Turn on or off of the Lens Shading Correction. NTSC / PAL : Replace composite video output NTSC or PAL. 8. RESET ‐ Change the settings to factory default state. CHAP 3. SYSTEM OPERATION 19 3 ‐ 3. MENU – Video FULL HD NETWORK CAMERA Video Stream Setup 1 2 3 4 5 6 1 Video codec : Set a compression method as H.264 or MJPEG. 2 Resolution : Select the video resolution of the image. 1080p(1920x1080) / 720p (1280x720) / D1(704x480) / CIF(352x240) Frame Rate: Set maximum frame rate per 1 second. (1~30fps) ‘* The actual number of frames for each network bandwidth limitations may be less, depending on the setting. In addition, in case the generated data cannot be sent to the Network properly, less frame will be appear than set value. I Frame Interval: Set numbers of I Frame between P Frames(Partial Frame). I Frame of Video can be set from 0 to 30. If set to ‘0’, I Frame is not generated. Resolution : ‐ VBR(Variable Bit Rate): Change the transmission speed on network fluid to minimize the loss of video image quality. You can select from 5 steps of resolution. The image quality, selected is a way to compress the frame constantly. Therefore, compressed bit rate will vary a lot according to the change in the frame or movement of the object. ‐ CBR(Constant Bit Rate): Compressed video images are transmitted according to set fixed bandwidth. It is used when image quality is high or images keep changing. If you want a high‐quality video transmission, set to 4Mbps or higher. Recommend to use, if you have enough network bandwidth. Bitrates : Video transmission is a sub‐menu that appears when you set the CBR. You can choose from 256 to 10,240 kbps transmission speed. 3 4 5 6 CHAP 3. SYSTEM OPERATION 20 FULL HD NETWORK CAMERA 3 ‐ 4. MENU ‐ Network TCP/IP Setup 1 2 3 4 5 Obtain IP address via DHCP(Dynamic Host Configuration Protocol) : IP address is automatically set in DHCP server. 2 Use the following IP address : ‐ IP address: Enter Static IP Address. ‐ Subnet mask: Enter Subnet mask address. ‐ Gateway: Enter Gateway address. 1 3 Web Server Port: Typical HTTP server port is 80. Please, select between 1025~65535, if you use separate web server. 4 Encryption : Please, select the protocol to encrypt from HTTP or HTTPS. 5 RTSP port: Video streaming port. RTSP (Real Time Streaming Protocol) between the server and the client Media transmission standard, and the default setting 554, the setting can be selected during 1025‐65635 . Reference 1 : Domain Name System (DNS) is the name of the domain or host in the Network numeric IP addresses that interpreted as TCP / IP Network Service. Network used to find the IP address for each computer that connects to the role, but it can be difficult to remember for users. For example, [www.amazon.com] is easy to remember instead of [207.171.166.48]. The name of each computers are separated by periods, consisting of alphanumeric string consists of the segment. Computer Network, All organizations that use at least one or more DNS query has instructions. The servers are called as a 'name servers' and have a list of different RTSP port number. Reference 2 : RTSP port number should be different from Web port number. CHAP 3. SYSTEM OPERATION 21 3 ‐ 4. MENU – Network FULL HD NETWORK CAMERA RTP Setup RTP (Real‐Time Transport Protocol, Real‐time Transport Protocol) is a transport layer protocol between user group that is connected in real‐time voice and video transmission and reception. Primarily, RTSP uses RTP to format packets of the multimedia contents. This menu is used when streaming doesn’t connect with RTSP. RTSP stream is sent to the destination set. SDP (Session Description Protocol) files appear on the server, the client is possible to search through http connection. TTL : Set TTL(Time To Live) value. The default setting is ‘7’ and the setting rage is from 1 to 255. CHAP 3. SYSTEM OPERATION 22 FULL HD NETWORK CAMERA 3 ‐ 4. MENU – Network IP Address Filtering 1 2 3 1 Enable IP Address filtering : Select the basic policy for granting access. ‐ Allow all : All the IP addresses are allowed except limited access list. ‐ Deny all : All the IP addresses are denied except access list. ‘* For ‘Deny all’ menu, at least 1 IP address must be exist. 2 Create a list of limit IP Address : 1. Enter the following items in the list. ‐ List Name ‐ From IP Address: Fill the starting IP Address to limit. ‐ To IP Address: Fill the last IP Address to limit. 2. Click [Add] Button. 3. Repeat above 2 steps to add IP Address to limit. 3 Delete listed IP Address : 1. Select 1 or some IP Addressed that you want to delete. 2. Click [Delete] Button. Reference: To create the policy to limit or authorize fill consecutive multiple IP addresses or fill in the start and end of the IP address number. Once, you put only 1 address, fill the same one to the list. CHAP 3. SYSTEM OPERATION 3 ‐ 4. MENU ‐ Network 23 IP CAMERA UPnP Setup FULL HD NETWORK CAMERA 1 2 1 Enable : On [Enable] mode, you can find connected cameras at client site by using UPnP(Universal Plug and Play) protocol. 2 UPnP name: Enter the name to appear at Network list. You can distinguish cameras when it shows several cameras. Default name is ‘IP_CAMERA’. 3 ‐ 5. MENU – Event Motion detection 1 2 3 2 Set the motion detection area : Use the mouse to position and size of motion detection windows. You can create this window up to 5. Window Name : Enter the name of created window. 3 Sensitivity : 1 Sensitivity is the condition to run the camera by detecting motion. Selected sensitivity works only in created window. A smaller number has higher sensitivity. Set from 0 to 100 is possible. CHAP 3. SYSTEM OPERATION 24 FULL HD NETWORK CAMERA 3 ‐ 5. MENU ‐ Event Motion detection schedule Create the schedule of motion detection. When sensor detects motion according to settings, alarm runs in accordance with set schedule. Action : Select the method of reaction. 1 ‐ ‐ FTP : Upload the recorded video when an event occurs, to specified FTP Server. SMTP : Email event warning message(entered on setup menu) to specified address. Event Server 1 2 3 4 ‐ FTP Transfer setup Set the details to transmit recorded video to FTP server in case of chose the react as ‘FTP’. 1 2 3 4 FTP server address : Enter FTP server address that can be uploaded video data. You can fill FTP server address in IP address or in Domain name. (ex. ftp.google.com) If you are using domain name, DNS must be registered to allow the change this domain name to IP address. When camera set by static IP address, if DNS is not registered, camera cannot find the way to FTP server by domain name. Upload path: Enter the folder name to save in FTP server. Port : Enter the number of FTP port. Normally, it used ‘21’. User ID / Password : To log in to FTP server. CHAP 3. SYSTEM OPERATION 25 FULL HD NETWORK CAMERA 3 ‐ 5. MENU – Event Event Server 5 6 7 8 9 10 11 12 ‐ E‐mail(SMTP) Transfer setup Set the details to send e‐mail through SMTP in case of chose the react as ‘SMTP’ 5 SMTP server address : Enter SMTP server address to sending e‐mail. Port : Enter the number of SMTP server. Normally, it used ‘25’. 7 User ID / Password : To log in to SMTP server. 8 E‐Mail sender : E‐mail address that is registered at specified SMTP server. Depends on receiving e‐mail server, [E‐Mail sender] can be used to certify sending mail. 9 E‐Mail receiver : E‐mail address to receive. To send an e‐mail to multiple addresses, separate by [,] or [;]. 10 Title : Enter the Title of e‐mail that will be sent in case of specified event. 11 Message : Fill the message to be sent. 12 Test : To confirm if the mail sent properly. CHAP 3. SYSTEM OPERATION 6 26 3 ‐ 6. MENU – Maintenance FULL HD NETWORK CAMERA Upgrade 1 2 3 4 1 2 3 4 Restart : Turn off and turn on the camera. All the settings are not changed. Reset : All values except the current IP settings will be initialized. Factory Default : All values are deleted including User Accounts and using log. Firmware upgrade : 1. Press the Browse button to find the firmware to upgrade on your PC to find 2. Press the Upload button to begin the upgrade. 3. When the upgrade is complete, the camera will turn off and on automatically. * During the upgrade, do not turn off the camera. 27