1
7130
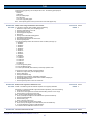
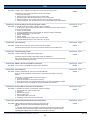
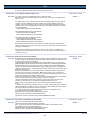
keys).
2. Enter code 057, then press (*) 001(*). The touchscreen should read <057-001>.
3. The touchscreen should say ON, if toner is present and OFF if toner is not present.
4. If the touchscreen switches from an ON/OFF state, replace the TLD sensor (p/n 40AA88030).
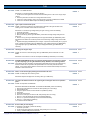
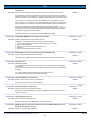
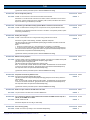
DESCRIPTION: Unable to install the key counter receptacle (p/n U021-0020) due to connector incompatibility
with the main body interface harness (CN35).
SOLUTION: CAUSE: Different style of key counter receptacle on the 7130.
SOLUTION ID: 131638
USAGE: 8
SOLUTION: There is a new adapter that allows external key counters to be connected to the
new-style connector on the 7130. The new key counter adapter (p/n 1206K0010) is available and
can be ordered from Parts.
Note: Konica is changing the key counter receptacle to the style that is presently on the 7130. All
applicable vendors have been notified of this change.
SOLUTION ID: 133056
DESCRIPTION: Code 0006 when attempting to run L-detect.
SOLUTION: CAUSE: Dirty or failed TCSB (Toner Control Sensor Board).
USAGE: 7
SOLUTION: Clean or replace the TCSB (p/n 26NA-9180) as necessary.
Note: The TCSB is located on the drum carriage.
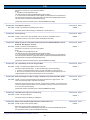
DESCRIPTION: FK102, how to set the machine to print received faxes on 8.5x11 paper only.
SOLUTION: To set the desired reception paper size, perform the following procedure:
1. Press the Help button.
2. On the LCD, press Key Ope.
3. Select Fax when the modes display.
4. Select Tx/Rx Mode Set.
5. Press the down arrow to select Rx Paper Selection.
6. Press Edit to change setting to 8.5x11 Fix.
7. Return to normal operation by selecting Back from the LCD.
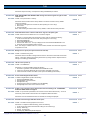
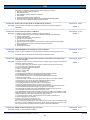
DESCRIPTION: How to reset the machine (initialize memory) to factory defaults.
SOLUTION: To reset memory to factory defaults perform the following:
1. Enter the 25 mode (power the machine ON, while pressing the 2 and 5 keys).
2. Select Software SW.
3. Using the up/down arrows, scroll to address 3-4 (All Memory Reset).
4. Select OFF.
5. Power the machine OFF.
6. Enter the 47 mode (turn the machine ON, while pressing the 4 and 7 keys).
7. Enter 0, 9, 3, and press the START key.
8. Power the machine OFF/ON.
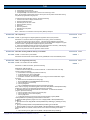
DESCRIPTION: FAILED TO WRITE TO LPT1 message is indicated on the PC when trying to flash the unit.
SOLUTION: CAUSE: The parallel port setting in the PC CMOS is not set to Standard (Normal) or Bi-Direct. It
may be set to either ECP or EPP, which will cause a corrupt flash process.
SOLUTION ID: 133755
USAGE: 7
SOLUTION ID: 135479
USAGE: 7
SOLUTION ID: 144524
USAGE: 7
SOLUTION: Verify the parallel port setting and make any changes utilizing the CMOS Setup Utility
(refer to the motherboard manual for instructions). To verify the parallel port settings, perform the
following:
1. Right-click on My Computer.
2. Click on Properties.
3. Click on Device Manager tab.
4. Click on the [+] symbol to open Ports.
5. Double-click on Printer Port (LPT1) to view the type of port [Manufacturer:].
Note: The parallel port setting procedure differs in each PC. Normally, the parallel port setting is
selected in the BIOS settings mode. For details, please refer to the user's manual for the PC.
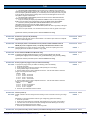
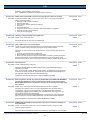
DESCRIPTION: Partial light or faded copies (from lead-to-trail edge), prints and internal test charts are
normal density.
SOLUTION: CAUSE: Failed write unit.
SOLUTION ID: 152260
USAGE: 7
SOLUTION: Replace the write unit (p/n 26WA-6500).
Note: Before replacing the write unit, ensure that the drum, developer, charge corona, and T/S
corona have been cleaned, replaced or determined to be working properly.
Copyright 2005, Konica Minolta Business Solutions U.S.A., Inc.
May 2005
5