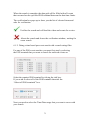
1
Product Technical Documentation
Stealth Pos Gateway
Version :- 4-01-30-CS-005
Document Revision History :Feb 2015 – 1.01 Release Mike Green
[email protected]
1
INDEX
1.
1.1.
1.2.
1.3.
Introduction
This product version
Supported POS systems on this version
Supported video management systems (VMS)
3
3
3
3
2.
2.1.
2.2.
2.3.
2.4.
2.5.
Installing the Stealth POS Gateway (SPG)
System requirements
Installing the Microsoft .NET Framework
Installing the SQL Server Express instance
Checking that the SQL Server is running
Installing the SPG application
4
4
5
9
18
24
3.
3.1.
3.2.
3.3.
3.4.
3.5.
3.6.
3.7.
SPG Product key authentication
Introduction to SPG product keys
Auth Step 1 Product_Keys.INI
Auth Step 2 AUTH_REQUEST.INI
Auth Step 3 E-Mail request
Auth Step 4 Load Site_Info.INI
Authentication by TeamViewer
Note on future release authentication
34
34
35
37
38
40
42
42
4.
4.1.
4.2.
SPG Overview
Controls on the main form
Configuring SPG
43
43
48
5.
The Live Pos Monitor
68
6.
6.1.
6.2.
The archive investigation client
Selecting POS events to review
Review archived video
70
70
78
7.
Viewing events from within the Luxriot VMS
83
8.
Conclusion
85
2
1. INTRODUCTION
The “Stealth Pos Gateway” is a middleware software product, which,
provides integration between a “retailers” point of sale system and
the video surveillance cameras monitoring the cashiers.
The product provides an effective tool, which is used by the surveillance
operator, to monitor point of sale transactions as they occur ( Live ) and/
or after the fact ( Archived ). Thus, assisting in reducing shrinkage at
the point of sale and with resolving customer disputes.
This document provides technical information on how to setup , use and
manage the SPG. It is not a ‘User Manual’ and should only be provided
to the surveillance system technical integrator.
1.1. THIS PRODUCT VERSION
This “Stealth Pos Gateway” product version, ( SPG-4-01-30-CS-005 ),
is used for the integration between pos systems that provide a means of
integration via UDP/IP and the “Luxriot” Video Management System
(VMS).
1.2. SUPPORTED POS SYSTEMS ON THIS VERSION
3
1.3. SUPPORTED VIDEO MANAGEMENT SYSTEMS ( VMS )
This SPG version is designed for use with a “Luxriot” VMS system.
NB :- Luxriot Version 2.5.1 or later
www.luxriot.com
The Luxriot VMS system provides the means of viewing, archiving and
managing the surveillance cameras pertaining to the installation.
The SPG provides a link between the surveillance archive and the Pos
transactional data.
2. INSTALLING THE STEALTH POS GATEWAY ( SPG )
NB :- Your Luxriot VMS Server may already come with the SPG
software pre-installed. In which case you can skip this section.
The SPG is a middleware application which provides the link between the
POS transactional data and the VMS.
This application is installed on the Luxriot VMS Client PC. The SPG is a
single instance application and should be installed once on the VMS
Client which is used by the investigation officer who will monitor and
resolve pos transactions, disputes and investigations.
For multi user pos investigations ( larger retail operations / chains ) use
the Stealth PIC, ( Pos Investigation Client ), which is a multi-user server/
client pos investigation system.
Generally the SPG is used on retail operations with less than 30 till points.
For retail operations with more than 30 till points the Stealth-PIC must be
used.
2.1. SYSTEM REQUIREMENTS
2.1.1. This is a Microsoft Windows application and must be installed on a
PC running a Windows 7 or later operating system.
4
2.1.2. This is a .NET (DOTNET) application and requires a
Microsoft .NET Framework Revision 4.5.1 or later.
2.1.3. This application uses a Microsoft SQL Server Express 2008
database to store pos event and configuration data. It requires an
Instance of SQL Server Express named SQLEXPRESSSPG to be
running on the machine to allow it to operate.
Let’s begin the installation.
2.2. INSTALLING THE MICROSOFT DOTNET 4.5.1 FRAMEWORK
The SPG is an application which requires a Microsoft.NET Framework
4.5.1 or later to operate.
The installation media is included in your installation media pack in the
folder :- Stealth Installation Media\SPG_Requirements.
Or download from Microsoft at :http://www.microsoft.com/en-za/download/details.aspx?id=40779
Or find it under downloads at www.sunbirdSA.com
Or download from our dropbox at :- ( Full Installation pack –
Includes .NET, SQL Express , SPG Installation media etc. )
https://www.dropbox.com/sh/2609taz3w6e4gsj/AABbGNeyLNw3k5Hn
QE-TWVvsa?dl=0
5
2.2.1 Run the .NET 4.5.1 Installation Package
2.2.2 Read and accept license terms and Install.
Note :- If the installer shows a repair or modify installation screen
then .NET 4.5.1 or later is already installed on this machine. You
can then cancel the .NET installation and proceed to installing the
SQL Server Express Instance.
6
2.2.3 Wait for installation to complete.
7
2.2.4 Finish .NET installation.
8
2.3. INSTALLING THE SQL SERVER EXPRESS INSTANCE
NAMED SQLEXPRESSSPG
The SPG is an application which requires an Instance of SQL Server
Express 2008 R2 to be installed on the host machine.
NB :- You must install an instance of SQL SERVER EXPRESS 2008 R2.
Not an earlier or later version. This application is developed on a
Microsoft Visual Studio 2010 development environment. It uses LINQ
for SQL Server to access the database.
The installation media is included in your installation media pack in the
folder :- Stealth Installation Media\SPG_Requirements.
Or download from Microsoft at :http://www.microsoft.com/en-za/download/details.aspx?id=25052
Or find it under downloads at www.sunbirdSA.com
Or download from our dropbox at :- ( Full Installation pack –
Includes .NET, SQL Express , SPG Installation media etc. )
https://www.dropbox.com/sh/2609taz3w6e4gsj/AABbGNeyLNw3k5Hn
QE-TWVvsa?dl=0
9
2.3.1 Run the SQL Server Express Installation Package
NB :- There are a few important steps to take in this installation. Do not
just skip through the installation defaults.
2.3.2 You are doing a new installation
10
2.3.3 Read, comply with and accept the Microsoft License Agreement.
11
2.3.4. Select All instance features and then click next.
IMPORTANT :Watch the next step
You must Name the Instance :- SQLExpressSPG
12
2.3.5. Name the Instance “SQLExpressSPG” and then click next.
IMPORTANT :Watch the next step
The SPG Application requires the SQL Server Browser service to be
running. The default is disabled. You must set this to automatic.
13
2.3.6. Set the SQL Server Browser to Automatic and then click next.
From this point onwards until the end of the SQL Server installation you
Select default options.
14
2.3.7. Use “Windows authentication mode” (default) then click next.
15
2.3.8. No need to send errors to Microsoft. Just click next.
16
2.3.9. Complete SQL Server setup by clicking close.
17
2.4.
Browse to services and make sure that you have an instance of
SQL Server ( named SQLEXPRESSSPG ) running.
2.4.1. From the “Start menu” type in “Services” in the search box.
Double click on Services.
18
2.4.2. In the services dialog make sure that you have an instance of SQL
Server named “SQLEXPRESSSPG”, and that the ‘Startup type’ is
set to ‘Automatic’, and that the service ‘Status’ is ‘Started’.
19
2.4.3. Check also that the “SQL Server Browser” service has a ‘Startup
type’ set to ‘Automatic’. If it is ‘Disabled’ or ‘Manual’ then set
it to ‘Automatic’.
For some reason the “SQL Server Express” installer may not set the
“SQL Server Browser” type to ‘Automatic’.
If it is ‘Disabled’ then you need to enable it.
Note :- The SPG Application will try to set this service startup type to
‘Automatic’ if it is found to be ‘disabled’ or ‘manual’. For completeness
however, we suggest that you set it here.
20
2.4.4. Set the ‘SQL Server Browser’ startup type to ‘Automatic’.
21
2.4.5. Start the ‘SQL Server Browser’ service.
22
2.4.6. Verify that the “SQLEXPRESSSPG” and “SQL Server Browser”
services have a ‘Startup Type’ of ‘Automatic’ and that both
services are ‘Started’.
The SQL Server instance “SQLEXPRESSSPG” which is required to save
the ‘Pos Events’ and ‘SPG configuration data’ is now setup correctly and
running.
23
2.5.
INSTALLING THE “STEALTH POS GATEWAY” (SPG)
APPLICATION.
The SPG is an application which integrates the retail ‘point of sale’
system ( Pos ) to the surveillance ‘video management system’ ( VMS ).
This application needs to be installed on the host ‘Luxriot Client’
machine.
The network topology must be such that the host machine is reachable by
the retailers ‘Pos’ Network and the ‘Luxriot Server’. ( May be the same
Machine … localhost ).
The installation media is included in your installation media pack in the
folder :- Stealth Installation Media\SPG_4-01-30-CS-005.
Or find it under downloads at www.sunbirdSA.com
Or download from our dropbox at :- ( Full Installation pack –
Includes .NET, SQL Express , SPG Installation media etc. )
https://www.dropbox.com/sh/2609taz3w6e4gsj/AABbGNeyLNw3k5Hn
QE-TWVvsa?dl=0
24
2.5.1. Run the ‘Install Shield’ ( Windows Installer ).
2.5.2. Read, understand and accept the ‘Sunbird Technologies
SOFTWARE LICENSE AGREEMENT.
25
2.5.3. Select the ‘Installation Destination Folder’ and then click next.
Tip :- The SPG application will install to a destination folder
“C:\Program Files (x86)\Stealth\Stealth Pos Gateway”, by default.
If you are installing this on a Windows 7 operating system
then we suggest that you use the default destination folder.
Windows 8 however makes it difficult to install or modify
configuration text files (.INI ) in a protected ‘Program Files’
folder. The SPG Application makes use of some .INI
configuration files.
If you install this application in the default folder then you will
need to enable the Administrator account to modify files in this
folder.
If you do not wish to enable the Administrator account on the host
machine, then we suggest that you ‘Change’ the installation
destination folder to install under a different path.
eg. C:\MyProg\Stealth\Stealth Pos Gateway\
26
2.5.4. Proceed with the installation.
27
2.5.5. Complete the SPG Installation.
This completes the SPG application installation.
You will now have an ICON on the desktop and in your start menu.
These ICON’s are used to launch the “Stealth POS Gateway” application.
Important Note :The POS Transaction Events are not loaded into the SQLSERVERSPG
Database unless the SPG Application is running.
The SPG application must therefore run at ‘Startup’ and continuously run
on the host PC.
The SPG installer does not copy the SPG Shortcut to the Startup menu.
You should do this manually.
28
2.5.6. SPG launch Icons on desktop and in the start menu.
29
2.5.7. Set “Stealth POS Gateway” launch shortcut to run minimized on
launch.
Right click on the ‘Stealth POS Gateway’ shortcut on the desktop.
Open the properties dialog.
30
2.5.8. Copy the “Stealth POS Gateway” launch shortcut to the host PC
startup folder.
31
You have now completed the installation of the installation of the
“Stealth Pos Gateway” ( SPG ) application.
The next section deals with product key authentication.
32
3.
SPG PRODUCT KEY AUTHENTICATION
3.1.
Introduction to SPG Product Keys ( Licenses )
The “Stealth Pos Gateway” ( SPG ) application is licensed to
operate for the number of tills ( pos terminals ) on the specific
retail site.
The SPG product is suitable for installations that have less than
30 tills and a single loss control investigation process.
For retail operations with more than 30 tills you need to use the
Stealth-PIC product, which, is a server/client based Pos
Investigation Client ( PIC ), designed for unlimited tills at
unlimited sites with unlimited simultaneous investigation officers.
The SPG and PIC applications utilize the same “Product Keys”,
which are purchased as a once off license for use on a specific
till on a specific site for the life of the product.
On an SPG installation a number of Product Keys ( from 1 to 30 )
are authenticated to run on the SPG application on the host pc.
Please Note :- The authentication process marries the product keys
purchased to the specific machine on which the SPG Application
is installed. Before you do any of the following to the target
machine you will first need to enquire from
[email protected] what the consequences of the change
will be.
i)
ii)
iii)
iv)
Change the primary hard drive of the host machine.
Add or remove network adaptors from the host machine.
Change the Motherboard / CPU of the host machine.
Re-Install the SPG application on the host machine.
If the host machine fails you will need to e-mail support at
[email protected] and supply the following information
to ensure that the product keys can be re-installed on the
replacement machine.
33
3.2.
Authentication of Product Keys STEP 1 … Copying the
Product_Keys.ini file to the SPG installation folder.
When you ordered your product keys for the specific installation,
you will receive a file called “Product_Keys.INI”.
This file contains your unique product keys for the specific
installation.
This file needs to be copied as is into the SPG application folder.
Do not modify this file. It is watermarked. If you modify it then
the authentication will fail.
34
If the application cannot find the Product_Keys.ini file, then, when you
try to run it, it will abort with the following message :-
Copy the PRODUCT_KEYS.INI file into the SPG application folder.
Now try to run the SPG application again.
35
3.3.
Authentication of Product Keys STEP 2 … Generating the
AUTH_REQUEST.INI File.
When you first run the SPG Application it checks to see if it can
find a valid SITE_INFO.INI installation. If not then it means that
the product keys are yet to be authenticated.
It will display a dialog box which prompts you to enter the site
description. This site description must contain unique detail about
the specific installation as this info is required for support purposes.
Enter a Unique site description when prompted :-
On entering the site name and clicking on OK the software will generate
an authorisation request file ( AUTH_REQUEST.INI ) in the SPG
application folder.
36
3.4.
Authentication of Product Keys STEP 3 … Sending the
AUTH_REQUEST.INI file for authentication.
Copy the AUTH_REQUEST.INI File from the SPG Application
folder and e-mail to [email protected].
37
If your product keys are valid and the site details are adequate to provide
support then you will receive a mail with a SITE_INFO.INI file attached.
You need to save this SITE_INFO.INI file and load it with the following
and final step in the authentication process.
38
3.5.
Authentication of Product Keys STEP 4 … Loading the
SITE_INFO.INI file onto the host machine.
The SPG Application requires the SITE_INFO.INI file to be loaded
into the following location on the target machine. ( SPG Host )
Note :- If more than one user will be using the SPG application then the
Same SITE_INFO.INI file will need to be copied or loaded into the
folder for that specific user.
This file can simply be copied into the users profile. This may be a
hidden folder, so, to simplify this process we have created a
“LoadSiteInfo” application which loads the selected file into the
current users profile.
Simply select the SITE_INFO.INI file from your stored location and
“Save to current user”
39
40
3.6.
Authentication of Product Keys via TeamViewer.
To simplify the “Authentication Process” this can be done via
TeamViewer.
If you are going to do this then please make an appointment by
sending an e-mail to :[email protected]
We will request the Teamviewer log in credentials at the appointed
time and assist with the authentication remotely.
3.7.
A note on future revision authentication.
Future revisions from revision 006 onwards will support on-line
automatic authentication via our website.
Look out for future updates.
This concludes the authentication process.
You are now ready to configure the SPG system.
41
4.
SPG OVERVIEW
This manual is not a “Luxriot” configuration manual. It is limited to
configuring the SPG to operate in conjunction with a Luxriot VMS
system. Where necessary please refer to the Luxriot documentation.
Note :- The SPG application makes use of the Luxriot SDK / API’s and
requires the Luxriot Client 2.5.1 or later to be installed on the same
machine as the SPG host. Even if the SPG Host is not a Luxriot VMS
Client the client software must be installed as the installation loads
various DLL files required when using the SDK.
4.1.
The controls on the Main Form of the SPG Application.
Once the SPG is authenticated properly it opens with the following
main form. Please note the application takes a while to initially
load.
42
4.1.1. Receive UDP Port
This is a read only control which shows which UDP port the SPG
is expecting to receive data on. Configuration of all of the
parameters described here is dealt with in later chapters. In this
section of the document we are giving you an overview of the main
form controls.
This version of the SPG is used only on POS systems that send the
transaction data via UDP/IP.
UDP is a one direction connectionless protocol where the ‘Server’
sends UDP Packets to the ‘Client’ and expects no response. The
‘Server’ and ‘Client’ are therefore often referred to as the ‘Sender’
and ‘Receiver’.
This version of the SPG is used only on POS systems where the
POS system sends the transaction data for all POS terminals ( tills)
to a single port. The POS terminal that is sending the message
identifies itself within the UDP packet transmitted.
So for this configuration all pos events are expected to be sent via
UDP to the IP Address of the SPG host machine on port 4000.
4.1.2. Pos System Type
This is a read only control which shows the POS SYSTEM TYPE
that is configured for this system. All POS SYSTEMS will send
the data out in a different format ( Protocol ). Depending on the
POS SYSTEM TYPE, in the configuration, the SPG application
knows how to process the incoming UDP packets.
4.1.3. Luxriot server IP
This is the IP Address, user name, password to connect to the
Luxriot VMS server that is associated to the camera looking
at each one of the up to 30 tills. Obviously these cameras can
reside on a different VMS server, hence the separate connection for
each. The format is :- localhost,”admin”,”admin” OR
127.0.0.1,”Whatever”,”” etc.
43
4.1.4. Till Name
The name associated to each till. This would match the name
By which the till is known in the store.
e.g. Till 1
, POS 01 , 1234Till01 etc.
4.1.5. Target Device
This is a drop-down list of the “Camera Name” that is associated
to the specific till. This is configured during the POS mapping
configuration which we deal with later.
4.1.6. VMS connection status bar
This is a status bar which shows the status of the last connection
to the VMS.
4.1.7. Button – Reconnect to VMS server
This is a button which is used to reconnect the SPG to the VMS
Server specified in “Luxriot Server IP01”. i.e. First VMS Server.
Usage is seldom but included in case the VMS is disconnected.
( The SPG does auto connect anyway but included for
completeness.)
4.1.8. Button – Archive Investigation
This button is used to open the ‘Archive Investigation Form’.
Used to review / search for Pos Transactions and correlated
video. Usage of this button is often. This is the heart of the
SPG application.
44
4.1.9. Button – Live Pos Watch
This button is used to open the ‘Live Monitor’ POS viewing
form. Used to do ‘Live Monitoring’ of cashier performance.
Usage of this button is often.
4.1.10.
Button – System configuration
This button is used to open the ‘System configuration form’.
This form is password protected and is only used by the system
administrator to configure the SPG application.
4.1.11.
Button – System information
This button is used to show the SPG ‘System information’.
Usage is seldom. Only used for system support by the
system administrator / service provider support.
4.1.12.
VMS Search Parameters Pane
Pane which shows the progress of rendering POS events
following a request to do so by the VMS. Usage seldom.
The reviewing of Pos events is accomplished more through
the ‘Archive Investigation’ page than via VMS external
event panes.
45
4.1.13.
4.1.14
List boxes for General information
List box 13 shows general technical information about UDP
packets received.
List box 14 shows general information about POS Transaction
Events received.
46
4.2.
Configuring the Stealth Pos Gateway ( SPG )
The SPG is configured using the configuration utility. We start
with this because understanding the configuration is paramount.
4.2.1. Entering the configuration screen.
You enter the configuration screen by clicking on the
button on the main form.
The configuration is password protected.
When you click on the
button an “Enter Password”
dialog will pop-up, requesting you to enter the configuration
password.
Enter the configuration password and hit Enter or press
The default configuration password is “admin”. This can be
changed within the configuration. Do not forget your configuration
47
password or you will need to make a support call to
[email protected]. We will only be able to rectify this with
TeamViewer access to the SPG host machine.
4.2.2. The general configuration “control panel”
Entering the correct configuration password will give you access to
the general configuration control panel.
This control panel is described in detail below.
4.2.2.1.
The Generate a POS test event panel
This panel is used to generate a test event to a Luxriot external event pane.
Before you understand what this does you need to understand what as
‘External event pane’ is.
48
When viewing video via the “Luxriot VMS Client” or “Local Luxriot
Connection” you can open external event panes by clicking View then
External event panes.
The external event panes are windows that are registered by a third party
application ( such as SPG ) on the Luxriot server to enable the SPG
application to send text information to be displayed from within the
Luxriot VMS.
We will register external event panes when we get to the “Easy map tills
To VMS” configuration menu.
The generate a POS test event panel is purely a test tool to allow the
system administrator to test the ability of the SPG to send messages to
external event panes on the VMS.
This will become very clear once you know how to register an external
49
event pane.
4.2.2.2.
The Connect to VMS server panel
This panel is used to establish a connection to a VMS server. This is
only ever necessary if a connection is not already established. i.e. The
VMS IP address, user name and password are not connected to the VMS
that you wish to configure.
Entering a valid “Host”, “Username” and “Password” will attempt to
establish a connection to the VMS. The success OR failure of this attempt
will be shown in the list box.
For our demo system the VMS Server is on the local host IP with a
username of ‘admin’ and a password of ‘admin’.
50
4.2.3. The Manage database panel
The “Manage Database” panel is accessed by clicking on the
Manage database icon on the general configuration control panel.
51
This panel is a tool which can be used by the system administrator to
manage the SQL Server Express Database, which stores the Pos
transaction event data , and the configuration data required by the SPG.
The SQL Express Database is in the SPG application folder and this is
named SPG_Database.mdf
This DataBase runs on the SQL Server Express instance
SQLEXPRESSSPG.
The SPG_Database.mdf has the following tables :-
52
The Events table stores POS transaction events that contains the
following fields :-
The Pane_Registration table stores external event source pane registration
information in the following fields :-
The Pane_Unregistration table stores external event source pane
unregistration information in the following fields :-
The POS_mapping table stores POS mapping parameters and contains the
following fields :53
The SPG_Errors table shows errors during the operation of the SPG
application. The fields are as follows :-
The SPG_Warnings table shows warnings during the operation of the
SPG application. The fields are as follows :-
4.2.4. Deleting records from the database tables.
54
The system administrator can delete records from the Database tables.
This should never be necessary but the option is available.
To delete records from a table :4.2.4.1.
Select the table.
4.2.4.2.
Select the time to search Database from.
Note :-
The database records are always displayed between date and
time limits. You must therefore ALWAYS select a start time
( From ) which is earlier than the end time ( To ).
If you want to search for “all” records then set the start time
to January 1 2015.
4.2.4.3.
Execute the database search
This will do a search of the database and display all records from the
table selected, which occurred between the start time and the end time.
55
4.2.4.4.
Searching the database
The search of the database may take some time depending on the length
of time between the start time and end time, and, the number of records
that occurred within that time frame,
The data grid view will be populated with all records found between the
‘start time’ and ‘end time’ found in the specified database table.
4.2.4.5
Selecting records to be removed.
56
If you now drag your mouse ( while holding the left button down )
within the LEFT MOST COLUMN of the data grid view then the
records that you drag over will be selected. ( Release the mouse
button when you are over the last record to be deleted. )
When records are selected a “Trash” icon will appear on the left of
the data grid view.
Click on the “Trash” icon to delete the selected records.
Important Note :- Deleting of database records is not reversible. If
You delete the records they are permanently deleted.
Please do not delete records from the SPG_Errors
or SPG_Warnings as these tables are only useful
for technical support to show system errors or
warnings.
57
4.2.4. The Map tills to VMS panel.
This panel is used to configure the tills and to map them to the relevant
camera etc.
58
4.2.4.1.
Selecting tills to be configured in the mapping process.
This control panel allows you to configure all of the tills that are
authenticated on the SPG system. ( Max 30 tills ).
59
Select the tills to be configured using the tick box next to the line for
that specific till.
This will highlight the “VMS Server IP”, “Till Name” and “Target
Device” lines. You can enter these edit boxes to enter the information
required.
Note :- The “Target Device” box has a drop down list. When you click
on the drop down list it will show you “all cameras” associated
to that VMS Server. You must pick the Camera associated to
the till from this list. Do not just write in the target device box as
the name must be exactly as the VMS camera name.
Note :-
Often you want to repeat the same information into the next
tills parameters. This can be simplified by using the
“replication tool” described below.
4.2.4.2.
Event column titles
The event column titles are the name of the columns in the ‘External
Event Pane’ and the ‘Event data grid view’.
The SPG always writes the ‘Event Description’ into the first column.
60
The SPG always writes ‘Attached Warnings’ into the second column.
The SPG always writes ‘Attached Exceptions’ into the third column.
Therefore we recommend that you always use the “Pre-load
recommended” settings for your column names.
Note :-
SPG Version 005 which is covered in this document does
not support “complex data filters”. Attached Warnings
and Attached Errors are therefore not supported in this
version and will never occur. Please however include these
column names in your configuration so that the system is
pre-configured for “complex data filters”.
4.2.4.3.
Selecting text attributes for ‘External Event Panes’
An ‘external event pane’ is a window that is created and registered by
third party systems ( such as the SPG) on the VMS system.
61
Registering an external event pane on the VMS allows you the ability
to send data to this event pane for display within the VMS.
SPG uses event panes and sends POS event data to these event panes.
We register an event pane to always have 3 columns with the names
specified in the pre-ceding paragraph. ( Event column titles )
Each one of these columns can be configured here to have different
attributes. i.e. Background Colour , Text Colour , Bold , Italic and
underline.
Use the ‘Colour picker’ or ‘Tick boxes’ to set the attributes for each
row type.
Note :- The row types are pre-defined for “Events”, “Warnings” and
“Errors”. We recommend that you use the attributes as shown in the
configuration figure.
62
You can ‘save’ the attribute configuration by clicking the
You can ‘load’ the defaults by clicking the
4.2.4.4.
button.
button.
The Replication tool.
The replication tool is simply provided to assist with the configuration
by auto-copying data from one till configuration field to the other.
Example :- If you want to make the Server IP settings for all tills
127.0.0.1,”admin”,”admin” it is a pain to type it into each tills field.
4.2.4.5.
Configuring the POS system type and port.
The pos system type and port is configured here.
Select the POS Type from the drop down list.
Configure the UDP listen port in the edit box.
63
Note :- If the POS system type does not appear in the drop-down list
then it is not supported on this SPG Version. Please enquire
from [email protected] whether the POS system type
that you are looking for is supported by another SPG/method.
4.2.4.6.
Downloading the configuration parameters.
External event panes on the VMS need to be registered / unregistered.
If you for example register an external event pane called “POS 01”
And then you register another event pane called “POS 01” then the
VMS will have two event panes with this name. This will be confusing
When you want to open them.
NB/ It is therefore very important that you first unregister any event
panes before you register new event panes.
64
On clicking the
button the event pane for the specified till will
be saved and a new database entry under “Pos Mappings” will be created.
Note :- The last record in the “Pos Mappings” table in the database is the
latest configuration record. All configurations are thus saved
unless explicitly removed from the database.
The save process will cycle through all selected tills. ( From 01 to 30 ).
You can stop this process by clicking the
65
button.
4.2.5. Changing the Configuration and Exit passwords
The ‘Set passwords’ panel is used to change the ‘configuration’ and
‘exit’ passwords for the SPG.
Important Note :The SPG application needs to be running for the POS transaction
events to be logged to the database.
Therefore the SPG application needs to be running all of the time.
For this reason it is advisable to have an ‘exit password’ enabled.
If you forget the configuration password then you will need to book a
support call via [email protected] to get us to reset the
password to default. This is only possible via TeamViewer access at
this stage, so, please try to keep the password handy.
66
67
5. The Live Pos Monitor
The ‘Live Pos Monitor’ client is opened by clicking on the
on the main form.
button
This dialog is used by the surveillance operator to monitor pos
transactions in live mode. i.e. as they occur.
In a multi screen environment you can open up to three live pos monitor
clients simultaneously, to monitor three different tills.
68
Important Note :- This software works best at a screen resolution of
1920 X 1080.
The minimum screen resolution that it will operate on
is 1024 X 768.
To use the software to maximum effect ( which goes
for the VMS also, you should use an environment
with multiple monitors. Usually 2 or 3 )
69
6. Archive Investigation Client.
The archive investigation client is the heart of the SPG system. The
archive investigation client is opened by clicking on the
the main form of the SPG application.
button on
This client allows the surveillance operator the functionality to search the
POS database and show the video from the VMS archive in correlation to
the pos events occurring.
This is used to verify that cashiers / tellers are entering the correct items
at the point of sale. Also to solve customer queries quickly and efficiently
by doing a review on receipt number etc.
The archive investigation is basically a two step process :i) You select the pos event / events that you want to review.
ii) You review the selected events.
6.1.
Selecting Pos Event / Events to Review.
When you first select the ‘Archive Investigation Client’ it opens a
‘Search Pos Events’ window which allows you to search through the
pos events database.
Here you have two options :You always need to select a pos terminal to review or all by ticking the
relevant tick box.
i)
You can either do a straight “time based search”, by selecting the
‘From’ and ‘To’ date/time from the date/time pickers, and then
clicking on the
ii)
button.
OR you can do a filtered search. Here the event results are filtered
and only the events within the search criteria are shown.
70
6.1.1. Doing a time based pos event search.
For any of the POS event searches you must first start by selecting
the POS terminal that you want to search for archived events on.
Select the required POS terminal by ticking the tick box.
If you wish to select all of the POS terminals then tick the
“Select all POS terminals” box.
71
Next you need to select the Time/Date range that you want to cover with
your search.
From -> The date/time to start the search from.
To -> The date/time to end the search at.
Note :- The longer this period of time is, the longer the search will take.
Click on the
button to perform the search.
72
When the search is complete the data grid will be filled with all events
that occurred on the specified POS terminal between the date/time limits.
The verification box pops up to show you the list of selected items and
asks for verification.
Verifies the search and will load the video and events for review.
Aborts the search and closes the verification window, waiting for
a new search.
6.1.2. Doing a time based pos event search with a search string filter.
For any of the POS event searches you must first start by selecting
the POS terminal that you want to search for archived events on.
Select the required POS terminal by ticking the tick box.
If you wish to select all of the POS terminals then tick the
“Select all POS terminals” box.
Next you need to select the Time/Date range that you want to cover with
your search.
73
From -> The date/time to start the search from.
To -> The date/time to end the search at.
Note :- The longer this period of time is, the longer the search will take.
Now you type in search string that you want to search for and then click
the
button.
Once the search is complete the following will be displayed :-
74
Notice that the populated data grid only shows events that are within the
search criteria. ( i.e. In the example, events that included “Transaction
Number” )
Or try to do the Search again but tick the box marked :“Show all but mark search string in red”
Notice now that the data grid is populated with all data within the time
frame but events containing the search string are highlighted in red.
You now proceed to select the events from the data grid that you wish
to review.
Tip :- Do this by pressing the left key of the mouse and dragging over the
left most column of the data grid. Releasing the mouse button on the last
event.
75
As you release the mouse you will notice that a new button popped up
on the left of the data grid.
This is the “Review Video” button.
Pressing the
button will open the “Verification box”
76
The verification box shows you the list of selected items and asks for
verification.
Verifies the search and will load the video and events for review.
Aborts the search and closes the verification window, waiting for
a new search.
77
6.2. Review Archived Video
This window opens with the Video from the first event on the list and
with the video paused.
You can now use the video position controlling tools to play / forward /
Rewind / pause the video.
6.2.1. The Video Review control buttons
78
PAUSE
1 SECOND FORWARD
PLAY SPEED 1 X
PLAY FAST FORWARD 2X 4X 6X 8X
STOP
1 SECOND BACK
REVERSE PLAY 1 X
REVERSE PLAY FAST 2X 4X 6X 8X
REVERSE OR FORWARD SPEED UP / DOWN
79
6.2.2. Current position
6.2.3. Text to Video correlation.
There are various parameters that you can set by tick boxes to change
how the current data grid item is displayed on the video.
These are selected by the tick boxes as shown above.
The description next to the tick box describes the function.
From the image following on the next page you can see that the current
Item viewing is ‘gray lighted’ , and, it is showing in the centre of the
data grid as per the selection.
80
6.2.4. Forward or Reverse referencing the video to a POS event item.
You can scroll down the data grid through the POS events and
automatically select any event that you wish to review from.
Select the event by Double Clicking the mouse while over it and the
video will automatically move forward / backwards and pause at the
new selected event.
81
82
7. Viewing events from within the Luxriot VMS.
As dealt with in the configuration, the Luxriot VMS supports a method
whereby third party systems such as the SPG can register and send text
to an “External Event Pane.”
This can be viewed in conjunction with the video on the Luxriot VMS.
In Live viewing mode when you open the external event page registered
it shows the external event pane with the live POS transactions.
In Media Archive Investigation Search the SPG populates the External
Event Pane as the review advances to the correct point.
Also double clicking on the event in the event search pane will
automatically set the video to review from that point.
83
84
8. Conclusion
This concludes the technical document for the Integration of POS systems
To the Luxriot VMS via a Stealth POS Gateway ( SPG ).
This document does not cover specific requirements that may be required
for the configuration of different POS systems to work on the SPG.
Please refer to the POS system suppliers documentation and/or any
documents on our website www.SunbirdSA.com pertaining to integration
to specific POS systems.
Or alternatively contact [email protected] for technical
assistance.
To help us improve out product and documentation please send any errors
or omissions that you struggle with to
[email protected]
END OF DOCUMENT
85