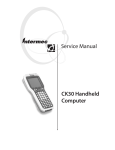
Download CK30 Handheld Computer User`s Manual Addendum
Transcript
User's Manual
Addendum
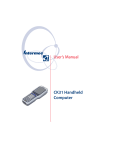
CK30 Handheld
Computer
Intermec Technologies Corporation
Corporate Headquarters
6001 36th Ave. W.
Everett, WA 98203
U.S.A.
www.intermec.com
The information contained herein is proprietary and is provided solely for the purpose
of allowing customers to operate and service Intermec-manufactured equipment and is
not to be released, reproduced, or used for any other purpose without written
permission of Intermec.
Information and specifications contained in this document are subject to change
without prior notice and do not represent a commitment on the part of Intermec
Technologies Corporation.
© 2004 by Intermec Technologies Corporation. All rights reserved.
The word Intermec, the Intermec logo, Norand, ArciTech, CrossBar, Data Collection
Browser, dcBrowser, Duratherm, EasyCoder, EasyLAN, Enterprise Wireless LAN,
EZBuilder, Fingerprint, i-gistics, INCA (under license), InterDriver, Intermec Printer
Network Manager, IRL, JANUS, LabelShop, Mobile Framework, MobileLAN,
Nor*Ware, Pen*Key, Precision Print, PrintSet, RoutePower, TE 2000, Trakker
Antares, UAP, Universal Access Point, and Virtual Wedge are either trademarks or
registered trademarks of Intermec Technologies Corporation.
Throughout this manual, trademarked names may be used. Rather than put a
trademark (™ or ®) symbol in every occurrence of a trademarked name, we state that
we are using the names only in an editorial fashion, and to the benefit of the trademark
owner, with no intention of infringement.
ii
CK30 Handheld Computer User’s Manual Addendum
Contents
What’s New in Service Pack 2.................................................................................... 5
What Does CCX Compliance Mean? ........................................................................ 5
What is EAN.UCC Composite Symbology? .............................................................. 5
Setting Funk Odyssey Security................................................................................... 5
Selecting Funk as Your Security Choice....................................................... 6
Selecting a Profile ........................................................................................ 6
Configuring WPA Security.......................................................................... 7
Configuring 802.1x Security........................................................................ 9
Configuring LEAP Security ....................................................................... 11
Configuring Static WEP Security .............................................................. 12
Loading a Certificate ................................................................................. 13
Disabling or Modifying Keypad Functions .............................................................. 16
Using the CK30 With a Low Battery Condition ...................................................... 17
Understanding Radio Power Management Settings.................................................. 18
Using Energy Saving Mode With Your 1551E or 1553 Scanner .............................. 18
CK30 Handheld Computer User’s Manual Addendum
iii
iv
CK30 Handheld Computer User’s Manual Addendum
What’s New in Service Pack 2
This addendum covers the new features available in service pack
2 for the CK30 Handheld Computer. Use this addendum in
combination with the CK30 Handheld Computer User’s
Manual (P/N 073528-003) for complete information for service
pack 2. These features have been added or modified:
• CCX v1.0 compliance
• EAN.UCC Composite symbology
• Funk Odyssey™ security
• Ability to disable or modify some keypad key functions
• Radio Power Management
• Energy Saving mode with the 1551E or 1553 scanner
What Does CCX Compliance Mean?
The CK30 is now CCX v1.0 compliant. The Cisco Compatible
Extensions (CCX) Program for WLAN devices provides tested
compatibility with licensed Cisco infrastructure innovations.
The Cisco Compatible Extensions Program enables you to take
advantage of the Cisco Aironet® wireless network.
What is EAN.UCC Composite Symbology?
The EAN.UCC Composite symbology combines a linear
component (EAN-128) with a 2D component (PDF417) to
encode data. EAN.UCC Composite bar code symbols are used
for encoding identification numbers and data supplementary to
the identification in accordance with EAN and UCC application
guidelines. You must have the IT4000 imager in your CK30 to
be able to use the EAN.UCC Composite symbology.
Setting Funk Odyssey Security
Funk Odyssey security provides everything that you get with
Microsoft security with the addition of CCX compliance. Funk
security enables you to use LEAP and TTLS authentication on
your CK30.
CK30 Handheld Computer User’s Manual Addendum
5
The type of security you choose is not dependent on your
authentication server. For example, you can use Funk security
with a Microsoft server.
To use Funk security, you need to:
• Select Funk security as your security choice
• Select a profile
• Set profile settings
• Download a certificate (if necessary)
Selecting Funk as Your Security Choice
The default security choice is Microsoft. If you want to use Funk
security, you need to select it as your security choice.
To select Funk security as your security choice
1 Press C and then B. The System Main Menu appears.
2 Select the Configuration Utility.
3 Select Communications > 802.11 Radio > Security Choice.
4 From the Security Choice dialog box, choose Funk Security.
An alert box appears asking if you want to warm boot now.
5 Press Enter. Your CK30 warm boots.
Selecting a Profile
You can define up to four profiles for your Funk Odyssey
security. Different profiles let your CK30 communicate in
different networks without having to change all of your security
settings. For example, you might want to set up one profile for
the manufacturing floor and one for the warehouse.
To select a profile
1 Press C and then B. The System Main Menu appears.
2 Select the Configuration Utility.
3 Select Communications > 802.11 Radio > Select Profile.
4 Select Active Profile and choose the profile you want to
name.
6
CK30 Handheld Computer User’s Manual Addendum
5 (Optional) Select Change Profile Label to give the active
profile a meaningful name.
6 Repeat Steps 4 and 5 for as many profiles as you want to
define.
7 Select the profile you want to configure with security settings.
8 Press Esc to return to the 802.11 Radio menu.
9 Configure your security settings.
Configuring WPA Security
Wi-Fi Protected Access (WPA) is a strongly enhanced,
interoperable Wi-Fi security that addresses many of the
vulnerabilities of Wired Equivalent Privacy (WEP). Instead of
WEP, WPA uses Temporal Key Integrity Protocol (TKIP) for its
data encryption method.
Currently, WPA satisfies some of the requirements in the IEEE
802.11i draft standard. When the standard is finalized, WPA
will maintain forward compatibility. WPA runs in Enterprise
(802.1x) mode or PSK (Pre-Shared Key) mode:
• In Enterprise mode, WPA provides user authentication using
802.1x and the Extensible Authentication Protocol (EAP).
That is, an authentication server (such as a RADIUS server)
must authenticate each device before the device can
communicate with the wireless network.
• In PSK mode, WPA provides user authentication using a
shared key between the access point and the CK30. WPAPSK is a good solution for small offices or home offices that
do not want to use an authentication server.
To use WPA security, you need:
• An authentication server (Enterprise mode only)
Note: You can also use a MobileLAN access point with
software release 1.80 or later as an authentication server. For
help, see the MobileLAN access System Manual (P/N 067150)
or MobileLAN access WA2X System Manual (P/N 073915).
• An access point with an 802.11b/g radio that supports WPA
CK30 Handheld Computer User’s Manual Addendum
7
• CK30 with the 802.11b/g radio and the 802.1x/WPA
security option
To enable WPA security on your CK30
1 Make sure you have selected Funk as your security choice.
2 Make sure you have configured the communications and
radio parameters on your CK30.
3 Press C and then B to open the System Main Menu.
4 Choose Configuration Utility > Communications > 802.11
Radio > Profile Settings.
5 For Association, choose WPA and press Enter.
6 For Encryption, choose TKIP and press Enter.
7 For Authentication, choose TTLS, PEAP, or TLS and press
Enter.
If you choose TTLS or PEAP:
a Select User name, type your user name, and then press
Enter.
b Select Password prompt, choose Enter password now,
and then press Enter.
Note: You can use Prompt for password to troubleshoot
your connection to the network if you have problems.
c Select User Password, type a user password, and then
press Enter.
d For Validate Server Certificate, choose Enabled and press
Enter.
Note: You must have the date on the CK30 set correctly
when you enable Validate Server Certificate..
If you choose TLS:
a Load a user and root certificate on your CK30. For help,
see “Loading a Certificate” on page 13 for help.
8
CK30 Handheld Computer User’s Manual Addendum
b For Validate Server Certificate, choose Enabled and press
Enter.
c You must enter a User Name and Subject Name. You can
also enter a Server Common Name if you want to increase
your level of security.
8 Exit the Configuration Utility.
To enable WPA-PSK security on your CK30
1 Make sure you have selected Funk as your security choice.
2 Make sure you have configured the communications and
radio parameters on your CK30.
3 Press C and then B to open the System Main Menu.
4 Choose Configuration Utility > Communications > 802.11
Radio > Profile Settings.
5 For Authentication, choose None and press Enter.
6 For Pre-Shared Key, enter the pre-shared key or the pass
phrase.
The pre-shared key must be a value of 32 Hex pairs. The preshared key must be preceded by 0x. The value must match
the key value on the access point. The pass phrase must be
from 8 to 63 characters.
7 Exit the Configuration Utility.
Configuring 802.1x Security
802.1x security provides centralized user authentication using an
authentication server, authenticators (access points), and
supplicants. These components communicate using an EAP
authentication type, such as TLS (Transport Layer Security) or
PEAP (Protected Extensible Authentication Protocol). 802.1x
security provides data encryption using dynamic WEP key
management.
To use 802.1x security, you need:
• An authentication server
CK30 Handheld Computer User’s Manual Addendum
9
Note: You can also use a MobileLAN access point with
software release 1.80 or later as an authentication server. For
help, see the MobileLAN access System Manual (P/N 067150)
or MobileLAN access WA2X System Manual (P/N 073915).
• An access point with an 802.11b/g radio
• A CK30 with an 802.11b/g radio and the 802.1x/WPA
security option
To enable 802.1x security on your CK30
1 Make sure you have selected Funk as your security choice.
2 Make sure you have configured the communications and
radio parameters on your CK30.
3 Press C and then B to open the System Main Menu.
4 Choose Configuration Utility > Communications > 802.11
Radio > Profile Settings.
5 For Association, choose Open and then press Enter.
6 For Encryption, choose WEP and then press Enter.
7 For Authentication, choose TTLS, PEAP, or TLS and then
press Enter.
If you choose TTLS or PEAP:
a Select User name, type your user name, and then press
Enter.
b Select Password prompt, choose Enter password now,
and then press Enter.
Note: You can use Prompt for password to troubleshoot
your connection to the network if you have problems.
c Select User Password, type a user password, and then
press Enter.
d For Validate Server Certificate, choose Enabled and press
Enter.
10
CK30 Handheld Computer User’s Manual Addendum
If you choose TLS:
a Load a user and root certificate on your CK30. For help,
see “Loading a Certificate” on page 13 for help.
b For Validate Server Certificate, choose Enabled and press
Enter.
c You can also enter a User Name, Subject Name and
Server Common Name if you want to increase your level
of security.
8 Exit the Configuration Utility.
Configuring LEAP Security
Lightweight Extensible Authentication Protocol (LEAP), also
known as Cisco-Wireless EAP, provides username/passwordbased authentication between a wireless client and a RADIUS
server. In the 802.1X framework, a LAN station cannot pass
traffic through an Ethernet hub or WLAN access point until it
successfully authenticates itself.
The station must identify itself and prove that it is an authorized
user before it is actually allowed to use the LAN. LEAP also
delivers a session key to the authenticated station, so that future
frames can be encrypted with a key that is different than keys
used by others sessions
To use LEAP security, you need:
• A RADIUS server
• Cisco access points
To enable LEAP security on your CK30
1 Make sure you have selected Funk as your security choice.
2 Make sure you have configured the communications and
radio parameters on your CK30.
3 Press C and then B to open the System Main Menu.
4 Choose Configuration Utility > Communications > 802.11
Radio > Profile Settings.
CK30 Handheld Computer User’s Manual Addendum
11
5 For Authentication, choose LEAP and then press Enter.
6 For Association, choose Open or Network EAP and then
press Enter.
7 For Encryption, choose WEP and then press Enter.
8 Select User name, type your user name, and then press Enter.
9 Select Password prompt, choose Enter password now, and
then press Enter.
Note: You can use Prompt for password to troubleshoot
your connection to the network if you have problems.
10 Select User Password, type a user password, and then press
Enter.
11 Exit the Configuration Utility.
Configuring Static WEP Security
The CK30 uses the Wired Equivalent Privacy (WEP) protocol
to add security to wireless local area networks (WLANs) based
on the 802.11b standard.
To use WEP security, you need:
• A CK30 handheld computer with an 802.11b/g radio.
• An access point with an 802.11b/g radio.
To enable WEP security on the CK30
1 Make sure you have selected Funk as your security choice.
2 Make sure you have configured the communications and
radio parameters on your CK30.
3 Press C and then B to open the System Main Menu.
4 Choose Configuration Utility > Communications > 802.11
Radio > Profile Settings.
5 For Association, choose Open and then press Enter.
6 For Encryption, choose WEP and then press Enter.
12
CK30 Handheld Computer User’s Manual Addendum
7 For Authentication, choose None and then press Enter.
8 Select WEP Key and then define a value for each WEP key.
You can define up to four WEP keys.
Enter an ASCII key or a hex key that is either 5 bytes or 13
bytes long depending on the capability of the radio. Set a 5byte value for 64-bit WEP or a 13-byte value for 128-bit
WEP. Hex keys must be preceded by 0x and contain 5 or 13
hex pairs.
9 Press Esc to return to the Profile.
10 Select Network Key Index, choose the WEP key you want to
use, and press Enter.
11 Exit the Configuration Utility.
Loading a Certificate
If you choose to use transport layer security (TLS) with WPA or
802.1x security, you need to have a unique client certificate on
the CK30 and a trusted root certificate authority (CA)
certificate. You can use a third-party CA to issue unique client
certificates and a root certificate.
If you are using Active Directory® to issue certificates, you can
use the Enroll Certificates application to load the certificates. If
you are using a third-party CA, you can use the Import Root or
User Certificates programs to load the certificates.
Note: Do not cold boot the CK30. Cold booting the computer
resets the time and date.
To load certificates on the CK30 if you are using Active Directory
1 Configure the network and radio settings for the CK30 to
communicate with your certificate authority.
2 From the Configuration Utility, Select Communications >
802.11 Radio > Certificates.
3 Select Enroll Certificates.
The Enroll Certificates dialog box appears.
CK30 Handheld Computer User’s Manual Addendum
13
4 In the Enroll Certificates dialog box, enter the User Name,
Password, and Server (IP address) to log into the CA server.
5 Press Enter. A dialog box appears asking if you want to load
the root certificate.
6 Press Enter for yes. The Enrollment Tool message box
appears telling you that the user certificate has been added.
7 Press Enter to close the Enrollment Tool message box.
8 Configure your CK30 for WPA or 802.1x security.
To load certificates on the CK30 if you are using a third-party CA
1 Copy your .cer file to the \temp\root folder on the CK30.
2 Copy your .der and .pvk files to the \temp\user folder on the
CK30.
3 From the Configuration Utility, select Communications >
802.11 Radio > Certificates.
14
CK30 Handheld Computer User’s Manual Addendum
4 Select Import Root Certificates to load the .cer file. A dialog
box appears asking if you want to add the certificate to the
root store.
5 Press Enter to add the certificate. A message box appears
telling you that the root certificate has been imported.
6 Press Enter to close the Success message box.
7 Select Import User Certificate to load the .der and .pvk files.
A message box appears telling you that the certificate has been
imported.
8 Press Enter to close the Success message box.
9 Configure your CK30 for WPA or 802.1x security.
CK30 Handheld Computer User’s Manual Addendum
15
Disabling or Modifying Keypad Functions
You can disable the functionality of several keys on the keypad if
you want to restrict the ability to perform adjustments made
from the keypad, such as changing the contrast.
You can disable these keypad functions:
• Beeper volume
• Display contrast
• Backlight on and off
• Task Manager (opened by pressing Alt and then Tab)
You can modify this keypad function:
• The behavior of the I key. You can configure the boot
functionality to either warm or cold boot when you press and
hold the I key for five seconds.
Note: This function is only available on CK30s with a PSC of
51 or higher. To find your PSC version, go to the System Main
Menu and choose Diagnostics > Hardware Diagnostics > PSC
Utility.
To disable keypad functions
1 Press C and then B. The System Main Menu appears.
2 Select the Configuration Utility.
3 Select Device Settings > Keypad. The Keypad settings screen
appear:
16
CK30 Handheld Computer User’s Manual Addendum
4 Choose the function you want to disable from the Keypad
menu, select Disable from the function dialog box, and then
press Enter.
5 Exit the Configuration Utility.
To change the I key functionality
1 Press C and then B. The System Main Menu appears.
2 Select the Configuration Utility.
3 Select Device Settings > Keypad.
4 From the Keypad menu, select Configure Boot
Functionality.
5 Choose Warm Boot or Cold Boot and then press Enter.
6 Exit the Configuration Utility.
Using the CK30 With a Low Battery Condition
If the Battery light blinks or turns on solid, you cannot restore
factory defaults or perform a warm or cold boot on your CK30
using the I key. You must replace the battery with a fully
charged battery before you can restore factory defaults or boot
your CK30.
Note: This function is only available on CK30s with a PSC of
51 or higher. To find your PSC version, go to the System Main
Menu and choose Diagnostics > Hardware Diagnostics >
PSC Utility.
Removing the main battery when the backup battery low or
critically low icon displays in the status bar may cause your
CK30 to cold boot and you may lose data.
Attention: L'enlèvement de la batterie principale quand le
bas de secours de batterie ou les affichages en critique bas
d'icône dans la barre de statut peut causer votre CK30 à la
botte froide et de vous peut perdre des données.
CK30 Handheld Computer User’s Manual Addendum
17
Understanding Radio Power Management Settings
There are now only two choices for radio power management
settings on the CK30. These radio power management settings
apply to Microsoft security. Use this table to understand the new
power management settings.
New Settings
Description
Disabled (CAM)
Specifies continuous access mode (CAM) and
is the default.
Enabled (FAST PSP)
Specifies a fast power saving mode that
provides the best combination of performance
and power usage.
Using Energy Saving Mode With Your 1551E or 1553
Scanner
Use Energy Saving mode with your 1551E or 1553 scanner to
save battery power on your CK30. When you use Energy Saving
mode, the scanner is active while you are pressing the trigger and
goes into Standby mode after a good read. With Energy Saving
mode enabled, the current consumption drops to zero during
standby. Full energy is restored when you scan the next label.
To use Energy Saving mode, you need:
• An energy saver cable. On a 10-pin scanner port, cable
P/N 3-606034-02 is required.
• Firmware version 2.13 or later on the scanner.
18
CK30 Handheld Computer User’s Manual Addendum
6001 36th Avenue West
Everett, WA 98203
U.S.A.
www.intermec.com
© 2004 Intermec Technologies Corp.
All Rights Reserved
CK30 Handheld Computer User’s Manual Addendum
*074726-001*
P/N 074726-001


