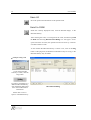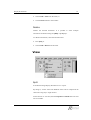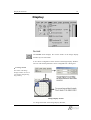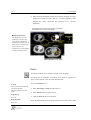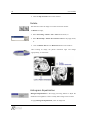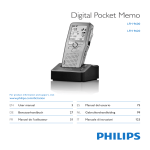
1
USER'S GUIDE DISPLAY WORKSTATION Version 2.0 About This Manual Thank you for purchasing our RAYPAX PACS solution. RAYPAX is a PACS (Picture Archiving and Communication System) that can capture, diagnose, review, and archive medical images and patient data. This User’s Manual was written to help users to better understand and use the functions of the RAYPAX system. Please read this manual thoroughly before operating the RAYPAX system. This manual should be kept for reference purposes. 8 Reproduction, reprint or distribution of this manual is prohibited without the expressed written consent of RAYPAX Co., Ltd. 8 The contents of this manual are subject to change without notice. 8 Though this manual was carefully prepared, there may be errors, omissions, etc. If there are any questions you may have or errors that you may find, please contact us. RAYPAX is a registered trademark of RAYPAX Co., Ltd. Copyright© 2003 by RAYPAX Co., Ltd. Contents 1 Getting Started Display Workstation Introduction........................................................5 Login ....................................................................................................6 2 Display Workstation Menu bar ............................................................................................10 Exam................................................................................................11 Edit ..................................................................................................17 View ................................................................................................19 Display.............................................................................................23 Series ...............................................................................................28 Image ...............................................................................................33 Processing........................................................................................40 Annotation .......................................................................................51 Workflow.........................................................................................59 Tools ................................................................................................70 3 Exam Browser Menu bar ............................................................................................89 Exam................................................................................................90 4 User's Guide Edit...................................................................................................92 View.................................................................................................95 Go To ...............................................................................................96 Bookmark ........................................................................................98 Workflow.......................................................................................100 Folder.............................................................................................101 Tools ..............................................................................................104 Search Grid.......................................................................................106 1 Getting Started Display Workstation Introduction The RAYPAX Display Workstation is a specialized medical viewing system for diagnostic purposes. It also acts as a PC-based medical viewing system designed for routine clinical use at a hospital or other medical institution. The RAYPAX Display Workstation allows loading, displaying, and manipulating of virtually any medical image or patient study that may consist of an individual or series of digital images. The basic functions of the RAYPAX Display Workstation are divided into finding/loading exams and viewing them. For finding and loading exams, the Exam Browser is used. When the Exam Browser is used to select an exam, the Image Display Window provides effective tools for diagnosis. In the Image Display Window, the images are shown in a window utilizing numerous methods (various look-up tables are provided, and others can be used as well). Precise observation of images is achieved using image zooming or a magnification tool that can be dragged over images. Manipulation of images can also be done through inverting, flipping, or rotating, while filters offer various image enhancements for revealing specific features within images. Cine looping is a valuable diagnostic tool that allows a series of images to be shown in sequence as a slide show, alone or in sync with other series. Various types of measurement tools and annotations are provided that can 6 User's Guide be used as overlays over images. Reports can be generated while viewing the images of an exam. These reports are saved with the exam and are opened automatically when the exam is opened for viewing again. RAYPAX Display Workstation runs under Microsoft Windows NT with the same user interface as Windows 95 and 98, which is familiar to millions of PC users. Login The following is the login window of the RAYPAX Display Workstation. User Login Window Depending on the User ID, users have different authorization levels. Please refer to the Tool Option menu if a change in the password is desired. Depending on the User ID, users have different authorization levels. Login window Enter the User ID and Password, and select a server from the list of available servers. Display Workstation 7 Click on the OK button to log into the RAYPAX Display Workstation; the main program of the RAYPAX Display Workstation will then be displayed. Unregistered users must contact the administrator to request a User ID and Password. Click on the Quit button to cancel the login process and exit the program. 2 Display Workstation This section describes menu items in the RAYPAX Display Workstation main window. Menu Bar Toolbox Thumbnail Bar Title Bar Image Display Window RAYPAX Display Workstation GUI There are two different types of menus in the RAYPAX Display Workstation; one is the menu of the main program window of the Display Workstation, and the other is in the Exam Browser window. (The menu of the Exam Browser is explained in Chapter 3.) The Menu bar of the Display Workstation is composed of 10 menu items and a Help file. Clicking the right mouse button over an image will show an additional pop-up menu, for quick access to common functions. The Thumbnail Bar displays a series of thumbnail images. Most of the time, the initial thumbnail image shown is selected from the middle of the series of images. 10 User's Guide If an image in the thumbnail window is clicked, the image will be displayed in the Image Display Window. In the title bar, there are format, navigation (with image counter), and Navigation and sync buttons in the Title Bar sync buttons in addition to the patient’s name, ID and modality of the selected exam. The format button gives choices for customized views for the Image Display Window. After clicking once on the button, configure a view by moving the mouse over the grid until the desired format is highlighted, then click the mouse button again. The navigation buttons allow selective movement between the first and last images of the selected exam, either by row (single arrow) or by page (double arrow). An image counter found on the left side of the buttons shows the number of the first image in the Image Display Window and the total number of images in the series. If more than 2 series or exams are opened and the sync box is checked, the open exams or series can be compared. This is especially useful for viewing different MR series together for direct comparison. Menu bar The Menu bar is composed of 10 menu items and a Help file. Main Menu of Display Workstation The following are descriptions of the submenus found within the Main Menu of the Display Workstation. Display Workstation 11 Exam Open… Open the Exam Browser by selecting Open… in the Menu bar or by clicking the Open icon in the Toolbox. (Please refer to Chapter 3 Exam Browser) Open Local… Open DICOM files that are saved on the local PC. DICOM images can be displayed from the database, but local access of existing DICOM files is much faster. Files can be previewed before opening, by checking the Show Preview box found at the bottom of the Open DICOM Files dialog box. When selecting images that are to be opened, it is possible to select several files at the same time by using the [Shift] or [Ctrl] keys while 12 User's Guide clicking on the desired files. Any changes made to the images or exams will not be reflected on the database, rather it will only be saved locally. The default DICOM file extension is ‘DCM’. If a ‘*.dcm’ file is clicked on, a preview image can be viewed. Open DICOM Files Dialog Open Related… It shows all related exams for the selected patient in the Related Exams dialog box, which can then be opened as desired. Related Exams Dialog Display Workstation 13 Open Emergency Exams… It shows all Emergency Exams. User can select and open the Emergency exam. Emergency Exams Dialog Close This is used to close the currently open exam and to save changes that were made. When closing the images that were open, it will suggest that everything be saved. Authorization is needed to save. Close All This is used to close all the exams and series that are currently open. Save Saves the position and annotations of the currently displayed image(s) in the selected exam. 14 User's Guide Save All Saves the position and annotations of all opened exams. Send to DGW Sends the currently displayed exam, with all DICOM images, to the DICOM Gateway. After selecting the exam, or an image from the exam, and choosing Send to DGW the following DICOM Send Dialog box will appear. If user opens more than one exam, the opened exam list will show up. And user can Add or Delete a exam. To test whether the DICOM Gateway is online or not, click on the Ping button. If the ping fails, the destination information may be wrong, or the DICOM Gateway may be offline. Example of Ping result To test if the DICOM Gateway is online, click the Ping button In order to send images to a different DICOM Gateway, click the Setting button and fill in the new destination information. Please refer to Tools > Option > DICOM Gateway. DICOM Send Dialog Display Workstation 15 View DICOM Send Log… DICOM Send Log Print Print menu from the main menu Prints the currently displayed images on film or paper. Images displayed in the Image Display Window can be printed using a Windows compatible paper-based printer or a DICOM compliant laser film printer. The report for the selected images can also be printed on a paper-based printer. Film Printer Information The print range can be selected, and changes can be made to the film format type. All exam images, selected images, or key images can be printed separately using the Print Range function. Before printing, check the names of the printers that are connected to the Select the name, size and type for the film printer. system. If no printer is connected as a Windows System printer, the paper print function will not work. 16 Paper Printer Information User's Guide RAYPAX Display Workstation supports Windows network printers. In this case, log onto the printer server before printing. Each series of images from the preview images can be chosen separately for printing. By clicking on an image, it is possible to select or deselect a Select the printer name, like a Windows System printer. series to print. Print Dialog Box The following functions are only available when Paper printer is chosen under the Print menu. When the Page Settings… button is clicked, it will display the dialog box for Report Print under the Options menu. Please refer to the menu under Tool > Options > Report Print. When the Preview… button is clicked, it will display a preview of what the printout will look like. Display Workstation 17 Exit Performs a logout of the current user and exits from the RAYPAX Display Workstation to return to the login screen. Edit The Edit menu is activated only when the annotation menu is used. Undo The Undo command reverses the last edit or command regarding the annotations made to the active image. It can remove annotations and the changes made to them, but it cannot undo any modifications that have been saved. To undo an action (before the image is saved), 8 Press [Ctrl] + [Z], or 8 Choose Edit > Undo, or 8 Click the Undo button in the Toolbox. 18 User's Guide Redo Actions that have been applied can be reversed using the Undo function, and actions that have been undone can be reapplied using the Redo function. Redo can only be used if immediately preceded by an Undo action. If Undo is used and then other actions are applied, the Redo function will not be available. To reapply actions that have been recently undone, 8 Press [Ctrl] + [Y], or 8 Choose Edit > Redo, or 8 Click the Redo button in the Toolbox. Copy Makes a copy of the selected annotation(s). Multiple annotations can be selected at the same time using the [Shift] or [Ctrl] keys. To copy an annotation, select the annotation and 8 Press [Ctrl] + [C], or 8 Choose Edit > Copy from the menu, or 8 Click the Copy button in the Toolbox. Paste Pastes the copied annotation onto the selected image. To paste an annotation, select the annotation(s), copy it using the Copy command and 8 Press [Ctrl] + [V], or Display Workstation 19 8 Choose Edit > Paste from the menu, or 8 Click the Paste button in the Toolbox. Delete Deletes the selected annotation. It is possible to select multiple annotations for deletion using the [Shift] or [Ctrl] keys. To delete an annotation, select the annotation and 8 Press [Del], or 8 Choose Edit > Delete from the menu. View Split It divides the Image Display Window into 2 or 4 parts. By doing so, various series from different exams can be compared at the same time using only a single monitor. If this function is activated, then the Expand and Shrink functions will not be available. 20 User's Guide The Split function gives the following viewing options, 8 None: It displays images on a single Image Display Window. 8 2V: It divides the Image Display Window vertically into 2 sections. Therefore, an Image Display Window can be selected for each exam or series. It is useful when comparing images by series or by exam. 8 2H: It divides the Image Display Window horizontally into 2 sections. It is possible to select an Image Display Window for each exam or series. 8 2X2: It divides the Image Display Window into 4 sections. Example for Split 2V How to use the Split function: 8 After selecting a viewing option from the Split menu, click the mouse button on an image from the selected series in the Thumbnail bar. Display Workstation 21 8 A window selection grid will be displayed. For example, if the 2X2 menu is selected, it will display a 2x2 grid, as shown on left, to allow selection of a section of the Image Display Window to view the selected series. 8 Select a section of the grid and the images of the selected series will be displayed in the corresponding section of the Image Display Window. Expand This function is available for multi-monitor systems (2 or more monitors). It is useful for displaying several images from one series on 2 or more monitors on the same system. To display the images of a series on one Image Display Window over more than one monitor, choose View > Expand or click the Expand button in the Toolbox. In order to use the Expand and Shrink functions, the Monitor Configuration under Tools > Options > System must be changed to reflect the number of monitors being used. Two or more monitors are required. Please refer to the Tools Menu. Shrink This function is available for multi-monitor systems (2 or more monitors). The Shrink function is used to reverse the action of the Expand function above. To display separate exams or images on individual Image Display Windows on each monitor, choose View > Shrink or click the Shrink button in the Toolbox. 22 User's Guide Result of using the Shrink function Result of using the Expand function Expand/Shrink for 2 Monitor System Full Screen This hides the Toolbox and Thumbnail bar, thus using the full screen for displaying images. The Toolbox and Thumbnail bar can be hidden, and recalled, by choosing View > Full Screen or by pressing [F11]. Thumbnail Bar The Thumbnail bar can be hidden/shown, by deselecting/selecting it from the menu, as it is a toggle style menu. Toolbox Bar The Toolbox can be hidden/shown, by deselecting/selecting it from the menu, as it is a toggle style menu. Display Workstation 23 Display Format The Format menu displays the current format of the Image Display Window by row and column. It also allows configuration of the format of the Image Display Window. The row and column parameters can be configured from 1 through 16. To change Format The format of the Image Display Window can also be conveniently changed using drag and drop. Change Display Format To change the format of the Image Display Window, 24 User's Guide 8 Click the Format button on the upper left hand corner of the selected series, drag the mouse to select the desirable column and row layout, and then click the mouse button again, or 8 Choose Display > Format from the menu and fill in the parameters for Row and Column in the dialog box, or 8 Click the Format button in the Toolbox and fill in the parameters for Row and Column in the dialog box. Show Annotation Saved annotations can be shown/hidden by selecting/deselecting it from the menu, as it is a toggle style menu. Annotations will not be displayed if the images in the Image Display Window do not have any annotations attached to them. To show, or hide, annotations in the Image Display Window, 8 Press [Ctrl] + [F9], or 8 Choose Display > Show Annotation from the menu, or 8 Click the Show Annotation button in the Toolbox. Show Annotation Hide Annotation Show/Hide Annotation Display Workstation 25 Show Information Information related to the images can be shown/hidden as an overlay on the images by selecting/deselecting it from the menu, as it is a toggle style menu. The displayed information is read from the DICOM header for each image, and is different for each modality, such as CT, MRI, CT, etc. For example, for MR images, the TI, TR, and TE values are displayed; while for CT images, the KV and mAs values are displayed instead of TI, TR, and TE. Patient Orientation The following image shows a description of the basic information that is displayed for an image from the DICOM header. This indicates the position and orientation of the image in relation to the patient when the image was captured. Modality Name Exam Date Exam Time SP: Slice Location SL: Slice Thickness GT:Gantry/Detector Tilt ST: Expose Time TI: Inversion Time TR: Repetition Time TE: Echo Time mAs: X-ray Tube Current KV: KVP Series Number Image Number Type of Compression Place Name Patient Name Patient ID Patient Sex Acquisition Number Scale Bar Patient Orientation Patient Orientation Z: Zoom W: Window Width C: Window Level Description of image related information To show, or hide, image information in the Image Display Window, 8 Press [F9], or 8 Choose Display > Show Information from the menu, or 8 Click the Show Information button in the Toolbox. 26 User's Guide Show Scout Image The scout image for the selected image series can be shown/hidden by selecting/deselecting it from the menu, as it is a toggle style menu. To compare the images in a series, select one scout image. When the navigation button is clicked, the selected scout image will not move as the other images in the series are navigated. To show, or hide, the scout image, 8 Choose Display > Show Scout Image from the menu, or 8 Click the Show Scout Image button in the Toolbox. Show Scout Image If the Show Scout Image menu item is not activated, go to Add Scout Display Workstation 27 Image in the Series menu. (Please refer to the Series menu.) Synchronize All This function synchronizes all windows in the Image Display Window when the Split function is used to create more than one window. When Synchronize All is used, the sync box for all windows in the Image Display Window is checked. To synchronize all windows in the Image Display Window, 8 Press [Ctrl] + [N], or 8 Choose Display > Synchronize All from the menu, or 8 Click the Synchronize All button in the Toolbox. Asynchronize All This function removes all synchronization among the windows in the Image Display Window. When Asynchronize All is used, all sync boxes that are checked in any window in the Image Display Window are unchecked. To asynchronize all windows in the Image Display Window, 8 Press [Alt] + [N], or 8 Choose Display > Asynchronize All from the menu. Load All Images This function loads all images in a series into memory for immediate access. This allows for quicker access during diagnosis, without having to wait 28 User's Guide for image loading when viewing new images. To load all images into memory, 8 Choose Series > Load All Images from the menu. Series Cine View… Cine View allows a series of images to be displayed in a sequential cinematic format, or in other words for movie-like viewing. The stack mode is used when the exam is composed of multiple images. Images in each series are stacked up and can be compared one by one. To view images in the Cine Viewer, 8 Choose Series > Cine View… from the menu, or 8 Click the Cine View button in the Toolbox. Display Workstation Popup menu for the Cine Viewer 29 The following Cine Viewer window will appear. Viewing controls can be found on the Control Panel at the bottom of the window, and on the popup menu after right-clicking on the Cine Viewer window. Images can also be navigated manually by moving the sliding bar immediately below the image on the top of the Control Panel, or by scrolling the wheel of the mouse. Apart from the viewing controls (described on the side bar), the Control Panel also includes a sync box and an image counter that shows the current image number and the total number of images in the series. Zoom for Cine Viewer images Control Panel Cine Viewer window 30 User's Guide Cine Viewer Tool Icons Play Backward Play Forward Pause: Pause the Cine The popup menu consists of the following functions, 8 Sync Helps to compare images of each synced series at the same time. 8 View Zoom in and out from 50% ~ 300% of the actual image size. Stop: Stop the Cine First Image Previous Image 8 Viewing controls Standard video and image navigation controls are provided. (These are the same as the controls found on the Menu bar) Next Image Last Image 8 Show Information Show/Hide the image related information. Temporal: Continuous forward viewing Spatial: Continuous viewing back and forth through the series Cine frame rate control Add Scout Image This function allows you to add a scout image to a series. The reason a scout image is used is to show the slice position of the selected image in relation to a cross-section of the same image. A scout image is useful when the position of selected images, especially MR or CT images, need to be known. The added scout image does not move (it is always the first image in the series), even during navigation through the images in the series. You can view the corresponding image for a scout line by clicking on the desired line, or by using the up and down arrows on the keyboard. Therefore, it is easy to determine exactly where a selected image comes from when using a scout image. Scout Line When using Add Scout Image, the Show Scout Image function is Scout lines are often called cut lines for CT images, planning lines for MR images or, in general, intersection lines. automatically selected. (Please refer to Show Scout Image under the Display menu) To add a scout image to a series, click on the series to create the scout image for and Display Workstation 31 8 Choose Series > Add Scout Image from the menu, or 8 Click the Add Scout Image button in the Toolbox. A dialog box will appear stating “Select Scout Image”. Click the OK button and select an image in another series to create the scout image from. The selected image should be scanned on a different axis than the series the scout image is being made for. Remove Scout Image This function removes the scout image from the selected series. To remove the scout image from a series, click on the series from which the scout image is to be removed, and choose Series > Remove Scout Image from the menu. Reset Images to Last Saved This function reverts all images in the series to the state they were when they were saved last. Any changes that were made after the images were saved will be lost, and any changes that were made before the last save cannot be retrieved. This is useful when undesired changes have been made to images in the series. It is good practice to save images whenever important changes have been made. Apply Original Window/Level This function applies the original window width and level values found in the DICOM information for the selected series. Load All Images All images in a series can be loaded into memory for use. If all images are already loaded into memory, this function is disabled in the menu. 32 User's Guide Window/Level Preset Window/Level settings can be preset for use with any series of images. Depending on the modality, certain Window/Level settings allow for better detail of images. When an ideal setting has been found, saving it as a Window/Level pre-defined setting will save time trying to adjust images in the future. When Window/Level presets are made, they are available to the user through the Window/Level Preset drop-down list under the Series menu, or as hot keys that are determined by the user. To save or create pre-defined Window/Level settings, 8 Select Series > Window/Level Preset > Edit Window/Level Preset from the menu, or 8 Press the hot key combination that you would like to save the preset to. (The available hot key combinations include [Ctrl] + a digit from [1][0], and [Alt] + a digit from [1]-[0]) Note: The Window and Level settings, and a changeable title (displaying the modality and procedure by default) are automatically entered when saving using the hot key method, but must be entered manually when using Edit Window/Level Preset from the menu. Please refer to the Window/Level Preset tab under Tools > Options. Display Workstation 33 Image Popup This function allows an image to be viewed in its own Popup Image Window. It is useful for side-by-side comparison of the selected image with other images in the series. Popup images remain on top of the Image Display Window, so that navigation of the images in the series must be made behind the Popup Image Window. Size, window/level and other image characteristics of the popup window can be adjusted separately, but any changes made will be lost when the window is closed. Image characteristics in the popup window can be adjusted as in the Image Display Window, and the size can be adjusted using the pull-down image menu or regular window controls found on the upper-right hand corner of the Popup Image Window. To create a popup window, select an image to use as a popup image and 8 Press [Ctrl] + [F7], or 34 User's Guide 8 Choose Image > Popup from the menu, or 8 Choose Popup Image from the pull-down image menu, accessible after right-clicking on the image. Popup Image Window Mark Key Image This function marks images in a series as Key Images. When saved, these Key Images can be viewed or printed separately from the rest of the exam or series. Key Images are useful for marking important or significant images in a Key Images There are 4 display tabs in the image viewer of the WCS. When the Key Image tab in the WCS image viewer is selected, it displays only the key images that were marked in the Display Workstation. series. When used with the Web Clinical System (WCS), it shortens the download time by selecting only Key Images to view. Key Images can also be printed separately under the Print Range option of the Print function. To mark an image as a Key Image, select the image and 8 Choose Image > Mark Key Image from the menu, or 8 Click the Mark Key Image button in the Toolbox. Display Workstation 35 Unmark Key Image This function unmarks a selected image marked as a Key Image. To unmark an image as a Key Image, select the image and 8 Choose Image > Unmark Key Image from the menu Key Image and Print Image Marks Mark Print Image This function marks images in a series as Print Images. These Print Images can be printed separately as a batch from the rest of the exam or series. The Print Range print option allows the marked Print Images to be printed separately by selecting Selected Images. To mark an image as a Print Image, select the image and 8 Choose Image > Mark Print Image from the menu, or 8 Click the Mark Print Image button in the Toolbox. 36 User's Guide Both Print Images and Key Images can be selected for the print range. Only Print Images are printed when Selected Images is selected. Selecting Print Range Only Key Images are printed when Key Images is selected. Unmark Print Image This function unmarks a selected image marked as a Print Image. To unmark an image as a Print Image, select the image and 8 Choose Image > Unmark Print Image from the menu Show DICOM Information This function displays the DICOM information for the selected image. DICOM files consist of header information and the image pixel raw data. Only the DICOM header information of the selected image can be seen. The DICOM information is divided into 6 different sections: Patient, Study, Patient Study, Series, Equipment and Image information. Each section shows information attribute, value and tag data. To display the DICOM Information for an image, 8 Press [Ctrl] + [I], or 8 Choose Image > Show DICOM Information from the menu, or 8 Choose Show DICOM Information from the pull-down image menu, accessible after right-clicking on the image, or 8 Click the Show DICOM Information button in the Toolbox. Display Workstation 37 Show DICOM Information Dialog Box Copy to Private Folder This function allows selected images or the full exam to be copied into a private folder of the Exam Browser. To copy images into a private folder, 8 Select the images that are to be copied (The [Ctrl] and [Shift] keys can be used to select multiple images). 8 Choose Image > Copy to Private Folder from the menu. 8 The following dialog box will appear. 8 Select the target. To copy all images in the series, select Whole exam. 38 User's Guide To copy the selected images, select Selected Images only. 8 Select the destination folder among the displayed private folders, and then click the Copy button. Otherwise, click the Cancel button to cancel the operation. Copy to Clipboard This function copies the currently selected image into the clipboard. The clipboard image can then be pasted into other application programs such as MS Word, PowerPoint, etc. Select All This function selects all images in the series. When all images are selected, any function that is performed will be applied to all images. To select all images in the series, 8 Press [Ctrl] + [A], or 8 Choose Image > Select All from the menu, or 8 Click the Select All button in the Toolbox. Deselect All This function deselects all images in the series. To deselect all images in the series, 8 Press [Ctrl] + [U], or 8 Choose Image > Deselect All from the menu. Display Workstation 39 Export Image This function exports the selected image(s) as a file on the local hard disk. Export Image supports .bmp, .jpeg, avi and DICOM file formats. Image information and annotations can also be saved with the images for nonDICOM image files. To export images as image files to the local hard disk, select the images that are to be exported and choose Image > Export Image from the menu. The following Export Image window will appear. Type in the File Path, or select a directory from the directory tree. Type in the File Prefix, which is the title that will precede the image number if multiple images are selected. The default File Prefix shows the patient name and modality. Lastly, choose the File Type, Export Range and Export Options that are to be applied to the export operation. If user select AVI Format, user have to select Frame rate and press OK. Export Image Window 40 User's Guide Processing Selection This function allows images to be selected in the Image Display Window. Methods for selecting multiple images are available and are explained below. Selection is also used to de-select previously selected images. To use the Selection function, 8 Press [F7], or 8 Choose Processing > Selection from the menu, or 8 Choose Selection from the popup image menu, or 8 Click the Selection button in the Toolbox. Display Workstation 41 To select multiple images, use the following keys. 8 [Shift] To select all images in a certain continuous range, select the first image and, while pressing the [Shift] key, click on the last image in the desired range. All images between the first and last image will be selected. 8 [Ctrl] With the [Ctrl] key pressed down, select all desired images by clicking on them. If the image is already selected, clicking on it again will deselect it. Window/Level This function adjusts the displayed window/level values of the image. To adjust the image contrast and brightness by changing the image window width and level, 8 Choose Processing > Window/Level from the menu, or 8 Choose Window/Level from the popup menu, or 8 Click the Window/Level button in the Toolbox. Window/Level While clicking and holding the left mouse button the following adjustments can be made, Dragging Up Increase Level Dragging Down Decrease Level Dragging Right Increase Window Dragging Left Decrease Window To adjust the window/level, 8 While clicking and holding the left mouse button, dragging the mouse to the right will increase the window value (i.e., decrease contrast), while dragging the mouse to the left will decrease it (i.e., increase contrast). 42 User's Guide 8 While clicking and holding the left mouse button, dragging the mouse upward will increase the level value (i.e., increase brightness), while dragging the mouse downward will decrease it (i.e., decrease brightness) By dragging the mouse left and right, up and down, the Window/Level value will change Right Mouse Button The Window/Level can be adjusted by using the right mouse button regardless of what function is being used. In other words, even when using another function, the Window/Level can be changed without switching functions. Adjust Window/Level Value Zoom This function allows you to enlarge or shrink a selected image. The image can be enlarged to a maximum of 16 times its original size, while it can be shrunk to the size of the fixed window. Zoom While clicking and holding the left mouse button the following adjustments can be made, To use the Zoom function, 8 Select Processing > Zoom from the menu, or 8 Select Zoom from the popup menu, or Dragging Up Zoom in Dragging Down Zoom out 8 Click the Zoom button in the Toolbox. Select the desired image and press and hold the left mouse button. If the Display Workstation 43 mouse is dragged up, the image zooms in; if it is dragged down, the image zooms out. Pan This function allows you to move an image within the viewing window when the image is larger than the window. When zooming or magnifying an image, it will become larger than the viewing window. It is then that panning (moving the image within a viewing window) becomes useful. When the left mouse button is clicked and held, the X and Y coordinate values can be seen at the bottom right-hand corner of the Image Display Window. This value corresponds to the relation of the viewed point to the vertex in the original image. Click and hold the left mouse button, then drag the mouse to view other parts of the image. To use the Pan function, 8 Select Processing > Pan from the menu, or 8 Select Pan from the popup menu, or 8 Click the Pan button in the Toolbox. 44 User's Guide Magic Glass The Magic Glass function has undergone some significant improvements. It is now possible to change the size of the Magic Glass window independently of the underlying viewing window, as well as apply independent window/level settings to the contents of the magic glass. Zoom in the Magic Glass window can also be increased to a greater Magic Glass While clicking and holding the left mouse button the following adjustments can be made, [Shift] magnification, which is especially useful for high-resolution systems. Magic Glass creates a small magnifying window that allows quick magnification of a small area of an image. When an image is currently displayed at a size equal to or larger than the size defined by the DICOM header information (for example, after zooming), the magnification ratio Window/Level [Ctrl] Zoom is 2:1. When an image is currently displayed at a size smaller than the size defined by the DICOM header information, the magnification ratio is 1:1. [Shift]+[Ctrl] Magic Glass size The default zoom ratio of the magic glass is twice as large as the zoom ratio of the currently displayed image. To use the Magic Glass function, 8 Select Processing > Magic Glass from the menu, or 8 Select Magic Glass from the popup menu, or 8 Click the Magic Glass button in the Toolbox. To change the size of the Magic Glass window, press the [Shift] and [Ctrl] keys together while clicking the left mouse button, and then move the mouse to enlarge or shrink the size of the window. By pressing [Shift] while clicking the left mouse button, the window/level value can be changed by moving the mouse. The method to change the window/level value is the same as the Window/Level function. (Please refer to Window/Level for details) By pressing [Ctrl] while clicking the left mouse button, the magnification Display Workstation 45 of the image in the magic glass can be changed by moving the mouse up or down. Local Window/Level This functions works in the same manner as the Window/Level function. However, Window/Level changes the values of the selected image manually while Local Window/Level changes the window/level values of the image based on the values in the selected local area. It is useful for Local Window/Level The window/level values in the selected area can be applied to the whole image. viewing the full image in relation to the Window/Level of a certain area of the image. To use the Local Window/Level function, 8 Select Processing > Local Window/Level from the menu, or 8 Select Local Window/Level from the popup menu, or 8 Click the Local Window/Level button in the Toolbox. Click the left mouse button and drag the mouse to form a local window over the desired area of the image. Dragging the mouse will change the window/level values displayed on the bottom right-hand corner of the Image Display Window. The window/level value of the entire image will change to the value in the selected area when the mouse button is released. Manual Stack This function allows stacking of images for sequential viewing from a single image view. 46 User's Guide Manual Stack gives the convenience of scrolling through the images in a series in a single image view using mouse movements. This allows the Manual Stack use of the largest possible image view for viewing and diagnosis. When While clicking and holding the left mouse button the following adjustments can be made, using Manual Stack with a viewing configuration of more than one Dragging Up image, the order of images surrounding the viewed image will change accordingly when finished scrolling. To use the Manual Stack function, Move Backward Dragging Down 8 Select Processing > Manual Stack from the menu, or Move Forward 8 Select Manual Stack from the popup menu, or 8 Click the Manual Stack button in the Toolbox. To scroll through the images in the series, click and hold the left mouse button over the image and move the mouse up or down. Moving the mouse up will scroll backwards in the series, and moving the mouse down will scroll forward in the series. The image number will be displayed on the bottom right-hand corner of the image while scrolling. Pixel Value This function displays the pixel value and coordinates where the mouse pointer (shown as cross hairs) is located. Pixel Value Depending on the image type, the pixel value will have different 8bit grayscale image meanings. The chart on the sidebar shows the meaning of the pixel value Grayscale value (0 ~ 255) for various image types. 9bit or higher bit grayscale image To use the Pixel Value function, Raw value (-32767 ~ 32768) 8 Select Processing > Pixel Value from the menu, or Color image RGB value (0 ~ 255) Several CT image Hounsfield units value (-1024 ~ 1024) 8 Select Pixel Value from the popup menu, or 8 Click the Pixel Value button in the Toolbox. When the cross hairs (as seen in the icon on the side bar) appear on the Display Workstation 47 image, drag the mouse around to view the pixel value and the coordinates in the bottom right-hand corner of the image. Invert This function inverts the image to a negative grayscale image. This means it reverses the gray shading of an image. Therefore, the black part of the image changes to white, and the white changes to black. To use the Invert function, 8 Select Processing > Invert from the menu, or 8 Select Invert from the popup menu, or 8 Click the Invert button in the Toolbox. Flip This function enables an image to be flipped on its vertical or horizontal axis. Flip from the Main Menu This is useful if the image has been scanned upside down, or if another view of the image is desired. To flip an image on its horizontal axis, 8 Select Processing > Flip > Horizontal from the menu, or 8 Select Rotate/Flip > Flip Horizontal from the popup menu, or 8 Click the Flip Horizontal button in the Toolbox. To flip an image on its vertical axis, 8 Select Processing > Flip > Vertical in the menu, or 8 Select Rotate/Flip > Flip Vertical from the popup menu, or 48 User's Guide 8 Click the Flip Vertical button in the Toolbox. Rotate This function rotates an image in a counter-clockwise manner. To Rotate an image, 8 Select Processing > Rotate > 90 or 270 from the menu, or 8 Select Rotate/Flip > Rotate 90 or Rotate 270 from the popup menu, or 8 Click the Rotate 90 button or Rotate 270 button in the Toolbox. After rotating an image, the patient orientation signs will change appropriately, as seen below. Histogram Equalization Histogram Equalization is the image processing feature to adjust the distribution of brightness so that a visually better image can be created. To apply Histogram Equalization, select an image and Display Workstation 49 8 Select Processing > Histogram Equalization from the menu, or 8 Select Enhancement > Histogram Equalization from the popup menu. Example for Histogram Equalization Sharpen This function uses a filter that increases the visibility of small lines and fissures, which may otherwise be difficult to spot. It brings an image into better focus and sharpens the detail by increasing the contrast of adjacent pixels. To Sharpen an image, select the image to sharpen and 8 Select Processing > Sharpen from the menu, or 8 Select Enhancement > Sharpening from the popup menu. 50 User's Guide Example for Sharpen Smoothen This function uses a filter that effectively makes an image look smoother by softening hard or rough edges. To Smoothen an image, select an image to smoothen and 8 Select Processing > Smoothen from the menu, or 8 Select Enhancement > Smoothing from the popup menu. Example for Smoothen Display Workstation 51 Annotation There are several types of annotation that can be added to images to indicate points of interest. Such annotation is created over the image that is being annotated; hence, the original image data is not altered. All annotation - such as text, markers, and measurement tools - will remain in the same relative position on the image even if pan or zoom is used. Once an annotation has been created, it can be displayed, hidden, saved with the exam, or deleted. To add an Annotation, 8 Select the desired type of Annotation under Annotation from the menu, or 8 Select the desired type of Annotation under Annotation from the popup menu. To modify an Annotation, select the annotation to modify and 8 Right-click on the image and select Properties from the popup menu. 8 Select one of the following three tool tabs to modify properties; Size/Statistics, Color/Line and Text. 52 User's Guide 8 After modifications are made, press Apply to preview the changes and continue modifying, or press OK to make the changes and close the window. Annotation Properties: Size/Statistics Mark the check box to display the corresponding information with the annotation. Statistics Displays the Minimum (Min), Maximum (Max), Average (Mean) and Standard Deviation (STD) Pixel Value of the selected annotation’s area. Size/Statistics Tab Annotation Properties: Color/Line The color and line style of the annotation can be changed. Display Workstation 53 Color/Line Tab Annotation Properties: Text The text can be modified. Select the font, style, size, color, effect and alignment. Text Tab 54 User's Guide Line The length (distance) between two points can be measured, or points of interest can be indicated. In accordance with the DICOM standard, distances are measured in millimeters for CT and MR studies and for some CR images. To add a Line, 8 Select Annotation > Line from the menu, or 8 Select Annotation > Line from the popup menu, or 8 Click the Line button in the Toolbox. Place the crosshairs above the point you want to start the line and click and hold the mouse button. While holding down the mouse button, move to the point you want to end the line and release the mouse button. Example of Line Angle Measurements of an angle can be made. To make a measurement of an angle, 8 Select Annotation > Angle from the menu, or 8 Select Annotation > Angle from the popup menu, or Display Workstation 55 8 Click the Angle button in the Toolbox. The first mouse click on the image will determine the location of the base of the angle. While holding down the mouse button, move the mouse along the desired axis of the first side of the angle and release the mouse button. After releasing the mouse button, move to the end point of the second axis and click the mouse button. An angle will be drawn in between the two end points. Example of Angle Cobb’s Angle Cobb’s Angle measurements are particularly useful for small angles and when the intersection point is outside the image area. To measure a Cobb’s Angle, 8 Select Annotation > Cobb’s Angle from the menu, or 8 Select Annotation > Cobb’s Angle from the popup menu, or 8 Click the Cobb’s Angle button in the Toolbox. Create a line that will form one side of the angle by clicking and dragging the mouse. Once the mouse button is released a second line forming the other side of the angle will appear along the horizontal axis making a positive angle. Both sides can be moved and aligned with the image as desired. The angle shown is for the angle between the two sides. 56 User's Guide Example of Cobb’s Angle Rectangle A rectangle can be created in the image window, showing height and width parameters. To create a Rectangle, 8 Select Annotation > Rectangle from the menu, or 8 Select Annotation > Rectangle from the popup menu, or 8 Click the Rectangle button in the Toolbox. Click and drag the mouse to create a rectangle, and then release the mouse button to complete the annotation. Example of Rectangle Display Workstation 57 Ellipse An ellipse can be created in the image window, showing the area of the created ellipse. To create an Ellipse, 8 Select Annotation > Ellipse from the menu, or 8 Select Annotation > Ellipse from the popup menu, or 8 Click the Ellipse button in the Toolbox. Click and drag the mouse to create an ellipse, and then release the mouse button to complete the annotation. Example of an Ellipse Polygon A polygonal region can be drawn with multiple points, showing the area and the length of the region. To create a Polygon, 8 Select Annotation > Polygon from the menu, or 8 Select Annotation > Polygon from the popup menu, or 8 Click the Polygon button in the Toolbox. Click the mouse button over the starting point of the polygon, and 58 User's Guide sequentially click the mouse button over all points of the polygon. When the last point is reached, instead of just clicking on it, double-click that point to end the polygon mapping. The points of the polygon can be moved around. Example of a Polygon Memo Text can be added to an image, and edited later on. To add a Memo, 8 Select Annotation > Memo from the menu, or 8 Select Annotation > Memo from the popup menu, or 8 Click the Memo button in the Toolbox. Click and drag the mouse to create a text box, and then enter the text for the memo. Example of Memo Display Workstation 59 Note Text can be added to an image with a line showing the point in context. It is useful when text is written to indicate something on an image. To add a Note, 8 Select Annotation > Note from the menu, or 8 Select Annotation > Note from the popup menu, or 8 Click the Note button in the Toolbox. Example of Note Workflow This function manages exam status in the RAYPAX system. The following are summarized descriptions of the RAYPAX Display Workstation workflow: 60 User's Guide 8 Technicians select an exam from the [Root Folder/ Worklists/ Verification] folder in the Exam Browser and open the exam to verify. 8 Technicians verify the selected exam after adjusting the image quality. During verification, the technician can select a specific radiologist to dictate the exam. In this case, the verified exam is automatically sent to the ‘Unread’ worklist of the selected radiologist only. If a radiologist is not selected, the verified exam is sent to the general ‘Unread’ worklist for all radiologists. 8 Radiologists select an exam from the [Root Folder/ Worklists/ Unread] folder in the Exam Browser and open the exam to dictate. 8 Radiologists review the selected exam on the Display Workstation and dictate a report into the RAYPAX system through a recording device. The dictated exam is sent to the ‘Transcription’ worklist. 8 Transcriptionists select an exam from the [Root Folder/ Worklists/ Transcription] folder in the Exam Browser and open the exam to transcribe a report. The transcribed exam is sent to the ‘Approval’ worklist. 8 Radiologists select an exam from the [Root Folder/ Worklists/ Approval] folder in the Exam Browser and open the exam to approve. 8 Radiologists have three choices when approving an exam. The exam can be approved and finalized, forwarded to another radiologist, or sent back for re-transcription. 8 Radiologists can forward the exam to another radiologist for a second opinion. The exam is sent to the [Root Folder/ Worklists/ Forwarded] folder in the Exam Browser. Forwarding can be canceled by the forwarding radiologist. 8 When a radiologist receives an exam from another radiologist, the exam can be found in the receiving radiologist’s [Root Folder/ Worklists/ Received] folder. The report for the selected exam can be viewed. A new report made by the receiving radiologist after Display Workstation 61 reviewing the exam can then be forwarded back to the forwarding radiologist, forwarded to another radiologist or approved and finalized. Verify… If exams are acquired in RAYPAX, then they have to be verified for use. Before selecting the verify function, the Brightness and Contrast of all images should be adjusted in advance. Once verification is successfully completed, the above message will be shown Verify Dialog Box 8 Emergency Report : If this is the Emergency Exam, check Emergency Report check box. Please refer Emergency Exam tab on Tools>Options for more information about Emergency Exam. 8 Not Specified : If a specific physician will not be selected, check ‘Not specified’ check box. To use Verify, select an exam in the Exam Browser and 8 Press [Ctrl] + [E], or 8 Choose Workflow > Verify from the menu, or 8 Click the Verify button in the Toolbox. 62 User's Guide In the Verify dialog box, 8 Select a Department. 8 The physician list of the selected department will be shown. 8 Select a physician or check the Not Specified box if a specific physician will not be selected. 8 Click the Verify button. Dictate… Dictation is normally performed by the diagnosing radiologist. The radiologist who is responsible for the images reads the verified images and records his diagnosis/opinion. It is possible to write the report, but radiologists usually use a voice recording system. Once the dictation is successfully saved, the above message will be shown. Dictation Dialog Box To use Dictate, 8 Choose Workflow > Dictate from the menu, or 8 Click the Dictate button in the Toolbox. To record, 8 Click the Record button, or press [F5]. 8 Click the Pause button, or press [F5] again, to momentarily stop recording. Display Workstation 63 8 Playback functions can also be used to verify the recording. 8 Click the Save & Close button when the recording is finished. Transcribe… A voice-recorded dictation must be transcribed into text. When the procedure for dictation is complete, the exam will be sent to a transcriptionist. The transcriptionist who receives the dictation translates the voice dictation into a text report. Please refer to the diagram below. Transcription Dialog To use Transcribe, 8 Press [Ctrl] + [T], or 8 Choose Workflow > Transcribe from the menu, or 8 Click the Transcribe button in the Toolbox. 64 User's Guide Result Code Dialog If the transcriptionist clicks the Add button in the report window, the dialog box below will be displayed. Result Code Dialog To search for a result code: 8 Type in the text to search on in the Keyword box and then click the Search button 8 Search results will be displayed in a window appearing on the right side. 8 Select one of the body parts that are displayed on the left side of the window under the upper section of the Reference Table. 8 Select a diagnosis that is displayed in the lower section of the Reference Table, and then click OK. Display Workstation 65 Report/Approve… This function allows a radiologist to approve or reject a diagnostic report. There are three choices for approval: Approve the report for the exam, forward the exam to another radiologist, or send the exam back for retranscription. Report/Approve Dialog Radiologists can forward exams to other radiologists by using the Forward button. Forwarding is useful for junior radiologists to send exams to senior radiologists for opinions, or when a radiologist is not fully confident in a diagnosis and wants a second opinion. 66 User's Guide Select Physician Dialog Box The Select Physician dialog box allows the selection of a radiologist to forward the exam to. Pressing the Complete button finalizes the exam by approving the report. Once an exam is approved the report cannot be redone or modified. Pressing the Reject Transcription button sends the exam back to have the transcription redone. An exam can be rejected because the transcription has errors or is not complete. This returns the exam back to the transcription worklist. Pressing the Reject Forward button returns a forwarded exam as rejected and not complete. Exams can be rejected if there are errors, the exam was sent to the wrong radiologist or if the radiologist cannot diagnose the exam. Display Workstation 67 Result Code Dialog If the Add button is clicked, the Result Code dialog box will be shown as above. Please refer to the Transcribe menu for details. Radiologist can input the report and select the report which is already registered. If user click Registration Report button on Report/Approve Dialog Box, user can see the following Report Sample Dialog. If user select Report Sample and click ‘Select’ button selected Report sample will shows up on Report Text box of Report/Approve Dialog Box. Also Radiologist can create Report Sample. 68 User's Guide Report Sample Dialog Box To use Report / Approve, 8 Press [F10], or 8 Choose Workflow> Report / Approve from the menu, or 8 Click the Report/Approve button in the Toolbox. Cancel Forwarding Only the radiologist who forwarded an exam can cancel the forwarding of the exam. Display Workstation 69 To cancel the forwarding of an exam, select the exam from the [Root Folder/ Work history/ Forwarding] folder and 8 Select Workflow > Cancel Forwarding from the menu. Report History… This function displays the selected exam’s report history information. To view the Report History, 8 Select Workflow > Report History… from the menu. The history and information for the exam will be displayed as shown in the diagram below. Report History Dialog 70 User's Guide Tools Options… If Options is selected from the main menu or Exam Browser, the Options dialog box will be shown. Several parameters of the RAYPAX Display Workstation can be modified and saved. Options are separated into tabs as listed below. System Tab This shows the information for connected RAYPAX servers in the Server List. Servers can be added, edited or deleted using the corresponding buttons on the right side. The server name must be the same as the alias in the Oracle database client. Display Workstation 71 Monitor Configuration Regardless of the number of monitors being used, the configuration that is set will be used to display the RAYPAX Display Workstation. Thus if one monitor is being used and a 2 monitor configuration is set, the monitor will display 2 split windows for the Display Workstation. System Tab 8 The Extra Memory Space field is used to set the minimum memory space for other programs. In other words, all memory except the memory amount allocated in Extra Memory Space will be used by RAYPAX Display Workstation. 8 Auto Lock field is used to set suspend time. This option can be configured by Admin Tool. If user does not use Display Workstation in amount of time, Display workstation will be locked. If user wants to unlock, input User Password and click Unlock button. Application Lock 72 User's Guide 8 The Monitor Configuration can be set to the multiple monitor settings found in the pull down list. Once a monitor setting has been made, the program must be restarted. 8 Caching allows exams that were previously viewed to be stored locally for quick and easy access at a later time. This is convenient for the pre-fetching of exams to be viewed by a radiologist at an appointed time. Click on Settings… to set the parameters for the caching function. Click on Delete Files to delete the cache. Cache Settings Dialog Box User Info Tab This displays the user’s information as shown in the diagram below. Telephone number, e-mail address, and password can be modified. Also, User Privileges for the user can be viewed, but cannot be modified. Display Workstation Change Password Dialog 73 To change the password for login, click the Change Password button. 8 Type in the appropriate password information in the Current Password, New Password and Confirm Password fields. 8 Click OK to change the password; otherwise, click Cancel to cancel the operation. User Info Tab Workspace Tab The default font and size of the workspace environment can be adjusted by section. The available sections for adjustment are the dialog box, Exam Browser, annotation, thumbnail size and system icon size. Changing the settings in these sections will display them as the default for the logged in user only. 74 User's Guide Workspace Tab Display Workstation 75 DICOM Gateway Tab DICOM Gateway Tab User can register DICOM Gateway. If user click Edit button, following DICOM Gateway Information Dialog box will be appeared. DICOM Gateway Information Dialog Box 76 User's Guide The following parameters can be modified. 8 Server Application Title This corresponds to the SCP’s (Service Class Provider) AE (Application Entity) title in terms of DICOM 3. 8 Client Application Title This corresponds to the SCU’s (Service Class User) AE (Application Entity) title in terms of DICOM 3. 8 IP Address DICOM Gateway IP Address 8 Port TCP/IP port number of DICOM Gateway 8 Secure Connection DICOM Secure Connection option User can create new DICOM Gateway click Add button or can delete DICOM Gateway click Delete button. Save Tab Save This function gives the option to save only certain changes to images. The save exam and save annotation privileges can be set in the Admin Tool. Check the boxes for the changes that are to be saved when Save or Save All is selected from the main menu. Save Tab Display Workstation 77 Report Print Tab Report Print Tab The following parameters can be modified. 8 Title Type in each title and select the position, font, and size. 8 Margin Input a number or click the increase or decrease button. 8 Item Information Select the items that are to be included in the report by checking the corresponding boxes. 78 User's Guide Example of Report Display Format Tab The default display format for each modality can be set. The standard format and the split layout can be set to the desired display format. Display Format Tab To add a display format, click on the Add button and the Add Display Format dialog box will appear as below. Click the Find button to select the modality to set the display format for. Change the Display Format and Split Layout fields to the desired format settings. To finish, click OK. Display Workstation 79 Add Display Format Dialog Display formats can also be edited or deleted by selecting the display format from the list and clicking the appropriate button. Default Display Tab When opening an exam that has more than one series, or if many exams are opened, it is possible to set the display format for different features including split layout, comparison exams and scout images. Default Display Tab 80 User's Guide The following parameters can be modified. 8 Open Exam Settings for the initial default display when opening an exam can be modified. 8 Open Series Settings for the initial default display when opening a series can be modified. 8 Display Image Display image information can be shown on an overlay image. Window/Level Preset Tab The Window/Level settings can be saved for later use with the same images. The settings are also available for use with other images by saving them as pre-defined settings. Window/Level Preset Tab Display Workstation 81 To preset the Window/Level, 8 Click the Add button. 8 Enter the Title and the Window and Level parameters. 8 Select a Hot Key from the pull-down menu (20 hot key combinations are available: [Alt] + 0~9 and [Ctrl] + 0~9) Edit Window/Level Preset Dialog 8 Click the OK button to add the preset; otherwise, click the Cancel button to stop the operation. Default Display Protocol (DDP) Tab Open Comparison Exam This is a function to automatically open patient exams that are related to the selected exam for comparison. The Default Display Protocol function allows pre-configured viewing of Comparison Exams. When an exam is opened using the With Comparison Exam function, related exams for that patient can be opened as well for comparison. The arrangement of these exams on the available monitors is determined by the parameters set with the Default Display Protocol. For details on the use of the With Comparison Exam function, refer to the Tools menu of the Exam Browser in this manual. 82 User's Guide Default Display Protocol (DDP) Tab 8 If user unchecks Always compare with the latest exam check box, when user open the exam, selected exam will be current Exam. If user checks this check box, the latest exam will be Current exam. Emergency Exam Tab If user have the privilege, user can see Emergency Exam tab. Display Workstation 83 Emergency Exam Tab 8 If user check Show Emergency Exam notification message box check box, when Emergency Exam occur user can see the message box like following picture. At this time, if user clicks the Message, Emergency Exam Dialog will be appeared. 8 Emergency Exam notification message box 84 User's Guide 8 Query Interval : Search interval selection for Emergency Exam. 8 Ignore exams opened by another user : If this box is checked, the Emergency Exam that is already opened by the other user will not be notified. 8 Emergency Exam List Dialog : Set expiration period by Study Date Toolbox Configuration… The Toolbox configuration and buttons can be customized. To edit the Toolbox configuration, 8 Choose Tools > Toolbox Configuration, or 8 Click the Toolbox Configuration button in the Toolbox. Display Workstation 85 Drag & Drop Buttons To add buttons, drag them from the Buttons menu and drop them onto the Toolbox configuration. To remove buttons, drag them from the Toolbox configuration and drop them outside the window. Toolbox Configuration Dialog Choose a category from the Category menu on the left side and drag and drop buttons from the Buttons menu as described in the side bar. Buttons can be rearranged once placed in the Toolbox configuration section at the bottom of the window. A description of the button function can be seen when you place the mouse pointer over the button icon in the Buttons menu. Click the OK button to complete configuration. Show Cut Line This function allows for show Cut line on images. If user enables this function, user can see the reference line to a crosssection of the images like following picture. 86 User's Guide Cut Line Windows Continue Macro The Macro function allows for easy duplication of job tasks. There are three different macros; Review Macro, Verification Macro and Dictation Macro. Review Macro is for repeating an image search function, Verification Macro is for repeating an exam verification task, and Dictation Macro is for repeating an exam dictation task. To start the Macro function, go to Tools > Verification (or Review or Dictation) Macro Start in the Exam Browser (Please refer to Chapter 3 Exam Browser). When a macro is started, the first available exam for the macro task will be opened in the Image Display Window. Select Tools > Continue Macro from the menu, or press the F12 button, to continue with the macro task. Once the macro task for the exam is finished or canceled, the next available exam for the macro task will be opened automatically in the Image Display Window. Display Workstation 87 To stop the Macro function, select Tools > Macro Stop in the Exam Browser. 3 Exam Browser This chapter describes the menu items in the RAYPAX Display Workstation Exam Browser. RAYPAX Display Workstation Exam Browser GUI The Exam Browser can be accessed by selecting Open… from the menu bar under Exam or by clicking the On-line Open button in the Toolbox. Menu bar The Menu bar is composed of 9 menu items. Menu of Exam Browser 90 User's Guide Exam The following are the descriptions of the submenus of the Exam menu. Open… This allows you to open an exam for viewing or performing workflow tasks. To open an exam, select an exam record and 8 Double click the selected exam record, or 8 Select Exam > Open… from the menu, or 8 Click the Open button on the Tool bar. Request Manual Fetch The Request Manual Fetch function requests that specified exams that are not in the Short Term Storage (STS) be restored from the Long Term Archive (LTA). This function is only available when the desired exam is offline, which is denoted by N under the On Line column in the Exam Browser. The manual fetch procedure requests the retrieval of a specific exam of a specific patient to be brought online into the STS for viewing. Display Workstation 91 When this function is run, a window asking for the priority of the fetch will be displayed, as shown below. After selecting the desired priority, click on OK. Manual Fetch Window Cancel Manual Fetch This function cancels a request made using the Request Manual Fetch function. Print This function allows the printing of an exam and its images. To Print from the Exam Browser, 8 Press [Ctrl] + [P], or 8 Select Exam > Print from the menu, or 8 Click the Print button on the Tool bar. Please refer to View DICOM Send Log… 92 User's Guide DICOM Send Log Print in Chapter 2 Display Workstation. Close This function closes the Exam Browser and goes back to the Image Viewer of the RAYPAX Display Workstation. To Close the Exam Browser, 8 Select Exam > Close from the menu, or 8 Click the Close button on the Tool bar. Edit The following are the descriptions of the submenus of the Edit menu. Display Workstation 93 Undo The Undo function reverses the last Cut/Paste/Delete operation. When undoing the last operation, the Exam Browser displays the folder that the last operation was performed in. To Undo the last operation, 8 Press [Ctrl] + [Z], or 8 Choose Edit > Undo, or 8 Click the Undo button on the Tool bar. Cut The Cut operation is used essentially to move an exam to another folder. Using the Paste function in conjunction will accomplish this. A cut exam is not removed until it is pasted into another folder. If an exam has been moved in error, it can be immediately reversed using the Undo function. This operation can be applied only within a write accessible folder. To Cut an exam, select the exam to cut and 8 Press [Ctrl] + [X], or 8 Choose Edit > Cut, or 94 User's Guide 8 Click the Cut button on the Tool bar. Copy This function copies a selected exam into memory. The exam can then later be pasted into another location using the Paste function. To Copy an exam, select the exam to copy and 8 Press [Ctrl] + [C], or 8 Choose Edit > Copy from the menu, or 8 Click the Copy button on the Tool bar. Paste This function pastes exams that have been cut or copied into a selected folder. The selected folder must be write accessible by the user or else the paste will not work. To Paste an exam, select the folder to paste into and 8 Press [Ctrl] + [V], or 8 Choose Edit > Paste from the menu, or 8 Click the Paste button on the Tool bar. Delete This function permanently removes the selected exam from the folder. This operation can be applied only within a write accessible folder. To Delete an exam, select the exam to delete and 8 Press [Del], or Display Workstation 95 8 Choose Edit > Delete from the menu. View The following are the descriptions of the submenus of the View menu. These are toggle style menus. Tool Bar This hides or unhides the Tool Bar. A check mark beside the name indicates that it is being displayed. Quick Bar This hides or unhides the Quick Bar. A check mark beside the name indicates that it is being displayed. Folder Path Bar This hides or unhides the Folder Path bar. A check mark beside the name indicates that it is being displayed. Reload This updates the folder content area with current database data. 96 User's Guide Text Size This shows the font size for the Exam Browser. To change the font size, 8 Choose View > Text Size > [Selected font size] from the menu, or 8 Click the arrow button beside the Text Size button on the Tool bar and select a font size, or 8 Press [Ctrl] and the corresponding number (1 ~ 5) for the desired font size, as shown in the side bar. Go To The following are the descriptions of the submenus of the Go To menu. Back This moves the folder view to the previous folder. Display Workstation 97 If the arrow button located to the right of the Back button is clicked, it will display a drop down folder list of previously viewed folders that can be chosen from. To go Back to a previous folder, 8 Select Go To > Back from the menu, or 8 Press [Alt] + [←] or, 8 Click the Back button on the Tool bar. Forward This moves the folder view to the folder previous to a Back move. If the arrow button located to the right of the Forward button is clicked, it will display a drop down folder list of previously viewed folders before a Back move that can be chosen from. To go Forward to a folder, 8 Select Go To > Forward from the menu, or 8 Press [Alt] + [→] or, 8 Click the Forward button on the Tool bar. Up one Level This moves the folder view to the folder that is one level higher in the folder directory (i.e. the parent folder). To move Up one Level, 8 Select Go To > Up One Level from the menu, or 8 Press [Alt] + [Up arrow], or 98 User's Guide 8 Click the Up button on the Tool bar. My Start Folder This moves the folder view to the folder that is designated as My Start Folder. To move to My Start Folder, 8 Select Go To > My Start Folder from the menu, or 8 Click the Start button on the Tool bar. My Private Folder This moves the folder view to the folder that is designated as My Private Folder. 8 Select Go To > My Private Folder from the menu, or 8 Click the Private button on the Tool bar. Current Patient Folder This moves the folder view to the folder that contains the whole exam for the selected patient, including the current selected exam. To go to the Current Patient Folder, 8 Select Go To > Current Patient Folder from the menu, or 8 Click the Patient button on the Tool bar. Bookmark It is possible to add or edit bookmarks as buttons on the Quick Bar for convenient access to frequently used folders. Display Workstation 99 Bookmarks can only be made for folders. Add Bookmark This allows a new bookmark to be added to the Quick Bar. To add a bookmark, open the folder to make a bookmark for and 8 Select Add Bookmark from the menu. 8 Enter the Bookmark Title when the Bookmark Title dialog box appears (or accept the default name). 8 Click OK. 8 The new bookmark will appear on the Quick Bar. Bookmark Title Dialog Edit Bookmark A bookmark can be edited. Editing functions include deleting, renaming, and changing display order on the Quick Bar. 100 User's Guide Edit Bookmark Delete Deletes the selected bookmark. Rename Renames the selected bookmark. Up Moves the selected bookmark up in the order. Edit Bookmark Dialog Down Moves the selected bookmark down in the order. To edit a bookmark on the Quick Bar, 8 Select Edit Bookmark from the menu. 8 Select a bookmark to edit and click one of the edit buttons. 8 When finished, click OK. 8 The changes can be seen on the Quick Bar. Workflow The Workflow menu is the same as the workflow in the Image Viewer of the RAYPAX Display Workstation. Please refer to the Workflow menu in Chapter 2 Display Workstation. Verify To start the Verify workflow task, Display Workstation 101 8 Press [Ctrl] + [E], or 8 Select Workflow > Verify from the menu. Transcribe To start the Transcribe workflow task, 8 Press [Ctrl] + [T], or 8 Select Workflow > Transcribe from the menu. Report/Approve To start the Report/Approve workflow task, 8 Press [F10], or 8 Select Workflow > Report/Approve from the menu. Cancel Forwarding To Cancel Forwarding of an exam that has been forwarded to another radiologist, 8 Select Workflow > Cancel Forwarding from the menu. Folder Folders in the Exam Browser can be configured to conform to the hospital environment with Admin Tool. The Folder menu is only activated when Private Folder is used. 102 User's Guide New A new folder can be created within the Private Folder. A new folder cannot be created in a folder that contains exams. To create a new folder, 8 Press [Ctrl] + [N], or 8 Select Folder > New… from the menu. Private Folder Information Dialog Box When creating a new folder, fill in the Folder Name, select the Folder Type, and select the folder Sharing attribute. If the Shared attribute is selected, this new folder will be shared with others. This means people have read permission in this folder, but it does not mean people can create/delete in this folder. Remove Folders can be deleted within the Private Folder. To remove a folder, select a folder to remove and Display Workstation 103 8 Select Folder > Remove from the menu. If the selected exam folder contains image data, then an alert box will be displayed and will ask for confirmation of the delete operation. A parent folder that contains at least one subfolder cannot be removed until all the subfolders are removed manually. Remove Folder Confirm Message Box Properties The properties of folders can be viewed for folders within the Private Folder. The name and sharing attributes of a selected folder can be changed. To view/change properties of a folder, select a folder and 8 Select Folder > Properties… from the menu. 104 User's Guide Tools Options… The Options menu is the same as in the Image Viewer menu in the RAYPAX Display Workstation. Please refer to the Options menu in Chapter 2 Display Workstation. Macro Start This function automates tasks in the workflow, including verification, dictation and review. To use a macro, 8 Select Tool > Verification (or Dictation or Review) Macro Start in the Exam Browser. 8 The first exam from the workflow exam list, for the selected workflow task, will be displayed in the Image Display Window. (For example, exams that are not verified in the case of Verification Macro) 8 Select Tools > Continue Macro from the menu of the Image Display Window. 8 In the case of Verification Macro, the Verify dialog box will be displayed; in the case of Dictation Macro, the Dictate dialog box will Display Workstation 105 be displayed. If the dialog box and the present exam are closed, the next exam will be displayed. In the case of Review Macro, there is no dialog box, so when the present exam is closed the next exam will be displayed. 8 When all exams from the workflow exam list are done, a dialog box will ask whether to repeat the above macro for any recently added exams. 8 If Yes is clicked, the first exam from the refreshed list will be displayed; if No is clicked, the macro function will quit. Macro Stop This function stops the macro started using the Macro Start function. To stop a macro, select Tools > Stop Macro in the Image Display Window or the Exam Browser. With Comparison Exam This function, when a patient’s exam is being opened, opens related exams for the patient for comparison. Related exams are determined by exam procedure for exams using the same modality, and by body part for exams using different modalities. To use the With Comparison Exam function, 8 Select Tools > With Comparison Exam from the Exam Browser. When exams are opened using the With Comparison Exam function, the layout configuration from the Default Display Protocol settings will be used to arrange the exams in the Image Display Window. Set Current Folder as Start Folder This function sets the current folder as the start folder. When logging into 106 User's Guide Display Workstation, this will be the folder that will be opened in the Exam Browser. Search Grid Drop Down: Modality Query The Query Field can be used to filter the contents of a folder. The Query Field is composed of a Field Header and a Field Editing area. Each Field Header can be resized by dragging the right edge of the field after clicking on it, or by double clicking on the right edge of the field to match the heading text width. The Field Editing area accepts text input for queries on the folder contents for that particular field. Once text is input, pressing [Enter] will execute the query. The folder content, name and number of Field Header items may be Calendar: Study Time Search different according to the type of folder. If the column header is clicked on, the column will be sorted alphabetically or numerically. However, this type of sorting may take a long time. There are 4 types of input for searches. 8 Edit Box Input text in the edit box and press [Enter]. A query for items that start with the inputted text will be made and then displayed. This input type is used for Patient Name, Patient ID, etc. Numeric: Img search 8 Drop Down Menu Select search criteria from the drop down menu. This input type is used in the modality search. 8 Calendar Select a date to search for using the calendar. This input type is used for Birth Date, Study Time, etc. 8 Numeric Input a number to search on and select the equation sign for the search (i.e. less than, equal to, or greater than). For example if 70 is inputted and equal to is selected, the query will display all exams Display Workstation 107 that contain exactly 70 images. Index 2 Cine .................................................................. 5 Cine View....................................................... 27 2H....................................................................19 2V....................................................................19 A Client Application Title .................................. 73 Close......................................................... 13, 85 Close All......................................................... 13 Add Bookmark................................................92 Cobb’s Angle.................................................. 56 Add Scout Image.............................................29 Comparison Exams......................................... 77 Angle...............................................................55 Complete ........................................................ 66 Annotation.......................................................51 Continue Macro ........................................ 81, 82 Annotation Properties .....................................52 Copy ......................................................... 17, 87 Apply Original Window/Level .......................31 Copy to Clipboard .......................................... 37 Approval .........................................................61 Copy to Private Folder.................................... 37 Asynchronize All ............................................26 Current Patient Folder .................................... 92 B Cut .................................................................. 86 D Back ................................................................90 Bmp.................................................................38 DDP ...................... See Default Display Protocol Body Part ........................................................98 Default Display............................................... 77 Bookmark........................................................92 Default Display Protocol ................................ 79 C Delete........................................................ 18, 87 Deselect All .................................................... 38 Caching ...........................................................69 DICOM files................................................... 36 Calendar ..........................................................99 DICOM Gateway............................................ 73 Cancel Forwarding....................................67, 94 DICOM Information....................................... 36 Cancel Manual Fetch ......................................85 Dictate ...................................................... 61, 63 110 Dictation Macro .............................................. 81 Display Format ............................................... 76 E Edit Bookmark................................................ 93 Ellipse ............................................................. 57 Exam Browser ............................................ 5, 83 Exam Procedure.............................................. 98 User's Guide K Key Images..................................................... 34 L Line ................................................................ 54 Load All Images ....................................... 26, 31 Local Window/Level...................................... 45 Login ................................................................ 6 Expand ...................................................... 18, 20 Export Image .................................................. 38 M Extra Memory Space ...................................... 69 Macro ....................................................... 81, 97 F Macro Stop ..................................................... 98 Magic Glass.................................................... 44 Flip.................................................................. 47 Folder.............................................................. 95 Folder Path Bar ............................................... 88 Folder Type..................................................... 95 Font................................................................. 71 Format....................................................... 10, 22 Forward............................................... 61, 66, 90 Full Screen ...................................................... 21 H Histogram Equalization .................................. 48 I Manual Fetch.................................................. 84 Manual Stack.................................................. 45 Mark Key Image............................................. 34 Mark Print Image ........................................... 35 Memo ............................................................. 59 Monitor Configuration ................................... 69 My Private Folder........................................... 91 My Start Folder .............................................. 91 N Navigation ...................................................... 10 New ................................................................ 95 Icon size.......................................................... 71 Note................................................................ 60 Invert............................................................... 47 O IP Address....................................................... 73 J Jpeg................................................................. 38 Open ......................................................... 11, 84 Open Comparison Exam ................................ 79 Open DICOM files ................... See Open Local Display Workstation 111 Open Local......................................................11 Related Exams ................................................ 98 Open Related...................................................12 Reload............................................................. 89 Options......................................................69, 97 Remove........................................................... 96 P Remove Scout Image...................................... 30 Report History ................................................ 68 PACS ................................................................1 Pan ..................................................................43 Password .........................................................71 Paste ..........................................................17, 87 Patient Orientation ..........................................24 Ping .................................................................13 Pixel Value......................................................46 Report Print .................................................... 75 Report/Approve ........................................ 65, 94 Request Manual Fetch .................................... 84 Reset Images to Last Saved ............................ 31 Result Code .................................................... 64 Review Macro ................................................ 81 Rotate.............................................................. 48 Polygon ...........................................................58 Popup ..............................................................32 S Port..................................................................73 Save .......................................................... 13, 74 Print...........................................................14, 85 Save All .......................................................... 13 Print Range......................................................14 Scout Image .................................................... 29 private folder...................................................37 Search Grid..................................................... 99 Properties ........................................................96 Select All ........................................................ 38 Q Selection ......................................................... 40 Send to DGW ................................................. 13 Quick Bar ........................................................88 R Server Application Title ................................. 73 Shared............................................................. 95 Radiologists.....................................................61 Sharpen........................................................... 49 RAYPAX ..........................................................1 Show Annotation ............................................ 23 RAYPAX Display Workstation ........................5 Show DICOM Information............................. 36 Record .............................................................63 Show Information........................................... 24 Rectangle.........................................................57 Show Scout Image.......................................... 25 Redo ................................................................16 Shrink ....................................................... 18, 20 Reject Forward................................................67 Size ................................................................. 52 Reject Transcription........................................66 Smoothen........................................................ 50 112 User's Guide Split................................................................. 18 Unmark Key Image ........................................ 34 Split Layout .................................................... 76 Unmark Print Image ....................................... 35 Start Folder ............................................... 91, 98 Unread ............................................................ 61 Statistics.......................................................... 52 Up one Level .................................................. 91 Sync ................................................................ 10 User Info......................................................... 70 Synchronize All .............................................. 26 User Privileges ............................................... 71 System ............................................................ 69 V T Verification Macro ......................................... 81 Technicians ..................................................... 61 Verify ..................................................61, 62, 94 Text Size ......................................................... 89 W Thumbnail Bar ............................................ 9, 21 Thumbnail images ............................................ 9 Tool Bar.......................................................... 88 Toolbox Bar .................................................... 21 Toolbox Configuration ................................... 80 Transcribe ................................................. 63, 94 Transcription................................................... 61 Transcriptionists ............................................. 61 WCS ............................................................... 34 Web Clinical System...................................... 34 Window/Level................................................ 41 Window/Level Preset ............................... 31, 78 With Comparison Exam ........................... 79, 98 Workflow ................................................. 60, 93 Worklist.......................................................... 61 Workspace...................................................... 71 U Z Undo ......................................................... 16, 86 Zoom .............................................................. 42