1
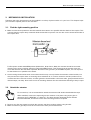
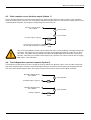
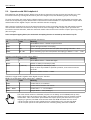
DCC Uncoupler Conversion Kit 3. MECHANICAL INSTALLATION Thanks to their size, the actuators can be installed in a variety of places under or in your loco. This chapter helps you to find the optimal place for the actuators. 3.1. Find the right mounting position Make sure the thread path from knuckle towards the actuator runs parallel with the shank of the coupler. This ensures that the coupler stays centered while the knuckle is opened. You can also run the thread at the side of the coupler box: For European models with NEM pockets (Kadee #17, #18, #19 or #20), the actuator should be mounted directly on the close-coupling shank (or behind the NEM pocket). This ensures that the actuator does not move the shank to the side when operated. Because of the geometry of the NEM couplers, it is not required for the thread to run parallel to the shank. Avoid routing the thread around corners because this may not only hinder the actuation of the knuckle, but also prevent the coupler from re-centering when switched off. If corners cannot be avoided, make sure it's rounded and has a smooth surface, or better guide the thread within a thin brass tube, gently bended into the desired shape, can help. Hint: Insert a wire of matching diameter into the tube before bending to keep it open. 3.2. Attach the actuator For a test drive, it is recommended to attach the actuator with double-sided adhesive tape. When satisfied, remove the tape and glue the actuator on its place using super-glue or gemstone glue (“GEM-TAC” or “Jewel-It”). The latter has the advantage that it remains somewhat flexible, and that it can be removed using alcohol if required. Remove any dirt and grease from both the actuator and the mounting surface using alcohol. Make sure that no glue drips onto the reel and on the front part of the actuator. 3