1
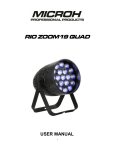
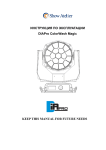
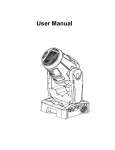
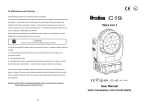
19*12W 4IN1 RGBW LED WASH 19*12W 4IN1 RGBW LED WASH Operating Manual What is include Equipment x 1 Power cable with Plug x 1 User manual x 1 Iron holder x 1 Unpacking instructions When receiving the equipment,carefully check the carton in order to make sure if all parts are good and all things have damage or not.Any damage appear in shipping,please keep packing material and inform the shipper to inspect.Be sure to keep all packing material.If the equipment has to return back to the manufacturer,please keep original carton and packing. AC Power The equipment has an auto-switching power supply that can accommodate a wide range of input voltages.The only thing necessary to do before powering on the unit is to make sure the line voltage you are applying is within the range of accepted voltages.This equipment will accommodate between 100V and 240V AC 50-60HZ.All equipments cannot be run off a rheostat(variable resistor ) or dimmer circuit. The equipment falls under protection-class I.Therefore it is essential that the equipment is earthed.The electric connection must carry out by qualified person. Make sure that available voltage is not higher or lower than rated one in the manual Make sure the power cord is never crimped or damaged by sharp edge. Always disconnect from the mains,When the device is not in use or before being cleaned Only handle the power cord by the plug.Never pull out the plug by tugging the power cord When installing the equipment,must be careful .Don’t touch the exposed cord,otherwise there is deadly electric shock When the equipment is in use,please don’t look at light source directly in order to prevent the eyes from damaging the equipment must be kept at least 0.5metre away from objects exposed when choosing the position Please use suitable and safe cord to connect with the equipment If you are not one qualified person or are not allowed by the manufacturer,don’t demount,repair and change the equipment Make sure to operate the device until it is in normal temperature .If it is more than 40℃ , don’t operate the device Don’t connect the fixture with dimmer equipment The specification Voltage:AC100-240V 50/60HZ Supply consumption:280W Led source:RGBW 4 IN 1 19PCS Cooling system:convection cooling Dimmer:0~100%linear 0~100% adjustable Strobe:0~20 times/sec, various of strobe effect Control mode:DMX 512/sound active/Stand alone Display:LCD display Beam angle: 15° Channel:24CH/12CH Scan speed:Pan 540º,Tilt 270º/Speed adjustable Scan fine:8/16Bit Scan Position:reposition auto after unexpected movement, electronic auto position correction Packing Dimensions:390x305x440mm Net weight: 9Kg Gross weight: 11 Kg Installation requirement The equipment can be used in various situation,it can be hung and stand Choose suitable situation to place or hang the equipment for installation.Make sure to use professional clamp and screws as hanging the equipment.and be sure that weight of the equipment is within range which installation area bear Be sure this equipment is kept at least 0.5m away from any flammable material in installing Make sure the equipment is installed by qualified person.Any wrongful installation can cause personal injury or material damage Please prevent other people from being under installation area,and use suitable and stable terrace in installing or repairing The equipment must be placed at ventilated situation and is kept at 50m away from the ground Power Connection The equipment has an auto-switching power supply that can accommodate a wide range of input voltages。he only thing necessary to do before powering on the unit is to make sure the line voltage you are applying is within the range of accepted voltages.This equipment will accommodate between 100V and 240v AC 50-60HZ. Cable Color connection PIN Brown AC live wire 1 blue AC zero curve 2 green/yellow AC ground wire 3 DMX serial Data Link 1. Connect the (female) 3 pin connector side of the DMX cable for the first equipment to the output(male) 3pin connector of the DMX cable for the controller 2. Connect the (male) 3 pin connector side of the DMX cable for the first equipment to the output(female) 3pin connector side of the DMX cable for next equipment and so on and so on Panel control Press Menu button enter main menu after starting up,then press UP(↑)DOWN(↓) to choose submenu, finally press ENTER to confirm Display Panel interface System run mode: DMX512-Edit mode-Sound active-Stand alone DMX512— 001—512 Edit—edit channel 1—date(0-255) — Edit Channel)16—Value(0-255) Sound active (program)1 — (program)2 Stand alone— Run program1—Run speed(0-255) — Run program2—Run speed(0-255) Memory: (scene)(1—16) Pan: (X forward—X backward) Tilt:(Y forward—Y backward) Control channel:Standard mode 12CH Extend mode 24CH Language:English/Chinese System Reset:ENTER Extend Mode(24CH) Channel (Name) (Value& function) 1 Pan 0~255 2 Tilt 0~255 3 X fine 0~255 4 Y fine 0~255 5 XY speed 0~255 (speed from fast to slow) 6 Dimmer 0~1(close).2~255(Dimmer).(from dark to bright) 7 Strobe 0~5(open) 6~255(strobe) from slow to fast) 8 R1 0~1 (first route Red close).2~255(from dark to bright) 9 G1 0~1(first route Green close).2~255(from dark to bright) 10 B1 0~1( first route Blue close).2~255 (from dark to bright) 11 W1 0~1 (first route White close).2~255(from dark to bright) 12 R2 0~1 second route Red close.2~255( from dark to bright) 13 G2 0~1(second route Green close).2~255(from dark to bright) 14 B2 0~1( second route Blue close).2~255 (from dark to bright 15 W2 0~1 (first route White close).2~255(from dark to bright) 16 R3 0~1 third route Red close.2~255( from dark to bright) 17 G3 0~1(third route Green close).2~255(from dark to bright) 18 B3 0~1( third route Blue close).2~255 (from dark to bright) 19 W3 0~1 (third route White close).2~255(from dark to bright 20 None None 21 internal program stand auto) 0-10 (none) 11-255 (program stand alone) 22 internal program speed 0-127(changeable) from fast to slow, 128-255 Linear adjustable from slow adjust to fast 23 X/Y Stand alone 0-63 normal 64-127 Pan stand alone 128-191 Tilt stand alone 192-255 Pan/Tilt stand alone 24 Reset 0~254 None 55/3S Re-set Standard Mode(12CH) Channel Name Value& function 1 Pan 0~255 2 Tilt 0~255 3 X fine 0~255 4 Y fine 0~255 5 XY Speed 0~255 speed from fast to slow 6 Dimmer 0~1close.2~255 dimmer dark to bright 7 Strobe 0~5 open 6~255 strobe slow to fast 8 R 0~1 (Red close).2~255( dark to bright) 9 G 0~1 (Green close).2~255( dark to bright) 10 B 0~1 (Blue close).2~255(dark to bright) 11 W 0~1 (white close).2~255(dark to bright) 12 Reset 0~254 None 255/3S Reset Please note: All Information is subject to change without prior notice.