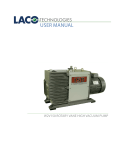
Download USER MANUAL - LACO Technologies, Inc.
Transcript
USER MANUAL
VACUUM DEGASSING CHAMBERS AND SYSTEMS
CONTACT US
PHONE/FAX
Toll Free: 800.465.1004
Phone: 801.486.1004
Fax: 801.486.1007
ADDRESS
LACO Technologies, Inc.
3085 West Directors Row
Salt Lake City, UT 84104
WEB
www.lacotech.com
[email protected]
SMT-09-1002 RevB1
ii
© 2014 LACO TECHNOLOGIES, INC.
CONTENTS
1.SCOPE................................................................................ 1
2.SAFETY.............................................................................. 1
3.COMPONENTS.................................................................. 1
4.BASIC
OPERATION....................................................................... 3
5.
RECOMMENDED PROCEDURES................................... 4
6.
APPENDIX A:
REMOVAL OF AIR FROM LIQUIDS................................ 5
7.
APPENDIX B:
CARING FOR ACRYLIC.................................................... 8
8.
APPENDIX C:
SPARE PARTS AND ACCESSORIES................................ 9
9.
APPENDIX D: W2V40 ROTARY VANE HIGH VACUUM
PUMP USER MANUAL................................................... 13
16. APPENDIX E: INSTRUTECH STINGER™ CONVECTION
VACUUM GAUGE MODULE USER MANUAL............. 26
22. ANALOG OUTPUT.......................................................... 42
24. FACTORY SERVICE AND SUPPORT............................ 51
25.WARRANTY..................................................................... 51
iii
© 2014 LACO TECHNOLOGIES, INC.
LACO USER MANUAL - VACUUM DEGASSING CHAMBERS AND SYSTEMS
1. SCOPE
This manual outlines the components, safety information, recommended
maintenance for LACO Technologies Vacuum Degassing Systems.
Following these recommended procedures will ensure that your degassing
system is performing at its highest level. This manual also includes product
information for degassing systems, including accessories, options, and
spare parts.
1.1
MAKEUP OF A DEGASSING SYSTEM
A typical vacuum degassing systems includes a vacuum chamber
connected to a vacuum pump for removing trapped gases from
compounds. With the appropriate vacuum pump degas chambers are
used to reduce the pressure above the surface of the material and permit
escape and subsequent removal of entrapped air and other gases that
could induce failure of the final product. Degas chambers and pumps are
available with several options and accessories for a complete vacuum
degas system to meet your requirements.
2. SAFETY
2.1
VACUUM PUMP SAFETY
A complete manual will be provided for the vacuum pump and should
be referred to for safety issues relating to the specific vacuum pump
purchased.
2.2
VACUUM CHAMBER SAFETY
All degassing chambers are designed for holding full vacuum, but any
defects, cracks or severe wear should be reported to LACO for advisement.
Vacuum chambers are not designed for pressure applications. If slight
pressure is needed (5 psi or less) the chamber must be provided with
necessary clamps and pressure safety relief valves.
3. COMPONENTS
A vacuum degassing system comprises of two main items; a vacuum
chamber and vacuum pump. Several accessories and options can be
added to customize the degassing system. Systems are available in
modular configurations or as complete setups mounted onto carts or
stands.
1
© 2014 LACO TECHNOLOGIES, INC.
LACO USER MANUAL - VACUUM DEGASSING CHAMBERS AND SYSTEMS
3.1
VACUUM CHAMBERS
The most common vacuum degassing chamber is a cylindrical vessel,
fitted with a vacuum control valve, vacuum release valve, vacuum dial
gauge, "L" type gasket and a clear acrylic or metal lid.
The cost of cylindrical vacuum chambers tend to increase far more with
increases in diameter than length. Horizontal chambers will also be more
than corresponding vertical chamber due to the need for cradle supports
and lid hinging. This orientation is preferred if the product is easier to load
and monitor. A common option for horizontal chambers include shelf
support rails and removable shelves. Vacuum degas chambers are most
commonly made from 304 stainless steel however LACO offers vertical
chambers also in aluminum and clear acrylic for full viewing.
To select a chamber for your purpose, ensure that your container will fit
into the chamber with sufficient space to allow for expansion of the liquid
to be degassed. Initially, fill your container one quarter with mixture,
experience will show the limit of mixture level permissible.
3.2
VACUUM PUMP AND HOSE
Based on the application the vacuum pump can be the greatest cost and
the most critical component for successful degassing. Choices range from
dry membrane pumps capable of vacuum levels down to 60 Torr or 27
inHG for single stage models and 7 Torr or 29 inHG for two stage models.
These dry pumps have pumping speeds or cfm values ranging from 1 to
7 cfm. For higher vacuum levels and cfm values, oil sealed rotary vane
vacuum pumps are used. Single stage models are capable of vacuum down
to 0.5 Torr and cfm from 1 to 100 cfm. Two stage models are capable of
vacuum down to 0.005 Torr or 5 millitorr and range in cfm from 2 to 50 cfm.
When selecting a pump it is necessary fully degas the mixture before it
even begins to gel or set. Knowing the pot life of the material will help in
selecting the right speed or cfm of pump. The manufacturer of the material
may recommend a vacuum level based on the properties of the material. If
you are unsure of the vacuum level requirement it is always easier to have
more vacuum than less.
3.3
COMMON ACCESSORIES
• Vacuum traps protect the vacuum pump from contaminates during the
degassing process and also prevent backstreaming of pump oil into the
vacuum lines or chamber.
• Digital vacuum gauges with units in torr or millitorr to accurately
monitor and repeat the process at the same vacuum level.
• Chamber mixers with rotary shaft feedthroughs
2
© 2014 LACO TECHNOLOGIES, INC.
LACO USER MANUAL - VACUUM DEGASSING CHAMBERS AND SYSTEMS
• Chamber internal platen heaters
• Heating blankets can be fitted around the vacuum chamber to achieve
higher wall temperatures. Heaters are NOT suitable for use with clear
acrylic doors.
• Electrical and thermocouple feedthroughs
• Liquid feedthroughs and valves
4. BASIC
OPERATION
Degassing of a liquid mixture is the removal of air bubbles which become
entrapped in the mixture when mixing the components. See Appendix A
for a complete discussion on vacuum degassing. The following is a quick
review of procedures for removal of air bubbles from resin mixes, RTV
silicone and similar liquids.
1. Close the vacuum valve connected to the vacuum pump and switch
the vacuum pump ON and allow to warm up.
2. Open the vacuum release or vent valve and remove the chamber lid.
3. Mix the materials to be degassed in a suitable container not more that
1/3 to 1/2 full and place this container in the chamber.
4. Replace the lid, making sure it fully covers the gasket on the vacuum
chamber.
5. Close the vacuum release valve.
6. Open the vacuum valve.
7. Watch the mixture and the vacuum gauge. When the chamber is
undergoing the evacuation the mixture will begin to rise, slowly at
first. At nearly full vacuum the mixture will have swollen up to fill the
mixing vessel, air bubbles will appear and burst at the mixture surface.
After a few seconds, this mixture will collapse to near its original
volume. Occasional bubbles will appear at the surface.
8. If the mixture rises too fast and is likely to overflow the container then
momentarily reduce the vacuum by opening and closing the vacuum
release valve or closing the vacuum valve. Repeat if necessary.
9. Wait for about 30 seconds after the collapse and close the vacuum
valve.
3
© 2014 LACO TECHNOLOGIES, INC.
LACO USER MANUAL - VACUUM DEGASSING CHAMBERS AND SYSTEMS
NOTE
One can also monitor the time and vacuum level on the
vacuum gauge as well as the material, to determine the
length of time to hold it under vacuum. The length of
time to degas is highly dependent on the product and the
particular application. Often an absolute pressure vacuum
gauge is used to monitor the vacuum level of the system
and determine if gases or solvents are evolving from
the product. The vacuum chambers are equipped with a
relative 0-30 in HG vacuum gauge, which is mainly used
to determine a rough vacuum level. For more accurate
measurement and control of the process, contact LACO
about an absolute vacuum gauge.
10. Open the vacuum release valve and remove the lid.
11. Fill the mold(s) carefully to minimize trapped air.
12. If necessary, place the mold(s) into the vacuum chamber.
13. Repeat stages above as necessary.
14. Some bubble may appear at the mixture surface and burst.
15. Continue degassing for about 30 seconds at full vacuum.
16. Repeat steps 10, 11, 12.
5. RECOMMENDED
PROCEDURES
5.1
VACUUM PUMP OIL CHANGES
The vacuum pump is the most critical maintenance item in a degassing
system. For oil sealed rotary vane vacuum pumps the most critical
maintenance item is to change the pump oil frequently. The frequency
will depend on the application and usage but it is recommend that if the
oil ever turns cloudy, dark or is foul smelling, change it immediately. Any
degassed solvents, water or other liquids will condense in the pump oil
and lower the vacuum level the pump is able to achieve. Frequent oil
changes will also extend the life of the vacuum pump.
When changing pump oil it is recommended to also use a flushing fluid
to cleanse the pump. LACO’s LVOFF is a hydrocarbon fluid specifically
designed to assist in the internal cleaning of particles and sludge build-up
in mechanical vacuum pumps. Its low viscosity helps free contamination
from internal parts allowing it to be flushed from the pump through the
drain valve.
4
© 2014 LACO TECHNOLOGIES, INC.
LACO USER MANUAL - VACUUM DEGASSING CHAMBERS AND SYSTEMS
5.2
FLUSHING PROCEDURE
1. Drain the used fluid from the pump while still hot from operation and
refill with LVOFF.
2. Run the pump blanked off or isolated for approximately 20-30 minutes
or until pump is hot.
3. Drain the pump completely (open gas ballast and jog the pump to aid
in removing oil).
4. Repeat the procedure if necessary then refill with LACO 19 grade oil
for direct drive pumps of 195 grade for belt drive pumps or other oil as
specified.
WARNING
Any foreign material left remaining in the vacuum
chamber or vacuum hose lines can contribute to
outgassing and reduce the performance of the system and
the vacuum pump.
6. APPENDIX A:
REMOVAL OF AIR
FROM LIQUIDS
6.1
APPLICATIONS
• RTV Silicone Rubber
• Araldite
• Polyester Resin
• Plastasols
• Casting Plaster
• Polysulphide Rubber
• Polyurethane Resin
• Adhesive Mixes
• Epoxy Resins
• Investment Plaster
6.2
INTRODUCTION
When any of the above listed materials are mixed with the required
additives, accelerator, filler etc., then air bubbles can become trapped
within the mixture. If not removed before the material cures the air
bubbles can cause defects such as nodules, cavities, hollows in the
finished cast. Sometimes such defects remain out of sight just below the
surface only to appear after a period of use. With electrical and electronic
encapsulation then these cavities can give rise to electrical breakdown. On
art figures cavities or nodules require correcting, which increases the time
and costs for a piece.
5
© 2014 LACO TECHNOLOGIES, INC.
LACO USER MANUAL - VACUUM DEGASSING CHAMBERS AND SYSTEMS
Mixing can be done by hand or an electric mixer before degassing,
depending upon the quantities involved. It depends on the amount and
type of filler and resin. The components are mixed in a container. It is
essential that the resulting mixture behaves as a liquid, i.e., flows and can
be poured.
When this mixture is put into the vacuum chamber and the air pressure
above it reduced, i.e. evacuated, the air bubbles which were formed at
atmospheric pressure now expand and rise to the surface where they
burst. The air thus released is pumped away.
In practice, degassing causes the whole mixture to expand about two
to six times its original volume. As the bubbles burst at the surface,
the expansion decreases. This process can take up to several minutes
depending upon the nature of the mixture, the volume of the vacuum
chamber and the speed of the vacuum pump used.
After expansion has subsided, bubbles can still appear at the surface,
which is mainly caused by the escape of traces of remaining air plus
volatile components of the mixture boiling off. The vacuum should only
be held for a further 30 seconds to 60 seconds at this stage, otherwise the
composition of the mixture will be altered and setting time will change
due to volatile components being removed by the vacuum.
This degassed mixture is then poured into your mold taking care to
minimize any trapped air. When your mold has been filled if you desire
you can put the whole mold with mixture into the vacuum chamber and
evacuate as before. This time only one or two bubbles should appear from
air, which was trapped in undercuts or adhering to the mould surface.
Again, beware of boiling off the volatile components, only a few seconds
or so at full vacuum should be sufficient.
You should be able to complete the above process long before the
material begins to gel or increase in viscosity. If degassing is too slow, you
may need to either increase the evacuation speed, i.e., change the pump
(to a larger cfm) or the decrease chamber size to reduce the pump down
time, or decrease the accelerator or possibly keep the components warm
in very cold weather.
6.3
COMMON CAUSES OF BUBBLES IN CASTINGS
• Air inclusion during mixing the resin and hardener together.
• Air trapped in moulds.
• Air trapped due to improper casting/moulding techniques.
• Air introduced by suction as the material shrinks or due to a leaking tool.
• Trapped residual solvent vapors from certain types of mould releases.
6
© 2014 LACO TECHNOLOGIES, INC.
LACO USER MANUAL - VACUUM DEGASSING CHAMBERS AND SYSTEMS
• Volatile components being stripped out of the materials while casting
under vacuum.
• Gases generated during the reaction (hardening) process.
• Gases formed during improper storage (moisture contamination etc.)
• Gases introduced through pressurized systems.
• Air from improperly degassed resin and/or hardener.
6.4
FACTORS THAT AFFECT THE REMOVAL OF GASES
• VISCOSITY OF THE MIX.
The higher the viscosity the more difficult it is to remove gases
• SURFACE TENSION OF THE MATERIALS
Can be reduced by heating and the addition of surfectants
• TEMPERATURE OF THE MIX.
Heating the material will reduce the viscosity. Be sure to consider the pot
life and gel time before heating any mixed materials.
• AMOUNT OF MATERIAL BEING DEGASSED AT ONE TIME.
The depth to surface ratio is important. The larger the surface that is
exposed to the vacuum the better. The lower the amount of product the
rising bubbles have to travel through the better.
• AGITATION
Agitation (mixing) during the degassing process (while under vacuum)
will speed the removal of air.
• VACUUM PUMP SIZE
The size or pumping speed of your vacuum pump usually noted in
terms of cubic feet per minute or cfm as well as the ultimate pressure or
vacuum level your pump can achieve.
• CHAMBER SIZE AND PIPING
Chamber size and the diameter and length of the vacuum hose can also
effect the time for removal of gases. It is recommended to use at least
the same diameter as your pump inlet and to use the shortest length
hose as possible.
6.5
MIXING UNDER VACUUM
Some materials need to be mixed under vacuum in order to obtain an
air free material. Some materials may also need heating before or during
mixing. Such material may need constant agitation or vibration to keep
them fluid so that they will actually flow as fluids to fill moulds and
containers. In such cases LACO can review the application and recommend
suitable vacuum equipment.
7
© 2014 LACO TECHNOLOGIES, INC.
LACO USER MANUAL - VACUUM DEGASSING CHAMBERS AND SYSTEMS
6.6
COMPLETION OF PROCESS BY PRESSURE
After subjecting the liquid material to a vacuum to remove entrapped air
the voids and spaces are probably still present but in vacuum. The final
stage of the process is to release the vacuum in the chamber, i.e. admit the
atmosphere which exerts a pressure of about 14.7 pounds on every square
inch. It is this pressure that pushes the material into the voids undercuts
and crevices of the mould. It is essential that the vacuum is released
immediately after degassing. It may help to gently vibrate the mould full
of material to temporarily overcome any tendency of the material to be
thixotropic, i.e., non-flowing such as with certain casting plaster mixes.
If the material has already begun to set while in vacuum and the surface is
not smooth but sponge like, then upon release of the vacuum air will enter
the body of the material and create a gassy cast. Should this happen then
vibration under vacuum and during vacuum release is needed so that the
material flows in to all the cavities.
7. APPENDIX B:
CARING FOR ACRYLIC
7.1
WASHING
Wash acrylic with a solution of mild soap or detergent and lukewarm
water. Use a clean soft cloth, applying only light pressure. Rinse with clean
water and dry by blotting with a damp cloth or chamois. Grease, oil, or
tar may be removed with a good grade of hexane, aliphatic naphtha, or
kerosene. These solvents may be obtained at a paint or hardware store and
should be used in accordance with manufacturer’s recommendations.
DO NOT USE: Window cleaning sprays, kitchen scouring compounds or
solvents such as acetone, gasoline, benzene, alcohol, carbon tetrachloride,
or lacquer thinner. These can scratch the sheet’s surface and/or weaken the
sheet causing small surface cracks called "crazing."
Acrylic can be cleaned with the following commercial cleaners without
damaging the coated surface: Fantastik household cleaner, Formula 409
household cleaner, Glass Plus cleaner, Mr. Clean household cleaner, Top
Job household cleaner, and Windex window cleaner.
It is not recommended to use abrasive cleaners.
7.2
POLISHING
Protect acrylic and maintain its surface gloss by occasional polishing with
a good plastic cleaner and polish. Apply a thin, even coat with a soft, clean
cloth and polish slightly with cotton flannel. Then wipe with a damp cloth
to help eliminate electrostatic charges that can attract dust particles.
8
© 2014 LACO TECHNOLOGIES, INC.
LACO USER MANUAL - VACUUM DEGASSING CHAMBERS AND SYSTEMS
7.3
REMOVING SCRATCHES
Fine scratches can be removed by hand polishing. Apply a plastic
scratch remover to a soft flannel pad and rub. When the scratches have
disappeared, remove all residue and polish. For deeper scratches, first
sand lightly with a 400-grit "wet or dry" sandpaper, using plenty of water
and rinsing the sandpaper frequently. Follow by buffing with a clean
muslin wheel and a good polishing compound. For the highest gloss, use
a clean-up wheel made of soft cotton or flannel sections and on which no
compound is used. An electric drill with a buffing wheel is ideal.
8. APPENDIX C:
SPARE PARTS AND ACCESSORIES
For information on recommended spare parts and accessories, see the
following tables:
• Table 1: Element Types for Clear Vacuum Types
• Table 2: Vacuum Pump Oil and Grease
• Table 3: Oil Mist Eliminators
• Table 4: PVC Vacuum Hose with NW Flanges
• Table 5: Vacuum Hose Fittings
• Table 6: Vacuum Gauges
• Table 7: Vacuum Chamber Fittings and Valves
• Table 8: Chamber Gaskets
• Table 9: Clear Vacuum Traps and Replacement Elements
LACO recommends to have one gallon of vacuum pump oil and one gallon
of flushing fluid along with a spare chamber lid gasket. Also, silicone
vacuum grease is also helpful for lubrication on the lid gasket to ensure
quick and easy vacuum sealing. If the chamber is equipped with a filter
trap, replacement elements are also recommended.
9
© 2014 LACO TECHNOLOGIES, INC.
LACO USER MANUAL - VACUUM DEGASSING CHAMBERS AND SYSTEMS
Below is a list of various element types available for the clear vacuum traps.
Table 1: Element Types for Clear Vacuum Types
ELEMENT TYPE
DESCRIPTION
Copper Gauze
Large surface area traps condensable particles and oil
vapors
Stainless Steel Gauze
Same as copper, but with added corrosion protection
Molecular Sieve
Reduces mechanical pump backstreaming and traps
water vapor
Sodasorb®
Minimizes migration of corrosive chemicals and
neutralizes acidic vapors
Activated Charcoal
Removes organic vapors
Activated Alumina
Removes Lewis acids, polar compounds, other acids, water
and particles
Polypro 2 Micron
Traps high volumes of solids and particulates as small as 2
microns; available in three sizes
Polypro 5 Micron
Same as above
Polypro 20 Micron
Same as above
Table 2: Vacuum Pump Oil and Grease
DESCRIPTION
1 QUART
1 GALLON
5 GALLON
19 Grade, Direct Drive, VP1x10-5 Torr
LVO191QT
LVO191G
LVO195G
20 Grade, High Quality, VP 1x10 Torr
LVO201QT
LVO201G
LVO205G
Flushing Fluid, All Pumps, Low
Viscosity
N/A
LVOFF1G
LVOFF5G
Silicone Vacuum Grease
LVO9140Z (4 oz Jar)
-6
Table 3: Oil Mist Eliminators
P/N
DESCRIPTION
SPARE ELEMENTS
LOME20025
Compact, NW25 In, 1/2" Outlet, 10 cfm
LGL915
LOME60025
15 cfm Clear Housing Oil Mist Eliminator
(NW25)
LGL150
LOME30050
5 cfm Compact Oil Mist Eliminator
(1/2" NPT)
Table 4: PVC Vacuum Hose with NW Flanges
P/N
SIZE
LVFP100N25
LMSA0953
1/2" I.D.
LMSA0955
1" I.D.
LMSA0986
3/8" I.D.
LVFAN16D50A
1/2" I.D. x NW 16
LVFAN16H38A
3/8" I.D. x NW 16
LVFAN25H38A
3/8" I.D. x NW 25
LVFAN25H50A
1/2" I.D. x NW 25
10
© 2014 LACO TECHNOLOGIES, INC.
LACO USER MANUAL - VACUUM DEGASSING CHAMBERS AND SYSTEMS
P/N
SIZE
LVFP038
3/8" I.D.
LVFP050
1/2" I.D.
LVFP100
1" I.D.
Table 5: Vacuum Hose Fittings
P/N
DESCRIPTION
LVFCN25A
Wing Nut Clamp
LVFGN25SV
Centering Ring SS/Viton
LVFBN25S
Blank-Off, SS
LVFFLWN25S
Flange Long Stub, SS
LVFTN25S
Tee, SS
LVFTX25S
Cross, SS
LVFE90N25S
Elbow, SS
LVFAN25FP12S
1/8’ FNPT Adaptor, SS
Table 6: Vacuum Gauges
P/N
DESCRIPTION
LVG-3025B
0-30 in HG Vacuum Gauge, SS Case, 1/4" NPT Bottom Mount
LVG-3025B
0-30 in HG Vacuum Gauge, SS Case, 1/4" NPT Rear Mount
LVG-200TC
Digital Thermocouple Display, Sensor & Cable
CVM211
Instrutech Stinger™ Convection Vacuum Gauge Module
Table 7: Vacuum Chamber Fittings and Valves
P/N
DESCRIPTION
LMSA8001
1/2’ MNPT Adaptor to NW25 - SS
LMSA8002
3/4" MNPT Adaptor to NW25- SS
LMSA8003
1/4" MNPT x FNPT Mini Ball Valve
LMSA8043
1/2" MNPT x FNPT Mini Ball Valve
LMSA8005
3/4" FNPT Ball Valve
LMSA8006
1/4" NPT Bronze Muffler
LMSA8007
1/2" NPT Bronze Muffler
Table 8: Chamber Gaskets
CHAMBER BUNA LID GASKETS
P/N
Chamber Diameter
LG06B
6"
LG08B
8"
LG10B
10"
LG12.75B
12.75"
LG18RB
18"
LG24RB
24"
11
© 2014 LACO TECHNOLOGIES, INC.
LACO USER MANUAL - VACUUM DEGASSING CHAMBERS AND SYSTEMS
Table 9: Clear Vacuum Traps and Replacement Elements
P/N
DESCRIPTION
MV300005
4.5" Clear Trap, No Insert
MV300010
9.5" Clear Trap, No Insert
MV300100
9.5" Clear Trap, with Copper Gauze
MV300105
4.5" Clear Trap, with Copper Gauze
MV300200
9.5" Clear Trap, with SS Gauze
MV300205
4.5" Clear Trap, with SS Gauze
MV300300
9.5" Clear Trap, with Molecular Sieve
MV300305
4.5" Clear Trap, with Molecular Sieve
MV300400
9.5" Clear Trap, with Sodasorb
MV300405
4.5" Clear Trap, with Sodasorb
MV300500
9.5" Clear Trap, with Activated Charcoal
MV300505
4.5" Clear Trap, with Activated Charcoal
MV300600
9.5" ClearTrap, with Activated Alumina
MV300605
4.5" Clear Trap, with Activated Alumina
MV300610
9.5" Clear Trap, with PolyPro 2 micron
MV300615
4.5" Clear Trap, with PolyPro 5 micron
MV300620
9.5" Clear Trap, with PolyPro 5 micron
MV300625
4.5" Clear Trap, with PolyPro 5 micron
MV300630
9.5" Clear Trap, with PolyPro 20micron
MV300635
4.5" Clear Sump with PolyPro 20 micron
MV300900
Replacement Element, 9.5" Copper Gauze
MV300905
Replacement Element, 4.5" Copper Gauze
MV300910
Replacement Element, 9.5" Stainless Steel
MV300915
Replacement Element, 4.5" Stainless Steel
MV300920
Replacement Element, 9.5" Molecular Sieve
MV300925
Replacement Element, 4.5" Molecular Sieve
MV300930
Replacement Element, 9.5" Sodasorb
MV300935
Replacement Element, 4.5" Sodasorb
MV300940
Replacement Element, 9.5" Activated Charcoal
MV300945
Replacement Element, 4.5" Activated Charcoal
MV400910
Replacement Element, 9.5" Activated Alumina
MV400915
Replacement Element, 4.5" Activated Alumina
MV400920
Replacement Element, 9.5" Polypro 2
MV400925
Replacement Element, 4.5" Polypro 2
MV400930
Replacement Element, 9.5" Polypro 5
MV400935
Replacement Element, 4.5" Polypro 5
MV400940
Replacement Element, 9.5" Polypro 20
MV400945
Replacement Element, 4.5" Polypro 20
LMSA8001
1/2"MNPT Adaptor to NW25 - SS
LMSA8002
3/4"MNPT Adaptor to NW25 - SS
12
© 2014 LACO TECHNOLOGIES, INC.
LACO USER MANUAL - VACUUM DEGASSING CHAMBERS AND SYSTEMS
9. APPENDIX D: W2V40 ROTARY VANE HIGH VACUUM PUMP USER
MANUAL
This manual contains installation, operation, maintenance, and
troubleshooting information for the W2V40 Rotary Vane Vacuum Pump.
Please read the manual in its entirety before operating the pump.
Our rotary vane vacuum pumps are designed to ensure safety when
used properly. It is the responsibility of the user to follow safety-related
warnings, cautions, notes, and other requirements described in this
manual.
Returned equipment will not be accepted without prior authorization.
Prior to shipping please call for a returned material authorization (RMA)
number.
LACO Technologies reserves the right to cancel the warranty if the pump
is disassembled without authorization, if pump fluids are used that are not
compatible with the design and materials used in the manufacture of the
pump, and if unauthorized spare parts are used.
10. SAFETY
Death or serious injury can result from improper use or application of
this pump. If the pump will be exposed to toxic, explosive, pyrophoric,
highly corrosive, or other hazardous process gases including greater than
atmospheric concentrations of oxygen, contact LACO Technologies for
specific recommendations.
WARNING
Ground the motor properly during installation. Disconnect
the power before beginning installation, maintenance or
repair work or before interchanging the input leads when
correcting the direction of rotation. Disconnecting the
power also avoids an unexpected start-up for pumps with
automatically resetting thermal overloads.
WARNING
If hazardous gasses or vapors are expelled from the pump,
do not operate the pump without an exhaust line and an
adequate exhaust system.
WARNING
Do not exceed a maximum backpressure of 7 psig.
Excessive pressure in the pump could damage the seals,
blow out the sight glass, or rupture the pump housing. In
addition, excessive backpressure can result in hazardous
process gas or contaminated oil leaking out of the pump.
WARNING
Don’t install an exhaust line with a smaller ID than the
exhaust port or allow restrictions or deposit build up in the
exhaust line.
13
© 2014 LACO TECHNOLOGIES, INC.
LACO USER MANUAL - VACUUM DEGASSING CHAMBERS AND SYSTEMS
WARNING
If you are purging the oil casing with inert gas, limit
the inert gas flow to avoid exceeding the 7 psig limit.
Accidentally connecting the pump’s exhaust port to
a vacuum line containing a closed valve also causes a
dangerous excessive pressure.
WARNING
Hazardous process gases can concentrate in the vacuum
pump, its oil, and its filters. If the pump has been used on
toxic, explosive, pyrophoric, corrosive, volatile, or other
hazardous substances, take the proper safety precautions
before opening the pump or filters.
Proper precautions could include:
—inert gas purging before and after you drain the oil
—sweeping hazardous gas from the pump or filters
—wearing gloves or protective clothing to avoid skin
contact with toxic or highly corrosive substances
—using a ventilated work area
—employing fume hoods
—wearing safety masks
—using a breathing apparatus
CAUTION
LACO rotary vane vacuum pumps are two-stage units
designed to operate continuously in the low torr & subtorr (millitorr) pressure range (<10 mmHg). Operation for
prolonged periods of time above 10 mm HG (Torr) can
result in permanent damage to the pump.
14
© 2014 LACO TECHNOLOGIES, INC.
LACO USER MANUAL - VACUUM DEGASSING CHAMBERS AND SYSTEMS
11. SPECIFICATIONS
11.1 BASIC PARTS AND SPECIFICATIONS
11.2 W2V40 SPECIFICATIONS
COMPONENT
DESCRIPTION
Pumping Speed @ 60 Hz
400 l/m, 14 cfm, 24 m3/hr
Pumping Speed @ 50 Hz
333 l/m, 11.6 cfm, 20 m3/hr
Ultimate Pressure (Gas Ballast Open)
5 x 10⁻² Torr
Ultimate Pressure (Gas Ballast Closed)
5 x 10⁻³ Torr
Standard Motor, CE Marked
115V, 1 HP, 60 Hz, On/Off Switch
Power Connection
Junction Box
Motor Speed @ 60 Hz
1700 rpm
Oil Capacity
1500 cc (1.5 quart)
Weight
Net 70 lbs, shipping 75 lbs
Intake/Exhaust type/diameter
NW 25 (26 mm) O.D. tube
Ambient Operating Temperature
70° to 40° C (45° to 104° F)
15
© 2014 LACO TECHNOLOGIES, INC.
LACO USER MANUAL - VACUUM DEGASSING CHAMBERS AND SYSTEMS
11.2.1
W2V40 DIMENSIONS
11.2.2
W2V40 PUMP CURVE
16
© 2014 LACO TECHNOLOGIES, INC.
LACO USER MANUAL - VACUUM DEGASSING CHAMBERS AND SYSTEMS
11.2.3
W2V40 SERVICE KIT
CODE #
DESCRIPTION
QTY
REMARKS
W2V0020
O-ring G-45
1
Common*
W4V0022
Oil Seal (Viton)
1
Common*
W2V0021
Oil Seal (Iron)
1
Common*
W4V0027
O-ring S-95
1
Common*
W4V0028
O-ring G-70
1
Common*
W4V0043
O-ring P-6
1
Common*
W4V0044
O-ring AN-170
1
Common*
W4V0048
O-ring P-5
1
Common*
W4V0068
1st Stage Valve
1
Common*
W4V0086
2nd Stage Valve 14.5X7
1
Common*
W4V0079
Distributor Valve dia 45X2
1
Common*
W4V0098
O-ring P-6
1
Common*
W4V0094
O-ring P-6
2
Common*
W4V0104
Oil Suction Felt
1
Common*
W4V0016
O-ring S-75
1
Common*
W4V0052
O-ring G-45
1
Common*
W4V0034
1st Stage Blade 55X38X6t
2
Major Only
W4V0035
1st Stage Blade Spring 0.5X2.5X3.5X45
2
Major Only
W4V0036
1st Stage Spring Guide 2.2X3.5X32
2
Major Only
W4V0037
2nd Blade Spring Guide 2.2X3.5X32
2
Major Only
W4V0038
2nd Stage Blade Spring 0.5X2.5X3.5X45
2
Major Only
W4V0039
2nd Stage Blade 40X30.5X6t
2
Major Only
W4V0074
2nd Valve Spring 0.6X7.2X17
1
Major Only
W4V0081
Oil Pump Blade 6X6X21
1
Major Only
Total (minor kit)
Total (major kit)
*Major and Minor
17
© 2014 LACO TECHNOLOGIES, INC.
LACO USER MANUAL - VACUUM DEGASSING CHAMBERS AND SYSTEMS
11.2.4
W2V40 EXPLODED VIEWS
18
© 2014 LACO TECHNOLOGIES, INC.
LACO USER MANUAL - VACUUM DEGASSING CHAMBERS AND SYSTEMS
12. PREPARATION & INSTALLATION
12.1 RECEIVING
Each rotary vane vacuum pump is inspected and carefully packed prior
to shipment. Inspect it after carefully unpacking it. In case of external
damage, retain the shipping container and notify the shipping carrier and
LACO immediately. The packing materials are designed specifically for the
pump, they should always be used when transporting the pump.
Unpack the pump and check for shipping damage as follows:
1. Inspect the outside of the shipping container for shipping damage. If
you will be making a damage claim, save the shipping container and
packing materials.
2. Unpack the pump.
3. Carefully inspect the pump for damage.
4. If you find any damage, proceed as follows:
a. Save the shipping container, packing material, and parts for inspection.
b. Notify the carrier that made the delivery within 7 days of delivery.
c. File a claim with the carrier.
d. Contact LACO Technologies to make arrangements for replacing
the damaged part(s).
12.2 REPORTING SHIPPING SHORTAGE
If you did not receive all the goods that you ordered, do the following:
1. Check the number of items listed on the packing slip. If the number of
pieces listed is greater than the number of shipping containers received, contact the carrier concerning the missing piece.
2. Check the packing list to see if the missing item(s) are on back order.
3. Carefully check the packing material and container to ensure the
missing item(s) were not overlooked.
4. If you cannot find the item(s), please notify LACO Technologies
immediately
12.3 REPORTING INCORRECT SHIPMENT
If the item received is not the item ordered, contact LACO Technologies
immediately.
19
© 2014 LACO TECHNOLOGIES, INC.
LACO USER MANUAL - VACUUM DEGASSING CHAMBERS AND SYSTEMS
12.4 INITIAL FILLING WITH VACUUM PUMP FLUID
All our rotary vane vacuum pumps are shipped with a full change of
vacuum pump fluid. Always be sure that the oil level is approximately in
the middle of the low and high level marks in the sight glass and please
note that upon start up of the pump, the oil level in the sight glass will
drop slightly.
12.5 CONNECTING THE PUMP TO THE SYSTEM
Clamps and centering rings are supplied for the intake and exhaust ports
of the pump.
CAUTION Do not connect power to your pump until the blank-off
plate is removed from the exhaust port. Operating the
pump with the blank-off in place will damage the pump
and can injure the operator.
All connections must be vacuum tight for your pump to achieve its
ultimate pressure. The 0-ring on the centering ring must be clean to
avoid leaks. Be sure that all quick release clamps are in place and properly
tightened.
Connect The Pump To The System As Follows:
1. Set the pump on an even horizontal surface. It need not be permanently mounted on the surface.
CAUTION Failure to remove the exhaust port cover before starting
the pump could result in damage to the pump.
WARNING Ensure that your vacuum line is connected to the pump’s
intake port and not to the exhaust port. If your vacuum
line has a closed valve, accidentally connecting it to the
pumps exhaust port causes a dangerous overpressure.
NOTE Ideally, the inside diameter of the vacuum line should be
the same size or larger than the (ID) of the intake port. If
the vacuum line is too narrow, it will reduce the pumping
speed.
WARNING Do not install an exhaust line with a smaller ID than the
exhaust port. Restrictions reduce the pumping speed
and could damage the oil seals or cause dangerous
overpressure in the pump.
20
© 2014 LACO TECHNOLOGIES, INC.
LACO USER MANUAL - VACUUM DEGASSING CHAMBERS AND SYSTEMS
1. If possible, install the exhaust line at a slightly descending angle to prevent condensate from flowing back into the pump and contaminating
the pump’s vacuum fluid.
2. If the exhaust line must be installed in the ascending position and the
process gas contains high levels of condensable vapors, connect a
condensate trap to the exhaust port. Condensate traps serve to collect
the condensates from saturated vapors. Contact LACO Technologies
for more information on the correct trap for your pump.
3. If no exhaust line is connected and your pump will be running above
1 Torr inlet pressure, connect an exhaust mist eliminator to the
exhaust port to remove pump fluid vapors and smoke. Contact LACO
Technologies for more information on exhaust mist eliminators.
4. If the exhaust line is attached to a negative pressure exhaust system,
adjust the negative pressure so that the vacuum pump fluid will not be
drawn from the pump.
13. BASIC OPERATION
13.1 START UP
Before starting the pump, please complete the following checklist:
CAUTION Do not connect power to your pump until the blank off
plate is removed from the exhaust port. Operating the
pump with the exhaust port blanked off will damage the
pump and can injure the operator.
1. Be sure that the pump is filled with the appropriate amount of vacuum
fluid.
2. Be sure that all electrical connections have been properly wired and
that there are no bare wires that could cause an electrical shock or fire.
3. Be sure that the rotation of the pump is correct. You will find a
rotational arrow on the front of the motor.
4. Be sure that all system connections have been secured with the
appropriate seal rings and clamps.
WARNING
If your pump has been prepared for oxygen service, check
if an explosion-proof motor is required.
21
© 2014 LACO TECHNOLOGIES, INC.
LACO USER MANUAL - VACUUM DEGASSING CHAMBERS AND SYSTEMS
13.2 OPERATION
1. These vacuum pumps are not designed for use in corrosive service.
When pumping hazardous or corrosive passes, we recommend the
use of an inlet vacuum trap. In addition a pump specially prepared for
perflouropolyether vacuum fluid is required when pumping highly
reactive or extremely corrosive gas. Contact us for recommendations.
2. Periodically check the vacuum fluid level in the sight glass to be sure it
is between the low and high levels. If you are operating the pump with
the gas ballast open, it will be necessary to check the oil level more
frequently.
3. If the vacuum fluid within the pump becomes discolored or
contaminated, change the fluid as soon as possible. Operating the
pump with contaminated or dirty oil will greatly reduce the life
expectancy of the pump and may lead to the cancellation of the
warranty.
13.3 ANTISUCKBACK
If the pump stops with the inlet under vacuum the antisuckback system
will stop air or oil leakage inside the module or into the vacuum chamber.
The vacuum integrity is guaranteed by:
• Quality of machining from surfaces between the functional elements
(stator, plates, housing, etc.).
• The exhaust valves on the exhaust orifice.
• A spring valve automatically closes the oil injection canal in the pump.
When the pump stops, the oil pump exhaust pressure is decreased and a
spring activated valve closes the oil injection canal.
13.4 GAS BALLAST
When condensable vapors (such as water vapor) are being pumped the
gas is compressed beyond its saturated pressure and can condense,
impairing pump performance. The vapor pressure of water at typical pump
temperatures is over 100 Torr. Even small amounts of water in the pump
fluid will have a big effect on pump performance. The gas ballast control
button allows a quantity of air to be injected into the second stage of the
pump during "compression" to reduce the partial pressure of the pumped
gas below its saturated vapor pressure and thus prevent condensation. At
the end of "compression" the pressure in the discharge chamber is greater
than atmospheric. The saturated vapor pressure of pump fluid and the
condensed vapors such as water is higher when it is hot than when it is
cold; therefore it is necessary to wait until the pump reaches its operating
temperature before pumping condensable vapor. Using the gas ballast
increases the ultimate pressure the pump can achieve.
22
© 2014 LACO TECHNOLOGIES, INC.
LACO USER MANUAL - VACUUM DEGASSING CHAMBERS AND SYSTEMS
14. MAINTENANCE
14.1 PREVENTATIVE MAINTENANCE
14.1.5
PUMP FLUID
Every vacuum pump is designed to work best with a specific pump
fluid and the fluid is an active part of the pumping mechanism. For best
performance, care must be used to select fluid with the physical and
chemical properties engineered for the pump. For LACO pumps the ideal
fluid for general purpose pumping is LACO’s LVO19 vacuum fluid. This is
a moderately priced fluid that is engineered to give the best vacuum and
longest life in LACO pumps. Other fluids may give good performance but
our specifications are based on regular use of LVO19 vacuum fluid.
WARNING
If the pump as been used on corrosive, toxic or volatile
chemicals, observe proper safety precautions before
removing the drain plug.
CAUTION Hydrocarbon pump fluid should be changed at the
following times:
1. After a 100 hour break-in period of pump operation.
2. When the pump fluid becomes contaminated or is discolored.
3. When condensation in the pump fluid is present.
4. Before and after the pump has been stored for a long period of time.
5. Perflouropolyether fluid should be reconditioned when it becomes
contaminated.
NOTE 14.1.6
Always change the pump fluid while the pump is warm
to prevent condensable vapors, such as water, from
remaining in the pump.
CHANGING THE PUMP FLUID
1. Turn the pump off and drain the fluid from the pump. Use your fingers
to remove the oil fill cap and the oil drain plug from the pump; allow
the fluid to drain into a suitable container. If the fluid fill cap or fluid
drain cap cannot be loosened with your fingers, cover them with a
cloth and use pliers.
2. After the oil flow diminishes, switch ON the pump, and allow it to run
for about 10 seconds and then switch if OFF.
23
© 2014 LACO TECHNOLOGIES, INC.
LACO USER MANUAL - VACUUM DEGASSING CHAMBERS AND SYSTEMS
3. If the fluid drained from the pump is discolored, contains particulate,
has a foul odor or is very dirty, flush out the pump using the procedure
below until the drained fluid is clean. If your pump requires more than
2 flushes, a foreline trap or oil filtration unit should be installed on the
pump. Contact our company for more information on foreline traps
and oil filtration units.
a. Reinstall the fluid-drain plug with flat gasket into the fluid-drain
port.
b. Refill the pump with LVOFF vacuum pump fluid until the fluid level
is visible in the lower rim of the fluid sight glass.
c. Blank off/on valve off the inlet port.
d. Turn ON the pump and allow it to run for about 10 minutes.
e. Turn the pump OFF and refer to step 1 to drain the vacuum fluid.
4. Charge the pump with fluid as follows:
a. Reinstall the fluid-drain plug with flat gasket into the fluid port.
b. Remove the fluid-fill cap and fill the pump to capacity with LVO10
vacuum pump fluid. Using other than LVO19 vacuum pump fluid
may result in damage to the pump or compromise the pump performance and lifetime.
c. Reinstall the fluid-fill cap with flat gasket.
14.2 LONG TERM STORAGE (2 WEEKS OR LONGER)
Before placing a pump in long term storage, follow the procedure below:
1. Drain all fluids from the pump as described in the previous section.
2. Refill the pump with clean LVO19 or LVOFF vacuum fluid as described
in the section for changing the pump fluid.
3. Always cover both the intake and exhaust ports with caps to keep
any dust or foreign materials from entering the pump. Place pump in
original container if available.
4. Be sure that the pump is stored in a horizontal position with the intake
and exhaust ports facing up.
5. When putting a pump into storage, put a pin hole in both the intake
and exhaust port caps.
24
© 2014 LACO TECHNOLOGIES, INC.
LACO USER MANUAL - VACUUM DEGASSING CHAMBERS AND SYSTEMS
14.3 AVOIDING OIL LEAKS DURING SHIPPING AND
STORAGE
Always drain your vacuum pump of all fluids before shipping. Failure to
do so can result in damaged shipping containers and delays by freight
carriers due to possibility of the presence of hazardous materials in the
event of a spill.
15. TROUBLESHOOTING
SYMPTOM
CHECK
SOLUTION
NOISY MOTOR,
WILL NOT TURN
Power line voltage and
connections
Correct voltage or connections
Any foreign materials
inside the pump
Remove the foreign materials. If
problem is with oil, change oil.
Motor (open internal
circuit)
Replace open windings.
Any foreign materials
inside the exhaust valve.
Remove foreign materials.
Power line voltage and
connections
Fix the leakage
If leakage, valve is open.
.Close the valve.
All the valves in the
vacuum line.
Close if found open
Oil level
Add oil.
Leakage on the device
connected.
Close the intake and recheck.
Moisture content of oil.
Change oil.
Oil regulator.
Replace.
If gas ballast is open.
C lose the gas ballast.
Worn out coupling
mechanism.
Replace coupling.
Worn out key between
motor and pump.
Replace the key and the set
screws.
NOISY AND
HOT PUMP
VACUUM LEVEL
DECLINES
MOTOR RUNS,
BUT NOT PUMP.
25
© 2014 LACO TECHNOLOGIES, INC.
LACO USER MANUAL - VACUUM DEGASSING CHAMBERS AND SYSTEMS
16. APPENDIX E: INSTRUTECH STINGER™ CONVECTION VACUUM
GAUGE MODULE USER MANUAL
16.1 USER INFORMATION
There are operational characteristic differences between solid state
equipment and electromechanical equipment. Because of these
differences, and because there are a variety of uses for solid state
equipment, all persons that apply this equipment must take every
precaution and satisfy themselves that the intended application of this
equipment is safe and used in an acceptable manner.
In no event will InstruTech, Inc. be responsible or liable for indirect or
consequential damages that result from the use or application of this
equipment.
Any examples or diagrams included in this manual are provided solely
for illustrative purposes. Because of the many variables and requirements
imposed on any particular installation, InstruTech, Inc. cannot assume
responsibility or liability for any actual use based on the examples and
diagrams.
No patent liability is assumed by InstruTech, Inc. with respect to use of
information circuits, equipment, or software described in this manual.
Throughout this manual we use notes, notices and apply internationally
recognized symbols and safety messages to make you aware of safety
considerations.
WARNING
Identifies information about practices or circumstances
that can cause electrical or physical hazards which, if
precautions are not taken, could result in death or serious
injury, property damage, or economic loss.
CAUTION
Identifies information about practices or circumstances
that can cause electrical or physical hazards which,
if precautions are not taken, could result in minor or
moderate injury, property damage, or economic loss.
NOTICE
Identifies information that is critical for successful
application and understanding of the product.
Labels may be located on or inside the device to alert people that
dangerous voltages may be present.
26
© 2014 LACO TECHNOLOGIES, INC.
LACO USER MANUAL - VACUUM DEGASSING CHAMBERS AND SYSTEMS
16.2 DESCRIPTION
Thermal conductivity gauges measure pressure indirectly by sensing
the loss of heat from a sensor to the surrounding gases. The higher the
pressure of the surrounding gas, the more heat is conducted away from
the sensor. Pirani thermal conductivity gauges maintain a sensor (usually
a wire) at some constant temperature, and measure the current or power
required to maintain that temperature. A standard Pirani gauge has a
useful measuring range of about 10-4 Torr to 10 Torr. By taking advantage
of convection currents that are generated above 1 Torr, convectionenhanced Pirani gauges increase the measuring range to just above
atmosphere.
The InstruTech® CVM211 Stinger™ module provides the basic signal
conditioning required to turn a convection vacuum gauge into a complete
measuring instrument. There are two different models of Stinger. One
model provides a non-linear analog output, and one setpoint relay. The
non-linear analog output is identical to the MKS Instruments / GranvillePhillips® "S-curve". The other model provides a Log-linear analog output,
and one setpoint relay. A built-in display provides a convenient user
interface for setup and operation of the vacuum gauge. This User Manual is
intended to be used with CVM211 displaying pressure in Torr/ mTorr units
of measure.
27
© 2014 LACO TECHNOLOGIES, INC.
LACO USER MANUAL - VACUUM DEGASSING CHAMBERS AND SYSTEMS
16.3 SPECIFICATIONS
Table 10: Stinger™ Specifications
COMPONENT
DESCRIPTION
MEASUREMENT RANGE (SIGNAL)
1 x 10⁻⁴ to 1000 Torr / 1.33 x 10⁻⁴ to 1333 mbar / 1 x 10⁻² Pa to 133 kPa
ACCURACY - N2 (TYPICAL)
1.0 x 10⁻⁴ to 1.0 x 10⁻³ Torr; 0.1 mTorr resolution
1.0 X 10⁻³ TO 400 TORR; ± 10% OF
READING
400 to 1,000 Torr; ±2.5% of reading
REPEATABILITY - (TYPICAL)
± 2% of reading
DISPLAY
3 digit LED (3 digits from 999 Torr to 10.0 mTorr), (2 digit LED from 9.9 mTorr to 1.0
mTorr), (1 digit LED from 0.9 mTorr to 0.1 mTorr)
MATERIALS EXPOSED TO GASES
Gold-plated tungsten, 304 & 316 stainless steel, glass, nickel, Teflon®
INTERNAL VOLUME
1.589 in3 (26 cm3)
INTERNAL SURFACE AREA
9.25 in2 (59.7 cm2)
WEIGHT
4.8 oz. (136 g)
HOUSING (ELECTRONICS)
Molded plastic
OPERATING TEMPERATURE
0 to +40 °C
STORAGE TEMPERATURE
-40 to +70 °C
BAKEOUT TEMPERATURE
+70 °C max
HUMIDITY
0 to 95% relative humidity, non-condensing
ALTITUDE
Operating; 8,200 ft. (2,500 m) max storage; 41,000 ft. (12,500 m) max
MOUNTING POSITION
Horizontal recommended
ANALOG OUTPUT
Log-linear 1 to 8 Vdc, 1 V/decade, or non-linear analog S-curve 0.375 to 5.659 Vdc
(Granville-Phillips® compatible)
INPUT POWER
11 to 30 Vdc, 2 W protected against power reversal and transient over-voltages
SETPOINT RELAY
One, single-pole double-throw relay (SPDT), 1 A at 30 Vdc resistive, or ac non-inductive
CONNECTOR
9-pin D-sub male
CE COMPLIANCE
EMC Directive 2004/108/EC, EN61326-1, EN55011
Low Voltage Directive 2006/95/EC, EN61010-1
ENVIRONMENTAL
RoHS compliant
16.4 DIMENSIONS
28
© 2014 LACO TECHNOLOGIES, INC.
LACO USER MANUAL - VACUUM DEGASSING CHAMBERS AND SYSTEMS
16.5 PART NUMBERS
Table 11: CVM211 Fittings/Flanges
CVM211 FITTINGS/FLANGES
PART NUMBER WITH LOG-LINEAR ANALOG INPUT
PART NUMBER WITH NONLINEAR ANALOG INPUT
COMBINATION 1/8 IN. NPT MALE - 1/2
IN. TUBE (USE 1/8 IN. NPT MALE OR
1/2 IN. O.D. O-RING COMPRESSION)
CVM211GAL
CVM211GAA
NW16KF
CVM211GBL
CVM211GBA
NW25KF
CVM211GCL
CVM211GCA
NW40KF
CVM211GDL
CVM211GDA
1 1/3 IN. MINI-CF / NW16CF MINICONFLAT®
CVM211GEL
CVM211GEA
2 3/4 IN. CF / NW35CF CONFLAT®
CVM211GFL
CVM211GFA
1/4 IN. CAJON® 4VCR® FEMALE
CVM211GGL
CVM211GGA
1/2 IN. CAJON® 8VCR® FEMALE
CVM211GHL
CVM211GHA
16.6 OPTIONS & ACCESSORIES
29
© 2014 LACO TECHNOLOGIES, INC.
LACO USER MANUAL - VACUUM DEGASSING CHAMBERS AND SYSTEMS
17. SAFETY
InstruTech has designed and tested this product to provide safe and
reliable service, provided it is installed and operated within the strict safety
guidelines provided in this manual. Please read and follow all warnings
and instructions.
To avoid serious injury or death, follow the safety information in this
document. Failure to comply with these safety procedures could result in
serious bodily harm, including death, and or property damage.
Failure to comply with these warnings violates the safety standards of
installation and intended use of this instrument. InstruTech, Inc. disclaims
all liability for the customer’s failure to comply with these instructions.
Although every attempt has been made to consider most possible
installations, InstruTech cannot anticipate every contingency that arises
from various installations, operation, or maintenance of the module. If you
have any questions about the safe installation and use of this product,
please contact InstruTech.
17.1 SAFETY PRECAUTIONS - GENERAL
WARNING
There are no operator serviceable parts or adjustments
inside the product enclosure. Refer servicing to service
trained personnel.
Do not modify this product or substitute any parts without authorization
of qualified InstruTech service trained personnel. Return the product
to an InstruTech qualified service and repair center to ensure that all
safety features are maintained. Do not use this product if unauthorized
modifications have been made.
WARNING
Source power must be removed from the product prior to
performing any servicing.
After servicing this product, ensure that all safety checks are made by a
qualified service person. When replacement parts are required, ensure that
the parts are specified by InstruTech, Inc. Substitutions of non-qualified
parts may result in fire, electric shock or other hazards. Use of unauthorized
parts or modifications made to this product will void the warranty.
To reduce the risk of fire or electric shock, do not expose this product to
rain or moisture. These products are not waterproof and careful attention
must be paid to not spill any type of liquid onto these products. Do not
use these products if they have been damaged. Immediately contact
InstruTech, Inc. to arrange return of the product if it is damaged.
30
© 2014 LACO TECHNOLOGIES, INC.
LACO USER MANUAL - VACUUM DEGASSING CHAMBERS AND SYSTEMS
Due to the possibility of corrosion when used in certain environmental
conditions, it is possible that the product’s safety could be compromised
over time. It is important that the product be periodically inspected for
sound electrical connections and equipment sound electrical connections
and equipment grounding. or electrical insulation has been compromised.
17.2 SAFETY PRECAUTIONS SERVICE AND OPERATION
Ensure that the vacuum port on which the CVM211 vacuum gauge is
mounted is electrically grounded.
Use an appropriate power source of 11 to 30 Vdc, 2 W.
Turn off power to the unit before attempting to service the module.
Turn off power to the unit if a cable or plug is damaged or the product is
not operating normally according to this User Manual. Contact qualified
InstruTech service personnel for any service or troubleshooting condition
that may not be covered by this User Manual.
It is important that the product be periodically inspected for sound
electrical connections and equipment grounding. Do not use if the
equipment grounding or electrical insulation has been compromised.
Do not use if the unit has been dropped or the enclosure has been
damaged. Contact InstruTech for return authorization and instructions for
returning the product to InstruTech for evaluation.
17.3 ELECTRICAL CONDITIONS
WARNING
When high voltage is present in any vacuum system, a
life threatening electrical shock hazard may exist unless
all exposed electrical conductors are maintained at earth
ground potential. This applies to all products that come
in contact with the gas contained in vacuum chambers.
An electrical discharge within a gaseous environment
may couple dangerous high voltage directly to any
ungrounded conductor of electricity. A person could be
seriously injured or killed by coming in contact with an
exposed, ungrounded electrical conductor at high voltage
potential. This condition applies to all products that may
come in contact with the gas inside the vacuum chamber
(vacuum/pressure containment vessel).
31
© 2014 LACO TECHNOLOGIES, INC.
LACO USER MANUAL - VACUUM DEGASSING CHAMBERS AND SYSTEMS
17.3.7
PROPER EQUIPMENT GROUNDING
WARNING
Hazardous voltages that could seriously injure or cause
death are present in many vacuum processes. Verify
that the vacuum port on which the CVM211 vacuum
gauge module is mounted is electrically grounded.
Consult a qualified Electrician if you are in doubt about
your equipment grounding. Proper grounding of your
equipment is essential for safety as well as intended
operation of the equipment. The CVM211 module vacuum
gauge must be connected directly to a good quality earth
ground. Use a ground lug on the CVM211 gauge vacuum
connection / flange if necessary.
WARNING
In order to protect personnel from electric shock and
bodily harm, shield all conductors which are subject to
potential high voltage electrical discharges in or around
the vacuum system.
17.3.8
ELECTRICAL INTERFACE AND CONTROL
It is the user’s responsibility to ensure that the electrical signals from this
product and any connections made to external devices, for example, relays
and solenoids, are used in a safe manner. Always double check the system
set-up before using any signals to automate your process. Perform a
hazardous operation analysis of your system design and ensure safeguards
and personnel safety measures are taken to prevent injury and property
damage.
17.4 OVERPRESSURE AND USE WITH HAZARDOUS
GASES
WARNING
Install suitable protective devices that will limit the level
of pressure inside your vacuum chamber to less than what
the vacuum chamber system components are capable of
withstanding. InstruTech gauges should not be used at
pressures exceeding 1000 Torr absolute pressure.
In cases where an equipment failure could cause a hazardous condition,
always implement fail-safe system operation. For example, use a pressure
relief device in an automatic backfill operation where a malfunction
could result in high internal pressures if the pressure relief device was not
installed on the chamber.
The CVM211 vacuum gauge module is not intended for use at pressures
above 20 psia (1000 torr); DO NOT exceed 35 psig (< 2 ½ bars) pressure
inside the sensor. If your chamber goes to higher pressures, you should
32
© 2014 LACO TECHNOLOGIES, INC.
LACO USER MANUAL - VACUUM DEGASSING CHAMBERS AND SYSTEMS
install an isolation valve or pressure relief device to protect the gauge tube
from overpressure conditions. With some fittings, actual safe overpressure
conditions may be lower; for example, a quick-connect, O-ring
compression fitting may forcibly release the gauge tube from the vacuum
chamber fitting with only a few psi over local uncorrected barometric
(atmospheric) pressure.
CAUTION
If the internal pressure of a vacuum gauge device is
allowed to increase above local uncorrected barometric
pressure (atmospheric pressure side), vacuum fittings
may release and possible overpressure conditions may
cause leaks that would allow the gas inside the gauge
tube to release into the atmosphere of the surrounding
environment. Toxic, pyrophoric and flammable gases
are examples of hazardous gases that if allowed to leak
out of the vacuum/pressure containment vessel into the
atmospheric environment, could cause bodily injury and
possible damage to equipment. Never expose the gauge
tube internal volume to pressure above local atmospheric
pressure when using hazardous gases.
17.5 GASES OTHER THAN NITROGEN / AIR
WARNING
Do not attempt to use with gases other than nitrogen (N2)
or air without referring to correction factor data tables.
InstruTech gauges and modules are calibrated for direct
readout of nitrogen or air. Do not attempt to use with
other gases such as argon (Ar) or carbon dioxide (CO2)
unless accurate conversion data for N2 to other gas is
properly used. Refer to sections titled ”Using the Gauge
With Different Gases”, ”Display” and ”Analog Output” for a
more complete discussion.
WARNING
Do not use this device in an explosive atmosphere or in
the presence of flammable gases, vapors or fumes. Do
not use this device to measure the pressure of explosive
or combustible gases or gas mixtures. The sensor wire in
the gauge normally operates at 125 °C, but if malfunction
should occur, the wire temperature could exceed the
ignition temperature of certain combustible gases and gas
mixture. This could cause an explosion which could result
in serious injury or death.
33
© 2014 LACO TECHNOLOGIES, INC.
LACO USER MANUAL - VACUUM DEGASSING CHAMBERS AND SYSTEMS
18. INSTALLATION
18.1 MECHANICAL INSTALLATION
Mount the CVM211 as close as possible to the pressure
You want to measure. Long or restricted, small diameter tubing will create
a pressure difference between your process chamber and the gauge. This
may cause a delay in response to pressure changes. Mounting the CVM211
too close to a gas source inlet may also cause measurement and control
instability.
Do not mount the CVM211 near a source of heating or cooling, such as
heaters or air conditioning vents.
Mount the CVM211 with its main (long) axis horizontal (see diagram at
right). The CVM211 is calibrated in this orientation. Pressure reading errors
may occur above 1 Torr if the unit is not mounted horizontally. Below 1
Torr, mounting position has little to no effect.
Mount the CVM211 with port down, if possible, to help minimize the effect
of any particles or condensation from collecting in the gauge.
Do not mount the CVM211 where it will be subjected to excessive
vibration. Vibrations may cause unstable readings, measurement errors
and possible mechanical stress to components in the CVM211.
Flanges/ Fittings - follow the manufacturer’s recommendations and note
the following:
- NPT fittings: When connecting the device using a NPT fitting, apply a
thread sealant compound or wrap the threaded portion of the tubing
with one-and-a-half to two wraps of pipe thread seal tape such as PTFE
(Teflon®) tape and hand tighten the gauge into the gauge port. Do not use
a wrench or other tool which may damage the gauge.
18.2 ELECTRICAL INSTALLATION
18.2.9
GROUNDING
Be sure the vacuum gauge and the rest of your vacuum system are
properly grounded to protect personnel from shock and injury. Be aware
that some vacuum fittings, especially those with O-rings when not used
with metal clamps, may not produce a good electrical connection between
the gauge and the chamber it is connected to.
34
© 2014 LACO TECHNOLOGIES, INC.
LACO USER MANUAL - VACUUM DEGASSING CHAMBERS AND SYSTEMS
18.2.10 ELECTRICAL CONNECTIONS
A good recommended practice is to remove power from any cable prior to
connecting or disconnecting it.
The InstruTech CVM211 will directly replace Granville-Phillips® MiniConvectron® modules that have a 9-pin
D-sub connector (DE-9P), and you can use your existing cables and
electronics.
For new installations, fabricate a cable to connect to the signals/functions
you want to use. Signals and pin assignments are described below.
Table 12: Connector and Pinout
PIN NUMBER
PIN DESCRIPTION
1
Relay 1 Normally Open
2
Relay 1 Normally Closed
3
Power Input (11-30 Vdc)
4
Power Ground
5
Analog Output (Log-Linear 1-8 V, or Non-linear Granville-Phillips®
compatible)
6
Relay 1 Common
7
Relay Disable (Disables Relay 1 when connected to pin 4 Ground)
8
Analog Ground
9
35
© 2014 LACO TECHNOLOGIES, INC.
LACO USER MANUAL - VACUUM DEGASSING CHAMBERS AND SYSTEMS
19. SETUP AND OPERATION
19.1 USER INTERFACE BASICS
The user interface is designed for easy operation and a natural progression
of setup parameters. This section gives a brief explanation of operation
and programming parameters. A complete user interface map is provided
following this section.
The CVM211 Stinger module has four settings that can be programmed
by the user with a 3 position switch located on the side of the module
housing. Pressing the switch straight in is referred to as pressing the
<select> key. Pressing the switch upward is referred to as pressing the
<up> key. Pressing the switch downward is referred to as pressing the
<down> key. During setup, and operation, be sure to consider the Torr/
mTorr LEDs.
19.2 PROGRAMMING
1. With the CVM211 in the normal pressure display mode, press and hold
<select> for 3 seconds.
2. The readout displays the value of the ‘setpoint turn-on’ pressure. The
relay energizes when the pressure is below this value [Factory default
= 100 mTorr].
3. a. To keep this value and proceed to the next step, press <select>.
b. To change the value, use the <up> <down> keys. Then press
<select> to save and go to the next step.
4. The readout displays the value of the ‘setpoint turn-off’ pressure. The
relay de-energizes when the pressure is above this value [Factory
default = 200 mTorr].
5. a. To keep this value and proceed to the next step, press <select>.
b. To change the value, use the <up> <down> keys. Then press
<select> to save and go to the next step.
6. The readout will display ‘000’ to indicate the unit is in the "zero adjust"
mode. To properly set "zero", with the CVM211 installed on your
vacuum system, the gauge should be evacuated to a pressure below 1
x 10-4 Torr [Factory default = 000 mTorr].
36
© 2014 LACO TECHNOLOGIES, INC.
LACO USER MANUAL - VACUUM DEGASSING CHAMBERS AND SYSTEMS
7. a. If the gauge is not evacuated to a pressure below 1 x 10⁻⁴ Torr, press
<select> to proceed to the next step, without saving a new "zero"
value.
b. If the gauge is evacuated to a pressure below 1 x 10⁻⁴ Torr, press
<down> to save the new user "zero" and proceed to the next step.
8. The readout will display the current "span" value. To set the
atmospheric pressure reading (also known as the "span" adjustment),
flow nitrogen gas or air into your closed vacuum chamber to allow the
pressure to rise to a known value above 400 Torr. Alternatively, if your
local uncorrected barometric pressure (air) is known, simply vent your
vacuum system chamber to expose the gauge to the local atmospheric
pressure [Factory default = 760 Torr].
9. a. If you do not have a known pressure in the gauge, press <select>
briefly (less than 3 seconds) to exit the setup menu and return to
the normal pressure display without saving a new "span" value.
b. If you do have a known pressure in the gauge, use the <up>
<down> keys to change the displayed value to agree with the
known pressure. Press and hold <select> for 3 seconds until the
displayed pressure switches to the new value. This will save the new
"span" setting and return to the normal pressure display.
10. It is good practice to perform the sequence of checking and adjusting
span (ATM) then zero (VAC) and then, finally re-checking the span
setting to ensure that the circuitry is properly balanced for use in
measuring pressure throughout the intended measurement range.
19.3 RETURN TO FACTORY DEFAULT SETTINGS
You can reset all values to the original factory default settings by holding
the <up> key for 5 seconds. The display will read "dEF" until 5 seconds has
passed, at which point all user settings will be replaced by the original
factory default values and the display will return to the normal pressure
display. If you release the <up> key before 5 seconds has passed, the
display will return to normal pressure display without resetting to factory
defaults.
37
© 2014 LACO TECHNOLOGIES, INC.
LACO USER MANUAL - VACUUM DEGASSING CHAMBERS AND SYSTEMS
19.4 USER INTERFACE MAP
38
© 2014 LACO TECHNOLOGIES, INC.
LACO USER MANUAL - VACUUM DEGASSING CHAMBERS AND SYSTEMS
20. USING THE GAUGE WITH DIFFERENT GASES
A thermal conductivity gauge senses heat loss which depends on the
thermal conductivity of the gas surrounding the sensor. Since different
gases, and mixtures, have different thermal conductivities, the indicated
pressure readings and outputs will also be different. InstruTech convection
gauges (and most other thermal conductivity gauges) are calibrated using
nitrogen (N2). When a gas other than N2 / air is used, correction must be
made for the difference in thermal conductivity between nitrogen (N2)
and the gas in use. The charts and tables on the following pages indicate
how different gases affect the display and output from an InstruTech
convection gauge.
WARNING
Using a thermal conductivity gauge with gases other
than that for which it is calibrated could result in death
or serious injury. Be sure to use gas correction data in this
manual when measuring pressures of gases other than
N2 / air.
For N2 the calibration shows excellent agreement between indicated and
true pressure throughout the range from 10-4 to 1000 Torr. At pressures
below 1 Torr, the calibration curves for the different gases are similar. The
difference in readings at these low pressures is a constant, a function of the
difference between thermal conductivities of the gases.
At pressures above 1 Torr, indicated pressure readings may diverge
significantly. At these higher pressures convection currents in the
gauge become the predominant cause of heat loss from the sensor and
calibration depends on gauge tube geometry and mounting position as
well as gas properties.
Generally, air and N2 are considered the same with respect to thermal
conductivity, but even N2 and air will exhibit slight differences in readings
at higher pressures. For example, when venting a system to atmosphere
using N2, you may see readings change by 30 to 40 Torr after the chamber
is opened and air gradually displaces the N2 in the gauge. For most other
gases the effect is much more significant and may result in a hazardous
condition as described below.
Other considerations when using gases other than N2 / air
FLAMMABLE OR EXPLOSIVE GASES
WARNING
InstruTech convection gauges are neither intrinsically safe
nor explosion proof and are not intended for use in the
presence of flammable or explosive gases or vapors.
Under normal conditions the voltages and currents in InstruTech
convection gauges are too low to cause ignition of flammable gases.
However, under certain failure conditions, sufficient energy could be
39
© 2014 LACO TECHNOLOGIES, INC.
LACO USER MANUAL - VACUUM DEGASSING CHAMBERS AND SYSTEMS
generated to cause flammable vapors or gases to ignite or explode.
Thermal conductivity gauges like the InstruTech convection gauges are
not recommended for use with flammable or explosive gases.
MOISTURE / WATER VAPOR
In some processes (lyophilization, for example) the gas composition may
not change significantly, except for moisture content. Water vapor can
significantly change the response of a thermal gauge and correction
should be made, as you would for any other gas.
OTHER CONTAMINANTS
If your gases condense, coat, or corrode the sensor, the gauge calibration
and response to different gases will change. Generally, if the gauge can be
"calibrated" ("zero" and "span" settings), these changes are small enough
to be ignored. If you can’t set zero and span, the gauge should be replaced
or return to factory for evaluation and possible cleaning.
Gas Correction Chart
The Y- axis of the above chart is actual pressure as measured by a
capacitance manometer, a diaphragm gauge that measures true total
pressure independent of gas composition. The X-axis is the pressure
reading indicated by the convection gauge under test. This chart shows
readings for an InstruTech convection gauge (CVG) and Granville-Phillips®
Convectron® gauge to illustrate that the difference in the response for
both of these types of gauges is virtually indistinguishable.
CAUTION
Do not assume this data applies to other convection
gauges which may or may not be the same.
Refer to the table in Section 21 and note the following examples:
Ex A: If the gas is nitrogen (N2), when the true total pressure is 500 Torr, the
gauge will read 500 Torr.
Ex B: If the gas is argon (Ar), when the true pressure is 100 Torr, the gauge
will read about 9 Torr.
If you are backfilling your vacuum system with Ar, when your system
reaches a pressure of 760 Torr true pressure your gauge will be reading
about 23 Torr. Continuing to backfill your system, attempting to increase
the reading up to 760 Torr, you will over pressurize your chamber which
may present a hazard.
40
© 2014 LACO TECHNOLOGIES, INC.
LACO USER MANUAL - VACUUM DEGASSING CHAMBERS AND SYSTEMS
Ex C: If the gas is helium (He), the gauge will read 999 Torr when pressure
reaches about 10 Torr true pressure and opening the chamber to
atmosphere prematurely may present other hazards for both people and
product.
CAUTION
What these examples illustrate is that using gases other
than nitrogen (N2) without using accurate gas conversion
data and other proper precautions could result in injury to
personnel and/or damage to equipment.
Suggested precautions when using gases other than nitrogen (N2):
Install a pressure relief valve or burst disk on your chamber, to protect it
from overpressure. Post a warning label on your gauge readout that states
"Do Not Exceed ____ Torr Indicated Pressure" (fill in the blank for maximum
indicated pressure for the gas you use) so that an operator using the gauge
will not exceed a safe pressure.
21. DISPLAY
The table below shows the displayed readings at various pressures for
selected gases.
41
© 2014 LACO TECHNOLOGIES, INC.
LACO USER MANUAL - VACUUM DEGASSING CHAMBERS AND SYSTEMS
Examples
1. Gas used is nitrogen (N2). Display shows pressure measurement of 10
Torr. True pressure of nitrogen is 10 Torr.
2. Gas used is argon (Ar). Display shows pressure measurement of 600
mTorr. True pressure of argon is 1 Torr.
3. Gas used is oxygen (O2). Display shows pressure measurement of 486
mTorr. True pressure of oxygen is 500 mTorr.
22. ANALOG OUTPUT
The CVM211 is provided with either a non-linear or a log-linear analog
output.
NON-LINEAR OUTPUT
The first Convectron® gauge controllers produced a non-linear output
signal of 0.375 to 5.659 Vdc for 0 to 1000 Torr of N2, roughly in the shape
of an "S" curve, as shown at right. Granville-Phillips® adopted the same
output curve for most of their Mini-Convectron® modules and controllers
with non-linear output (although in recent years, some Granville-Phillips®
controllers may output variations of the original Scurve).
The non-linear output from InstruTech convection gauges, modules and
controllers duplicates the original S-curve of 0.375 to 5.659 Vdc for 0 to
1000 Torr.
The table shown in section 22.1 contains the lookup data for converting
the non-linear output voltage into pressure values for nitrogen and various
other gases.
LOG-LINEAR OUTPUT
Many InstruTech modules and controllers also provide a log-linear output
signal, as an alternative to the nonlinear signal described above. This
output, shown at right, is a 1 Volt per decade signal that may be easier to
use for data logging or control.
The table shown in section 22.2 contains the lookup data and provides the
formulas for converting the log-linear output voltage into pressure values
for nitrogen and various other gases.
42
© 2014 LACO TECHNOLOGIES, INC.
LACO USER MANUAL - VACUUM DEGASSING CHAMBERS AND SYSTEMS
22.1 NON-LINEAR ANALOG OUTPUT
You may calculate the N2/air pressure represented by the 0.375 to 5.659 V
non-linear analog output voltage for the "S-curve" using a multi-segment,
nth order polynomial function calculation. The coefficients for the nth
order polynomial equation defined for various pressure measurement
ranges are given in the following table:
43
© 2014 LACO TECHNOLOGIES, INC.
LACO USER MANUAL - VACUUM DEGASSING CHAMBERS AND SYSTEMS
The following table is for use with CVM211 Stinger part numbers ending
with the letter "A" providing a nonlinear analog output.
44
© 2014 LACO TECHNOLOGIES, INC.
LACO USER MANUAL - VACUUM DEGASSING CHAMBERS AND SYSTEMS
22.2 LOG-LINEAR ANALOG OUTPUT
The following table is for use with CVM211 Stinger part numbers ending
with the letter "L" providing an output voltage that is linear with respect to
the log of pressure.
45
© 2014 LACO TECHNOLOGIES, INC.
LACO USER MANUAL - VACUUM DEGASSING CHAMBERS AND SYSTEMS
46
© 2014 LACO TECHNOLOGIES, INC.
LACO USER MANUAL - VACUUM DEGASSING CHAMBERS AND SYSTEMS
23. SERVICE
23.1 CALIBRATION
Every InstruTech module is calibrated prior to shipment using nitrogen
(N2). However, you can calibrate the instrument by adjusting zero and
span (atmosphere) using the procedure described previously in section
19.2 titled "Programming" (also see User Interface Map). Zero and span
(atmosphere) calibration affect the displayed value and the output signal.
Zero calibration optimizes performance of the gauge when operating
at a low pressure range of 1 x 10⁻⁴ Torr to 1 x 10⁻³ Torr. If your minimum
operating pressure is higher than 1 x 10⁻³ Torr, it is not normally necessary
to perform calibration at zero and thus, span calibration should be
adequate. If you are able to evacuate your system to below 1 x 10⁻⁴ Torr, it
is always a good practice to check and set zero if necessary. This will also
improve performance in cases where gauge contamination is causing
higher readings than 1 x 10⁻⁴ Torr, even though the system has been
evacuated to below 1 x 10⁻⁴ Torr. Care should be exercised when using
gases other than nitrogen (N2) / air.
LACO VACUUM GAUGE CALIBRATIONS
For vacuum gauge calibration services on ISO-17025, A2LA and NIST
traceable certificates, you can meet demanding quality standards
with vacuum gauge calibration services from LACO Technologies.
Our calibration lab services all types of vacuum gauges (see Range &
Capabilities) most shipping in 2 weeks or less. Calibrations are charged per
sensor. Any associated controllers, displays or power supplies should be
included with the gauge sensors so they can be calibrated as a set.
LACO gauge calibrations services feature:
• Broad Calibration Range
• All Vacuum Gauge Types
• Fast Delivery
• Responsive Technical Support Staff
• A2LA Accredited
A2LA Accredited calibration lab with compliance to ISO/IEC 170252005 and ANSI/NCSL Z540-1-1994. Also complies with ISO-9001 quality
standard.
TO ORDER: Contact the LACO calibration department at 801-486-1004 or
via email at: [email protected] for instructions on how to submit
your gauge or leak standard for service.
47
© 2014 LACO TECHNOLOGIES, INC.
LACO USER MANUAL - VACUUM DEGASSING CHAMBERS AND SYSTEMS
23.2 MAINTENANCE
In general, maintenance is not required for your InstruTech module.
Periodic performance checks may be done by comparing the gauge to a
known reference standard.
23.3 TROUBLESHOOTING
Table 13: Troubleshooting
INDICATION
POSSIBLE CAUSE
POSSIBLE SOLUTION
DISPLAY IS OFF / BLANK
No power
Check power supply & power cable
READINGS APPEAR VERY
DIFFERENT FROM EXPECTED
PRESSURE
• The process gas is different from the gas
used to calibrate the CVM211
• Correct readings for different gas
thermal conductivity. See section 5 on
using the gauge with different gases
READINGS ARE NOISY OR
ERRATIC
• Module has not been calibrated or has
been calibrated incorrectly
• Check that zero and span are adjusted
correctly
• Loose cables or connections
• Check and tighten connections
• Contamination
• Inspect gauge for signs of
contamination such as particles, deposits,
discoloration on gauge inlet. Return to
factory for possible cleaning
• Vibration
• Ensure gauge is not mounted where
excessive vibration is present
GAUGE CANNOT BE
CALIBRATED - ZERO AND
SPAN CAN’T BE ADJUSTED
• Contamination
• Return to factory for possible cleaning
• Sensor failure for other cause
• Return to factory for evaluation
SETPOINT DOES NOT
ACTUATE
Incorrect setup
Check setpoint setup
DISPLAY SHOWS "BAD"
Sensor wire damaged
Return to factory for evaluation
ATMOSPHERIC PRESSURE
READS TOO HIGH AND CAN’T
BE SET TO CORRECT VALUE
• Contamination
• Return to factory for possible cleaning
• Sensor wire damaged
• Return to factory for evaluation
ATMOSPHERIC PRESSURE
READS TOO LOW AND CAN’T
BE SET TO CORRECT VALUE
• Sensor wire damaged
• Return to factory for evaluation
• Contamination
• Return to factory for possible cleaning
48
© 2014 LACO TECHNOLOGIES, INC.
LACO USER MANUAL - VACUUM DEGASSING CHAMBERS AND SYSTEMS
23.4 CONTAMINATION
The most common cause of all vacuum gauge failures is contamination
of the sensor. Noisy or erratic readings, the inability to set zero or
atmosphere and total gauge failure, are all possible indications of gauge
contamination.
Contamination can be generally characterized as either:
A) a reaction of process gases with sensor elements, or
B) an accumulation of material on the sensor elements. Sensors that fail
due to chemical reaction are generally not salvageable. Sensors that fail
due to condensation, coatings, or particles may possibly be restored by
cleaning.
A) Reactive Gases
If process gases react with the materials of construction of the sensor,
the result is corrosion and disintegration of the sensor over time. The
chemistry of the gases used for plasma etching and other reactive
semiconductor processes are examples where this failure mode is possible.
In this case, cleaning can’t solve the problem because the sensor has been
destroyed. The sensor or module must be replaced.
If you experience this failure mode quickly or frequently, you should
consider a different vacuum gauge for your application. Thermal vacuum
gauges may be available with different sensor materials that are not as
reactive with your particular process gases. The standard gold plated
tungsten sensor used in the InstruTech convection gauge is offered
for use with air and inert gases such as N2, argon, etc. InstruTech also
offers platinum sensors for applications not compatible with gold plated
tungsten.
There is no material that is universally chemical resistant; your choice of
vacuum gauge (as well as all other vacuum components) should take into
consideration the potential reactions between your process gases and the
materials of construction. Consider what effect water vapor will have when
combined with your process gases because a finite amount of water will
enter the chamber during venting to atmosphere with air.
B) Oil, Condensation, Coatings, and Particles
If the failure is due to an accumulation of material in the gauge, we may be
able to restore your gauge or module by cleaning. Contamination may be
as simple as condensed water, or as difficult as solid particles.
Oils and hydrocarbons: Exposure of the gauge internal surfaces to oils
and hydrocarbons can result in sensor contamination. Some of these
types of contamination may be removed by cleaning the gauge. If there
49
© 2014 LACO TECHNOLOGIES, INC.
LACO USER MANUAL - VACUUM DEGASSING CHAMBERS AND SYSTEMS
is the possibility of oil back streaming from wet vacuum pumps, it is
recommended that a filter or trap be installed to prevent contamination of
components of your vacuum system.
Condensation: Some gases (such as water vapor) can condense on sensor
surfaces, forming a liquid coating that changes the rate at which heat
is removed from the sensor (which changes the calibration). The sensor
can often be restored simply by pumping on the gauge between process
cycles. A dry N2 purge will help speed up drying, or the gauge may be
gently heated provided temperature doesn’t exceed the specified limit of
40 °C, operating.
Coatings: Some gases can condense on sensor surfaces, forming a solid
coating, which changes the rate at which heat is removed from the sensor.
Some of these coatings may be removed by cleaning the gauge.
Particles: Particles generated by the process may enter the gauge during
the process cycle or during the venting cycle. The result is interference
with heat removal from the sensor. In this case cleaning may be able to
remove particles from the gauge. However, particulate contamination is
the most difficult to remove as particles can become stubbornly trapped
inside the gauge. In some processes, solid particles are created during the
process throughout the chamber including inside the gauge. Particles
tend to form on cooler surfaces such as in a gauge at room temperature.
You may slow down the build-up of particles in the gauge by keeping the
gauge warm (within specified limits) during the process cycle.
Particles in the process chamber may be swept into the gauge during the
vent cycle. The CVM211 has a screen built into the gauge port to help keep
the largest particles out of the gauge. In very dirty applications, or where
particles are small enough to get through the screen, an additional filter
installed on the inlet may help prolong the gauge life.
In some vacuum processes, desorbed and sputtered materials from
the process may enter vacuum components connected to the process
vacuum chamber by line-of-sight transport especially under high vacuum
conditions, i.e., in the molecular flow regime. To prevent materials that
may be transported via line-of-sight momentum from entering your
vacuum gauge or other components, it is advisable to install some form
of apparatus that will block the line-of-sight. In many cases a simple 90o
elbow may help prevent or reduce the transport of particles from entering
your vacuum gauge.
In the event of gauge contamination please contact the factory to return
the gauge for possible cleaning if the gauge has not been exposed to
hazardous materials.
50
© 2014 LACO TECHNOLOGIES, INC.
LACO USER MANUAL - VACUUM DEGASSING CHAMBERS AND SYSTEMS
23.5 MODULE AND SENSOR REPLACEMENT
The CVM211 module is factory calibrated for the specific sensor (gauge
tube) installed in it. If the device fails for any reason, return the CVM211
to the factory to determine if either the sensor or the electronics could be
replaced or if the entire module should be replaced.
24. FACTORY SERVICE AND SUPPORT
If you need help setting up, operating, troubleshooting, or obtaining
a return materials authorization number (RMA number) to return the
module for diagnosis, please contact us during normal business hours
(8:00am to 5:00pm Mountain time) Monday through Friday, at 303-6510551. Or e-mail us at [email protected].
For the safety of our employees, you must down load a material disclosure
form from our website at www.instrutechinc.com Please use this form to
provide a history of the gauge detailing what gases have been used. We
cannot work on gauges that have been exposed to hazardous materials.
25. WARRANTY
SELLER warrants that its products are free of defects in workmanship
and material and fit for the uses set forth in SELLER’s catalog or product
specifications, under the normal use and service for which they are
intended.
The entire warranty obligation of SELLER is for the repair or replacement, at
SELLER’s option, of products or parts (examination of which shall disclose
to SELLER’s satisfaction that it is defective) returned, to SELLER’s plant,
properly identified within twenty four (24) months (unless otherwise
noted) after the date of shipment from InstruTech Plant. BUYER must
obtain the approval of SELLER and a return authorization number prior to
shipment.
Alteration or removal of serial numbers or other identification marks
renders this warranty void. The warranty does not apply to products
or components which have been abused, altered, operated outside of
the environmental specifications of the product, improperly handled
or installed, or units which have not been operated in accordance with
SELLER’s instructions. Furthermore the warranty does not apply to
products that have been contaminated, or when the product or part is
damaged during the warranty period due to causes other than ordinary
wear and tear to the product including, but not limited to, accidents,
transportation, neglect, misuse, use of the product for any purpose other
than that for which it was designed.
THIS WARRANTY IS EXCLUSIVE AND IN LIEU OF ALL OTHER WARRANTIES,
EXPRESS OR IMPLIED, INCLUDING ANY IMPLIED WARRANTY OF
MERCHANTABILITY OR FITNESS FOR A PARTICULAR PURPOSE. THIS
WARRANTY EXTENDS ONLY IN FAVOR OF THE ORIGINAL BUYER. THE
51
© 2014 LACO TECHNOLOGIES, INC.
LACO USER MANUAL - VACUUM DEGASSING CHAMBERS AND SYSTEMS
BUYER’S SOLE REMEDY SHALL BE THE REPAIR OR REPLACEMENT, AS IS EXPRESSLY
PROVIDED HEREIN, OF ANY WARRANTED DEFECTIVE PRODUCT OR PART, AND
UNDER NO CIRCUMSTANCE SHALL SELLER BE LIABLE TO BUYER OR ANYONE
ELSE FOR ANY CONSEQUENTIAL DAMAGES TO PERSONS OR PROPERTY, FOR
INCIDENTAL DAMAGES OR LOSS OF TIME, FOR ANTICIPATED OR LOST PROFITS, OR
ANY OTHER LOSS INCURRED BY THE BUYER RELATED TO THE PRODUCT COVERED
BY THIS WARRANTY. THIS EXCLUSIVE REMEDY SHALL NOT BE DEEMED TO HAVE
FAILED OF ITS ESSENTIAL PURPOSE SO LONG AS SELLER IS WILLING AND ABLE TO
REPAIR OR REPLACE DEFECTIVE PARTS IN THE PRESCRIBED MANNER. THIS LIMITED
WARRANTY MAY NOT BE MODIFIED BY SELLER UNLESS SUCH MODIFICATION OR
WAIVER IS IN WRITING, EXECUTED BY AN AUTHORIZED OFFICER OF SELLER
52
© 2014 LACO TECHNOLOGIES, INC.
LACO USER MANUAL - VACUUM DEGASSING CHAMBERS AND SYSTEMS
53
© 2014 LACO TECHNOLOGIES, INC.


