1
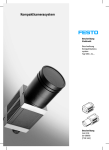
The Checkbox family
Manual
Checkbox
Identbox
Countbox
Sortbox
Manual
526 373
[649 320]
en 0103c
Contents and general instructions
Author . . . . . . . . . . . . . . . . . . . . . . . . . . G. Neumann-Rasaei
Editors . . . . . . . . . . . . . . . . . . . . . . . . H.-J. Drung, M. Holder
Original . . . . . . . . . . . . . . . . . . . . . . . . . . . . . . . German text
Translation . . . . . . . . . . . . . . . . . . . . . transline Deutschland
Layout . . . . . . . . . . . . . . . . . . . Festo AG & Co., Dept. KG-GD
Layout . . . . . . . . . . . . . . . . . . . Festo AG & Co., Dept. KI-DT
Edition . . . . . . . . . . . . . . . . . . . . . . . . . . . . . . . . . . . en 0103c
Title . . . . . . . . . . . . . . . . . . . . . . . . . . . . . . . . . . MANUAL-EN
Designation . . . . . . . . . . . . . . . . . . . . . . . P.BE-Checkbox-EN
Order-no. . . . . . . . . . . . . . . . . . . . . . . . . . . . . . . . . . 526 373
E (Festo AG & Co., D-73726 Esslingen, Federal Republic of
Germany, 2001)
Internet: http://www.festo.com
E-Mail: [email protected]
The copying, distribution and utilization of this document as
well as the communication of its contents to others without
expressed authorization is prohibited. Offenders will be held
liable for the payment of damages. All rights reserved, in particular the right to carry out patent, utility model or ornamental design registrations.
Festo P.BE-Checkbox-EN en 0103c
I
Contents and general instructions
II
Festo P.BE-Checkbox-EN en 0103c
Contents and general instructions
Contents
Designated use . . . . . . . . . . . . . . . . . . . . . . . . . . . . . . . . . . . . . . . . . . . . . . . . . . . . . . . .
Operating requirements . . . . . . . . . . . . . . . . . . . . . . . . . . . . . . . . . . . . . . . . . . . . . . . . .
Target group . . . . . . . . . . . . . . . . . . . . . . . . . . . . . . . . . . . . . . . . . . . . . . . . . . . . . . . . . .
Service . . . . . . . . . . . . . . . . . . . . . . . . . . . . . . . . . . . . . . . . . . . . . . . . . . . . . . . . . . . . . . .
Scope of delivery . . . . . . . . . . . . . . . . . . . . . . . . . . . . . . . . . . . . . . . . . . . . . . . . . . . . . . .
Important user instructions . . . . . . . . . . . . . . . . . . . . . . . . . . . . . . . . . . . . . . . . . . . . . .
Notes on this manual . . . . . . . . . . . . . . . . . . . . . . . . . . . . . . . . . . . . . . . . . . . . . . . . . . .
Documentation on the Checkbox family . . . . . . . . . . . . . . . . . . . . . . . . . . . . . . . . . . . .
Product-specific terms and abbreviations . . . . . . . . . . . . . . . . . . . . . . . . . . . . . . . . . . .
VII
VII
VIII
VIII
VIII
X
XIII
XIV
XIV
1.
System summary . . . . . . . . . . . . . . . . . . . . . . . . . . . . . . . . . . . . . . . . . . . . . . .
1-1
1.1
1.2
1.3
1.4
1.5
1.6
The Checkbox family . . . . . . . . . . . . . . . . . . . . . . . . . . . . . . . . . . . . . . . . . . . . 1-3
Software packages for the Checkbox . . . . . . . . . . . . . . . . . . . . . . . . . . . . . . . 1-4
Scope of functions of the Checkbox . . . . . . . . . . . . . . . . . . . . . . . . . . . . . . . . 1-5
Components of the Checkbox . . . . . . . . . . . . . . . . . . . . . . . . . . . . . . . . . . . . . 1-6
Method of operation of the Checkbox . . . . . . . . . . . . . . . . . . . . . . . . . . . . . . .
1-7
Buffer zone . . . . . . . . . . . . . . . . . . . . . . . . . . . . . . . . . . . . . . . . . . . . . . . . . . . . 1-10
2.
Fitting and Installation . . . . . . . . . . . . . . . . . . . . . . . . . . . . . . . . . . . . . . . . . .
2-1
2.1
2.2
2.2.1
2.2.2
2.3
2.4
2.4.1
2.4.2
2.4.3
2.5
Fitting the modules . . . . . . . . . . . . . . . . . . . . . . . . . . . . . . . . . . . . . . . . . . . . .
Power supply connections of the controller . . . . . . . . . . . . . . . . . . . . . . . . . .
Electrical connection . . . . . . . . . . . . . . . . . . . . . . . . . . . . . . . . . . . . . . . . . . . .
Pneumatic connection . . . . . . . . . . . . . . . . . . . . . . . . . . . . . . . . . . . . . . . . . . .
Operation without buffer zone sensors . . . . . . . . . . . . . . . . . . . . . . . . . . . . . .
Operation with buffer zone sensors . . . . . . . . . . . . . . . . . . . . . . . . . . . . . . . .
Buffer zone sensors at the connection “Sensors” . . . . . . . . . . . . . . . . . . . . .
Buffer zone sensors at the connection “Controller” . . . . . . . . . . . . . . . . . . . .
Controlling the small parts conveyor . . . . . . . . . . . . . . . . . . . . . . . . . . . . . . .
Diagnostic interface . . . . . . . . . . . . . . . . . . . . . . . . . . . . . . . . . . . . . . . . . . . . .
2-3
2-6
2-6
2-7
2-9
2-11
2-11
2-13
2-15
2-16
Festo P.BE-Checkbox-EN en 0103c
III
Contents and general instructions
3.
The I/O module on the Checkbox . . . . . . . . . . . . . . . . . . . . . . . . . . . . . . . . .
3-1
3.1
3.2
3.3
3.4
3.5
3.6
3.7
3.8
I/O functions . . . . . . . . . . . . . . . . . . . . . . . . . . . . . . . . . . . . . . . . . . . . . . . . . . .
Internal power supply of the I/O module . . . . . . . . . . . . . . . . . . . . . . . . . . . .
Connecting a higher-order controller . . . . . . . . . . . . . . . . . . . . . . . . . . . . . . .
Start/stop mode . . . . . . . . . . . . . . . . . . . . . . . . . . . . . . . . . . . . . . . . . . . . . . . .
Counter reading check (Countbox, Sortbox) . . . . . . . . . . . . . . . . . . . . . . . . .
Displays at the transfer position . . . . . . . . . . . . . . . . . . . . . . . . . . . . . . . . . . .
Selecting the parts type/sorting program . . . . . . . . . . . . . . . . . . . . . . . . . . .
Error message . . . . . . . . . . . . . . . . . . . . . . . . . . . . . . . . . . . . . . . . . . . . . . . . . .
3-3
3-5
3-8
3-10
3-13
3-14
3-17
3-21
4.
Commissioning . . . . . . . . . . . . . . . . . . . . . . . . . . . . . . . . . . . . . . . . . . . . . . . .
4-1
4.1
4.2
4.3
4.4
Control panel of the Checkbox . . . . . . . . . . . . . . . . . . . . . . . . . . . . . . . . . . . . .
Switching on and off . . . . . . . . . . . . . . . . . . . . . . . . . . . . . . . . . . . . . . . . . . . . .
Operating modes of the Checkbox . . . . . . . . . . . . . . . . . . . . . . . . . . . . . . . . .
Error diagnosis . . . . . . . . . . . . . . . . . . . . . . . . . . . . . . . . . . . . . . . . . . . . . . . . .
4-3
4-4
4-6
4-7
5.
Teaching parts with the Checkbox . . . . . . . . . . . . . . . . . . . . . . . . . . . . . . . . .
5-1
5.1
5.1.1
5.1.2
5.2
5.2.1
5.2.2
5.2.3
Preparing the teach procedure . . . . . . . . . . . . . . . . . . . . . . . . . . . . . . . . . . . .
5-3
Features and characteristics of the conveyed parts . . . . . . . . . . . . . . . . . . . . 5-3
Set operating mode TEACH . . . . . . . . . . . . . . . . . . . . . . . . . . . . . . . . . . . . . . . 5-5
The teach procedure . . . . . . . . . . . . . . . . . . . . . . . . . . . . . . . . . . . . . . . . . . . .
5-6
Addressing teach data . . . . . . . . . . . . . . . . . . . . . . . . . . . . . . . . . . . . . . . . . . . 5-6
Scanning sample parts . . . . . . . . . . . . . . . . . . . . . . . . . . . . . . . . . . . . . . . . . . 5-7
Saving teach data . . . . . . . . . . . . . . . . . . . . . . . . . . . . . . . . . . . . . . . . . . . . . . . 5-11
6.
Testing parts with the Checkbox . . . . . . . . . . . . . . . . . . . . . . . . . . . . . . . . . .
6-1
6.1
6.1.1
6.1.2
6.1.3
6.1.4
6.1.5
Preparing the test procedure . . . . . . . . . . . . . . . . . . . . . . . . . . . . . . . . . . . . .
Set operating mode SELECT . . . . . . . . . . . . . . . . . . . . . . . . . . . . . . . . . . . . . .
Load the teach data . . . . . . . . . . . . . . . . . . . . . . . . . . . . . . . . . . . . . . . . . . . . .
Set the tolerance . . . . . . . . . . . . . . . . . . . . . . . . . . . . . . . . . . . . . . . . . . . . . . .
Enable the orientations (Countbox, Sortbox) . . . . . . . . . . . . . . . . . . . . . . . . .
Set counter function (Countbox, Sortbox) . . . . . . . . . . . . . . . . . . . . . . . . . . .
6-3
6-3
6-4
6-6
6-7
6-7
IV
Festo P.BE-Checkbox-EN en 0103c
Contents and general instructions
6.2
6.2.1
6.2.2
6.2.3
6.2.4
6.2.5
6.3
6.3.1
6.3.2
6.3.3
6.3.4
Test mode . . . . . . . . . . . . . . . . . . . . . . . . . . . . . . . . . . . . . . . . . . . . . . . . . . . . .
Proceed as follows . . . . . . . . . . . . . . . . . . . . . . . . . . . . . . . . . . . . . . . . . . . . . .
Visual check . . . . . . . . . . . . . . . . . . . . . . . . . . . . . . . . . . . . . . . . . . . . . . . . . . .
Checking the features . . . . . . . . . . . . . . . . . . . . . . . . . . . . . . . . . . . . . . . . . . .
Checking the orientation . . . . . . . . . . . . . . . . . . . . . . . . . . . . . . . . . . . . . . . . .
Influence of tolerance on the test result . . . . . . . . . . . . . . . . . . . . . . . . . . . . .
Automatic mode . . . . . . . . . . . . . . . . . . . . . . . . . . . . . . . . . . . . . . . . . . . . . . . .
Set operating mode SELECT . . . . . . . . . . . . . . . . . . . . . . . . . . . . . . . . . . . . . .
Manual start/stop mode . . . . . . . . . . . . . . . . . . . . . . . . . . . . . . . . . . . . . . . . .
Counter function (Countbox, Sortbox) . . . . . . . . . . . . . . . . . . . . . . . . . . . . . .
Modifying operating parameters . . . . . . . . . . . . . . . . . . . . . . . . . . . . . . . . . . .
6-10
6-10
6-12
6-12
6-13
6-14
6-15
6-15
6-16
6-16
6-18
7.
Maintenance . . . . . . . . . . . . . . . . . . . . . . . . . . . . . . . . . . . . . . . . . . . . . . . . . .
7-1
7.1
7.2
General . . . . . . . . . . . . . . . . . . . . . . . . . . . . . . . . . . . . . . . . . . . . . . . . . . . . . . .
Cleaning . . . . . . . . . . . . . . . . . . . . . . . . . . . . . . . . . . . . . . . . . . . . . . . . . . . . . .
7-3
7-3
A.
Technical appendix . . . . . . . . . . . . . . . . . . . . . . . . . . . . . . . . . . . . . . . . . . . . .
A-1
A.1
A.1.1
A.1.2
A.2
A.3
A.3.1
A.3.2
A.3.3
0
A.4
A.5
A.6
Operating faults . . . . . . . . . . . . . . . . . . . . . . . . . . . . . . . . . . . . . . . . . . . . . . . .
General cause of faults . . . . . . . . . . . . . . . . . . . . . . . . . . . . . . . . . . . . . . . . . .
Error messages . . . . . . . . . . . . . . . . . . . . . . . . . . . . . . . . . . . . . . . . . . . . . . . . .
Status displays on the control panel . . . . . . . . . . . . . . . . . . . . . . . . . . . . . . . .
Calculation examples . . . . . . . . . . . . . . . . . . . . . . . . . . . . . . . . . . . . . . . . . . . .
Bandwidth and tolerance . . . . . . . . . . . . . . . . . . . . . . . . . . . . . . . . . . . . . . . . .
Scatter of characteristics . . . . . . . . . . . . . . . . . . . . . . . . . . . . . . . . . . . . . . . . .
Feature deviation . . . . . . . . . . . . . . . . . . . . . . . . . . . . . . . . . . . . . . . . . . . . . . .
A-3
A-3
A-5
A-10
A-16
A-16
A-18
A-19
B.
Brief instructions . . . . . . . . . . . . . . . . . . . . . . . . . . . . . . . . . . . . . . . . . . . . . . .
B-1
C.
Index . . . . . . . . . . . . . . . . . . . . . . . . . . . . . . . . . . . . . . . . . . . . . . . . . . . . . . . . .
C-1
Pin assignment . . . . . . . . . . . . . . . . . . . . . . . . . . . . . . . . . . . . . . . . . . . . . . . . . A-21
Technical specifications . . . . . . . . . . . . . . . . . . . . . . . . . . . . . . . . . . . . . . . . . . A-24
Accessories . . . . . . . . . . . . . . . . . . . . . . . . . . . . . . . . . . . . . . . . . . . . . . . . . . . . A-27
Festo P.BE-Checkbox-EN en 0103c
V
Contents and general instructions
VI
Festo P.BE-Checkbox-EN en 0103c
Contents and general instructions
Designated use
The Checkbox has been designed for use in manual and industrial applications in enclosed work rooms under normal
operating conditions.
The Checkbox described in this manual is intended exclusively for use as follows:
–
for sorting and rejecting small conveyed parts such as
e.g. screws, springs, bolts.
–
for contact-free checking of the position and quality of the
parts.
Use the Checkbox only as follows:
–
in accordance with designated use
–
in faultless technical condition
–
without any modifications by the user.
No guarantee claims can be accepted if the device is opened.
The specified limits for pressure, temperature, electrical connections etc. must be observed.
Please observe the standards specified in the relevant
chapters and comply with technical regulations, as well as
with national and local regulations.
Operating requirements
Festo P.BE-Checkbox-EN en 0103c
–
The features of the conveyed part which determine the
orientation or quality must be recognizable and distinguishable for the Checkbox.
–
It must be possible to integrate the conveyor unit in the
material flow.
VII
Contents and general instructions
Target group
This manual is intended exclusively for technicians trained in
control and automation technology, who have experience in
installing and commissioning electrical systems.
Service
Please consult your local Festo service centre if you have any
technical problems.
Scope of delivery
Checkbox
Conveyor unit – with conveyor belt or tunnel variant and integrated line camera control unit with operating panel and I/O
interfaces.
Documentation
Description of the Checkbox
Software
CheckKon (function: observe system) including diagnostic
cable
Accessories
–
Compressed air tubing with coupling plug and screw
connector
–
Hybrid connecting cable for control unit/conveyor unit
with two Harting connectors
–
5-pin connector for the conveyor unit.
VIII
Festo P.BE-Checkbox-EN en 0103c
Contents and general instructions
–
2 configurable (blanking) plugs:
–
4-pin round plug for connecting “sensors”
Wired at the factory:
Operation without buffer zone sensors i.e. sensor
inputs 1...2 wired with reference voltage
–
37-pin sub-D plug for connecting the “controller”
Wired at the factory:
Internal power supply of the I/O module.
Operation without buffer zone sensors i.e. sensor
inputs 3...6 wired with reference voltage (Sortbox).
A summary of additional accessories available can be found
in chapter A.6.
Festo P.BE-Checkbox-EN en 0103c
IX
Contents and general instructions
Important user instructions
Danger categories
This manual contains instructions on the possible dangers
which may occur if the product is not used correctly. These
instructions are marked (Warning, Caution, etc.), printed on a
shaded background andmarked additionally with a pictogram. A distinction is made between the following danger
warnings:
Warning
This means that failure to observe this instruction may
result in serious personal injury or damage to property.
Caution
This means that failure to observe this instruction may
result in personal injury or damage to property.
Please note
This means that failure to observe this instruction may
result in damage to property.
The following pictogram marks passages in the text which
describe activities with electrostatically sensitive components.
Electrostatically sensitive components may be damaged if
they are not handled correctly.
X
Festo P.BE-Checkbox-EN en 0103c
Contents and general instructions
Marking special information
The following pictograms mark passages in the text containing special information.
Pictograms
Information
Recommendations, tips and references to other sources of
information.
Accessories
Information about suitable accessories.
Environment
Sections dealing with environmetal aspects.
Identbox, Countbox, Sortbox
Information which only applies to a certain design of Checkbox (Identbox, Countbox or Sortbox).
Text markings
S
The bullet indicates activities which may be carried out in
any order.
1. Figures indicate activities which must be carried out in the
sequence shown from top to bottom.
–
Festo P.BE-Checkbox-EN en 0103c
Hyphens indicate general activities.
XI
Contents and general instructions
Conventions
XII
–
Operating and display components of the controller are
represented in the text in upper-case letters e.g. TYPE
SELECT, TOLERANCE. Supplementary details are shown in
square brackets.
Example: TYPE SELECT [1] indicates the luminous button 1
of the button group TYPE SELECT.
–
Inputs and outputs of the plug connectors are specified
with the pin number as follows:
Input pin 1
I/1
Output pin 2 O/2
–
Plug connectors are shown viewed towards the device.
This representation corresponds to the view (from the
cable side) of the connections to be wired.
Festo P.BE-Checkbox-EN en 0103c
Contents and general instructions
Notes on this manual
This manual refers to the standard design of Identbox, Countbox or Sortbox with operating system version 3.x.
When the Checkbox is switched on, the version number of the
operating system will be shown briefly on the TOLERANCE
display.
The options and parameters available depend on the operating system, the type of Checkbox connected and the pre-settings made at the factory. Special customer-specific designs
may differ in technical data, parameter settings and functionality.
The pre-setting of the Checkbox can be modified if required
with the software packages CheckKon (function “Modify system”) or CheckOpti available as options. Further information
on the software packages can be found in the manuals listed
under “Documentation on the Checkbox family.”
Festo P.BE-Checkbox-EN en 0103c
XIII
Contents and general instructions
Documentation on the Checkbox family
Further information on using the Checkbox can be found in
the following manuals:
Manual
Contents
User manual on the Checkbox family,
type P.BE-Checkbox...
Description of the functioning, commissioning,
operation and maintenance of the relevant Checkbox type: Identbox, Countbox and Sortbox
Description of the Checkbox configurator
software package, type P.SW-CB-KONF-...
Operation of the CheckKon software package
(Checkbox configurator)
Description of the Checkbox optimizer
software package, type P.SW-CB-OPTI-...
Operation of the CheckOpti software package
(Checkbox Optimizer)
Product-specific terms and abbreviations
Term/abbreviation
Meaning
Bad part
A test part on which at least one feature lies outside the tolerances.
C-value
The C-value indicates the extent of the scatter of the features of the
sample parts.
Checkbox
Any device from the Checkbox family (e.g. Identbox, Countbox,
Sortbox).
Feature
Characteristic features are ascertained from the contour data of the
sample and test parts. These are, e.g. length, height etc., as well as a
feature for each configuration tool (CheckOpti).
Good part
A test part on which all features lie within the tolerances.
Orientation
The parts to be checked by the Checkbox may lie facing in different
directions on the conveyor belt. During the teach procedure, you define the orientations by showing the part in different directions.
Orientation 1 is the preferred orientation (nominal orientation).
Parts type
Conveyed part defined by the teach data of the sample parts.
Sample parts
Parts shown during the teach procedure.
XIV
Festo P.BE-Checkbox-EN en 0103c
Contents and general instructions
Term/abbreviation
Meaning
Scatter of features
The value range of a feature ascertained from several parts.
(System) parameter
Checkbox settings (in some cases settings can only be made with
configuration software).
Teach data
All features ascertained during teaching, in each case with min./max.
limits and average value.
Teach procedure
During the teach process, sample parts on the conveyor belt are
shown to the Checkbox. This is also referred to as ”Teaching parts”.
Test data
The test data are the data used for the test. These correspond to the
teach data plus the specified tolerances.
Test parts
Parts shown during the test process.
Test procedure
During the test procedure, test parts on the conveyor belt are shown
to the Checkbox and classified according to their features with regard
to orientation and observance of tolerances. This is also referred to as
”Testing parts”.
Tolerance
Factor in percent related to the average values which has an effect on
the min./max. limits of all the features.
Festo P.BE-Checkbox-EN en 0103c
XV
Contents and general instructions
XVI
Festo P.BE-Checkbox-EN en 0103c
System summary
Chapter 1
Festo P.BE-Checkbox-EN en 0103c
1-1
1. System summary
Contents
1.
System summary . . . . . . . . . . . . . . . . . . . . . . . . . . . . . . . . . . . . . . . . . . . . . . .
1-1
1.1
1.2
1.3
1.4
1.5
1.6
The Checkbox family . . . . . . . . . . . . . . . . . . . . . . . . . . . . . . . . . . . . . . . . . . . . 1-3
Software packages for the Checkbox . . . . . . . . . . . . . . . . . . . . . . . . . . . . . . . 1-4
Scope of functions of the Checkbox . . . . . . . . . . . . . . . . . . . . . . . . . . . . . . . . 1-5
Components of the Checkbox . . . . . . . . . . . . . . . . . . . . . . . . . . . . . . . . . . . . . 1-6
Method of operation of the Checkbox . . . . . . . . . . . . . . . . . . . . . . . . . . . . . . .
1-7
Buffer zone . . . . . . . . . . . . . . . . . . . . . . . . . . . . . . . . . . . . . . . . . . . . . . . . . . . . 1-10
1-2
Festo P.BE-Checkbox-EN en 0103c
1. System summary
1.1
The Checkbox family
The devices in the Checkbox family permit the optical (contactless) positioning and quality check of conveyed parts.
Variants of the Checkbox are available for this purpose, depending on requirements.
Device
Festo P.BE-Checkbox-EN en 0103c
Manual
Identbox
Basic device with separate
rejection of incorrectly orientated parts and bad parts
Countbox
Functions as with Identbox
plus: Counting of good parts
with preselectable nominal
amount
Sortbox
Functions as with Countbox
plus: simultaneous sorting
and commissioning of several different conveyed parts
1-3
1. System summary
1.2
Software packages for the Checkbox
Various software packages are available for user-friendly
commissioning, optimizing and monitoring of the products of
the Checkbox family.
Software package
Functions
Checkbox configurator (CheckKon)
– Displaying and evaluating registered test parts
– Display and protocoling the parts contour as
well as the features derived from the contour.
– Display of the light intensity registered by the
camera.
– Display and printout of the system configuration.
– Displaying and modifying the system parameters.
– Loading a new operating system into the
Checkbox.
Checkbox optimizer (CheckOpti)
– Modifying the teach data independently of the
Checkbox (offline).
– Monitored checking of parts, display of the
registered features.
– Evaluation of the parts check with regard to
reliability (evaluation).
– Graphic representation of test run (deviation
from test part or position).
– Optimizing the parts check by manual adaption of the min./max. values of the teach data
or by configuration tools.
– Support in project planning, administration
and documentation.
Checkbox statistics (CheckStat)
– Display, evaluation and printout of statistical
data of the tested parts.
The software packages have been developed specially for the
Checkbox family products and can be used with all the devices in the Checkbox family.
1-4
Festo P.BE-Checkbox-EN en 0103c
1. System summary
1.3
Scope of functions of the Checkbox
Functions of the Checkbox
IB
CB
SB
Quality check
– Checking the quality, e.g. for shavings or burrs
in the case of swivel and milling parts.
– Machine sorting of faulty and foreign parts.
x
x
x
Position check (nominal orientation)
– Position-orientated supply of good parts to the
following machine.
– Return of incorrectly orientated good parts to
the small parts conveyor.
x
x
x
Check of buffer zone
– Return of good parts when buffer zone is full. If
supplied parts block all buffer zones for a long
period, the small parts conveyor will switch off.
– Checks of the position and of the buffer zone
can be made at the same time.
x
x
x
x
x
IB = Identbox, CB = Countbox, SB = Sortbox
Production count
A continuous counter ascertains the sum of all the
good parts.
– Transport of defined amounts of components
(1...10 million) by specifying a nominal number
of good parts.
– Nominal number freely selectable for each parts
type.
Festo P.BE-Checkbox-EN en 0103c
Sorting
– Simultaneous transport of different parts types
from a small parts amount.
– Sorting into different buffer zones.
x
Commissioning
Putting together a parts assortment
– Transport of defined amounts of components
(1...10 million) by specifying a nominal number
of good parts.
– Nominal number freely selectable for each parts
type.
x
1-5
1. System summary
1.4
Components of the Checkbox
1 Controller
3
4
2 Conveyor unit
Conveyor belt
3 Stop edge
2
4 Conveyor unit
camera housing
1
Fig. 1/1: Components of the Checkbox
The Checkbox consists of two compact modules:
The controller
Conveyor unit
with control panel:
–
I/O interfaces
–
configurable test functions.
with high-quality line camera, LED light strip and conveyor
belt suitable for industrial use. An encoder can be fitted onto
the conveyor unit. The variants of the conveyor unit are distinguished by the following:
–
the maximum size of the conveyed part, the camera
resolution
–
the belt speed, the direction of movement of the belt
–
the number of reject positions.
Further information on the various designs of conveyor unit
can be found in the chapter A.5 “Technical specifications”.
1-6
Festo P.BE-Checkbox-EN en 0103c
1. System summary
1.5
Method of operation of the Checkbox
The method of operation of the Checkbox is based on
–
the contactless recognition of small parts
–
the teaching of new parts without programming
–
an integrated quality check.
1 The rejection of
incorrectly orientated parts
2 Rejection of
faulty or foreign
parts
1
2
3
3 Output of good
parts via a buffer
zone
4 Conveyor belt of
the Chekbox
5 Small parts
conveyor
4
5
Fig. 1/2: Conveyor path (example)
Recognizing
Festo P.BE-Checkbox-EN en 0103c
A small parts conveyor (e.g. vibrator conveyor, centrifugal
machine, stage conveyor) sorts out the conveyed parts and
passes them on to the conveyor belt of the conveyor unit. The
conveyor belt passes the parts between the line camera and
the LED lighting. The camera registers each conveyed part in
contour images. From the contours the system ascertains
part-specific features such as the length, breadth and surface.
1-7
1. System summary
On the basis of the features, the Checkbox recognizes:
Learning
–
the parts type
–
the orientation
–
the observance of dimensions
–
the quality.
The nominal contour of a conveyed part type is ascertained
by a simple procedure.
1. Addressing
You select a memory location for the conveyed part type.
2. Scanning
You “show” the camera several samples of this conveyed
part type in the nominal orientation one after the other. If
necessary, you then scan the sample parts in further
orientations.
3. Saving
At the end of the teaching process, you save the features
of the parts type as the teach data under the memory
address set.
Checking
Each conveyed part registered is compared with the saved
teach data and separated according to the different types.
The test parts are separated basically via three paths:
–
Good parts are carried e.g. to an assembly plant.
–
Incorrectly orientated parts are returned to the small
parts conveyor.
–
Faulty or foreign parts are rejected.
The conveyor unit is fitted with at least two compressed air
nozzles which blow conveyed parts down from the belt at
certain positions. The remaining conveyed parts leave the
belt at the end.
1-8
Festo P.BE-Checkbox-EN en 0103c
1. System summary
Standard delivery positions of the Checkbox
Identbox/Countbox
3
2 1
1
2
3
Blow down position for incorrectly orientated
parts, superfluous parts or if parts are jammed.
Blow-down position for bad parts (faulty parts,
foreign parts).
Delivery position for good parts, e.g. in the
buffer zone of an assembly machine.
Sortbox
3
2
2
2
1
The Sortbox is fitted with 2, 4 or 6 compressed air
nozzles depending on type for rejecting/blowing
down parts.
1
2
3
Blow down position for incorrectly orientated
parts, superfluous parts or if parts are jammed.
Blow-down position for different types of good
parts.
Blow-down position for bad parts (faulty parts,
foreign parts).
The standard configuration set at the factory determines the
positions at which the tested parts leave the conveyor belt.
The number and arrangement of the delivery positions can
vary depending on the Checkbox version. The assignment of
the positions can be modified with the CheckKon software
(function “Modify system”).
Festo P.BE-Checkbox-EN en 0103c
1-9
1. System summary
1.6
Buffer zone
The buffer zone serves as a parts buffer for the following machine, e.g. assembly plant, and must be of such a size as to
permit operation of the machine with as litttle interruption as
possible. The Checkbox can monitor the status of fitted buffer
zones by means of sensors and switches off the small parts
conveyor, e.g. if it is overloaded.
Buffer zone sensors
Please note
When selecting the sensors, make sure that the sensor
output has a potential of 24 V DC (normally-closed function) in the off position.
This ensures reliable operation of the supply system and
prevents the system from becoming jammed, e.g. in the
event of a cable fracture.
Signal delay
The buffer zone inputs are processed by the Checkbox with a
debounce time. The sensor signal is only evaluated if it is
present for at least 1 second. This delay prevents each conveyed part passing from triggering the signal “Buffer zone
full” at the sensor.
The delay time of 1 second between the registering of a conveyed part by the sensor and the interpretation of the signal
by the Checkbox must be taken into account whene the
buffer zone sections are planned.
CheckKon
With the CheckKon software you can modify the following
settings of the buffer zones.
1-10
–
Switching logic (buffer zone sensor type = normally open/
closed).
–
Signal delay (minimum sensor signal duration for status
“Buffer zone empty” or “Buffer zone full”.
Festo P.BE-Checkbox-EN en 0103c
1. System summary
Dimensioning
Buffer zone sections
IB
CB
SB
Buffer zone section A
Section between conveyor belt and sensor
Section A must accept all conveyed parts which lie
between the camera and the sensor when a conveyed part has been registered by the sensor. The
length depends on:
– the geometry of the conveyed parts
– the maximum transport rate of the small parts
conveyor
– the length of the conveyor belt
x
x
x
Buffer zone section AB
Section between sensors 1 and 2 (only buffer
zones with 2 sensors).
Section AB determines the switching delay (hysteresis) of the small parts conveyor for regulating
the supply of parts. The longer the section is, the
less is the switching frequency.
x
x
Buffer zone section B
Section between sensor and following machine.
When the small parts conveyor is switched on
again, operation of the assembly plant without
interruption must be guaranteed before the first
new conveyed parts arrive. Section B must be designed so that a sufficient number of conveyed
parts are available. The length depends on:
– the geometry of the conveyed parts
– the maximum time delay beween the small
parts conveyor being switched on again and the
availability of the new conveyed parts
– the length and speed of the conveyor belt
x
x
IB = Identbox, CB = Countbox, SB = Sortbox
Festo P.BE-Checkbox-EN en 0103c
x
1-11
1. System summary
Identbox, Countbox
Identbox and Countbox are operated with a buffer zone. The
buffer zone can be monitored by one, or for switching delay
(hysteresis) of the small parts conveyor, with two sensors.
Buffer zone with one sensor (Identbox/Countbox)
1 Conveyor belt of
1
the Checkbox
2 Buffer zone
3 Sensor 1
2
4 Buffer zone
3
section A
5 Section B
4
5
Fig. 1/3: Buffer zone sections (1 sensor)
Signal level
Meaning
Result
LOW
at sensor 1
Buffer zone is full
– LCD TOLERANCE switches to FULL
– Good parts are blown down
– After a preset time, e.g. 30 s, the small parts conveyor
will be switched off
– The conveyor belt continues to run
HIGH
at sensor 1
Sensor does not
register any conveyed part
The small parts conveyor is switched on.
24 V DC active low
1-12
Festo P.BE-Checkbox-EN en 0103c
1. System summary
Buffer zone with two sensors (Identbox/Countbox)
1 Conveyor belt of
the Checkbox
2 Sensor 2
1
3 Sensor 1
4 Buffer zone
2
5 Buffer zone
3
section A
6 Section AB
4
5
7 Section B
6
7
Fig. 1/4: Buffer zone sections (2 sensors)
Signal level
Meaning
Result
LOW
at sensor 2
Buffer zone is full
– LCD TOLERANCE switches to FULL
– Good parts are blown down
– After a preset time, e.g. 30 s, the small parts conveyor
will be switched off
– The conveyor belt continues to run
HIGH
at sensor 1
Sensor does not
register any conveyed part
The small parts conveyor is switched on.
24 V DC active low
Festo P.BE-Checkbox-EN en 0103c
1-13
1. System summary
Sortbox
The Sortbox is operated with max. 6 buffer zones. Each buffer
zone can be monitored by a sensor.
Buffer zones each with one sensor (Sortbox)
1 Conveyor belt of
1
the Checkbox
2 Sensor 1
2
3 Buffer zone
4 Buffer zone
3
section A
4
5 Section B
5
Fig. 1/5: Buffer zone sections (1 sensor per buffer zone)
Signal level
Meaning
Result
LOW
at individual
sensor outputs
Individual buffer
zones are full
– LCD TOLERANCE shows FULL for the relevant parts
type.
– Following good parts of the parts type are blown down.
– Bad or foreign parts are transported to the delivery
position.
LOW
at all sensor
outputs
All buffer zones
are full
– LCD TOLERANCE switches to FULL and flashes at
1 second intervals.
– After a preset time, e.g. 30 s, the small parts conveyor
will be switched off.
– The conveyor belt continues to run.
HIGH
on at least one
sensor output
At least one
sensor does not
register any conveyed part
The small parts conveyor is switched on.
24 V DC active low
1-14
Festo P.BE-Checkbox-EN en 0103c
Fitting and Installation
Chapter 2
Festo P.BE-Checkbox-EN en 0103c
2-1
2. Fitting and Installation
Contents
2.
Fitting and Installation . . . . . . . . . . . . . . . . . . . . . . . . . . . . . . . . . . . . . . . . . .
2-1
2.1
2.2
2.2.1
2.2.2
2.3
2.4
2.4.1
2.4.2
2.4.3
2.5
Fitting the modules . . . . . . . . . . . . . . . . . . . . . . . . . . . . . . . . . . . . . . . . . . . . .
Power supply connections of the controller . . . . . . . . . . . . . . . . . . . . . . . . . .
Electrical connection . . . . . . . . . . . . . . . . . . . . . . . . . . . . . . . . . . . . . . . . . . . .
Pneumatic connection . . . . . . . . . . . . . . . . . . . . . . . . . . . . . . . . . . . . . . . . . . .
Operation without buffer zone sensors . . . . . . . . . . . . . . . . . . . . . . . . . . . . . .
Operation with buffer zone sensors . . . . . . . . . . . . . . . . . . . . . . . . . . . . . . . .
Buffer zone sensors at the connection “Sensors” . . . . . . . . . . . . . . . . . . . . .
Buffer zone sensors at the connection “Controller” . . . . . . . . . . . . . . . . . . . .
Controlling the small parts conveyor . . . . . . . . . . . . . . . . . . . . . . . . . . . . . . .
Diagnostic interface . . . . . . . . . . . . . . . . . . . . . . . . . . . . . . . . . . . . . . . . . . . . .
2-3
2-6
2-6
2-7
2-9
2-11
2-11
2-13
2-15
2-16
2-2
Festo P.BE-Checkbox-EN en 0103c
2. Fitting and Installation
2.1
Fitting the modules
Transport
Always transport the Checkbox in the original packing;
further transport safety measures are not required.
Mounting location
Please note
Handle all the modules on the Checkbox with care. Please
note especially the following ambient conditions:
– The checkbox must be placed in a location free of
vibration.
– The ambient air must be clean: free of oil, no varnish
spray, no grinding dust.
– Screening from external light and extreme magnetic
fields (e.g. by induction furnaces).
In this way you will achieve optimum test results and guarantee a long service life of the devices.
Space required
Festo P.BE-Checkbox-EN en 0103c
Please observe the space required for mounting the Checkbox. The dimensions of the Checkbox and weight specifications can be found in chapter A5.
2-3
2. Fitting and Installation
Fastening the
conveyor unit
There are threaded holes on the bottom of the conveyor unit
for fastening it with standard profile sections, e.g. ITEM,
HERON, ROBOTUNITS.
ITEM profile section
80 x 80 mm
1 Item profile section
80 x 80 mm
2 Item automatic
connector
3 4 x slotted head screw
M6x40 DIN 912
Fastening the controller
2-4
HERON profile section
50 x 50 mm
1 Heron profile section
50 x 50 mm
2 Heron connector HV-50
as connector
3 2 x slotted head screw
M8
Fasten the controller with 4 M8 screws on the rear of the controller housing.
Festo P.BE-Checkbox-EN en 0103c
2. Fitting and Installation
Fitting guides
Integrate the conveyor unit in the material flow in order to
ensure a reliable supply of parts from the small parts conveyor onto the conveyor belt. Ensure also the transfer of parts
from the conveyor belt to the buffer zone (e.g. drop pipe,
slide, shaker) of the next machine by mechanical devies.
You can obtain mounting plates as accessories for fastening
mechanical supply or delivery guides to the conveyor unit.
Connecting the controller
There are plug connectors on the side of the controller for
periphery devices, control and signal connections. Further
information on the individual connections can be found in the
chapters which follow.
1
2
3
4
5
6
1 Controller X4
2 Conveyor unit with camera (hybrid cable) X5
3 Mains cable
4 Diagnostic interface X1
5 Small parts conveyor X2
6 Buffer zone sensors X3
Fig. 2/1: Connections and interfaces of the controller
Festo P.BE-Checkbox-EN en 0103c
2-5
2. Fitting and Installation
2.2
Power supply connections of the controller
2.2.1 Electrical connection
Warning
Before carrying out installation and maintenance work
always switch off the power supply. Connect the devices
only when they are switched off.
The power supply for the Checkbox must comply with the
following requirements:
–
Voltage range: 85 V to 264 V
–
Frequency: 50 Hz/60 Hz
The power unit of the Checkbox automatically recognizes the
voltage applied. Adjustment by hand is not necessary.
Warning
Connect the Checkbox only when it is in faultless condition.
Use only the original connecting cable.
1 Controller X4
2 Conveyor unit
with camera X5
3 Mains cable
1
2
3
Fig. 2/2: Electrical connections of the controller
2-6
Festo P.BE-Checkbox-EN en 0103c
2. Fitting and Installation
Connect the Checkbox modules to the power supply as follows:
S
To provide the power supply for the I/O module, insert
the plug “Controller” into connection 1 on the connection side of the controller. The plug is set at the factory to
“Internal power supply”. Please refer here to the information in chapter 3.2.
S
Connect the hybrid cable on the connection side of the
controller to connection 2 on the bottom of the conveyor unit.
Please note
Insert the hybrid cable very carefully. Make sure that the
plug is fully inserted before you close the locking lever.
This will prevent the contacts from bending.
S
Plug in the mains cable for the power supply to the Checkbox.
2.2.2 Pneumatic connection
Please note
Connect the Checkbox only to filtered, non-lubricated and
dried compressed air. In this way you will avoid damage to
the devices as a result of contaminated compressed air.
The compressed air supply for the rejecct valves must fulfil
the following requirements:
Festo P.BE-Checkbox-EN en 0103c
–
supply: 4...6 bar overpressure
–
non-lubricated
–
dried and filtered with filter 40 ìm.
2-7
2. Fitting and Installation
Please note
There must be an overpressure of 4...6 bar in the operating
modes SELECT and AUTO. Only in this way can you be sure
that bad or incorrect parts are blown down and are not
deposited in the following machine.
1 Compressed air
connection
2 Connecting the
controller
1
2
Fig. 2/3: Connections of the conveyor unit
Please note
Use the Checkbox only with the compressed air tubing
from Festo included in delivery:
part no. 152 587 (@ 8 mm, 3 m long, quick coupling plug).
Connect the Checkbox conveyor unit to the compressed air
supply as follows:
2-8
S
Insert the end of the compressed air tubing intended for
the screw connector into the Quickstar plug connector on
the conveyor unit.
S
Provide the connection to the compressed air supply via
the quick coupling plug on the compressed air tubing.
S
Use a screwdriver to set the blow-down pressure on the
restrictors of the reject valves so that the conveyed parts
can be reliably blown down.
Festo P.BE-Checkbox-EN en 0103c
2. Fitting and Installation
2.3
Operation without buffer zone sensors
1 Controller X4
2 Sensors X3
1
2
Fig. 2/4: Connecting the plugs “Controller” and “Sensors”
For operation without buffer zone sensors, all sensor inputs
of the connections “Controller” and “Sensors” must be set to
HIGH. Only in this way is the Checkbox ready to operate.
Otherwise the LCD TOLERANCE will show the status FULL in
the operating mode AUTO. All good parts will be blown down.
The small parts conveyor will be switched off after 30 s (standard setting).
Use the (blanking) plugs wired at the factory to connect the
sensor inputs with the 24 V DC reference voltage.
Festo P.BE-Checkbox-EN en 0103c
–
The 4-pin plug “Sensors” for the buffer zone sensors
1...2.
–
The 37-pin Sub-D plug “Controller” alternatively for the
buffer zone sensors 1...2 (Identbox, Countbox) or 1...6
(Sortbox).
S
Screw the plug “Sensors” into connection 2. Sensor
inputs 1...2 are then wired with the reference voltage.
S
Make sure that the plug “Controller” is inserted at connection 1 (see 2.2.1 Supplying the I/O module). At the
same time, sensor inputs 3...6 of the Sortbox are wired
with the reference voltage.
2-9
2. Fitting and Installation
Operation without buffer zone sensors
Connector socket “Sensors” on the Checkbox
O/1
24 V DC reference sensors
I/2
Buffer zone sensor 2
O/3
0 V reference sensors
I/4
Buffer zone sensor 1
O/3
I/4
I/2
O/1
The sensor inputs are negative-switching (normally-closed).
If 24 V DC is applied, the small parts conveyor will be switched on.
The 4-pin plug “Sensors” wired at the factory bridges the sensor
inputs I/2 and I/4 with 24 V DC. The inputs I/25 and I/26 at the connection “Controller” are then connected internally with the reference
voltage.
Operation without buffer zone sensors
Connector socket “Controller” on the Sortbox
O/7
24 V DC reference voltage
I/25
Buffer zone sensor 1
I/6
Buffer zone sensor 2
I/24
Sortbox Buffer zone sensor 3
I/5
Sortbox Buffer zone sensor 4
I/23
Sortbox Buffer zone sensor 5
I/4
Sortbox Buffer zone sensor 6
Sensor inputs I/25 and I/26 are already connected internally to
24 V DC via the plug “Sensors”. The plug “Controller” wired at the
factory bridges the connections “Buffer zone sensors 3...6”.
2-10
Festo P.BE-Checkbox-EN en 0103c
2. Fitting and Installation
2.4
Operation with buffer zone sensors
Use the plugs provided for connecting buffer zone sensors to
the Checkbox:
–
the 4-pin plug “Sensors” with 1...2 sensors (chapter
2.4.1)
–
the 37-pin Sub-D plug “Controller” with more than two
sensors (Sortbox, chapter 2.4.2).
The plug “Controller” is wired at the factory for internal power
supply of the I/O module. This configuration is only permitted
for operation with buffer zone sensors. If you connect the
Checkbox to other devices, e.g. a PLC, via the connection
“Controller,” you must connect the I/O module to an external
power supply.
2.4.1 Buffer zone sensors at the connection “Sensors”
Use the 4-pin plug “Sensors” provided.
1. Loosen the knurled nut of the plug from the plug housing.
2. Loosen the screw terminals on the plug and remove the
bridges fitted at the factory between the sensor inputs
and the reference voltage.
3. Connect the buffer zone sensors to the non-assigned
sensor inputs.
4. Screw the plug into the plug housing.
Festo P.BE-Checkbox-EN en 0103c
2-11
2. Fitting and Installation
Operation with 2 buffer zone sensors
Connector socket “Sensors” on the Checkbox
O/1
24 V DC
Reference voltage
I/2
Buffer zone sensor 2
O/3
I/4
O/3
0V
Reference voltage for sensors
I/2
O/1
I/4
Buffer zone sensor 1
The sensor inputs are negative-switching (normally-closed).
If 24 V DC is applied, the small parts conveyor will be switched on.
As an option, direct connection with a Festo DUO cable is also possible. Cable designation signal x (= I/1), signal x+1 (= I/2).
If only one buffer zone sensor is required, bridge the unused
sensor input according to your Checkbox type.
Operation with 1 buffer zone sensor
Connector socket “Sensors” on the Checkbox
2-12
O/3
I/4
I/2
O/1
O/3
I/4
I/2
O/1
Identbox, Countbox
Connect both sensor inputs I/4 and I/2
with each other.
Sortbox
Connect the unused sensor input, e.g. I/2,
with the 24 V DC reference voltage (HIGH).
Festo P.BE-Checkbox-EN en 0103c
2. Fitting and Installation
Please note
S Screw the ready-to-use plug “Sensors” into connection
2 (Fig. 2/4).
S Insert the plug “Controller” wired at the factory into
connection 1.
Only in this way is the Checkbox ready to operate.
2.4.2 Buffer zone sensors at the connection “Controller”
Use the Sub-D plug “Controller” provided, if you wish to connect more than two buffer zone sensors to the Sortbox.
1. Loosen both screws and locking rings on the Sub-D plug.
2. Remove the bridges fitted at the factory between the
sensor inputs and the reference voltage.
3. Connect the buffer zome sensors with the unused sensor
inputs (see following table).
4. Connect unused sensor inputs with the 24 V DC reference
voltage (HIGH).
5. Place the locking rings on the screws and tighten the plug
on the plug housing.
6. Insert the plug into connection 1 (Fig. 2/4).
Festo P.BE-Checkbox-EN en 0103c
2-13
2. Fitting and Installation
Operation with 2 buffer zone sensors
Connector socket “Controller” on the Sortbox
O/7
24 V DC reference voltage
O/26
GND 0 v reference voltage
I/25
Buffer zone sensor 1
I/6
Buffer zone sensor 2
I/24
Buffer zone sensor 3
I/5
Buffer zone sensor 4
I/23
Buffer zone sensor 5
I/4
Buffer zone sensor 6
Please note
The inputs “Sensor 1” and “Sensor 2“ are provided both
at connection “Sensors” as well as at connection “Controller”.
If you are using both sensor inputs at the connection
“Controller”:
S Remove the bridges fitted at the factory in the plug
“Sensors”.
S Then screw the plug “Sensors” into connection 2
(Fig. 2/4).
Only in this way is the Checkbox ready to operate.
2-14
Festo P.BE-Checkbox-EN en 0103c
2. Fitting and Installation
2.4.3 Controlling the small parts conveyor
If there is no connection on the small parts conveyor for an
external switching contact, you can use the power circuit
module available as an accessory for controlling the small
parts conveyor.
1 Conveyor unit X2
1
Fig. 2/5: Connection “Small parts conveyor” on the Checkbox
If an external switching contact can be connected to the small
parts conveyor, connect it according to the following pin assignment:
Connector plug “Small parts conveyor” on the Checkbox
1
Normally-open contact 1
2
Normally-open contact 2
3 4 5
Not assigned
Contact loading 48 V / 100 mA
5
4
3
1
2
1
2
On the connection “Controller” there is also an output (O/37)
intended for controlling the small parts conveyor. However,
this is not designed as a floating normally-open contact, but
as a 24 V power output.
Festo P.BE-Checkbox-EN en 0103c
2-15
2. Fitting and Installation
2.5
Diagnostic interface
In order to connect the Checkbox to the PC, use the serial
diagnostic cable with 4-pin round plug (connection Checkbox)
and 9-pin Sub-D plug (connection PC).
1 Diagnostic
1
interface X1
Fig. 2/6: Diagnostic connection of the controller
The diagnostic cable is included in delivery with the Checkbox
or with the CheckKon software. If required, the diagnostic
cable is also available as an accessory, see Appendix A.6.
S
S
Connect the diagnostic cable to the following connections:
–
the diagnostic interface (X1) on the Checkbox,
–
a serial interface COM1 or COM2 of the PC.
Remove the diagnostic cable as soon as you have finished
working with CheckKon/CheckOpti. In this way you will
avoid malfunctioning of the Checkbox.
If, in exceptional cases, the connection between the PC and
the Checkbox is necessary for continuous operation:
S
Use an electrical isolation (optocoupler) between the PC
and the Checkbox. If you have any technical problems,
please consult your Festo Service.
Further information on commissioning, optimizing and monitoring the Checkbox via the PC interface can be found in the
documentation for the software packages CheckOpti and
CheckKon.
2-16
Festo P.BE-Checkbox-EN en 0103c
The I/O module on the Checkbox
Chapter 3
Festo P.BE-Checkbox-EN en 0103c
3-1
3. The I/O module on the Checkbox
Contents
3.
The I/O module on the Checkbox . . . . . . . . . . . . . . . . . . . . . . . . . . . . . . . . .
3-1
3.1
3.2
3.3
3.4
3.5
3.6
3.7
3.8
I/O functions . . . . . . . . . . . . . . . . . . . . . . . . . . . . . . . . . . . . . . . . . . . . . . . . . . .
Internal power supply of the I/O module . . . . . . . . . . . . . . . . . . . . . . . . . . . .
Connecting a higher-order controller . . . . . . . . . . . . . . . . . . . . . . . . . . . . . . .
Start/stop mode . . . . . . . . . . . . . . . . . . . . . . . . . . . . . . . . . . . . . . . . . . . . . . . .
Counter reading check (Countbox, Sortbox) . . . . . . . . . . . . . . . . . . . . . . . . .
Displays at the transfer position . . . . . . . . . . . . . . . . . . . . . . . . . . . . . . . . . . .
Selecting the parts type/sorting program . . . . . . . . . . . . . . . . . . . . . . . . . . .
Error message . . . . . . . . . . . . . . . . . . . . . . . . . . . . . . . . . . . . . . . . . . . . . . . . . .
3-3
3-5
3-8
3-10
3-13
3-14
3-17
3-21
3-2
Festo P.BE-Checkbox-EN en 0103c
3. The I/O module on the Checkbox
3.1
I/O functions
1 Controller X4
1
Fig. 3/1: Connector socket “Controller” on the Checkbox
The connection “Controller” contains the I/O module of the
Checkbox with the following switching and connecting possibilities:
Connector socket “Controller”
Pin
Connection
Function
I/4...I/6
I/23...I/25
Buffer zone
sensors
Depending on Checkbox design – 2 to 6 sensor inputs. The configuration of these inputs is described
in chapters 2.3 “Operation without buffer zone sensors” and 2.4 “Operation with buffer zone sensors”.
O/37
Conveyor unit
A 24 V power output is provided at pin 37 for controlling the small parts conveyor (see also chapter
2.4.2 “Controlling the small parts conveyor”).
O/1...O/3
O/9...O/12
O/15, O/20
O/28...O/31
O/21, O/22
I/32, I/33
Controller
For communication of the Checkbox e.g. with a
programamble logic controller or a subsequent
machine: See further information in chapter 3.3
“Connecting a higher-order controller”.
26, 7
Reference voltage
GND, + 24 V DC
15, 16
34, 35
Power supply
Internal or external power supply for the I/O module is described in section 3.2 “Power supply for
the I/O module”.
Festo P.BE-Checkbox-EN en 0103c
3-3
3. The I/O module on the Checkbox
Electrical characteristics
Electrical characteristics of the I/O signals
Outputs
– Max. current loading per channel:
250 mA
– Max. sum current of all outputs: 1.5 A
– PNP-switching
Inputs
–
–
–
–
Input current: 5 mA (constant)
Logical “1”:
1 : VON > 15 V
Logical “0”: VON < 7 V
PNP-switching
Please note
If you use high resistance measuring devices for measuring the voltage at the outputs, a minimum loading of 1 mA
will be required.
In this way you can be sure that correct voltage values will
be displayed.
3-4
Festo P.BE-Checkbox-EN en 0103c
3. The I/O module on the Checkbox
3.2
Internal power supply of the I/O module
The I/O module of the Checkbox is connected via pin I/15
(24 V DC) and pin I/34 (GND) to the built-in power unit or
external power source. Use the Sub-D plug “Controller” provided for connecting the power supply.
Important note
In the case of internal supply of the I/O module, devices
connected to the Checkbox have direct electrical coupling
with the power supply for the Checkbox processor.
The circuit type “Internal supply” is therefore only permitted for connecting buffer zone sensors. The circuit type
“External supply” is stipulated for other applications.
Internal supply
The plug “Controller” is wired at the factory for internal power
supply for operation with buffer zone sensors. The I/O module is operated thus via the power unit for the Checkbox.
Connector socket “Controller” on the Checkbox
Internal power supply
O/16
Internal GND
O/35
Internal + 24 V DC
I/15
External GND
I/34
External + 24 V DC
GND
+ 24 V DC
Festo P.BE-Checkbox-EN en 0103c
3-5
3. The I/O module on the Checkbox
External supply
External supply of the I/O module is stipulated to ensure EMC
conformity. The external supply must be electrically isolated
from the internal power supply to the Checkbox.
The external power supply also supplies the valves at the
blow-down positions on the conveyor unit. The power unit
must therefore be designed for loading currents of 1...3 A.
Important note
Connect the I/O module of he Checkbox to an external
power supply if you are using the Checkbox in conjunction
with other devices. To do this, modify the factory setting of
the Sub-D plug “Controller” provided.
In this way you will avoid malfunctioning and damage to
the device.
Connector socket “Controller” on the Checkbox
External power supply
I/15
External GND
I/34
External + 24 V DC
GND
+ 24 V DC
Use the Sub-D plug “Controller”.
1. Loosen both screws and locking rings on the plug
housing.
2. Remove the bridge between pins 16 and 15 (GND).
3. Remove the bridge between pins 35 and 34 (+ 24 V DC).
4. Connect pin 15 with the earth/ground potential (0 V) of
the external power supply.
3-6
Festo P.BE-Checkbox-EN en 0103c
3. The I/O module on the Checkbox
5. Connect pin 34 with the + 24 V potential of the external
power supply.
6. Place the locking rings on the screws and tighten the
plug on the plug housing.
7. Insert the configured plug into the connection
“Controller”.
Reference voltages
The voltage applied to pins I/15 and I/34 is available as reference voltage at pins O/7 and O/26. In the stop status this
reference voltage is switched off.
Pin
Title
Function
O/26
Reference voltage
GND
e.g. as reference potential for PLC
O/7
Reference voltage
+ 24 V DC
e.g. as power supply for buffer zone
sensors
Fuses 300 mA, self-resetting
Festo P.BE-Checkbox-EN en 0103c
3-7
3. The I/O module on the Checkbox
3.3
Connecting a higher-order controller
Important note
If you connect the Checkbox to other devices, e.g. a PLC,
via the connection “Controller”, you must connect the I/O
module to an external power supply (see chapter 3.2).
You can then guarantee faultless operation and prevent
serious damage to the Checkbox electronics.
For remote control of the Checkbox, connect the following
control and signal lines of the I/O module:
3-8
Pin
Title
Function
I/33
O/2
O/14
Remote start
Operating mode 0
Operating mode 1
Start/stop mode (remote)
O/31
O/12
O/30
O/11
O/29
O/20
O/1
Actuator 1
Actuator 2
Actuator 3
Actuator 4
Actuator 5
Actuator 6
Actuator 7
Displays at the transfer
position:
– Good parts
– Incorrectly orientated
parts/incorrect parts
type
– Bad/foreign parts
O/3
O/22
O/21
Fault status 0: Warning
Fault status 1: Error
Fault status 2: Classification
Error messages
Festo P.BE-Checkbox-EN en 0103c
3. The I/O module on the Checkbox
The following functions are type-specific:
Pin
Title
Function
Identbox
I/10
I/28
I/9
I/27
I/8
Parts type bit 0
Parts type bit 1
Parts type bit 2
Parts type bit 3
Parts type bit 4
External type selection
Countbox
I/32
O/13
Start new counting cycle
Preselected counter reading reached
Counter reading check
I/10
I/28
I/9
I/27
I/8
Parts type bit 0
Parts type bit 1
Parts type bit 2
Parts type bit 3
Parts type bit 4
External type selection
Sortbox
Festo P.BE-Checkbox-EN en 0103c
I/32
O/13
Start new counting cycle
Preselected counter reading of all parts types
reached
Counter reading check
I/10
I/28
I/9
I/27
Sorting program bit 0
Sorting program bit 1
Sorting program bit 2
Sorting program bit 3
External sorting program
selection
3-9
3. The I/O module on the Checkbox
3.4
Start/stop mode
Remote-controlled starting presupposes that the Checkbox
has been switched on with the mains switch.
The Checkbox is started with a change of signal at pin I/33
LOW>HIGH and stopped again by a change of signal
HIGH>LOW.
Pin
Signal level
Meaning
I/33
LOW>HIGH
Starts the Checkbox
HIGH>LOW
Stops the Checkbox
1. Apply LOW for ½ second
2. Apply HIGH permanently
Deleting the error
The following applies with alternating control either by manual operation or via the I/O module:
3-10
–
After a manual start:
If the Checkbox is switched on with the START button, it
can still be switched off with the change of signal
HIGH>LOW (stop signal) at pin I/33.
–
After a start signal from the controller:
If there is a constant HIGH signal at pin I/33, the Checkbox can still be switched off with the STOP button.
–
After a manual stop:
With a change of signal LOW>HIGH (start signal) at I/33,
the Checkbox can be switched on again after a manual
stop.
Festo P.BE-Checkbox-EN en 0103c
3. The I/O module on the Checkbox
The modification to the operating status with a manual start
or stop is passed on to the controller via O/14 and O/2. The
output signals differ according to operating mode and status,
as represented in the pulse-time diagrams.
Operating Pulse-time diagram
Operating status after a manual stop:
mode
AUTO
Pin I/33
Remote start
Pin O/14
Checkbox mode 1
Pin O/2
Checkbox mode 0
TEACH
Pin I/33
Remote start
Pin O/14
Checkbox mode 1
Pin O/2
Checkbox mode 0
SELECT
Pin I/33
Remote start
Pin O/14
Checkbox mode 1
Pin O/2
Checkbox mode 0
Festo P.BE-Checkbox-EN en 0103c
1
0
1
0
1
0
1
0
1
0
1
0
1
0
1
0
1
0
3-11
3. The I/O module on the Checkbox
Operating Pulse-time diagram
Operating status Switching on again after a manual
mode
stop:
1
SELECT
Pin I/33
Remote start
Pin O/14
Checkbox mode 1
Pin O/2
Checkbox mode 0
0
1
0
1
0
t off > 3 s
Manual stop
Operating Pulse-time diagram
Operating status External stop signal from the
mode
controller after a manual start
SELECT
Pin I/33
Remote start
Pin O/14
Checkbox mode 1
Pin O/2
Checkbox mode 0
1
0
1
0
1
0
t on (min. 3 s)
Manual start
3-12
Festo P.BE-Checkbox-EN en 0103c
3. The I/O module on the Checkbox
3.5
Counter reading check (Countbox, Sortbox)
Good parts counting with preselected number of items
When the last good part of a counting process reaches the
reject position for bad or foreign parts, output O/13 will be
switched from LOW>HIGH (nominal number reached) via the
connection “Controller”.
In order to start the counting cycle again, you must switch
output I/32 from LOW>HIGH. The Checkbox then resets output O/13 from HIGH>LOW and begins the new counting cycle.
Pin
Signal level
Meaning
I/32
HIGH
Starts the new counting cycle
O/13
HIGH
Preselected counter reading
(of all parts types) reached
O/13
LOW
Preselected counter status not
yet reached.
Pulse-time diagram
Counter reading check
Pin I/32
Start new counting cycle
100 ms < tsc < 500 ms
1
Pin O/13
Preselected counter
reading reached
tpc = max. 600 ms
1
sc = start counting cycle
Festo P.BE-Checkbox-EN en 0103c
0
t sc
0
t pc
pc = preselected counter status
3-13
3. The I/O module on the Checkbox
3.6
Displays at the transfer position
The number and arrangement of the delivery positions can
vary depending on the Checkbox version. The following diagram refers to the standard configuration set at the factory.
Standard transfer positions of the Identbox/Countbox on a
conveyor unit with 2 reject positions
The compressed air valves of the reject positions are connected directly to the outputs actuators 1...2. These outputs
are set at + 24 V DC if the parts test delivers the following
result:
–
incorrectly orientated or superfluous (good) part
–
bad or foreign part.
If the Checkbox recognizes a test part as a good part,
pin O/30 (actuator 3) will be set from rest potential 0 V to
+ 24 V DC.
Signal level: Actuators 1...3
Pin
Connection “Controller” of the Identbox/Countbox
3-14
Actuator 1
The + 24 V DC signal is present when the
test part passes the reject nozzle for incorrectly orientated or superfluous good
parts. The duration of the signal corresponds to the time the part requires to
pass the nozzle.
O/31
Actuator 2
The + 24 V DC signal is present when the
test part passes the reject nozzle for bad
or foreign parts. The duration of the signal
corresponds to the time the part requires
to pass the nozzle.
O/12
Actuator 3
The + 24 V DC signal is present when the
good part passes the end of the system
edge (guide rail of the conveyor unit).
O/30
Festo P.BE-Checkbox-EN en 0103c
3. The I/O module on the Checkbox
The outputs O/1, O/11, O/20, O/29 are intended as an option
for further actuators. If the appropriate periphery is present,
four further reject positions can be installed via these outputs.
Note the following when evaluating the output sugnals
“Actuators...” by means of a higher-order controller: If the
test parts are passed through at a high rate, some parts may
be blown back although previously tested parts have not yet
been blown down. This delay arises due to the long distance
between the return valve and the reject valve.
Standard transfer positions of the Identbox/Countbox on a
conveyor unit with 6 reject positions
The compressed air valves of the reject positions are connected directly to the outputs actuators 1.6. These outputs
are set at + 24 V DC if the parts test delivers the following
result:
–
incorrectly orientated or superfluous (good) part
–
good part of a certain parts type.
If the Checkbox recognizes a test part as a bad or foreign
part, pin O/1 (actuator 7) will be set from rest potential 0 V to
+ 24 V DC.
Festo P.BE-Checkbox-EN en 0103c
3-15
3. The I/O module on the Checkbox
Signal level: Actuators 1...7
Pin
Connection “Controller” of the Sortbox
3-16
Actuator 1
The + 24 V DC signal is present when the
test part passes the reject nozzle for incorrectly orientated or superfluous good
parts. The duration of the signal corresponds to the time the part requires to
pass the nozzle.
O/31
Actuators 2...6
The +24 V DC signals are present when
test parts pass the reject nozzle for good
parts of a certain parts type. The duration of the signal corresponds to the
time the part requires to pass the nozzle.
O/12
O/30
O/11
O/29
O/20
Actuator 7
The + 24 V DC signal is present when the
bad or foreign part passes the end of the
system edge (guide rail of the conveyor
unit).
O/1
Festo P.BE-Checkbox-EN en 0103c
3. The I/O module on the Checkbox
3.7
Selecting the parts type/sorting program
A higher-order controller can automatically change the parts
type of the Identbox/Countbox or the sorting program of the
Sortbox:
–
Pin I/33 > LOW:
The Checkbox switches to the stop status.
–
The signals at the inputs are then set according to the
binary coding of the desired parts type or sorting program (see following tables). The signals must be present
permanently.
–
Pin I/33 > HIGH:
The Checkbox switches to the start status.
The selection possibility is limited to maximum 30 parts types
or 14 sorting programs.
The selection depends on the operating system of the Checkbox. For this reason, not all binary codings specified lead to
the selection of a valid parts type/sorting program.
Festo P.BE-Checkbox-EN en 0103c
3-17
3. The I/O module on the Checkbox
Identbox, Countbox
Binary coding of the parts type
3-18
Parts type
I/10
20
I/28
21
I/9
22
I/27
23
I/8
24
No preselection
LOW
LOW
LOW
LOW
LOW
1
HIGH
LOW
LOW
LOW
LOW
2
LOW
HIGH
LOW
LOW
LOW
3
HIGH
HIGH
LOW
LOW
LOW
4
LOW
LOW
HIGH
LOW
LOW
5
HIGH
LOW
HIGH
LOW
LOW
6
LOW
HIGH
HIGH
LOW
LOW
7
HIGH
HIGH
HIGH
LOW
LOW
8
LOW
LOW
LOW
HIGH
LOW
9
HIGH
LOW
LOW
HIGH
LOW
10
LOW
HIGH
LOW
HIGH
LOW
11
HIGH
HIGH
LOW
HIGH
LOW
12
LOW
LOW
HIGH
HIGH
LOW
13
HIGH
LOW
HIGH
HIGH
LOW
14
LOW
HIGH
HIGH
HIGH
LOW
15
HIGH
HIGH
HIGH
HIGH
LOW
16
LOW
LOW
LOW
LOW
HIGH
...
...
...
...
...
...
30
LOW
LOW
LOW
LOW
HIGH
No preselection
HIGH
HIGH
HIGH
HIGH
HIGH
Festo P.BE-Checkbox-EN en 0103c
3. The I/O module on the Checkbox
Sortbox
Binary coding of the sorting program
Festo P.BE-Checkbox-EN en 0103c
Sorting program
I/10
20
I/28
21
I/9
22
I/27
23
No preselection
LOW
LOW
LOW
LOW
1
HIGH
LOW
LOW
LOW
2
LOW
HIGH
LOW
LOW
3
HIGH
HIGH
LOW
LOW
4
LOW
LOW
HIGH
LOW
5
HIGH
LOW
HIGH
LOW
6
LOW
HIGH
HIGH
LOW
7
HIGH
HIGH
HIGH
LOW
8
LOW
LOW
LOW
HIGH
9
HIGH
LOW
LOW
HIGH
10
LOW
HIGH
LOW
HIGH
11
HIGH
HIGH
LOW
HIGH
12
LOW
LOW
HIGH
HIGH
13
HIGH
LOW
HIGH
HIGH
14
LOW
HIGH
HIGH
HIGH
No preselection
HIGH
HIGH
HIGH
HIGH
3-19
3. The I/O module on the Checkbox
Identbox, Countbox
Pulse-time diagram Parts type change 1 > 10
1
Pin I/10
0
1
Pin I/28
0
1
Pin I/9
0
1
Pin I/27
0
1
Pin I/8
0
1
Pin I/33
Remote start
0
min. 1 s
Sortbox
Pulse-time diagram Sorting program change 2 > 1
Pin I/10
Bit 0
1
0
1
Pin I/28
Bit 1
Pin I/9
Bit 2
Pin I/27
Bit 3
0
1
0
1
0
1
Pin I/33
Remote start
min. 1 s
3-20
Festo P.BE-Checkbox-EN en 0103c
3. The I/O module on the Checkbox
3.8
Error message
The Checkbox signals faults at the connection “Controller” as:
–
Warning at pin O/22
–
Fault at pin O/3
The output signals are evaluated e.g. with a machine light
with the following displays:
Green: faultless operation
Yellow: Warning
Red:
Fault
Signal level: Error message
O/22
O/3
There is a fault
HIGH
LOW
There is a warning
LOW
HIGH
The classification of the warning or of the fault is made via pin
O/21 as shown in the two following tables:
Error
Errors indicate a functional fault in the Checkbox. The Checkbox stops and the operator must intervene.
Code E... Signal level: Error
O/22
O/3
O/21
< 60
Ambient error
Recognition error
or memory error
HIGH
LOW
LOW
> = 60
Hardwar error
HIGH
LOW
HIGH
As standard, all error messages which stop the Checkbox are
defined as errors.
Festo P.BE-Checkbox-EN en 0103c
3-21
3. The I/O module on the Checkbox
By means of a factory configuration or subsequent conversion with the aid of the CheckKon configurator software, error
E 05 can be redefined as a warning.
Warnings
3-22
Warnings indicate a status of the Checkbox which requires
the intervention of the operator.
Signal level: Warning
O/22
O/3
O/21
Material jam or small parts conveyor is
empty (E 05).
LOW
HIGH
HIGH
Festo P.BE-Checkbox-EN en 0103c
Commissioning
Chapter 4
Festo P.BE-Checkbox-EN en 0103c
4-1
4. Commissioning
Contents
4.
Commissioning . . . . . . . . . . . . . . . . . . . . . . . . . . . . . . . . . . . . . . . . . . . . . . . .
4-1
4.1
4.2
4.3
4.4
Control panel of the Checkbox . . . . . . . . . . . . . . . . . . . . . . . . . . . . . . . . . . . . .
Switching on and off . . . . . . . . . . . . . . . . . . . . . . . . . . . . . . . . . . . . . . . . . . . . .
Operating modes of the Checkbox . . . . . . . . . . . . . . . . . . . . . . . . . . . . . . . . .
Error diagnosis . . . . . . . . . . . . . . . . . . . . . . . . . . . . . . . . . . . . . . . . . . . . . . . . .
4-3
4-4
4-6
4-7
4-2
Festo P.BE-Checkbox-EN en 0103c
4. Commissioning
4.1
Control panel of the Checkbox
3
2
4
1
5
Operating elements
Functions
1 Illuminated buttons for
TYPE SELECT [1]...[6]
2 Keyswitch for selecting the
– TEACH
– SELECT
– AUTO
3 Countbox/Sortbox:
– LCD COUNTER
4 Display for showing and
– LCD TOLERANCE
selecting/displaying the
parts type
operating
p
g modes
Display for selecting the
counter type and for
setting the counter
Display of current counter status
or nominal number
– Illuminated buttons Acceptance of the good parts
OFF: in nominal orientation
ON: in all orientations
– Push buttons [-][+] Select counter function,
preselect nominal number,
reset counter
setting the test parameters
– Push buttons [-][+]
5 Illuminated buttons for mo- – STATUS (yellow)
nitoring and controlling the
operating status
Learning new parts
Test //adapt
p p
parameters
Automatic mode
– START (green)
– STOP (red)
Display of configuration,
Error messages
Test results ...
Setting the memory group
Orientation, tolerance
Status display / error quitting
Switching on
Switching off
Fig. 4/1: Control panel of the Checkbox
Festo P.BE-Checkbox-EN en 0103c
4-3
4. Commissioning
4.2
Switching on and off
Before switching on the Checkbox you must carry out the
following steps as described in chapters 2 and 3:
1. Fitting the modules
2. Connecting the compressed air supply
3. Connecting the power supply
4. Configuration of the connectings “Sensors” and “Controller”: Insert (blanking) plugs or connect the control
cables for buffer zone sensors.
1 Mains switch
2 LCD TOLERANCE
1
3 START button
4 STOP button
2
4
3
Fig. 4/2: Operating panel
4-4
Festo P.BE-Checkbox-EN en 0103c
4. Commissioning
Switching on
Switch on the Checkbox as follows:
1. Actuate the mains switch on the connection side of the
controller.
2. When you have switched on, all the displays and illuminated buttons of the Checkbox will light up briefly and
indicate readiness to operate. The LCD TOLERANCE will
then show the following system information, one item
after the other:
LCD
Meaning
Letter for Checkbox design I(dent), C(ount) or S(ort)
and version status of the operating system.
Example: Identbox version 3.0
Number of memory groups or sorting programs
(Sortbox) and also letter E with system setting “with
encoder”. Example: 6 memory locations, encoder
System setting of the camera resolution.
Example: 1024 pixels
3. Start the Checkbox with the green illuminated button
START. The conveyor belt runs. The START button is lit
continuously.
Switching off
Switch off the Checkbox as follows:
1. Press the STOP button. The STOP button is lit continuously. The conveyor belt remains at a stand.
2. Switch off the mains switch on the connection side of the
controller.
Festo P.BE-Checkbox-EN en 0103c
4-5
4. Commissioning
4.3
Operating modes of the Checkbox
For teaching and checking the conveyed parts you can select
one of three operating modes in the Checkbox: TEACH,
SELECT and AUTO. You can switch the operating mode with
the key switch on the control panel (Fig. 4.1).
TEACH mode
In the TEACH mode the Checkbox learns all features for the
parts check with the aid of sample parts. The following steps
are required here:
1. Addressing teach data
2. Scanning sample parts
3. Saving teach data
SELECT mode
You can set the SELECT mode in order to
S
save the teach data
S
check the test procedure
S
set the test parameters.
When you switch from TEACH mode to SELECT mode, all the
current teach data will be saved automatically. The following
parameters will be set in the SELECT mode:
SELECT mode
IB
CB
SB
Selecting the parts type/sorting program
x
x
x
Optimizing the tolerance
x
x
x
Accept good part only in nominal orientation or in
all orientations
x
x
Selecting and setting the counter function
x
x
IB = Identbox, CB = Countbox, SB = Sortbox
AUTO mode
4-6
In the AUTO mode the test procedure runs automatically and
can only be influenced manually by means of the START/
STOP buttons.
Festo P.BE-Checkbox-EN en 0103c
4. Commissioning
4.4
Error diagnosis
A diagnostic system is incorporated in the controller of the
Checkbox. If an operating fault is recognized, the LCD display
TOLERANCE will show an error code and the illuminated buttons TYPE SELECT, STATUS, STOP will flash. As standard all
defined error messages are declared as an error, in reaction
to which the Checkbox stops.
The Checkbox can be set as the customer desires; depending
therefore on the design of the Checkbox or software configuration:
–
the error E 05 can be redefined as a warning
–
the error messages E 01, E 02, E 04, E 05, E 06 can be
deactivated.
The following error groups are defined:
Festo P.BE-Checkbox-EN en 0103c
Code
Group
Explanation
E 01...12
Ambient error
Fault in the compressed air supply, the power supply, the parts
supply; dirty lens etc.
E 20...21
Recognition errors
Orierntations or sample parts
cannot be distinguished
E 40...43
Loss of data
Teach data, configuration data or
system parameters are not compatible or do not exist
>=E 60
hardware error
Internal error (can only be rectified
by after-sales service)
4-7
4. Commissioning
A detailed list of the codes and instructions on eliminating
faults can be found in Appendix A.1.
After eliminating faults:
4-8
S
Quit the error message with the STATUS button.
S
Press the STOP button, then the START button.
Festo P.BE-Checkbox-EN en 0103c
Teaching parts with the Checkbox
Chapter 5
Festo P.BE-Checkbox-EN en 0103c
5-1
5. Teaching parts with the Checkbox
Contents
5.
Things learn with the Checkbox . . . . . . . . . . . . . . . . . . . . . . . . . . . . . . . . . .
5.1
5.1.1
5.1.2
5.2
5.2.1
5.2.2
5.2.3
Preparing the teach procedure . . . . . . . . . . . . . . . . . . . . . . . . . . . . . . . . . . . .
5-3
Features and characteristics of the conveyed parts . . . . . . . . . . . . . . . . . . . . 5-3
Set operating mode TEACH . . . . . . . . . . . . . . . . . . . . . . . . . . . . . . . . . . . . . . . 5-5
The teach procedure . . . . . . . . . . . . . . . . . . . . . . . . . . . . . . . . . . . . . . . . . . . .
5-6
Addressing teach data . . . . . . . . . . . . . . . . . . . . . . . . . . . . . . . . . . . . . . . . . . . 5-6
Scanning sample parts . . . . . . . . . . . . . . . . . . . . . . . . . . . . . . . . . . . . . . . . . . 5-7
Saving teach data . . . . . . . . . . . . . . . . . . . . . . . . . . . . . . . . . . . . . . . . . . . . . . . 5-11
5-2
5-1
Festo P.BE-Checkbox-EN en 0103c
5. Teaching parts with the Checkbox
5.1
Preparing the teach procedure
If you are using the CheckKon/CheckOpti software packages,
please note the instructions in the software manuals on how
to prepare the teach procedure.
As standard during the teach procedure, the parts are blown
down from the belt at the first blow-down position. This is to
ensure that no sample parts are unintentionaly transported
further to the next machine.
5.1.1 Features and characteristics of the conveyed parts
The Checkbox registers conveyed parts as two-dimensional,
black-white profile pictures (parts contour). Features for distinguishing different good parts are derived from the parts
contour. Discolouring and surface faults do not influence the
test result during this recognition process.
The features of the conveyed part, which determine orientation and quality and which are important for the distinguishing process, must be recognizable to the Checkbox.
Provide suitable sample parts for every parts type in accordance with the following specifications:
–
Festo P.BE-Checkbox-EN en 0103c
The sample parts show all the characteristics which a part
classified as “good” should possess.
Use different sample parts with a usual scatter of features. With the scatter of features, you can determine the
extent to which test parts later classified as “good” may
deviate from each other.
5-3
5. Teaching parts with the Checkbox
–
Small rotationally symmetric parts are particularly suitable. Non-rotationally symmetric parts can however also
be checked if a pre-orientation of the conveyed parts is
made with the small parts conveyor.
–
The conveyed part must be supplied correctly on the conveyor belt.
–
5-4
–
The length, diameter and height of a conveyed part
must be suited to the conveyor unit type, see chapter
1.4.
–
The conveyed part must be supplied in a stable
orientation (it must not roll away or vibrate).
The conveyed part must be blown down reliably by the
reject nozzles.
Exceptionally large conveyed parts made of heavy material (e.g. steel) with streamlined shape may, under certain circumstances, not be blown down. Carry out a test to
make sure that the conveyed parts are blown down.
Festo P.BE-Checkbox-EN en 0103c
5. Teaching parts with the Checkbox
5.1.2 Set operating mode TEACH
Prepare the Checkbox as follows:
1. Mount the Checkbox ready for operation.
2. Switch the Checkbox on (mains switch on the rear of the
controller).
3. Set operating mode TEACH with the key switch.
4. Press the green START button.
The LCD TOLERANCE shows the current setting of the memory
group. The START button lights up; the coveyor belt remains
at a stand.
Festo P.BE-Checkbox-EN en 0103c
5-5
5. Teaching parts with the Checkbox
5.2
The teach procedure
Carry out the teach procedure as follows:
1. Addressing teach data.
2. Scanning sample parts.
3. Saving teach data.
A description of the individual steps can be found in the following sections.
5.2.1 Addressing teach data
During the teach procedure, the data of each parts type are
saved in memory groups by means of memory addresses.
Maximum 6 different parts types can be addressed in a memory group. Maximum 8 orientations can be assigned to each
parts type.
A total of 48 parts types can be addressed depending on the
number and assignment of the memory groups. The number
of memory groups and the number of orientations per parts
type is configured at the factory. (number of memory groups
x number of parts types x number of orientationss per parts
type = maximum 96).
Sortbox
With the Sortbox, the sorting program is specified by the assignment of a memory group. The number of sorting programs corresponds therefore to the number of memory
groups of the Checkbox.
5-6
Festo P.BE-Checkbox-EN en 0103c
5. Teaching parts with the Checkbox
The display TOLERANCE shows memory group 1 when the
TEACH mode is switched on. Address the teach data as follows:
1. Set the memory group.
Set the desired memory group with the keys [+] and [-] on
the TOLERANCE display.
2. Determine the parts type.
Select with one of the TYPE SELECT keys [1]...[6] the
number which is to be assigned to the parts type.
When the parts type has been addressed, the Checkbox
starts the conveyor belt automatically and you can start scanning the sample parts.
If, when the parts type is selected in the LCD TOLERANCE, the
information “tool” is shown, the memory address is assigned
with additional software tools. The teach procedure can
nevertheless be carried out. Further information can be found
in the CheckOpti manual.
5.2.2 Scanning sample parts
The conveyor belt runs during the complete scanning procedure. If you press the STOP button, the teach procedure
will be discontinued. The currently registered data will be
ignored and the complete teach procedure must be repeated.
Festo P.BE-Checkbox-EN en 0103c
5-7
5. Teaching parts with the Checkbox
Positioning sample parts
The TOLERANCE display shows orientation 1 (nominal orientation). Make sure that the sample parts are positioned in accordance with the orientation shown.
S
Show at least six parts of the current type per orientation.
If possible use different parts, but if necessary the same
part can be shown several times.
S
Carry out the teach procedure as realistically as possible.
Use e.g. the conveyor unit and supply device intended for
this purpose.
S
Place the sample parts on the conveyor belt one after the
other. They should be positioned exactly like the parts to
be tested later. Avoid particular care at first in placing the
parts.
S
In cases where particularly different variations of the ascertained parts contour (view) are permitted or are possible in an orientation, you should show the “extreme”
variations, or as large a number of different variations as
possible during the teach procedure.
Observing the scatter of characteristics
The following factors influence the scatter of characteristics:
–
Parts geometry
–
Different contours of the part, depending on the angle of
rotation around the longitudinal axis (e.g. with springs,
screws).
–
Different positioning on the belt.
A detailed description of the computational algorithm of the
scatter of characteristics can be found in Appendix A.3.2.
5-8
Festo P.BE-Checkbox-EN en 0103c
5. Teaching parts with the Checkbox
Please observe the TOLERANCE display when scanning the
sample parts. This display shows briefly for each part the
maximum value of the scatter of chateristics for the feature
which curently deviates the most (C- value).
C-value
Meaning
< 10
Sample parts are very similar in all features.
> 30
Large scatter of at least one feature.
–
Low values indicate narrrow manufacturing tolerances
and a uniform supply of parts.
–
Very high values indicate that the taught sample parts
differ greatly in their characteristics from each other. If the
(good) parts are allowed to differ greatly from each other,
the teach procedure can be continued.
It is optimum if the curve of the values changes greatly at first
and then remains increasingly constant. If the value only
changes slightly, a sufficient scattter is then usually achieved
in the current orientation.
If the C-value shown changes considerably, this indicates that
the conveyed part has been positioned incorrectly.
1. Press the STOP button to interrupt the teach procedure.
2. Repeat the complete teach procedure for the parts type.
Festo P.BE-Checkbox-EN en 0103c
5-9
5. Teaching parts with the Checkbox
Scanning further orientations
A parts type is not registered completely until the camera has
recorded all the intended orientations.
1. Set the next orientation with the butttons TOLERANCE [+]
and [-].
2. Scanning the sample parts in the new orientation In order
to do this, repeat the steps described in section 5.2.2.
For the test to be reliable, the features ascertained from the
individual orientations must be clearly distinguishable from
each other.
5-10
S
Check whether there is at least one feature in which the
various orientations differ.
S
Make sure in particular that orientation 1 (nominal
orientation) differs clearly in at least one feature from all
the other orientations.
Festo P.BE-Checkbox-EN en 0103c
5. Teaching parts with the Checkbox
5.2.3 Saving teach data
Save the teach data when the sample parts of a parts type
have been learnt in all intended orientations. Use the key
switch to switch to the operating mode SELECT. The teach
data will then be saved automatically.
The LCD TOLERANCE then shows in faultless operation the
current memory group and the tolerance in per cent, e.g.
memory group 1, tolerance 5 %. The current parts type remains selected. The conveyor belt continues to run.
Note the following error displays on the LCD TOLERANCE:
Code
Explanation
The nominal orientation cannot be distinguished from
other orientations.
Possible causes
The nominal orientation was taught several times by
mistake.
S Repeat the teach procedure. Make sure that the
sample parts are positioned in accordance with the
orientation shown.
The nominal orientation is too similar to other orientations.
S Optimize the teach data with the CheckOpti software. With CheckOpti even minimum differences can
be recognized. Please consult your technical advisor
in this respect.
Countbox, Sortbox:
If it is not necessary to distinguish the nominal orientation:
1. Turn the key switch to TEACH.
2. Switch on the illuminated button on the
LCD COUNTER.
3. Repeat the teach procedure.
Festo P.BE-Checkbox-EN en 0103c
5-11
5. Teaching parts with the Checkbox
Sortbox
Code
Explanation
The taught sample part cannot be distinguished clearly
from other sample parts because e.g.
– the sample part is identical to the parts type of
another TYPE SELECT memory location;
– a different orientation of the sample part has been
saved on another TYPE SELECT memory location.
S Repeat the complete teach procedure
S Optimize the sorting procedure with the CheckOpti
software. Please consult your technical advisor in
this respect.
After saving you can carry out one of the following steps:
5-12
S
Keep a record of your work.
S
Register the next parts type in a further teach procedure.
In order to do this repeat all the steps as from section
5.1.1.
S
Check the completed teach procedure in test mode, and
pay attention to orientation and quality as described in
chapter 6.
Festo P.BE-Checkbox-EN en 0103c
Testing parts with the Checkbox
Chapter 6
Festo P.BE-Checkbox-EN en 0103c
6-1
6. Testing parts with the Checkbox
Contents
6.
Testing parts with the Checkbox . . . . . . . . . . . . . . . . . . . . . . . . . . . . . . . . . .
6-1
6.1
6.1.1
6.1.2
6.1.3
6.1.4
6.1.5
6.2
6.2.1
6.2.2
6.2.3
6.2.4
6.2.5
6.3
6.3.1
6.3.2
6.3.3
6.3.4
Preparing the test procedure . . . . . . . . . . . . . . . . . . . . . . . . . . . . . . . . . . . . .
Set operating mode SELECT . . . . . . . . . . . . . . . . . . . . . . . . . . . . . . . . . . . . . .
Load the teach data . . . . . . . . . . . . . . . . . . . . . . . . . . . . . . . . . . . . . . . . . . . . .
Set the tolerance . . . . . . . . . . . . . . . . . . . . . . . . . . . . . . . . . . . . . . . . . . . . . . .
Enable the orientations (Countbox, Sortbox) . . . . . . . . . . . . . . . . . . . . . . . . .
Set counter function (Countbox, Sortbox) . . . . . . . . . . . . . . . . . . . . . . . . . . .
Test mode . . . . . . . . . . . . . . . . . . . . . . . . . . . . . . . . . . . . . . . . . . . . . . . . . . . . .
Proceed as follows . . . . . . . . . . . . . . . . . . . . . . . . . . . . . . . . . . . . . . . . . . . . . .
Visual check . . . . . . . . . . . . . . . . . . . . . . . . . . . . . . . . . . . . . . . . . . . . . . . . . . .
Checking the features . . . . . . . . . . . . . . . . . . . . . . . . . . . . . . . . . . . . . . . . . . .
Checking the orientation . . . . . . . . . . . . . . . . . . . . . . . . . . . . . . . . . . . . . . . . .
Influence of tolerance on the test result . . . . . . . . . . . . . . . . . . . . . . . . . . . . .
Automatic mode . . . . . . . . . . . . . . . . . . . . . . . . . . . . . . . . . . . . . . . . . . . . . . . .
Set operating mode SELECT . . . . . . . . . . . . . . . . . . . . . . . . . . . . . . . . . . . . . .
Manual start/stop mode . . . . . . . . . . . . . . . . . . . . . . . . . . . . . . . . . . . . . . . . .
Counter function (Countbox, Sortbox) . . . . . . . . . . . . . . . . . . . . . . . . . . . . . .
Modifying operating parameters . . . . . . . . . . . . . . . . . . . . . . . . . . . . . . . . . . .
6-3
6-3
6-4
6-6
6-7
6-7
6-10
6-10
6-12
6-12
6-13
6-14
6-15
6-15
6-16
6-16
6-18
6-2
Festo P.BE-Checkbox-EN en 0103c
6. Testing parts with the Checkbox
6.1
Preparing the test procedure
In order to prepare the test procedure, switch the Checkbox
to the SELECT mode and set the operating parameters for the
test mode or automatic mode.
Operating parameters for the
test procedure
IB
CB
SB
Load the teach data
x
x
x
Set the tolerance
x
x
x
x
x
x
x
IB = Identbox, CB = Countbox, SB = Sortbox
Enable the orientations
Select and set the counting function
(for automatic mode)
6.1.1 Set operating mode SELECT
All settings in the SELECT operating mode are made while the
conveyor belt is running. Prepare the Checkbox as follows:
1. Carry out teach procedure (see chapter 5).
2. Set key switch to SELECT.
3. If the STOP button is pressed down, press the START
button.
Festo P.BE-Checkbox-EN en 0103c
6-3
6. Testing parts with the Checkbox
The LCD TOLERANCE then shows the current memory group
and the tolerance in per cent, e.g. memory group 1, tolerance
5 %. The current parts type remains selected.
6.1.2 Load the teach data
Select the memory group of the saved teach data as reference for the test procedure.
1. Press the buttons TOLERANCE [+] and [-] at the same time.
The LCD TOLERANCE shows the current memory group.
2. Select the desired memory group.
S
Increase value by 1: Press TOLERANCE [+] briefly.
S
Reduce value by 1: Press TOLERANCE [-] briefly.
The illuminous button TYPE SELECT is switched off. The conveyor belt remains at a stand.
Sortbox
When the memory group is selected, the relevant sorting
program is activated.
1. Quit the selection of the sorting program by pressing any
illuminous TYPE SELECT [...] button. The conveyor belt
starts again. The LCD TOLERANCE shows the selected
memory group and the tolerance in per cent.
2. Set further parameters or start with the test mode
(chapter 6.2).
6-4
Festo P.BE-Checkbox-EN en 0103c
6. Testing parts with the Checkbox
Identbox, Countbox
The current parts type selection is deleted when the memory
group is changed.
1. Select the new parts type with the illuminous button
TYPE SELECT [...]. The conveyor belt starts again. The LCD
TOLERANCE shows the selected memory group and the
tolerance in per cent.
2. Set further parameters or start with the test mode
(chapter 6.2).
Festo P.BE-Checkbox-EN en 0103c
6-5
6. Testing parts with the Checkbox
6.1.3 Set the tolerance
The tolerance increases the band width of the taught features. Test parts, the features of which lie within the band
width of the sample part or in the tolerance range bordering
onto this, will still be accepted as good parts.
The setting range of the tolerance lies between 0 and 20 %. If
the tolerance = 0, only those parts, the features of which lie
within the band width of the sample parts scanned during the
teach procedure, will be accepted as good parts. The tolerance is preset at the factory with 5 % (standard setting).
Set at least 1 % tolerance. You can then be sure that good
parts are correctly classified despite minimum position
deviations.
The LCD TOLERANCE shows the current memory group and
the tolerance in per cent. Set the tolerance as follows:
1. With the TOLERANCE [+] button, you can increase the
value displayed by 1.
2. With the TOLERANCE [-] button, you can reduce the value
displayed by 1.
The value selected will automatically be added to the data of
the parts type and saved.
With critical conveyed parts, you must ascertain the optimum
setting of the tolerance in test mode (see chapter 6.2).
6-6
Festo P.BE-Checkbox-EN en 0103c
6. Testing parts with the Checkbox
6.1.4 Enable the orientations (Countbox, Sortbox)
With the illuminous button LCD COUNTER, you can set the
test mode so that test parts are accepted as good parts either
in all taught orientations or only in the nominal orientation
(Orientation 1).
Illuminous
buttons
Effect
ON
Good parts are accepted in all taught orientations.
OFF
Good parts are accepted only in one orientation (nominal orientation). Good parts which
are otherwise orientated are blown down.
6.1.5 Set counter function (Countbox, Sortbox)
In order to select the counter function, the counter display
and the counter setting use the buttons COUNTER [-] and [+].
Setting
Display !)
Counter function
Production
Current
counter status
Good parts counting
All good parts are counted
continuously.
Preselect
Preselected
nominal
number
Actual
Current
counter status
Good parts counting with
preselected number of items
All good parts are counted until
the nominal number is reached.
The set nominal number or the
current counter status as desired
is then shown on the LCD
COUNTER.
!) Display only in AUTO mode. The counter function is not activated
in the operating modes TEACH and SELECT.
Festo P.BE-Checkbox-EN en 0103c
6-7
6. Testing parts with the Checkbox
Select counter function
Press briefly the buttons COUNTER [-] and [+] simultaneously.
With each further pressing of the buttons you change to the
next counter function. The current setting is shown on the
LCD COUNTER.
Reset counter
The current counter status is usually reset by a signal from
the higher-order controller (see chapter 3.4).
In order to set the counter status manually to “0”:
1. Select the setting Actual (Act) or Production (Prod).
2. Hold the buttons COUNTER [+] and [-] pressed down at the
same time for at least 3 s, until the display on the LCD
COUNTER switches to “---”.
Good parts counting with preselected number of items
Setting the nominal
number
The nominal number of good parts is set separately for each
parts type and saved automatically with the data of the
parts type. Select first the parts type and the counter function Preselect:
1. Select the parts type with one of the illuminous buttons
TYPE SELECT [1]...[6].
2. Press the buttons COUNTER [+] and [-] at the same time
until PrE is displayed.
3. After 1.5 s the LCD COUNTER changes to represent the
nominal number (presetting: 9.9.9.9 = 9999*10#).
Numerical values from 1 to 9999 are shown uncoded in the
LCD. Larger numerical values are shown with addittional multipliers (points) see chapter A2, section “Representation of
numbers”.
6-8
Festo P.BE-Checkbox-EN en 0103c
6. Testing parts with the Checkbox
Set the nominal value as follows:
S
Increase value by 1: Press COUNTER [+] briefly
faster: Hold COUNTER [+] pressed down.
S
Reduce value by 1: Press COUNTER [-] briefly
faster: Hold COUNTER [-] pressed down.
Countbox
S
Set nominal value to “1”. Hold COUNTER [+] and [-]
pressed down simultaneously until the display is deleted
(min. 3 s).
Sortbox
If, with the Sortbox, the nominal number of a parts type is set
to “0”, the parts arriving of this type will not be counted, but
blown down.
S
Set nominal value to “0”. Hold COUNTER [+] and [-]
pressed down simultaneously until the display is deleted
(min. 3 s).
If, in AUTO mode, the current counter status is to be shown,
set the counter type “Actual”.
Festo P.BE-Checkbox-EN en 0103c
6-9
6. Testing parts with the Checkbox
6.2
Test mode
6.2.1 Proceed as follows
With the teach data, a reliable grading must be achieved of
the parts to be checked according to orientation and qualaity
(e.g. whether data of the parts have been observed). Therefore always evaluate the teach data in the test mode with
regard to their reliability.
Prepare the Checkbox as described in chapter 6.1. The conveyor belt runs and the LCD TOLERANCE shows the current
memory group and the tolerance in per cent.
Test procedure
6-10
Please note the following procedure:
S
Use test parts which correspond approximately in their
composition to the parts to be tested later in AUTO mode,
i.e. good, bad and incorrecctly orientated parts.
S
The test parts should be (by chance) positioned like the
parts to be checked later in AUTO mode. Avoid at first
particular care in placing the parts. As far as is possible,
use the conveyor device intended for this purpose.
S
You must check a sufficient number of parts in order to
obtain a reproducible result. Show e.g. 6 parts recognized
as good and 6 bad parts per orientation.
S
Press the STOP button in order to interrupt or terminate
the test mode.
Festo P.BE-Checkbox-EN en 0103c
6. Testing parts with the Checkbox
Status display
Observe the Checkbox displays during the test procedure.
When a conveyed part is registered, the status display will
light up briefly.
The display TOLERANCE will light up for 1.5 seconds.
Status displays during the test procedure
Evaluating the test part deviation.
Evaluating the test part orientation (if more
than one orientation has been learnt).
Evaluation
The following methods or criteria will assist you in evaluating
the teach data and the test results.
–
Visual check
chapter 6.2.2
–
Checking the features
chapter 6.2.3
–
Checking the orientation
chapter 6.2.4
–
Influence of the tolerance
chapter 6.2.5
If too many good parts are rejected as bad parts:
S
Increase the tolerance. Please refer here to the information in chapter 6.2.5.
S
Repeat the teach procedure:
–
with more sample parts,
–
using the conveyor device intended for use in
automatic mode.
If the checked parts are graded reliably according to orientation and quality:
Festo P.BE-Checkbox-EN en 0103c
S
Press the STOP button.
S
Switch to the AUTO operating mode in order to start the
automatic test (chapter 6.3).
6-11
6. Testing parts with the Checkbox
If the quality check and the position recognition for the parts
assortment is not sastisfactory, you can use aditional operating parameters and tools with CheckOpti, in order to optimize
the test results. Please consult your technical advisor in this
respect.
6.2.2 Visual check
Check the test results e.g. according to the following points of
view:
–
Have the orientations been recognized correctly?
–
Is the grading of the parts recognized as good/bad correct?
Use the sample parts to check the test parts with regard
to their grading. If you have also checked faulty parts,
check whether these have actually been recognized as
bad.
–
Use as many test parts as possible to make sure that they
are correctly output at the delivery positions for good,
bad or incorrectly orientated parts.
Note the explanations on the test procedure in the following
chapter sections 6.2.3 and 6.2.4. If necessary, optimize the
test result via the influence of the tolerance (chapter 6.2.5).
6.2.3 Checking the features
The individual features of the test parts differ from the average values of the sample part features. The Checkbox ascertains for each test part the feature which deviates the most
(maximum deviation).
During the test procedure you can see this test part deviation
for 1.5 seconds in the TOLERANCE display.
6-12
Festo P.BE-Checkbox-EN en 0103c
6. Testing parts with the Checkbox
Display
Evaluation
Remark
100
Good part
The smaller the value, the
more exact the test part
corresponds to saved
sample parts.
› 100
Bad part
The greater the value, the
less the test part corresponds to saved sample
parts.
Display range: 0 to 999
Detailed instructions on the test part deviation (computational algorithm) can be found in chapter A.3.3.
6.2.4 Checking the orientation
During the test procedure, the Checkbox ascertains whether
the orientation of the test part just scanned can be assigned
to the orientations of the sample part.
The LCD TOLERANCE shows the result (after the display of the
test part deviation) for 1.5 seconds.
Display
Evaluation
Meaning
‹ 100
Test part orientation
can be assigned
The smaller the value,
the more reliably the
test part orientation
can be recognized.
› 100
Test part orientation
cannot be assigned
clearly
The greater the value,
the less reliably the
test part orientation
can be recognized.
Display range: 0 to 999
Festo P.BE-Checkbox-EN en 0103c
6-13
6. Testing parts with the Checkbox
6.2.5 Influence of tolerance on the test result
When a new parts type is taught, the features of all scanned
parts are recorded. The values of the registered features
usually differ from each other. For each feature there is then a
value range (bandwidth) in which test parts are graded as
“good”. By means of the tolerance setting, you can extend
this bandwidth. Especially with critical conveyed parts, you
should ascertain the optimum setting of the tolerance before
switching to the AUTO mode. Further information on the tolerance (computational algorithm) can be found in chapter
A.3.1.
Make sure that the LCD TOLERANCE shows the current memory group, e.g. 1 and the current tolerance e.g. 5 %.
Set the tolerance as follows:
1. With the TOLERANCE [+] button, you can increase the
value displayed by 1.
2. With the TOLERANCE [-] button, you can reduce the value
displayed by 1.
3. Use one of the following methods:
6-14
S
Empirical setting
Vary the tolerance so that a large number of parts are
tested and corrrectly recognized as good or bad parts.
S
Setting according to test part deviation
Select sample parts which are suitable as reference
for good or bad parts. The recogition-specific features
should lie where possible in the border range good/
bad. Vary the tolerance so that the following test part
deviation is shown when the borderline sample parts
are scanned.
‹ 100 for the borderline sample part “good” or
‹ 100 for the borderline sample part “bad”.
Festo P.BE-Checkbox-EN en 0103c
6. Testing parts with the Checkbox
6.3
Automatic mode
6.3.1 Set operating mode SELECT
Prepare the Checkbox as follows:
1. Prepare test procedure (see chapter 6.1).
2. Turn key switch to AUTO.
3. If the STOP button is pressed down, press the START
button.
The Checkbox then triggers a blow-free process. This is to
ensure that there are no parts on the conveyor belt. The
Checkbox then switches on the small parts conveyor.
The LCD TOLERANCE shows in faultless operation the current
memory group and the tolerance setting for the current parts
type in per cent.
The LCD COUNTER shows in faultless operation the counter
status or the nominal number.
Sortbox
In automatic mode you can use the TYPE SELECT buttons to
access the tolerance setting and the current counter status of
each parts type of the current sorting program.
Festo P.BE-Checkbox-EN en 0103c
6-15
6. Testing parts with the Checkbox
If the parts supply is interrupted, the LCD TOLERANCE will
show the error message E 05.
Code
Explanation
The Checkbox has not received a conveyed part for
min. 30 seconds.
1. Quit the error message with the illuminous button
STATUS.
2. With manual supply of parts: supply more parts or
press the STOP button.
3. With automatic supply of parts: check buffer zone
and material jam.
6.3.2 Manual start/stop mode
In the operating mode AUTO, manual adjustmnt is only possible via the illuminous button STOP. Program processing is
then stopped; the conveyor belt switches off. The current
operating parameters are retained in the STOP status.
The automatic mode can be continued with START.
If alternating between manual operation and operation with a
higher-order controller, please note the information in chapter
3.4.
6.3.3 Counter function (Countbox, Sortbox)
The display COUNTER on the Countbox/Sortbox shows in
faultless operation either the continuous current counter
status for good parts or the nominal number of good parts.
With STOP the current counter states are saved. With START
the counting processes are continued with the saved counter
states.
6-16
Festo P.BE-Checkbox-EN en 0103c
6. Testing parts with the Checkbox
The switch position of the illuminous button on the LCD
COUNTER influences the counter function. Depending on the
switch position, only good parts in the nominal orientation or
good parts in all learnt orientations will be counted.
Button
Influence on counter function
ON:
All good parts (in learnt orientations) will be
counted.
OFF
Only good parts in nominal orientation will be
counted.
Good parts counting with preselected number of items
The following applies to the standard design of Checkbox:
If the preset nominal number of a parts type is reached, all
further good parts of that parts type will be blown down at
the delivery position for superfluous good parts until the
small parts conveyor is switched off. Foreign or bad parts will
be further rejected at the appropriate delivery position.
Countbox
As soon as the nominal number is reached, the LCD COUNTER
will show the information FULL. After the preset time, e.g.
30 s, the small parts conveyor will be switched off.
Sortbox
As soon as the nominal number is reached, the LCD COUNTER
for the relevant parts type will show the information FULL. As
soon as the preset nominal numbers of all parts types are
reached, the LCD shows COUNTER FULL and flashes at 1 second intervals. After the preset time, the small parts conveyor
will be switched off.
Festo P.BE-Checkbox-EN en 0103c
6-17
6. Testing parts with the Checkbox
As soon as the last good part reaches the deliveryy position
for foreign/bad parts, the counting process is finished. In
order to start a new counting process, the Checkbox requires
the signal “Start new counting cycle” from the higher-order
controller. Information on the I/O dialogue can be found in
chapter 3.5. Manual resetting of the counter status is only
possible in the operating mode SELECT, see chapter 6.1.5.
6.3.4 Modifying operating parameters
All settings of the Checkbox are to be made in the operating
mode SELECT. Please refer here to the explanations in
chapter 6.1.1 ... 6.2.5.
6-18
Festo P.BE-Checkbox-EN en 0103c
Maintenance
Chapter 7
Festo P.BE-Checkbox-EN en 0103c
7-1
7. Maintenance
Contents
7.
Maintenance . . . . . . . . . . . . . . . . . . . . . . . . . . . . . . . . . . . . . . . . . . . . . . . . . .
7-1
7.1
7.2
General . . . . . . . . . . . . . . . . . . . . . . . . . . . . . . . . . . . . . . . . . . . . . . . . . . . . . . .
Cleaning . . . . . . . . . . . . . . . . . . . . . . . . . . . . . . . . . . . . . . . . . . . . . . . . . . . . . .
7-3
7-3
7-2
Festo P.BE-Checkbox-EN en 0103c
7. Maintenance
7.1
General
The Checkbox has been designed for rough industrial environments and is distinguished by high reliability, robust
structure and long service life. Special maintenance is not
required.
Warning
Before undertaking cleaning or maintenance work,
switch off the following sources of energy:
– the compressed air supply
– the power supplies.
7.2
Cleaning
Cleaning the Checkbox
Remove dirt on the housing, operating elements and conveyor belt with a soft moist cloth.
Please note
With plastic parts, do not use any solvent or abrasive
cleaning agent which might damage the surface. Use only
non-abrasive, solvent-free cleaning agents.
Fixed cleaning intervals are not stipulated. The frequency of
cleaning depends on the conditions of use at the site.
Faultless functioning of the Checkbox optics can only be guaranteed if the glass surfaces are clean and not scratched.
Festo P.BE-Checkbox-EN en 0103c
7-3
7. Maintenance
Clean the following if it/they is/are dirty:
–
the protective screen “Camera” between the camera and
the conveyor unit
–
the protective screen “Lighting” between the lighting and
the conveyor unit.
Please note
Make sure that the glass surfaces are not scratched; do
not use abrasive cleaning agents. You will then avoid damage which could lead to malfunctioning of the Checkbox.
First remove the camera cover.
1. Switch off the compressed air and the power supplies.
2. Loosen the four fastening screws on the bottom of the
camera cover.
3. Lift up the camera cover.
Cleaning the protective screen “Lighting”
It is not necessary to dismantle the protective screen
“Lighting” in order to clean it.
Clean the glass surface above the conveyor belt:
7-4
–
with clean, non-lubricated compressed air,
–
with a soft moist cloth and a non-abrasive cleaning agent.
Festo P.BE-Checkbox-EN en 0103c
7. Maintenance
1
2
5
4
3
1 Camera cover
2 Protective screen “Camera”
3 Protective screen “Lighting”
4 Lighting
5 Plugs
Fig. 7/1: Protective screens
Festo P.BE-Checkbox-EN en 0103c
7-5
7. Maintenance
Cleaning the protective screen “Camera”
1. Loosen the locking screw next to the camera slot.
2. Pull the loose protective screen by its handle carefully
upwards out of the screen slot.
3. Clean the glass surface as described above.
Refit the protective screen again after cleaning it.
1. Place the protective screen by its handle carefully back
into the screen slot.
2. Tighten the locking screw next to the camera slot by hand.
Please note
Tighten the screw only by hand. You will then avoid
damage to the protective screen.
7-6
Festo P.BE-Checkbox-EN en 0103c
Technical appendix
Appendix A
Festo P.BE-Checkbox-EN en 0103c
A-1
A. Technical appendix
Contents
A.
Technical appendix . . . . . . . . . . . . . . . . . . . . . . . . . . . . . . . . . . . . . . . . . . . . .
A-1
A.1
A.1.1
A.1.2
A.2
A.3
A.3.1
A.3.2
A.3.3
A.4
A.5
A.6
Operating faults . . . . . . . . . . . . . . . . . . . . . . . . . . . . . . . . . . . . . . . . . . . . . . . .
General cause of faults . . . . . . . . . . . . . . . . . . . . . . . . . . . . . . . . . . . . . . . . . .
Error messages . . . . . . . . . . . . . . . . . . . . . . . . . . . . . . . . . . . . . . . . . . . . . . . . .
Status displays on the control panel . . . . . . . . . . . . . . . . . . . . . . . . . . . . . . . .
Calculation examples . . . . . . . . . . . . . . . . . . . . . . . . . . . . . . . . . . . . . . . . . . . .
Bandwidth and tolerance . . . . . . . . . . . . . . . . . . . . . . . . . . . . . . . . . . . . . . . . .
Scatter of characteristics . . . . . . . . . . . . . . . . . . . . . . . . . . . . . . . . . . . . . . . . .
Feature deviation . . . . . . . . . . . . . . . . . . . . . . . . . . . . . . . . . . . . . . . . . . . . . . .
Pin assignment . . . . . . . . . . . . . . . . . . . . . . . . . . . . . . . . . . . . . . . . . . . . . . . . .
Technical specifications . . . . . . . . . . . . . . . . . . . . . . . . . . . . . . . . . . . . . . . . . .
Accessories . . . . . . . . . . . . . . . . . . . . . . . . . . . . . . . . . . . . . . . . . . . . . . . . . . . .
A-3
A-3
A-5
A-10
A-16
A-16
A-18
A-19
A-21
A-24
A-27
A-2
Festo P.BE-Checkbox-EN en 0103c
A. Technical appendix
A.1
Operating faults
A.1.1 General cause of faults
Problem
Cause
Remedy
Device cannot be switched on
with START button; START and
STOP buttons light up at the
same time.
No power supply of the I/O
module
– Internal supply: Insert the
(blanking) plug preset at the
factory into the connection“Controller”.
– External supply: Replace the
bridges in the (blanking) plug
by a connection to an external power supply; check the
external power supply.
(Compare chapter 3.2)
Device does not function, all
illuminous buttons flash
Ambient, setting, data or hardware error
1. Identify error coding in
chapter A.1.2
2. Eliminate error
3. Quit with STATUS button
Good test parts are sorted out
as bad parts
– Tolerance set too low
– Incorrect sample part
selected via TYPE SELECT
– Increase tolerance
– Repeat teach procedure with
more sample parts
– Select (correct) sample part
with TYPE SELECT buttons
Bad test parts are accepted by
the device as good parts
– Tolerance set too high
– Deviations not recognized by
the Checkbox
– Reduce tolerance
With CheckOpti:
Optimize the teach data
LCD COUNTER: Display FULL:
Good parts in all orientations
are blown back into the small
parts conveyor
The preselected counter status
is reached and is not reset by
the external controller
Check connection to controller
In spite of light weight, conveyed parts are not reliably
blown down at the delivery
points.
Festo P.BE-Checkbox-EN en 0103c
– Blow-down timing point
incorrectly set
– Suction effect due to flow
resistance of conveyed part
With CheckKon:
– Modify blow-down timing
point
– Modify nozzle geometry
A-3
A. Technical appendix
Problem
Cause
Remedy
Conveyed parts facing wrong
way at end of conveyor belt
– Conveyed parts are turned
the wrong way due to unevenness of the system edge
or
– Conveyed parts are turned
the wrong way when previous/following parts are
blown down.
1. Close the compressed air
restrictor.
2. Observe the conveyed parts
at the end of the conveyor
belt:
– Turned: Replace system
edge; open compressed air
restrictor.
– Not turned: Open compressed air restrictor; reduce
the blow-down duration with
CheckKon or increase the distance between conveyed
parts.
When a new sample part has
been learnt, good test parts are
sorted out as bad parts
Teach procedure interrupted
with STOP button
1. Repeat teach procedure for
new sample part
2. Conclude teach process: Do
not press the STOP button,
but use the key switch to
switch to operating mode
SELECT.
Blow-down timing point/
duration of the Checkbox is not
correct.
Test part deviation is shown
unusually long on LCD
TOLERANCE.
Checkbox runs in diagnostic
mode (setting via CheckKon or
CheckOpti)
– With CheckKon/CheckOpti:
Switch from diagnostic mode
to operating mode
A-4
Festo P.BE-Checkbox-EN en 0103c
A. Technical appendix
A.1.2 Error messages
Error messages are shown on the LCD TOLERANCE. They must
be quitted before the Checkbox can start again:
1. First eliminate the cause of the fault.
2. Then actuate the (flashing) button STATUS.
Code Cause
Remedy
Ambient error
E 01
Fault in the compressed air
supply
– No compressed air
– Pressure too low
– Fluctuations in pressure in
supply network
– Check compressed air supply
– If necessary, insert a pressure reservoir between the
Checkbox and the compressed air network.
E 02
Optical faults
– Lighting dirty or defective;
glass cover of camera or
camera optics dirty
– Camera optics misted due to
considerable difference in
temperature of Checkbox/
environment
– Blockage in front of the
optical unit.
– Camera registers lower
range of conveyor belt
– Max. parts length exceeded
– Remove dirt with a soft cloth and non-abrasive cleaning
agent or blow down from the glass cover with non-lubricated compressed air.
– Avoid large differences in temperature.
– With CheckKon:
Corrrect the setting of the picture limits.
Increase exposure time or ratio encoder frequency/line
frequency.
E 03
Camera fault
– Check camera connection. Disconnect from the mains
supply before loosening the camera connection.
– Replace the camera cable
E 04
System recognizes too many
incorrect conveyed parts:
> 75 % of the last 20 parts were
graded as bad parts
– Check the selection of the sample part type
– Increase tolerance
Festo P.BE-Checkbox-EN en 0103c
A-5
A. Technical appendix
Code
Cause
Remedy
E 05
Material blockage:
No conveyed part for at least
30 seconds (time varies
depending on Checkbox
configuration)
Fill up small parts conveyor.
E 06
Maximum permitted parts
length exceeded
– With CheckKon: Set parameter “Max. parts length”
correctly.
– Set the device so that the parts follow along at a
recognizable distance.
E 07
Optical faults:
Reduced brightness
Clean the glass covers of the lighting and of the camera.
E 08
Conveyor belt blocked or
encoder does not turn
1. Press the STOP button.
2. Remove test parts which have become trapped.
Check units added to the conveyor unit; remove
obstructions on the conveyor belt.
3. Check that the encoder functions correctly.
4. Press the START butto.
E 09
E 10
Internal I/O module overloaded
1. Press the STOP button.
2. Check whether external outputs are loaded with a
current too high.
3. Press the START button.
Or contact the Festo after-sales service.
E 12
No power supply on I/O module
– Check the blanking plug on the connection for the
higher-order controller.
– Operation with electrical isolation: Checking the external supply voltage.
E 14
Belt speed for the set ratio
encoder frequency/line
frequency of the camera
(FEZ-value) too high
– Reduce belt speed
– With CheckKon: Adapt FEZ-value
A-6
Festo P.BE-Checkbox-EN en 0103c
A. Technical appendix
Code
Cause
Remedy
Recognition errors
E 20
The nominal orientation cannot
be distinguished from other
orientations, because e.g.
– parts orientations were
swapped during the teach
process by mistake
or
– the nominal orientation is
too similar to other orientations.
S Repeat the teach procedure. Make sure that the
sample parts are positioned in accordance with the
selected orientation.
S Optimize the teach data with the CheckOpti software.
Countbox, Sortbox:
If it is not necessary to distinguish the nominal orientation:
1. Turn the key switch to TEACH.
2. Switch on the illuminated button on the LCD COUNTER.
3. Repeat the teach procedure.
Recognition error - Sortbox
E 21
The taught sample part cannot
be distinguished clearly from
other sample parts because
e.g.
– the sample part is identical
to the parts type of another
TYPE SELECT memory location.
– a different orientation of the
sample part has been saved
on another TYPE SELECT
memory location.
Festo P.BE-Checkbox-EN en 0103c
S Repeat the complete teach procedure.
S Optimize the sorting procedure with the CheckOpti
software.
A-7
A. Technical appendix
Code
Data error
Remedy
E 40
Teach data are not clear.
When the device is switched on
again, the saved teach data are
no longer OK.
– Repeat the teach process.
– Check environment on non-CE-conform devices.
– If this occurs frequently and when other devices are
connected to the Checkbox: Operation with external
power supply of the I/O module, see chapter 3.2.
E 41
Controller has lost system
parameters
– Load system parameters again from internal safety
memory:
1. Switch off Checkbox via mains switch.
2. Press the TYPE SELECT [1] button and hold pressed
down while the mains switch is switched on.
3. Release the TYPE SELECT [1] button after 2 seconds.
During the load procedure all the illuminous buttons
light up briefly one after the other from left to right
(running light).
– With CheckKon: Load system parameters again.
– Or contact the Festo after-sales service.
E 42
Controller has lost configuration part of the teach data
– Load system parameters again from internal safety
memory:
1. Switch off Checkbox via mains switch.
2. Press the TYPE SELECT [1] button and hold pressed
down while the mains switch is switched on.
3. Release the TYPE SELECT [1] button after 2 seconds.
During the load procedure all the illuminous buttons
light up briefly one after the other from left to right
(running light).
– With CheckKon: Load the teach data again.
– Or contact the Festo after-sales service.
E 43
Teach data are not compatible.
Teach data are not compatibly
organised for the Checkbox
used.
Use compatible teach data format.
Repeat the teach process.
If a hardware error message >= E 60 occurs, please contact
Festo after-sales service.
A-8
Festo P.BE-Checkbox-EN en 0103c
A. Technical appendix
Error situation
Cause
Remedy
...E 01, although pressure in
the compressed air network is
apparently constant.
Brief fluctuations in pressure in
the compressed air network,
e.g. by large volume consuming
devices.
If necessary, insert a pressure
reservoir between the Checkbox and the compressed air
network.
...FULL on LCD TOLERANCE,
although the buffer zone is not
full.
Good parts in all orientations
are blown back into the small
parts conveyor.
– (Blanking) plug missing at
connection “Sensors”
– Bridges missing at connection “Controller”
– Control cable defective or
incorrect pin assignment at
connection “Sensors”.
– Operation without buffer
zone sensors: Insert blanking
plug and check bridges.
– Operation with buffer zone
sensors: Check control cable
and pin assignment.
...E 02, although length of conveyed part is shorter than max.
permitted length.
– Conveyed part has lots of
holes or is semi-transparent.
– Speed of conveyor belt has
been modified.
With CheckKon:
- Increase belt speed
- Increase exposure time
- Vary grey value threshold
- Limit camera angle of vision
- Activate filter function
...E 02 occurs in the morning
although the Checkbox worked
perfectly the day before.
– High fluctuations in temperature for example between
day and night.
– Conveyor belt has been
replaced
With CheckKon:
Setting the lower picture limit
...E 04 although only a small
number of bad parts passes
the test procedure.
Moving particles of dirt on the
conveyor belt.
– Clean the conveyor belt with
compressed air.
– Install a cutting device in
front of the conveyor belt.
Festo P.BE-Checkbox-EN en 0103c
A-9
A. Technical appendix
A.2
Status displays on the control panel
Illuminous buttons
Status
Button
Meaning
Continuous lighti
ing
TYPE SELECT [1] [2] [3]
[4] [5] or [6]
Display of the selected
memory location
START
Controller is switched on
STOP
Controller is switched off
Test part is passed as a good
part in all taught orientations.
Flashes
STATUS
New part passes the camera.
TYPE SELECT [1] to [6]
STATUS
STOP
Error message
An error code also appears
in the LCD TOLERANCE, see
Appendix A.1.2.
Checkbox with encoder
In order to display the belt speed, press the STATUS button in
the select mode. The LCD TOLERANCE then shows the belt
speed of the conveyor unit in [mm/s].
LCD displays
The grey shaded fields mark the main displays. Main displays
are shown continuously; the remaining (additional) displays
are only shown for a brief period due to an event or an operating status. The counter function is not active in the operating mode TEACH; the LCD COUNTER does not show anything.
A-10
Festo P.BE-Checkbox-EN en 0103c
A. Technical appendix
Switch on
Display TOLERANCE
LCD
Meaning
Letter for Checkbox design I(dent), C(ount) or S(ort)
and version status of the operating system.
Example: Identbox version 3.0
Number of memory groups or sorting programs
(Sortbox) and also letter E with system setting “with
encoder”. Example: 6 memory locations, encoder
System setting of the camera resolution.
Example: 1024 pixels
Teach mode
Display TOLERANCE
Display
Meaning
Values
Selection of the memory group of
the parts type/sorting program
Corresponding
to the Checkbox configuration
Example: Memory group 1
Characteristic scatter
< 10: Sample parts are very similar
in all features.
> 30: Large scatter of at least one
feature.
0...999
Orientation of the sample parts
during the teach procedure.
1...8
Error code for system error.
01...99
Details in
chapter A.1.2
Memory address occupied
– with measuring tool
– or with optimized teach data
(CheckOpti).
Festo P.BE-Checkbox-EN en 0103c
A-11
A. Technical appendix
Select mode
Display TOLERANCE:
Display
Meaning
Values
Selection of the memory group of
the parts type / sorting program
Tolerance value for the current
parts type
1st. number: Parts type or sorting
program
2nd. number: Tolerance in %
1st. number:
corresponding
to the Checkbox configuration
2nd. number:
0...20
A-12
Test part deviation:
The smaller the value, the more
exact the test part corresponds to
saved sample parts.
≤ 100: Good part
> 100: Bad part
0...999
The smaller the value, the more
reliably the test part orientation
can be recognized.
< 100: Test part orientation can be
assigned
> 100: Test part orientation cannot be assigned clearly
0...999
Error code for system error.
01...99
Details in
chapter A.1.2
Festo P.BE-Checkbox-EN en 0103c
A. Technical appendix
Display COUNTER
Display
Display
Teach mode
Range
Counter function without
switching off
Option: Production counter
---
Counter function with
switching off
Option: Nominal value of good
parts
---
Meaning
Range
Counter function with switching off
Option: Current counter
---
Counter function with switching
off
Option: Nominal value of good
parts
0...9999 * 103
Display TOLERANCE
Display
Festo P.BE-Checkbox-EN en 0103c
Meaning
Meaning
Range
Tolerance value for the current
parts type/sorting program
1st. number: Parts type or sorting
program
2nd. number: Tolerance in %
2nd. number:
0...20
Status of buffer zone (signal from
buffer zone sensor)
---
Error code for system error
01...99
Details in
chapter A.1.2
A-13
A. Technical appendix
Display COUNTER
Display
A-14
Meaning
Range
Corresponding to the selected
option of the counter function:
Without switching off
– Production counter
With switching off
– Nominal value of good parts or
– Current counter
0...9999 * 103
Preselected counter reading
reached
---
Festo P.BE-Checkbox-EN en 0103c
A. Technical appendix
Number representation
Display COUNTER
As from value 9999 the 4-position LCD shows numerical
values with additional decimal points (multipliers). The values
shown must be multiplied by the power of 10 for each decimal point.
Numerical value
Multiplication
9999
Festo P.BE-Checkbox-EN en 0103c
Number
9999
1.0 0 0
1000 x 101
10000
1.0.0 0
1000 x 102
100000
1.0.0.0
1000 x 103
1000000
A-15
A. Technical appendix
A.3
Calculation examples
A.3.1 Bandwidth and tolerance
Bandwidth B specifies the extent to which the value of the
feature may vary upwards or downwards.
Tolerance T specifies the per cent increase in the bandwidth
of each feature, related to the average value of the feature.
Cmax tol = Cmax+A × T
100
Cmin tol = Cmin−A × T
100
B = Cmax tol−Cmin tol
= C max − Cmin + 2 × T × A
100
→T=
O
B
Cmax
Cmax tol
Cmin
Cmin tol
T
A-16
B−(C max − Cmin)
× 100
2×A
Average value of the feature
Bandwidth
Feature - maximum
Upper limit of bandwidth incl. tolerance
Feature - minimum
Lower limit of bandwidth incl. tolerance
Tolerance
Festo P.BE-Checkbox-EN en 0103c
A. Technical appendix
Example
Ascertaining the bandwidth for the feature “Length” of a conveyed part with a set tolerance of 5 % (display on the LCD
TOLERANCE).
Conveyed part lengths [mm] for 5 sample parts ascertained
during the teach procedure: 60 60 61 65 60
Therefore:
A
Cmax
Cmin
T
= 61.2 mm
= 65 mm
= 60 mm
=5%
Average value of the length
Length - maximum
Length - minimum
Tolerance
B = Cmax − C min + 2 × T × A
100
B = (65−60) + 2 × 5 × 61.2
100
B = 11.12
B
Cmax tol
68.06
Cmax
65.00
O
Cmin
61.20
60.00
Cmin tol
56.94
1
2
1 Bandwidth of conveyed part length
2 Bandwidth with 5 % tolerance
Result: All conveyed parts with a length of 57...68 mm are
classified as good parts. The Checkbox ascertains appropriate value ranges for each feature.
Festo P.BE-Checkbox-EN en 0103c
A-17
A. Technical appendix
A.3.2 Scatter of characteristics
S=
O
Cmax
Cmin
S
Example
Cmax−C min
× 100 %
A
Average value of the feature
Feature - maximum
Feature - minimum
Characteristic scatter
Ascertaining the characteristic scatter for the feature
“Length” of a conveyed part.
The following values are taken from the example
“Bandwidth”:
A
Cmax
Cmin
= 61.2
= 65
= 60
Average value of the length
Length - maximum
Length - minimum
S = 65−60 × 100 %
61.2
S = 8.2 %
A-18
Festo P.BE-Checkbox-EN en 0103c
A. Technical appendix
A.3.3 Feature deviation
Ascertaining deviation D for C ‹ A
D=
O
Cactual
Cmin tol
D
Example
Cactual−A
× 100 %
Cmin tol−A
Average value of the feature
Current feature measurement
Lower limit of bandwidth incl. tolerance
Feature deviation
Ascertaining the deviation for the current feature “Length”
of a conveyed part Cactual = 61 (C ‹ A).
The following values are taken from the example
“Bandwidth”:
A
Cmin tol
= 61.2
= 56.94
Average value of the length
Length - lower value
Cactual
= 61
Length - current value
D = 61−61.2 × 100 %
56.94−61.2
D = 4.7 %
Festo P.BE-Checkbox-EN en 0103c
A-19
A. Technical appendix
Ascertaining deviation D for C ‹ A
D=
C actual−A
× 100 %
Cmax tol−A
O
Cactual
Cmax tol
D
Example
Average value of the feature
Current feature measurement
Upper limit of bandwidth incl. tolerance
Feature deviation
Ascertaining the deviation for the current feature “Length”
of a conveyed part Cactual = 64 (C ‹ A).
The following values are taken from the example
“Bandwidth”:
A
Cmax tol
= 61.2
= 68.06
Average value of the length
Length – upper value
Cactual
= 64
Length - current value
D = 64−61.2 × 100 %
68.06−61.2
D = 41.8 %
A-20
Festo P.BE-Checkbox-EN en 0103c
A. Technical appendix
A.4
Pin assignment
Connector socket “Controller” on the Checkbox
Pin
Identbox
Countbox
Sortbox
O/1
Actuator 7
Actuator 7
Actuator 7
O/2
Identbox mode 0
Countbox mode 0
Sortbox mode 0
O/3
Error status 1
Error status 1
Error status 1
I/4
Do not connect
Do not connect
Buffer zone sensor 6
I/5
Do not connect
Do not connect
Buffer zone sensor 4
I/6
Buffer zone sensor 2
Buffer zone sensor 2
Buffer zone sensor 2
O/7
Reference voltage + 24 V
Reference voltage + 24 V
Reference voltage + 24 V
I/8
Ext. Type preselect bit 4
Ext. Type preselect bit 4
Do not connect
I/9
Ext. Type preselect bit 2
Ext. Type preselect bit 2
Ext. Sorting program preselect bit 2
I/10
Ext. Type preselect bit 0
Ext. Type preselect bit 0
Ext. Sorting program preselect bit 0
O/11
Actuator 4
Actuator
Actuator 4
O/12
Actuator 2
Actuator 2
Actuator 2
O/13
Do not connect
Nominal number reached
Nominal numbers of all parts types
reached
O/14
Identbox mode 1
Countbox mode 1
Sortbox mode 1
I/15
Ext. I/O supply GND
Ext. I/O supply GND
Ext. I/O supply GND
O/16
Ext. I/O supply GND
Internal voltage GND
Internal voltage GND
O/17
Conveyor belt
Conveyor belt
Conveyor belt
O/18
Cleaning valve
Cleaning valve
Cleaning valve
19
Not assigned
Not assigned
Not assigned
O/20
Actuator 6
Actuator 6
Actuator 6
O/21
Error status 2
Error status 2
Error status 2
O/22
Error status 0
Error status 0
Error status 0
Festo P.BE-Checkbox-EN en 0103c
A-21
A. Technical appendix
Pin
Identbox
Countbox
Sortbox
I/23
Do not connect
Do not connect
Buffer zone sensor 5
I/24
Do not connect
Do not connect
Buffer zone sensor 3
I/25
Buffer zone sensor 1
Buffer zone sensor 1
Buffer zone sensor 1
O/26
Reference voltage GND
Reference voltage GND
Reference voltage GND
I/27
Ext. Type preselect bit 3
Ext. Type preselect bit 3
Ext. Sorting program preselect bit 3
I/28
Ext. Type preselect bit 1
Ext. Type preselect bit 1
Ext. Sorting program preselect bit 1
O/29
Actuator 5
Actuator 5
Actuator 5
O/30
Actuator 3
Actuator 3
Actuator 3
O/31
Actuator 1
Actuator 1
Actuator 1
I/32
Do not connect
Start new counting cycle
Start new counting cycle
I/33
Remote start
Remote start
Remote start
I/34
Ext. I/O supply + 24 V
Ext. I/O supply + 24 V
Ext. I/O supply + 24 V
O/35
Internal voltage + 24 V
Internal voltage + 24 V
Internal voltage + 24 V
I/36
Ext. Pressure sensor 1)
Ext. Pressure sensor 1)
Ext. Pressure sensor 1)
O/37
Conveyor unit
Conveyor unit
Conveyor unit
1)
As standard the built-in pressure sensor of the Checkbox is monitored. If an external pressure
sensor is to be connected via I/36, the Checkbox configuration must be adapted accordingly.
Please consult the Festo after-sales service.
A-22
Festo P.BE-Checkbox-EN en 0103c
A. Technical appendix
Connector socket “Sensors” on the Checkbox
O/1
24 V DC
Reference voltage for sensors
I/2
Buffer zone sensor 2
O/3
I/4
O/3
0V
Reference voltage for sensors
I/2
O/1
I/4
Buffer zone sensor 1
The sensor inputs are negative-switching (normally-closed).
If 24 V DC is applied, the small parts conveyor will be switched on.
As an option, direct connection with a Festo DUO cable is also possible. Cable designation signal x (= I/1), signal x+1 (= I/2).
Connector plug “Small parts conveyor” on the Checkbox
1
Normally-open contact 1
2
Normally-open contact 2
3 4 5
Not assigned
Contact loading 48 V/100 mA
Festo P.BE-Checkbox-EN en 0103c
5
4
3
1
2
1
2
A-23
A. Technical appendix
A.5
Technical specifications
General operating specifications
Checkbox operating specifications
General
Temperature
for operation, storage, transport
+ 10 ... + 50 °C
non-condensing
Electromagnetic compatibility
(EMC)
EN 61000-2-3
Protection against electric shock
hazard
Protective earthing
Degree of protection
IP54
Pneumatics
Compressed air quality
– Non-lubricated
– Dried
– Filtered with filter 40 ìm
Compressed air supply
4...6 bar overpressure
Electric components
A-24
Power supply (self setting)
85...264 V / 50...60 Hz
via a backup fuse of 1 A (slowblowing) in the mains switch
Power consumption
Max. 150 VA
Festo P.BE-Checkbox-EN en 0103c
A. Technical appendix
Conveyor and test output
Conveyor and test output
Camera resolution
Conveyor unit up to
@ 10 mm
@ 30 mm
@ 80 mm
Resolution
2/100 mm
1/10 mm
1/10 mm
200 mm/s
100...300
300 mm/s
100...400
300 mm/s
100...400
Belt speed
Speed
can be set
Examples of conveyor rate Belt speed 300 mm/s
M3x25 screws in correct position for mounting
4...5 items/s
Axes @ 18x25 mm for quality check
8 items/s
Bolts @ 5x50 mm tested and in correct position
2 items/s
The conveyor rate depends on the size of the component, the
number of orientations and the belt speed.
Dimensions, weight
Controller: Dimensions and weight
Festo P.BE-Checkbox-EN en 0103c
Height
[mm]
208
Width
[mm]
329
Depth
[mm]
204
Weight
[kg]
6
A-25
A. Technical appendix
Conveyor unit: Dimensions and weight
@ 10 mm
Forparts up to
@ 30 mm
@ 80 mm
Conveyor unit with 2 blow-down positions
Height
[mm]
154
142
254
Width
[mm]
300
580
580
Depth
[mm]
295
291
432
Weight
[kg]
4
7
12
Conveyor unit with 4 blow-down positions
Height
[mm]
154
142
254
Width
[mm]
410
730
730
Depth
[mm]
295
291
432
Weight
[kg]
5
8.5
16
Conveyor unit with 6 blow-down positions
Height
[mm]
154
142
254
Width
[mm]
520
880
930
Depth
[mm]
295
291
432
Weight
[kg]
6
10
16
Conveyor unit dimensions
Rotation-symmetric or pre-orientated parts
Dimensions
Conveyor unit for conveyed part
@ 10 mm
@ 30 mm
@ 80 mm
Length 1)
[mm]
3...50
3...80
5...80
Diameter
[mm]
0.5...10
3...30
3...80
1) Further lengths on request
A-26
Festo P.BE-Checkbox-EN en 0103c
A. Technical appendix
A.6
Accessories
Accessories
Encoder
Buffer zone sensors
Stop panel, stainless steel
Replacement conveyor belt
Knife-edge deflector roller (for conveyor unit @ 30 mm)
Power module for controlling the conveyor unit
Cables
Diagnostic cable/software
order no. 150 268
Cable for buffer zone sensors
– Adapter cable ((Duo cable))
– Extension cable 2.5 m
– Extension cable 5 m
order no. 18 685
order no. 18 684
order no. 18 686
Hybrid cable (for connecting the control unit with the conveyor unit)
in various lengths
Spare plug
5-pin spare plug for connecting the small-parts conveyor
4-pin spare plug for buffer zone sensors
37-pin spare plug for a higher-order controller
37-pin spare plug for a higher-order controller with 5 m cable length
Mounting plates for build-on parts to the conveyor unit
Mounting plate, supply
Mounting plate, exit
Festo P.BE-Checkbox-EN en 0103c
A-27
A. Technical appendix
A-28
Festo P.BE-Checkbox-EN en 0103c
Brief instructions
Appendix B
Festo P.BE-Checkbox-EN en 0103c
B-1
B. Brief instructions
Contents
B.
B-2
Brief instructions . . . . . . . . . . . . . . . . . . . . . . . . . . . . . . . . . . . . . . . . . . . . . . .
B-1
Festo P.BE-Checkbox-EN en 0103c
B. Brief instructions
Procedure
Commissioning
Before switching the Checkbox on you must carry out the
following steps:
1. Fit the modules
2. Connect the compressed air supply
3. Connect the power supply
4. Connect the plugs provided (see table “Operating
requirements”):
Switching on
–
The 4-pin plug “Sensors” for connecting the buffer
zone sensors 1...2 or for wiring unused sensor inputs
with the reference voltage.
–
The 37-pin Sub-D plug “Controller” for connecting the
power supply for the I/O modules and for connecting
buffer zone sensors or for wiring unused sensor inputs with the reference voltage.
Switch on the Checkbox as follows:
1. Actuate the mains switch on the connection side of the
controller.
2. Start the Checkbox by pressing the green illuminated
START button on the control panel of the controller. The
conveyor belt runs. The START button is lit continuously.
Operating modes
Festo P.BE-Checkbox-EN en 0103c
Use the key switch to start the relevant operating mode of the
Checkbox:
–
TEACH: for carrying out the teach procedure.
–
SELECT: for saving the teach data, setting the operating
parameters and for checking the conveyed parts in test
mode.
–
AUTO: for checking the conveyed parts in automatic
mode.
B-3
B. Brief instructions
Switching off
Switch off the Checkbox as follows:
1. Press the STOP button. The STOP button is lit continuously. The conveyor belt remains at a stand.
2. Switch off the mains switch on the connection side of the
controller.
Identbox, Countbox: Operating requirements
Operation without buffer zone sensors
S Screw the plug “Sensors” wired at the factory into the connection
“Sensors”.
S Also insert the plug “Controller” for the power supply to the I/O
modules into the connection“Controller”.
Operation with 1 buffer zone sensor at the connection “Sensors”
S Use the plug “Sensors”
- without the bridge fitted at the factory
- with the sensor connected at sensor input 1
- with unused input 2 bridged with input 1
Screw the plug into the connection “Sensors”.
S Also insert the plug “Controller” wired at the factory into the
connection “Controller”.
Operation with two buffer zone sensors at the sensors connection
S Use the plug “Sensors”
- without the bridge fitted at the factory
- with sensors connected at both sensor inputs.
Screw the plug into the connection “Sensors”.
S Also insert the plug “Controller” wired at the factory into the
connection “Controller”.
B-4
Festo P.BE-Checkbox-EN en 0103c
B. Brief instructions
Sortbox: Operating requirements
... without buffer zone sensors
S Screw the plug “Sensors” wired at the factory into the connection
“Sensors”.
S Also insert the plug “Controller” wired at the factory into the
connection “Controller”.
... with 1 buffer zone sensor at the connection “Sensors”
S Use the plug “Sensors”
- without the bridge fitted at the factory
- with the sensor connected at sensor input 1
- with unused input 2 connected to 24 V DC.
Screw the plug into the connection “Sensors”.
S Also insert the plug “Controller” wired at the factory into the
connection “Controller”.
... with two buffer zone sensors at the connection “Sensors”
S Use the plug “Sensors”
- without the bridge fitted at the factory
- with sensors connected at both sensor inputs
Screw the plug into the connection “Sensors”.
S Also insert the plug “Controller” wired at the factory into the
connection “Controller”.
... with more than two buffer zone sensors at the connection
“Sensors”
S Use the plug “Controller” if you wish to connect more than two
buffer zone sensors
- without the bridges fitted at the factory between the sensor
inputs and 24 V DC
- with sensors connected at the appropriate sensor inputs
- with unused sensor inputs connected to 24 V DC
Screw the plug into the connection “Controller”.
S Use the plug “Sensors” at the connection “Sensors”
- without the bridges fitted at the factory between the sensor
inputs and 24 V DC.
Screw the plug into the connection “Sensors”.
Festo P.BE-Checkbox-EN en 0103c
B-5
B. Brief instructions
Teach procedure
Step
Set operating
mode TEACH
Switch on operating mode TEACH
with the key switch. The TOLERANCE display shows memory
group 1.
Addressing teach
data
1. Set the desired memory group
with the keys [+] and [-] on the
TOLERANCE display.
2. Determine the number of the
parts type with one of the TYPE
SELECT keys [1]...[6]. 1)
Scanning sample
parts
Show at least six sample parts in
the current orientation.
1. Scan sample parts in orientation 1.
2. Observe characteristic scatter
It is optimum when the value
changes at first very much,
then remains almost constant.
3. Set the next orientation with
the key TOLERANCE [+].
4. Scan sample parts in the new
orientation.
Saving teach data
Switch to the operating mode
SELECT with the key switch.
1)
B-6
LCD TOL. Checkbox
The sorting program is defined for the Sortbox when a memory
group is assigned.
Festo P.BE-Checkbox-EN en 0103c
B. Brief instructions
Test procedure
Step
LCD TOL. Identbox
Countbox
Sortbox
Set operating
mode SELECT
S Switch on operating mode SELECT with the key switch.
The LCD TOLERANCE shows the current memory group and the
tolerance in per cent.
Set the operating
parameters
Load the teach data (parts type):
1. Press the keys TOLERANCE [+] and [-]
at the same time.
2. Select the memory group with
TOLERANCE [+] or [-].
3. Select the parts type with TYPE
SELECT [...].
S Set the
tolerance with
TOLERANCE [+]
or [-]; standard
setting 5 %;
min. 1 %
Test mode
Festo P.BE-Checkbox-EN en 0103c
Load teach data
(sorting program):
1. Press the keys TOLERANCE [+] and [-] at
the same time.
2. Select the memory
group with TOLERANCE [+] or [-].
S Set the tolerance with TOLERANCE [+] or
[-]; standard setting 5 %; min. 1 %
S Enable the orientations (all orientations)
or block (only the nominal orientation)
with the illluminous button on the LCD
COUNTER.
S Set the counter function or display:
Press COUNTER [+] and [-] at the same
time.
Set the nominal number: COUNTER [+]
or [-].
Supply several test parts of the current parts type (good – bad –
incorrectly orientated). LCD TOLERANCE shows briefly one after
the other
– the test part deviation
– the position deviation.
Evaluation:
1. Visual check, check of the blow-down positions and the
blow-down procedure
2. Max. feature deviation of the test part (test part deviation
< 100 ?)
3. Check of orientation (position deviation < 100 ?)
4. Check influence of the tolerance
B-7
B. Brief instructions
Step
Automatic mode
LCD TOL. Identbox
Sortbox
S Switch to the operating mode AUTO with the key switch.
The LCD TOLERANCE shows the
current memory
group and the
tolerance in per
cent.
B-8
Countbox
The LCD TOLERANCE shows the current
memory group and the tolerance in per cent.
The LCD COUNTER shows in faultless operation the counter status or the nominal number.
Festo P.BE-Checkbox-EN en 0103c
Index
Appendix C
Festo P.BE-Checkbox-EN en 0103c
C-1
C. Index
Contents
C.
C-2
Index . . . . . . . . . . . . . . . . . . . . . . . . . . . . . . . . . . . . . . . . . . . . . . . . . . . . . . . . .
C-1
Festo P.BE-Checkbox-EN en 0103c
C. Index
A
Abbreviations . . . . . . . . . . . . . . . . . . . . . . . . . . . . . . . . . . . . XIV
Accessories . . . . . . . . . . . . . . . . . . . . . . . . . . . . . . . . . . . . . A-27
AUTO . . . . . . . . . . . . . . . . . . . . . . . . . . . . . . . . . . 4-3, 4-6, 6-15
Automatic mode . . . . . . . . . . . . . . . . . . . . . . . . . . . . . . . . . 6-15
B
Belt speed . . . . . . . . . . . . . . . . . . . . . . . . . . . . . . . . A-10, A-25
Binary coding
Parts type . . . . . . . . . . . . . . . . . . . . . . . . . . . . . . . . . . . . 3-18
Sorting program . . . . . . . . . . . . . . . . . . . . . . . . . . . . . . . 3-19
Buffer zone . . . . . . . . . . . . . . . . . . . . . . . . . . . . . . . . . . . . . 1-10
Section . . . . . . . . . . . . . . . . . . . . . . . . . . . . . . . . . . . . . . 1-11
Sensor . . . . . . . . . . . . . . . . . . . . . . . . . . . . . . . . . . . . . . . 1-10
Buffer zone sensors . . . . . . . . . . . . . . . . . . . . . . . . . . 2-11, 3-3
At the connection “Controller” . . . . . . . . . . . . . . . . . . . 2-13
At the connection “Sensors” . . . . . . . . . . . . . . . . . . . . . 2-11
C
Camera resolution . . . . . . . . . . . . . . . . . . . . . . . . . . . . . . . A-25
Checkbox
Components . . . . . . . . . . . . . . . . . . . . . . . . . . . . . . . . . . . 1-6
Countbox . . . . . . . . . . . . . . . . . . . . . . . . . . . . . . . . . . . . . . 1-3
Dimensions . . . . . . . . . . . . . . . . . . . . . . . . . . . . . . . . . . . A-25
Identbox . . . . . . . . . . . . . . . . . . . . . . . . . . . . . . . . . . . . . . 1-3
Method of operation . . . . . . . . . . . . . . . . . . . . . . . . . . . . 1-7
Sortbox . . . . . . . . . . . . . . . . . . . . . . . . . . . . . . . . . . . . . . . 1-3
Weight . . . . . . . . . . . . . . . . . . . . . . . . . . . . . . . . . . . . . . . A-25
CheckKon . . . . . . . . . . . . . . . . . . . . . . . . . . . . . . . . . . . . . . . 1-4
CheckOpti . . . . . . . . . . . . . . . . . . . . . . . . . . . . . . . . . . . . . . . 1-4
CheckStat . . . . . . . . . . . . . . . . . . . . . . . . . . . . . . . . . . . . . . . 1-4
Festo P.BE-Checkbox-EN en 0103c
C-3
C. Index
Cleaning
Checkbox . . . . . . . . . . . . . . . . . . . . . . . . . . . . . . . . . . . . . 7-3
Protective screens . . . . . . . . . . . . . . . . . . . . . . . . . . 7-4, 7-6
Connection
Controller . . . . . . . . . . . . . . . . . . . . . . . . . . . . . . . . . 2-5, 3-8
Conveyor unit . . . . . . . . . . . . . . . . . . . . . . . . . . . . . . . . . . 2-8
Electrical . . . . . . . . . . . . . . . . . . . . . . . . . . . . . . . . . . . . . . 2-6
Fitting pneumatic components . . . . . . . . . . . . . . . . . . . . 2-7
PC . . . . . . . . . . . . . . . . . . . . . . . . . . . . . . . . . . . . . . . . . . 2-16
Small parts conveyor . . . . . . . . . . . . . . . . . . . . . . . 2-15, 3-3
Control panel . . . . . . . . . . . . . . . . . . . . . . . . . . . . . . . . . . . . 4-3
Controller . . . . . . . . . . . . . . . . . . . . . . . . . . . . . . . . 1-6, 3-3, 3-8
Conveyor part
Characteristics . . . . . . . . . . . . . . . . . . . . . . . . . . . . . . . . . 5-3
Dimensions . . . . . . . . . . . . . . . . . . . . . . . . . . . . . . . . . . . A-26
Conveyor rate . . . . . . . . . . . . . . . . . . . . . . . . . . . . . . . . . . . A-25
Conveyor unit . . . . . . . . . . . . . . . . . . . . . . . . . . . . . . . . . . . . 1-6
Counter display . . . . . . . . . . . . . . . . . . . . . . . . . . . . . . . . . . 6-7
Counter function . . . . . . . . . . . . . . . . . . . . . . . . . . . . 6-7, 6-16
D
Designated use . . . . . . . . . . . . . . . . . . . . . . . . . . . . . . . . . . VII
Diagnostic interface . . . . . . . . . . . . . . . . . . . . . . . . . . . . . . 2-16
E
EMC safety . . . . . . . . . . . . . . . . . . . . . . . . . . . . . . . . . . . . . . 3-6
Encoder . . . . . . . . . . . . . . . . . . . . . . . . . . . . . . . . . . . . . . . . A-10
Error . . . . . . . . . . . . . . . . . . . . . . . . . . . . . . . . . 3-21, 4-7, 5-11
Error messages . . . . . . . . . . . . . . . . . . . . . . . . . . . . . . . . . A-5
Error/fault
Eliminating faults . . . . . . . . . . . . . . . . . . . . . . . . . . . . . . . A-3
C-4
Festo P.BE-Checkbox-EN en 0103c
C. Index
F
Feature deviation . . . . . . . . . . . . . . . . . . . . . . . . . . . . . . . . A-19
FULL . . . . . . . . . . . . . . . . . . . . . . . . . . . . . . . . . . . . . . . . . . A-13
G
Good parts counting . . . . . . . . . . . . . . . . . . . . . 3-13, 6-7, 6-17
Setting the nominal number . . . . . . . . . . . . . . . . . . . . . . 6-8
I
I/O module
Functions . . . . . . . . . . . . . . . . . . . . . . . . . . . . . . . . . . . . . 3-3
Power supply . . . . . . . . . . . . . . . . . . . . . . . . . . . . . 2-11, 3-5
Reference voltage . . . . . . . . . . . . . . . . . . . . . . . . . . . . . . . 3-7
L
LCD
COUNTER . . . . . . . . . . . . . . . . . . . . . . . . . . . . . . . . 4-3, A-10
TOLERANCE . . . . . . . . . . . . . . . . . . . . . . . . . . . . . . . 4-3, A-10
N
Nominal number . . . . . . . . . . . . . . . . . . . . . . . . . . . . . . . . 6-17
Nominal orientation . . . . . . . . . . . . . . . . . . . . . . . . . . . 5-8, 6-7
Numerical representation . . . . . . . . . . . . . . . . . . . . . . . . . A-15
O
Operating modes . . . . . . . . . . . . . . . . . . . . . . . . . . . . . 4-3, 4-6
Operating parameters . . . . . . . . . . . . . . . . . . . . . . . . . . . . 6-18
Operating system . . . . . . . . . . . . . . . . . . . . . . . . . . . . . . . . . XIII
Festo P.BE-Checkbox-EN en 0103c
C-5
C. Index
Orientation
Checking . . . . . . . . . . . . . . . . . . . . . . . . . . . . . . . . . . . . . 6-13
Enable . . . . . . . . . . . . . . . . . . . . . . . . . . . . . . . . . . . . . . . . 6-7
Number . . . . . . . . . . . . . . . . . . . . . . . . . . . . . . . . . . . . . . . 5-6
TEACH . . . . . . . . . . . . . . . . . . . . . . . . . . . . . . . . . . . 5-8, 5-10
P
Parts type
Number . . . . . . . . . . . . . . . . . . . . . . . . . . . . . . . . . . . . . . . 5-6
Pin assignment . . . . . . . . . . . . . . . . . . . . . . . . . . . . . . . . . . A-21
Power supply for the I/O module
External . . . . . . . . . . . . . . . . . . . . . . . . . . . . . . . . . . . . . . . 3-6
Internal . . . . . . . . . . . . . . . . . . . . . . . . . . . . . . . . . . . . . . . 3-5
Pulse-time diagram
Changing the parts type . . . . . . . . . . . . . . . . . . . . . . . . .
Changing the sorting program . . . . . . . . . . . . . . . . . . . .
Counter reading check . . . . . . . . . . . . . . . . . . . . . . . . . .
Start/stop mode . . . . . . . . . . . . . . . . . . . . . . . . . . . . . . .
3-20
3-20
3-13
3-11
S
Sample parts . . . . . . . . . . . . . . . . . . . . . . . . . . . . . . . . 5-3, 5-7
Scatter of characteristics . . . . . . . . . . . . . . . . . . . . . . 5-8, A-18
SELECT . . . . . . . . . . . . . . . . . . . . . . . . . . . . . . . . . . 4-3, 4-6, 6-3
Service . . . . . . . . . . . . . . . . . . . . . . . . . . . . . . . . . . . . . . . . . VIII
Small parts conveyor . . . . . . . . . . . . . . . . . . . . . . . . . . . . . . 1-7
Control . . . . . . . . . . . . . . . . . . . . . . . . . . . . . . . . . . . . . . 2-15
Switching delay . . . . . . . . . . . . . . . . . . . . . . . . . . . . . . . 1-11
Sorting program
Number . . . . . . . . . . . . . . . . . . . . . . . . . . . . . . . . . . . . . . . 5-6
Standard delivery positions . . . . . . . . . . . . . . . . . . . . . . . . . 1-9
Standard transfer positions . . . . . . . . . . . . . . . . . . . . . . . . 3-14
START . . . . . . . . . . . . . . . . . . . . . . . . . . . . . . . . . . . . . . 4-3, 4-4
Start/stop mode . . . . . . . . . . . . . . . . . . . . . . . . . . . . . . . . . 3-10
STATUS . . . . . . . . . . . . . . . . . . . . . . . . . . . . . . . . . . . . . 4-3, 4-7
STOP . . . . . . . . . . . . . . . . . . . . . . . . . . . . . . . . . . . . . . . 4-3, 4-4
C-6
Festo P.BE-Checkbox-EN en 0103c
C. Index
T
Target group . . . . . . . . . . . . . . . . . . . . . . . . . . . . . . . . . VIII, XIII
TEACH . . . . . . . . . . . . . . . . . . . . . . . . . . . . . . . . . . . . . . 4-3, 4-6
Teach data
Addressing . . . . . . . . . . . . . . . . . . . . . . . . . . . . . . . . . . . . 5-6
Load . . . . . . . . . . . . . . . . . . . . . . . . . . . . . . . . . . . . . . . . . . 6-4
Save . . . . . . . . . . . . . . . . . . . . . . . . . . . . . . . . . . . . . . . . 5-11
Teach procedure . . . . . . . . . . . . . . . . . . . . . . . . . . . . . . . . . 1-8
Addressing teach data . . . . . . . . . . . . . . . . . . . . . . . . . . . 5-6
Preparation . . . . . . . . . . . . . . . . . . . . . . . . . . . . . . . . . . . . 5-3
Saving teach data . . . . . . . . . . . . . . . . . . . . . . . . . . . . . . 5-11
Scanning sample parts . . . . . . . . . . . . . . . . . . . . . . . . . . 5-7
Test mode . . . . . . . . . . . . . . . . . . . . . . . . . . . . . . . . . . . . . . 6-10
Test part deviation . . . . . . . . . . . . . . . . . . . . . . . . . . . . . . . 6-12
Test procedure . . . . . . . . . . . . . . . . . . . . . . . . . . . . . . . . . . . 1-8
Enable the orientations . . . . . . . . . . . . . . . . . . . . . . . . . . 6-7
Load the teach data . . . . . . . . . . . . . . . . . . . . . . . . . . . . . 6-4
Preparation . . . . . . . . . . . . . . . . . . . . . . . . . . . . . . . . . . . . 6-3
Set counter function . . . . . . . . . . . . . . . . . . . . . . . . . . . . . 6-7
Set the tolerance . . . . . . . . . . . . . . . . . . . . . . . . . . . . . . . 6-6
Test mode . . . . . . . . . . . . . . . . . . . . . . . . . . . . . . . . . . . . 6-10
Tolerance . . . . . . . . . . . . . . . . . . . . . . . . . . . . . . . . . . 6-6, A-16
Tolerance factor . . . . . . . . . . . . . . . . . . . . . . . . . . . . . . . . . 6-14
TOOL . . . . . . . . . . . . . . . . . . . . . . . . . . . . . . . . . . . . . . . . . . A-11
X
X1 . . . . . . . . . . . . . . . . . . . . . . . . . . . . . . . . . . . . . . . . 2-5, 2-16
X2 . . . . . . . . . . . . . . . . . . . . . . . . . . . . . . . . . . . . . . . . 2-5, 2-15
X3 . . . . . . . . . . . . . . . . . . . . . . . . . . . . . . . . . . . . . . . . . 2-5, 2-9
X4 . . . . . . . . . . . . . . . . . . . . . . . . . . . . . . . . . . 2-5, 2-6, 2-9, 3-3
X5 . . . . . . . . . . . . . . . . . . . . . . . . . . . . . . . . . . . . . . . . . 2-5, 2-6
Festo P.BE-Checkbox-EN en 0103c
C-7
C. Index
C-8
Festo P.BE-Checkbox-EN en 0103c