1
Toad™ DBA Suite for
Oracle 12.5
®
Installation Guide
Contents
Requirements
iii
About Toad Editions
iii
System Requirements
iv
Required Windows Privileges
vii
Install Toad Editions
viii
Install Toad Editions
viii
License Toad Editions
Silently Install Toad Editions
ix
x
About Installing Silently
x
Extract MSI Files
x
Install through Command Line
xii
Command-Line Parameters (Toad for Oracle)
xii
Install Benchmark Factory through Command Line
xv
Install Toad Data Modeler through Command Line
xv
Shortcuts
Install Spotlight through Command Line
xv
xvi
Install Patches Silently
xvii
Uninstall Toad for Oracle through Command Line
xviii
Install Product Licenses during Silent Installation
Configure the License File
About Dell
xix
xix
xx
Contacting Dell
xx
Technical support resources
xx
1
Requirements
About Toad Editions
By purchasing one of the Toad for Oracle Editions, you have obtained not only a powerful
Oracle application development tool, but other tools to help you maintain and develop your
Oracle database applications.
This guide is an executive overview of the Toad DBA Suite for Oracle. It provides basic
information about installing the products, including system requirements and the use of the Dell
Software Installer. See the specific Installation Guide for each product for more information about
each application, including troubleshooting information.
The following Dell Software applications are included in this edition:
l
Toad for Oracle Xpert
l
DB Admin Module Add-on
l
Benchmark Factory™ for Databases - Oracle Edition
l
®
Spotlight™ on Oracle
Includes Spotlight on Unix/Linux, Spotlight on Windows, and Spotlight on
Oracle Data Guard
l
Toad™ Data Modeler (free use)
l
Backup Reporter for Oracle
®
In many cases, if functionality is disabled within Toad for Oracle, you may not have an
appropriate license to use it. When Toad is running, you can see which components are licensed
by selecting Help | About.
Toad DBA Suite for Oracle Installation Guide
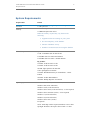
iv
Requirements
System Requirements
Requirement
Details
Processor
1 GHz processor (Spotlight requires 1.2 GHz processor)
Memory
1 GB RAM required for 32-bit
2 GB RAM required for 64-bit
Note: The memory required may vary based on the
following: Hard disk space
l
Applications that are running on your system
l
Size and complexity of the database
l
Amount of database activity
l
Number of concurrent users accessing the database
By Toad Edition:
2 GB - Toad DBA Suite for Oracle and
Toad DBA Suite for Oracle RAC Edition
Toad DBA Suite for Oracle - Exadata Edition
By product:
120 MB - Toad for Oracle 32 bit
150 MB - Toad for Oracle 64 bit
90 MB - SQL Optimizer for Oracle®
1GB - Spotlight™ on Oracle®
120 MB - Benchmark Factory™ for Databases - Oracle
Edition
200 MB - Toad™ Data Modeler
200 MB - Backup Reporter for Oracle®
Operating system
Windows Server 2003 (32-bit and 64-bit)
Windows XP (32-bit and 64-bit)
Windows Vista (32-bit and 64-bit)
Windows Server 2008 (32-bit and 64-bit) - 2 CPU required
Windows Server 2008 R2 (64-bit) - 2 CPU required
Windows 7 (32-bit and 64-bit)
Windows 8 (32-bit and 64-bit)
Windows Server 2012 (64-bit)
Exceptions:
64-bit Toad's SQL Tracker requires Windows Vista or later.
Spotlight: Windows XP requires Service Pack 1 or later.
Toad DBA Suite for Oracle Installation Guide
v
Requirements
Database requirements
Requirement
Details
Database client
Oracle Client 9.2.0.8
Oracle Client or Instant Client 10.2.0.3/10.2.0.4
Oracle Client or Instant Client 11.2.0.1/11.2.0.3
Oracle Client or Instant Client 12c
Note: You must use the 32-bit version of Toad with the 32bit Oracle client, and the 64-bit version of Toad with the
64-bit Oracle client.
Database server
Oracle
Oracle 8.0.6; 8.1.7; 9i; 9i R2; 10g; 10g R2; 11g, 11g R2,
12c.
Exadata
Toad has been tested on Oracle Exadata 2.0 running Oracle
database 11g R2.
Important: It is recommended that your client version be of
the same release (or later) as your database server. This is an
Oracle recommendation to prevent performance issues.
Exceptions:
Spotlight requires 9.2.0.4 or later and SQL*Net 3.5 or later.
Toad Data Modeler requires 9i or later.
Dell Backup Reporter for Oracle requires 9i or later.
Cloud database service
Oracle databases running on Amazon EC2
Exception:
Benchmark Factory has not been tested.
IPv6
Internet Protocol Version 6 (IPv6) is being adopted by the
US Federal Government and industries around the world. In
its most basic format, the new protocol uses 128-bit
addresses instead of 32-bit addresses used by the current
IPv4 to route packets over the Internet. Toad for Oracle
features such as FTP access the Internet through third-party
vendors such as /nSoftware's IP*Works that are IPv6
compliant. For access to Web sites by way of the Toad
Online window, Toad simply invokes the user-defined or
default Web browser.
Toad DBA Suite for Oracle Installation Guide
vi
Requirements
Additional requirements
Requirement
Details
Additional Software
Microsoft Internet Explorer 6.0 or later (to view video via
the Jump list within Toad, and the Release Notes).
Adobe Acrobat Reader 7.0 or later (to view the Installation
Guide).
Dell Backup Reporter for Oracle:
Dell Backup Reporter requires that the .NET framework
version 2.0 through version 3.5 be installed.
Spotlight on Oracle:
Microsoft .NET Framework 3.5 (Service Pack 1 or later).
Additional requirements
Spotlight requires:
l
Monitor capable of supporting a resolution of
1280x1024 or larger. (You should also set the
display to use the 64K color palette [65536 colors].)
l
RAC edition supports up to 16 instances in a cluster,
with a theoretical limit of 36 instances.
Virtualization support
Before installing your Toad Edition, review the following for virtualization support:
Type
Details
Application virtualization
Citrix® XenApp 5.0 and 6.5 have been tested.
Exceptions:
l
Desktop virtualization (VDI)
Benchmark Factory has not been tested.
Dell™ vWorkspace™ 7.0 has been tested.
Exceptions:
Server virtualization
l
Toad for MySQL—Has not been tested.
l
Benchmark Factory—Has not been tested.
l
Spotlight—Has been tested on desktop VMware®
workstations.
Oracle VM 3.1 has been tested.
Exceptions:
l
Benchmark Factory for Databases - Oracle Edition
has not been tested.
Toad DBA Suite for Oracle Installation Guide
vii
Requirements
Type
Details
l
Toad for MySQL has not been tested.
l
Spotlight has been tested on VMware ESX server™.
Spotlight supports Oracle Virtualization (OVM).
Limited testing has been done using Oracle VM 3.0.
VMware ESX Server 3.5 has been tested.
Exceptions:
l
Toad Data Modeler has been tested using VMware
Server 3.0.
l
Toad for MySQL has not been tested.
l
Benchmark Factory has not been tested.
Note: Toad Editions may work in virtualization environments other than the ones listed.
Upgrade and compatibility
Note regarding settings when upgrading:
Toad supports importing settings from a previous version of Toad for Oracle if the new version is
within two releases of the previous version. If your versions are more than two releases apart, you
need to install an intermediate version to successfully import the files.
Required Windows Privileges
In order to install and run Toad for Oracle, make a connection, and do basic operations, you must
have the following privileges.
Operating System
Windows XP
Windows Server
Windows Vista
Windows 7
Windows 8
Windows Server 2012
Requirements
l
Read access to the Oracle client folder
l
Read/write privileges on the Oracle Homes directories that
you use for your connections
l
Be a Power User or Administrator
l
Read access to the Oracle client folder
l
Read/write privileges on the Oracle Homes directories that
you use for your connections
l
Read access to the Oracle client folder
l
Read/write privileges on the Oracle Homes directories that
you use for your connections
Note: Other functionality in Toad may require additional privileges.
2
Install Toad Editions
Install Toad Editions
You can install any or all of the products that are included in your Toad Edition using the Dell
Software Installer.
Notes:
l
See the Dell Software Installer Release Notes for detailed information about the current
version of the Dell Software Installer.
l
You can also install Toad Edition products silently. Silent installation provides a
convenient method for deploying Toad products to multiple machines. See
"Extract MSI Files"
To install a Toad Edition
1. Run the Toad Edition installation program.
2. Complete the wizard. Review the following for additional information:
Destination
directory
Select a directory to install the applications in your Toad edition. The
default directory is C:\Program Files\Quest Software.
Note: This directory sets the base directory for the installation of all
Dell Software products.
Individual
Products
Expand a product in the product list to select additional installation
features such as install type, installation directory, and so on.
Note: For additional information about other products, see the
appropriate product Installation Guide.
Toad DBA Suite for Oracle Installation Guide
ix
Install Toad Editions
License Toad Editions
Beginning with Toad 10.1, all products within a Toad edition share a licensing key. For best
results, when you have completed installation of your products, run Toad for Oracle first and
enter the license key when prompted. This ensures that all installed products reflect the
appropriate license key.
Upgrade Existing Licenses
If you have previously licensed versions of Toad for Oracle or the other products in this edition,
your old license keys will continue to work. If you are upgrading to a different edition and have
been issued a new key, use the following procedure.
To upgrade an existing license
1. Launch Toad for Oracle.
2. Select Help | Licensing and enter your new license key. Any new features are enabled
automatically, and any additional Toad products are licensed using this key.
3
Silently Install Toad Editions
About Installing Silently
In order to perform a silent install, you must first extract the MSI file from the Dell
Software Installer. Once the extraction completes, you can easily install all of the selected
products through the silent install batch file, or individually install the products through the
command line.
Note: You do not need to install the Dell Software Installer on any of the computers where you
are silently installing Toad products. The Dell Software Installer is only used to extract the
required MSI files.
To install silently
1. Extract the MSI from the Dell Software Installer.
2. Silently install the products. Select one of the following options:
Run silent install
batch file
Run SilentInstall.bat to install all of the selected products. This
file is located with the extracted MSI files.
This is the easiest option to install silently. It uses all of the
default options to install the products.
Install through
command line
Execute command-line parameters to install one product at a
time.
This option allows you to change the parameters to fit your
environment or standards, such as installing to a different
directory.
Extract MSI Files
nnTo extract MSI files from the Dell Software Installer
1. Run your Toad bundle from the command prompt, including the correct path to the
directory where it resides and the /extract parameter. Since the executable contains
spaces, remember to include quotation marks. For example:
Toad DBA Suite for Oracle Installation Guide
xi
Silently Install Toad Editions
2. Complete the wizard. Review the following for additional information:
Product Selection
Page
Description
Select the product Verify that all the products you want to extract display in this
you want to
list. If a product does not display, you should start over and
extract
select an edition that contains all the files.
Finish Page
"specified
location" link
Description
Click this link to open the directory where your files have been
extracted. This directory also includes the silent installation
batch file (SilentInstall.bat).
The batch file contains the commands to silently install all the
products that you selected from the relative path. The install
requires the applicable directories from the locations that you
extract to and installs each product to the default directory.
"Readme.txt" link
Click this link to open the extraction log as well as the
command-line parameters that are needed to perform default
installations of the products. This file also defines the order in
which the products need to be installed to satisfy the
dependencies between the products.
This option allows you to change the parameters to fit your
environment or standards, such as installing to a different
directory.
Toad DBA Suite for Oracle Installation Guide
xii
Install through Command Line
Install through Command Line
To silently install Toad for Oracle through the command line
1. Extract the MSI from the Dell Software Installer.
2. Enter an install command similar to the following:
msiexec /i "<path to msi file\ToadforOracle_
version.msi>"INSTALLDIR="<installation folder>"
ADDLOCAL=Client,Server/q /l*v <path to install log, including file
name>
For example:
msiexec /i "C:\Documents and
Settings\Johndoe\desktop\ToadforOracle12.5.exe"
INSTALLDIR="C:\Programs\Quest Software\Toad for Oracle"
ADDLOCAL=Client,Server /q /l*v "C:\install.log"
Command-Line Parameters (Toad for Oracle)
nnYou can use the following parameters to silently install Toad for Oracle:
Option
Parameter
Description
/l
Package|ProductCode
Installs or configures the product.
/f
[p|o|e|d|c|a|u|m|s|v]
Repairs the product. This option ignores any
property values entered in the command-line.
The default argument list for this option is
'omus.' The following options are available:
Package|ProductCode
l
p—Reinstalls only if a file is missing.
l
o—Reinstalls if a file is missing or an
older version is installed.
l
e—Reinstalls if a file is missing or an
equal or older version is installed.
l
d—Reinstalls if a file is missing or a
different version is installed.
l
c—Reinstalls if a file is missing or the
stored checksum does not match the
calculated value. This option only
repairs files that have
msidbFileAttributesChecksum in the
Attributes column of the File table.
Toad DBA Suite for Oracle Installation Guide
xiii
Install through Command Line
Option
Parameter
Description
l
a—Forces all files to be reinstalled.
l
u—Rewrites all required, user-specific
registry entries.
l
m—Rewrites all required, computerspecific registry entries.
l
s—Overwrites all existing shortcuts.
l
v—Runs from source and re-caches the
local package. Do not use this option
for the initial installation of the
product or feature.
/a
Package
Installs the product on the network.
/x
Package/ProductCode
Uninstalls the product.
/l
[i|w|e|a|r|u|c|m|o|p|v|x|+|!|*] Writes logging information to a logfile in the
specified path. The path to the logfile location
Logfile
must already exist. The installer does not
create the directory structure for the logfile.
Flags indicate which information to log. If no
flags are set, the default is 'iwearmo.' The
following options are available:
l
i—Status messages.
l
w—Nonfatal warnings.
l
e—All error messages.
l
a—Start up of actions.
l
r—Action-specific records.
l
u—User requests.
l
c—Initial UI parameters.
l
m—Out-of-memory or fatal exit
information.
l
o—Out-of-disk-space messages.
l
p—Terminal properties.
l
v—Verbose output.
l
x—Extra debugging information. Only
available on Windows Server 2003.
Toad DBA Suite for Oracle Installation Guide
xiv
Install through Command Line
Option
/q
Parameter
n|b|r|f
Description
l
+—Append to existing file.
l
!—Flush each line to the log.
l
"*"—Log all information except for the
v and x options. To include the v and
x options, enter "/l*vx".
Sets the user interface level. Review the
following options:
l
q, qn—No UI
l
qb—Basic UI. Use qb! to hide the
Cancel button.
l
qr—Reduced UI with no modal dialog
box displayed at the end of the
installation.
l
qf—Full UI and any authored
FatalError, UserExit, or Exit modal
dialog boxes at the end.
l
qn+—No UI except for a modal dialog
box displayed at the end.
l
qb+—Basic UI with a modal dialog
box displayed at the end. The modal
box does not display if you cancel the
installation. Use qb+! or qb!+ to hide
the Cancel button.
l
qb- —Basic UI with no modal dialog
boxes. Note that /qb+- is not a
supported UI level. Use qb-! or qb!- to
hide the Cancel button.
Note: The ! option is available with Windows
Installer 2.0 and works only with basic UI. It
is not valid with the full UI.
RESTRICTIONS p
i
Prevents users from saving their connection
password by disabling the Save password
field in the Database Login window. For
example: RESTRICTIONS=p
Prevents users from accessing the Internet via
Toad by disabling all Internet access in Toad.
This can be combined with the 'p' parameter;
for example: RESTRICTIONS=p,i
Toad DBA Suite for Oracle Installation Guide
xv
Install through Command Line
Install Benchmark Factory through Command Line
To silently install Benchmark Factory through the command line
1. Extract the MSI from the Dell Software Installer.
2. Enter the following command:
msiexec.exe /i “<path to msi file\BenchmarkFactory_version.msi>” /qn
INSTALLDIR=”<destination directory>”
Where version is the full version, including the build number (for example, 6.0.0.147).
Install Toad Data Modeler through Command Line
To silently install Toad Data Modeler through the command line
1. Extract the MSI from the Dell Software Installer.
2. Enter the following command:
setup.msi /q INSTALLDIR="C:\Program Files\Quest Software\Toad Data
Modeler version\"
The argument for the silent installation from a command-line is “/q”. To specify a
directory where Toad Data Modeler should be installed, use INSTALLDIR=”PATH”.
(Otherwise, the default path is used.)
To specify the database platform where you want to install Toad Data Modeler or which
shortcuts should be created and where, use the ADDLOCAL parameter. If this parameter
is not used, a default installation is performed.
Example:
setup.msi /q INSTALLDIR="C:\Program Files\Quest Software\Toad Data
Modeler
version
\ADDLOCAL=Complete,XPMANIFEST,SUPPORTDATABASES,SHORTCUTUNINSTALL,
SHORTCUTDESKTOP,SHORTCUTSTARTMENU,SHORTCUTQUICKLAUNCH,SHORTCUTHELP,
POSTGRESQL,POSTGRESQL81,POSTGRESQL82
If you use the ADDLOCAL parameter, always select the Complete, XPMANIFEST, and
SUPPORTDATABASES options. These options are required for the correct installation.
When installing support for a particular database platform, you must install basic support
for the selected database platform. For example, to support the Oracle 10g database,
Oracle must also be selected.
Shortcuts
You can use the following to create shortcuts when installing silently:
Toad DBA Suite for Oracle Installation Guide
xvi
Install through Command Line
Command
Description
SHORTCUTUNINSTALL
Creates a shortcut for uninstall in the Start menu.
SHORTCUTDESKTOP
Creates a shortcut for Toad Data Modeler on the
desktop.
SHORTCUTSTARTMENU
Creates a shortcut for Toad Data Modeler in the Start
menu.
SHORTCUTQUICKLAUNCH
Creates a shortcut for Toad Data Modeler in the
Quick Launch bar.
SHORTCUTHELP
Creates a shortcut for the Help file, User Manual, and
Reference Guide in the Start menu.
Tip: Other parameters for silent installs can be found if you enter the “setup.msi ?” command.
Install Spotlight through Command Line
You cannot install the extracted Spotlight on Oracle file because it is not an MSI file and cannot
be run outside of the Dell Software Installer.
To obtain a copy of the Spotlight on Oracle MSI that you can install silently, contact Support.
Toad DBA Suite for Oracle Installation Guide
xvii
Install Patches Silently
Install Patches Silently
If you already have Toad installed and want to upgrade silently, you must include
REINSTALLMODE=vo REINSTALL=ALL in the command. If these parameters are not included, the
MSI registers that Toad is already installed and does not upgrade it.
For example, if you are currently in the directory where the MSI resides, entering the following
command installs to the standard location:
msiexec.exe /i <path to msi file\ToadforOracle<version>SetupFull.msi>
REINSTALLMODE=vo REINSTALL=ALL
You can also set additional parameters or run the MSI from a location other than the active
directory. For example:
msiexec /i "C:\Documents and Settings\johndoe\desktop\
ToadforOracleSetupFull.msi REINSTALLMODE=vo REINSTALL=ALL
INSTALLDIR="C:\Programs\Quest Software\Toad for Oracle\" /q /l*v
"C:\install.log"
Toad DBA Suite for Oracle Installation Guide
Uninstall Toad for Oracle through Command Line
Uninstall Toad for Oracle through
Command Line
To silently uninstall Toad through the command line
»
Enter a command similar to the following:
msiexec /x "<path to msi file\ToadforOracle_version.SetupFull.msi>" /q
xviii
Toad DBA Suite for Oracle Installation Guide
xix
Install Product Licenses during Silent Installation
Install Product Licenses during Silent
Installation
You can install a license as part of the silent install process by pushing a windows registry file
to the target machine and importing it to the registry.
Configure the License File
When a silent install is performed, a License Key template (Questkey.reg) is extracted into the
selected directory. You can use this template to enter the key(s) that you would like to use on
the target PC.
The following represents the contents of the sample registry key:
Windows Registry Editor Version 5.00
[HKEY_CURRENT_USER\Software\{08439167-4CA5-48E9-A810-A3A7C0B80B06}]
[HKEY_CURRENT_USER\Software\{08439167-4CA5-48E9-A810-A3A7C0B80B06}\Local]
[HKEY_CURRENT_USER\Software\{08439167-4CA5-48E9-A810-A3A7C0B80B06}
\Local\REPLACE_WITH_KEY]
"SiteMessage"="REPLACE_WITH_SITEMESSAGE"
"ProductName"="REPLACE_WITH_PRODUCTNAME"
"ProductVersion"="REPLACE_WITH_PRODUCTVERSION"
Review the following to configure the license file:
l
Do not change the first two lines as they are the key entries to add a license.
l
In the template, replace “REPLACE_WITH_????” with the relevant information supplied
with your license.
l
Since the license key is used to create a folder in the registry, you can add additional
licenses in the same file by replicating the last four lines.
l
The license(s) are ready for use once the Questkey.reg file has been pushed and
imported to the registry and the entries are available on the remote machine.Any
product that is run in the Toad bundle reads and validates the license and removes the
entries from the registry.
l
Your product(s) are ready for use when the license is validated.
About Dell
Dell listens to customers and delivers worldwide innovative technology, business solutions and
services they trust and value. For more information, visit www.software.dell.com.
Contacting Dell
Technical support:
Online support
Product questions and sales:
(800) 306-9329
Email:
[email protected]
Technical support resources
Technical support is available to customers who have purchased Dell software with a valid
maintenance contract and to customers who have trial versions. To access the Support
Portal, go to
http://software.dell.com/support/.
The Support Portal provides self-help tools you can use to solve problems quickly and
independently, 24 hours a day, 365 days a year. In addition, the portal provides direct access to
product support engineers through an online Service Request system.
The site enables you to:
l
Create, update, and manage Service Requests (cases)
l
View Knowledge Base articles
l
Obtain product notifications
l
Download software. For trial software, go to Trial Downloads.
l
View how-to videos
l
Engage in community discussions
l
Chat with a support engineer
©
2014 Dell Inc.
ALL RIGHTS RESERVED.
This guide contains proprietary information protected by copyright. The software described in
this guide is furnished under a software license or nondisclosure agreement. This software may be
used or copied only in accordance with the terms of the applicable agreement. No part of this
guide may be reproduced or transmitted in any form or by any means, electronic or mechanical,
including photocopying and recording for any purpose other than the purchaser’s personal use
without the written permission of Dell Software Inc.
The information in this document is provided in connection with Dell Software products. No
license, express or implied, by estoppel or otherwise, to any intellectual property right is
granted by this document or in connection with the sale of Dell Software products. EXCEPT
AS SET FORTH IN DELL SOFTWARE’S TERMS AND CONDITIONS AS SPECIFIED IN
THE LICENSE AGREEMENT FOR THIS PRODUCT, DELL SOFTWARE ASSUMES NO
LIABILITY WHATSOEVER AND DISCLAIMS ANY EXPRESS, IMPLIED OR STATUTORY
WARRANTY RELATING TO ITS PRODUCTS INCLUDING, BUT NOT LIMITED TO, THE
IMPLIED WARRANTY OF MERCHANTABILITY, FITNESS FOR A PARTICULAR
PURPOSE, OR NON-INFRINGEMENT. IN NO EVENT SHALL DELL BE LIABLE FOR
ANY DIRECT, INDIRECT, CONSEQUENTIAL, PUNITIVE, SPECIAL OR INCIDENTAL
DAMAGES (INCLUDING, WITHOUT LIMITATION, DAMAGES FOR LOSS OF PROFITS,
BUSINESS INTERRUPTION OR LOSS OF INFORMATION) ARISING OUT OF THE USE
OR INABILITY TO USE THIS DOCUMENT, EVEN IF DELL SOFTWARE HAS BEEN
ADVISED OF THE POSSIBILITY OF SUCH DAMAGES. Dell Software makes no
representations or warranties with respect to the accuracy or completeness of the contents of this
document and reserves the right to make changes to specifications and product descriptions at
any time without notice. Dell Software does not make any commitment to update the
information contained in this document.
If you have any questions regarding your potential use of this material, contact:
Dell Software Inc.
Attn: LEGAL Dept
5 Polaris Way
Aliso Viejo, CA 92656
Refer to our Web site (www.software.dell.com) for regional and international office information.
Trademarks
Dell, the Dell logo, and Dell Knowledge Xpert, Dell vWorkSpace, Dell Toad, T.O.A.D., Toad
World, Toad for Oracle, SQL Optimizer for Oracle, Code Tester for Oracle, Spotlight on Oracle,
Benchmark Factory, and Dell Backup Reporter for Oracle are trademarks of Dell Inc. and/or its
affiliates. Other trademarks and trade names may be used in this document to refer to either the
entities claiming the marks and names or their products. Dell disclaims any proprietary interest in
the marks and names of others.