1
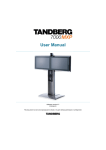
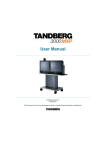
Installation Sheet
TANDBERG 1700 MXP
This box contains:
TANDBERG 1700 MXP unit
Designer lens caps
TANDBERG Remote Control
User manual on CD
Registration card
Installation sheet
Accessories box:
1 VGA - DVI cable
Power cable
1 LAN cable
Power supply
Batteries for remote control
Headset recommendations
Tilt the display
manually to get a
better viewing angle.
The lens cap is magnetic
and can be placed on
the side of the screen
when not in use.
Turn the ring to focus
the camera. To see
yourself, press the
Selfview key on the
Remote Control
Tilt the camera
manually to make it
point at you.
Standard PC headsets with 3.5mm jacks are
compatible with the TANDBERG 1700 MXP. Having
a headset with microphone is optional.
Please see the user manual for more information
about using a headset with TANDBERG 1700 MXP
and for a technical headset recommendation.
Headset/Loudspeaker
toggle button
Headset out
Headset microphone
DVI-I for PC
presentations
Connect the video
system to your LAN
Power
Audio / Line In
for PC presentations
The mirror
help you to
locate the
connectors.
D13921.02
To let the PC and the
video system share a
single LAN connection,
connect your PC to the
LAN through the video
system.
Mount the lid
as shown.
The lid is
held in place
by magnets.
System Configuration
TIP
If the menu is not
already
present, press the
OK/Menu key on the
remote control to
open the menu.
Included in this box are three magnetic designer
lens caps. The lens cap allows you to physically
close the lens on your TANDBERG 1700MXP
video system if required. Simply place the lens
cap of choice onto the lens. When not in use
place the lens caps on the side of the video
system – or on your whiteboard.
1
Getting Started
Navigate the menu
with arrow keys and
OK.
4
Snapshot
Touch tones
Language
Open ‘General’. Select language.
Press ‘Save’ to save changes.
The TANDBERG 1700 MXP turns on
automatically when you power up the
system. A Welcome menu appears on the
screen. Use the TANDBERG Remote
Control to navigate in the menu.
2
Camera Presets
Enable Software Options
In the Welcome menu, enter option key and
bandwidth key to enable software options (if
any). Press Restart to make the options
take effect.
3
Open the Control Panel
When you have restarted the system, the
main menu appears on the screen.
Choose ‘Control Panel’ from the main menu
and press OK.
5
LAN Configuration
Open ‘Network - LAN Settings’.
Make IP/H.323 configuration and press
‘Save’.
Please read the user manual for further details.
D13921.02