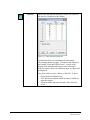
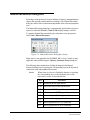
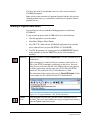
1
SCORBASE Version 5.6 and higher for SCORBOT-ER 4u SCORBOT-ER 2u ER-400 AGV Mobile Robot User Manual Catalog #100342, Rev. H March 2014 Copyright 2014 Intelitek Inc. SCORBASE USER MANUAL Catalog #100342, Rev. H March 2014 Every effort has been made to make this book as complete and accurate as possible. However, no warranty of suitability, purpose, or fitness is made or implied. Intelitek is not liable or responsible to any person or entity for loss or damage in connection with or stemming from the use of the software, hardware and/or the information contained in this publication. Intelitek bears no responsibility for errors that may appear in this publication and retains the right to make changes to the software, hardware and manual without prior notice. INTELITEK INC. 444 East Industrial Park Drive Manchester NH 03109-5317 Tel: (603) 625-8600 Fax: (603) 625-2137 Web site: www.intelitek.com Table of Contents Chapter 1: Introducing SCORBASE .................................................................... 1 Chapter 2: Starting SCORBASE........................................................................... 3 System Requirements.........................................................................................3 Installing the Software .......................................................................................4 Uninstalling the Software ..................................................................................7 Starting SCORBASE .........................................................................................7 Quitting the Software .........................................................................................8 Chapter 3: Menus Overview ................................................................................. 9 The SCORBASE Window .................................................................................9 File Menu .........................................................................................................10 Edit Menu.........................................................................................................12 Run Menu.........................................................................................................13 Options Menu...................................................................................................14 View Menu.......................................................................................................16 Window Menu .................................................................................................18 Help Menu .......................................................................................................19 Charts ...............................................................................................................19 Chapter 4: Homing and Control ......................................................................... 25 General .............................................................................................................25 Homing ............................................................................................................26 Search Home All Axes ........................................................................26 Search Home - Robot ..........................................................................27 Search Home - Peripherals ..................................................................27 Go Home Command ........................................................................................27 Go Home All Axes – Robot – Peripherals ..........................................27 On-Line Mode / Off-Line Mode ......................................................................27 Control On / Control Off – CON/COFF ..........................................................28 Chapter 5: Position Definition ............................................................................ 31 Joint and Cartesian Coordinate Systems ..........................................................32 Joint Coordinate System ......................................................................32 Cartesian Coordinate System (XYZ) ..................................................33 Absolute and Relative Positions ......................................................................34 Record and Teach ............................................................................................34 Manual Movement Dialog Box .......................................................................35 Robot Movement Dialog Box ..........................................................................37 Teach Positions Dialog Box.............................................................................37 User Manual i SCORBASE Simple (Level 1) ..................................................................................38 Simple (Advanced Level) ....................................................................38 Expand (Advanced and Pro Levels) ....................................................39 Simple (Pro Level) ..............................................................................40 Recording Positions (Joint Coordinates) .........................................................41 Record Absolute Position (Levels 1, 2 & Pro) ...............................................41 Record Relative Position (Pro Level) ..................................................41 Teaching Positions (XYZ Coordinates) ...........................................................42 Teach Absolute XYZ Position (Levels 2 & Pro) ................................42 Teach Relative XYZ Position (Levels 2 & Pro)..................................42 Positions Window ............................................................................................43 Positions ..............................................................................................43 Position Popup Window ......................................................................44 Watch Popup Window.........................................................................44 Position Data Dialog Bars ................................................................................45 Encoder Counts Dialog Bar .................................................................45 XYZ Dialog Bar ..................................................................................45 Joints Dialog Bar .................................................................................46 Using a Teach Pendant with SCORBASE .......................................................46 Chapter 6: Program Editing................................................................................ 47 Opening and Closing a Program ......................................................................47 Program Editing Tools .....................................................................................49 Adding and Editing Commands .......................................................................51 Axis Control Commands..................................................................................52 Program Flow Commands ...............................................................................64 Input/Output Commands ..................................................................................76 Advanced Commands ......................................................................................83 Vision Commands............................................................................................85 Chapter 7: Variable Programming ..................................................................... 87 Monitoring Variable Value ..............................................................................89 Chapter 8: Program Execution........................................................................... 91 Running a Program ..........................................................................................91 Halting Program Execution..............................................................................92 Inputs and Outputs Dialog Bars .......................................................................93 Digital Inputs & Outputs Dialog Bars .................................................93 Analog Inputs & Outputs Dialog Bars ................................................94 SCORBASE Log File ......................................................................................95 Chapter 9: Project Files Management ............................................................... 97 Project Management ........................................................................................97 Chapter 10: System Configuration .................................................................... 101 Window Layout Options ................................................................................101 User Manual ii SCORBASE Window Menu ...................................................................................101 Simulation & Teach ............................................................102 Teach & Edit .......................................................................103 Run Screen ..........................................................................104 Project Screen ......................................................................105 Open CIM Screen ................................................................106 User Screen; Save User Screen ...........................................107 Other Options .................................................................................................107 Options Menu ....................................................................................107 Hardware Setup ...................................................................107 Parameter Set Window ........................................................110 Line Number .......................................................................112 Reload Last Project at Startup .............................................112 Experience Level .................................................................112 View Menu ........................................................................................113 Dialog Bar Display Options ................................................114 Appendix A .......................................................................................................... 115 Command Line Options ....................................................................115 User Manual iii SCORBASE User Manual iv SCORBASE 1 Introducing SCORBASE SCORBASE for SCORBOT-ER 4u is a robotics control software package for robot programming and operation. SCORBASE for SCORBOT-ER 4u provides numerous capabilities: Communication with the robot controller over USB channel. Control and real-time status display of five robot axes, gripper and two peripheral axes. Full support and real-time status display of eight digital inputs, eight digital outputs, four analog inputs, and two analog outputs. Position definition and display as well as manual robot movement in reference to Joint Coordinate System (encoder units). The Cartesian Coordinate System (X,Y,Z, Pitch and Roll) is also used. Robot movement definition as Go to Position, Go Linear, or Go Circular, with active speed settings in percentages. (Availability depends on Experience Level setting.) Default setting of 1000 positions and 10000 active program lines. Interrupt programming for handling responses to changes in digital input status. Variable Programming, in three levels of complexity, to moderate the learning curve. This makes it possible for beginners to start at a lower level, and advance through the levels, as they become more skilled in robotics programming. Saving and loading projects. SCORBASE can be installed as part of RoboCell, an interactive graphic software package, which provides simulation of the robot and other devices in the workcell. This manual describes all the features and operations for all Experience Levels of SCORBASE. When necessary, illustrations show the differences in the levels, and descriptions note the availability of options and commands. User Manual 1 SCORBASE Introducing SCORBASE User Manual 2 SCORBASE Introducing SCORBASE 2 Starting SCORBASE The instructions in this chapter are for SCORBASE only. If you intend to install SCORBASE as part of the RoboCell software package, follow the instructions in Chapter 2, Starting RoboCell, in the RoboCell User Manual. System Requirements SCORBASE for ER 4u computer requirements are: Pentium 4 Dual Core with 3 GHz processor or higher, equipped with CD drive. At least 512 MB RAM (1 GB for Vista/7). A hard drive with at least 100 MB of free disk space. Windows XP/Vista/7. A Super VGA or better graphics display, minimum 256 colors. A Mouse or other pointing device. USB port. Minimum requirements are: Pentium 4 Dual Core with 2 GHz processor 512 MB Note: Your operating system might have additional hardware requirements. User Manual 3 SCORBASE Starting SCORBASE Installing the Software The SCORBASE software is supplied on a CD which also contains RoboCell. Close any open applications before proceeding with the installation procedures. If you are about to reinstall the software, or install a newer version to an existing SCORBASE directory, it is recommended that you back up any existing user-created files before you begin the installation. It is also recommended that you remove the previous SCORBASE version for Windows installation, using the software’s Uninstall utility. To install SCORBASE: Insert the CD into the CD-ROM drive to start the installation procedure. If the procedure does not start, either: From the Windows task bar, click Start | Run and type D:Setup (where D: is your CD drive), or Using Windows Explorer, explore the CD drive and click Setup. Wait until the Welcome window is displayed. Figure 2-1: Welcome Window User Manual Click Next to open the License Agreement window. 4 SCORBASE Starting SCORBASE Figure 2-2: License Agreement Window Review the Intelitek software license agreement. You must accept the terms of this agreement in order to proceed with the installation. To accept, choose Yes. The Software Selection Window opens. Figure 2-3: Software Selection Window User Manual 5 SCORBASE Starting SCORBASE Select SCORBASE for ASRS 2X36u, SCORBASE for ASRS 36u, SCORBASE for ER 2u, SCORBASE for ER 4u or SCORBASE for Mobile Robot. The robot that you select becomes the default robot while you are working in SCORBASE, although you can choose to open a new project and work with a different robot. See the Hardware Setup option in the Options Menu. Click Next to open the Setup Type window. Figure 2-4: Setup Type Window User Manual Select the desired language and click Next to open the Choose Destination Location window. 6 SCORBASE Starting SCORBASE Figure 2-5: Choose Destination Location Window The default destination folder for the files is: \ Intelitek\SCORBASE Click Next to accept the default, or click Browse to select another folder and then click Next to open the Select Program Folder window. Click Next to complete the installation procedure. Uninstalling the Software To uninstall SCORBASE: 1. From the SCORBASE program group, select UnInstall. 2. Follow the instructions which appear on the screen. Starting SCORBASE To start SCORBASE: 1. Make sure that all the components to be used are installed and connected according to the installation procedures detailed in the User Manuals supplied with the robot and controller. 2. Turn on the computer and the controller. 3. Select Start | Programs | SCORBASE. User Manual 7 SCORBASE Starting SCORBASE 4. Select the SCORBASE command. After initialization, the following screen appears: Figure 2-6: SCORBASE Opening Screen If SCORBASE opens in Off-Line mode or the controller is not detected, the program will load and operate in Off-Line mode. Only one instance of SCORBASE can be active at a time. Quitting the Software Stop the SCORBASE program (if running). If you have unsaved changes in the project, SCORBASE prompts you to save the changes before closing. To close SCORBASE (or its components), do any of the following: From the Menu Bar, select File | Exit. Click the Close box in the SCORBASE Title Bar. Press [Alt]+F4. See page 11. User Manual 8 SCORBASE Starting SCORBASE 3 Menus Overview The SCORBASE Window Figure 3-1 shows the SCORBASE opening screen which comprises: A Title Bar containing the screen name and the usual Windows controls for sizing and closing the application screen. A Menu Bar containing all SCORBASE command menus and options. A Toolbar containing icons for the most commonly used options. A Status Bar displaying information regarding the SCORBASE software, modes of operation, current activity, etc. When you position the mouse over an icon, a description of the icon appears in the status bar. Note: The System menu (displayed by right clicking the Title Bar) contains the Always on Top menu item, enabling you to display the application on top at all times. Figure 3-1: SCORBASE Window User Manual 9 SCORBASE Menus Overview File Menu A SCORBASE project contains a program (SBP file), user-defined positions (PNT file), and a project data file (WS file). If RoboCell is also being used, the project includes the cell image (3DC file). Throughout this manual, the term “project” refers to the program positions (and image) files saved by the user as one entity. The File menu contains the usual Windows functions that allow you to open new or previously saved projects, save and close projects. You can print files containing robot programs and positions, and exit the software. The File menu options are: New Project Opens a new untitled project. See page 97. (Ctrl+N) Open Project (Ctrl+O) Save Project (Ctrl+S) User Manual Opens the Load Project window which lists SCORBASE files (without a virtual cell). Saves the currently active project (program, positions and graphics). Save Project As... Saves the currently active project under a new project name. Close Project Closes the currently open project. New Script Opens Notepad for writing a new Visual Basic script. Save the file with a .VBS extension in the same directory as the SCORBASE project file. The best practice for naming the file is: <SCORBASE project name>.VBS. 10 SCORBASE Menus Overview User Manual Open Script Opens File Selector box for opening an existing Visual Basic script file. Print Program Prints the program. (Program window must be active). Print Positions Prints the user-defined positions. (Positions Window must be active) Print 3D Image Reserved for RoboCell program option. Print Preview 3D Image Reserved for RoboCell program option. Print Charts Opens a dialog box to select the specific axis chart for display or printout. Only one axis can be selected at a time. See page 19. Print Preview Charts Displays the selected axis chart before printout. Import 3D Model Reserved for RoboCell program option. Edit 3D Model Reserved for RoboCell program option. View File Enables you to view a file from those listed: SCORBASE programs (*.sbp) Position data (*.pnt) When you select a file, a window opens displaying that file. This is useful for copying lines from another existing SCORBASE program into a program being written. Exit Closes SCORBASE. If changes to a program or position file have been made but not yet saved, a message appears giving you the opportunity to save the file before you exit SCORBASE. 11 SCORBASE Menus Overview Edit Menu The Edit menu contains the usual Windows functions that allow you to edit program files. Cut (Ctrl+X) Deletes selected text or lines from the program lines, and places it on the Windows and SCORBASE clipboards. See page 47. Copy (Ctrl+C) Places a copy of selected text or lines from the program lines on the Windows and SCORBASE clipboards. See page 47. Paste (Ctrl+V) Inserts the contents of the SCORBASE clipboard into the program lines. See page 47. Find (Ctrl+F) Opens a dialog box that allows you to search for a particular text string, SCORBASE command, or command argument. See page 47. Find Next (F3) Repeats the last Find operation for the next occurrence. See page 47. Command/Remark Inserts/deletes asterisk at beginning of a (*…) SCORBASE program command line. This action toggles the command line between a remark and an executable command. See page 47. User Manual Go to Line… Opens a dialog box that displays the total number of lines in the program, and prompts you for a line number. The program editor jumps to the line you specify. See page 47. Go to Selected Line Display the line selected. Useful for long programs. See page 47. 12 SCORBASE Menus Overview Run Menu The Run menu contains SCORBASE commands for homing the robot and peripheral axes (see Chapter 4, page 25), and executing programs. Note: If the software is operating Off-Line, only the Run program options are available in this menu. Search home all axes Homes both the robot and any configured peripheral axes. See page 26. Search home – robot Homes the robot. Search home – peripherals Homes the peripheral. Go home – all axes Sends the robot and peripherals to their home positions. See pages 26 and 27. Go home - robot Sends the robot to its home position. This command does not home the robot. See pages 26 and 27. Go home – peripherals Sends the peripherals to their home position. This command does not home the peripherals. See pages 26 and 27. Run single line Executes the selected (highlighted) program line. See page 91. (F6) Run single cycle (F7) User Manual This command is available only if the system has been homed once, after opening SCORBASE. See page 27. This command is available only if the system has been homed once, after opening SCORBASE. See page 27. Executes the program from the selected (highlighted) program line to the end of the program. 91. 13 SCORBASE Menus Overview Run continuously (F8) Executes the program from the selected (highlighted) program line. When the last program line is reached, the program starts again from the first line. See page 91. Stop (F9) Immediately stops program execution and movement of all axes. See page 92. Pause (F10) Stops program execution after the current line is executed. See page 92. Note: Pause and Stop are software methods for halting program execution. In an actual emergency situation, you should use the EMERGENCY button on the controller or the ABORT key on the Teach Pendant. Options Menu The Options menu allows you to define your preferences for operating the software. On-Line Establishes communication with the controller. See page 27. Off-Line SCORBASE does not communicate with the controller, even though it may be connected. Off-Line mode is useful for checking and debugging programs. See page 27. Control On Enables servo control of the axes. See page 28. (F5) User Manual Control Off Disables servo control of the axes. See page 28. Hardware Setup Opens the Hardware Setup dialog box where you can define the peripheral devices which are connected and operated by the controller as axes 7 and 8. 14 SCORBASE Menus Overview Set Parameters Opens the Parameter Set Window (see Figure 10-12 and Figure 10-13). Advanced Commands must be activated in order to utilize Set Parameters. See page 16. Figure 3-2: Parameter Set Window Parameters can be set for the robot and for each one of the eight axes. Select the appropriate tab and set the desired parameters. User Manual Line Number Shows/hides program line numbers in the program window. Reload Last Project at Startup When checked, opens the last project saved when SCORBASE is started. Level 1 Displays list of commands and options at introductory level. Commands related to Level 2 and Pro are disabled. See page 112. Level 2 Displays list of commands and options at advanced level. Commands related to Pro are disabled. See page 112. Pro Displays list of all commands and options. See page 112. 15 SCORBASE Menus Overview Advanced Options Opens a dialog box in which these options are available: Advanced Commands (See page 47). ViewFlex Commands (see the ViewFlex User Manual). Figure 3-3: Advanced Options Dialog Box When one or both options are checked, the corresponding commands (Advanced Commands and Vision Commands) are listed under the Command tab of the Workspace Window. Parameters should only be modified by skilled operators. View Menu The options in the View menu allow you to show/hide SCORBASE dialog bars and windows. User Manual Workspace Shows/hides the Workspace Window. Through this window, the user can access the project files and the SCORBASE commands tree. See page 47. Manual Movement Shows/hides the Manual Movement Dialog Box. This box enables manual control over the movements of the robot, the gripper and peripheral axes. 16 SCORBASE Menus Overview Teach Positions Shows/hides the Teach Positions Dialog Box. This box enables recording, teaching and deleting positions. It also enables the user to send the robot and/or peripherals to a previously defined position. The functions available depend on the current Experience Level setting. Robot Movements Opens the Robot Movement Dialog Box. Pressing on a selected axis moves it in the selected direction. Positions The Positions Window displays the positions of the currently open project. The list is presented in tabular format. Charts Dialog Bars User Manual Opens Charts. Toggles the display of seven dialog bars that enable the following: Joints – Displays the robot’s joints angle (five joints). XYZ - Displays the robot tool center point (TCP) position and orientation. The coordinate system origin is at the center of the robot base at table level. Digital outputs - Displays the status of digital outputs 1-8 (dark green - off; light green - on). Click on an output to show/hide its status. Digital inputs - Displays the status of digital inputs 1-8 (dark green - off; light green - on). In Off-Line clicking on input toggles its status. Analog outputs - Displays the value of analog output 1&2 (0-255)-(0-10 volt). Analog inputs - Displays the value of analog input 1-4 (0-255). In Off-Line you may set the analog input value. Encoders – Displays the encoder counts of axes 1-8. (Encoders are zeroed after homing the system.) See pages 45 and 93. Show All Dialog Bars Displays all seven dialog bars. Close All Dialog Bars Closes all seven dialog bars. 17 SCORBASE Menus Overview Movement Information Displays the following data: Position error of eight axes in encoder counts Home switch status of all eight axes PWM for one selected axis. The PWM (Pulse Width Modulation) is the controller output for the selected axis motor. Messages Opens the Messages Window. The data displayed in the Messages window is printed using the PS (Print to Screen & Log) commanding SCORBASE. Toolbar Status Bar Shows/hides the programming toolbar (default on). Shows/hides the lower status bar (default on). Window Menu The Window menu enables you to select the desired window layout options. Simulation & Teach Sets the screen to display the RoboCell window and dialog bars required to define positions. This is disabled in SCORBASE. Teach & Edit Opens Program Window, Workspace Window, Manual Movement Window and Teach Position Window. Run Screen Displays the Program Window, together with its toolbar. Project Screen Displays the Program Window and Positions Window. Open CIM Screen User Screen User Manual Displays Program Window, Open CIM Device Driver Window, and CIM Messages Window. This allows the user to customize the screen layout according to personal preference. 18 SCORBASE Menus Overview Save User Screen This saves the User Screen layout for later recall with the User Screen command. [Project Name] Displays the file name of the open project. Help Menu The Help menu options: SCORBASE Help (F1) Opens SCORBASE On-Line help. Scripting Help Opens help files for Visual Basic scripting. About Shows the SCORBASE software version. Charts SCORBASE charts can be configured to display the following data (Y-axis) vs. time (X-axis). User Manual Encoder counts (axis position), represent the actual axis position. The encoder counts are shown in a blue line. Position error is the difference between the required axis position and the actual axis position. The error is expressed in encoder counts and shown in a red line. The PWM value represents the controller output. The error and the axis control parameters determine the PWM value shown in a green line. 19 SCORBASE Menus Overview The data for each axis (1-8) is shown in a different chart. Sample charts for axes 1 and 2 are shown in Figure 3-4. Figure 3-4: Chart for Two Axes To open the Charts window, do one of the following: Click the Charts icon in the toolbar Select View | Charts. . The following options are available in the Charts window toolbar: User Manual Start chart Starts drawing the chart. Stop chart Stops drawing the chart. 20 SCORBASE Menus Overview Options Opens the Chart Options dialog box where you can select the data to be displayed in the chart(s). Figure 3-5: Chart Options Dialog Box Click the data that you want displayed in the charts. The example shown in Figure 3-5 results in the display of the Encoder, Error and PWM of axis 1, as well as the display of the Encoder and Error for axes 2 through 6. Since each axis is shown in a different chart, six charts will be displayed. Any chart can be saved to a history (*.his) file. To do so: Check the Record History box. Click the Browse button (which becomes available) to open the window. Select the folder and enter the name of the file to be saved. User Manual 21 SCORBASE Menus Overview Figure 3-6: Open Project Dialog Box To set the resolution of the chart for the Encoder, Errors and PWM: Click the Advanced button in the Chart Options dialog box. The Range column opens. Figure 3-7: Chart Options Dialog Box User Manual 22 SCORBASE Menus Overview History Opens the History Files Window. Select the desired history (*.his) file from the list or browse to locate it. Figure 3-8: History Files Window Note: To open a history file you must first stop drawing the chart. Legend Displays the colors used in the charts for Encoder, Error and PWM. Encoders – Blue Error – Red PWM – Green User Manual 23 SCORBASE Menus Overview User Manual 24 SCORBASE Menus Overview 4 Homing and Control General The robot and peripheral axes location is monitored and controlled using encoders. To initialize the encoders and to obtain repeatable performance the axes must first reach a predefined position known as hard home. All recorded positions and movements refer to the hard home position. The homing procedure finds the hard home for the selected axes. SCORBASE offers two commands relating to the home position. Search Home is the procedure for homing. During Search Home, each axis is homed separately. The controller activates the currently homed motor axis, until its micro-switch is pressed. Then the controller initializes the axis encoder counter and turns to home the next axis. After all configured axes are homed, the homing procedure ends. Go Home sends the selected axes to a position where the encoders’ value is zero. Note: This command does not home the axes. The two commands are available in three levels: User Manual Search / Go home all (applies for all active axes) Search / Go home robot (applies for the robot) Search / Go home peripherals (applies for axes 7 & 8). 25 SCORBASE Homing and Control Homing Search Home All Axes To start the homing procedure, do one of the following: Select Run | Search home - all axes. Click the Search Home icon. A window opens displaying the number of the axis currently being homed. Each time an axis is successfully homed, a checkmark appears next to the axis number. After the five axes and the gripper have been homed, a checkmark appears next to Robot. Figure 4-1: Homing Status Window To abort homing while the procedure is still in progress, do one of the following: Press [F9] (Stop command) Press the red EMERGENCY button on the controller. Press the EMERGENCY key on the Teach Pendant. If the homing procedure fails, a message appears. The Search Home - All Axes command executes the robot’s homing procedure as well as that of any peripheral devices that have been configured in the Options | Peripherals Setup menu. This command can only be performed when SCORBASE is On-Line. User Manual 26 SCORBASE Homing and Control If the system has already been homed and you change SCORBASE to OffLine mode, there is no need to home the system again when you return to OnLine mode. When SCORBASE is in Off-Line Mode, or when RoboCell is installed and is in Simulation Mode, the homing procedure is not required. The homing procedure initializes Joint and XYZ values according to a software definition. All encoders are set to 0, while the robot Cartesian coordinates are set according to a software model. Search Home - Robot This command runs the homing procedure for the robot. Homing of the peripherals is enabled only after the system has been homed once. Search Home - Peripherals This command runs the homing procedure for the configured peripherals. Homing of the robot is enabled only after the system has been homed once. Go Home Command Go Home All Axes – Robot – Peripherals After the axes have been homed, select Run | Go Home - All Axes to send the axes back to their home position at any time. This command sends the robot and peripherals to a position where the axes encoders value equals zero. The Go Home command does not run the homing procedure. Selecting the Go Home - Robot or Go Home - Peripherals command sends the selected axis to its home position. On-Line Mode / Off-Line Mode SCORBASE can run either in On-Line or in Off-Line mode. In On-Line mode, SCORBASE communicates with the controller over the USB channel. If the Control On state is selected, SCORBASE controls the robot, peripherals and I/O device. In Off-Line mode, SCORBASE can be used only in the Control Off state (useful for programming and debugging). The active mode is displayed in the status bar. To change to On-Line, select Options | On-Line. To change to Off-Line, select Options | Off-Line. User Manual 27 SCORBASE Homing and Control If SCORBASE is opened in On-Line, or On-Line is selected from the Options menu, this message appears as SCORBASE searches for the controller: Figure 4-2: Controller Search Status Window If the controller is detected, On-Line mode is activated. If the controller is not detected, Off-Line remains the active mode. Control On / Control Off – CON/COFF The Control On state enables servo control of the axes. This state is available only in On-Line mode. In the Control Off state, axis movement commands cannot be executed. The Control state (On or Off) is displayed in the lower right corner of the status bar. To enable control of the axes, do one of the following: Select Options | Control On. Click the Control On Press the F5 key. icon. To disable control, do one of the following: Select Options | Control Off. Click the Control Off icon. If you have disabled control and SCORBASE opens in On-Line mode, or OnLine mode is selected after detection of the controller, this prompt appears: Figure 4-3: Control On Confirmation Dialog Box User Manual 28 SCORBASE Homing and Control Press OK to enable control or press Cancel to remain in the Control Off state. The controller automatically disables control if an impact condition, trajectory error or thermic overload error occurs during execution of a movement command. If you attempt to move the axes when control is disabled, this error message appears: Figure 4-4: Axis Move Error When SCORBASE is in Off-Line mode, the Control state cannot be altered. User Manual 29 SCORBASE Homing and Control User Manual 30 SCORBASE Homing and Control 5 Position Definition Every SCORBASE project includes a set of pre-defined positions and a program that sends the robot from one position to the other. Prior to running a program all the positions used in that program should be defined. SCORBASE offers various tools to define and store positions that will be used in the programs. The following SCORBASE tools are used in the position definition process. Manual Movement Dialog Box Teach Positions Dialog Box Robot Movement Dialog Box Position Data Dialog Bars Positions Window To activate the dialog boxes which are most useful for position definition, select Window | Teach & Edit. Any of the following four methods can be used for position definition: No. Method Level 1 Absolute position Joint coordinates 1, 2, Pro 2 Relative position Joint coordinates 2, Pro 3 Absolute position Cartesian coordinates 2, Pro 4 Relative position Cartesian coordinates 2, Pro Note: Peripheral position definition can only be performed in the Pro level. User Manual 31 SCORBASE Position Definition Joint and Cartesian Coordinate Systems Defining a position in SCORBASE can be done by using either the Joint or Cartesian coordinate systems. In both systems, a robot position is defined using five parameters derived from the data supplied by the five axes encoders. An encoder is an angular movement sensor attached to the axes motor. A Peripheral position is always defined using one variable that stores the sensor output (encoder value) of that position. Joint Coordinate System A robot position in Joint coordinates is defined by five angle values, representing each angle of the joints. The joint names are Base, Shoulder, Elbow, Pitch, and Roll. Figure 5-1: Robot Joints User Manual 32 SCORBASE Position Definition For example, after homing, the robot position in Joints coordinates is: Axis #1 - Base = (0) Axis #2 - Shoulder = (–120) Axis #3 - Elbow = (95) Axis #4 - Pitch = (88) Axis #5 - Roll = (0) Cartesian Coordinate System (XYZ) A robot position in Cartesian (or XYZ) coordinates is defined by these parameters. The distance of the robot’s Tool Center Point (TCP) from the point of origin (the center bottom of the robot base), along the three axes that describe three-dimensional space (X,Y,Z). The Pitch (P) and Roll (R) angles of the gripper, specified in angular units. Figure 5-2: Tool Center Point in Cartesian (XYZ) Coordinates User Manual 33 SCORBASE Position Definition For example, after homing, the robot position in Cartesian coordinates is defined as: X = (169) [mm] Y = (0) [mm] Z = (503) [mm] Pitch = (-63) Roll = (0) A position recorded in one coordinate system can be converted by SCORBASE to another coordinate system. Absolute and Relative Positions SCORBASE offers two methods of defining a robot or peripheral position: Absolute and Relative. The two methods are applicable in Cartesian and in Joint coordinates. An absolute position is defined using all five robot position parameters. If the Joint coordinate system is used, the robot position is defined using the Base, Shoulder, Elbow, Pitch, and Roll angles. In the XYZ coordinate system, a position is defined using the X, Y, Z values in millimeters, and the Pitch and Roll angles in degrees. An absolute position is usually a fixed position in world space. A relative position is a position whose coordinates are defined as an offset from a reference position coordinates. If the coordinates of the reference position change, the relative position moves along with it, maintaining the same offset. A relative position can be defined in either Cartesian or Joint coordinate values. A position can also be defined as relative to current. In this case, the relative position is calculated as an offset from the coordinates of the current robot position. Record and Teach Although the terms teach and record are often used interchangeably, SCORBASE makes the following distinction: Record position: defines a robot position in a Joint coordinates system. Teach position: defines a robot position in a Cartesian coordinates system. User Manual 34 SCORBASE Position Definition Manual Movement Dialog Box Recording a robot position (in Joint coordinates) is done by manipulating the robot to the required position and then recording it. The Manual Movement dialog box allows direct control and manipulation of the robot and peripheral axes. The Manual Movement dialog box is automatically opened when a project is opened, or when the Window | Teach & Edit display setting is selected. To open the Manual Movement dialog box when there is no open project, select View | Manual Movement. Figure 5-3: Manual Movement Dialog Box (Joints) Note: Axis 6 is not applicable for SCORBOT-ER 2u. Axes 7 and 8 are only applicable when defined using the Options | Hardware Setup dialog box. The following chart explains how clicking the buttons in the Manual Movement dialog box (or pressing the corresponding keys on the keyboard) controls the robot and peripheral movements. Joints When Joints is selected, clicking the buttons (or pressing the corresponding keys on the keyboard) moves one robot axis at a time, as described below: Keys User Manual Joint Motion 1/Q Rotates the BASE right and left. 2/W Moves the SHOULDER up and down. 3/E Moves the ELBOW up and down. 4/R Moves the wrist (PITCH) up and down. 5/T Rotates the wrist (ROLL) right and left. 6/Y Opens and closes gripper via servo control. 7/U Moves peripheral axis #7 (if connected). 8/I Moves peripheral axis #8 (if connected). 35 SCORBASE Position Definition Figure 5-4: Manual Movement Dialog Box (XYZ) XYZ When XYZ is selected, clicking the buttons (or pressing the corresponding keys on the keyboard) moves the TCP, as described below. Movements in XYZ mode are sometimes a combination of simultaneous movements of a few axes. Keys XYZ Motion 1/Q TCP moves along X-axis (back and forth). 2/W TCP moves along Y-axis (right and left). 3/E TCP moves along Z-axis (up and down). 4/R Axes move in order to change the gripper’s pitch angle; the TCP position does not change. 5/T The gripper rolls; the TCP position does not change. Open Gripper Completely opens the gripper. Close Gripper Completely closes the gripper. The robot can be manipulated from the Manual Movement dialog box before it has been homed in Joint mode only. In fact, it is often necessary to bring the robot into a more suitable position before initiating the homing routine. However, an axis limit error message may appear during manipulation of a robot that has not been homed. Movement of an axis continues as long as the button or key is pressed, or until a software or hardware limit is reached. User Manual 36 SCORBASE Position Definition Robot Movement Dialog Box The Robot Movement dialog box enables control over the robot in XYZ and Joint modes. Figure 5-5: Robot Movement Dialog Box Clicking on an axis image or the XYZPR buttons moves the robot as described above at Manual Movement Dialog Box. To open the Robot Movement dialog box, select View | Robot Movement. Teach Positions Dialog Box The Simple/Expanded Teach Positions dialog box enables the following: Teaching positions (in Cartesian coordinates). Recording positions (in Joint coordinates). Sending the axes to the recorded positions (when program is not running). Go to Position Go Linear Go Circular To display the description of the function of each icon in the Teach Position dialog box, simply place the mouse on the desired icon without clicking a mouse button. The user can define 1,000 positions. A higher computer (CPU and memory) can hold more positions. User Manual 37 SCORBASE Position Definition Simple (Level 1) Figure 5-6: Teach Positions Dialog Box (Simple), Level 1 The Teach Positions (Simple) dialog box offers the following options: Position Number 1, 2 & Pro A numerical name for position. Record 1, 2 & Pro Records the current robot position (in joint coordinates) to the position displayed in the position number field. Delete 1, 2 & Pro Deletes from memory the position in the position number field. Go to Position 1, 2 & Pro Executes the Go to Position command, which sends the robot’s TCP (Tool Center Point) from its current position to the selected position. 1, 2 & Pro Selects the speed for all movement commands. 10 fastest, 1 slowest, 5 default. Speed Simple (Advanced Level) Figure 5-7: Teach Positions Dialog Box (Simple) for the Level 2 (Advanced) User. User Manual 38 SCORBASE Position Definition At the Advanced level, the Teach Positions dialog box offers all the commands available at Level 1, and also all of the following: Expand 2 & Pro Opens the Teach Positions (Expanded/Simple) dialog box. Absolute / Relative to 2 & Pro Defines positions either as absolute or relative to another position. When Relative to is selected, a Relative to field appears. Select either an existing position or Current. A position that is Relative to Current means that the reference position is the robot position at the time it is sent to that position. Relative to is only available to Level 2 and Pro. Expand (Advanced and Pro Levels) Click Expand to open the Teach Positions (Expanded) dialog box: Figure 5-8: Teach Positions (Expand) Dialog Box for Level 2 (Advanced) User User Manual X(mm), Y(mm) Z(mm), Pitch(deg), Roll(deg) Fields for displaying or changing the Cartesian coordinates of the selected position. See page 33. Get Position Displays the Cartesian coordinates of the selected position. See page 33. Clear Clears all position coordinate fields. The position data does not change. Teach Teaches position using the Cartesian Coordinate System. 39 SCORBASE Position Definition Go Circular Executes the Go Circular to Position command. This command sends the robot in a circular path to the target position (in the position number field), via the position specified in the Via position field. The circular motion applies only to the robot. Via position Selects the intermediate position through which the Go Circular movement passes. Go Linear to Position Executes the Go Linear to Position command. Sends the axes in a straight line to the selected position. Toggles to the Teach Position (Simple) dialog box. Simple Simple (Pro Level) Figure 5-9: Teach Positions (Simple) Dialog Box (Pro Level) At the Pro level, the Simple Teach Positions dialog box offers the following additional commands: Include Axes Pro Instructs the controller to define coordinates for axes for Robot, Peripheral or both. A peripheral position can be recorded only in the Pro level. Duration Pro Defines the time it takes to complete a movement command. The time is defined in tenths of a second. For further information, See page 53. These commands remain available when the Teach Positions dialog box is expanded. User Manual 40 SCORBASE Position Definition Recording Positions (Joint Coordinates) Record Absolute Position (Levels 1, 2 & Pro) To record an absolute position: 1. Use either the Manual Movement dialog box or the Robot Movement dialog box to move the robot to the position you want to record. 2. Click on the Teach Position dialog box. 3. Type a position number in the Position Number field, or select an existing position number if you want to modify (overwrite) a previously defined position. 4. Select Absolute. 5. Select Include Axes (Robot or Peripherals): a. Robot: to record a position for the robot axes. b. Peripherals: to record a position for the peripheral axes (Pro level only). c. The user can select both. 6. To record the current position, click the Record Position icon. Record Relative Position (Pro Level) To record a relative position: 1. Make sure you have first defined a reference position. 2. Move the robot to the position whose coordinates you want to record as relative to another position. 3. In the Position Number field in the Teach Positions (Simple) dialog box, enter a new position number. 4. Select Relative to, and enter a number (or select Current) for the reference position in the Relative to field. 5. Click Record. You have now recorded a relative position. A position that is Relative to Current means the specified offset will be computed from the location at which the robot is positioned at the time it is sent to the relative position. If the reference position changes, the relative position also moves. User Manual 41 SCORBASE Position Definition Teaching Positions (XYZ Coordinates) In order to teach a position in XYZ coordinates, click Expand. See page 33. Teach Absolute XYZ Position (Levels 2 & Pro) To teach an absolute XYZ position 1. Click Expand. 2. Enter XYZ, Pitch and Roll values. 3. Click Teach. To use existing position coordinates to define a new position (or modify that position’s coordinates), do the following: 1. In the Position Number field in the Teach Positions dialog box, select an absolute position number. 2. Click Get Position. The XYZPR values of the position now appear in the XYZ, Pitch and Roll fields. Note: If the position is relative, only the offset values will be displayed. 3. In the Position Number field, enter a different number (or leave the position number if you want to modify that position). 4. To record a position for the robot axes, click Robot. To record a position for the peripheral axes, click Peripherals. To record positions for both, click Robot and Peripherals. 5. In one or more of the coordinate fields, enter a new value (in millimeters or degrees). 6. Click Teach. Warning: If you click Record, the current TCP coordinates will be written to the selected position. Teach Relative XYZ Position (Levels 2 & Pro) To teach a relative XYZ position: Make sure you have first recorded the reference position. 1. In the Position Number field, in the Teach Positions dialog box, enter the new position number. 2. Select Relative to, and enter the number of the reference position in the Relative to field. All XYZ coordinate fields are blank or show 0. 3. In one or more of the coordinate fields, enter a new value (in millimeters or degrees). 4. Click Teach. A position that is relative to current means the specified offset will be computed from wherever the robot is located at the time it is sent to the relative position. If the reference position changes, the relative position moves accordingly. User Manual 42 SCORBASE Position Definition Positions Window Positions The Positions window displays a list of the positions of the currently open project. The list is presented in tabular format. As default, the table presents position information in both the Joint Coordinate System and the Cartesian Coordinate System. When fully open, the window is divided horizontally into two panels. By dragging the bottom edge of the window, you can reveal the bottom panel. The top panel displays all positions in the project (Position Inventory Panel). The bottom panel (Watch Panel) displays the positions which have been selected for watching. Figure 5-10: Positions Window, fully opened to display both the Position Inventory Panel and the Watch Panel. Each row in the top portion of the table represents a single position. To manipulate the list: User Manual Select a position (row). Right-click to display the popup window. 43 SCORBASE Position Definition Position Popup Window Position No. Delete Delete All Displays the number of the position. Deletes the selected position. Deletes all listed positions from the Position Inventory Panel and the SCORBASE memory. Add Watch Copies the position data to the watch list, visible in the Watch Panel. Show Joint Shows only Joint values of all positions. See page 32. Show XYZ Shows only the XYZPR of all positions. See page 33. Show Both Shows both Joint and XYZPR values of all positions. Note: The peripheral positions are always displayed using encoder counts. Watch Popup Window Position No. Delete Delete All User Manual Displays the number of the position. Removes the selected position from the watch list, but does not affect its presence in the overall list. Removes all listed positions from the watch list, but does not affect their presence in the overall list. Show Joint Shows only Joint values of all positions. This can be set to a value different from the Position Inventory Panel. See page 32. Show XYZ Shows only the XYZPR of all positions. This can be set to a value different from the Position Inventory Panel. See page 33. Show Both Shows both Joint and XYZPR values of all positions. 44 SCORBASE Position Definition Position Data Dialog Bars SCORBASE offers three dialog bars that display all axes, encoder counts and the robot position in reference to both the Cartesian Coordinate System (XYZ) and the Joint Coordinate System. All dialog bars are accessible at all levels via the View menu. They may also be opened or closed using the View | Show All Dialog Bars or View | Close All Dialog Bars commands. Encoder Counts Dialog Bar The Encoder Counts dialog bar displays the current values of the encoders for each of the eight axes. Figure 5-11: Encoder Counts Dialog Bar To display the Encoder Counts dialog bar, select View | Dialog Bar | Encoders. The encoder values change whenever the axes are moved. These values are set to 0 (or close to zero) after the Search Home All Axes command is executed. XYZ Dialog Bar The XYZ dialog bar displays the current Cartesian Coordinate System (XYZ PR) values of the TCP. Figure 5-12: XYZ Dialog Bar To display the XYZ dialog bar, select View | Dialog Bar | XYZ. The values shown in the above example are the Joint values after the Search Home command is executed. User Manual 45 SCORBASE Position Definition Joints Dialog Bar The Joints dialog bar displays the angles between the two links of the joint, in degrees. Figure 5-13: Joints Dialog Bar To display the Dialog bar, select View | Dialog Bar | Joints. The values shown in the above example are the XYZ values after the Search Home command is executed. Using a Teach Pendant with SCORBASE The Teach Pendant is a hand-held terminal that gives the operator direct control of the robot and peripheral axes. In addition to controlling movement of the axes, the Teach Pendant may be used for recording positions, sending the axes to recorded positions, and other functions. To control the axes from the Teach Pendant, SCORBASE must be operating in the On-Line mode, and the Teach/Manual switch on the Teach Pendant must be switched to Teach. This disables control of the axes from SCORBASE dialog boxes. All Teach Pendant operations are reflected in the SCORBASE dialog boxes. For example, positions recorded by the Teach Pendant will appear in the Position Number list in the Teach Positions dialog box; and encoder and XYZ values will change in the Encoder Counts and XYZ dialog boxes. The Teach Pendant operation is described fully in the Teach Pendant for Controller User Manual. User Manual 46 SCORBASE Position Definition 6 Program Editing A SCORBASE program is a set of instructions written by the user to control the robot, peripheral equipment and to communicate with external I/O devices. This chapter explains how to create and edit a SCORBASE program. The following tools are used for program editing: Program commands editor. Command tree that lists all SCORBASE commands. Opening and Closing a Program Every SCORBASE program is part of a SCORBASE project. A project also includes the user-defined positions, project data and, if RoboCell is installed, a virtual cell (3dc file). Only one project can be opened at a time. To open a saved program, open the project containing the desired program by doing one of the following: Select File | Open Project… Click on the Open an Existing Project Press Ctrl + O. icon. In all cases, the Load Project window will open, prompting you to select the project that contains the program you want to edit. The program is displayed in the Program Window. To create a new project, do one of the following: User Manual Select File | New Project… Click on the Create a New Project Press Ctrl + N. 47 icon. SCORBASE Program Editing By default, the new project is opened with the Teach & Edit layout. This layout displays four windows: Program Window that holds the SCORBASE program. Manual Movement Dialog Box. Teach Positions Dialog Box. Workspace Window that shows: Project data, i.e., positions, user program and graphical display (if installed). SCORBASE Command Tree. The Program Window contains the text of the SCORBASE program currently loaded. Its title bar displays the name of the project. Also shown by default is the programming toolbar. The toolbar contains a drop-down list of all subroutines available, for quick navigation. Figure 6-1: Program Window The Workspace Window contains two tabs to switch between the project files and the commands currently available. User Manual 48 SCORBASE Program Editing Figure 6-2: Workspace Window – Project Tab The Commands tab displays the Command Tree, which in turn displays all of the commands available for the currently set Experience Level. Program Editing Tools SCORBASE is a text-based programming language in which every command is a single text line. SCORBASE programs are edited by means of the usual Windows text editing options, which can be accessed: Via the Edit menu By pressing the designated keys By right-clicking the mouse in the Program Window to open a pop-up menu. Cut - Ctrl+X Deletes selected text or lines from the program, and places it on the Windows and SCORBASE clipboards. Copy - Ctrl+C Places a copy of selected text or lines from the program on the Windows and SCORBASE clipboard. Paste - Ctrl+V Inserts the contents of the SCORBASE clipboard into the program. Find - Ctrl+F Opens a dialog box that allows you to search for any string, such as a command or text. Figure 6-3: Find Dialog Box User Manual 49 SCORBASE Program Editing Find Next - (F3) Repeats the last Find operation for the next occurrence. (Accessible also from the Find dialog window). Command/ Remark (*…) Inserts/deletes asterisk at beginning of a command line. SCORBASE ignores command lines that start with an asterisk. This feature is useful for debugging. Go to Line Opens a dialog box that displays the total number of lines in the program and prompts you for a line number. Type in the number. The program editor will jump to the line you specify. Figure 6-4: Go To Line Dialog Box Go to Selected Line Automatically scrolls the Program Window to display the line which you have selected. This is useful for long programs when you have selected a particular line and then scrolled away from it. In very short programs which fit within a single window, this function has no visible effect. In addition, use the keyboard for the following functions: [Ins] Toggles between Insert Mode and Overwrite Mode. The currently active mode is shown in the Status bar at the very bottom of the SCORBASE window. In Insert Mode, a new command is inserted into the program above the line currently marked by the cursor. User Manual [Del] Deletes the line or lines currently marked by the cursor. [Ctrl+Home] Brings the cursor to the first line of the program. [Ctrl+End] Brings the cursor to the last line of the program. 50 SCORBASE Program Editing [PgUp] Displays the previous page of program lines. [PgDn] Displays the next page of program lines. Adding and Editing Commands SCORBASE commands are organized in a Command Tree, which is displayed in the Workspace Window. SCORBASE only displays the commands which are available in the currently set Experience Level. At the Introductory level (Level 1), only basic commands appear in the Command Tree. At the Advanced level (Level 2), the number of commands is increased. At the Professional level (Pro Level), all commands are accessible. To see the Command Tree, click the Command tab in the Workspace Window. SCORBASE commands are grouped into these categories: Axis & Control Program Flow Inputs & Outputs Advanced - By default, this category is hidden. Select Options | Advanced Options | Advanced Commands to display these commands. Vision - By default, this category is hidden. Select Options | Advanced Options | ViewFlex Commands to display these commands. Clicking on a category opens/closes the list of commands. To add commands to a program, do one of the following: Double-click on the desired command in the Command Tree. Type the two letters written next to the command. Click on the command icons in the Program Window (applicable only for selected commands). If you are working in Insert Mode, the new command line is added above the currently selected (highlighted) line. If you are working in Overwrite Mode, the new command replaces the selected line. Toggle between the two modes using the [Ins] key. Many commands open dialog boxes for completing the command line parameters. To change a command parameter, click on the command to re-open the command dialog box. Change the required parameter, and click OK to close the dialog box. Note: For safety reasons, certain parameters are not accessible by the user, i.e., they appear grayed, and can be changed only by Intelitek support personnel. User Manual 51 SCORBASE Program Editing To delete, cut, copy and paste a line, use the usual Windows tools. Axis Control Commands Level 1 – Introductory Level 2 – Advanced Pro – Professional Figure 6-5: Command Tree - Axis Control Icon User Manual Command Levels Description OG Open Gripper 1,2,Pro Fully opens the gripper. CG Close Gripper 1,2,Pro Fully closes the gripper (on itself, or on a grasped object). 52 SCORBASE Program Editing GP Go to Position 1,2,Pro Opens the Go to Position Dialog Box. The Go to Position command sends the robot to a recorded position, in the shortest time, using Point to Point (P to P) control. In Point to Point control, all axes move independently and there is no control over the TCP trajectory. Figure 6-6: Go To Position Dialog Box Movement Control Target Position The destination of the movement. Enter a number or a variable in this field. Speed/Duration Fast Executes the movement at the fastest speed possible. Speed Executes the movement at a slower speed. Enter a number from 1 through 99(%), or a variable, in the Speed field. Default: 50 (average speed). Duration Executes the movement in a specific amount of time. Enter the time in tenths of a second, or a variable. Available only in Pro Level. Via Position User Manual The position via which the destination of the movement is reached. Enter a number or a variable in this field. 53 SCORBASE Program Editing GL Go Linear to Position #_Speed ... 2,Pro Sends the robot’s TCP (tool center point) from its current position to the target position, along a linear path (straight line). The linear motion applies only to the robot axes. For linear motion, speed can also be defined in mm/s. Figure 6-7: Go To Position Linear Dialog Box 2,Pro Sends the robot’s TCP in a circular path to the target position, via the position GC Go specified in the Via Position field. The circular motion applies only to the robot. Circular to Note: The Circular command follows the circle defined by the three positions Position (current TCP position, target position, and the intermediate position specified in #_ the Via position field). Speed... Via Position User Manual 54 The position via which the destination of the movement is reached. Enter a number or a variable in this field. SCORBASE Program Editing JA Jaw 2,Pro Moves the gripper’s jaw to the specified span. The command opens this dialog box: Figure 6-8: Jaw Dialog Box Enter a number or a variable in the Jaw field. Note: Accuracy cannot be guaranteed if the width is less than 5 mm or greater than 65 mm. Jaw activates Servo Control for the gripper motor, whereas Open Gripper and Close Gripper commands do not use the gripper axis Servo Control. Unless you need the Jaw command for a specific application, the Open Gripper and Close Gripper commands are recommended. IL If Limit Switch < # > on jump to <Label> Note: This command is not available for SCORBOT-ER 2u. 2,Pro The IL is a conditional jump command. It causes program execution to jump to the line that contains the specified Label, if the selected axis micro switch is pressed (On). The command opens a dialog box. Figure 6-9: If Dialog Box Enter the Axis number or a variable in the Limit Switch field. Enter the name of a Label in the Jump to field. User Manual 55 SCORBASE Program Editing RP Record Position #_ Pro When the Record Position command is executed (during program execution), the controller records the current position data to the specified position. The command opens this dialog box: Figure 6-10: Record Position Dialog Box Enter a position number or a variable in the Record Present Position as Position field. The Record Position command is useful when a position (and all relative positions that refer to that position) must be relocated, during program execution. This command updates the position data. 2,Pro Initializes (sets to 0) the encoder count of the selected axis. The command opens SA Set this dialog box: Axis #_ ... (to Zero) Figure 6-11: Set Axis Dialog Box Enter a number or a variable in the Axis field. User Manual 56 SCORBASE Program Editing SC Start Conveyor Pro Starts the conveyor, as a speed-controlled conveyor. Movement of the conveyor will continue until a Stop Conveyor (ST) command is encountered. The command opens this dialog box: Figure 6-12: Start Conveyor Dialog Box ST Stop Conveyor User Manual Pro Enter the Axis number in the Axis field Enter a number or a variable in the Speed field. Select a movement direction (Plus or Minus). Note: When operating a speed controlled conveyor by means of the Start/Stop Conveyor commands, do not record positions, and/or use the Set Axis (to Zero) command for the conveyor, in the same program. Stops the continuous motion of a conveyor that was initiated by a Start Conveyor (SC) command. 57 SCORBASE Program Editing Pro SG Set Variable to Gripper Sensor Assigns the value of the gripper opening (in mm) to a variable. This command is useful when there is a need to measure the object in the gripper, or to check the gripper status (open, closed or gripping an object). Figure 6-13: Set Variable (Gripper Sensor) Dialog Box In the Name field, enter the name of the variable. For more information on variables, see page 87. Note: This command is not available for SCORBOT-ER 2u. WR Write Commands the gripper to convert the letters specified into lettering on the workpiece. The size is controlled by the Scale setting (1-10). Figure 6-14: Write Dialog Box CN ControlOn User Manual Enables axis control by the controller. See page 28. 58 SCORBASE Program Editing CF ControlOff TJ Teach Position By Joints Disables axis control by the controller. See page 28. Pro Teaches the position as defined by the absolute positions of the joints. Figure 6-15: Teach Position (Absolute Joints) Dialog Box Enter a new unique number in the Position Number box. Enter the values for Base, Shoulder, Elbow, Pitch and Roll in 1/100ths of a degree. User Manual Pro Get Position Copies the values of the robot’s current position into the appropriate boxes. Pro Clear Clears the values from all the boxes. 59 SCORBASE Program Editing RJ Teach Position By Joints Relative to Position Pro Teaches the position as defined by the positions of the joints relative to another defined position. Figure 6-16: Teach Position (Relative Joints) Dialog Box Enter a new unique number in the Position Number box. Enter the values for Base, Shoulder, Elbow, Pitch and Roll in 1/100ths of a degree, and choose which point this new one is to be calculated from. TX Teach Position by XYZ Pro Teaches the position as defined by the absolute Cartesian coordinate of the TCP (Tool Center Point). Figure 6-17: Teach Position (Absolute XYZ) Dialog Box Enter a new unique number in the Position Number box. Enter the values for X, Y and Z in 1/100 mm, and Pitch and Roll in 1/100ths of a degree. User Manual 60 SCORBASE Program Editing RX Teach Pro Position by XYZ Relative to Position Teaches the position as defined by the Cartesian coordinate of the TCP (Tool Center Point) relative to another defined position. Figure 6-18: Teach Position (Relative XYZ) Dialog Box Enter a new unique number in the Position Number box. Enter the values for X, Y and Z in 1/100 mm, and Pitch and Roll in 1/100ths of a degree.tp User Manual 61 SCORBASE Program Editing SJ Set Variable to Joint Position Allows you to set a variable to the value of a specified joint at a specified position number. Figure 6-19: Set Variable to Joint Position Dialog Box Enter the name of the variable in the Variable Name field and select the position number from the Position Number drop-down list. Enter an integer between 1 and 5 for the Joint number, as follows: Base 1 Shoulder 2 Elbow 3 Pitch Roll 4 5 You may also insert a variable which contains one of these values. User Manual 62 SCORBASE Program Editing SX Set Variable to Cartesian Position Allows you to set a variable to the value of a specified Cartesian coordinate at a specified position number. Figure 6-20: Set Variable to CartesianPosition (Relative XYZ) Dialog Box Enter the name of the variable in the Variable Name field and select the position number from the Position Number drop-down list. Enter an integer between 1 and 5 for the Cartesian coordinate number, as follows: X 1 Y 2 Z 3 Pitch 4 Roll 5 You may also insert a variable which contains one of these values. User Manual 63 SCORBASE Program Editing Program Flow Commands Level 1 – Introductory Level 2 – Advanced Pro – Professional Figure 6-21: Command Tree - Program Flow branch Icon Command WT Wait (10ths of second) Levels Description 1,2,Pro Halts program execution for a time specified in tenths of a second. The command opens this dialog box: Figure 6-22: Wait Dialog Box Enter a number or a variable in the 1/10 of second field. User Manual 64 SCORBASE Program Editing WC Wait For Condition 2,Pro Halts program execution until the defined condition is fulfilled. The command opens this dialog box: Figure 6-23: Wait For Condition Dialog Box JU Jump to 1,2,Pro This unconditional jump command causes the program pointer to jump to the line that contains the specified Label. The command opens this dialog box: Figure 6-24: Jump To Dialog Box RE Remark 2,Pro Enter the Label name in the Jump to field. (Be sure to include a line with this Label in your program.) When the Jump command is used, Jump is checked in the dialog box. You can modify the Jump command to an IF jump command (conditional jumping) only in Levels 2 and Pro. Allows insertion of a comment line for explanation and documentation into the program. The command opens this dialog box: Figure 6-25: Remark Dialog Box Enter up to 47 characters of text, including spaces. User Manual 65 SCORBASE Program Editing RB Ring Bell 2,Pro RT Reset Timer Pro When executed, this command produces a beep, using the computer’s internal loudspeaker. SCORBASE uses a timer that measures time in units of tenths of a second. The timer starts operating when SCORBASE is opened. The Reset Timer command resets the value of the SCORBASE timer to 0. To use the timer, the timer value must be assigned to a variable, using the Set Variable command. (See page 66 for more details). 1,2,Pro Allows you to assign a value, or an expression (result of a specific SV Set computation), to a variable. Variable to Computation The command opens the Set Variable dialog box (Computation is selected by default). Figure 6-26: Set Variable (Default) Dialog Box In level 2, the Set Variable value can only be a result of computation. In the Pro level, variable values can be derived from other sources. For further information, see pages 58, 62, 63, 68, and 82. Variable Name User Manual 66 Enter the name of the variable. The first character must be a letter. SCORBASE Program Editing Value or Expression Enter a value or a formula. To set the variable to a fixed value, enter a number (in the range of +/-1000000). To set the variable to the result of a computation, enter a string that consists of two arguments and an operator. An argument can be either an integer or a variable (e.g., fun*2). Click on the arrow to see a list of operators, or use the following list: Arithmetic Operators Addition + Multiplication * Subtraction Division / Floating Point Division \ Algebraic Operators ^ Power (raises the first argument to the power of the second argument). MOD Figure 6-27: Operators Drop-Down List, Set Variable Dialog Box User Manual Modulus (returns the remainder of the first argument divided by the second). Logical (Boolean) Operators Not NOT And AND Or OR Exclusive or XOR Equivalent (Null or Boolean values only) EQV Implication (Null or Boolean values only) IMP The result of a logical operation is 1 (True), or 0 (False). Any operand with a non-zero value is considered true, while a zero value is considered false. 67 SCORBASE Program Editing A value assigned using the SV command can be used for conditional jumping using the IF <Condition> Jump command. Actions can then be generated according to the variable value. The following example jumps the program cursor to a label if more than three seconds elapse after timer reset: Reset Timer … Set Variable TIME to timer IF TIME > 30 jump to PICKUP For more information on variables, See page 87. VT Set Variable to Timer Pro Allows you to assign the current value of SCORBASE timer to a variable. The SCORBASE timer starts operating when SCORBASE is opened. Figure 6-28: Set Variable Dialog Box (Timer) To initialize the SCORBASE timer in a program, use the Reset Timer (RT) command. User Manual 68 SCORBASE Program Editing IF If Jump to 2,Pro A conditional branch command, which is used to determine the program flow in relation to the value of the variables. The command opens this dialog box: Figure 6-29: If/Jump Dialog Box If the condition in the IF field is true, program execution jumps to the line specified by the label in the Jump to field. If the condition in the IF field is false, program execution skips to the following line. IF Enter the condition. The condition includes a variable name, a comparison operator and another variable name, or a number. Jump to Enter the name of a Label. (Be sure to include a line with this Label in your program.) Example: If COUNTER > 0 jump to START_LOOP Go to Position 1 speed 5 … START_LOOP: Go to Position 2 speed 5 If the value of Counter is greater than zero, the robot will go to Position #1. If the value of Counter is equal to or less than zero, the robot will go to Position #2. Use two equal signs (= =) for equal operators. For example: If COUNTER == 0 jump to END The IF jump command can be converted to an unconditional jump command by selecting Jump (instead of If). User Manual 69 SCORBASE Program Editing SS Set Subroutine 2,Pro Creates a subroutine. You can program up to 64 subroutines in one program. The command opens this dialog box: Figure 6-30: Set Subroutine Dialog Box In the Name field, enter a name or number for the subroutine. Note: Create subroutines only at the end of the main program. Every subroutine must end with a Return from Subroutine command. RS Return from Subroutine 2,Pro Marks the end of a subroutine. At run time, this command terminates the execution of the subroutine, and the program resumes execution at the line that follows the Call Subroutine command. Note: Every subroutine must end with a Return from Subroutine command. User Manual 70 SCORBASE Program Editing CS Call Subroutine 2,Pro Activates the specified subroutine. The command opens this dialog box: Figure 6-31: Call Subroutine Dialog Box In the Name field, enter the name of the subroutine. Notes: Use the Call Subroutine command either from the main program or from another subroutine command. You can call the same subroutine repeatedly in the same program. You can call a subroutine from a Visual Basic script that is loaded. Append the prefix SCRIPT. to the beginning of the Visual Basic subroutine name. If more than one VB script is loaded, it is the responsibility of the programmer to ensure that there is no conflict of names. After the subroutine is executed, the program resumes execution from the line that follows the Call Subroutine command. User Manual 71 SCORBASE Program Editing RU Run Subroutine Pro Activates the selected subroutine. The command opens this dialog box: Figure 6-32: Run Subroutine Dialog Box Either write a subroutine name, or select one from the drop down menu. To include the subroutine in the SCORBASE program, press the Program button. To run the subroutine, press the Execute button. When the command is initiated, execution of the main program continues, and the subroutine runs concurrently. SCORBASE facilitates the operation of up to 100 concurrent programs. (The Call subroutine command suspends the main program until the completion of the subroutine.) LA Label 1,2,Pro Marks a line in the program that is referenced by a Jump command. The command opens this dialog box: Figure 6-33: Label Dialog Box In the Label field, enter a name. Do not include blank spaces – use an underscore. Do not use the same label name more than once. User Manual 72 SCORBASE Program Editing PS Print to Screen & Log 2,Pro Instructs SCORBASE to print data containing strings, messages and variable values to a log file, or to the message window, or to both. The command opens this dialog box: Figure 6-34: Print Dialog Box Enter text and spaces. To print a value of a variable, place the variable name in single quote marks. For example: VARX='X' will print as VARX=50 (when the value of X is 50). To print a value of a Visual Basic Script variable, include “SCRIPT.” followed by the variable name in single quote marks. For example: VARY='SCRIPT.Y' will print as VARY=100 (when the value of SCRIPT.Y is 100). Select the desired print destination. User Manual 73 SCORBASE Program Editing SM Send Message Pro Sends a message to MANAGER, Robot Device Driver, CNC Device Driver, or Device Driver. Figure 6-35: Send Message (Device) Dialog Box For a message to the MANAGER, select the type of message from the list of available types. Type a Task ID, and select a message from the drop-down menu. Consult the Open CIM user manual for more details. Figure 6-36: Send Message (Manager) Dialog Box For other device drivers, type the ID of the Device you wish to receive the message, and enter the string to be sent. User Manual 74 SCORBASE Program Editing MC Send Command Pro Sends a command to the CNC Device Driver. This is the same dialog box as the SM command, except that the default device is the CNC Device Driver, and the default message is a command, rather than a string. Figure 6-37: Send Command (CNC Device) Dialog Box Enter the device ID and the command in the boxes. LS Load Script Pro Loads a Visual Basic script by means of the following dialog box: Figure 6-38: Load Script Code Box The script must be located in the same subdirectory as the SCORBASE project file. You must be sure that the LS command is actually executed before you attempt to call any of the affected subroutines or variables. You may load more than one script into a single SCORBASE project. However, it is the programmer’s responsibility to ensure that there are no name conflicts. User Manual 75 SCORBASE Program Editing EN End Program This command simply enters the command End on the selected line of the program. It signifies the end of the program. It may be used in more than one subroutine, such as subroutines which respond to various error conditions. Pro Input/Output Commands Level 1 – Introductory Level 2 – Advanced Pro – Professional Figure 6-39: Command Tree - Inputs & Outputs Branch User Manual 76 SCORBASE Program Editing II If Input # On/Off Jump 1,2,Pro Causes the program to jump to a label or call a subroutine, if the state of the tested digital input matches the status specified (On or Off). The command opens this dialog box: Figure 6-40: If Input Dialog Box In the Input Number field, enter the number of digital input (1-8), or a variable. Select either On or Off for the state of the input. Select either Jump or Call Subroutine; then complete the active field. In the Jump to Label field, enter the name of a Label. In the Call Subroutine field, enter the name of a subroutine, or a variable. OI On Input Interrupt # On/Off Pro Sets the condition for an input interrupt service. The service (Call Subroutine or Run Subroutine) will be performed whenever the condition (input status) is satisfied, regardless of the current program pointer position. The command opens this dialog box: Figure 6-41: On Input Interrupt Dialog Box User Manual 77 SCORBASE Program Editing Input Number On/Off Enter the number of a digital input, a variable or the word ANY. Use of the word ANY causes any input (1-8) to evoke the interrupt state. Select the state of the input. Call Subroutine Enter the name of a subroutine that will be executed in case of interrupt. Execution of the main program is suspended until completion of the subroutine. Run Subroutine Enter the name of a subroutine that will be executed in case of interrupt. Execution of the main program continues, and the subroutine is spawned as a concurrent process. An interrupt command causes the program to halt the command it is currently executing (which can also be a movement or a delay), and to immediately execute the command specified for this interrupt. If the specified command is a Call Subroutine, the program will resume from the point where it was suspended, as soon as the subroutine completes its execution. If the specified command is a Run Subroutine, the main program resumes immediately after the concurrent process is started. User Manual 78 SCORBASE Program Editing An interrupt command can be disabled and enabled by means of the EI (Enable Interrupt) and DI (Disable Interrupt) commands described below. Example: Figure 6-42: On Input Interrupt (Call) Dialog Box This inserts the following line of code: On Input Interrupt 1 On Call Subroutine GET001 When Input 1 is turned on, the program immediately calls subroutine GET001. If any axes are moving when the interrupt occurs, they will immediately stop. When the subroutine is completed (Return from Subroutine command is reached), the axes will reassume the position and status that were interrupted, and the program will continue from that point. DI Disable Interrupt # Pro Causes the specified input interrupt to become inactive. When an interrupt is inactive, it is disregarded until the EI (Enable Interrupt) command reactivates it. The command opens this dialog box: Figure 6-43: Disable Interrupt Dialog Box Input Number Enter an input number, a variable, or the word ALL. Enable/Disable Select Enable in order to modify the command. User Manual 79 SCORBASE Program Editing EI Enable Interrupt # Pro Causes the specified input interrupt to become active. The command opens this dialog box: Figure 6-44: Enable Interrupt Dialog Box When an interrupt is active, it is waiting for an interrupt status (defined using the OI [On Interrupt] command described above). Input Number Enter an input number, a variable, or the word ALL. Enable/Disable Select Disable in order to modify the command. ON Turn On Output # 1,2,Pro Sets the state of the specified digital output On. The command opens this dialog box: Figure 6-45: Turn On Output Dialog Box Output Number Select a number or type a variable name. The default settings of Digital and On can be changed. User Manual 80 SCORBASE Program Editing OF Turn Off Output # 1,2,Pro Sets the state of the specified digital output Off. The command opens this dialog box: Figure 6-46: Turn Off Output Dialog Box Output Number Select a number or type a variable name. The default settings of Digital and Off can be changed. AO Set Analog Output # Pro Sets the state of the specified analog output. The command opens this dialog box: Figure 6-47: Set Analog Output Dialog Box Output Number Value Range Enter a number (1 or 2), or a variable. Enter a number between 0 and 255 which corresponds to the output voltage. The range of the output voltage is 0-10 Volts. The Analog default setting can be changed. User Manual 81 SCORBASE Program Editing AI Set Variable to Analog Input # Pro Sets the value of the specified analog input to a variable. The command opens this dialog box: Figure 6-48: Set Variable (Analog) Dialog Box Variable Name Enter the name of the variable. The first character of the name must be a letter. Analog Input Number Enter an input number (1-4) or a variable, where the variable value is an integer in the range of 0-255 corresponding to a controller input voltage of 0-10 volts. See also the description of the Set Variable commands in the preceding sections of this chapter. WN Wait For Digital Input # On Halts program execution until the selected input is switched on. The command opens this dialog box: Figure 6-49: Wait For Digital Input On Dialog Box User Manual 82 SCORBASE Program Editing WN Wait For Digital Input # Off Halts program execution until the selected input is switched off. The command opens this dialog box: Figure 6-50: Wait For Digital Input Off Dialog Box Advanced Commands Advanced Commands are displayed in the Command Tree when you select Options | Advanced Options | Advanced Commands. Pro – Professional Figure 6-51: Command Tree - Advanced Commands User Manual 83 SCORBASE Program Editing UP Use Parameter Set Pro Specifies the Parameter Set to be used. The command opens this dialog box: Figure 6-52: Use Parameter Set Dialog Box Open the drop-down list to select the desired Parameter Set and click OK. See page 110 for further information. PV Set Parameter Value Pro Sets the value for a selected device parameter by name. The command opens this dialog box: Figure 6-53: Set Parameter Value Dialog Box Axis Open the drop-down list to select the axis for which you need to change the parameter. Name Open the drop-down list to select the parameter whose value needs to be changed. Value Enter the new value. The details of the selected parameter are automatically displayed. User Manual 84 SCORBASE Program Editing Vision Commands Vision Commands are displayed in the Command Tree when you select Options | Advanced Options | ViewFlex Commands. See the ViewFlex User Manual for full details. Pro – Professional Figure 6-54: Command Tree - Vision Commands User Manual 85 SCORBASE Program Editing User Manual 86 SCORBASE Program Editing 7 Variable Programming The SCORBASE language allows variable programming. Variables allow you to write commands that change as the state of the robot or its environment changes during program execution. Therefore they are useful for creating loops and subroutines in robot programs. To use a variable, it must first be defined using the Set Variable to Computation command. See pages 47 and 66. Variable names can be up to 22 characters long. It is recommended, however, that you use meaningful names that are as short as possible. The first character of the name must be alphabetic. SCORBASE has full access to variables in Visual Basic scripts that are loaded in memory. The variable name must begin with SCRIPT., for example: SCRIPT.A. Values can be transferred both to and from variables in external Visual Basic scripts. In most editing commands, a variable can be specified instead of a numeric value. A variable cannot be used to specify a Label or a Subroutine. If, at run time, the program encounters a variable whose value is not defined or is out of range, an error message is displayed. Figure 7-1: Undefined Variable Error Message Using a Variable Instead of a Numeric Value User Manual 87 SCORBASE Variable Programming Example #1 Set Variable station1=5 Set Variable lamp=1 Go to Position station1 fast Turn on output lamp In this example, one of the robot stations named “station1” is recorded as position #5 and a lamp is connected to output #1. When the program initiates, the value (5) is assigned to the variable named station1 and the value (1) is assigned to the variable lamp. The following program lines send the robot to position “station1” and turn on a “lamp”. Using a meaningful name for the variable makes the programming, debugging and maintenance easier. Example #2 Set variable pos = 0 Start: Set variable pos = pos +1 Go to position pos fast Wait 50 (10ths of seconds) If pos < 5 jump to start In this example, the robot moves to Positions #1, #2, #3, #4 and #5. At each position, the robot waits 50 seconds. After waiting at position #5, the program terminates. Example #3 Start: Set variable tested = 0 Loop: Set variable tested = tested +1 If input tested off call sub off If input tested on call sub on If tested < 8 jump to loop Jump to start Set Subroutine off Turn off output tested Return from subroutine. Set Subroutine on Turn on output tested Return from subroutine In this example, the program sequentially scans digital inputs 1 through 8 in an endless loop. User Manual 88 SCORBASE Variable Programming If the tested input is On, the program turns on the corresponding output. If the tested input is Off, the program turns the corresponding output off. Monitoring Variable Value To monitor a variable value, SCORBASE offers the following tools: 1. When SCORBASE is running and a Set Variable command is executed, the current value of the variable is displayed in the status line at the bottom of the screen. 2. When the program is not running, click on the Set Variable command in which the value is assigned to the variable, and then execute this line using the Run Single Line command. The variable value is displayed in the status line at the bottom of the screen. 3. The Print to Screen & Log (PS) command can also be used to print the actual value of a variable, by placing the variable name within single quote marks in the text to be printed. Example: Set Variable z = 5 Set Variable x = 9 Set Variable y = x - z Print to screen z=’z’ x=’x’ y=’y’ When the program is running, the following messages appear in the status bar: 1. When the first line is executed, the message is z=5 2. When the second line is executed, the message is x=9 3. When the third line is executed, the message is y=4 4. When the fourth line is executed, this window opens: Figure 7-2: Variable Status Dialog Window User Manual 89 SCORBASE Variable Programming 8 Program Execution The Program Window and the dialog bars described in this chapter are used for activating and monitoring program execution. Select Window | Run Screen to display only the Program window, which shows the section of the program currently executed. Status Bar - indicates the currently executed line or current value of a variable. Inputs and Outputs Dialog Bars - show the Analog Input, Analog Output, Digital Input, Digital Output values. To activate the dialog bars that are most useful for program execution, select View | Dialog Bars and then the desired dialog bar from the pop-up menu. Log file - records data during program execution. Running a Program SCORBASE offers three modes of running a program. To select the running mode do one of the following: User Manual Click the appropriate Run icon in the toolbar. Select one of the Run options in the Run Menu. Press the function key. Single line (F6) Runs the currently selected (highlighted) line. Single cycle (F7) Runs the program from the currently selected (highlighted) line. Running stops after the last line is executed. Continuous (F8) Runs the program from the currently selected (highlighted) line. After the last line is executed, program execution continues from the first line. 91 SCORBASE Program Execution The [Run] key on the Teach pendant cannot be used to start execution of SCORBASE programs. Note: Always restart execution of a program from the first line after you have changed program data (e.g., recorded new coordinates for a position, edited a program line, etc.). Halting Program Execution Stop and Pause are the two methods of halting program execution from SCORBASE. To stop or pause programs from SCORBASE do one of the following: Click the appropriate icon in the toolbar. Select Run | Stop, or Run | Pause. Press F9 / F10 - Make sure the SCORBASE application is the currently active window before you press F9 (STOP) or F10 (PAUSE). To STOP the program you can also press the red EMERGENCY button on the controller or press the ABORT key on the Teach Pendant (if installed). Stop (F9) Program execution is stopped immediately. Use this command only in emergencies. If the workstation is connected only to a stationary robot such as an ER-4u, the STOP command is sent directly to the device. However, other devices such as the ER-400 AGV Mobile Robot require the user to define a subroutine with the name ON_STOP. When the STOP button or F9 is pushed, the ON_STOP subroutine is called. The subroutine might contain a line such as Turn Off Output 1. Here is an example for use with the ER-400 AGV Mobile Robot: Figure 8-1: Program Window – ON_STOP subroutine. Pause (F10) User Manual Stops program execution only after the current command has been executed. Thus, axes may continue moving (to complete their motion) after the Pause command is issued. 92 SCORBASE Program Execution Inputs and Outputs Dialog Bars Digital Inputs & Outputs Dialog Bars The Digital Inputs & Outputs dialog bars show the status of the controller digital inputs and outputs. The display is available in all modes of operation. Figure 8-2: Digital Input Dialog Bar Figure 8-3: Digital Output Dialog Bar In both dialog bars, when the I/O status is Off (false), the matching I/O number is dark green. When the I/O status is On (true), the matching I/O number is light green If control is On, the sixteen Output / Input LEDs on the front panel reflect the I/O status. If control is On, clicking on an output number in the Digital Output dialog bar toggles the status of the controller’s digital outputs. In Off-Line the Digital Output dialog bar can also be used to simulate the status of controller's digital inputs. This option is useful for checking the If Input#_onJump command. In On-Line mode, to test the program response for the If Input#_onJump command, short the designated input terminal to the digital input ground. User Manual 93 SCORBASE Program Execution Analog Inputs & Outputs Dialog Bars SCORBASE can monitor and control four (4) analog inputs and two (2) analog outputs. The Analog Inputs & Outputs dialog bars show the values of the controller Analog Inputs and Outputs. These dialog bars may also be opened or closed using the View | Show All Dialog Bars or View | Close All Dialog Bars commands. Figure 8-4: Analog Input Dialog Bar Figure 8-5: Analog Output Dialog Bar The Analog Inputs and Output resolution is 8-bit. The Analog Input / Output range is from 0 (minimum) to 255 (maximum). Output values can only be manipulated when SCORBASE is operating OnLine. To change the value of an Analog Output, do one of the following: Click Output (the color turn from light yellow to white), and type a number. Use the AO (Set Analog Output #) command, and run this line. When the controller receives an Analog Input signal from an external device, the value (0-255) of the signal is reflected in the Input Value field. User Manual 94 SCORBASE Program Execution SCORBASE Log File The SCORBASE log file records the messages printed using the PS (Print to Screen Log) command. To print to a message to the log file, click either Log File or Screen and Log File. Figure 8-6: Print to Screen Command The Log file is initialized (cleared) each time SCORBASE is loaded. To see the file content, open the file SCBS.LOG using a text editor (such as WordPad). The file is located in the SCORBASE subdirectory named BIN. SCORBASE generates an SCBS.BAK backup file of the SCBS.LOG file each time the program is closed. User Manual 95 SCORBASE Program Execution 9 Project Files Management A SCORBASE project includes the following files: SCORBASE program (file extension *.SBP) Recorded Position files (file extension *.PNT) Project data (file extension *.WS) Graphic image (if RoboCell is installed – file extension *.3DC). All commands (except for Open) relate only to the SBP, PNT and WS files. Opening or saving a project from the File menu opens or saves all project files (three or four files). As default, all files are located in the Projects directory (folder) in the ER 2u or ER 4u directory (depending on which robot is being used for the project). Project Management SCORBASE project files are managed by means of the usual Windows file tools, which can be accessed by icons or via the File menu. User Manual New (Ctrl+N) Opens a new, untitled, project named Untitled. All project-related files are created. Open (Ctrl+O) Opens a Load Project File dialog box for opening a previously saved project. All projectrelated files are opened. Only one project may be open at a time. 97 SCORBASE Project Files Management Save (Ctrl+S) Saves the currently active project. If the project has not previously been saved (i.e., is untitled), a dialog box for specifying the project name opens. All project-related files are saved, including Program, Positions and Graphics. Save As... Opens the Save Project dialog box for saving the currently active project under a new name. All project-related files are saved under that new name. As default, all projects are saved in a Projects folder. Close Project Closes the currently open project. New Script Opens Notepad. The user can then begin to write a new Visual Basic script file. Open Script Opens File Selector box for opening an existing Visual Basic script file. Print Program Prints the program. The Program window must be active to select this option Print Positions Prints the position table. The Position window must be open and active to select this option. You can open the Position window by selecting View | Positions. User Manual Print 3D image Prints the 3D image (if RoboCell program is installed). Print Preview 3D Image Opens a dialog window that shows how the printed cell will appear on paper. Print Charts Opens a dialog box to select the specific axis chart for display or printout. Only one axis can be selected at a time. Print Preview Charts Opens a screen, which displays the selected axis chart before printout showing how the printed cell will appear on paper. Import 3D Model Opens the Import 3D Image dialog window showing the graphic module files (*.3DC files). Edit 3D Model Opens the Graphic Module in CellSetup. 98 SCORBASE Project Files Management User Manual View File Opens the View File window to display the program or position of any selected project. Exit Quits SCORBASE. If changes to a program or position file have been made, but not yet saved, a warning message will be displayed. 99 SCORBASE Project Files Management 10 System Configuration SCORBASE offers the following options for system configuration: Window Layout options. Experience level. Hardware setup. Window Layout Options Window Menu Figure 10-1: Window Menu The display options enable optimal usage of the screen area. SCORBASE offers five basic display options and a wide range of dialog bars and windows through which the user can see and change system data. User Manual 101 SCORBASE System Configuration Simulation & Teach Figure 10-2: Simulation and Teach Screen Available only if RoboCell is installed. This layout option displays the following windows: Program Window that holds the SCORBASE program. 3D Image Manual Movement Dialog Box Teach Positions Dialog Box Workspace Window that shows: Project tab Commands tab For further information, see the RoboCell User Manual. User Manual 102 SCORBASE System Configuration Teach & Edit Figure 10-3: Teach & Edit Screen When a SCORBASE project is opened, the screen is set for the Teach & Edit display mode by default. In this mode, these windows and dialog boxes are displayed: Program Window that holds the SCORBASE program. Manual Movement Dialog Box Teach Positions Dialog Box Workspace Window that shows: Project tab Commands tab To open the Teach & Edit layout, select Window | Teach & Edit. User Manual 103 SCORBASE System Configuration Run Screen Figure 10-4: Run Screen The Run Screen display option opens only the Program Window. When the program is running, the currently executed line is highlighted and information on the currently executed command is displayed in the status bar. To open the Run Screen layout, select Window | Run Screen. User Manual 104 SCORBASE System Configuration Project Screen Figure 10-5: Project Screen The Project Screen option displays the following: Program Window that holds the SCORBASE program. Workspace Window that shows: Project tab Commands tab Positions Window When the program is running, the currently executed line is highlighted, and information on the currently executed command is displayed in the status bar. To open the Project Screen layout, select Window | Project Screen. User Manual 105 SCORBASE System Configuration Open CIM Screen Figure 10-6: Open CIM Screen The Open CIM Screen option displays the following: User Manual Program Window that holds the SCORBASE program. Open CIM Device Driver Window, which provides: Toolbar, with Operation Mode selector button for Manual Stop Online Simulation Standalone. When this option is selected, you may press the icon on the toolbar to open the TCP/IP dialog box for establishing communications with other Open CIM applications. 106 SCORBASE System Configuration Task History panel Percentage Complete from Pick & Place File CIM Messages panel Messages Window To use the Open CIM Screen layout, select Window | Open CIM Screen. User Screen; Save User Screen Figure 10-7: Window Menu – Select User Screen By default, the User Screen displays the same windows as the Teach & Edit Screen. However, the user can customize the layout of the windows to the needs of the project. This is useful when you have specified one or more dialog bars under the View menu. See page 114. To save the layout for future use, select Window | Save User Screen. Whenever you desire to use that layout again, select Window | User Screen. Other Options Options Menu Hardware Setup SCORBASE allows you to define the devices that are connected and operated by the controller as Axes 7 and 8. The following peripherals can be connected to the USB Controller: User Manual 107 SCORBASE System Configuration Figure 10-8: Options Menu – Hardware Setup Catalog number Description 1009 Rotary Table, 24V 1010 Conveyor Belt (gray), 24V 1020 1.0m Linear Slidebase, belt-drive, 24V 1021 1.8m Linear Slidebase, belt-drive, 24V 1013 Linear Table 0.3m, 24V 1014 XY-Table, 24V 1234 Motor Kit 24V Note: The following peripherals are not supported: 1.0m Linear Slidebase, belt-drive, 24V Catalog #1018 1.8m Linear Slidebase, belt-drive, 24V Catalog #1019 Contact your local distributor for further information. Do not change the hardware setup unless you are authorized to do so. To define the devices, select Options | Hardware Setup. The Hardware Setup dialog box opens. Click on the arrow to open the list of available devices, and then click on the desired device. User Manual 108 SCORBASE System Configuration Figure 10-9: Hardware Setup Dialog Box (Initial) Figure 10-10: Hardware Setup Peripherals Dialog Box showing default settings The Hardware Setup option also enables you to work with a different robot from the one you selected during installation. See page 4. To do so, click the Robot radio button. Figure 10-11: Hardware Setup Robot Dialog Box. Select the desired robot and click OK. User Manual 109 SCORBASE System Configuration Parameter Set Window Figure 10-12: Parameter Set Window - for Robot Figure 10-13: Parameter Set Window - for Axes User Manual 110 SCORBASE System Configuration SCORBASE contains the following parameter sets: Parameter Set Description $2KG Moves objects that weigh about 2 kg. $3KG Moves objects that weigh about 3 kg. $Current Current parameter set loaded to the controller. $Default Default set when parameters are optimized. Maxspeed Activates the robot at maximum speed. To modify any of the parameters of the above vendor-supplied sets you must save the set under a different name. Click the Save As icon to open the dialog box. Enter the name of the new Parameter Set and click OK to save it. Figure 10-14: Parameter Set Window toolbar Use the Parameter Set Window toolbar to select one of the following options: User Manual Open Displays the Open Parameter Set window. Select the desired Parameter Set from the list. Save Saves the Parameter Set after changes have been effected. A Parameter Set marked with the $ symbol cannot be changed and saved. The set must first be saved under a new name using the Save As icon. Save As Opens the Save Parameters Set As dialog box. Enter the name of the new Parameter Set and click OK to save it. Default Displays the $Default Parameter Set. Apply Loads the selected Parameter Set to the controller. View Opens the selected Parameter Set Window, which lists all the parameter keys, with description and value, included in the Parameter Set. The keys are listed by sections. See page 110. 111 SCORBASE System Configuration Line Number Figure 10-15: Options Menu – Line Number Selection By default, SCORBASE displays program line numbers in the Program Window. If you wish to hide them, uncheck the toggle under Options | Line Number. Reload Last Project at Startup Figure 10-16: Options Menu – Reload Last Project Selection When SCORBASE is initiated, the program can be set up to automatically open the last project. To toggle this option, select or deselect Options | Reload Last Project at Startup. A checkmark appearing next to this option indicates that the option is on. Experience Level SCORBASE offers three experience levels: User Manual Introductory (Level 1) Advanced (Level 2) Professional (Pro Level) 112 SCORBASE System Configuration A higher level offers more commands and tools. Levels can be selected from the Tool bar or from the Options menu. Level 1 Displays list of commands and options at introductory level. Commands related to Level 2 and Pro are disabled. Level 2 Displays list of commands and options at advanced level. Commands related to Pro are disabled. Pro Displays list of all commands and options. Display of the Advanced Commands and the Vision Commands is activated by selecting Options | Advanced Options. View Menu The following display options are available from the View menu: Movement information Displays the following: Position error for all eight axes Home switch status (for all eight axes). The number 1 indicates the switch is on (pressed) while 0 indicates the switch is off (released). Selected axis (1 – 8) PWM value. The PWM value indicates the power sent to the axis motor. Figure 10-17: Movement Information Dialog Box Messages Displays the content of the PS (Print To Screen) commands. Figure 10-18: Messages Window User Manual 113 SCORBASE System Configuration These two commands produce a window which overlaps the existing windows. The user should readjust the positions and sizes of these windows according to personal preference. Dialog Bar Display Options All Dialog bars are accessible from the View menu. Select View | Dialog Bars. Joints XYZ Shows angle of the robot joints. See page 46. Shows position coordinates of the TCP. See page 45. Digital output Shows digital output status and enables toggling an output status. See page 93. Digital input Shows the digital input status. Enables toggling an input status in Off-Line mode, for program debugging. See page 93. Analog output Analog input Encoders Displays the value (0-255) of Analog output 1 and 2. These values can also be modified through this dialog bar. See page 94. Displays the value (0-255) of Analog inputs 1-4. Enables setting a value for an input in Off-Line mode, for program debugging. See page 94. Shows the values of the eight encoders. See page 45. Each of these options adds a dialog bar to the bottom of the screen, overlapping whatever windows are displayed. The user can retile the screen by reselecting the desired Window Layout Options from the Window menu. User Manual 114 SCORBASE System Configuration Appendix A Command Line Options The following table describes the command line options that enable the integration of user applications with SCORBASE. Before operating SCORBASE with these command line options, follow and obey all warnings and cautions provided in the user application manuals to prevent, for example, hazards from moving parts. The SCORBASE command line format that is required when using the options described in the table is provided, as follows: SCORBASE.EXE [Optional INI File] [Optional Switches] Option Description /O Loads SCORBASE in online mode. For example, SCORBASE.EXE SCBS.INI /O /S Loads SCORBASE in simulation mode. For example, SCORBASE.EXE SCBS.INI /S /H Performs auto homing from online mode. For example, SCORBASE.EXE SCBS.INI /H /L Loads a specific workspace in simulation mode. For example, SCORBASE.EXE SCBS.INI /L=“C:\PROGRAMES\INTELITEK\ ROBOCELL\PROJECTS\ER4u\Er4Cell1.WS” /R Loads a specific workspace and runs SCORBASE. For example, SCORBASE.EXE SCBS.INI /R=”C:\PROGRAM FILES\INTELITEK\ROBOCELL\ PROJECTS\ER4u\Er4Cell1.WS” /I Open CIM Robot Device Driver configuration file. For example: SCORBASE.EXE /I=USBVD1.INI /N Open CIM Robot Device Driver number. /T Displays the SCORBASE application on top of the desktop at all times. User Manual 115 SCORBASE System Configuration Prevents the SCORBASE application from staying on top of the desktop. This command can be activated only when SCORBASE is open. Minimizes the SCORBASE application. This command can be activated only when SCORBASE is open. Restores the SCORBASE application. This command can be activated only when SCORBASE is open. Closes the SCORBASE application. This command can be activated only when SCORBASE is open. /U /M /E /C /CIMDD_ONLINE Open CIM-SCORBASE device driver mode: Online /CIMDD_SIMUL_AUTO Open CIM-SCORBASE device driver mode: Simulation /CIMDD_STANDALONE_ONLY Open CIM-SCORBASE device driver mode: Standalone Examples of SCORBASE command line procedures are provided, as follows: Loading a workspace in simulation mode: At the prompt, type the following: SCORBASE.EXE /S /L=”C:\PROGRAM FILES\INTELITEK\ ROBOCELL\PROJECTS\ER9u\Act3.WS”. The workspace will be loaded in simulation mode. Loading the software in online mode and homing the robot: User Manual At the prompt, type the following: SCORBASE.EXE /O /H /R=”C:\PROGRAM FILES\INTELITEK\ROBOCELL\PROJECTS\ER4u\Er4Cell1.WS”. The workspace will be loaded in online mode and the robot will be homed. 116 SCORBASE System Configuration