1
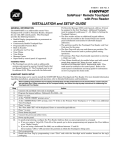
SUMMARY OF SYSTEM COMMANDS
Event Logging Commands
(Alpha keypad only)
Wireless System
Commands
User Code Commands
(Alpha keypad only)
Arming Functions
(Alpha keypad only)
Event Log Display = Code+[#] + 60
Event Log Print = Code + [#] +61 (Installer Only)
Clear Event Log = Code + # + 62 (Installer Only)
House Id Sniffer Mode=Code + [#] + 2 (Installer Only)
Transmitter Id Test= Code + [#] + 3 (Installer Only)
Go/No Go Test=Code + 5 (Test Key)
Add A User Code=User Code + 8+ New User Number + New User's Code
Change A Code=User Code + 8 + User Number + New User's Code
Delete A User's Code=Your User Code + 8 + User Number To Be Deleted + Your
Code Again
View User Capability= User's Code + * + *
Set Real-Time Clock (Installer, Master Only)=Code + # +63
Arming Away
Arming Stay
Arming Instant
Arming Maximum
Quick Arm
Global Arming
Disarming
Bypassing Zones
Enter Code + Away [2].
Enter Code + Stay [3].
Enter Code + Instant [7].
Enter Code + Maximum [4].
Use # Key Instead Of User Code Followed By Any Of
The Above Arming Mode Keys.
If Enabled For The User, The Keypad Will Display A
Prompt. Answer The Prompted Questions
Enter Code + Off [1].
Enter Code + Bypass [6] + Zone Number. To
Automatically Bypass All Faulted Zones, Use
Quick Bypass
Chime Mode
(Alpha keypad only)
(Alpha keypad only)
Programming Commands
"Quick Bypass" Method: Enter Code + Bypass + [#].
Enter Code + Chime [9]. To Turn Chime Mode Off,
Enter Code + Chime Again.
Partition Goto=
User Code + * + Partition Number 0-8
GOTO Home Partition=User Code + * + 0
Panics
*+1 Zone 95 (A Key)
*+# Zone 99 (B Key)
#+3 Zone 96 (C Key)
View Downloaded Messages= Press 0 For 5 Seconds
Display All Zone Descriptors=Press * For 5 Seconds
Display User Self Help= Hold Any Key For 5 Seconds
Site Initiated Download=User Code + # + 1
Direct Wire Download Enable= User Code + # + 5
Enter Program Mode=Installer Code + 800
Exit Program Mode=*99 Or *98
Scheduling Commands
(Alpha keypad only)
Installer Programmed Schedule Events=Installer Code + # + 80
Temporary Schedule Editing=User Code + # + 81 (Installer, Master, Manager
Only)
Extend Closing Window=User Code + # + 82 (Installer, Master, Manager Only)
End User Output Device Programming=User Code + # + 83
Output Device Control
(Alpha keypad only)
Activate Output Device As Programmed =User Code + # + 71
Activate Output Device As Programmed =User Code + # + 72
Activate Access Relay For Current Partition=User Code + 0
Activate Output Device Manually=User Code + #70.
– 177 –
Section 25: KEYPAD FUNCTIONS
This section provides the following information:
• General information about keypad usage
• Basic keypad functions
• Global arming
• Access control
• Delaying closing time
• Executing the "Go To" command
• Viewing:
A user's capabilities
Zone descriptors
Downloaded messages
Built-in user's guide
• Speed key macro commands
• Executing #70 Manual Relay Activation mode
General Information
The keypad allows the user to arm and disarm the system, and perform other
system functions, such as bypassing zones, viewing messages from the central
station, and displaying zone descriptors. Zone and system conditions (alarm,
trouble, bypass) are shown in the display window.
When an alarm occurs, keypad sounding and external sounding will occur, and
the zone(s) in alarm will be displayed on the keypad. Pressing any key will
silence the keypad sounder for 10 seconds. Disarming the system will silence
both keypad and external sounders. When the system is disarmed, any zones
that were in an alarm condition during the armed period will be displayed
(memory of alarm). To clear this display, simply repeat the disarm sequence
(enter the security code and press the OFF key).
The keypads also feature chime annunciation, and 3 panic keys (for silent,
audible, fire or personal emergency alarms) which can notify the central station of
an alarm condition, if that service is connected.
Arming Functions
The following is a brief list of system commands. For detailed information
concerning system functions, refer to the User's Manual.
Display Faulted
Zones
Before arming, the system must be in the READY
condition (all zones must be intact). If the "NOT
READY" message appears, press the READY * key
to display faulted zones.
Arming Away
Enter code + 2 (AWAY).
Arming Stay
Enter code + 3 (STAY). (all zones designated as
zone types 4 and 10 will be automatically bypassed)
Arming Instant
Enter code + 7 (INSTANT) (same as STAY without
entry delay).
Arming Maximum
Enter code + 4 (MAXIMUM) (same as AWAY without
entry delay).
Disarming
Enter code + 1 (OFF).
Bypassing Zones
Enter code + 6 (BYPASS) + zone number. To
automatically bypass all faulted zones, use "Quick
Bypass" method: Enter code + BYPASS + # .
Chime Mode
Enter code + 9 (CHIME). To turn chime mode off,
enter code + CHIME again.
– 161 –
Quick Arming:
Note that if QUICK ARM is enabled (field *29), the #
key can be pressed instead of entering the security
code, for any of the arming procedures (Away, Stay,
Instant, Maximum, etc.).
User #02 must be programmed into the system in order for the Quick Arm feature
to work.
Mode
AWAY
STAY
INSTANT
MAXIMUM
SUMMARY OF ARMING MODES
Features For Each Arming Mode
Exit
Entry
Perimeter
Delay
Delay
Armed
Yes
Yes
Yes
Yes
Yes
Yes
Yes
No
Yes
Yes
No
Yes
Interior
Armed
Yes
No
No
Yes
Global Arming
If enabled for the user, the keypad will display the following:
ARM ALL
?
0 = NO , 1 = YES
If NO, the keypad prompts for arming each partition
individually. If YES, the system attempts to arm all
partitions allowed by this user. If there are any faults (open
doors, windows, etc.) the keypad will display them. See
notes below. These faults must be corrected or the zone
bypassed before arming will occur. When faults are
corrected, repeat the arming procedure.
1.
When using the Global Arm feature, if there are faults
in any of the selected partitions, the system will enter a
summary mode in which the faulted zones of all of the
selected partitions will be displayed. These faults must
be corrected or bypassed (code + BYPASS + [#] will
attempt to bypass the faults in all of the selected
partitions). This summary mode will end in approx. 120
seconds if no keys are pressed.
2.
If, when disarming the system using a Global Disarm,
any of the selected partitions has a condition which
would cause the keypad to beep (such as alarm
memory or a trouble condition), the system will cause
the keypad to beep and will enter a summary mode in
which the alarm memory or trouble conditions of all of
the selected partitions will be displayed. This mode will
continue until either approx. 120 seconds elapses or a
second disarm occurs which clears the beeping
Global arming cannot be performed from a wireless keypad or a non-alpha display
keypad.
– 162 –
Access Control
If programmed, one relay may be used for access control in each partition. The
relay is programmed in data field 1*76. To activate this relay, the user enters his
user code + 0 . The relay will pulse for 2 seconds.
Delaying Closing Time
If Open/Close schedules are used, end users can manually delay closing time by
extending the closing window by 1 or 2 hours. This is useful if a user must stay
on the premises later than usual. The user must have authority level of manager
or higher.
To extend the closing window, enter user code + # +82.
Closing Delay ?
Hit 0-2 Hours
Enter the number hours, 1 or 2, by which the end of the
closing window should be extended. Note that the delay
is from the scheduled closing time, not from the current
time. Press * to accept entry and exit this mode.
Press # to exit this mode without changes.
The system will send an "Access Schedule Change"
message to the central station when the closing window
is extended (if programmed in fields 2*13 and 2*14.
An extension of the closing window cannot be reduced once it is set. However, a
1 hour delay can be increased to 2 hours. This is to prevent the user from
deleting the delay after the normal window expires, thereby missing the end of
the window.
Partition "GOTO" Commands
Each keypad is assigned a default partition for display purposes, and will show
only that partition's information. To see information for another partition, or
perform system functions in another partition, use the GOTO command (code +
[*] +partition number 0-8). The keypad will remain in the new partition until
directed to go to another partition, or until 120 seconds has elapsed with no
keypad activity. To return to your home partition, enter * + partition number 0.
You must program data field 2*18 to enable the GOTO function. This is a
partition-specific field that must be set for each partition the user wants to access
from another partition's keypad
Viewing Capabilities Of A User
The keypad will display the partitions that a user is authorized for, the user
number, and the authority level for all partitions authorized. Enter code + [*] + [*].
The user's capabilities in each authorized partition will typically be displayed as
follows:
Part. 1 A0 * WHSE
User 01 Auth.=1G.
The user's Open/Close report capability is shown by the
dot following the authority level. If Open/Close is not
enabled for a user, the dot will not appear.
Viewing Zone Descriptors
The Alpha Keypads can display all programmed descriptors, which is useful to
the installer when checking entries, and can be helpful to the user when there is
a need to identify zones. To display descriptors, the system must be
disarmed and ready to arm. Press and hold the READY key until the built-in
instructions for that key appear, then release the key. The zone descriptors will
appear one at a time, for about 2-3 seconds each. For faster viewing, press the
READY key to display the next descriptor in numerical order and so on. When all
descriptors have been displayed, the control will exit display mode. To exit
display mode before all descriptors have been displayed, enter the security code
and press the OFF key.
– 163 –
Viewing Downloaded Messages
Users may occasionally receive a message from their installation company
displayed on an alpha keypad. When this occurs, the keypad will display
"Message. Press 0 for 5 secs.". Instruct the user to press and hold the 0 key to
display the central station's message. Note that the system must be in the
READY state to view these messages.
Using The Built-In User's Manual
An abbreviated User's Manual is stored in the system's memory, and can be
particularly useful to the end user if the printed User's Manual is not conveniently
accessible when the user needs to perform a seldom used and unfamiliar system
procedure. The Built-in User's Guide is displayed only on an alpha keypad by
simply pressing any of the function keys (e.g., OFF, AWAY, STAY, MAXIMUM,
BYPASS, INSTANT, CODE, TEST, READY, #, and CHIME) for approximately 5
seconds and then releasing it. Abbreviated instructions relative to the key that
has been pressed will then be displayed (2 lines of text are displayed at a time).
This function operates in either the armed or the disarmed state.
Panic Keys
There are three panic key pairs (shown below) that, if programmed, can be used
to manually initiate alarms and send a report to the central station. Each key pair
can be individually programmed for 24 Hour Silent, Audible or Auxiliary
(Emergency) responses, as well as Fire. The panic function is activated when the
appropriate key pair is pressed at the same time.
The panic functions are identified by the system as follows:
PANIC
Displayed as Zone
For alpha keypads, these panic keys can
* 1
95
also be programmed with an alpha
# 3
96
descriptor.
*
#
99
For the Panic functions to be of practical value, the system must be connected to
a central station.
Speed Key [D] (Macros)
The "D" key can be used to activate a string of up to 16 keystrokes. These
keystrokes are known as a macro and are stored in the system's memory . Each
partition may have its own macro. Typical Speed Key functions include:
• Arming sequences that involve first bypassing certain zones before arming.
• Seldom used but repeatable sequences.
• Relay activation sequences.
To program a macro, enter your user code + [#] + [D]. The following appears:
ENTER SPEEDKEY "D"
existing sequence displayed
Enter up to 16 keystrokes. A speed key sequence can include different
commands. Press the "D" key to separate different commands. For example,
you may want to perform the following sequence.
Desired function
Keystrokes
GOTO partition 2
Enter *2
Bypass zones 10 & 11
Press bypass [6], then the zone numbers 10 & 11
Arm in maximum mode Press maximum [4] key
Return to partition 1
Enter *1
– 164 –
To program that speed key sequence, type the following :
*2 D 61011 D 4 D *1 D D
Note that the "D" key is pressed after the "2," the last "1" and the "4," separating
the different commands. Press "D" twice to complete the entry and exit.
To execute a speed key sequence, press the "D" key. The following appears:
ENTER USER CODE
****
Enter your user code.
automatically.
The programmed speedkey sequence will begin
When defining speedkey sequences, do not use the [#] key to represent Quick
Arming. The system uses the code entered in response to the prompt to initiate
commands in a speedkey sequence, so the quick arm key is unnecessary. The
system interprets the use of the [#] key in a speedkey sequence as its designated
function only (e.g. #2 is not interpreted as arm in away mode, but rather as enter
house ID sniffer mode).
Manual Relay Activation Mode (#70 Mode)
The system allows users to manually activate relays/X-10 modules by keypad
command using either the keypad or a telephone keypad (if VIP module is used).
The user will be prompted (either by keypad alpha display or telephone voice
module).
To activate relays from a keypad, enter 4-digit security code + [#] +70.
To activate relays using a telephone and VIP module, first dial the 2-digit phone
access code. When the system acknowledges the access, enter 4-digit security
code + [#] + 70. The following prompts/voice responses will begin.
ENTER DEVICE NO.
00=QUIT
01
nn DEVICE IS OFF
HIT 0=OFF , 1=ON
Voice: "ENTER DEVICE CODE NOW"
Enter the 2-digit number of the relay/X-10 module to be
activated.
Voice: "voice descriptor DEVICE nn ON/OFF. FOR
voice descriptor ON ENTER 1, FOR voice descriptor
OFF ENTER 0"
Press 0 or 1 to turn the device off or on respectively.
"nn" represents the 2-digit relay/X-10 module number
and voice descriptor is the relay voice descriptor
programmed by the installer (see relay descriptor
programming section).
nn DEVICE IS OFF
HIT THE "*" KEY
Voice: "voice descriptor DEVICE nn ON/OFF. TO EXIT
ENTER 00 NOW"
From a keypad, press * to continue. The ENTER
DEVICE NO. prompt will appear.
From a telephone keypad, enter 00 to exit, or enter the
next relay number to be programmed. The current on/off
state of that relay will be annunciated as described
above. Alternatively, if 6 seconds elapses with no key
depression, the voice module will annunciate the
"ENTER DEVICE CODE NOW" message.
– 165 –