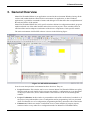
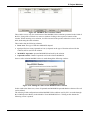
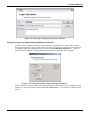
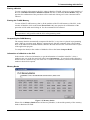
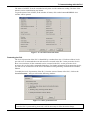
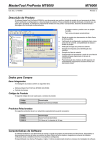
1
MasterTool Extended Edition User’s Manual MT8000 Rev. J 12/2010 Cod. Doc.: MU299605 altus General Supply Conditions No part of this document may be copied or reproduced in any form without the prior written consent of Altus Sistemas de Informática S.A. who reserves the right to carry out alterations without prior advice. According to current legislation in Brazil, the Consumer Defense Code, we are giving the following information to clients who use our products, regarding personal safety and premises. The industrial automation equipment, manufactured by Altus, is strong and reliable due to the stringent quality control it is subjected to. However, any electronic industrial control equipment (programmable controllers, numerical commands, etc.) can damage machines or processes controlled by them when there are defective components and/or when a programming or installation error occurs. This can even put human lives at risk. The user should consider the possible consequences of the defects and should provide additional external installations for safety reasons. This concern is higher when in initial commissioning and testing. The equipment manufactured by Altus does not directly expose the environment to hazards, since they do not issue any kind of pollutant during their use. However, concerning the disposal of equipment, it is important to point out that built-in electronics may contain materials which are harmful to nature when improperly discarded. Therefore, it is recommended that whenever discarding this type of product, it should be forwarded to recycling plants, which guarantee proper waste management. It is essential to read and understand the product documentation, such as manuals and technical characteristics before its installation or use. The examples and figures presented in this document are solely for illustrative purposes. Due to possible upgrades and improvements that the products may present, Altus assumes no responsibility for the use of these examples and figures in real applications. They should only be used to assist user trainings and improve experience with the products and their features. Altus warrants its equipment as described in General Conditions of Supply, attached to the commercial proposals. Altus guarantees that their equipment works in accordance with the clear instructions contained in their manuals and/or technical characteristics, not guaranteeing the success of any particular type of application of the equipment. Altus does not acknowledge any other guarantee, directly or implied, mainly when end customers are dealing with third-party suppliers. The requests for additional information about the supply, equipment features and/or any other Altus services must be made in writing form. Altus is not responsible for supplying information about its equipment without formal request. COPYRIGHTS Ponto Series, MasterTool, PX Series, Quark, ALNET and WebPLC are the registered trademarks of Altus Sistemas de Informática S.A. Windows, Windows NT and Windows Vista are registered trademarks of Microsoft Corporation. i Summary Summary 1. INTRODUCTION ............................................................................................................................................. 1 The Software MasterTool Extended Edition .................................................................................................. 1 MasterTool ProPonto MT6000 ................................................................................................................... 1 Documents Related to this Manual .................................................................................................................. 1 Visual Inspection ............................................................................................................................................... 1 Technical Support ............................................................................................................................................. 2 Warning Messages Used on this Manual......................................................................................................... 2 2. TECHNICAL DESCRIPTION ........................................................................................................................ 3 Lite, Professional and Advanced ...................................................................................................................... 3 System Requirements ........................................................................................................................................ 4 Buying Data........................................................................................................................................................ 4 Items 4 Product Code ............................................................................................................................................... 4 3. GENERAL OVERVIEW .................................................................................................................................. 5 Project Treeview ................................................................................................................................................ 6 Verification Window ......................................................................................................................................... 7 Edition Area ....................................................................................................................................................... 8 Configuration Module Window .................................................................................................................. 8 Extended Configuration Window................................................................................................................ 8 Module Program Window ........................................................................................................................... 9 Monitoring Window .................................................................................................................................. 10 4. PROJECT ON MASTERTOOL EXTENDED EDITION .......................................................................... 11 What is a Project? ........................................................................................................................................... 11 How to Convert a Project from MasterTool Programming ........................................................................ 11 Files Generated by MasterTool Extended Edition ....................................................................................... 12 Creating a Project ........................................................................................................................................... 12 Opening a Project ............................................................................................................................................ 13 Inserting and Removing Modules on Project................................................................................................ 14 Inserting and Removing other Documents.................................................................................................... 15 Creating a Module to the Project ................................................................................................................... 15 Inserting Notes and Descriptions of the Project ........................................................................................... 16 Changing the Project PLC Model .................................................................................................................. 17 Verifying the Project ....................................................................................................................................... 18 Finding Operands - Cross Reference ............................................................................................................. 18 Substituting Operands .................................................................................................................................... 19 Searching an Instruction................................................................................................................................. 21 Visualizing the Hierarchy of Modules ........................................................................................................... 21 Operands Report ............................................................................................................................................. 21 Importing and Exporting Tags and Descriptions ...................................................................................... 22 Exporting Project to HTML Format ............................................................................................................. 23 Content Selection of HTML ...................................................................................................................... 24 Sorting Lists of Operands.......................................................................................................................... 24 Report Operands........................................................................................................................................ 24 ii Summary Modules ..................................................................................................................................................... 25 Path 25 5. PROJECT MODULES ................................................................................................................................... 26 Opening a Module ........................................................................................................................................... 26 Saving a Module .............................................................................................................................................. 26 Inserting Module Notes and Descriptions ..................................................................................................... 26 Information of Modules on HardDisk ........................................................................................................... 26 Editing the Module Version............................................................................................................................ 27 Configuration Module ..................................................................................................................................... 27 Operands Declaration ................................................................................................................................ 28 ALNET I ................................................................................................................................................... 30 ALNET II .................................................................................................................................................. 30 Serial Channels.......................................................................................................................................... 30 Serial Channels Settings Sample (To Ponto Series) .................................................................................. 31 MODBUS Slave ........................................................................................................................................ 31 MODBUS Master...................................................................................................................................... 33 Synchronism.............................................................................................................................................. 34 Parameters (To Grano Series) ................................................................................................................... 35 Keys Configuration ................................................................................................................................... 35 Installing a HardFlex (To Grano Series) ................................................................................................... 36 Bus (To Ponto Series) ............................................................................................................................... 38 External Interrupt (To PO3x47 Series) ..................................................................................................... 41 Bus (To Grano Series) ............................................................................................................................... 41 Bus (To AL Series) ................................................................................................................................... 43 PLC Configuration ................................................................................................................................... 45 Ethernet (To Ponto Series) ........................................................................................................................ 46 Ethernet (To AL Series) ............................................................................................................................ 49 Redundant CPU (Only PO3247) ............................................................................................................... 49 Extended Configuration Module.................................................................................................................... 54 Extended Configuration Module - PROFIBUS PO4053 .......................................................................... 55 Extended Configuration Module - Multiserial PO7093 ............................................................................ 56 Program Module.............................................................................................................................................. 59 Ladder Program Module ................................................................................................................................ 59 Searching for a Logic ................................................................................................................................ 60 Inserting a Instruction ............................................................................................................................... 60 Removing an Instruction ........................................................................................................................... 61 Editing an Instruction ................................................................................................................................ 61 Cutting Instructions ................................................................................................................................... 61 Copying Instructions ................................................................................................................................. 62 Pasting Instructions ................................................................................................................................... 62 Cutting Logics ........................................................................................................................................... 62 Copying Logics ......................................................................................................................................... 62 Pasting Logics ........................................................................................................................................... 62 Inserting or Editing Tags and Logic Comments ....................................................................................... 63 Editing the Input and Output Function Modules Parameters .................................................................... 64 ST Program Module ........................................................................................................................................ 65 Undo and Redo .......................................................................................................................................... 65 Cut, Copy and Paste .................................................................................................................................. 66 Searching a Text inside ST Module .......................................................................................................... 66 Replace a Text inside ST Module ............................................................................................................. 66 Go to Line ................................................................................................................................................. 67 Setting Diagnostic Operands ..................................................................................................................... 67 Setting Temporary Operands .................................................................................................................... 67 iii Summary 6. INSTALLATION ............................................................................................................................................ 69 CD-ROM .......................................................................................................................................................... 69 Download on Internet ..................................................................................................................................... 69 Hardware and Software Requirement .......................................................................................................... 69 Versions of MasterTool Extended Edition .................................................................................................... 69 Installing the MasterTool Extended Edition ................................................................................................. 69 Installing the USB Driver ............................................................................................................................... 70 Uninstalling the MasterTool Extended Edition ............................................................................................ 71 Starting the MasterTool Extended Edition ................................................................................................... 71 Connections ...................................................................................................................................................... 72 Configuration of the Serial Channel .............................................................................................................. 73 7. COMMUNICATING WITH THE PLC ....................................................................................................... 76 Selecting the PLC of the Network to Communicate ..................................................................................... 76 PLC Address with Serial Channel ............................................................................................................. 76 PLC Address with Ethernet Channel ........................................................................................................ 77 PLC Download/Upload Window .................................................................................................................... 77 Uploading Modules to the PLC................................................................................................................. 78 Downloading Modules from the PLC ....................................................................................................... 79 Modules Window ............................................................................................................................................. 79 Sending Modules from RAM to FLASH .................................................................................................. 80 Sending Modules from FLASH to RAM .................................................................................................. 80 Erasing a Module ...................................................................................................................................... 81 Erasing the FLASH Memory .................................................................................................................... 81 Compacting the RAM Memory................................................................................................................. 81 Information of a Module on the PLC ........................................................................................................ 81 Memory Banks .......................................................................................................................................... 81 Status Window ................................................................................................................................................. 82 Changing the Status of the PLC ................................................................................................................ 82 Enabling or Disabling the Outputs ............................................................................................................ 83 PLC Information ....................................................................................................................................... 83 PO3x47 PLC Series................................................................................................................................... 83 System Messages ...................................................................................................................................... 84 Firmware Messages ................................................................................................................................... 85 Call Stack .................................................................................................................................................. 85 Bus Status .................................................................................................................................................. 86 ALNET II Network Status ........................................................................................................................ 86 Protecting the PLC .................................................................................................................................... 87 Inserting / Changing the PLC Password.................................................................................................... 88 Status of Forced Operands ........................................................................................................................ 88 Monitoring ....................................................................................................................................................... 89 Monitoring Operands ................................................................................................................................ 89 Monitoring Modules.................................................................................................................................. 90 Monitoring Logic ...................................................................................................................................... 90 Forcing Operands ............................................................................................................................................ 91 MTConsole ....................................................................................................................................................... 92 Running MTConsole ................................................................................................................................. 92 8. PRINTING DOCUMENTS ............................................................................................................................ 94 Window to Select the Documents to Print ..................................................................................................... 94 Configuring the Printer .................................................................................................................................. 94 9. OPTIONS ......................................................................................................................................................... 96 iv Summary 10. GLOSSARY ..................................................................................................................................................... 97 v 1. Introduction 1. Introduction The Software MasterTool Extended Edition MasterTool Extended Edition MT8000 software, or simply MToolXE, is the tool of configuration and programming of Altus equipment (Grano, Ponto, PX Series and AL-2004), including PLCs and remote. This tool also allows the monitoring of processes, configuration of modules and generation of reports. It runs on Windows® 2000, Windows® XP and Windows® 7 operating systems (all 32bits), having available software and manuals’ versions in English and Portuguese. This software is an improved version of MasterTool Programming, and it has innumerable improved resources and extras, becoming this tool of programming very versatile. MasterTool Extended Edition allows the development of applications. The edition of the program applicatory uses the concept of symbolic programming (tags or nicknames), making possible the documentation of the project during the edition of the modules. The concept of the project, that establishes a relation between several archives forming a work environment, it facilitates the work, reducing significantly the time of development, beyond hindering the user to commit errors of configurations more common, through the option of verification of project. MasterTool ProPonto MT6000 MasterTool ProPonto MT6000 software, is necessary for configuration and parameterization of Ponto Series. This software referenced in this document as ProPonto is found in the same CDROM of MToolXE, in a subfolder with the same name, and must be installed from there. WARNING: The ProPonto is necessary only for the creation and configuration of bus to PLCs of Ponto series. Further information on ProPonto can be got in the manual of use of ProPonto that can be found in the format PDF in the directory ProPonto/CDROM Manual. Documents Related to this Manual To get additional information about MasterTool Extended Edition can be consulted other documents (manuals and techniques characteristics) beyond this. These documents are available in the last revision at www.altus.com.br. The following documents are suggested as source of additional information: Techniques Characteristics MT8000 MasterTool Extended Edition Ladder Programming Manual MasterTool Extended Edition ST Programming Manual MasterTool ProPonto User’s Manual - MT6000 Visual Inspection Before proceed the installation, it is recommendable to make a careful visual inspection of the material, verifying if it does not have damages caused for the transport. Verities if all the CD-ROMs are in perfect state. In case of defects, informs the company or the nearer Altus deliver. It is important to register the series number of each equipment received, as well the revisions of software, in case it exists. This information will be necessary in case of need to contact the Altus technician support. 1 1. Introduction Technical Support To enter in contact with Altus technician support in São Leopoldo, RS, Call +55-51-35899500. To know the Altus technician support centers in others localities, consult our site (www.altus.com.br) or send an e-mail to [email protected]. If the software is already installed, please have the following information upon requesting the assistance: The version of software MasterTool Extended Edition. The software key version used in MasterTool Extended Edition. The revision of the equipment and the version of the executive software, contained in the label affixed on the side of the product, when the question relates with communication with devices. The content of the applicatory program (modules). The operating system Windows version (with your Service Pack) of the computer that is executing the software. Warning Messages Used on this Manual This manual, the messages of warnings will be presented in the following formats and meanings: DANGER: indicates a risk to life, production, serious harm to people, or that substantial material or environmental damage may happen it the necessary precautions are not taken. ATTENTION: Indicates configuration, application and installation details that must be followed to avoid situations that can cause system errors and related consequences. WARNING: Indicates important configuration, application or installation details to obtain the maximum performance of the system. 2 2. Technical Description 2. Technical Description Lite, Professional and Advanced The software MasterTool Extended Edition MT8000, has three distribution versions, each one with a optimized profile, in accordance with the necessity of the user. They are: Lite: programming software specific for applications in Grano Series Professional: programming software specific for all Altus PLCs series (Ponto Series, PX Series, Grano and AL-2004) Advanced: programming software with tools for bigger applications Each version has characteristics, ends and functions specific for each purpose. The following table, details these differences: Lite Professional Advanced Verification of the Project Yes Yes Yes Verification of modules uploading Yes Yes Yes Programming of PX Series No Yes Yes Programming of Series AL (Only AL-2004 or superior) No Yes Yes Programming of Ponto Series No Yes Yes Programming of Grano Series Yes Yes Yes Programming of Quark Series No Yes Yes Programming of AL-600 Series No Yes Yes Programming of AL-2000 Series No Yes Yes Programming of AL-3000 Series No Yes Yes Structured Text Language(ST) No Yes Yes Blocks and Relay Languages (Ladder) Yes Yes Yes Communication with devices through Ethernet Yes Yes Yes Saving of Monitoring Windows Yes Yes Yes Independent numerical base for each operand on monitoring windows Yes Yes Yes Conversion of Projects from MasterTool Programming MT4100 and MT4000 to MasterTool Extended Edition Yes Yes Yes Redundancy Wizards No No Yes Tags of Operands up to 25 characters Yes Yes Yes Printing of program modules and project configuration Yes Yes Yes Skins of Function Modules Yes Yes Yes Skins to loop PID Yes Yes Yes Modules call hierarchy Yes Yes Yes Substitution of operands blocks Yes Yes Yes Inclusion of files on the project Yes Yes Yes MTConsole No No Yes Table 2-1. MToolXE version characteristics ATTENTION: The programming of PLC Series: Quark, AL-600, AL-2000, AL-3000 and Piccolo Serie (by the programming module MT4100) is available since version 5.50 of MasterTool XE. 3 2. Technical Description System Requirements MasterTool Extended Edition, to any of its distribution versions, presents as minimal requisites for its installation the following products: MasterTool Extended Edition Platform PC with Windows® 2000 SP4, Windows® XP SP2 (32bits) or Windows® 7 (32bits). .Net Framework Version 2.0 SP2 Processor Pentium III 800 MHz (minimum) HD space 100 MB (minimum) RAM Memory 256 MB (minimum) Video Super VGA Resolution 1024 x 768 Table 2-2. System requirements Buying Data Items The product can be acquired in two forms: In a packing that contains the following items: Software MasterTool Extended Edition recorded in CDROM License Contract of Altus software In a packing of the product that contains the license to software download in Altus website: www.altus.com.br (Versions/Licenses) Product Code The following codes must be used for purchase of the product: Code Name MT8000 Lite MasterTool Extended Edition Lite MT8000 Lite /L MasterTool Extended Edition Lite /L (license) MT8000 Professional MasterTool Extended Edition Professional MT8000 Professional /L MasterTool Extended Edition Professional /L (license) MT8000 Advanced MasterTool Extended Edition Advanced MT8000 Advanced /L MasterTool Extended Edition Advanced /L (license) Table 2-3. Code for purchase MTool XE 4 3. General Overview 3. General Overview MasterTool Extended Edition is an application executed in the environment Windows having all the easiness and standardizations offered for this environment. Its application, as other Windows applications, is guided for commands of menus and dialogue boxes that allow the accomplishment of the tasks and choice of the options. MasterTool Extended Edition has, still, specific windows edition for configuration module, program module and each one of the other modules and archives used in projects. These windows allow an efficient edition and an adequate visualization of the diverse components of each specific module. The main environment of MToolXE software is shown in the following figure: Figure 3-1. MToolXE environment It can be seen clearly that the environment has three divisions. They are: Project Treeview: This window can be use to increase MasterTool Extended Edition use agility therefore with one only double click it can open one module, a configuration or even documents of the project. Moreover, diverse functionalities of the software can be accessed through this window. Project Verification: In this window is presented the result of the verification of a module or of the project, being indicated the errors of configuration and/or programming. Still, are presented alerts to inform the user of a configuration/ programming that they cannot have the waited result. Edition area: Edition area and/or visualization of one or more modules of program, reports, monitor window or any other file or configuration made for MasterTool Extended Edition; 5 3. General Overview Project Treeview The project treeview window has, as objective, visualize the modules and documents used in the project, making possible the fast access to the content of them and speeding many functions that can be executed in MasterTool Extended Edition. All the archives visualized in this window are part of the project. Therefore, it is through this window that archives and/or modules of the project are inserted or it removed. This can be easily made through a click with the right button of the mouse. A tree view has several levels, represented by files. The main file refers to the open project, and the name of the project followed by the CPU can be seen. The other levels are divided in several files, in order to separate files and documents according to their type and functionality, to organize and ease the handing of the project. Figure 3-2. Project treeview The Project Treeview has the following folders: Modules: this folder contains all the application modules, Configuration, Execution, Function or Procedure. Through treeview, with a click with the right button on module, it can open the module, to make crossed reference, substitution of operands, verification of modules, sending of modules, etc. Monitor Windows: this folder contains referring archives to the monitoring windows. These windows can quickly be opened with a double click on the respective desired archive. Operating Report: this folder contains the reports of operands, having a report for each type of operating supported for the PLC. In such a way, any report can easily be consulted, at any time. Documentations: this folder can contain any files to be inserted in the project. In this way, the documentations made for the project can be easily be disposal. To open an inserted document, 6 3. General Overview click twice on the desired document. To remove it, click with the right button of mouse and the option will be available. WARNING: The removal of a document link of the project implies in the removal of the archive in the directory of the project. Verification Window The verification window has as objective to assist the work of the programmer, allowing the visualization of all the errors and warnings contained in the configuration and programming. The warning messages and information relative to these occurrences are presented in a clear way and objective, in order to tell to the programmer what it is the error and where it can be found. The window of verification is filled and modified every time a project is opened, when a module is saved or envoy for a device, or when requested, through command, to verify the Project or verify module. In the heading bar of the window it is informed what was verified ( project or module, and if will be this finishes case which the module ) and the amount of errors and warnings contained in the verification. Each error or warnings is represented by a line and will be in the window until a new verification is carried out. The definition of error is all and any configuration and/or programming that certainly causes a dysfunction. A warning is an indication of a configuration and/or dangerous programming, or then incomplete but that it can be desired, or then, not necessarily it will make that the objective of the project be compromised. A project with one or more errors cannot be sent to the PLC, therefore it could cause a serious imperfection. ATTENTION: It is suggested that all modules that are uploaded in PLC do not have any warning, in order to prevent behaviors not desired. Figure 3-3. Verification window The window of verification contains the following columns: Column of Icons: Graphical indication if is an error or warning; Description: Description of the occurrence that it indicates of fast form the configuration and/or invalid programming. Module: Indicates the name of the module where the occurrence is found. However, some occurrences are found in the project and can appear with the name of the project. Localization: It indicates more specific form, inside the module, the localization of the occurrence. 7 3. General Overview WARNING: Giving a double click with the left button of mouse on the line of an occurrence being in error or warning, the module will be opened in the corresponding point. Edition Area MasterTool Extended Edition works with the project concept. Project represents the programming and configuration of a PLC that uses diverse modules and other documents, as the following ones: Configuration Module Extended Configuration Module Program Module Monitoring Window All these documents and other reports they are shown in the Edition Area. In this space it finds these open modules when requested, as a window for each module. In this way, they can be opened diverse simultaneously windows, allowing agility in the work. Configuration Module Window The edition window of the configuration module allows to visualize and to modify the diverse values of configuration of the PLC, and is shown in the follow figure: Figure 3-4. Configuration module edition window To get information how to configure the module Configuration, check the Chapter Module of Configuration, in this manual. Extended Configuration Window The edition window of an Extended Configuration module can vary according to the type of the Extended module of Configuration. However, these windows are similar to the window of the Module configuration. To get information about how to configure each one of the modules of Extended Configuration, check the chapter Extended Module of Configuration, in this manual. 8 3. General Overview Module Program Window The module program window presents the modules that it contains upon programming of PLC (or part of it). This window varies in accordance with the language of each module, and it can be Ladder or Language ST diagram. An example of these windows is presented in the follow figures: Figure 3-5. Edition window of ST language program module 9 3. General Overview Figure 3-6. Edition window of ladder language program module To get information about how to configure the program module, check the chapters Module of Program Ladder and Module of Program ST, in this manual. Monitoring Window The monitoring window visualizes the values of operands of PLC in real time. Any type of operating in diverse numerical bases can be monitored, such as Decimal, Binary, Octal and Hexadecimal. The following figure illustrates the monitoring window: Figure 3-7. Monitoring window To get information about how to monitor operands and to manipulate the Monitoring Window, check the chapter Monitoring Operands, in this manual. 10 4. Project on MasterTool Extended Edition 4. Project on MasterTool Extended Edition What is a Project? MasterTool Extended Edition works with the project concept to better take care better and represent the applications. A project establishes a relation between some archives forming an environment of work, facilitating the development, reducing of significant form the creation time, beyond avoiding errors of more common configurations through verification. The name of the project archive has the extension .MTXE. Some characters, such as * / :, have special meaning for the operational system used, being considered invalid characters for the formation of the project name. Therefore, this data must be observed in the determination of the name of the project. A project is used to congregate all the necessary modules to the execution of the PLC tasks, composing one application program. Moreover, a project has documents and reports to be developed, and they give future preventive maintenance. As in any project developed in other versions, it is necessary the existence of a module configuration C000 and an execution module E001. When a new project of programming is created, the configuration module automatically is created and can be visualized in the window of module edition Configuration. WARNING: The folder standard for the creation of a project is “...\My Documents\My Projects” being able to be modified in the instant of the creation of a new project. WARNING: All the integrant modules of the project are located in the same subfolder that is indicated in the creation of the project. In case there are inserted modules that are in other subfolder, copy of the module is automatically carried out for the subfolder of the project. How to Convert a Project from MasterTool Programming MasterTool Extendend Edition can convert projects created by MasterTool Programming, in MT4000 as well as MT4100. MToolXE will carry through the conversion of all the modules, with its respective archives of descriptions and reports of Operands. To carry through the conversion of a project, open the project created in MasterTool Programming, as it was a normal project of MToolXE. MasterTool Extended Edition will make an automatic backup of the project creating a backup folder and moving all the archives of the project for inside of that folder. Only the necessary files for MToolXE will remain in the folder of the project, as the other files that it will create due to the configurations. To convert projects from PLCs series AL-600, AL-2000, AL-3000, QUARK and PICCOLO will be ask a PLC of serie AL-2004, Ponto or Grano. In this case, all ladder, operand report and module report will be normally converted. However, all the data module C will be lost and should be reconfigured again in the new project. 11 4. Project on MasterTool Extended Edition Figure 4-1. Changing the model of PLC WARNING: It is recommended to the user to make a manual backup of the project before proceeding with this conversion. ATTENTION: To PLC series AL-600, AL-2000, AL-3000, QUARK and PICCOLO is not possible to convert the configuration module. In this case all the data module C will be lost and should be reconfigured again in the new project. Files Generated by MasterTool Extended Edition MToolXE generates and uses diverse archives that compose the projects. Some of them are the Modules of Project and others are documentations and reports in general. The follow table samples the formats of the names of the used archives for MToolXE with the respective meanings: Name Format Meaning *.MTXE Main file of the MToolXE project. T-XXXXXX.NNN Module File of MToolXE project: T – Module type (C, E, F or P) XXXXXX – Module name with 6 characters NNN – Module number *.Notas File of notes and descriptions from the Project *.Tags File that contain the saved Operands Report. Possess the name of the project with the .Tags extension. *.mnt Monitoring window file. Table 4-1. Files generated by MToolXE Creating a Project To create a project without using one Wizard, the PLC used in the project must be selected, and the name of the project indicated. In the menu Project/New... the following screen is opened: 12 4. Project on MasterTool Extended Edition Figure 4-2. Creating a new project For the creation of a new project with Wizard, first must be choose the PLC Model and then click in the Use Wizard (if there are any available option to respectively PLC Model). It is a project previously created for one determined situation, facilitating, for dealing with many necessary stages already concluded, for the project reach the objective. In case it is desired to use some Wizard, one of them must be selected and the steps indicated in the screen must be followed. ATTENTION: The PLC of series AL-600, AL-2000, AL-3000, QUARK and PICCOLO and the router devices AL2400/S, AL-2401, QK2400 and QK2401 are configured by MT4100 programming module, open in other window. Opening a Project To carry through the edition of a project it is necessary that this project is opened in MToolXE. When a project is opened in MToolXE and it had been edited previously, all the windows of the project will come back as they were before the project having been closed, that is, MToolXE restores all the configuration of the project. To open a project, access the menu Project/Open... and select in browse a project of MasterTool Extended Edition *.MTXE or then, a project of MasterTool Programming *.MTL (see Converting Project of MasterTool Programming). WARNING: Use the menu option Project/Last Projects to quickly open the recently edited projects. ATTENTION: The PLC of series AL-600, AL-2000, AL-3000, QUARK and PICCOLO and router devices AL2400/S, AL-2401, QK2400 and QK2401 are configured by MT4100 programming module, open in other window. 13 4. Project on MasterTool Extended Edition ATTENTION: The PLC projects of series AL-2004, Ponto and Grano, if in MT4100 programming module format (file with *.mtl extension) should be converted to MasterTool XE format (file with *.mtxe extension). See How to Convert a Project from MasterTool Programming. Inserting and Removing Modules on Project The Project modules that a project contains can be removed, as well as Modules of Project already previously existing can be included. To carry through these commands, Tree view of the Project can be used, through the right button of mouse. To insert a module: 1. Click with the right button of mouse in the folder Modules of Project tree view, as in the next figure: Figure 4-3. Inserting a project module 2. To select a file of opened browse. The file will be copied to the Project directory, in case it is not in this same folder. To remove a Module of Project: 1. Click with the right button of the mouse exactly on the module that is desired to be removed of the project, as in the follow figure, and click in the option remove: 14 4. Project on MasterTool Extended Edition Figure 4-4. Removing a module from project WARNING: The module removed of the project is not deleted, is only not considered by the project. Inserting and Removing other Documents Like the insertion and removal of Project Modules, works the insertion and removal of Monitoring Windows and Documents. The project tree view contains folders as Documents and Monitoring Windows where these elements added to the project can be found. In the Tree view folder of Project Operands Report no element can be added or excluded, as these reports are fixed, being able to be modified only its content. Creating a Module to the Project Beyond inserting modules already existing in the project, another form to add more modules is creating a new one. This procedure can be made with any opening project, clicking in the menu Module/New... A screen will be opened with the next one illustrated: 15 4. Project on MasterTool Extended Edition Figura 4-5. Creating a new module Depending on the type of selected module, some parameters of this window will not be available for alteration or then the restriction of values will move. It happens because some modules has restrictions, as shown in the follow table: Module Type Restrictions Start Module The number is constant 000 and the language is Ladder Main Module The number is constant 001 and the language is Ladder Time Interruption Module The number is constant 018 and the language is Ladder External Interruption Module The number is constant 020 and the language is Ladder Procedure Module The number can vary from 0 to 199 and the language is Ladder or ST Function Module The number can vary from 0 to 228 and the language is Ladder or ST Extended Configuration Module The number can vary from 003 to 009. The field Extended Configuration Module is enable to choose an option. Table 4-2. Project module names restrictions WARNING: Some types of modules cannot be shown in the options list because the type is not adjusted for the model of the Project PLC. The same occurs with the type of extended module configuration. For further details check the manual of the used PLC. Inserting Notes and Descriptions of the Project In MasterTool Extended Edition a series of documentations can be made to help in the development and maintenance of the project. Among them there is Notes and Description of the Project that can be visualized and edited through the menu Report/Project Notes... The follow Screen represents these documentations: 16 4. Project on MasterTool Extended Edition Figure 4-6. Project notes window Changing the Project PLC Model At the moment of creation of a project in MasterTool Extended Edition is defined which PLC model of the project. However, some situations demand the change of PLC and this can be made through the menu Project/Change PLC Model... or clicking with the right button of mouse in Tree view of the project, exactly on the project folder, and selecting the menu item Change PLC Model … Whatever is the way used for the alteration of the PLC Model a window for the election of the new PLC model is opened, as in the figure bellow: Figure 4-7. Changing the project PLC model To modify the PLC Model used in the project, select in the list the new PLC, click on OK button and confirm the exchange in case of being certain. ATTENTION: The alteration of the Model PLC of the project can cause losses of information of the project. This happens because depending on the old and new model some information are not necessary or they are not part of the scope of the new model. So, these information are not used. It is suggested, after the PLC model is modified, to check the Module Configuration (C-*.000) and verify the project. 17 4. Project on MasterTool Extended Edition Verifying the Project To verify the project in order to detect errors or dangerous behaviors in the programming and/or configuration, click in the menu Project/Verify Project. The result of this verification can be visualized in the Window of Verification. A different manner to carry out the project verification is to make a module verification individually. For this, go to the menu Module/Verify Module. ATTENTION: The verifier of projects verifies errors of syntax in the configuration and programming of a project. It does mean that the application will function as it is wanted, therefore the user can commit errors of programming, in the logic of the functioning. The algorithms used in the programming are of responsibility of the user. Finding Operands - Cross Reference The search for operands used in the project, also known as Crossed Reference, can look for one or more operands (Band of Operands) for all the modules of the o project, that is, in the Configuration Module, in all Extended Modules Configuration, Function Modules, Procedure Modules, etc. To carry through this search, go to the menu Search/Operands… and inform the band of operating that it is desired to search, as in the following figure: Figure 4-8. Selecting an operands band to find on project This screen basically has the objective to inform the band of operands that will be searched. In case it is desired to limit the search area for the band of operand, is enough to select of the list search in a module. In such a way the search will be effective only in the current module. After informed the band of operands, it can be visualized in the field Band, click in the button Search. The result of the search will appear in a screen as shown: Figure 4-9. Operands searching results This window has diverse columns: Operand: This column shows the Band of Operands that was found. 18 4. Project on MasterTool Extended Edition Access: This column determines how the occurrence uses the band of operands: it uses the data of the band (Reading) or it writes the content of operating (Writing). Module: It is indicated the Module the occurrence is. Localization: It is an indication, inside the module, where the occurrence can be found. Comment: This column describes the purpose of the operands use. ATENTION: Double clicking on the line, the module is opened (if it is not already opened) and selected the place where the operand is. It is very important to know as this search of operands functions to be able to interpret the result. For this, the following example determines when a band of operands or one simple operand enters in the window of search result. Band of operands searched: %M0010 to %M0020. Situation Found on Search %M0000 No %M0007 to %M0010 Yes %M0002 to %M0040 Yes %M0010 Yes %M0020 Yes %M0010.0 Yes %M0015 Yes Table 4-3. Example of a search for operands Substituting Operands The Substitution of Operands in the project can substitute bands of operands, with the respective subdivisions for another band of the same type of operating, in all the modules of the project, that is, in the Module Configuration, in all Extended Modules Configuration, Modules Function, Modules Procedure, etc. To carry through this substitution, go to the menu Search/substitution… and inform the band of operating that it is desired to substitute and for which new desired band it will be substituted. The following figure illustrates this operation: 19 4. Project on MasterTool Extended Edition Figure 4-10. Selecting an operands band to substitute This screen basically has the objective to inform the band of operands that will be substituted, across the fields Operand and Quantity. Already the substitute band of operands is formed by the field Substitute for and also for the field Quantity, because the band must have the same size. There is also the option to substitute or not the operands with subdivision that is inside the band. These options can be determined through checkbox Bit, Nibble, Byte e Word. There is an option to verify if the operand range to substitute is already used in the project. If is used, the substitution will not do. This verification is disable clicking in the To allow substitution for operands that already are in use in the Project. After these data are informed, when you click on OK button a screen will appear as shown in the figure: Figure 4-11. Information of the operands bands that will be substituted This window informs the bands of operating in the project, or selected module, that will be substituted and the ones that will not be substituted and the respective places where it finds. After 20 4. Project on MasterTool Extended Edition intently reading the content of this window, to pressure the button Yes and will be effected the substitution. Searching an Instruction Differently from the operands, an instruction of Modules of Programs that use the language Ladder can be searched. For this, go to the menu Search/Instruction… and the following screen will be shown: Figure 4-12. Searching for an instruction on the project After selecting the Instruction of the options List and click in Searching a window of results similar to the search of operands will be opened. Visualizing the Hierarchy of Modules Hierarchy of modules is considered the order in which the modules are executed, that is, which module calls another module and where it happens. The MasterTool Extended Edition shows this information in graphical way, through the menu command Project/ Hierarchy of Modules. Clicking in this menu, a window will be opened as shown to follow: Figure 4-13. Modules project hierarchy To visualize where each one of these modules is called, click with the right button of mouse and select the option of the menu Show Localization. With double click on a module, the module of Program in the localization will be opened where it calls the module clicked. Operands Report Each operand and the subdivisions of point and, each table and the position can have one associated tag and a commentary. The tag of each operand can have up to 25 characters of size and only letters 21 4. Project on MasterTool Extended Edition and numbers can be used (the letters always are converted for capital letters). It is not possible the creation of equal tags for any operands. The commentary of each operand can have up to 60 characters of size and any characters can be used in its edition. There is a report for each type of operand on the PLC model of the project. Each of these reports can be accessed by the menu Report/Operand. A new submenu with all the reports of the project will be opened. Clicking in one of these menus, a window will be opened as shown: Figure 4-14. Memory operands report Each line of the table corresponds to one operating or a bit of operating. In this window there are the following columns: Operand: Operand associated to line. U: It indicates if an operand is being used in some point of the project. This column is brought up to date only in the opening of the window. Tags: It indicates tag of the respective operating. It can contain up to 25 characters. Description: Description of operating, being able to contain up to 60 characters; WireInfo: This column is available only in the Report of Operating Input/output. Wire-info is a label used in the closet wiring to identify the wire, the handle or any another pertinent information. In such a way, the entry point or exit correspondent can be located by the wire-info, of the electric panel, checking the relation of tags, operands and wire-info. WARNING: The label of wire-info is used only for documentation of the system, not being able to be used in the operations of forcing, monitoring or edition of instructions, although it is visualized in the logic. Importing and Exporting Tags and Descriptions The MasterTool Extended Edition has functions to export and to import tags and descriptions for archives of values of Excel (.CSV). Such procedures facilitate the documentations that the user desires to make on the project and also facilitates the edition of tags and its description, since they can be edited in Excel and imported for MToolXE. 22 4. Project on MasterTool Extended Edition To effect the exportation of tags and descriptions, that is, to save these information of the project in a file CSV, click in the menu Report/Export Tags and Descriptions… Clicking on this menu a browse window will be opened to select the folder and the name of the file that will be saved. To import tags and descriptions of operands click in the menu Report/Import Tags and Descriptions… A window will be opened to choose the behavior of the importation of Tags. Figure 4-15. Importing tags and descriptions of a CSV file After clicking on OK, a browse window will be opened for the choice of the desired file for importing the information. Exporting Project to HTML Format The MasterTool Extended Edition allows exporting the main project information to a report in HTML format, allowing the viewing in any computer with an internet browser installed. To perform the project export to HTML format, just click the menu Project / Project Export / HTML format. A window opens as shown in Figure 4-16 to select the items to be exported. In this window, the information that will be exported to HTML and its format is defined. 23 4. Project on MasterTool Extended Edition Figure 4-16. Export project window to HTML Content Selection of HTML In the top left of the screen, there is one of the main groups of this window, called the Content selection of HTML, which allows the selection of the sections that will compose the generated HTML document. The sections Report Operands and Modules still have other configuration options detailed below. Sorting Lists of Operands This group is defined as the ordering of the operands tables. The default option is to order by Operating, but can also be sorted by Tag. Report Operands In group Report Operands, it is possible to select the types of operands that will be exported within this section . The configuration options are: Include cross-reference: Includes cross-references of reading and writing of each operand listed. Creating hyperlink in references: Transforms the cross-reference pointing to hyperlink on the logic where the operand is referenced. List only operands of selected modules: Filters only those operands that are being used in selected modules in Modules section. 24 4. Project on MasterTool Extended Edition Modules In the Modules group, there are listed all modules present in the project and have options such as: Include list of operands: Includes list of operands used in each logic. Include cross-reference: Includes cross-references of reading and writing of each operand listed. Creating hyperlinks in references: Transforms the cross-reference pointing to Hyperlink on the logic where the operand is referenced. Remove unselected modules references: Remove the cross-references of modules that were not selected. Include notes module: Includes note of each module, if exists. Include observation of the logics: Includes observation of each module, if exists. Path The field Export Directory, selects the directory where the files are generated. In this folder, the following is generated: an HTML file with content selected for export, a CSS for formatting and Logics folder with the image of the logic used in the export. HTML and CSS files always have the same name of the project.In the field Specifying CSS, you can specify a custom CSS style file. The contents of this file will be copied to the CSS file generated in the export. ATTENTION: In case of very large projects, we recommend to export the project in stages, due to the large amount of information that can be generated, with the result, generating an HTML file too large, which in some cases make impracticable to open it by some browsers. 25 5. Project Modules 5. Project Modules MasterTool Extended Edition uses diverse types of project modules for diverse purposes, with the objective to program and/or configure a PLC. Each one of these types of modules has details that make them different among themselves and it will be shown ahead. However many characteristics exist in common among the types of modules. They will be demonstrated afterwards. Opening a Module For visualization or edition of a module it needs to be open in the area of edition. There are diverse ways of opening a module: Through the menu Module/Open… For this method the open module does not necessarily needs to be the project and if is the case it will not belong to the project until the module is inserted in the project. Through the Project Tree view with a double click on the desired module. Through the Verification Window, with a double click on the correspondent occurrence of the error. Thus, the module that contains the error will be opened. Saving a Module An edited or created module needs to be saved to recover the information contained there. Whenever is desired to save a module, it will be saved in the same local where was opened or created. To save a module can be made in the following ways: Click in the menu Module/Save Verify Module or verify Project (this last save all the open modules) When closing a window of an edited module, but not saved, is asked if it is desired to save it Inserting Module Notes and Descriptions To insert notes and descriptions to a module, open the desired module and, with it opened, go to the menu Report/Module Notes … A window very similar to the project notes will be opened. Information of Modules on HardDisk It is possible to verify information of a module in disk without opening it. There are two forms of making it: Click on the menu Module/Information… and choose a module in browse presented. In this way information of a module that belongs or not to the open project can be visualized. Through the Tree view of the Project clicking in the corresponding module with the right button of mouse and selecting the option Information… Whatever is the way used to ask for information of a module the result is something similar to the following screen: 26 5. Project Modules Figure 5-1. Information window of a project module Since version 5.10 of MasterTool Extended Edition is showed the Content CRC, calculated only by respective module content. Also, is showed in the same window the Module CRC, calculated by all module content and information, for example Upload date and time. Editing the Module Version In order to keep a better organization of the files and modules versions sent for a PLC there is the version of the modules that can be edited. In the case of modules function in assembly this data cannot be modified. To edit and to visualize the version of a module, you must have it opened and go to the menu Module/Version… The following window for edition and visualization of this parameter will be shown: Figure 5-2. Editing the version of a project module Configuration Module The Configuration Module, or only Module C, is the module that has all the necessary configurations for the use of a programming project. This module is created as soon as a new project is created and cannot be removed of the project. In this module there are the main configurations of each PLC, such as declaration of operands, bus, nets, etc. The name of this module follows the following format: C*.000,where * it must have at most 6 characters. 27 5. Project Modules The Module Configuration does not have a common form for the diverse PLCs supported by MasterTool Extended Edition, as exactly the differences of characteristics of each one of them influences in what the Module Configuration has or does not have. So, they can only be visualized, in the window of Configuration Module, the configurations that can be made for one determined PLC. However, whatever is the PLC chosen for the Project, the visualization window of edition of the Configuration Module has a common main form, as shown in the following figure: Figure 5-3. Editing window of the configuration module As the Configuration Module contains all the information of a determined configuration of PLC, the configurations have been subdivided and are visualized in the list that appears in the left side of the window. Each one of these subdivisions is named Module C Item. As the election of this list, the window of the module configuration is modified, illustrating the correspondent Module C Item. So, it is very easy to surf for the configurations of the Configuration Module. When a Module C Item of is modified, the button apply will be enabled. The configurations will start to be valid only after clicking on Apply, when the window will be closed and will be asked if it is desired to save the content of the window. However the recovery of the information must be confirmed to be applied to the alterations. In case some alteration has been made accidentally, click on Close button and the window will have the values of when it was opened or of the last time it was clicked on the Apply button. When changing Module C Item in the list, a confirmation or not of the application of the alteration will have to be effected before changing the visualized Module C Item. They will only be changed if the values are not used or applied. So, each Item of C Module will be analyzed separately. Operands Declaration In this Item of C Module the amount of operands used throughout the project is declared, whatever is the type of operands. The declaration of operands is divided basically in three groups: Simple Operands, Retentive Operands and Table Operands. This idea can be observed in the next figure. 28 5. Project Modules Figure 5-4. Operands declaration The declaration of simple operands is made inserting the amount of operands in the field of the corresponding type. The retentive operands are directly dependent on the correspondent simple operands field. It cannot be configured more simple operands than retentive operands. On the right it is shown the status of memory occupation destined to the declaration of operands, in order to illustrate the memory use. The declaration of table operands happens in two stages: the first one, in the screen of the Module C Operands Declaration Item the amount of tables of each type that will be used must be informed. In the second stage, consists in determining the amount of positions that each one of these tables has and this is made clicking on the button Positions… A screen will be opened as the following: Figure 5-5. Declaration of the positions table quantities ATTENTION: As the type of CPU selected in the project, some operands are not available and the fields will be incapacitated. 29 5. Project Modules ALNET I All the PLCs have at least a serial canal with which they can communicate with supervisory, MasterTool Extended Edition and any another ALNET I Master device. The configuration of the parameters of these serial canals is made in the following window: Figure 5-6. Configuring the serial channel with ALNET I protocol In this window the speed of the serial door can be configured, for example, as well as the Address of the Station. ALNET II For the PLCs that support ALNET II, this Module C Item makes the configuration of the PLC in this net, in a clear way. In this window times of Time-Out it can be configured, as well as speed of communication, Redundancy, etc. The following figure illustrates this idea: Figure 5-7. ALNET II network configuration Serial Channels In this window (COMs Settings session) we set the protocols for each communication channel (look the specified PLC manual). Is possible use simultaneously the same or different protocols in communication channels. 30 5. Project Modules Figure 5-8. Setting COMs Serial Channels Settings Sample (To Ponto Series) The three serial channels can be used as show bellow: USB serial channel (COM 1): to connect to a personal computer with the MasterTool Extended Edition software. RS485 serial channel (COM2): connected to one or more equipment with MODBUS protocol, such as smart sensors and drivers. This channel is isolate, and a right cable must be used to make a net. RS-232C serial channel (COM3): to connect to a local HIM. ATTENTION: To set others modules and PLCs, verify more details in specified Data Sheet and Manuals. MODBUS Slave Diverse PLCs support the protocol MODBUS Slave in one of its COMs. It can be used through the following configuration window: 31 5. Project Modules Figure 5-9. MODBUS Slave relations window This window serves only for visualization of the MODBUS Slave relations presented in the COM of the PLC, being able to include or to remove relations clicking in the respective buttons of the window. When inserting a new relation, it will be inserted in the position where the cursor is in the table, dislocating the other relations. This window has the following columns: Data Area: The type of function MODBUS adopted. Qt: Specifies how many Operands or bits (it depends on the type of function selected for the relation) will be used for the relation. MODBUS Operands: Operand MODBUS band used by the relation. Operands on PLC: Band of operands used in the relation MODBUS. Insert or edit a relation MODBUS Slave is made through the following window: Figure 5-10. Editing the values of the MODBUS Slave relation In this window the Data Area, Altus of Operands and MODBUS Operand that the relation will work can be defined. The referring COM configurations and the MODBUS Slave address used by PLC are made through the COM Properties Button, in the Module C Item MODBUS Slave. Clicking on this button the following screen is opened: 32 5. Project Modules Figure 5-11. Configuring the COM to use the MODBUS Slave channel MODBUS Master As well as MODBUS Slave, many Altus PLCs support MODBUS Master and to use such functionality the following window of configuration is shown: Figure 5-12. MODBUS Master relations window This window serves only for visualization of MODBUS Master relations presented in COM of PLC, being able to include or to remove relations clicking in the respective buttons of the window. When inserting a new relation, this will be inserted in the position where the cursor is in the table, dislocating the relations. This window has the following columns: Node: Specifies the address in net MODBUS of the corresponding slave. N: Number of the function MODBUS. It only must be filled in case of a Generic relation, or this field should not be modified. Function MODBUS: Election of the MODBUS function;. Operands MODBUS: Band of MODBUS operands used for the relation. Qt: Specifies how many Operands or bits (it depends on the type of function selected for the relation) will be used for the relation. 33 5. Project Modules Origin Operands in the PLC: Band of operands used to write in the MODBUS output. In a double click a dialogue is opened, where the first operand of the band can be informed. The size of the band is specified in the column Qt of the respective relation. Target Operands in PLC: Band of operands used to read the MODBUS inputs. In a double click a dialogue is opened where the first operating of the band can be informed. The size of the band is specified in the field of the column Qt of the respective relation. Operands Status: Band of Memory Operands (size 2) where the diagnosis of each relation can be seen. Pooling: Time in which the relation will be brought up to date by the Master, in units of 100 ms. The button insert Relation, situated in the inferior part of the window serves to insert a relation between the relations already previously declared for the user. The button remove Relation cleans and removes the relation selected for the user. To select a relation as it was mentioned in the function of these buttons, selected a cell of the line that is desired to be changed. Inserting or editing a relation MODBUS Master is made through the following window, where all the data specified previously can be edited: Figure 5-13. Editing a MODBUS Master relation To edit the COM properties for use of MODBUS Master click on the button COM Properties... and a similar window of MODBUS Slave will be opened. Advanced configurations of MODBUS Master can be visualized and be edited through the button Advanced..., that opens a window. Synchronism Some PLCs can operate with the clock synchronized with others PLCs or not. In case they operate synchronized, it must be configured if PLC generates or if it receives synchronism. The option Synchronism NMEA mentions applications that use synchronism GPS. In usual applications the option Without Synchronism must be selected, as in the following figure: 34 5. Project Modules Figure 5-14. Configuring the PLC synchronism Parameters (To Grano Series) In this Item of C Module some special parameters of a PLC are configured, such as Band of Operands used by the Clock of the PLC and Band of Operands of Diagnostic of the System. The next figure shows the window of parameters for PLCs of the Grano Series. Figure 5-15. Configuring parameters of Grano Series To edit one of the operand bands, click on the respective button and inform the desired band of operands. Keys Configuration Some PLCs have keys for interface with the user, which can be configured in this Item of C Module. This window can be visualized as follows: 35 5. Project Modules Figure 5-16. Configuring the PLC keys This window has a table with the following columns: PLC Operands: Band of operands used in the function of the keyboard key. Inferior: Inferior limit of values. Superior: Superior limit of values. To insert, edit or to remove a keyboard key function, select a cell of a line that represents the function and click on the buttons Insert Function..., Edit Function... or Remove Function, respectively. For a keyboard key function being configured, click in the respective line of the table, to open the following edition window of functions of keyboard keys: Figure 5-17. Editing the keys function In this Item of C Module, there is a control operating of the keyboard keys that can be configured, as for Type of Visualization. Installing a HardFlex (To Grano Series) Some CPUs Grano use HardFlex. This device must be installed first before the bus set, since that makes up the bus master module. The installation and the selection of which HardFlex be used with a given CPU is done through the Settings menu Options/ Install HardFlex .... 36 5. Project Modules By opening its installation screen, we have two options: Install HardFlex and Install HardFlex in PLC. Figure 5-18. Installing HardFlex The first option should be selected when you want to insert a new HardFlex the project. First, you must click on the button Copy to directory MasterTool to select the desired HardFlex, according to the type of CPU used in the project. The second option should be used to install HardFlex in CP. Select HardFlex you want to install and click the button Install in the PLC. ATTENTION: The installing of HardFlex in PLC Will change its state to programming. After the installation, the screen is as shown below: 37 5. Project Modules Figure 5-19. Installation HardFlex completed Bus (To Ponto Series) Often, only a PLC of a programmable controller does not have all the necessary sources to reach the application goal. As the requirements vary from application to application, the PLCs incorporate the demanded functions through the E/S modules in its bus, it means, the PLC has basically the function of executing the program and managing its interfaces as serial channels, memories, etc. The modules in its bus has normally points or input channels to interface with factory equipments. The bus configuration to Ponto Series in MasterTool Extended Edition is made through the following window: 38 5. Project Modules Figure 5-20. Configuration of the bus on Ponto Series WARNING : The page “External Interrupt” is available only to PO3x47 Series (PO3047, PO3147 and PO3247). In the superior part of Configurations there are information of the first operands used in the automatic placing of the bus modules. Automatic placing consists in the definitions of operands according to the goals of each module, so each operand must be specified separately. In this screen is also possible to configure if the bus will support or not hot swap. The bus configuration of is made through the software MasterTool ProPonto MT6000 (enclosed in the CD of MToolXE and available on of Altus website www.altus.com.br). In this case, it is advisable to check the manual of use of this software. The configuration of ProPonto must be imported into MToolXE, through the button Read (the archive *.GBL it must be in the same directory of the project). The software ProPonto can be executed automatically opening the archive GBL of bus through the button Execute. After importing a bus from ProPonto, the disposal of the modules in the bus, as well as operands placed for each one of them can be visualized clicking in the borders Segment 0, Segment 1, Segment 2 or Segment 3. In this in case, one guide of segment of Ponto Series bus can be seen as shown in the figure: 39 5. Project Modules Figure 5-21. Segment 0 of Ponto Series bus This screen has the following columns: Pos: Position of the module in bus. Idx: Number of the relation of each module. There are modules with more than one relation. Modules: Name of the declared module. Input: Operands referring to the inputs of the module. Output: Operands referring to the module output. Diagnostic: Operands referring to the diagnostic of the module. MasterTool Extended Edition can only modify the operands used in each relation of the module. It can be done through the button Edit Operand..., on the right inferior corner, or with a double click in the corresponding line of the relation that is desired to modify. In both cases, the following screen is opened: 40 5. Project Modules Figure 5-22. Editing relations of Ponto Series modules ATENTION: To make sure if the bus is configured correctly, use the Project Verification. External Interrupt (To PO3x47 Series) The external interrupt E-*.020 is actived in rise edge of first digital input point of the module configured as external interrupt source. To enable the external interrupt must set it in bus configuration. After this, include the E-*.020 module, the digital input module. In some applications must be fast, is used the function F-AES.087, to refresh the I/O independently of the main module (E-*.001). Figure 5-23. External interrupt settings Bus (To Grano Series) The bus of Grano Series can be totally configured in MasterTool Extended Edition through the following window: 41 5. Project Modules Figura 5-24. Configuration of Grano Series bus In the border Configurations the first octet of Digital output can be defined. It is used to place the digital output operands. In this border, it is also configured if the PLC will be used in the Enslaved way or the master way (for further details check the manual of use of the PLC). In case of being Enslaved way, it is still necessary to define the size and the area of exchange of data between PLC master and slave, and which operands are used in this process. On the right of the screen the modules HardFlex installed in MasterTool Extended Edition can be visualized (see the chapter Installing Modules HardFlex in MToolXE) and the HardFlex used by PLC. To move the HardFlex used, click on of the desired option, available in the list. WARNING: It will only be available in the list of HardFlex Modules the modules installed previously, before opening the project. In the border bus, a window as the following one is shown: Figura 5-25. Editing the bus to Grano series This screen has the following columns: Pos: Position of the module in bus. Idx: Number of the relation of each module. There are modules that have more than one relation. Modules: Name of the module or HardFlex declared 42 5. Project Modules IB: Operands referring to the digital inputs of the module. IW: Operands referring to the analog inputs of the module. QB: Operands referring to the digital outputs of the module. QW: Operands referring the analog outputs of the module. Diagnostic: Operands referring to the diagnostic of the module. To insert a module click on the button Insert..., and select a module of the open list of options. To remove it, click on the button Remove in the position of the corresponding table to this module. To edit the parameters of a relation, select a corresponding line to the relation and click on the button Parameters... a window will be opened, as shown in the figure (This window varies according to each relation): Figure 5-26. Editing the parameters of a relation on a Grano Series module To edit one of the values of the table of this new window, click on the corresponding line and insert or select the new value desired. If the line is gray, then it is not available for edition. Bus (To AL Series) As well as bus of Grano Series, the bus of AL Series can be totally configured in MasterTool Extended Edition, through the following window: 43 5. Project Modules Figure 5-27. Configuration of AL Series bus In the border Configurations the Keys of Exchange of each one of the buses can be qualified (only from buses 2 to 9). In this border can be also qualified the exchange of modules with the powered PLC (Hot Swap) and the first octet of digital output, used for the modules of input and output and to enable the diagnostic operands and define the initial operand diagnostic of CPU The modules bus can be visualized and edited through the bus borders 0 to 9, as in the figure below: Figure 5-28. Editing the AL Series bus This screen has the following columns: Position: Position of the module in bus. Module: Name of the declared module. Input: Operands referring the digital inputs of the module. 44 5. Project Modules Output: Operands referring the digital outputs of the module. Address: Address of the module through an operand %R. PA: This column, that only appears in buses 2 to 9, indicates how the module of E/S must be addressed, through the Adjusts Points (PA). Differently of buses of others Series, the bus of AL Series does not allow the edition of the operands of input, output or address. These operands are placed according to the order of the modules in the bus and the position that each one occupies. This window only allows the removal and insertion of new modules. To insert a module, select an empty line, that is, that does not contain a module, and after click on the button Add... A window with a list of modules will be opened. Select the module to be inserted. To remove it, select the line of the module and click on the button Remove. ATTENTION: The configuration for modules of series PX is equal to the configuration for modules of series AL. PLC Configuration This Module C Item has as objective make a fast visualization and configuration of the protocols used for the PLC in the serial channels (COMs). The window basically has a figure of PLC used in the project where, using the mouse, you can click in the serial channel of the figure that will be changed for the correspondent Module C Item to COM clicked. The figure illustrates this idea: Figure 5-29. Configuring the PLC Serial channels In some PLCs the used protocol for determined COM can be chosen, and it is made through the lists available in the window. The used protocol will change the window of the Module C Item correspondent to the COM. In the PO3x47 series, there is a way to change the language, as show bellow: 45 5. Project Modules Figure 5-30. Configuring the PLC serial channels There are more specified configurations like Maximum Program Configuration Time, E-*.018 Period (Time Interrupt Module) and COMs Configuration. This last, configure the auxiliary channels (COM2 and COM3) allow a selection among many different protocols. In this selection is possible configure the MODBUS relations, this is conversion between PLC operands and MODBUS operands, allow identify and/or inform the PLC areas can be changed by MODBUS net. ATTENTION: - E-*.018 : is executed in cycles, in period defined by user in configuration module C-*.000, can be: 50 ms, 25 ms, 10 ms, 5 ms or 2,5 ms. - Maximum Program Configuration Time: is the maximum time to execute a complete program cycle in PLC. This time must be 100ms (minimum) until 800ms (maximum). The cycle execution must not be higher than this time, including the calls to other modules like P and F and the interrupt modules like E-*.018 and E-*.020. The firmware does a continuum verify of time cycle, passing automatically to Error state if the time cycle is higher than this limit. – Language Displayed: This function set the language showed in the module display. The available languages are: Portuguese and English. Ethernet (To Ponto Series) Many Altus PLCs can work in Ethernet, what demands some basic configurations, such as IP Address, Sub-net Mask and Gateway default. These configurations will be available only if there is any module Ethernet configured in the PLC bus. The configuration can be made through the following window: 46 5. Project Modules Figure 5-31. Configuring Ethernet parameters The fields IP Adress, Sub-net Mask and Default gateway match the properties of IP addresses of PLC. All three addresses have the same format (IPV4) and are composed by four bytes that can have values from 0 to 255. The field IP Address defines which is the address that PLC in TCP/IP network. This address is divided in two parts: sub-net address and node address. Both addresses, sub-net and node, depends of the mask sub-net to be determined. The field Sub-net Mask allows the subdivision of Ethernet network in several sub-networks minors. It determines the portion of the IP address refers to the address of the sub-net and their portion corresponding to the node address of PLC. IP address with values 0.0.0.0 and 255.255.255.255 and mask sub-net with value 0.0.0.0 are invalid. The field Default gateway indicates which gateway will be responsible for retransmission the messages sent to others sub-nets. If do not exist a default gateway in network, the address 1.1.1.1 must be informed to this field. The section Protocols allows select through checkboxes which protocols are enable for the interface in question. For interface PO7094 are available the protocols ALNET II Server, ALNET II Client and/or MODBUS, and the second depends on the availability of no other Ethernet interface (PO7091 and PO7092) declared on the bus. The editing of the configuration of Ethernet modules is done through a dedicated software, may be called by the button Open WebGate... Through this software, can be configured either Ethernet modules. 47 5. Project Modules Figure 5-32. Ethernet configuration - Webgate Software The edition of the configurations of the Ethernet modules of PLCs of Ponto Series is made through a dedicated software, being able to be called by the button Execute... , then a module of the list will be selected. Through this software, any one of the modules presented in the bus can be configured. In this software it is imported a file named chipxx.ini, which will count to all the relative configurations to the Ethernet module. To import the settings for Ethernet module for the software MasterTool XE through external tool WebGate, simply click on the button Import Chip.INI .... Will appear immediately a message of import completed (if no errors occur) and the screen will refresh to the new values of the imported file. In the button, Advanced Settings... you can configure in detail the channel Ethernet using the following window: Figure 5-33. Configuring advanced settings The editable fields of this window are: Time-out inter SubNetwork (x100 ms): this parameter defines the time-out communication between the CPU and network interface. It is highly recommended to use the default value for this parameter since it should never be less than the cycle time of CPU. 48 5. Project Modules MODBUS Settings: MODBUS TCP/IP or MODBUS RTU over TCP/IP in server mode, compatible with different systems of supervision, HMIs, programmable controllers and gateways world market. ATTENTION: Some fields may be disabled for certain Ethernet interfaces. See details in their documentation of the modules. Ethernet (To AL Series) The PLCs of the AL Series, as AL-2004, can use in its bus many modules Ethernet. In this way, the configurations of these modules are made through the following window: Figure 5-34. Ethernet bus modules The configuration of each module can be made clicking in the corresponding button. According to the clicked module, a window of the corresponding configuration to the supported characteristics will be opened. Redundant CPU (Only PO3247) The PO3247 Redundant CPU enables two CPUs installed together on the bus. However, only one CPU can access the I/O modules per time. The CPU that has access to the bus is called Primary, while the other is called Backup. The Backup CPU cannot access the bus, it only receives data from Primary and returns his diagnostic. In case of fault on Primary CPU, or fault on its, power supply, or fault on bus activity, the Backup CPU pass to control the bus and changes itself to Primary. At same time, while the other CPU lost the access to bus, it changes to Backup or enters in error by a fault diagnosed. To configure the PO3247 CPU as redundant is necessary to follow the steps described below: 1. Configure the bus using MasterTool ProPonto tool 2. Enable the redundancy on C Module 3. Configure the redundant relations 4. Upload the program to both CPUs For further information about redundancy on PO3247 CPU, see the Manual de Utilização PO3047, PO3147 e PO3247 - UCPs Série Ponto (MU209108). 49 5. Project Modules Figure 5-35. PO3247 redundant CPU Bus Configuration To configure the PO3247 redundant CPU is necessary to assemble the bus using the MasterTool ProPonto tool selecting the CPU code name "PO3247 - RED CPU 1M 30 I/O" instead of the CPU code name "PO3247 - CPU 1M Flash 30 I/O". It is not necessary to put another CPU on the bus because that redundant CPU already indicates that will be two CPUs. 50 5. Project Modules Figure 5-36. Configuration using MasterTool ProPonto WARNING: There two kinds of PO3247 UCP in ProPonto. When wish a redundant configuration is necessary insert UCP described as PO3247 –Red CPU 1M 30 I\O as shown the figure 5-30 Redundant Relations The second step is to define the redundant relations. The redundant relations are used to define which operands will be copied from Primary CPU to Backup CPU. This is necessary to a redundant system to continue at same state when a fault occurs. At each execution cycle, the Primary CPU copy every data defined as redundant to Backup CPU. When the Backup CPU finish to process the received data it indicates the final of a cycle and only then a new execution cycle is started. 51 5. Project Modules Figure 5-37. PO3247 redundant configuration 52 5. Project Modules Redundancy Options Figure 5-38. Edition of the redundancy options All redundancy configurations are made in item Redundancy of C Module configuration. The first step to enable the redundancy is mark the check box Enable Redundancy and set the Diagnostic Range. To see more: Manual of Programming of PLC PO3x47 WARNING: Is important to think about the choice of the redundant operands ranges. An excessive number of operands can raise the CPU cycle time. The total number of redundant operands is limited up to 16kbytes. 53 5. Project Modules Figure 5-39. Inserting redundant relation Uploading Redundant Configuration After finishing the configuration, it is necessary to upload the project to both CPUs (Primary and Backup). At this time one CPU will pass to execute the program as Primary and the other as Backup. Extended Configuration Module MTool XE has a special configuration for modules PO4053 and PO7093. These settings can be met through the Module C- Extended created through the following window: 54 5. Project Modules Figure 5-40. Creating a extended module Extended Configuration Module - PROFIBUS PO4053 In the MasterTool XE there is the Extended Configuration Module, where is possible edit the PROFIBUS net configurations. To do that, we must import to the project the .PB file, clicking in the Import .PB file.... These files, with extensions .PB are generated by ProfiTool® software. Figura 5-41. Ethernet module bus Configuration Details Control: are the operand used to diagnostic the interface and the module connected to it. 55 5. Project Modules o Master A: field with operands Memory (%M) that receive the signal of diagnostic of Master of the net PROFIBUS. This diagnostic informs the general situation of network., under the point of view of the Master. o Master B: fieds of operands Memory (%M) that receive the signal of diagnostic of the PROFIBUS redundant Master. o Redundant: Show the specific diagnostic of the redundancy, where they inform where the net the module is active at the moment o Errors band: field with Memory Operands (%M) with signal of eventual errors in the PROFIBUS net operation. The length of this range is fixed always in 2 operands. o Control: field with Auxiliary Operands (%A) to control of the Master module of PROFIBUS net. The length is the same of one auxiliary operand. Slave Diagnostics: Diagnostics about slaves modules in the PROFIBUS net. This operand range require only Memory operands (%M) single or table (%TM). The length of this range is specified by user in the field Operands Quantity, and the value must be between 75 and 255. Redundancy: Enable or not the redundancy option. After import the .PB file to the project, is possible edit the fields in the grade. Import/Export The button Export Relations is used to export the relations settings to a *.CSV file, it can be opened in Microsoft® Excel. This file can be used to do a configuration’s backup. The button Import Relations is used to, import the relations in the *.CSV file to PROFIBUS relations settings. ATTENTION: - The maximum number of relations is 2000. - For more details how to set the PROFIBUS modules, consult the User’s Manual of respective equipment. ATTENTION: This window have several characteristics that depend on the used CPU at moment. Extended Configuration Module - Multiserial PO7093 The MTool XE has a special configuration for buses that containing the module PO7093. This module has 3 serial channels for local HMI functions and MODBUS network, configurable via the Extended Configuration module. With the module PO7093 declared on the bus, it’s necessary create the module Extended (See topic: Extended Configuration Module). With the insertion of the module configuration, the tree-view will have the appearance shown below: 56 5. Project Modules Figure 5-42. New extended module In Configuration Module, must be chosen the position of the module PO7093 in the bus and the respective protocol for each of the serial channels. 57 5. Project Modules Figure 5-43. PO7093 configuration The configuration screens for each of the serial channels vary according to the protocol selected for the channel (ALNET I or MODBUS Master or Slave). Configuring In this window can be configured, for example, the speed of the serial port and the address of the station. Figure 5-44. Channel ALNET I More details of the configuration ALNET I and other protocols in session Properties the COMs. Configuration MODBUS Master and Slave: See the respective items: MODBUS MASTER and SLAVE in the chapter "Module Configuration". 58 5. Project Modules ATTENTION: For more details about modules PO7093, as compatibility with CPU's, see the Technical Documentation (CE109617) and User Manual (MU209617). Program Module Program Module is a module that has routines developed to be executed in a PLC. The name of a module of Program always has one of the following formats: F-*.*: Function Module P-*.*: Procedure Module E-*.*: Execution Module There are basically two languages of development of Program Modules: Ladder and Structure Text (ST). The language Ladder is a graphical programming language that remembers the diagrams of electric panels used in industry, before PLC. This language is of great acceptance in the area by the simplicity of programming and use of practically the same symbols of the diagram of relays. For further details about this language, consult the Manual of Programming Ladder of MasterTool Extended Edition. The programming language Structure Text, or simply ST, is a text language that congregates the classic programming elements to develop algorithms. For further details about this language, check the Manual of Programming ST of MasterTool Extended Edition. Both languages can simultaneously be used in the project, however it is not possible to have both in the same Module of Program. Ladder Program Module The Program Module Ladder is represented in MasterTool Extended Edition through a graphical publisher, where there are some concepts determined in the Manual of Programming Ladder of MasterTool Extended Edition. This publisher is basically subdivided by logics, as shown in the follow figure: 59 5. Project Modules Figure 5-45. Ladder program edition window As aid to the use of the language, there is a column in the left of the window, where there is a button to maximize and to minimize a logic. In the previous figure, logic 1 is minimized, differently from the remaining logics. Searching for a Logic To roll the window of visualization of a module of Ladder program for a specific logic, go to menu Search/Logic..., with the module of program opened, and inform the logic in the following window: Figure 5-46. Searching for a logic Inserting a Instruction The procedure for the insertion of an instruction is the same for all. For the instructions that has operands or any another parameter to be informed, a window for edition is presented. This window reflects the drawing of the box of the instruction, as shown in the following figure: 60 5. Project Modules Figure 5-47. Inserting an instruction on the ladder program module To insert an instruction, with the module of the program opened, it must follow the steps: 1. Place the cursor of logic in the cell where the instruction must be inserted. 2. Select in the instructions menu the group of instructions desired and select the instruction inside the group, or select the corresponding button in the tools bar. A window with the format of the box of the instruction is shown. In case it is not possible to insert an instruction due to the restrictions of the cell, the item of menu and the button in the tools bar are incapacitated. 3. Edit the corresponding operands to the selected instruction indicating the address or tag of it. Removing an Instruction The exclusion of an instruction is easily made, selecting the instruction and clicking in DEL, or through the menu Instruction/Remove. Editing an Instruction To edit an instruction, click on of the instruction that is desired to edit, or select the instruction and go to menu Instruction/Edit.... the same window of insertion of an instruction will be opened, however with the current values in the corresponding fields. ATENTION: The instruction can also be changed, but keeping the operands, through the shortcut keyboard key CTRL + T, the instruction will be changed by an equivalent. Whenever this shortcut is enabled, on the instruction, it will be changed by a different one. Example: an instruction SOM, can be changed by SUB and MUL. Cutting Instructions An instruction or a group of instructions previously selected can be extinguished of a logic of ladder program for the command CTRL+X of the keyboard. A copy of it is transferred to the Exchange Area, being able to be again inserted in any point of a logic (since it does not exceed the limits of the logic) through the command CTRL+V of the keyboard. 61 5. Project Modules Copying Instructions The copy of Instructions of Ladder program logic is identical to cut instructions, however copied instructions are not excluded from the module. To effect the copies of instructions, use the keyboard keys CTRL+C , and the instruction selected will be copied for the transference area. Pasting Instructions Paste instructions in a module program, from loaded instructions in the transference area, can be made through the keyboard keys CTRL+V. The instructions will be insert in the empty cells and substitute the instructions in the same area. Will not allow paste instructions in some cells, if is a invalid local to any instruction in the clipboard. Cutting Logics A group of logics can be cut of a program module ladder by the menu Edition/Cut Logics… A copy of them is transferred to the Exchange Area, being able to be inserted again in any point of the module through the menu Edition/Paste Logics... When calling the command menu to cut logics of a program module ladder, the following window will be opened, to inform the logics that will be cut: Figure 5-48. Cutting logics of a program module Copying Logics The copy of Logics of a program module Ladder for the transference area is identical to cutting logical, however, the copied logics are not excluded from the module. To copy logics, go to the menu Edition/Copy Logics... and the following window will be opened: Figure 5-49. Copying logics of a program module In this window the logics to be copied must be informed. Pasting Logics Paste logics in a program module, from loaded logics in the transference area, can be made through the menu Edition/Paste Logics... A window where the number of the logic must be informed will be 62 5. Project Modules opened, in which the logics will be paste. If it is the last logic, then new logics in the end of the program module will be enclosed. If it is first or any logic of the way, the logic will be replaced in order to hold the new inserted logics. Figure 5-50. Pasting logics on the program module Inserting or Editing Tags and Logic Comments Every logic used in a program module Ladder can have an associated tag, a commentary describing shortly the function of the logic and a field of comments to describe it. Tag and commentary of the logic are shown in the first line of the logic, when a program module is being visualized in MasterTool Extended Edition. To edit the Logic Tags and commentaries, go to the menu Report/Logic description… or click with the right button of the mouse on the logic and select the menu with the same name. The followings windows will be opened: This first window show all tags in module: Figure 5-51. Logic description To edit a descript of the logic it is enough click in a line of the grid in window as below. The following window will be shown: 63 5. Project Modules Figure 5-52. Inserting or editing tags and logic comments Editing the Input and Output Function Modules Parameters A module function ladder, differently of what happens with modules of execution and procedure, allows that parameters of input for the function are used, and values are returned after its execution. To edit these input and output parameters go to the menu Module/Edit Parameters… (Only for Ladder function modules). Clicking on this menu, the following window will be opened: Figure 5-53. Setting the amount of input and output parameters In this window the amount of input and output parameters is determined, being in maximum 10 for each one. To edit any parameter, click on the button Parameters…. This window to edition will be opened. 64 5. Project Modules Figure 5-54. Editing the parameters of a ladder function module ST Program Module The Module of Program Structure Text, or simply ST, is represented in MasterTool Extended Edition through a text editor, where there are some concepts determined in the Manual of Programming ST of MasterTool Extended Edition. This editor is very similar to an editor of conventional text; however, as is dedicated to the programming of the language ST, it presents some characteristics that distinguish it from other editors. The edition window of a module of ST program is as the following: Figura 5-55. ST program module window This editor detaches with different colors the programming elements (variable, commentaries, words key, etc) to facilitate the visualization and understanding of the program. Undo and Redo The ST module allow undo and redo the last modifications in module. The operation can be do it in menu Edition / Undo or by keyboard shortcut CTRL + Z. The actions undid can be redo, by menu Edition / Redo or by keyboard shortcut CTRL + Y. 65 5. Project Modules Cut, Copy and Paste The ST module allow selected text can be transfer between the code editor and Transfer Area of Windows. This operations are called Cut, Copy and Paste and can be access by menu Edition and keyboard shortcuts: Cut: this operation delete the selected text and save it in memory. The operation can be access by menu Edition / Cut or the keyboard shortcuts CTRL+X or SHIFT+DEL. Copy: this operation copy the selected text to the memory. The operation can be access by menu Edition / Copy or the keyboard shortcuts CTRL+C or CTRL+INSERT Paste: this operation write the copied text in the memory to the selected position in ST editor. The operation can be access by menu Edition / Paste or the keyboard shortcuts CTRL+V or SHIFT+INSERT. Searching a Text inside ST Module The tool Searching allow user to find a text inside the ST module. This window is access by menu Edition / Find or keyboard shortcut CTRL + F. Find what: text to find Match case: if selected, difference Upper Case than Down Case Match whole word: if selected, find only by integer word Search UP: if selected, search for the text from actual position to up Find Next: find to next result Replace: enable to replace the text to other Mark all: mark all occurs with a bookmark in each position Figure 5-56. Find/replace window Replace a Text inside ST Module The window Replace allow the user to locate and substitute a text inside the ST module. This windows is access by menu Edition / Replace keyboard shortcut CTRL + R. Find what: text to find Replace With: text to replace Match case: if selected, difference Upper Case than Down Case Match whole word: if selected, find only by integer word Search UP: if selected, search for the text from actual position to up Find Next: find to next result Replace: replace the actual occur the text to other Replace All: replace every text find Mark all: mark all occurs with a bookmark in each position 66 5. Project Modules Figure 5-57. Substitution window Go to Line The tool “Got to Line” allow go to the line in the program very fast. The nest window show how to configure this. Figure 5-58. Go to line window Setting Diagnostic Operands Each ST module has diagnostic of own function, for example, error “divided by zero”. The error codes is listen in Manual ST Programming. The next window is access by menu Modules / Operands/ Diagnostic. Figure 5-59. Diagnostic operands window Setting Temporary Operands Some math operations need operands to keep some temporary results. The kind of operands can be enable individually. Case necessary to use a kind of operand disabled, will create a verify error. For each kind of operand is possible set the initial address and the quantity of operands. But, actually is just necessary set 4 operands. This configuration window is access by menu Modules / Operands / Temporary. 67 5. Project Modules Figure 5-60. Temporary operands window settings 68 6. Installation 6. Installation This chapter describes as MasterTool Extended Edition is distributed, the requirements of the hardware and necessary software to its execution, the procedure for the installation in hard disk from CD-ROM of distribution and how to initiate the execution of MasterTool Extended Edition. CD-ROM The MasterTool Extended Edition is distributed in a set that contend: 1 CD-ROM License contract of Altus Software The CD-ROM contains a folder called MToolXE that contains the program CONFIG.EXE. For further details on the installation check the section Installing MasterTool Extended Edition advanced in this chapter. Download on Internet The MasterTool Extended Edition can also be downloaded from (www.altus.com.br). It is recommended to the users, periodically, to make an update download of the software, in this way, to take knowledge of new characteristics added to the new versions of MasterTool Extended Edition. Hardware and Software Requirement The requirements for the use of the MasterTool Extended Edition are described in the chapter Technique Description. WARNING: The installation and use of MToolXE must be made using a login pertaining of a user of the administrators group. Versions of MasterTool Extended Edition Frequently, the software MasterTool Extended Edition can suffer alterations, such as inclusion of new characteristics, alterations, etc. As it occurs, there are new versions of the software. The users who have a license of MasterTool Extended Edition will always be able to have access to the use of more recent versions. However, the new functionalities and characteristics can be blocked, being free only for new keys of software. Whenever is necessary to download the software MToolXE, it can be used normally with the key of existing software. Installing the MasterTool Extended Edition To install the MasterTool Extended Edition in Windows: 1. Insert the CD-ROM in drive D: or according to the configuration of the microcomputer. 2. Automatically is shown an auxiliary program that asks which product will be installed. Select MasterTool Extended Edition and click in Installing. 69 6. Installation 3. When initiates the installation, follow the procedures shown in the screen. ATTENTION: The user must install Framework .NET of Microsoft, with the CD of MToolXE on the first time the software is installed in a microcomputer. ATTENTION: The package of Modules Function also is offered in the installation of MToolXE, however every time a project of MasterTool Extended Edition is modified, it is suggested to bring up to date this package through the site of Altus (www.altus.com.br). ATTENTION: The installer of the MdacTyp is not necessary to be installed in Windows XP because this operational system already possess the necessary resources. Installing the USB Driver The MasterTool XE installer allow to install the driver responsible by communication between the computer and the PLC with USB. To start the installation, access the MasterTool XE CD, and access the file Autorun.EXE. Figure 6-1. Setup window in MasterTool XE To install in your system, click in OS 32bits button. After that, the driver will be install. The next window will be showed when the installation finish. 70 6. Installation Figure 6-2. Window in the end of driver install Click in OK button to finish the install. Uninstalling the MasterTool Extended Edition To uninstall the MasterTool Extended Edition in the Windows there are the following forms: Click on the button Start, select Programs, MasterTool Extended Edition, and click on Uninstall MasterTool Extended Edition. Through the Panel of Control of windows, in Add or remove Programs. Starting the MasterTool Extended Edition To use MasterTool Extended Edition it is necessary to have a license, that is, a software key that allows the use of MToolXE. This key of software is requested on the first time that the MToolXE is executed, through a screen, shown below: Figure 6-3. Software key window In case of not having the key of software, or the key being invalid, there is the option of the MasterTool Extended Edition execute in Demonstration mode (Demo). This way, the software works normally, however it will not be allowed: Communicate with devices, by serial or Ethernet Save any document or module Some functionality are restricted according to the version of the software key, that is, if the software key is of the same version of MasterTool Extended Edition, then all the functionalities will be available. However, if the version of the software key is previous the version of MasterTool XE. 71 6. Installation Extended Edition, it qualifies only the functionalities updated until the version of the software key. To verify the version of a software key, after installed and informed the key of the software, click on the menu Help/About… A window will be shown, as illustrated bellow that contains this information, with the version of MasterTool Extended Edition. For further details, see the chapter Versions of MasterTool Extended Edition. Figure 6-4. MasterTool XE about window indicating the versions Connections MToolXE communicates with the programmable controller, gateway, bridge or with the adapter of communication in net, through the serial interface type RS232C of the microcomputer and, in the case of MT4100, it also communicates by the Ethernet channel. In case there is more than a serial interface of the type RS-232C, MToolXE assumes that the communication will be carried through by the interface 1 (COM1). It is possible, however, to define another serial interface for the accomplishment of the communication through commands of MToolXE. ATTENTION: The connection or disconnection of any peripheral (PLC, printer, protector of software, etc) with the microcomputer must be carried through with the equipment off, or there is the risk to damage the communication interfaces. ATTENTION: It is indispensable the existence of ground between the peripheral equipment and the microcomputer before carrying through any connection. The next table shows the connections allowed between the microcomputer where the peripheral MToolXE, and devices are executed, as well as the handles Altus used for such connections. 72 6. Installation Serial Interface Connection Type Cable Used 9 pins MasterTool XE and AL-2004, PX2004 gateways AL-2400/S e QK2400 bridges AL-2401 e QK2401 serial communication module AL-1402 MasterTool XE and communication adapter AL-1413 9 pins MasterTool XE and MODEM RS-232C AL-1346 9 pins AL-1715 25 pins MasterTool XE and PLCs PO3X42, PO3X45, PO3X47, Grano. MasterTool XE and AL-2004, PX2004 gateways AL-2400/S e QK2400 bridges AL-2401 e QK2401 serial communication module AL-1402 MasterTool and communication adapter AL-1413 25 pins MasterTool XE and MODEM RS-232C AL-1345 25 pins MasterTool XE and PLCs PO3X42, PO3X45, PO3X47, Grano. MasterTool XE e PO3X47 AL-1715 9 pins 25 pins USB AL-1342 or AL-1390 * AL-1349 AL-1343 or AL-1383 * AL-1395 AL - 1746 Table 6-1. Connections types ATTENTION: The handles AL-1342 and AL-1343 allow the communication with PLCs configured for use of MODEM "half-duplex“, whereas the handles AL-1383 and AL-1390 do not allow. In other characteristics, they are functionally identical. Configuration of the Serial Channel After the installation of MasterTool Extended Edition, during the first execution, the command of menu “Configurations/Communication…” must be selected, so that the configuration of the serial canal that will have to be used for the communication with the programmable controller is made. The figure illustrates the screen of configuration of the serial channel: 73 6. Installation Figure 6-5. Serial channel configuration window ATTENTION: In case the mouse stops working, it is had that the communication with the programmable controller was configured to use the same serial channel of the mouse. In this case the selection of serial canal in MasterTool must be modified, or the configuration of the serial channel used by the mouse, and Windows must be restarted. In Autodetect button, is possible detect the selected port baudrate. Clicking in this button, will open this window. Figure 6-6. Autodetect baudrate window Clicking in Detect button, is execute the autodetect mode, searching for the PLC baudrate. 74 6. Installation Figure 6-7. Baudrate found ATTENTION: The automatic baudrate detection of serial channel only will work if the personal computer is connect to the energized PLC. 75 7. Communicating with the PLC 7. Communicating with the PLC MasterTool Extended Edition can use any one of the serial interfaces, or an Ethernet channel of the microcomputer, in order to carry through communications with different equipments. These communications can be used to read or to send modules from/to PLCs, to monitor application programs, to modify the state of the PLC, to monitor and to force the operands, among others tasks. These communications always use the protocol ALNET I to serial communication, or ALNET II to Ethernet communication. Both protocols are of the Altus. Selecting the PLC of the Network to Communicate Before carrying through a communication with a PLC, it is necessary to configure in the MasterTool Extended Edition the used environment and the address of the PLC in the net. The environment, here called Channel, must be chosen between Serial and Ethernet, as it must be specified in the address of the PLC in the net of the chosen Canal. The configuration of the address is made through the menu Communication/Address… Figure 7-1. Configuring the communication channel and the PLC address The address configured in this window is used by all the commands of communication of MasterTool Extended Edition, except some commands that use proper addresses in each window, such as monitoring operands. The configuration of this window is saved with the project (when it will be opened). PLC Address with Serial Channel Before carrying through a serial communication, it is necessary that the addresses of Node and Sub-net, with which the communication will be carried through, are configured. These addresses identify to the PLC or router device with which MToolXE executes the communication. For omission, MToolXE assumes as address for node and sub-net the value 000, used for communication point-to-point with the PLC. Communication point-to-point is carried through with a device that is directly connected in the microcomputer of the MToolXE, through a cable. WARNING: The address 000 for node and sub-net does not have to be used in net communications, only in pointto-point connections, as it determines that all the PLCs in the net receive and answer the sent command, occurring collisions in the answers. The following table presents the possible values for addresses of node and sub-net: 76 7. Communicating with the PLC Node Sub-net Communication Type 0 0 ALNET I Point to point 1 a 254 0 ALNET I 255 0 ALNET I with Broadcast 1 a 31 1 a 63 ALNET II Table 7-1. Node and sub-net addresses The sub-net with address 000 indicates that the communication is carried through using the net ALNET I and the value contained in the option Node indicates the node that receives the communication. The node 000 address determines that all the PLCs in the net receives and answer the sent command. Specifying the node address in the band from 001 to 254 guarantees that only the corresponding PLC will identify and answers the command. The sub-net address with values between 001 and 063 indicates that the communication is carried through using the net ALNET II and that is destined to an only node, being so the indicated one in the option Node. WARNING: The communication of MasterTool through the net ALNET II is possible with the use of gateway. PLC Address with Ethernet Channel As the serial channel, Ethernet channel needs the IP address of the PLC in the Ethernet net to effect the communication with the same. The valid addresses for use in this type of communication are the same ones used in a net Ethernet. PLC Download/Upload Window To a module carry through the tasks that have been programmed, it must be sent for the PLC. When a module that is in the PLC is needs alteration, it must be read for MToolXE so that the alterations can be carried through. The processes of reading and sending of modules for the PLC, deletion of modules and transferences between memory RAM and FLASH EPROM can delay some seconds, as MToolXE bring up to date the directory of modules after these procedures. The window Read and/or Send Modules for PLC can be opened through the menu Communication/ Download/Upload Module… the communication with the PLC will be carried out through the following window: 77 7. Communicating with the PLC Figure 7-2. Download/upload modules window This window presents many information, about the MasterTool Extended Edition project, in disk, as well as about the PLC. There are two lists of modules in the screen: the first one presents Modules on Project, where are listed all the safe modules in the project and the second list, Modules on PLC, presents exactly the modules that are in the PLC memory. The list PLC module has a line for each module contained in the memory, and also has the following columns: Name of the Module: name of the module that is in the memory of PLC. Size: size of the module in bytes. Localization: this informs if the module is in RAM or EPROM. Upload Date and Hour: dates and hour that the module was sent for PLC. CRC: this column indicates if a module is equal (=) or different (!) of the respective module in the project. If it does not have any indication, the module exists only in the PLC and in the project does not have anyone with this same name. The list of Modules in the Project contains a line for each pertaining module to the project, having only two columns: Name of the Module and Size, with the same meanings of the other list. In the inferior part of the screen read or send Modules, there are the states of the memories used for PLC, as well as the state of it and the CRC of the project in record and the project in PLC. ATTENTION: Since 5.10 MToolXE version the CRC is calculate only with modules contents and not more completely module. Uploading Modules to the PLC To send a module from the window download/upload Modules, select the module of the list Modules on Project and click in > Upload Module (s). One or more modules can be selected. In case of uploading all the modules of the project for PLC, click on the button >>> Upload All. It also can send a module through the Treeview of Project, clicking with the right button of mouse on the module and selecting the option Upload Module. The process of upload modules automatically makes a verification of the project, using, in this in case, also the data of the PLC that is communicating. In case it has some errors or warnings a window will be shown indicating the abnormalities. In case of error, the modules will not be uploaded, until the errors are solved. If it has 78 7. Communicating with the PLC only warnings, a window with the occurrences will be shown, asking if the user really desires to send the data. This window of verification is as shown in the following figure: Figure 7-3. Example of errors uploading module to the PLC In case uploading the module has been concluded, the sent modules will have to appear in the list of Modules in the PLC. When a module is sent, in case the PLC has an equivalent, this last one will be overwritten. WARNING: Only saved modules, that are part of the project, can be sent for the PLC. WARNING: The Sending of modules is only allowed in case the PLC is in way execution, programming or cycled, or a warning window will be shown and the PLC will have to be placed in programming mode. Downloading Modules from the PLC To read a module of the PLC, from the window read or send Module, select the module of the list of Devices on Module and click in Download module(s) <. One or more modules can be selected. In case of reading of all the modules of the PLC, click on the button Download all <<<<. The read Module of the PLC will be enclosed in the project, overwriting an equivalent module. The module reading will only be allowed, if the PLC of who it is reading the module, is the same type of PLC declared in the project. Modules Window The MasterTool Extended Edition has a window that visualizes the main information on the memory of program of PLC, the modules that are in RAM and FLASH, being able to control where the module will remain (RAM or FLASH), if will be extinguished of the memory of PLC, etc. This window of Modules can be found on the menu Communications/Modules... as in the following figure: 79 7. Communicating with the PLC Figure 7-4. PLC modules window In the superior part of this window there are two lists: the list of the left contains the modules that are in the memory RAM of PLC. The list of the left represents the modules that are in the memory FLASH of PLC. Each one of these lists has two columns, each line, which represents a module, indicates the name and size of it. In the inferior part of the window, the banks of memory of the PLC can be visualized, as well as the size of the busy and free memory of the PLC. OBS: When the communication is started in Ethernet web, the free memory banks 8 to 15 will show with zero (0) value. This happen because there is a command limitation in Ethernet. Through this window, many other commands can be effected, clicking on the buttons, as described below. Sending Modules from RAM to FLASH To transfer to a module of the memory RAM to memory FLASH of the PLC, from the window of Modules, select the module of the list of Modules in RAM and click in RAM->Flash. One or more modules can be selected. In case of transferring all the modules of the PLC, click on the button All RAM->Flash. ATENTION: The transference of modules from RAM to FLASH can delay some seconds, according to the size and amount of modules of the program. This time is necessary for the update of the windows with the directories of modules. This operation can be sped up if the PLC is in programming mode. Sending Modules from FLASH to RAM To transfer a module of the memory FLASH to memory RAM of the PLC, from the window of Modules, select the module of the list of Modules in Flash and click in Flash->RAM. One or more modules can be selected. In case of transferring all the modules of the PLC, click in the button All Flash->RAM. 80 7. Communicating with the PLC Erasing a Module To erase a module of the memory the PLC, either in RAM or FLASH, select one or more modules of the lists of Modules in RAM or Modules in Flash and click on the button Erase Module. Only one question for confirmation of the procedure will be made and clicking on Yes the command will be effected. Erasing the FLASH Memory To erase all the FLASH memory, that is, all the modules of the FLASH memory of the PLC, in the window of Modules, click on the button Erase Flash. Only one question for confirmation of the procedure will be made and clicking on Yes the command will be effected. WARNING: This operation is only possible with the PLC in Programming mode. Compacting the RAM Memory The memory RAM is automatically compacted for the PLC, every time it is placed in programming mode. When in execution mode, RAM is compacted only with the command of the corresponding drive in the MasterTool Extended Edition, therefore this task increases the verification time of cycle of the application program. To compact the RAM, in the window of Modules click on the button Compact RAM. Information of a Module on the PLC In the window of Devices Information, to get the information of a module in the PLC, select a module in any one of the lists and click in the button Information… It can also be made effecting a double click on a module in any one of the lists. A window of information, similar to information of module in disk will be opened. Memory Banks Figure 7-5. Memory banks When click in Memory Banks button in Directory Modules, is showed the quantity of free memory banks in RAM and FLASH. 81 7. Communicating with the PLC ATTENTION: When the communication is by Ethernet net, the ALNET II protocol, some memory banks can show three interrogation points (???), indicating the tool cannot calculate the available space in these banks. This occurs because there is a command limitation by Ethernet net. Status Window The MasterTool Extended Edition it has a window that asks for the main information of the state that the PLC is at the moment it is requested opening this window. This window can be opened through the menu Communication / Status… In this window information related to the PLC can be found, as in the next figure: Figure 7-6. PLC status window In this window is presented the model of the PLC and executive version, the PCL status, the list of forced operands. There are other functionalities that can be accessed through this window, by means of the available buttons of the left side of the screen. These functionalities are discussed below: Changing the Status of the PLC The status of the PLC can be modified by the MasterTool Extended Edition, through the election of the available states: Execution Programming Cycled For further information on states of the PLC, see item Status of Operation of the PLC, in the section Project of Programming in the Programming Manual of MasterTool Extended Edition. In cycled mode, the button Execute Cycle, when cycled, executes a cycle of verification on the PLC. 82 7. Communicating with the PLC Enabling or Disabling the Outputs The enabled outputs, determine that the PLC brings up to date the leaving points with the values of the memory image. The disabled outputs, determine that PLC turns off all the digital outputs. However, this operation does not modify the operands status, correspondents in the memory image. WARNING: If the PLC is not powered, the disabling of the leaving points is removed. That is, when the PLC will be energized again, the state of operands memory will be normally transferred, to the end of each verification, for the leaving points. PLC Information During the execution of one application program in PLC the status of PLC in a given moment it can be verified. Getting information of PLC allows to verify items as the current mode (programming, execution, cycled or error), messages of error or warning, times of instantaneous cycle, average, minimum and maximum among others parameters shown in the Window of PLC Status. To get all these information, click on the button Information..., or then, through the menu Communication/PLC Information... The following window will be opened: Figure 7-7. PLC information window While the window is open, to bring up to date the values click on the button New Status, or then, mark the option Continuous reading for constant update of the screen. PO3x47 PLC Series The PO3x47 PLC Series has Logs like System Messages, Firmware Messages, and Call Stack. The System Messages Logs has all maintenance PLC information. This is a good tool to detect problems occurred by some operation error. 83 7. Communicating with the PLC Figure 7-8. PLC information window Clicking in Advanced... button, the advanced information window will be open. The advanced information window show the PLC logs, with the registry of the last users actions in to PLC. This window is divided by Pages. There are three pages: System Messages, Firmware Messages and Call Stack. System Messages Figure 7-9. Advanced information window: system message page selected 84 7. Communicating with the PLC This page has the system message historic with the last users PLC actions. This log was created to help to detect problems made by bad users operations. This historic has until 128 messages, each one with its date and time. ATTENTION: Is necessary adjust the PLC clock. Else, the field “Date and Time” show “Invalid date and time”. Firmware Messages The firmware messages are the historic with the main functions and routines called by PLC firmware program application. These messages were created to firmware developers find more quickly some error. This historic has until 64 messages. Beyond the called or executed procedure/function , is shown in this history the information of time in milliseconds of each event, this information is necessary to calculate the lost time in each function/procedure in some case abnormality in functioning of equipment. Figure 7-10. Advanced information window: firmware message page selected Call Stack This page inform the which the order of modules (E*.000, E*.001, E*.018, E*,020, F*.*, P*.*) were called in last execution cycle This information is showed in a Treeview component, because this is the best way to show how the modules call each other. This information is very important to verify problems like infinities loops, module does not used, and so on. 85 7. Communicating with the PLC Figure 7-11. Advanced information window: call stack page selected ATTENTION: In pages (System Messages, Firmware Messages and Call Stack) there is a button called “New State”, where, clicking in this button, the information in al pages will be update. Bus Status Some PLCs can show information about the bus status of PLC. It can be obtained in the screen of Status of PLC through the button Bus... When clicking on this button, a screen with the figure to follow will be opened: Figure 7-12. Bus status ALNET II Network Status The status of ALNET II can be directly consulted from MasterTool Extended Edition. The referring values to the statisticians of the transmissions, receptions and parameters of the device are presented. 86 7. Communicating with the PLC The status of ALNET II can be consulted an only time or with continuous reading. The data of the statistics can be reinitialized at any instant. To get the status of net ALNET, in the window of Status, click on the button ALNET II... this window will be opened: Figure 7-13. ALNET II network status Protecting the PLC The level of protection of the PLC is identified by a number from 0 to 3. Each one of these levels provides a set of commands that can and cannot be executed in the PLC. In the protection level 0 there is no restriction; all the commands can be executed in the PLC. As the protection level increases, the set of possible commands diminishes. For further information about protection levels, see item Levels of Protection of the PLC in the Manual of Programming of MasterTool Extended Edition. To modify the level of protection of the PLC, from the screen of Status of the PLC, click on the button Protection… and you will see the following window: Figure 7-14. PLC protection level WARNING: In case the PLC is protected by password, it will be necessary to effect the status change. 87 7. Communicating with the PLC Inserting / Changing the PLC Password To modify or to insert password is made through the window of Status of the PLC, for the button Password… The password is used to define the level of protection of the controller. It can have from 1 to 8 characters. For the alteration of the password it is necessary to type the current password of the PLC, and the new desired password twice. ATTENTION: When leaving factory, the controllers do not have defined password, not being necessary the declaration of current password to define the first password. It is recommended that the password is written and kept in safe place. In case of losing the password programmed in the PLC, contact Altus. The screen of password alteration: Figure 7-15. Changing the password For further information about Password, see item Levels of Protection of the PLC in the Manual of Programming of MasterTool Extended Edition. Status of Forced Operands The window of PLC Status has in the inferior part a list with the status of the forced points of the operands %E and %S. The values are presented in a picture with the name of operands followed by the status of each point of operand. The status of each point can be: 1 - point forced for the value 1 0 - point forced for the value 0 _ - point not forced For further information about forcing, see item Purification of Projects of Programming, Forcing, in the Manual of Programming of MasterTool Extended Edition. To free the forcing operands, through the screen of State of PLC, select a line of the list of Forced Points that represents the operand that is desired to free. In case it is desired to free the operands entirely, click on the button Free All, but, in case of liberating only one bit, click on the button Free... This last option, when selected, will open a window, as shown in the figure: Figure 7-16. Free one bit of a forced operand 88 7. Communicating with the PLC Monitoring The monitoring is showing in real time the values in the instructions, modules or logics. There are three kind of monitoring: Operands, Modules and Logics. Monitoring Operands The monitoring of operands consists of presenting MasterTool Extended Edition in real time the values contained in the operands of PLC. The values of the operands are presented in an edition window that contains a list of the operands that must be monitored. Many monitoring windows can be used, identified for the address of the node and sub-net or for the IP address of the same and for the name of the monitor file window, in case it has been saved. In the monitoring window list is allowed the insertion or removal of one operand or a table position. In case the monitoring is carried through for a block of operands or for more than a table position, for each block of operands is shown a monitoring window, not being allowed the direct edition in this window. The monitoring window can be created from the menu Communication/Monitor..., specifying in the following window, the operating and the amount of monitored operands: Figure 7-17. Selecting operands to monitor In this window, the communication channel of the monitoring window can also be chosen, so that many monitoring windows can be used with different PLCs. Clicking on OK button, a new monitoring window will be opened, created with the parameters informed in this window. The next figure illustrates a monitoring window: Figure 7-18. Example of a monitor window 89 7. Communicating with the PLC In the heading of each monitoring window are shown the heading of the window, the node address and the sub-net address, or the IP address of the device that is being monitored. In each monitoring window, there is a table with the monitored operands and the following columns: Operand: Monitored operands, being able to be any, even subdivisions Value: Value of operating monitored in PLC Base: Numerical base that will be used to visualize the value monitored The monitoring window can be saved and annexed to the project. For this, the name of the window must be inserted, that it must be in the same folder that the project. The operands that are being monitored will be saved, as well as the respective numerical bases. To open these windows, go in the window of Treeview of Project and open the desired window. Monitoring Modules In monitoring modules, all module content is monitoring, using operand monitoring, to fill the ladder. To access this tool, click in menu Communication / Monitoring Modules. All opened modules will be monitoring. To monitoring a unique module, click in menu Module / Monitoring Module. This item can also be accessed by context menu (clicking in the module area with the right button). Monitoring Logic The Logic monitoring is different than others monitoring, because allow show the data when the logic is executed in program. The MasterTool Extended Edition allow only one logic by time to monitoring and this tool is available only to PLCs has this functionality. To access this option, click in menu Module / Monitoring Logic. When the logic monitoring, is executed by PLC, has its values showed and signalized if this logic was execute (green) or no (red).. Figure 7-19. Example of a monitored logic When the execution of program does not occurs, the values of last monitoring are showed but the second plane is red now. 90 7. Communicating with the PLC Figure 7-20. Example of a monitored logic did not execute In special situations like PLC in Program state, the logic has the second with red color, because there is not execution. Other special situation is no communication with PLC. In this case, the value in operands will be the last monitored value before the state exchange. Other special situation is time out communication with PLC. In this time where the value reads are not possible, the value of operands will show “?”, keeping the color of last valid read. ATTENTION: This functionality is only qualified to series PO3x47 Forcing Operands The operands of the PLC can have its values directly modified from MasterTool Extended Edition. This procedure is called forcing, and it is very important in the debug of projects, as it can be determined the status of the outputs and inputs in order to detect problems and to test the installations, among others functionalities. To force operands, click on the menu Communication / Force…, opening the following window: Figure 7-21. Operands forcing window 91 7. Communicating with the PLC Through this window the operands and the respective values to force can be defined, as well as determine which PLC will be forced, through the communication channel. In case the amount of operands is more than 1, in the screen a table with a line for each operating forced is opened. The max number of operands that can be forced simultaneously is 63 The operand forcingapplies only to the %E and %S operands. For other operands, %A, %M. %D, %I, %F, %TM. %TD, %TI e %TF, the operation is converted to a write operation, because the CPUs do not support forcing commands with these operands. MTConsole The MTConsole is a utility that allows the communication with the PC through the command prompt windows to create scripts for automating routine communication. Available commands are: Read state from PLC Change state from PLC Read protection level Change protection level of PLC Erase FLASH memory Remove module of the PLC Change memory storage Read directory modules Read information from PLC Read forced relays from PLC Change password protection of PLC Read memory banks Send modules to PLC Read modules from PLC Compare project Verify project Running MTConsole To run the MTConsole, take the steps described below: 1. Menu START – RUN (for Windows 7: START – ALL PROGRAMS – ACCESSORIES – RUN) write cmd and click OK. 2. Write cd \Program Files\Altus\MtoolXE (default folder where the MasterTool XE is installed and can be changed by the user during installation). 3. Write the desired command. 92 7. Communicating with the PLC Figura 7-22. Running MTConsole Information about the commands, use the command mtcons /?. MTConsole is available from MasterTool XE 5.61 version Advanced. Also is necessary a license for this version or higher. MTConsole works with all models of Altus PLCs. The commands Send/Read modules, Compare, Verify project and read forced relays work only with PLCs of Grano Series, PX Series, Ponto Series and AL-2004. 93 8. Printing Documents 8. Printing Documents MasterTool Extended Edition allows printing the main documents and reports, offering resources and options for configuration of the impression, as well as what will be printed. Window to Select the Documents to Print In MasterTool Extended Edition there is a window in which can be configured and selected the documents to print. The figure shows this window of election. Figure 8-1. Window to select the documents to print On the left, the election of the type of document that will be printed is made: Report of Tags and Descriptions or Modules of Program. In case of printing report of tags and descriptions, the one that will be printed have to be informed, through the type of operating. In case of desiring to print module program, a module in the list Name has to be chosen and, in case of module program to ladder, inform the logics that will be printed. In this screen can also be determined if will be printed the heading and the baseboard for pages. A previous of the impression can be visualized in the monitor. For this, after selecting and configuring the impression options, click on the button Visualize... Configuring the Printer After clicking on the button OK in the window of Document Election for Impression, a window of configuration of the impression and printer will be opened, as shown: 94 8. Printing Documents Figure 8-2. Configuring the printer Clicking on the button Properties... the screen of configuration of the selected printer is opened. 95 9. Options 9. Options In MasterTool Extended Edition is possible to modify the configurations of user options. This is possible having access the menu Configurations/Options… Figura 9-1. Options configuration This window has the following options: Show: It allows to configure the way of visualization of used addresses in the modules of program and the color used for each one of them. The options are: o Active Contact: Color setting to represent the active contact in ladder monitoring. o Inactive Contact: Color setting to represent the inactive contact in ladder monitoring. o Tag: It allows the visualization of addresses for the used tag, in case it exists. It is also possible to mark the box Tag+Bit; in such a way, the tag created for an address will be automatically used for all the bits of that address, in case they are used in the program. o Operand: It allows the visualization of addresses for the proper operating. o Wire-Info: It allows the visualization of addresses for the description of Wire-Info used in the window of Report of Input/output Operands. Operation: It allows inhibit/allow the opening of the confirmation window of exchange of PLC status. This option can be useful to avoid the improper exchange the PLC status. Numbers after Comma: It allows configuring the numbers after comma used by %F or %TF operands. ST Editor Configurations: Color configuration to edit ST programs. Active Instructions Toolbar: Enable or not the toolbar about ladder instructions and other auxiliary functions. 96 10. Glossary 10.Glossary Active CPU Jumpers Algorithm Altus Relay and Blocks Language Application Program Arrestor Assembly Language Backup CPU In a redundant system is the CPU that is controlling the system – reading the inputs, executing the application program and activating the outputs. Small connector to shortcut pins located on a circuit board. Used to set addresses or configuration. Finite and well defined sequence of instructions with the goal to solve problems Set of rules, conventions and syntaxes used when building a application program to run in Altus PLC. Program downloaded into the PLC and has the instructions that define how the machinery or process will work. Lightning protection device using inert gases. Microprocessor programming language, it is also known as machine language In a redundant system, it is the CPU supervising the active CPU. It is not controlling the system, but is ready to take control if the main CPU fails. Bit Basic information unit, it may be at 1 or 0 logic level. BT Battery test. Bus Set of electrical signals that are part of a logic group with the function of transferring data and control between different elements of a subsystem Byte Information unit composed by eight bits. C-Module Commercial Code CSS Commissioning See Configuration Module. Product code formed by the letters PO and followed by four digits. Cascading Style Sheets. Is a style language used to define as shown as a HTML document. Final verification of a control system, when the application programs of all CPUs and remote stations are executed together, after been developed and verified individually. Configuration Module Also referred to as C-Module. Unique module in a remote application program that carries several needed parameters for its operation, such as the operands quantity and disposition of I/O modules in the bus CPU Central Processing Unit. It controls the data flow, interprets and executes the program instructions as well as monitors the system devices. Diagnostic Procedures to detect and isolate failures. It also relates to the data set used for such tasks, and serves for analysis and correction or problems. E2PROM Electrically Erasable Programmable Read-Only Memory. Non-volatile memory that may be electrically erased by the electronic circuit. E-Module See Execution Module Encoder EPROM ER ESD Execution Module Firmware FLASH EPROM F-Module FMS Function Module Hardkey Hardware HTML I/O I/O Module I/O Subsystem IEC 61131 IEC Pub. 144 (1963) IEC-536-1976 Normally refers to position measurement transducer. Erasable Programmable Read Only Memory. Memory for read only that may be erased and programmed out of the circuit. The memory doesn’t lose its contents when powered off. Acronym used on LEDs to indicate error Electrostatic Discharge. Application program modules. May be one of three types: E000, E001 and E018. The E000 module is executed just once upon system powering or when setting programming into execution mode. The E001 module has the main program that is executed cyclically, while the E018 module is activated by the time interruption. The operating system of a PLC. It controls the PLC basic functions and executes the application programs. Non volatile memory that may be electrically erased and programmed.. See Function Module. Fieldbus Message System. Application software module called from the main module (E-module) or from another function module or procedure module. It passes parameters and return values. Works as a subroutine. Connector normally attached to the parallel port of a microcomputer to avoid the use of illegal software copies Physical equipment used to process data where normally programs (software) are executed Hypertext Markup Language. Is the language used to create Internet pages. See Input/Output. Hardware module that is part of the Input/Output (I/O) subsystem. Set of digital or analog I/O modules and interfaces of a PLC Generic international standard for operation and use of programmable controllers. International standard for protection of accidental access and sealing the equipment from water, dust and other foreign objects. International standard for electrical shock protection. 97 10. Glossary IEC-801-4 IEEE C37.90.1 (SWC) Input/Output Interface Interruption ISOL. kbytes International standard for tests of immunity against interference by pulses burst SWC stands for Surge Withstand Capability. This is the international standard for oscillatory wave noises protection. Also known as I/O. Data input or output devices in a system. In PLCs these are typically the digital or analog modules that monitor or actuate the devices controlled by the system. Normally used to refer to a device that adapts electrically or logically the transferring of signals between two equipments. Priority event that temporarily halts the normal execution of a program. The interruptions are divided into two generic types: hardware and software. The former is caused by a signal coming from a peripheral, while the later is caused within a program Acronym used to indicate isolation or isolated. Memory size unit. Represents 1024 bytes. LED Light Emitting Diode. Type of semiconductor diode that emits light when energized. It’s used for visual feedback. Logic A graphic matrix in Altus Relay and Blocks Language where are inserted the relay diagram language instructions that are part of an application program are inserted. A set of sequentially organized logics makes up a program module. MasterTool Menu Module (hardware) Module (software) Module address: Nibble The Altus WINDOWS® based programming software that allows application software development for PLCs from the Ponto, Grano, PX, Piccolo, AL-2000, AL-3000 and Quarks series. Throughout this manual, this software is referred by its code or as MasterTool Programming. Set of available options for a program, they may be selected by the user in order to activate or execute a specific task Basic element of a system with very specific functionality. It’s normally connected to the system by connectors and may be easily replaced. Part of a program capable of performing a specific task. It may be executed independently or in conjunction with other modules through information sharing by parameters. Address used by the CPU in order to access a specific I/O module. Information unit composed of four bits. Not-operant CPU In a redundant system this is the CPU that is neither active nor backup. May not take control of the system. Operands Elements on which software instructions work. They may represent constants, variables or set of variables. PA PLC P-Module Procedure Module See Jumpers. See Programmable Controller. See Procedure Module. PLC application software module called from the main module (E-module) or from another procedure module or function module that does not have parameters. PROFIBUS PA Means PROFIBUS Process Automation. Programmable Controller Also know as PLC. Equipment controlling a system under the command of an application program. It is composed of a CPU, a power supply and I/O modules. Programming Language Set of rules, conventions and syntaxes utilized when writing a program. RAM Random Access Memory. Memory where all the addresses may be accessed directly and in random order at the same speed. It is volatile, in other words, its content is erased when powered off, unless there is a battery to keep its contents. Redundant CPU The other CPU in a redundant system. For instance, the redundant CPU of CPU2 is CPU1 and vice versa. Redundant system System with a backup or double elements to execute specific tasks. Such system may suffer certain failures without stopping the execution of its tasks. Ripple Oscillation present in continuous voltages. RX Acronym used to indicate serial reception. Scan Cycle Sockets Software Supervisory Station Tag Toggle Hot swap TX Upload Varistor Watchdog timer WD Word A complete execution of the PLC application program. Part to plug in integrated circuits or other components, thus facilitating their substitution and maintenance. Computer programs, procedures and rules related to the operation of a data processing system Equipment connected to a PLC network with the goal of monitoring and controlling the process variables Name associated to an operand or to a logic that identifies its content. Element with two stable states that are switched at each activation. Procedure of replacing modules in a system without powering it off. It is a normal procedure for I/O modules. Acronym used to indicate serial transmission. Reading a program or configuration from the PLC. Protection device against voltage spikes. Electronic circuit that checks the equipment operation integrity. Acronym for watchdog. See Watchdog timer Information unit composed by 16 bits. 98