1
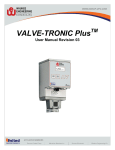
Flo-Tronic Plus™
User Manual Revision 03
Flo-Tronic Plus Rev 03
Page 10
Manual #: 011
Initial Release: 12/21/2010
Rev No: 03
Date: 4/15/2013
COPYRIGHT
No part of this publication may be reproduced, transmitted,
transcribed, stored in a retrieval system, or translated into any
language or computer language, in any form or by any means,
electronic, mechanical, magnetic, optical, chemical, manual, or
otherwise, without prior written permission of United Process Controls
Inc..
DISCLAIMER:
The Flo-Tronic PlusTM is to be used by the industrial operator under
his/her direction. Waukee Engineering is not responsible or liable for
any product, process, damage or injury incurred while using the FloTronic PlusTM. United Process Controls Inc. makes no representations
or warranties with respect to the contents hereof and specifically
disclaim any implied warranties or merchantability or fitness for any
particular purpose.
For assistance please
contact:
United Process Controls Inc.
TEL: +1-414-462-8200 • FAX: +1-414-462-7022
Toll free North America: +1-800-438-3347
[email protected]
www.group-upc.com
Copyright © 2013, Waukee Engineering., a member of United Process Controls.
All rights to copy, reproduce and transmit are reserved
Flo-Tronic Plus Rev 03
Page 11
1. WARNING
Thank you for purchasing control equipment from Waukee Engineering a member of United
Process Controls. We want your new control equipment to operate safely. Anyone who uses
this equipment should read this publication (and any other relevant publications) before
installing or operating the equipment.
To minimize the risk of potential safety problems, you should follow all applicable local and
national codes that regulate the installation and operation of your equipment. These codes
vary from area to area and usually change with time. It is your responsibility to determine
which codes should be followed, and to verify that the equipment, installation, and operation
are in compliance with the latest version of these codes.
At a minimum, you should follow all applicable sections of the National Fire Code, National
Electrical Code, and codes of the National Electrical Manufacture’s Association (NEMA). There
may be local regulatory or government offices that can also help determine which codes and
standards are necessary for safe installation and operation.
Equipment damage or serious injury to personnel can result from failure to follow all applicable
codes and standards. We do not guarantee the products described in this publication are
suitable for your particular application, nor do we assume any responsibility for you product
design, installation, or operation.
If you have any questions concerning the installation or operation of this equipment, or if you
need additional information, please call us at 414-462-8200.
WARNING: Read this manual thoroughly before using FloTronic.
WARNING: This unit contains ESD (Electrostatic Discharge)
sensitive parts and assemblies. Static control precautions
are required when installing, testing, servicing or repairing
this assembly. Component damage may result if ESD
control procedures are not followed. If you are not familiar
with static control procedures refer to an applicable ESD
protection handbook.
WARNING: Flo-Meter must be earth grounded.
Ungrounded Flo-Meters may become a source of Ignition.
Copyright © 2013, Waukee Engineering., a member of United Process Controls.
All rights to copy, reproduce and transmit are reserved
Flo-Tronic Plus Rev 03
2.
Page 12
TABLE OF CONTENTS
1.
WARNING ............................................................................................................................................................. 11
2.
TABLE OF CONTENTS............................................................................................................................................. 12
3.
MANUAL OVERVIEW ............................................................................................................................................. 13
4.
FLOW SENSOR INTRODUCTION ............................................................................................................................. 14
5.
SPECIFICATIONS .................................................................................................................................................... 15
6.
INSTALLATION AND WIRING ................................................................................................................................. 16
7.
CALIBRATION AND FIELD SERVICE ......................................................................................................................... 19
8.
MAINTENANCE ..................................................................................................................................................... 21
9.
CALCULATIONS ..................................................................................................................................................... 22
10.
TROUBLESHOOTING ............................................................................................................................................. 23
10.
APPENDIX “A” - DRAWINGS .................................................................................................................................. 24
Copyright © 2013, Waukee Engineering., a member of United Process Controls.
All rights to copy, reproduce and transmit are reserved
Flo-Tronic Plus Rev 03
Page 13
3. MANUAL OVERVIEW
The Purpose of this Manual
Thank You for Purchasing a Flo-Tronic Plus™ Flow Sensor. This manual shows you
how to install, wire and maintain Waukee’s Flo-Tronic Plus. It also helps you understand
how to interface it to other devices in a control system. This manual contains important
information and should be read and understood by all individuals who install, use or
service this equipment.
Supplemental Manuals
The Installation and Operation of Waukee Flo-Meters manual contain technical
information as well as precautions about Waukee Flo-Meters.
Technical Support
We strive to make our manuals the best in the industry. We rely on your feedback to let
us know if we are reaching our goal. If you cannot find the solution to your particular
application, or, if for any reason you need technical assistance, please call us at:
+1-414-462-8200 Toll free North America: +1-800-438-3347
Our technical support group will work with you to answer your questions. They are
available Monday through Friday from 8:00 A.M. to 4:30 P.M. Central Standard Time.
We also encourage you to visit our web site where you can find technical and nontechnical information about our products and company.
http://www.waukeemeters.com
http://www.group-upc.com
If you have a comment, question or suggestion about any of our products, services, or
manuals, please e-mail or contact us by phone.
Conventions Used
When you see the exclamation point icon in the left-hand margin, the
paragraph to its immediate right will be a warning. This information could
prevent injury, loss of property, or even death in extreme cases. Any
warning in this manual should be regarded as critical information that should
be read in its entirety. The word WARNING or CAUTION in boldface will
mark the beginning of the text.
When you see the “notepad” icon in the left-hand margin, the paragraph to
its immediate right will be a special note.
Copyright © 2013, Waukee Engineering., a member of United Process Controls.
All rights to copy, reproduce and transmit are reserved
Flo-Tronic Plus Rev 03
Page 14
4. FLOW SENSOR INTRODUCTION
The Waukee Flo-Tronic™ utilizes a sensor to read the position of the float rod indicator on a
Waukee Flo-Meter™. The unit provides both electrical and mechanical indication of flow. The
unit is factory calibrated to provide linear and accurate flow measurement. If necessary, the
Flo-Tronic may be “field calibrated”.
How it works
Magnet assembly attached to float rod of the Waukee Flo-Meter interacts with a
magnetostrictive linear position sensor installed in Flo-Meter sensing head. A strain
pulse is induced in a specially designed waveguide by the momentary interaction of two
magnetic fields. One field comes from a moving magnet, which passes along the
outside of the sensing tube, the other field from a current pulse launched along a wire
inside the waveguide. The interaction between these two magnetic fields produces a
strain pulse which travels at sonic speed along the waveguide, until the pulse is detected
at the head of the transducer. The position of the moving magnet is precisely
determined by measuring the elapsed time between the launching of the electronic pulse
and the arrival of the strain pulse. As a result, accurate non-contact sensing of the FloMeter’s indicator is achieved. The indicator position is directly related to the Flo-Meter’s
flow rate and is represented by a proportional analog electrical signal.
Model Explanation
FT M17
Size
S17:
SF17:
M17:
M811:
S Gas (3” Scale)
SF Liquid (3” Scale)
M1-7 (6” Scale)
M8-11 (6” Scale)
L13:
L46:
L79:
L10:
L1-3 (9” Scale)
L4-6 (9” Scale)
L7-9 (9” Scale)
L10 (9” Scale)
Model
Copyright © 2013, Waukee Engineering., a member of United Process Controls.
All rights to copy, reproduce and transmit are reserved
Flo-Tronic Plus Rev 03
Page 15
5. SPECIFICATIONS
General Specifications
Measurement
Electrical Power
Operation Specification
± 0.4% FS + 1.6% Rd
Accuracy
< 0.5% FS
Repeatability
Turndown Ratio
Operating Voltage
Power Consumption
Ranges Selectable
1:40 (2.5 … 100%)
24VDC ± 10%
75mA
Current: 4-20mA or 0-20mA
Voltage: 0-10VDC or 2-10VDC
Voltage Output
Analog Output
Short Circuit Protection YES
Short Circuit Current 0.875mA
Min Load Impedance 1k Ohm
Current Output
Relay Output
Environment
Open Circuit Voltage
Max Load Impedance
Type
Contact Rating
Alarm Logic
Operating Temp
Humidity
Storage Temp
Enclosure Rating
Installation Location
Copyright © 2013, Waukee Engineering., a member of United Process Controls.
24VDC
500 Ohm
SPST
0.5A @ 30VDC
No power or alarm condition de-energize relay
0°C to 65°C (32°F to 150°F)
20 to 90% RH (non-condensing)
-20°C to 65°C (-4°F to 150°F)
IP 65
Keep from corrosive gas and liquid
All rights to copy, reproduce and transmit are reserved
Flo-Tronic Plus Rev 03
Page 16
6. INSTALLATION AND WIRING
Flo-Meter Installation
The Installation and Operation of Waukee Flo-Meters manual
contains instructions on the proper installation of the Flo-Meter.
Read all CAUTIONS and WARNINGS before proceeding.
The Flo-Tronic -Meter is shipped as a complete unit. Before
installing the Flo-Meter, carefully remove the Flo-Tronic Sensor, to
achieve this lay the unit on its side on a work bench or table. Then
hold the Flo-Tronic unit with one hand, while unscrewing the union
nut counters clockwise with the other hand to loosen it.
CAUTION: Once the Flo-Tronic is loose from the Flo-Meter
make sure to pull the Flo-Tronic from the Flo-Meter straight
back off the float rod assembly. Moving the Flo-Tronic to one
side or another during removal may result in damage to the
float rod assembly.
Remove the Float Rod Assembly and store it in a safe location until
Flo-Meter body is installed and mounted. Once the Flo-Meter is
installed, remove the red tape from the float rod and insert the float
rod assembly into the Flo-Meter body. Fill the sight glass tube with
Waukee Flo-Meter oil so that the level of oil is approximately one
(1) inch from the top. Then carefully install the Flo-Tronic on to the
Flo-Meter.
FLO-METER
BODY
FLOAT STOP
BODY O-RING
FLOAT ROD
ASSEMBLY
RED TAPE
FLO-TRONIC
SENSOR
Do not put oil in the sight glass tube of meters used for
oxygen or methanol service. Oxygen Flo-Meters should be
run dry, or with distilled water. Flo-Meters for Methanol
service will automatically fill the sight glass tube with
Methanol when in service.
WARNING: Do not fill the sight glass tube with Flo-Meter oil on
meters used for oxygen service. Use of oil may cause fire or
explosion. Serious personal injury may result from fire or
explosion.
Copyright © 2013, Waukee Engineering., a member of United Process Controls.
All rights to copy, reproduce and transmit are reserved
Flo-Tronic Plus Rev 03
Page 17
Wiring Guidelines
Your company may have guidelines for wiring installation. If so, you should check those
before you begin the installation. Here are some general things to consider:
• Use the shortest wiring route whenever possible.
• Use shielded wiring for all signal wiring and ground the shield at the Field Device
end. DO NOT ground the shield at both the Flo-Tronic Sensor and Field Device.
• Do not run the signal wiring next to large motors, high current switches, or
transformers. This may cause noise problems.
• Route the wiring through an approved cable housing to minimize the risk of
accidental damage. Check local and national codes to choose the correct
method for your application.
• Be sure to leave enough slack in the cables to allow easy removal of the FloTronic from the Flo-Meter for maintenance. If seal tight or similar conduit is used,
be sure to provide an adequate loop of conduit for maintenance access.
Wiring Connections
All wiring connections are located inside the main box. To access the wiring terminals
remove the (4) four screws located on the front of the box and remove the cover.
CAUTION: To reduce the risk of electrical shock and also to prevent
damage to the Flo-Tronic and the Field Device. It is advised to turn off the
supply power to the Flo-Tronic and Field Device before connecting or
disconnecting any wires.
WARNING: Any electrical or mechanical modification to this equipment
without prior written consent of United Process Controls will void all
warranties, may result in a safety hazard, and may void the CE listing.
ends.
Use 18-22AWG shielded cable for the signal wiring. It is recommended to
run all signal wires in a separate steel conduit. The shield wire should only
be connected at the Field Device end. Do not connect shield wire on both
Circuit Protection
The Flo-Tronic is equipped with built-in over-voltage and short circuit protection. The
unit may require recycling of power to reset once the fault condition is removed.
Copyright © 2013, Waukee Engineering., a member of United Process Controls.
All rights to copy, reproduce and transmit are reserved
Flo-Tronic Plus Rev 03
Page 18
Wiring Terminals
Power / Analog Output Wiring
DIP SW
(4 Pin Terminal Block)
Pin #
123
1234
123
1
2
3
4
Description
+24VDC
DC Common
Analog Output (+)
Analog Output (-)
Wire
Color
Red
Black
Green
White
Alarm Relay Wiring
(3 Pin Terminal Block)
Pin #
1
2
3
Analog Output Configuration
(3 Pin Terminal Block)
Pin #
DIP Switch Settings
Switch B
Analog Output
OFF
OFF
ON
ON
OFF
ON
OFF
ON
4-20mA
2-10VDC
0-20mA
0-10VDC
Basic Wiring Diagram
1
2
3
DC COMMON (BLK)
3
ANALOG - (WHT)
1
4 Conductor
Shielded
Cable
Description
+VDC
Signal Input
Common
Wire
Color
Brown
Green
White
+24VDC (RED)
4
2
Common
N.C.
N.O
Wire
Color
Brown
Blue
Orange
Sensor Wiring
Use the table below to configure
the unit to the desired analog
output
Switch A
Description
ANALOG + (GRN)
SHIELD
Process
Controller
or Data
Logger
Copyright © 2013, Waukee Engineering., a member of United Process Controls.
24VDC
Power
Supply
All rights to copy, reproduce and transmit are reserved
Flo-Tronic Plus Rev 03
Page 19
Alarm Relay Wiring
The Flo-Tronic Plus includes an alarm relay, on power up the relay is energized to
indicate that the unit has power. The relay will de-energize under the following
alarm conditions:
• Loss of Power
• Loss of Sensor Signal
• Over Temperature Condition
• Output Wiring Problem
CAUTION: Relay is for use with 30VDC or less ONLY!!! Use of any other
voltage may result in damage to unit and poses a potential fire risk.
WARNING: An external relay must be used if connecting alarm contacts to a
load over 0.5 Amps. Use of alarm contact with loads over 0.5 Amps will
result in relay failure and poses a potential risk of fire.
7. CALIBRATION AND FIELD SERVICE
The Flo-Tronic Plus output signal is calibrated at the factory and should be received calibrated,
but in some cases the unit may require field calibration of the electronics. If you find that the
analog output signal is not correct in relation to the indicated flow, you can recalibrate the
output by the adjustment of the “Zero” and “Span” potentiometers located inside the sensor
box.
CAUTION: Do not turn
potentiometers
excessively as
these adjustments
are sensitive.
ZERO
SPAN
123
1234
123
+ Lead from DMM
- Lead from DMM
Copyright © 2013, Waukee Engineering., a member of United Process Controls.
All rights to copy, reproduce and transmit are reserved
Flo-Tronic Plus Rev 03
Page 20
Measurement of Ouput Signal
The best way to measure the output signal is to disconnect the unit from the field device and
connect a multi-meter across terminals 3&4. Set the multi-meter to measure the correct signal
the unit is setup for.
If you are unsure what the output signal is, refer to “Analog output configuration”
located on page 8.
Adjustment of Output Signal
This procedure requires the ability to move the float rod from 0 “Zero” flow to 100% “Full
Scale” flow. There are two methods to achieve this.
Method 1
Remove the Flo-Tronic and float rod assembly from the Flo-Meter and
manually move the float rod assembly to the required position for calibration.
Refer to page 6 of this manual for removal and installation. This is the
preferred method of Calibration of the Flo-Tronic.
CAUTION: Make sure supply fluid to Flo-Meter has been SHUT-OFF
before removing the Flo-Tronic from the Flo-Meter. Failure to do so
may result in accidental death or explosion.
Method 2
If the equipment and process allows this, the float rod assembly can be moved
to the required position for calibration by shutting off the fluid valve for zero
flow and opening the fluid valve to full open for full flow.
WARNING: Depleting or over-gassing of equipment that the Flo-Meter
is connected to may produce a hazardous condition, check with all
personnel before attempting this method of calibration. Waukee is not
responsible for any damages that may occur using this method.
To adjust the Zero (0%), the float rod should be at the bottom or zero flow position.
Then adjust the “Zero” pot until the signal is correct for the selected analog output. This
will be 4mA for 4-20mA, 0mA for 0-20mA, 2V for 2-10VDC and 0V for 0-10VDC
To adjust the Span “Full Scale Flow”, the float rod will now need to be adjusted to Full
scale (100%). Then adjust the “Span” pot until the signal is correct for the selected
analog output. This will be 20mA for a current output or 10VDC for a voltage output.
Copyright © 2013, Waukee Engineering., a member of United Process Controls.
All rights to copy, reproduce and transmit are reserved
Flo-Tronic Plus Rev 03
Page 21
8. MAINTENANCE
The Flo-Tronic is a magnetic based sensor which is unaffected by dirt. The dampening oil can
be soiled to the point that it is not possible to visually read the flow on the Flo-Meter and the
unit will still accurately determine the position of the float rod assembly.
The Flo-Meter is a mechanical device that requires regular maintenance in order to maintain
accuracy. All Flow Meters are susceptible to dirt affecting its accuracy. Although not all
manufactures have a means to gauge when the Flo-Meter requires maintenance. Waukee FloMeters on the other hand have a built in indication when the FloMeter requires maintenance, which is the dampening oil. When the oil becomes soiled it is
indication maintenance on the Flo-Meter is needed. The frequency of maintenance intervals will
vary depending on the cleanliness of the gas being used. To replace the oil will require the
removal of the Flo-Tronic; refer to the installation section of this manual for instructions. Also
during these maintenance intervals it is recommended that all gaskets and o-rings are
inspected for signs of wear or damage. Replace worn or damaged seals. Gasket kit sets are
available from Waukee if needed.
Copyright © 2013, Waukee Engineering., a member of United Process Controls.
All rights to copy, reproduce and transmit are reserved
Flo-Tronic Plus Rev 03
Page 22
9. CALCULATIONS
Determine output for a given flow rate
1. First determine the % of scale represented by:
% of Scale = _Actual Flow (cfh) _
Full Scale Flow (cfh)
2. Then the Output is calculated by:
For 4-20mA mA = (% of Scale x 16) + 4
For 0-20mA mA = % of Scale x 20
For 2-10VDC VDC = (% of Scale x 8) + 2
For 0-10VDC VDC = % of Scale x 10
Example 1:
Scale Plate is 750CFH
Indicated Flow is 500CFH
Output range = 4-20mA
500
750
= .6666
(.6666 x 16)+4 = 14.65mA
Determine the flow rate from the output
1. First determine % of Full Scale:
4-20mA Range = mA – 4
16
0-20mA Range = mA
20
0-10VDC Range = VDC
10
2-10VDC Range = VDC-2
8
Example 2:
Find the flow rate for a 420mA signal of 12.00mA
and a Flow Meter Scale of
1000CFH
12 – 4
16
= .5 or 50%
.5 x 1000 = 500CFH
2. Then Actual Flow is calculated by:
Actual Flow = % of Full Scale x Full Scale Flow
Copyright © 2013, Waukee Engineering., a member of United Process Controls.
All rights to copy, reproduce and transmit are reserved
Flo-Tronic Plus Rev 03
Page 23
10. TROUBLESHOOTING
Diagnostic Lights
The Flo-Tronic has a comprehensive diagnostic system. The diagnostic lights are
displayed on the front panel of the unit.
PWR - The Power LED indicates when power is
applied.
SEN - The Sensor LED indicates when Sensor
Signal is Lost
OUT – The Output LED indicates when there is a
problem with the output signal
Current mode = Output Open (No Load)
or load resistance too
high
Voltage mode = Output shorted or input
resistance too low
TEMP – The TEMP LED indicates when unit electronics (IC) temperature is in excess of
185°F; unit will not function until temperature is below 185°F
Diagnostics
Description
PWR LED not Illuminated
SENSOR LED Illuminated
OUTPUT LED Illuminated
TEMP LED Illuminated
Copyright © 2013, Waukee Engineering., a member of United Process Controls.
Corrective Actions
1. Check for 24VDC power at terminals 1 and 2
2. Make sure power supply is not over loaded
1. Check wiring at terminals 1,2,3 of sensor TB
2. Check for cut or damaged sensor cable
1. Check wiring at terminals 3 & 4
2. Check wiring at Field device
Ensure unit is configured for correct output signal
1. Shield device from sources of heat
All rights to copy, reproduce and transmit are reserved
3.
Flo-Tronic Plus Rev 03
10.
Page 24
APPENDIX “A” - DRAWINGS
On Demand
Copyright © 2013, Waukee Engineering., a member of United Process Controls.
All rights to copy, reproduce and transmit are reserved
Flo-Tronic Plus Rev 03
Page 25
Reach us at www.group-upc.com
United Process Controls brings together leading
brands to the heat treating industry including
Waukee Engineering, Furnace Control, Marathon
Monitors and Process-Electronic.
We provide prime control solutions through our
worldwide sales and services network with easy-toaccess local support.
WAUKEE ENGINEERING COMPANY, INC.
A member of United Process Controls
5600 West Florist Avenue, Milwaukee, WI 53218, U.S.A.
Phone: +1-414-462-8200 Fax: +1-414-462-7022
E-mail: [email protected]
Copyright © 2013, Waukee Engineering., a member of United Process Controls.
All rights to copy, reproduce and transmit are reserved