1
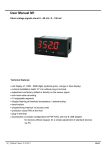
OPERATING MANUAL
Sample PRO 100 Series
Electric Heating
Applies to Versions:
SPE1*, SPE2, SPE4, SPE6
NOTE: All electrically heated roasters in the ‘Sample PRO 100 Series’ are
modular and this manual applies to the entire series. Please also refer to the
‘Technical Manual’ supplied with each specific model.
Copyright: All rights to this technical documentation reserved. This documentation is
intended only for the personal use of the owner of the roaster. No part of the technical
specifications, drawings and illustrations contained in this documentation may be
reproduced, circulated or used for the purpose of competition or disclosed to others
without the express written permission.
*Illustration in this manual: SPE1 model
Coffee PRO Direct | OPERATING MANUAL | Sample PRO 100 Series | Electric Heating U.S. SALES & TECHNICAL SUPPORT QAQC LAB / COFFEE LABORATORY
589 RAPPAHANNOCK DRIVE WHITE STONE VA 22578
TEL (804) 318-3686 FAX (703) 991-7133
WARNINGS
- This appliance is not intended for use by persons (including children) with
reduced physical, sensory or mental capabilities, or lack of experience and
knowledge, unless they have been given supervision or instruction concerning
use of the appliance by a person responsible for their safety.
- Children should be supervised to ensure that they do not play with the
appliance.
- Care is needed when handling during maintenance.
- If the supply cord is damaged it must be replaced by a qualified person in order
to avoid a hazard.
1. Introduction SPE1
The Sample PRO 100 E1 is a coffee roaster used for roasting small batches of
coffee and consists of 01 roasting drum with a capacity of up to 100g/ batch
(green beans). This roaster is heated by 3 x thermal light bulbs per drum and is
fitted with a cooling sieve.
CONTROL ELEMENTS
Drum handle
Hopper
Cooling tray
Heat control dial
Power switch
Air ventilation knob
Digital controller
Coffee PRO Direct | OPERATING MANUAL | Sample PRO 100 Series | Electric Heating U.S. SALES & TECHNICAL SUPPORT QAQC LAB / COFFEE LABORATORY
589 RAPPAHANNOCK DRIVE WHITE STONE VA 22578
TEL (804) 318-3686 FAX (703) 991-7133
2. Operation Principle
Coffee beans are fed into the front hopper of the roasting drum. Coffee beans
are rotated and mixed continuously in the drum and roasted evenly. Below the
roasting drum lays the electric heat source. 3 thermal bulbs supply heat. Air
ventilation sucks out the hot air and chaff during the roasting process. Roasted
coffee is finally discharged into the cooling sieve.
3. Preparations
- Unpack the product carefully and place on a stable flat counter in a dry area
away from water or water splashes. Remove all plastic wrap from the product
and ensure the drum is entirely clean and empty of packaging residue.
NOTE: For SPE1 models, remove the carry-lid of the machine by unscrewing
the knobs on each side of the machine. Slide the lid forward and gently remove
from the machine.
-Connect the main plug of the machine with a 220-240V and 50Hz power source.
Make sure the wall socket is fitted with an efficient ground contact.
DO NOT plug the appliance into the supply mains if a ground system is not
available in mains socket and was not positively checked to be in compliance
with national/ local electrical models.
IT IS COMPULSARY TO GROUND THE APPLIANCE. Do not use extension
cables, plug adapters for multiple sockets, or makeshift connections.
The amount of Hz supplied to the machine determines the speed of the drum
and all machines come with a standard cogwheel sized to achieve 60RPM.
NOTE: Running the machine in a 60Hz environment means the drum speed is
20% faster. In this case please contact the vendor for supply of a larger
cogwheel.
Switch on the machine using the main power switch (red color) and check if the
machine is rotating.
NOTE: For SPG1 models, verify that the cooling fan at the exhaust in the back
of the machine is working.
DO NOT FILL ANY COFFEE BEANS INTO THE ROASTER YET.
Coffee PRO Direct | OPERATING MANUAL | Sample PRO 100 Series | Electric Heating U.S. SALES & TECHNICAL SUPPORT QAQC LAB / COFFEE LABORATORY
589 RAPPAHANNOCK DRIVE WHITE STONE VA 22578
TEL (804) 318-3686 FAX (703) 991-7133
- Check that the heating lamps are functioning by turning the temperature knob
located at the front control panel.
WARNING: Do not look straight into the lights and only touch the lamps with a
damp cloth! Do not touch the light bulbs with your bare hands.
- Verify that the digital controller is functioning and set to the desired
temperature. The smaller temperature indication in green color is the set
temperature. Actual temperature is indicated in red and is displayed larger. Once
the set peak temperature is reached, the thermal bulbs will automatically shut
down.
NOTE: the reading is bean/ air temperature measured inside the back of the
drum. Set the desired temperature by pushing the appropriate button on the far
left side of the controls. Be careful not to enter a different program by pushing
the wrong buttons. (For more information and problem solving please visit the 3rd
party suppliers website and download the appropriate user manual).
- Connect the flexible exhaust pipe to the machine if required and point into
desired direction.
NOTE: For SPE1 models connect the flexible exhaust pipe to the machine if
required and point into desired direction. For all SPE2, SPE4 and SPE6 models
connect the flexible exhaust pipe to the top of the supplied cyclone input. Then,
carefully screw the supplied motor onto the top rim of the cyclone with the
supplied tools. Install the second exhaust pipe to the output of the cyclone, and
point into the desired direction. Plug the cyclone into power and verify that it is
fully functional.
- Make sure the bean filler is ready (to fill the beans into the roaster) and cooling
tray is in place.
- Unpack the timer and spoon from the maintenance kit.
- In the event that your machine is supplied with an additional thermocouple,
connect the output wire to a data bridge and data logging software of your
choice.
-You are now ready to perform your first sample roast!
NOTE: We highly recommend you season the drum by initially roasting a batch
of coffee dark in order to clean the drum thoroughly and add oils to its surface.
Coffee PRO Direct | OPERATING MANUAL | Sample PRO 100 Series | Electric Heating U.S. SALES & TECHNICAL SUPPORT QAQC LAB / COFFEE LABORATORY
589 RAPPAHANNOCK DRIVE WHITE STONE VA 22578
TEL (804) 318-3686 FAX (703) 991-7133
4. Operating Instructions
- Wait until the roaster reaches the desired roasting temperature. Default setting:
220C.
NOTE: For all 2,4 and 6 drum models, switch on the cyclone at this stage.
Always make sure that the cyclone is switched on prior to roasting.
-Pull the airflow knob out to enable air suction through the drum. Recommended
setting: initially half open, then fully open after “yellow stage” or “1st cracking” of
beans.
- Fill exactly 100g of beans into the hopper with the filler. Set the heat control
dial to achieve a roasting time between 8-12 minutes. This typically occurs at
dial #5 and #6 but may vary.
- During the roasting process, from time to time use a spoon to sample and
monitor the degree of roasting from the hopper.
- After obtaining the desired result, turn the heat control dial counterclockwise to
shut down the thermal bulbs. Push in the airflow knob to enable air underneath
the cooling trays. To discharge the batch, lift the drum handle of the appropriate
roasting drum up and pull forward. After emptying the roasting drum, move the
handle back gently. In the event that more coffee is being roasted, bring the heat
control dial back to the desired setting.
- Make sure all beans are emptied and repeat the roasting operation as desired.
- Continuously spread the roasted beans evenly by using the supplied spoon.
Ensure proper cooling within 3 minutes. Pour the roasted beans into a coffee
tray.
- Prepare for grinding and cup testing or storage as required…
5. Maintenance
- The Sample PRO 100 is specifically designed for minimal maintenance.
WARNING: Before carrying out any such maintenance work, allow the roaster to
cool down by starting the suction fan, then unplug the main electrical power
supply
- Clean the thermal bulbs chamber with a flat brush and vacuum cleaner as
required
- Tighten the bolts of the front drum hinges from time to time and as required
- After 6 months of frequent use open the machine from underneath the control
panel and vacuum clean chaff residues out of the machine as necessary
Coffee PRO Direct | OPERATING MANUAL | Sample PRO 100 Series | Electric Heating U.S. SALES & TECHNICAL SUPPORT QAQC LAB / COFFEE LABORATORY
589 RAPPAHANNOCK DRIVE WHITE STONE VA 22578
TEL (804) 318-3686 FAX (703) 991-7133
- Lubricate the cogwheels with plenty of grease when they appear to be dry or
noisy
6. Safety Instructions
- Roasted coffee that is not cooled in time will catch fire resulting in accidents.
- Unauthorized changes to the roaster are not permitted for safety reasons.
- Do not use the appliance bare foot or if your hands or feet are damp
- Always keep the appliance dry
- Do not roast anything else but green coffee
- Do not roast unattended
- Do not touch the drum surface while operation as can get EXTREMELY HOT
IN CASE OF EMERGENCY:
- Fire in the roasting drum: Leave roasted coffee in the roasting drum; do not
empty! Wait until the roaster has cooled down.
- Fire in the cooling sieve: Switch off the main switch (power). Extinguish roasted
coffee with water.
7. Tool kit/ Accessories
1.
2.
3.
4.
5.
6.
7.
8.
Bean filler
Spoon to sample coffee
Screw driver
Keys
Thermal lights
Flexible pipe
Plug adapter
Timer (not shown on photo)
Coffee PRO Direct | OPERATING MANUAL | Sample PRO 100 Series | Electric Heating U.S. SALES & TECHNICAL SUPPORT QAQC LAB / COFFEE LABORATORY
589 RAPPAHANNOCK DRIVE WHITE STONE VA 22578
TEL (804) 318-3686 FAX (703) 991-7133