1
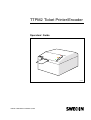
TTPM2 Ticket Printer/Encoder
Operators’ Guide
SW95045
Publ No.: 00861-000 Ed. A October 3, 2001
Related manuals
TTPM2 Selection Guide, 101193
TTPM2 Operators’ Guide, 00861-000
TTPM2 Technical Specification, 00874-000
TTPM2 Installation and Programming Manual, 00759-000
TTPM2 Service Manual, 00693-000
This is a publication of Swecoin AB
Box 322, SE-192 30 Sollentuna, Sweden
Phone
+46 8 623 45 60
Fax
+46 8 594 709 89
E-mail
[email protected]
[email protected]
Web site http://www.swecoin.se
© SWECOIN AB 2001
All rights reserved. Reproduction in whole or in parts is prohibited without written consent of the copyright owner. We
have taken great care to ensure that the information in this
manual is correct and complete. However, if you discover
any errors or omissions, or if you wish to make suggestions
for improvements, you are welcome to send your comments
to us. Swecoin AB disclaims any liability resulting from the
use of this information and reserves the right to make
changes without notice.
Edition A, October, 2001
Printed in Sweden
This edition of the manual is based on firmware 906-350
and control board 2448-901.
2
TTPM2 Operators’ Guide
October, 01
CONTENTS
1 Introduction .................................................................................................................. 4
2 Operation ...................................................................................................................... 5
2.1
Switching on ................................................................................................... 5
2.2
Operator controls ............................................................................................ 6
2.3
Loading tickets................................................................................................ 7
3 Maintenance ................................................................................................................. 9
3.1
Daily (performed by operator)........................................................................ 9
3.2
Weekly (performed by trained operator or handyman)................................ 10
3.3
Annual (performed by technician)................................................................. 13
3.4
Cleaning products shopping list.................................................................... 13
4 Faultfinding................................................................................................................. 14
4.1
No tickets produced and yellow indicator ON............................................... 14
4.2
No/faint print ................................................................................................. 14
4.3
Barcode unreadable ..................................................................................... 14
4.4
Many encoding retries .................................................................................. 15
4.5
Frequent paper jams..................................................................................... 15
Striped tickets.......................................................................................................... 15
4.7
Messages on your screen............................................................................. 16
4.8
Indicators on the printer ................................................................................ 17
5 Corrective actions...................................................................................................... 18
5.1
General reset ................................................................................................ 18
5.2
Paper jam removal........................................................................................ 18
5.3
Self test ......................................................................................................... 19
6 Moving the printer...................................................................................................... 20
6.1
Secure shipping ............................................................................................ 20
6.2
Secure smooth paper path ........................................................................... 20
6.3
Ensure interference free environment .......................................................... 21
6.4
Use correct serial cable ................................................................................ 21
7 Ticket stock ................................................................................................................ 22
October, 01
TTPM2 Operators’ Guide
3
1
INTRODUCTION
This manual should help you maintain your printer in top condition over many years and
hundreds of thousands of tickets.
The essence of this manual is that a clean printer is a reliable printer!
The regularity of the outlined maintenance is greatly affected by the ticket volume of your
application. But is a good rule to spend a few minutes taking care of your printer before or
after a big event, or when the day is over before you put out the light and go home.
4
TTPM2 Operators’ Guide
October, 01
2
OPERATION
2.1
Switching on
The power switch is on the rear right side of the printer. Do not press any other button
when turning on the printer for normal operation.
Power
ON/OFF switch
Power cable
receptacle
Fuse holder
Interface
connector
SW00016
Figure 1. Position of the Power ON/OFF switch.
October, 01
TTPM2 Operators’ Guide
5
2.2
Operator controls
The front panel has three buttons and three indicators with the following functions.
Red indicator
Rear pushbutton
Error, turn OFF
and ON the printer
to clear.
Press and hold at power ON to turn on paper
jam clearing mode. Press front button to
advance ticket forward and middle button to
retract ticket backwards. Turn printer OFF
and ON to exit paper jam clearing mode.
Yellow Indicator
Fixed: Out of paper.2
Center pushbutton
Blinking: Print command
received, but out of paper.
Ejects any document in
the selected ticket track.
(Same as when an !E
command is received.)
Front pushbutton
Green indicator
1
Fixed: Power ON & printer ready.
1.Cuts and ejects a ticket .
2. Press and hold at power ON to enter
self test mode. Press again to encode
and print one ticket. The printout
Flickering: Receiving data.
shows current firmware version. Turn
printer OFF and ON to exit self test
Temporarily OFF: Commands are executed.
mode.
Blinking: Insert ticket.
SW97108
Figure 2. Indicators and pushbuttons
Using the buttons and indicators will be further explained later in this manual.
1
6
1
Do not hold the front button depressed! Doing so will result in erroneously cut tickets often resulting in paper jam.
2
On CD 200 versions, load new ticket stock, then press the center pushbutton.
TTPM2 Operators’ Guide
October, 01
2.3
Loading tickets
NOTE! – Do not turn off the printer to load tickets.
Single and dual track versions
Position the tickets behind the printer with the magnetic stripe facing down on the left
side of the printer.
Insert the ticket material in the rear ticket entry until it stops.
> One ticket length
2.3.1
90°
SW97116
Figure 3. Positioning the ticket stock
Figure 4. Position of the magnetic stripe when loading paper
CAUTION! – NEVER store the tickets on the floor. Stones that enter the
printer together with the ticket material destroy the printhead.
CAUTION! – Make sure that the ticket path between the ticket material
is free from hard edges
October, 01
TTPM2 Operators’ Guide
7
2.3.2
CD 200 version
Load the tickets in the hopper with the magnetic stripe facing down and the railway
symbol forward.
Put the weight on top of the ticket pile.
SW00022
Figure 5. Positioning the ticket stock
2.3.3
Front load versions
Figure 6.
8
Loading a single ticket from the front.
TTPM2 Operators’ Guide
October, 01
3
MAINTENANCE
3.1
Daily (performed by operator)
This should be carried out Daily in high print-volume environment and Weekly in low and
medium volume environments
1
One Cardclene cleaning card will be required for the following process
•
Remove ticket stock.
•
Eject ticket from inside the printer by pressing the button next to the green light.
•
Insert Cardclene into the upper rear ticket entry (A in illustration) and press the front
button (green). The ticket will be taken into the printer and ejected in the front.
For best results the card should be inserted at least 4 times, two in the upper and two
in the lower ticket entry. The card is designed to remove debris i.e. paper dust.
So therefore you are advised not to insert the card in the same way every time, it
should be rotated before every insertion so that all surfaces are fully used.
•
Finally reload the ticket stock and turn the printer on.
Figure 7. Inserting a cleaning card in rear ticket entry
1
See page 13, ”Cleaning products shopping list” for details.
October, 01
TTPM2 Operators’ Guide
9
3.2
Weekly (performed by trained operator or handyman)
This should be carried out Weekly in high print-volume environment and Monthly in low
and medium volume environments
•
Remove ticket stock.
•
Eject ticket from inside the printer by pressing the button next to the green light.
Figure 8. Inserting a cleaning card in rear ticket entry and pressing it firmly.
•
On all printers: Push the Cardclene into the Slot A as in photograph above left, and
the card will be taken into the printer which will stop feeding when only 5mm is showing.
Press firmly down onto the card with your thumb as in photograph above right and
press the button next to the green light. After 5 seconds lift your thumb to release the
Cardclene and it will be ejected through the front slot.
•
On front load printers: Holding the last 5mm of the Cardclene firmly, insert it into the
front hopper and issue a “load ticket from front”-command !L3.
The printer will try and pull the card in, but if you hold onto it firmly enough so that all
but the last 5mm is pulled in, it will give an error after approx. 5 seconds, and the appropriate roller will have been cleaned. Turn off and on the printer to remove the
Cardclene.
•
10
On CD-200 versions: Insert the Cardclene into the empty card dispenser and place
the weight on top of it.
Turn the printer off and on and after approx. 20 seconds the cleaning process will
stop.
Remove the card and turn the printer off.
TTPM2 Operators’ Guide
October, 01
Figure 9. Blow the dust from the sensors.
•
Raise the lid, and using the air duster, point the nozzle at each of the 5 visible sensors see photograph above and blow very briefly.
Next clean the rollers that are indicated in the below photo:
Figure 10.
October, 01
Clean the rubber rollers.
•
Close the lid, insert ticket stock into the rear hopper, turn the printer on and a ticket will be
fed into the machine.
•
Turn the printer off and lift the lid.
•
Place the Cardclene onto the indicated rollers using only a slight amount of pressure,
and manually (with your thumb as shown in the photograph on the right) turn the
brass gear so that the ticket is fed forwards and the rollers are rotated. The pressure
applied to the Cardclene will clean the necessary rollers.
•
Close the lid and turn the printer on. The ticket will be ejected and another will take its
place.
TTPM2 Operators’ Guide
11
Next clean the roller attached to the brass gear used above:
•
Turn the printer off, open the lid, and lift the printhead.
CAUTION! – The printhead is sensitive to scratches and static electricity. NEVER use
tools of any kind against the printhead.
Figure 11.
Cleaning the drive belts.
•
Insert the Cardclene under the clear plastic flap below the printhead and manually
rotate the brass cogwheel so that the leading edge of the cleaning card passes the
roller, see photograph on the right.
•
Hold the card with your right hand whilst rotating the brass cogwheel a couple of full
times.
•
Remove the Cardclene and lower the printhead
•
Lower the printhead to normal position.
•
Close the lid and turn the printer on.
•
Wipe of the outside surfaces of the printer.
•
Load tickets.
•
Make a test printout to see that the printer functions correctly.
•
If you used the self-test to do the test printout, turn OFF and ON the printer afterwards, and the printer is ready for another week of hard work!
The printer is now ready for use.
12
TTPM2 Operators’ Guide
October, 01
3.3
Annual (performed by technician)
Disconnect the power and interface cable.
Remove the cover.
Check that screws are tightened and inspect rubber belts and rollers for wear and
cracking.
Check that the cogwheels align properly and are firmly fixated on their shafts.
Check for missing circlips.
Check that you can rotate the rollers over the magnetic heads when no ticket is inserted between head and roller.
Enter a single ticket into the lower rear input. Turn the rear cogwheels to feed the
ticket in over the magnetic module until the rear of the ticket passes the home position sensor. Check that you cannot easily rotate the rollers over the magnetic heads.
Turn the rear cogwheels the other way around and check that the ticket goes up to
the upper rear upper track.
Forward the ticket again as much as possible while checking that is passes between
the rollers after the cutter without slipping.
Hold down the plunger of the front solenoid and turn the largest of the front cogwheels on the right.
Check that the ticket enters between the platen and the printhead without slippage,
then remove the ticket.
Check the position of the springs. They should be as close together as possible.
Remove any dust that has fallen down into the printer.
Make a weekly maintenance.
Reassemble the printer.
Make test tickets while watching the tickets move through the printer. If ticket transport hesitates, check the width adjustment of that part of the ticket track.
After completing this, the printer is as good as new!
3.4
Cleaning products shopping list
Isopropanol solvent impregnated cleaning cards (AF Cardclene)
Compressed air spray can (AF Sprayduster)
Vacuum cleaner with computer type hose and brush set (Pullman Mini Vac PVB 2)
Pure Isopropyl alcohol 99.7% (AF Isoclene)
Rubber-roller restorer-fluid (AF Platenclene PCL 100)
Lint free cleaning cloth (AF Safewipes)
Cleaning products can be purchased from various suppliers around the world. The AFproducts within parenthesis in the list above are examples from AF Computer Cleaning
Products, see www.af-net.com.
October, 01
TTPM2 Operators’ Guide
13
4
FAULTFINDING
4.1
No tickets produced and yellow indicator ON
Load ticket stock in the selected ticket track.
4.2
4.3
No/faint print
Check that the ticket material is thermally coated by swiftly striking your nail across
the ticket. This should produce a black line.
Make a self-test printout to check that the printer prints without use of the host computer.
Check that the printhead pressure plate is lowered fully.
Barcode unreadable
Clean the printhead.
Make test printout to check that the line across the paper has no gaps in the width
used by the barcode (all pixels in the test line are black).
CAUTION! – NEVER store the tickets on the floor. Stones that enter the
printer together with the ticket material destroy the printhead.
14
TTPM2 Operators’ Guide
October, 01
4.4
Many encoding retries
4.5
Bad stripe material on ticket.
Wrong ticket thickness.
The ticket material hooks onto something on its way into the printer .
Dirt buildup on feed rollers.
Erroneously adjusted magnetic rollers.
1
Frequent paper jams
4.6
1
The ticket material hooks onto something on its way into the printer .
Ticket material too wide (wider than 54.3 mm).
Slipping ticket transport due to dirt buildup on rollers or drive belts.
Worn of missing drive belts.
Striped tickets
1
Ticket material without magnetic stripe.
Magnetic stripe on the wrong side. Should be facing
downwards on the left side of the printer as seen from
the ticket exit. (In the center facing down on center
track printers.)
The ticket material hooks onto something on its way into the printer .
Misadjusted rollers over the magnetic heads.
1
Take some tickets and put them on the lid of the printer. Load them into the printer and print tickets. If the problem now is
gone, the ticket path to the printer is the cause of the problem.
October, 01
TTPM2 Operators’ Guide
15
4.7
Messages on your screen
The printer communicates with the host computer that runs your ticket booking software.
This means that any condition that occurs in the printer should be taken care of by the
software in such a way that you get the guidance you need to solve the situation.
4.7.1
Errors reported by the printer
1) Out of tickets. Please load tickets in the lower rear input.
2) Out of tickets. Please load tickets in upper rear input.
3) Paper jam when fetching ticket from lower rear input. Please make sure that the tickets can move freely into the printer.
4) Paper jam when fetching ticket from upper rear input. Please make sure that the tickets can move freely into the printer.
5) Cutter error. No full cut performed. Please clear paper jam in cutter.
6) Cutter error. Cutter blade not returned to home position. Please clear paper jam in
cutter, and turn OFF, then ON the printer to return the cutter to home position.
7) Cutter error. Cutter blade not moving. Please clear paper jam in cutter, and turn OFF,
then ON the printer.
8) Paper jam when trying to print the ticket. Please clear the paper jam.
9) Magnetic encoding on track 2 (or center track) failed. Check that the stripe on the
ticket stock is positioned to the left of the printer as seen form the ticket exit.
10) Magnetic encoding on track 1 or 3 failed Check that the stripe on the ticket stock is
positioned to the left of the printer as seen form the ticket exit.
11) Not possible to read magnetic information on inserted ticket. Make sure the ticket is
inserted correctly.
12) No document inserted within time limit for a front load. Please Retry.
13) Ticket inserted through front load but immediately retracted. Please feed the ticket in
again.
14) Ticket inserted through front load is blocked. Please clear the front load input.
15) Unable to retract the ticket from the front load.
16) Old ticket found in the ticket path during power on. It has been erased, VOID-printed
and ejected.
17) Critical error. The printer must be turned OFF, error condition cleared, then turned
ON again.
4.7.2
Acknowledges reported by the printer
1) Ticket stock is available in the selected ticket track.
2) The magnetic encoding was successful.
3) The ticket is ready to be printed (encoded and cut).
4) The last line of the printable area has been printed successfully.
16
TTPM2 Operators’ Guide
October, 01
4.8
Indicators on the printer
Different error types can show up during processing.
The most common is that the TTPM2 is out of paper.
All errors encountered by the printer, and requiring
operator assistance, are indicated with a signal from
an indicator on top of the printer. The operator then
has to follow a specific procedure depending on the
type of error that caused the stop. The procedures
are as follows:
• Yellow indicator lights up
Indicates "No paper" in the selected paper entry. Insert new paper supply or new single ticket. The document will be automatically loaded to active position.
• Yellow indicator ON and green indicator ON or flashing.
No paper in the selected paper entry. Ticket data has been received. Insert paper into
the selected paper entry.
• Red indicator lights up
Indicates unsuccessful read-after-write of the magnetic encoding. The TTPM2 makes
a second attempt to encode and read the ticket. During that attempt the red indicator
will go out. For each unsuccessful attempt, the red indicator lights up again.
• Red indicator is ON
If the Red indicator stays ON, even though ticket stock is present in the selected entry,
this indicates that the paper path in the TTPM2 has been blocked. Follow the description on the next page to remove the paper jam.
NOTE! No data is lost in the process of detecting and acting on errors as long as the
printer is not switched OFF. If, however, the printer is switched OFF by mistake when an
error is attended to, two tickets will normally be lost because of the error:
1) The ticket being printed will be lost.
2) The next ticket will be lost.
The reason for the next ticket being lost is that even though the printer has battery
backed up memory which preserves data, it is not possible to guarantee that no data is
lost in the serial communication during the power OFF condition. It is, therefore, necessary for the printer to erase the input buffer and wait for either a clear or print command
before it can synchronize printing to incoming data.
October, 01
TTPM2 Operators’ Guide
17
5
CORRECTIVE ACTIONS
5.1
General reset
A general reset of the TTPM2, restoring all parameters to their default value, is effected if
all three pushbuttons are kept depressed at power ON. All three indicators will light but
nothing else will happen. At this point, the power has to be turned OFF and ON once
more. The TTPM2 is then reset.
5.2
Paper jam removal
Open the TTPM2 cover to locate and remove the ticket that is stuck in the mechanism.
Use the following procedure:
5.2.1
Select paper jam clearing mode
1. Power OFF.
2. Push and hold the rear pushbutton while turning ON the power. The red indicator
shows a steady light to indicate paper jam clearing mode.
5.2.2
Tickets stuck in rear of the printer
Press and hold the center push button to eject the ticket towards the rear of the unit.
5.2.3
Tickets stuck in front part of the printer
Press and hold the front push button to eject the ticket towards the front of the unit.
5.2.4
Exit paper jam clearing mode
Power OFF and back ON again, the TTPM2 is operational but any ticket information previously sent to the unit is lost.
5.2.5
Manual cranking
You can also power OFF the printer
and turn the feed rolls manually to
remove the blocking ticket.
18
TTPM2 Operators’ Guide
October, 01
5.2.6
Lifting the printhead
Push the printhead release lever forward while lifting the printhead. Release the lever
when the printhead is lifted.
Printhead
Figure 12.
Lifting the printhead.
Now the paper path is relieved and you can remove any stuck ticket, and clean the
printhead.
CAUTION! – The printhead is very sensitive to static electricity and to scratches. NEVER
use any tool on the printhead. To clean it, use a soft piece of cloth and pure isopropyl
alcohol.
5.3
Self test
1. Press and hold the front pushbutton at power ON to enter self-test mode.
2. Press again to encode and print one ticket. The printout shows current firmware version.
3. Turn printer OFF and ON to exit self-test mode.
The green indicator lights up at power ON. Should it fail to light up, switch the TTPM2
OFF and back ON again. If the green indicator is still OFF, check your power connection
both in the TTPM2 and in the wall outlet. Also check your main power supply fuse.
October, 01
TTPM2 Operators’ Guide
19
6
MOVING THE PRINTER
If you plan to move the printer follow the steps below to avoid unpleasant surprises.
6.1
Secure shipping
Always ship the printer in its original packing material. If you lost it, order new from Swecoin.
6.2
Secure smooth paper path
The ticket material must not hook onto anything on its way into the printer. All edges that
the ticket material passes must be smooth and with large radius.
RIGHT VIEW
RIGHT VIEW
90
FANFOLD TICKET
STOCK
m
m
FANFOLD TICKET
STOCK
SW00007
CAUTION! – NEVER store the tickets directly on the floor. Stones that
enter the printer together with the ticket material destroy the printhead
20
TTPM2 Operators’ Guide
October, 01
6.3
Ensure interference free environment
The new location must be without electrical and magnetical interference. The printer must
be connected to a grounded power socket. Add a power line conditioner, and proper
screening if necessary.
6.4
Use correct serial cable
Use a correctly configured serial interface cable between the printer and host computer.
The printer may print single tickets correctly with other cables but when batch printing
tickets the loss of handshaking gives incorrect number of tickets or misprinted tickets.
October, 01
TTPM2 Operators’ Guide
21
7
TICKET STOCK
The TTPM2 printers are produced, calibrated for, and tested with the customers ticket
stock.
When you receive new ticket stock form your supplier; please take a moment to check
that the newly delivered tickets have the correct measurements. This may save you from
endless paper jams.
Perforation not allowed
within this 6 mm wide area
Stub perforation
2 ±0.3
R 3.15 ±0.3
+
Thermal
coating
6 ±0.5
54 +0.2, -0.4
6 mm
0.38±0.02
Transport
direction
Magnetic
stripe
8. max.
110 ±0.25
0.6
16 min.
0.04 max.
SW95044E
Figure 13.
22
Gapped 110 mm tickets
Thickness
0.18, 0.25 or 0.40 ± 0.02 mm
Width
53.6 to 54.2 mm (most critical parameter!)
Length
86 or 110 ± 0.25 mm
Corner radius
3.15 + 0.3 mm/-0 mm. Used for optical detection of top-of form
and cut.
TTPM2 Operators’ Guide
October, 01