1
A
,4
SHRP-C/UWP-91-502
#
User Manual
NCSU Concrete Materials
Database Program
William K. Chi
North Carolina State University
Strategic
'
Highway Research Program
National Research Council
Washington, D.C. 1991
SHRP-C/UWP-91-502
Contract C-205
Product Code 2014, 2023, 2024
Program Manager: Don M. Harriott
Project Manager: Inam Jawed
Program Area Secretary: Ann Saccomano
January 1991
Reprinted November
key words:
computer
concrete
database
fiber-reinforced
manual
materials
1993
concrete
mechanical properties
reinforced concrete
relational database
user manual
Strategic Highway
National Research
2101 Constitution
Washington, DC
Research Program
Council
Avenue N.W.
20418
(202) 334-3774
This manual represents the views of the author only, and is not necessarily reflective of the views of the
National Research Council, the views of SHRP, or SHRP's sponsor. The results reported here are not
necessarily in agreement with the results of other SHRP research activities. They are reported to stimulate
review and discussion within the research community.
50/NAP/1193
Acknowledgments
The research described herein was supported by the Strategic Highway Research
Program (SHRP). SHRP is a unit of the National Research Council that was authorized
by section 128 of the Surface Transportation and Uniform Relocation Assistance Act of
1987.
SHRP Contract C-205 is concerned with an investigation of the mechanical behavior of
high-performance concretes. The research is being conducted by a team from three
universities: North Carolina State University, the University of Arkansas, and the
University of Michigan.
This report is based on the author's independent study project which is a requirement
for the Master of Civil Engineering degree. The author has benefited greatly from the
frequent discussions with his professors: Mr. Michael L. Leming, Dr. Paul Zia, and Dr.
Shuaib H. Ahmad. Their guidance is gratefully acknowledged.
Preface
This guide explains how to use the NCSU Concrete Materials Database Program.
to query the database, and describes how to input and update data.
It shows how
HOW THIS GUIDE IS ORGANIZED
This guide is divided into two parts:
• Part I.
• Part H.
User Manual
Reference
PART I : USER MANUAL Exercises that help you understand how to query the database and
descriptions that help you understand how to input and update data.
PART II: REFERENCE
Information concerningseparate operationsand fields.
HOW TO USE THIS MANUAL
Two methods are used in this manual. Examples are used in query operations, while procedures
are listed for input operations. It is best to read it while sitting at your computer, where you
can enter the exercise examples and see the results on your screen.
.
6
CONVENTIONS
USED IN THIS MANUAL
The following conventions are observed in this manual:
Text that must be entered exactly are shown in capital letters and in Courier font, e.g. AUTH.
Text that are displayed on the screen such as prompts are shown in italics.
!
SUPPLEMENTARY MANUALS YOU MAY USE
I
This program is constructed using several of Oracle's tools. While this manual provides
essential information, at times it may be helpful to refer to the Oracle publications listed below:
SQL*PLUS User Guide
SQL*FORMS Operator Guide
SQL*MENU User Guide
ORACLE FOR 123 User Guide.
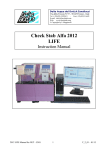
Contents
Preface
PARTI
...........................................
i
USER MANUAL
1
Login
2
Application Menus ....................................
2
3
Learning How To Query Dam .............................
4
3.1
3.2
3.3
3.4
3.5
3.6
4
...........................................
Sample Database
Example on Querying Conclusion Database
Example on Querying Table A and Table B
Example on Using ORACLE FOR 123 To
Query Table A and Table B
Example on Querying Formula/Graph
Database
Figures
Learning How To Input Data ..............................
4.1
4.2
4.3
4.4
4.5
1
15
General Procedures
Input Data Into Conclusion Database
Input Data Into Table A and Table B
Input Data Into Formula/Graph Database
Input Data in Maintenance Mode
°.°
111
PART II REFERENCE
5
Hardware And Software Requirement
6
Installation and Assigning Users ...........................
23
7
Query Mode .......................................
25
7.1
7.2
7.3
7.4
7.5
8
9
10
.......................................
39
Base Table Input Form
Conclusion Input Form
Table A Input Form
Table B Input Form
Formula/Graph Input Form
Figures
Maintenance Mode ...................................
9.1
9.2
9.3
21
Conclusion Database
Table A and Table B Database
Formula/Graph Database
Print Reference Lists
Figures
Input Mode
8.1
8.2
8.3
8.4
8.5
8.6
.......................
47
Reference Keyword Lists Input Forms
List of Values Input Form
Figures
Oracle For 123 .....................................
50
Appendix A
Application Menus Chart ...........................
52
Appendix B
Sample Database ................................
56
Appendix C
Field Names And Definitions
61
Appendix D
Table Joins
Appendix E
Complex Query
iv
........................
...................................
................................
67
69
PART I
USER MANUAL
1
Login
Login procedure for the NCSU Materials Database is simple. First, make sure you axe in the
working directory (drive:/shrp is the default). Then, follow the steps below to access the
program.
1.
Enter SHRP and then press < Enter > to start the program.
2.
You axe prompted to enter your usemame and password. Enter your usemame and press
< Enter >. Then enter your password and press < Enter >.
Alternately, you can enter USER1 as the usemame and USER1 again as the password to gain
access to the program's query mode. USERI/USER1 is the public username and password that
come with the program. However, your database administrator (DBA) may have deleted the
public username and password for security reason. If neither methods succeed, consult your
DBA or refer to Chapter 6.
2
Application Menus
In this chapter you will learn how to move around the Application Menus, the NCSU Database
program's menu system. The different levels of access that the program employs to ensure
security will also be discussed.
Once you have logged in successfully, you will be viewing the APPLICATIONMENU screen.
Depending on your assigned user level you are accessing all or a sub-setof the program. There
are three user levels:
1.
2.
3.
Level 1 users can only access query mode
Level 2 users can access query mode and input mode
Level 3 users can access the entire program which includes query mode, input mode, and
maintenance mode.
There are several layers of menus that can guide you to the desired operation. The complete
Application Menus chart is shown in Appendix A.
Move Around the Menus
You can navigate through the Application Menus with two interchangeable methods of selecting
options: number entry and cursor position entry. To select an option you 1) enter the number
that corresponds to that option, and then press the <Enter> key; 2) move the cursor to that
option, and then press the <Enter> key.
There are two function keys that you will use quite often in the Application Menus. < F2 > key
2
displays help messages for a option, and <Home>
menu screen.
•
key jumps the program to the previous
Go ahead and try to move around the Application Menus to get a feel of the menu system. If
you select an option that starts an operation, you can exit that operation and return to the menu
screen by entering < Esc> or < ctrl >-z.
Additional Information
NCSU Database's Application Menus are constructed using Oracle's SQL*Menu tool. You can
refer to SQL*Menu User's Guide to get better acquainted with how to use the menus.
Snmmary
In this section you have learned how to log in the program and how to move through the
Application Menus. In summary,
1.
2.
3.
4.
5.
Enter SHRP to start the program.
Enter your username and your password.
Move the cursor to the desired option, and then press < Enter >.
Press <F2 > to receive help message.
Press < Home > to go to the previous menu.
3
3
Learning
How To Query
Data
In this chapter you will learn how to query the NCSU Database based on a sample database.
The NCSU Database is comprised of three sub-databases: Conclusion Database, Table A and
Table B Database, and Formula/Graph Database.
The Conclusion Database contains investigators' conclusions from a research article. The Table
A and Table B Database contains numeric data on mixes and load responses reported in research
articles; these data axe stored in Table A and Table B. The Formula/Graph Database contains
information on graphs and formulas reported in research articles.
In this chapter, step-by-step procedures are used to show you how to query each type of the
databases.
3.1 Sample Database
When the NCSU Database program was installed, a set of data was input into the database for
demonstration purpose. A portion of the example database is shown in Appendix B. These data,
which will be used in the examples in this chapter, axe composed of three parts:
A total of 30 conclusions from 16 research articles are input into the Conclusion Database.
Partial numeric data from 2 research articles are input into the Table A and Table B Database.
A total of 8 formula/graph information sets from 2 articles axe input.
4
After you finish these examples, you can remove these dam by running the batch file
'REMOVE'. This will erase all the data in the database.
;t
3.2 Example On Querying Conclusion Database
Goal
You want to retrieve conclusionsthat have been drawnfrom researchpapers concerning creep
thathave been publishedafter 1983. You also want to send the queried result to a printer, by
year and within the year by author's name in ascending alphabeticalorder.
Steps
1.
After you have logged in successfully, navigate through the Application Menus to the
QUERY CONCLUSIONDATABASE menu screen.
2.
Move the cursor to the first option, then press < F2 > to view help message. Return to
menu screen by pressing any key.
3.
Select the first option (Execute Query Statement). A help message box and a WHERE >
prompt appears. Read the help message to get a general idea on how to enter a search
criteria.
4.
At the prompt, enterthe where clause, YEAR > = 1983 AND KW='CREEP' to indicate
that you want to search articles that were published after 1983 and axe on creep. Press
< Enter > to execute the query. The program should then indicate 5 records axe updated
which means 5 conclusions satisfied the search criteria. The screen at this point should
resemble Figure 3-1(a). Press <Enter> to return to the menu screen.
If you have an inputerror, the program will display an error message. You can exit the
operation by pressing < etrl >-z, then select the option again and redo Step 4.
5.
Select option #2 (Display Query Resul0. A form like Figure 3-1(b) appears on the
screen. This form displays those conclusions that have been selected. Press < Dn > key
five times to browse through these five conclusions. Then go back to the first conclusion
by pressing < Up > key five times.
6.
Each conclusion has a number of keywords. Press < ctrl >- < PgDn >. The keywords
associated with the displayed conclusion appears on the screen.
Press
< ctrl >- < PgUp > to return to the displayed conclusion. After finishing examining the
conclusions and their keywords, press < Esc > to exit the form.
5
7.
Select Option #3 and a new menu screen appears with three options. You can display
the result to the screen, send it to the printer, or save it to a file. Select Option #2(Print
to Printer).
r
8.
After you select option #2, a new help message box and the ORDER > prompt appears
on the screen. At this prompt, you need to provide the order in which result should be
displayed. Enter YEAR,AUTH to tell the program to display result by year in ascending
order, and within the year by author's name also in ascending order. Press <Enter>
to continue. Then the message, -ready the printer-, appears. Make sure your printer is
turned on. At this point, your screen should be like Figure 3-1(c).
9.
Press < Enter > to start printing. Once printing is completed, the program automatically
returns to the menu screen.
Slllnm_lry
You have learned now how to query the conclusion database. In summary, to query the
conclusion database:
1.
Navigate through the Application Menus to the Query Conclusion Database screen.
2.
Select Execute Query Statement option, and enter your where clause.
3.
Select Display Query Result option, and browse through the result to make sure that is
what you want.
4.
Select Print Query Result option, and then select the option to print the query result to
the screen, the printer, or a file.
3.3 Example On Querying Table A And Table B
Goal
You want to see what experimental data are available on the compressive strength that have
water/cement ratio of 0.4 or less and are cured until testing at 28 days.
Preparation
Except the simplest search, most queries on Table A and Table B axe rather complex.
Therefore, it is best to formulate the query statementon paper first. To do that, you need to
know the correct field names and the corresponding list of values given in Appendix C. Three
kinds of information are needed. For our example,
6
The columns we want to display:
W_C_RATIO, CUR_TM, CHEMI_TP, STRGTH_TSTrP, ULT_STRSl
.
The where clause:
W C RATIO< =0.4 AND CUR TM---28 AND AGE TST=28 AND
STRGTH TSTrP='FC'
m
The order clause:
LILT STRS1
Notice that the columns displayed do not have to be in the where clause or the order clause.
However, it is advisable to display all relevent columns to make sure the queried result is as
intended.
Steps
1.
Navigate through the Application Menus to the Query Table A and B screen.
2.
Select Optiott#l(Execute Query and Send to a File). By selecting this option, you are
about to enter and execute a query and send the result to a file.
3.
A new menu screen appears on the screen. On this menu screen you are asked to select
one of the six options that matches your query statement. The rule on which option to
select is always as follows: select the option that contains all the fields that are used,
either in the column clause, the where clause, or the order clause. In our example,
select Option#5 (Query involves Table A and Table B).
4.
A help message box and a prompt, Enter values for columns >, appears on the screen.
At this prompt, you are asked to enter the columns that you want to display on the
screen. Enter W_C_RATIO, CUR_TM, CI-IEMI_TP, STRGTI-I_TSTrP, ULT_STRS 1,
then press < Enter >.
5.
Another help message box and a differentprompt, Where >, appears on the screen. At
this prompt, you are asked to provide the where clause. Enter
W C RATIO< =0.4
STRGTH TSTrP='FC'
AND
CUR TM=28
AND
AGE TST=28
AND
Be sure you have entered all the information correctly. Do not press <Enter> in
middle of the where clause. The program automatically wraps to the next line.
Different parts of a field name are connected with the underscore, not the dash; the
character strings have to be enclosed with single quotations. At this point, the screen
should resemble the Figure 3-2(a). Press <Enter > to continue.
7
6.
Another help message box and a different prompt, Order >, appears on the screen. At
this prompt, you are asked to tell the program the order you want to display. Enter
ULT_STRS1, telling the program to sort the data according to strength value in
ascending order. Press <Enter> to start displaying the result on the screen. Five
records should be selected.
7.
If the result is not what you are looking for and you want to exit, press < ctrl >-z to go
back to the menu screen. Let's assume the queried result is acceptable and you want to
save it into a file. At the end of the displayed data, a message, < Enter > to continue,
appears on the screen. Press < Enter >.
8.
Another help message box and a different prompt, SAVE TO A FILE NAME (default
ext. LST):, appears on the screen. At this prompt, you are asked to provide a filename
to save the query result. Enter QRYDATA and press <Enter>, saving the resultant
data to QRYDATA.LST under your working directory.
9.
Another help message box and a different prompt, Enter values to the columns>,
appears on the screen. At this prompt, you are asked to name the columns that you want
to save. Be aware that the columns you specified in Step 3 have not been saved because
those columns are used only for formulating the query statement. Enter BART_ID,
W_C_RATIO, CU-R_TM,AGE_TST, CHEMI_TP, ULT_STRS1, then press <Enter >.
The screen will display the requested data as in Figure 3-2(b), and at same time, the
program saves the data to a file.
10.
You can save more columns to the file. At the end of displayed data, enter / and press
<Enter > to regenerate the prompt, Enter values for columns>. Then you can enter
seven more columns. In fact, you can save as many columns as you want by repeating
this step. But for this exercise, let's stop and enter EXIT to exit and return to the menu.
QRYDATA.LST is a text file saved under your working directory. You can access and edit it
by logging off the NCSU Database program and bringing the file up in any word processor
program.
Summary
You have worked an example on how to query Table A and Table B. In summary, the
procedures are as follows:
1.
Work out precisely the query statement you want to do on paper first.
2.
Navigate through the Application Menus to Query Table A and Table B screen and select
the options that correspond your needs.
3.
Enter the query information as requested.
(
4.
If you made a mistake, you can exit to the menu at any time by enter < ctrl >-z, and
then press < Enter >.
One disadvantage of this method of querying Table A and Table B is that whenever a mistake
is made, you have to start over again. However, ORACLE FOR 123 provides a better
alternative in querying table A and Table B. ORACLE FOR 123 utilizes the power of a
spreadsheet in combination with Oracle's RDBM. If you can access ORACLE FOR 123, then
you probably want to become familiar with it. In the next section the same example will be used
to demonstrate the use of ORACLE FOR 123.
3.4
On Using Oracle For 123
To Query Table A And Table B
Example
Goal
The goal is the same as in the last section. You want to see what experimental data are available
on the compressive strength that have water/cement ratio of 0.4 or less and are cured until
testing at 28 days.
Steps
1.
Exit from the Application Menus
2.
Type ORAl23 and press <Enter>
3.
Use normal Lotus procedures to bring up the ftle ABQRY.WK1.
appears and you are prompted to enter your username.
4.
Enter your username and press <Enter>. Then enter your password and press
<Enter>.
Unless you log in with correct username and password, you can not access
the example data in the tables.
5.
Browse through the help message to get a general idea on how to perform queries.
6.
Press < alt >-s to prompt the user-defined commands.
7.
Select the command COLUMNS, A table which lists out the field names and short
explanations appears, These fields belong to the Base Table and Table A and Table B
that you can access. You can browse through remaining fields by using the down cursor
key. There should be a total of 114 entries.
The help screen
8.
Change 'N' to 'Y' in the DISP column where the column numbers are 48, 25, 42, 60,
16, and 66. 'Y' indicates to the program that the field is to be displayed. Make sure
no other cells on the DISP column contain 'Y'. If they do, change them to 'N'.
9.
Press <alt>-s again to bring up the user-defined commands. This time, select the
command CRITERION/ORDER. This command will bring up a blank area with a left
parenthesis at top left comer. You can enter the where clause and the order clause in
this area. The left parenthesis is a reminder to you that the where clause needs to be
enclosed by parenthesis.
10.
Enter the where clause and the order clause as shown in Figure 3-3. Make sure the
where clause is enclosed by parenthesis.
11.
Press < alt >-s again and select the command EXECUTE. This command will execute
the where clause and the order clause that you entered. If there is an input error, a
message will appear and you can edit your where/order clauses and execute again.
12.
Press < alt >-s again and select the command DATA. The program will display the data
you have queried.
Sllmm_Lry
You have learned a different way of querying Table A and Table B, using ORACLE FOR 123.
In summary,
1.
Select the COLUMNS command, and select the fields you want to display.
2.
Select the CRITERION/ORDER command, and enter the where/order clauses. Be sure
to enclose the where clause by parenthesis to ensure correct query result.
3.
Select the EXECUTE command. If there is an error, edit the where/order clauses.
4.
Select the DATA command and see the data.
3.5 Example On Querying Formula/Graph Database
The procedure to query the Formula/Graph Database is identical to that of the Conclusion
Database. Once you navigate through the Application Menus to the Query Formula/Graph
Database screen, you can follow the same procedures as listed in Section 3.1. Therefore, it will
not be repeated here.
10
For the where clause, enter YEAR> = 1975 AND KW='STRESS-STRAIN RELATIONSHIP'
and press < Enter >. And for the order clause, enter ART and press < Enter >. If you ask to
send the result to print to the printer, the output should be as shown in Figure 3-4.
i
11
3.6 Figures
I
1. ART
2. AUTH
3. YEAR
4. TITLE
5. CONCL*
6. KW
article ID *
author's name
year of publtcatton
title of an article
conclusion =_
keyword
ART','Z1000'
AUTH LIKE 'ZIA_=
YEAR>-1979
CONCL='- 1
KWI'CREEP'
You can exit at any time by enter <ctr1>-z.
ENTERQUERY>YEAR_,=Ig83AND KW='CREEP'
5 Records Updated
<Enter> to return
FIGURE 3-1(a) CONCLUSION
CONCLUSION
_t...iD
DATABASE
WHERE CLAUSE
DATABASE DISPLAY
.1_1_kl.
AT_rT-TI'IR
_'_,_,_-__._-_
I_
D_TA
TITLE
FIGURE 3-1(hl CONCLUSION
1. ART
2. AUTH
3. YEAR
4. TITLE
5. CONCL_
6. KW
DATABASE
DLqPLAY SCREE N
article ID _
author's name
year of publication
title of an article
conclusion "
keyword
ENTERORDER) YEAR,AUTH
- Ready the printerFIGURE 3-1fcl CONCLUSION
12
<Enter> to start
DATABASE
ORDI_R SCREEN
Enter columns' names that you want to display while
formulating the query.
Example: AART_ID, ASPE..ID, CMT TP, CMT_QTY
Keep the number of columns to maximum of 7 allows
results to display across one screen,
You can exit at any time by enter <ctrt>-z.
Enter values for columns> W_C_RATIO, CUR_TM,CHEMI..TP,STRGTH_TSTTP,ULT_TRS1
I
Example: CMT_TP-'I' AND MIN_ADM_TP-'FUME'
Enter queqf statement here.
WHERE> W_C..FIATIO<=0.4 AND CUR_TM,,28 AND AGE TST,,28 AND STFIGTH TST'FP,,I::C'
I;']GURI_
ARTICLE
ID #
A2012
A2012
A2012
A2012
A2012
3-2(a_
TABLR
WATER
CEMENT
RATIO
3.2(h_
TABlr_R B R_[AMFLK
CURING
TIME
A_
(days)
.30,.)
.;4,>
.360
.270
.270
FIGURE
A AND
28.00
28.00
28.00
28.00
28.00
EXAMPLE
OU_RY
OURRY
CHEMICAL
_ TEST ADMIXI
(days) TYPE
ULTIMATE
STRESS1
28.000
28.000
28.000
28.000
28.000
10730.000
11020.000
11310.000
12905.000
13630.000
SUPERPLASTICIZER
SUPERPLASTICIZER
RE,_IJLT(TABLES
A AND
B_
13
A
B
1
C_DER
2
"'''''''-''''-'''''''''''''----''''''''''
3
4
5
6
7
8
9
(W_C_RA1]O<.0,4 AND CUR TM=28 AND AGE_TST-28
ANO STRGTH_TSTrP.'FC_
ORDERBYULT_STRS1
r
3
FT(",URE 3-3
CRITERION/ORDER
SHRP
_age:
FIGURE/GRAPH
DATABASE
Art_ID
FIG ID
Year
:
:
:
A2009
G2
1981
Author
Title
:
:
Dep
Vat
:
CARRASQUILLO,
R. L.
PROPERTIES
OF HIGH
STRENGTH
TERM LOADS
Stress
Ind
Ind
end
Ind
Ind
Var1:
Vat2:
Vat3:
VaP4:
VatS:
strain
strain
strain
CONCRETE
Note
:
Art_ID
F/G ID
Year
:
:
:
A2009
G3
1981
Author
Title
:
:
CARRASGUILLO,
R.L.
_ROPERTIES
OF HIGH-STRENGTH
TERM LOADS
stress
strain
(high strength)
strain
(medium
strength)
strain
(normal
strength)
Vat
:
Var1:
Vat2:
Vat3:
Vat4:
VatS:
Relation:
Note
:
records
FIGURE
QUERY
RESULT
3-4
SUBJECT
TO SHORT-
(high strength)
(medium
strength)
(normal
strength)
Fig.2
Typical
stress/strain
curvol
o¢
and high
strength
concrete
stroke
rate:
2,000
micro-in/man,
4%:8"
DeD
Ind
end
end
end
Ind
FOR 123
I
Relation:
14
C-205
RCRV.EN (/3RACLR
Fig.3
Typical
stress-strain
and high strength
concrete
stro_:e rate:
2000 u-in/man!
CONCRETE
curves
of
normal,
medium,
cylinder
SUBJECT
TO SHORT-
normal,
4">:8" specimen
medium
cylinders
selected.
EXAMPLE
OUERY
RESULT
(FORMULA/GRAPH
DATABASE]
4
Learning How To Input Data
In this chapter you will learn how to input and update data into the Conclusion Database, the
Table A and Table B Database, and the Formula/Graph Database. All input forms contain
extensive help messages and error checking mechanisms that can help you during input
operation.
To input correctly you need to understand the purpose of each table and how tables are joined.
You may want to refer to the report on the NCSU Concrete Materials Database Program,
Chapter 3, NCSU Concrete Materials Database Structure, before you start this chapter.
4.1 General Procedures
All input forms in the program are developed using SQL*Forms, Oracle's form generation tool.
Since input procedures are fairly simple and straight forward, no example will be used. Instead,
a step by step procedure for each input operation is given to get you acquainted with the basic
input steps. That should be enough for most of your needs. If you want to become more
proficient, refer to the SQL*Forms Operator's Guide.
No matter which input form you use, the procedures are generally the same. In the following,
some definitions specific to input forms will be stated first, and then a general outline on how
to input, update and save the data will be described.
15
Some Def'mitions
A field in a form is a cell where you can enter data. You can go to the next field by pressing
< Enter >, and go to the previous field by pressing < shift >- < Tab >.
A record is one row of data in a table. In a form you can go to the next record by pressing
< PgDn >, or go to the previous record by pressing < PgUp >.
A block in a form is generally indicated by a single line box. A block usually contains one table.
Some blocks axe single record blocks, while others axe multi-record blocks. You can go to next
block in a form by pressing < ctrl >-<PgDn >, and go to the previous record by pressing
<ctrl>- <PgUp>.
A page in a form generally means one screen. When screen changes, a different page appears.
The current page number is always displayed at the bottom of the screen.
Operations
You can enter data into a field when the cursor is in that field. Then you can move to the next
field by pressing < Enter >. Pressing < Enter > at the last field will bring the cursor back to
_ae fh'st field.
You can jump to the next record by pressing < PgDn >.
In some input forms, more than one block exist. Press < ctrl >- < PgDn > to go to the next
block and press < ctrl >-< PgUp > to go to the previous block.
What you entered in the form would not be saved to the database until you commit the change.
Press <F10> to commit the change. It is good practice to commit your changes frequently.
If you want to update information, you need to first query out the information from the database.
Follow these steps:
1.
Press < F7 >, the [Enter Query] key. The entire input form goes blank.
2.
Move the cursor to the field that you want to enter the search value. For example, in
the Base table, enter Z1000 to search out the article with article ID number equal to
Z1000. You can press the <Enter> key to go to different fields and enter other search
values. In fact, you can use Boolean operators in the fields. Refer to the SQL*FORM
Operator User's Guide, Chapter 3 for details.
3.
After you have entered all the search values you want, press <F8 >, the [Execute
Query] key, to execute the query.
16
4.
The form displaysthose records that satisfies the search criteria. Then you can edit those
records by the procedure outlined above. Do not forget to commit your change.
4.2 Input Data
Inputdata into the ConclusionDatabaseinvolves two input forms: 1) The Base Table InputForm
where information such as the article ID number,author's name and article title axe contained,
and2) the Conclusion InputForm where the conclusionand keywords axe contained. Refer to
Figures 8-1 and 8-2.
Steps
1.
Navigate throughthe ApplicationMenus to the InputMode screen, and select the first
option, Base Table Input Form.
2.
A form that contains the Base Table appearson the screen. You can enter information
on an article in this form, using the steps listed above. Make sure you commit the input
by pressing <F10>.
3.
You can exit the Base Input Form by pressing <Esc>.
4.
Select the second option, Conclusion Input Form. In this form you can enter the
conclusion and its keywords. Make sure you commit your input by pressing <F10>.
5.
To enter keywordsfor a conclusion, press < ctrl>- < PgDn >. A referencekeyword list
is displayed on the right. You can either type in the keywords, or you can select
keywords from the reference list. To select a keyword, press <Enter >. The cursor
jumps to the referencekeyword list block. Then use the < Up > or < Dn > cursor keys
to browse the list. When the cursor rests on the reference keyword you want, press
< Enter> again to accept. You can repeatthis step to input all the keywords you need
to enter. Make sureyou commit your inputby pressing <F10>.
6.
Press <ctrl>-<PgUp>
to go back to the conclusion block. If you have more
conclusions for the article, you would repeatSteps 4-6.
4.3
Input Data Into Table A And Table B
Input data into Table A and Table B involves the TableA InputForm and Table B Input Form.
In addition, if no entry for an article is made in the Base Table, you also need the Base Table
Input Form.
17
Steps
1.
Navigate through the Application Menus to the Input Mode screen. Select the third
option, Table A Input Form.
2.
When you input data into the form, keep in mind following items:
3.
a)
Pressing < Enter > when the cursor is in the last field will bring up the second
page.
b)
Instead entering values, you can select a value at those fields that contain a list,
e.g. Cement Type. Press <F9> to display the list of values. Browse the list and
make your selection by pressing < Enter >.
c)
From second page on, cursor can not enter the first three fields, AART._ID,
AMIX_ID, and ASPE ID. They axe for display only.
d)
You can copy the previous value in the field by pressing < F3 >.
Commit your input by pressing <F10>.
screen.
Then press <Esc>
to exit back to the menu
The procedure of inputting data into Table B is identical, except one minor detail. Since Table
B's size is large, Table B Input Form is divided to three parts. Column 48-58 is contained in
Part I, column 59-89 in Part II, and column 90-114 in Part m. You can access each part by
selecting the appropriate options.
Input data into Part I is identical to input data into Table A. In part II and Part HI, in order to
make sure no duplicate records axe inputted, the program does not allow you to access column
48-51. You can enter and execute a query to bring out the data for the same article, then enter
the data in Part II and Part III as usual.
4.4
Input Data Into Formula/Graph Database
The steps for inputtingdata into the Formula/Graph Database are the same as for inputting data
into the Conclusion Database. You can follow the steps outlined in Section 4.2 to input data into
the Formula/Graph Database.
4.5
Input Data in Maintenance Mode
There axe three operations you can perform in the maintenance mode. You can enter new values
18
•
into the LIST OF VALUES table where Table A and Table B can access; you also can enter
new reference keywords for the Conclusion Database and the Formula/Graph Database. Since
steps are fairly simple and are very similar with other input forms, only an outline of the
procedures is listed below.
List of Values Input Form
1.
Navigate through the Application Menus to the Maintenance Mode screen, and select List
of Value Table Input Form. A blank form with two columns appears on the screen.
2.
Press <F'/> [Enter Query]. The form goes blank. Move the cursor to the Field Name
column. Enter the field name, then press <F8>[Execute Query]. The screen will
display the existing values.
3.
Move the cursor to the next blank cell, and enter the new value. Press <F10 > to
commit the input. You can exit by pressing < Esc >.
Reference Keyword Lists
For both Conclusion Database and Formula/Graph Database, the procedure to input new
keyword into the reference keyword lists is the same, so it will be discussed together.
1.
Navigate through the Application Menus to the Maintenance Mode screen, and select
either Conclusion Reference Keyword List or Formula/Graph Reference Keyword List.
2.
A form with the existing keywords appears. Move the cursor all the way to the next
blank cell, and enter the new keyword. Press <F10> to commit the input.
3.
You can exit to the menu screen by pressing<Esc >.
Warning on Updating Information in Maintenance Mode
Be extremely careful when you need to update any information in the maintenance mode.
Remember that if you change a keyword in the reference keyword lists or a value in the List of
Values table, queries based on the new keyword or value would not be able to select the correct
records unless you update all the records. For example, if you change the keyword 'HIGH
STRENGTH' TO 'HIGH-STRENGTH', a query using 'HIGH-STRENGTH' will not select those
records.
19
PART II
REFERENCE
5
Hardware And Software
Requirements
In order to operate the NCSU Materials Database program correctly, your computer system must
satisfy the following minimum requirements.
Hardware Requirement
If your system is workstations that are certified by 0mcle, then you should not have any
problem. However, if you are working on PCs, then you have to have enough ram memory and
disk memory to install and run ORACLE RDBM, SQL*PLUS, SQL*MENU, and SQL*FORM.
Generally speaking, you need at least a 286 machine with about 3 megabytes of extended
memory and 10 megabytes of hard disk storage space. You can consult Appendix A of Oracle
Application Tools for MS-DOS User's Guide for details.
Software Requirement
The following Oracle products are required to run the NCSU Database program:
ORACLE RDBM
SQL*PLUS
SQL*MENU
SQL*FORMS
ORACLE FOR 123
version
version
version
version
5.1B
2.0
4.1
2.3
version 1.0
(optional)
21
or their higher versions. Although ORACLE FOR 123 is not required to run the program, it
is strongly recommended. In addition, to run ORACLE FOR 123, you must also have Lotus
version 2.1. installed.
ii,
22
6
Installation and Assigning Users
This section shows how to install the NCSU Materials Database Program. The person who is
to perform the installation and to add new users must have the DBA privilege.
Installation
Before you attempt to install the NCSU Database program, make
hardwares and softwares. Make sure the ORACLE RDBM,
SQL*Forms are properly installed. And if you have ORACLE
installed. If you need to install any of the products, refer to
MS-DOS Getting Started booklet.
sure your system has adequate
SQL*Plus, SQL*Menu, and
FOR 123, that should also be
Oracle Application Tools for
The installation process involves four steps: 1) copy program files to the working directory, 2)
assign default users to the system, 3) install tables and example data, and 4) assign default users
to the SQL*Menu. Only the user with the DBA privilege can perform installation. These four
steps are described below:
1.
Create a working directory where all the program files will be stored. For example, on
a PC you can create a directory, named shrp, under drive c (c:/shrp), then copy all the
files from the NCSU Concrete Materials Database Program micro diskette into the
working directory.
2.
Log in to SQL*Plus, then type @ASSIGN to execute the ASSIGN script. The ASSIGN
script assigns 3 default users and their passwords; they are USER1/USER1,
23
USER2/USER2, USER3/USER3. In addition, a fourth user, the creator of the tables
used in the program, is designated as CHI/CHI.
3.
Log off SQL*Plus and return to DOS prompt, then type IMP to execute the Oracle
import utility. A list of prompts will guide you through the steps. Accept defaults on
all the steps. Afer all the tables are imported, exit the import utility by pressing .
(period). Refer to Chapter 2, Oracle Utilites for detailed explanations.
4.
The three default users must be assigned by the DBA to access SQL*Menu. The steps
are listed below. Refer to Chapter 8, SQL*Menu User's Guide for detailed explanations.
4.1
4.2
4.3
4.4
Type SQLMENU and then press <Enter> to start SQL*Memu.
Select Option 1 (SQL*Menu Development of Dynamic Menus).
Select Option 4 (Creating of a new user of SQL*Menu).
On the Grantee field, enter USER1 and then press <Enter>. The cursor jumps to the
Grant option field. Leave the field blank by pressing <Enter >.
Repeat Step 4.4 two more times to assign USER2 and USER3.
4.5
Assigning New Users
The program comes with three default usernames and passwords. USER1/USER1 is the default
username and password for level 1 users. Similarily, USER2/USER2 is for level 2 users and
USER3/USER3 for level 3 users. A person with the DBA privilege has the authority to assign
new users to the program and designate their user levels. On the other hand, he also has the
authority to remove or change the default usernarnes and passwords for security reasons. Refer
to Chapter 8, SQL*MENU User's Guide for procedures.
24
,
.
QUERY MODE
In this chapter each operation in the query mode will be described in detail.
7.1 Conclusion Database
Menu Screen
Query Conclusion Database
Option #1
Execute Query Statement
Select this option to enter a search criteriain querying the ConclusionDatabase. A help message
box and a prompt appears on screen as shown in Figure 7-1.
At The Prompt Enter the where clause usingthe nomenclatures in the help message box. The
syntax for the where clause follows the SQL query expressions. Refer to SQL Language
Reference Manual, Chapter 1, Page 12-14 for definitions and examples on SQL operators. In
general, the operators used in the where clause are Boolean operators. Most common ones are
=, > =, >, < =, <, !=, AND, OR, NOT, and LIKE. Remember all character strings must
be enclosed by single quotations. Press < enter> to execute the query.
Six nomenclatures can be used in the search criteria:
ART is the article ID number. ART is comprised of a 5 character string. In general,
Z1000-Z1999 are articles reviewed by Dr. Paul Zia. A2000-A2999 are by Dr. Shaub Ahmad,
25
andL3000-L3999
by Prof.Michael
Leming.
AUTH is the first author's name of an article. AUTH is a character string.
YEAR is the year of publication. YEAR is a 4 digit number.
TITLE is the article rifle. TITLE is a character string.
CONCI.//is the conclusion number for a particular article. In articles where there are more than
one conclusion, conclusions are numerically sequenced starting at 1.
KW is the keyword. KW is a character string.
Execution Complete If syntactically correct, following messages will appears on the screen,
_ records updated.
< Enter > to return.
' ' indicates the number of conclusions selected. Press < Enter > to return to the menu screen.
Input Error If syntactically incorrect, the program will display an error message. Press
< Enter > or < ctrl >-z to return to the menu screen and select this option again.
Limitation A total of 128 characters can be entered. Every nomenclature can only be used one
time per where clause.
Menu Screen
Query Conclusion Database
Option//2
Display Query Result
Select this option to view the conclusions that have satisfied the most recent query. A form like
Figure 7-2 appears on the screen. You can browse through those conclusions and opt not print
certain conclusions.
Browse You can browse through the selected conclusions. <Up > cursor key display the
previous conclusion. The < Dn > cursor key goes to next the conclusion. The display order
is always by article ID number, and within the article ID number, by the conclusion number.
Update Print Field The only field that can be updated in this form is the PRINT field. You
can enter N to indicate that particular conclusion not to be printed. Make sure you press
<F10> to commit the change.
26
See Keyword List To see the keyword list for a conclusion, Press < ctr1>- < PgDn >. Press
< ctrl> - < PgUp > to return.
Menu Screen
Print Query Result (Conclusion Database)
Option #1
Print Query Result to Screen
Opyion #2
Print Query Result to Printer
Option #3
Print Query Result to f'de
The procedures for these three options are very similar, thus will be discussed together. Select
one of the three options to print the selected conclusions to the semen, to a printer, or to a file.
Before printing, the program asks for the display order. A help message box and a prompt
shown in Figure 7-3 appears on screen.
At The Prompt Enter the display order you want, and then press < Enter > to start printing.
You can embed display orders; you also can display records either in ascending or descending
order. The default order is ascending order. For example,
ENTER ORDER > YEAR DESC, AUTH
will display records by year in descending order, and within the year by first author's name in
ascending order.
Input Error If an syntax error is made, an error message appears. You can return to the menu
screen by pressing < ctrl >-z or < enter >. You can select this option again because query
result is not lost.
Print To Printer If you select OPTION#2, the programprompts you to ready the printer. The
prompt, -Ready the Printer- < enter > to start, appears on the screen. Press < Enter > to start
printing.
Print To File If you select OPTION#3, the program prompts you to specify a filename. The
prompt, FILE NAME TO SAVE(default extension .LST)>, appears on the screen. Enter a
filename following MS-DOS naming convention and then press < enter>. The file will be
saved under your working directory. Please note that if you name a file that already exists, the
new file will overwrite the old file automatically.
27
7.2 Table A And Table B Database
Menu Screen #1
Menu Screen//2
Options
Query Table A and Table B and Save to File
Query Table A and Table B and Save to Lotus
all options under the two menu screens
Before You Start This method of queryingTable A and Table B is provided mainly for those
systems that do not have ORACLE FOR 123 installed. This method has some limitations. If
your system has ORACLE FOR 123, it is better to use ORACLE FOR 123 to perform the
query. Refer to Chapter 10 for details.
General Procedures Either you intend to save a result to a file or to Lotus in querying Table
A and Table B, the procedures are similar, and thus will be discussed together. The program
guides you through the query operation in five steps. The five steps are:
1)
2)
3)
4)
5)
enter
enter
enter
enter
enter
the
the
the
the
the
columns you want to see on screen.
where clause.
order clause and then display result on screen.
filename if the result is to be saved to a file.
columns you want to save to the file or to Lotus.
Step 1 Select an option that matches the type of query you intend to perform. You should
select the option in which all the fields that you will use is included. That includes field names
in specifying columns, field names in the where clause, and field names in the order clause.
After you press < Enter > key, a help message box and a prompt as in Figure 7-4 will appear
on the screen.
At the prompt, enter up to seven field names, separated by commas, that you want to display
on the screen. Then press < Enter > to proceed. The field names must correspond to the list
in Appendix C and are capitalized. Be aware that the fields you entered at this prompt do not
have to be contained in the where clause. The purpose of displaying these fields is for you to
examine the query result and decide whether the result is satisfactory. They are not saved to
a file or to Lotus.
Step 2 After you pressed < Enter>, another help message box and a new prompt as in Figure
7-5. appears. You are asked to enter the search criteria at this prompt.
At the prompt, enter the where clause and press < Enter > to proceed. The field names are used
in the where clause. Make sure names agree with the list in Appendix C and character strings
are enclosed in single quotations. Boolean operators are used in forming an expression. Most
28
common operators are: >, > =, <, < =, l=, AND, OR, and NOT. Refer to SQL Language
Reference Manual, Chapter 1, Page 12-14 for definitionsand examples.
Step 3 After you pressed < Enter>, anotherhelp message box and a new promptas in Figure
7-6 appears. You are asked to enter the display order at this prompt.
At the prompt, enter the order clause and press < Enter> to proceed. You can embed display
orders. You also can display records either in ascending or descending order. The default order
is ascending order. For example, if you enter CUR_TM, ULT_STRS1 DESC, the program
will display databy curing time in ascendingorder, and within the same curing time by ultimate
stress in descending order.
Step 4 If the resultis to be saved to a file, another help message box and a new prompt as in
Fig. 7-7 appears. However, if the result is to be saved to Lotus, this prompt will not appear
and you should skip to Step 5. At this prompt, you are asked to create a file to store the query
result.
At the prompt, enter the filename and press < Enter >. The filename should follow MS-DOS
naming convention. It is saved under the working directory. If there is an existing file with the
same file name, the older version will be overwritten.
Step 5 Depending on data destination,one of the two help message boxes and prompts appears
on screen.
If data destination is a file, at the prompt,enter the field names and press < Enter> to execute.
Keep the number of fields to a maximum of 7 at a time so data can be saved across the width
of a page. You can save more fields by entering '/' to regenerate the prompt. If you make an
input error, an error message will display on the screen. Do not worry because your where
clause and order clause are not lost; just enter '/' to regenerate the prompt and enter the correct
field names again. Finally, you can exit at any time by pressing <ctrl>-z or enter EXIT and
press < Enter >.
If data destination is Lotus spreadsheet, a help message box and a prompt as in Figure 7-8
appear on the screen. At the prompt, enter field names that are to be displayed in Lotus and
press < Enter > to execute. Since the data destination is not a file, you can enter more than 7
fields at the prompt, but you can not add more fields by regenerating the prompt. On the other
hand, if you have made an input error, you can try again by entering '/' to regenerate the
prompt.
To access data in the Lotus spreadsheet, log off the Application Menus, boot up the Lotus
spreadsheet and select the file 'ABVIEW'. The data will automatically show starting at cell A1.
29
Limitation At each prompt in the five steps described above, a maximum of 128 characters are
accepted. Therefore, this method of querying Table A and Table B is viable only for a few
columns and a simple where clause. In addition, until Step 4, there is no way to edit your input
once <Enter> key is pressed. Therefore, if there is any input error, you have to restart by
exiting the prompts and returning to the menu screen.
There are two ways you can overcome these limitations. First, you can query using ORACLE
FOR 123. See next paragraph. Second, you can construct complex query using the option
described in the next section.
A Better Alternative If you can access ORACLE FOR 123, a better query method that
eliminate the above limitations is available. In this program a Lotus file containing a set of
macros is available to assist you in querying Table A and Table B. Refer to Chapter 10 for
details.
Menu Screen
Option #3
Query Table A and Table B
Execute complex query
Select this option if you want to enter a complex query when the previous options are not
adequate. This option brings up the SQL*PLUS. In SQL*PLUS, you can formulate as complex
and as long a query as you desire.
To formulate query in SQL*PLUS, you need to understand SQL syntax. In addition, you need
to include the table joins yourself in the where clause. You can refer to SQL*PLUS User's
Manual for SQL syntax. And you can refer to Appendix D to see the SQL expressions on table
joins.
You may also want to read the NCSU Database Program Report to get a conceptual
understanding of the program's data structures.
You are not totally on you own when you select this option. All the fields from Table A, Table
B and Base Table have been defined: both the display column width and the column title. Thus,
if you keep the number of columns to a maximum of seven, then the queried result can be
displayed clearly across the width of the screen.
To tap the potential of the program, some queries can only be generated this way. Refer to
Appendix E for details.
30
7.3 Formula/Graph Database
Menu Screen
Option #1
Query Formula/Graph Database
Execute Query Statement
Select this option to enter search criteria in querying the Formula/Graph Database. A help
message box and a prompt appears on screen as shown in Figure 7-9.
The procedure for thisoption is almost identical to option#1 in Query Conclusion Database menu
screen. Refer to that section for reference. The only difference is that, in this option, you use
FG ID# instead of CONCL#.
FG_ID# stands for Figure or Graph ID designation and is comprised of character string. In
general, G1 stands for graph #1 of an article, and F1 stands for formula #1 of an article.
Menu Screen
Option #2
Query Formula/Graph Database
Display Queried Result
Select this option to view those conclusions that satisfy the most recent query. A form like
Figure 7-10 appears on the screen. You can browse through these records and opt not to print
c._rtainrecords.
The operations used in this form is the same as in that of Query conclusion Database. Refer to
that section for details. In this form following fields are displayed:
ART_ID The article ID number that was assigned in the Base table. A corresponding Lotus
f'flewith the same articleID number as its filename shouldbe includedin the data files provided.
You can access the file through the normal Lotus spreadsheet commands.
FG_ID The formula or graph ID number. A designation with the F prefix stands for Formula,
and G prefix stands for Graph. In the Lotus file, each graph should be identified with the
formula/graph ID number.
PRINT
print this record or not.
AUTHOR firstauthor'sname.
.
TITLE
DEP VAR
the article title
description of the dependent variable on a graph.
31
IND VAR
descriptions of the independent variables on a graph. Up to five independent
variables can be listed.
RELATION for graph, the description of the graph is displayed; for formula, the actual formula
is displayed.
NOTE
any additional information or comments.
Menu Screen
Option #1
Option #2
Option #3
Print
Print
Print
Print
Query Result
Query Result
Query Result
Query Result
(Formula/Graph Database)
to Screen
to Printer
to f'de
When you select one of the three options, a help message box and a prompt as shown in Figure
7-11 appears. The procedures here are identical to that of in Print Query Result screen for
Conclusion Database. Refer to that section for details.
7.4 Print Reference Lists
Menu Screen
Option #1
Print Reference List
Select Field N_mes and List of Values to Print
You can select the field names and the their list of values to print to the printer. When this
option is selected, a screen resembling Figure 7-12 appears.
Select Fields To Print The only item you can update is the PRINT column. Change to 'Y' if
you want to print that field name and its list of values. You can preview the list of values for
a field name by pressing < F9 >. Press < Enter > to return.
Most Often Used Keys
< up >
< down >
< F9 >
< F 10>
Menu Screen
Option//2
Option//3
32
move to next record
move to previous record
see list of values
commit
Print Reference List
Print Field Names and List of Values
Print Reference Keyword List
(Conclusion Database)
Print Reference Keyword List
(Formula/Graph Database)
Option #4
|
Select option #2 to output the field names and their lists of values that were selected from the
option #1, to the printer. You can use this printout to assist you in querying Table A and Table
B.
Select option #3 to output the reference keyword list for the Conclusion Database to the printer.
You can use this list to assist you in querying the Conclusion database.
Select option #4 to output the reference keyword list for the Formula/Graph database to the
printer. You can use this list to assist you in querying the Formula/Graph database.
Once the printing is completed, the program automatically returns to the menu screen.
7.5 Figures
1. ART
2. AUTH
3. YEAR
4. TITLE
5. CONCL#
6. KW
You can exit at
article ID #
authors name
year of publlcdon
title of an article
oonclusion #
keywon:l
any time
ART-'Z1000'
AUTH LIKE 'ZIA%'
YEAR>el979
CONCI.#-I
KW,,'CREEP'
by enter <ctrl>-z.
ENTER
QUERY>
FIGURE
7.1
EXECUTE
OUERY
SCREEN
(CONCLUSION
DATABASE]
33
---
_DAT,
AR'r_ID_
aBASEDISPLAYSCREB4 -,,illl
__
PRINTBI
YEAR
DATA
El
TITLE
FIGURE
7._ DISPLAY
OI__R¥
(CONCLUSION
_. ART
2. AUTH
3. YEAR
4. TITLE
5. CONCL#
6. KW
RI_..SULT SCREEN
DATARASE_
atl_e ID #
authodsname
year of publicltlOR
_tle of an ar_le
con_usion#
keywo¢l
ENTERORDER>
FIGURE
7-3 PRINT
OUERIED
(CONCLUSION
34
RESULT
DATABARE_
SCREEN
|
I
I
Illl
II I
Entercoiumf,.s'names that you want to displaywhile
Formulatir_jthe query.
4
Example:AART ID, ASPE_IO,CMT_TP,CMT_QTY
Keepthe number of columns to maximumof 7 allows
'esultsto display across one screen.
_'oucan exit at any time by enter <ctrl>-z.
I
Enter values for columns=,
FIGURE
%4 HELP
(TABLE
A AND TABLE
MESSAGE
AND PROMPT
FOR
COLUMNS
CLAUSE
B)
Enter query statementAND
Example:CMT._TP=T
here.MIN ADM_TP='FUME'
WHEFE_
FIGURE
?._; HELP
fTABLE
A AND TABLE
MESSAGE
AND PROMPT
FOR WHERE
CLAUSE
B_
Enter
Example:ULT_STRS1,
order statement CUR..TM
here.
FIC, URE 7.6 HEI.P
"
(TABLE
_IE_ACE
AND PROMPT
FOR ORDER
CLAUSE
A AND T:',,I_LE B)
35
I
I
I
Following procedures save above query into a file. Please note:
I. Maximumof 7 columnscan be selectedat a time
2. Enter '/' to regenerate more columns
3. Enter '<ctrl>-z to exit.
!
/_or EXIT:.
FIGURE
7.7
HELP
MESSAGE
AND PROMPT
TO SAVE TO A FILE
(TABI.E
FOR
ENTERING
A AND TABLE
COLUMNS
B)
I
I
I
Enter columns' namesthat to be displayedin Lotus>
FIGURE
7.8 HELP
MESSAGE
AND
PROMPT
TO gAVE TO LOTU_q (TABLE
36
FOR ENTERING
A AND T/_BLE
l]]
COLUMNS
I
1. ART
_
2. FG_ID
¢
•
i
I
IO #
ART.'Z1000'
flgurefgreph IO 0
3. AUTH
4. YEAR
S.TITLE
author'sname
yearof pub_
titleof an a_cle
6. KW
keyword
FG_ID,,'FI'
AUTHLIKE_IA%'
YEAR>,,1979
KW-'CREEP'
You can exit, at any time by <ctrl>-z.
F_.r_-_CUERY>
FIGURE 7.9 EXECUTE OUERY SCREEN
(FORMULA/GRAPH DATABASE1
.--- FORMULA/GRAPH
DISPLAYSCREEN-.i
ART_ID
i
FGIO
PRINT
BE
•
YEAR
man
Tn'LE
DEPVAR
INDVARI
INDVAR2
I
III
,ND
INDVN_IS
RE.AnON
NOTE
F][GURE 7-10
DISPLAY OUERY RES[nLT _CREEN
(FORMULA/CRAPE[ DATABASE1
I
I. ART
2. FG_ID
2. AUTH
3. YEAR
4. TITL_
5. CONCL#
6. KW
I
article
ID#
fiR_,/gra_ ID#
author'sname
year of publication
title
of an m_ck
conclusion #
keywclcd
II
ENTER ORDER>
FIGURE 7.11
PRINT OUERY RESULT SCREEN
(FORMULA/GRAPH
DATABASE_
37
PRINT REID NAMESANDOST OF VALUES
PRINT
FIELD TABLE
FIELDNAME
(N)
R_ n Ex_'r'K_
(PAGEI)
FIELD
NAME
liSTOf:V/U.UI_
ii!:i
EXPLANATZON
_
(PAGE 2)
' FIGURE
38
7-12 FORM
FOR
PRINTING
FIELD NAME._
AND LIRT OF VALUER
8
Input Mode
In this chapter each input form will be described in detail.
8.1 Base Table Input Form
You can input general information about an article in the Base Table Input Form. The form is
depicted in Figure 8-1.
ARTID
Enter the article ID number in this field. It must be a distinct five character string.
YEAR
Enter the year of publication. YEAR should be a 4 digit number.
DATA
Enter Y or N to indicate whether numeric data is to be included in Table A and Table B.
39
AUTHOR'S NAME
Enter the ftrst author's name; last name first, then the initials.
to 30 characters can be entered in this field.
TITLE
Enter the title of the article.
For example, Ahmad, S. A. Up
Up to 240 characters can be entered in this field.
Most Commonly Used Keys
< F 10 >
< enter >
commit
next field
< F7 >
<F8 >
enter query
execute query
8.2 Conclusion Input Form
You can enter conclusions in this input form as well as assign keywords.
in Figure 8-2.
ART ID
Enter article ID number.
The form is depicted
It must be a five character string.
CONCL NO.
Enter the conclusion number for an article, starting with 1.
CONCLUSION
Enter up to 10 lines of text as shown on the screen.
KEYWORD
You can access the KEYWORD block by pressing < ctrl >- < Pgdn >. Select the desired
keyword from the REFERENCE KEYWORD LIST block. You can do this by pressing the
< Enter > key to jump to the REFERENCE KEYWORD LIST block. Then move the cursor
to the desired keyword and press < Enter >. You can return to the main screen by pressing
< ctrl > - < PgUp >.
Most Used Function
<F10>
< ctrl >- < PgDn >
< ctrl >- < PgUp >
< enter >
< F7 >
F8 >
40
Keys
commit
go to next block
go to previous block
next field
enter query
execute query
8.3
Table A Input Form
You can enter the data into Table A using this input form. The primary key for Table A is
composed of three fields: AART_ID, ASPE_ID and AMIX_ID. Data for these three fields can
only be entered on Page 1. In subsequent pages these three columns are only for display.
Portion of the form is depicted in Figure 8-3.
AART ID
AART ID is the article ID number.
base table.
AART ID should be the same with the ART ID in the
-
ASPE ID
ASPE_ID is the specimen ID number. ASPE_ID is numeric and sequenced by ascending order
starting at 1.
AMIX ID
AMIX_ID is mix ID #; AMIX_ID is a character string with a maximum of 30 characters long.
Other Fields Other fields are either numeric or alphanumeric. Up to 30 characters can be
entered in all alphanumeric fields except the note field at the end, which can take up to 240
characters. Refer to Appendix C for definition of each field.
List Of Values In certain alphanumeric fields, a list of acceptable values are listed. You can
access that table by pressing <1=9 >. Then move the cursor to the desired field and press
< Enter >.
Most Commonly Used Function Keys
<F9>
go to LIST OF VALUE block.
< F10 >
commit change
< F7 >
enter query
< F8 >
execute query
< enter >
next field
< shft >- < tab >
previous field
< Dn >
next record
< Up >
previous record
< F3 >
copy field from previous record
8.4
t
Table B Input Forms
Table B input form is subdivided into three forms because of its large size. However, it is
actually one table and should be treated so. Portion of the forms are shown in Figure 8-4. The
41
procedures in entering data is identical to Table A input so they are not repeated here.
There are two items needed be aware of. First, the field names for the three fields that comprise
the primary key have different first letter designation than that of TABLE A, e.g. BART_ID vs.
AART ID.
Second, to access primary key in Table B Input Forms Part II and Part IH, you need to perform
enter query and execute query operations: Press <F7> [Enter Query], move cursor to
BART_ID, enter the article ID number that you want and then press <F8> [Execute Query].
8.5 Formula/Graph
Input Form
You can enter information On formula/graph in this input form as well as assign keywords.
form is depicted in Figure 8-5.
ART ID
Enter article ID number.
The
m
It must be a five character string.
F/G NO.
Enter the Formula/Graph designation here. For example, F1 stands for formula no. 1 an article;
G1 stands for graph no. 1 for an article. This field is alphanumeric.
DEP VAR
Description of the dependent Variable in a graph. A maximum of 80 charactors can be entered.
IND VAR
Description of independent variables. Up to five independent variables can be entered and each
accept up to 80 charactors.
RELATION
Description of the relation between independent variables and dependent variable.
For a
formula, the equation can be entered here. A maximum of 240 charactors are allowed.
NOTE
Any additional comments can be entered here.
A maximum of 240 charactors are allowed.
KEYWORD
You can access the KEYWORD block by pressing <ctrl>-<PgDn>.
Select the desired
keyword from the REFERENCE KEYWORD LIST block. You can do this by pressing the
<Enter > key to jump to the REFERENCE KEYWORD LIST block. Then move the cursor
to the desired keyword and press <Enter >. You can return to the main screen by pressing
< ctrl > - < PgUp >.
42
Most Used Function Keys
< F10>
< ctrl>- < PgDn >
< ctrl>- < PgUp >
< enter>
< F7 >
< F8 >
commit
go to next block
go to previousblock
next field
enter query
execute query
8.6 Figures
"
_
ART_ID
¥_Ul
INPUI"FORM
YEAR
DATA
AUI"HOR'S_
TITLE
FlU.fIRE
8.1 BA£R TAIlI.I_.
INPUT
I_ORM
43
CONCLUSION TABLE INPUT FORM
ART iD_ONCL NO.
ma
(PAGE
1)
KEYWORDINPUT FORM(CONCLUSIONTABLE)
ART
ID#
CE]NEL
#
KEYWOFID
REFERENCEKEYWORDLIST
_::_'i_'
i%
I!!_.:_:_.. .._.,
(PAGE
FIGURE
44
8-2
:_::_":__'_'__"__""°_
_"__'_
2)
CONCLUSION
INPUT
FORM
(1)
(2)
(3)
(4)
(5)
(6)
(7)
mmummm
(PAGE
n
|
I (1)
]A
I _
11
(2)
(3)
A
A
sPs MIX
(8)
F
/(_
(9)
(10)
F
,_3
F
_
(11)
C
_
(12)
C
._S
(13)
(14)
C
_
C
.=03
(15)
(PAGE2)
_;1_I;RI[ RJ
POR'rl"ON O_ TARLI_. A INlqJT FORM
I
(48)
B
N:cr
ID
(49)
B
SPE
ID
(50)
B
MIX
ID
(54)
n
(51)
(52)
(53)
(55)
(56)
SPE
TYPE
Sm:
MI].D CAP/GRPPLATENGIKt
TYPE TYPE
TYPE
NI I/lllllNNi
(PAGE
n
|n
1)
I
(PAGE
2)
FIGURE 8-4 PORTION OF TABLE B INPUT FORM
45
TABLEF INPUT FORM
n
ART_ID OONCLNO.
IND VAFI2
...........................................................
'..............
_":_':
IND VAFI3
I";'."
............................................................
";;';;;';,:' '::':
" ' " .... ": " "'_ "" " ""_"_'':'"':'"_-"_'_
_="_
.......
_:_;_:_"
_'•
$_
IND VAPA
12!:;::::::::::":
:;"",
_.............
,.;:,_i
:'._:::_:
:_'i:ii
_::i_.:_:_::i_:_:_._:
f.::_:::_:_:_:ii_i_:,
_>._;_:_::;_:_'._:_:_:_;_i_
RE_T1ON
lili!iiiiiiiiiii+i!_+::_::_:i:,':ii_:::h
. ;.!,:_:.:;:::::::i_!!_i:_:
!!_i:!:i:!:_iF_ii:!ii.ii_iii_!_i_i_._!:!..:.i_i_!5!_!;!_i_:iii_!ii!!_!:_:_i!:!_!_
I::: :::::;::;::::;::::
:::::"
"":'_"::::;:;::" ;,:"':: ':: ::: ::::::_ :::: _::::::k:
:_"_ _::': ;;;;;::_:;_,::;_:i;._
i
(PAGE
l)
KEYWORDINPUT FORM (FORMULA/GRAPH)
ID#
I:_
ID #"
KEYWORD
REFERB_ICE
KEWVO_ LiST
•
i
:::::.,::'::'_.,"._:::_._::,<._:;:
:::::::::::::::::::::::::::::::::::::::::::::
,.......>:::,:,:_
..__._::._:
.... .,.:,.,......;_.....:..,..,-.:.,.:.:.
:::::::::_;_:!_._:$,';,_:_',;.;_-:_::::_._::
:::_::_
::::;:_ .::::.
l!:
_..._.-._!_:._!_._:_...!!_.....:.-_:_;!
! _._ ::;_... _t ",:_::_::_:;:::_:_.::$_::;;_:_::)_'.:_:_.::::;_::
_:.,.._
_-_!!:_:_:_:i!!_!
•I
.:_;_:':_'_.
:'2.:;_.;:_
!i__._._;':_':_y'::_!_
_ i_i_i_ii!
ii_i_;;;_.i_i_i!:i!:ff::
:.;._._.
:_..._._<_.:.._:_o.
::::_:::_::::.
:?,;:;,_
::::::::::::::::::::::::::::::::::::::::::::::::::::::::::::
_:_:':!_.:_:_:_:_:;:i_
_'_!:_:,:;_
•.
ii
(PAGE
FIGI_RE
46
8.$
2)
FORMULA/GRAPII
INPUT
FORM
9
Maintenance Mode
In this chapter each maintenance form will be described in detail.
9.1 Reference Keyword Lists
Input Form for Conclusion
Database Reference Keyword List
Input Form for Formula/Graph Database Reference Keyword List
You can add new keywords to the reference keyword lists. These two forms axe shown in
Figure 9-1 and Figure 9-2. The most updated version of the reference lists are reflected when
you access either the Conclusion Input Form or the Formula/Graph Input Form. Each keyword
can have up to 30 characters long.
Most Commonly Used Function Keys
•
< up >
< dn>
< F10 >
move to previous keyword
move to next keywword
commit change
47
9.2 List Of Values Input Form
You can enter additional values into the LISTVAL table, so Table A and Table B cart reference
them. The form is shown in Figure 9-3.
Enter New Value Entering new value into the LISTVAL table is a three step procedure. First,
enter and execute a query to select those records corresponding to the field you want. Second,
enter the new value or term. Third, commit the change.
Press < F7 >. Move the cursor to FIELD NAME field, and then enter the field name you want
to add values. Press < F8 > to execute the query and the list of values associated with that field
appears on the screen.
Move the cursor to the LIST OF VALUES field and to the next available cell. Enter the new
value.
Press <F10>
to commit the change.
9.3 Figures
INPUT FORM
(CONCt.USIONTABLEKEYWORDUST)
FIGURE
9-1
REFERENCE
(CONCLUSION
48
KEYWOIlD
LIST
DATABA_]_
INPUT FORM
(FORMULNGRAPH
FIGURE
9.2
KEYWORD
REFERENCE
KEYWORD
FORMULA/GRAPH
LIST
DATABASE3
UST OF VALUES INPUT FORM
|
F,_oNAM_
('tABLES
AAND8)
ii
_ O_
V_UES
EX_I_N
"_.,
FIGURE
q.3
l+IgT
OF VALUE
INPUT
FORM
49
10
Oracle For 123
In this chapter a set of macros in ORACLE FOR 123 is described. Users can use this set of
macros to query Table A and Table B Database.
ORACLE FOR 123 is a Lotus add-in tool. Having Lotus spreadsheet attached to ORACLE
RDBM enhances the data manipulation capability of ORACLE. Since numeric data manipulation
is the main task in Table A and in Table B, ORACLE FOR 123 presents a better alternative in
querying Table A and Table B.
Access Oracle For 123 Exit out to the DOS prompt, then type ORAl23 and press <enter>.
Bring Up ABQRY.WK1
The query procedures are stored as a set of macro in a Lotus file,
called ABQRY.WK1. Use normal Lotus commands to bring up the ABQRY.WK1.
Query Steps The steps to query table A and table B are stored as menu commands. These are
outlined below. You can access the menu commands by pressing < ctrl >-s at any time.
Colnrnn_ Select this command to choose the fields you want to display. The only enterable
field is the DISP while other columns axe protected. Only 'N' or 'Y' should be entered in the
cells. 'Y' indicate field selected. You can select up to 50 fields at a time. Keep in mind that
what you select do not necessarily have to be included in the where/order statement.
Where/Order
Select this command to enter the where clause and order clause of the query
statement. You can enter up to 10 Lines of codes. Be sure you enclose the where clause to ensure
50
proper operation of SQL statement.
Execute Select this command to execute the query statement. If there is an error, a message
will appears on the screen. In that case, select WHERE/ORDER again and edit the statement.
Data Go to the data that the query has generated. The data area starts at A200 cell.
lnit Clear all the input. Initialize the Column screen so no fields are selected and clear the
WHERE/ORDER screen.
UNFREEZ In order to protect macros from accidental erasing, portions of the spreadsheet are
protected at times. UNFREEZ disable all protection. In rare occasions that you want to use
this option, be careful not to erase program codes.
HELP Go to the help screen for quick instruction on how to run the program.
Advantages To query table A and table B this way have several advantages over the previous
method. They are listed below:
1.
You can edit the query statement without starting afresh.
2.
You do not have to concern yourself on which tables are involved in a query statement.
That is taken eared for you by the macro.
3.
There is no 128 character limit.
4.
Data obtained can be manipulated further by normal Lotus operations.
Other Comments Actually, you virtually have all the database management capability that are
used in other parts of the NCSU Database program by using ORACLE FOR 123 alone. You can
input data as well as do complex queries. Refer the ORACLE FOR 123 User's Manual for
detail instructions.
51
Appendix
A
Application
52
Menus Chart
APPLICATION
MENUS
1. NCSU DATABASE
2.EXIT
L
1.QueryMode
2. InputMode
3.IV_nmmnce
Mode
I I,
1.
OUERV
"see Partr
MODE
NCSU
DATAllA_E
9._ INrPu'r
MODE
_. ]blAIN'rl_NAN_'E
MODE
1. Base Tshle Input Prom
1. List c/"Vslou I_mt Form
2. cood_uimInput_nR
2._...m
3. Table A InputForm
4. T_de B InputFarm (Pro 1)
$. TaI_B InputForm (Part ID
6. Table B Input Form (Part lID
(Coadewa _)
3. lte/emlEe KmY'mmd
lnJLme
]L_oem
(1_
Dualb_e)
7._
APPLICATION
Key,_ h_
_atFom
MENU (PART I_
53
L o_Rv
l"znLg
A zNl)
"rzRLR n
I. F_m Q(MsySmeu_m _d So_ m V-_
2. E.x_umQury Smemmtam/Sad to
3.Execm_
_
(SQL)
J
TO_'_nLg
I. Query Invdv_ TgI_ A only
2. Que:y tnvoivu TableB only
I. QueryInvalv_ Tal_ A only
2. _
InvolvesTableB only
3. Q_r/kvlovu Ba_ T_ andTableA
4.Q_='y_nr]o_sBarnTal/z md TableB
5. QueryInvclvmTabk A and TableB
6. Quet7InvolvesBase T_le. T_I¢ A. andTabkB
3. Qmw/lavlovm _m, Tsbk am(/Table
A
4. (_m7 lavloves BMsTs/_ sad Tsbl_B
5. _
lavdvu Tahk A md TableB
6. QueryInvolveaBaseTable,TablzA, andTaldeB
APPLICATION
MENUS
(PART
II
!
111)
55
Appendix
B
Sample Database
56
Base table
Art ID
Year
Author
Title
A2012
1983
BROOKS, J. J.
PROPERTIES OF ULTRA-HIGHSTRENGTH CONCRETE CONTAINING
A SUPERPLASTICIZER
A2009
1981
CARRASQUILLO,
R.L.
PROPERTIES
OF HIGH STRENGTH
CONCRETE SUBJECT TO SHORT-TERM
LOAD
Conclusion table
Art 1D
m
A2012
Concl#
1
Conclusion
Concretes with and without superplasticizers
were tested under short term and long term (one
year) to quantify the effects. Eighteen 4 in.
cubes were tested for compressive strength.
Eighteen 6x12 in. cylinders were tested for
indirect tensile strength. Eight 4x4x20 prisms
were tested for dynamic modulus of elasticity.
Fourteen 3x10 in. cylinders were tested for
swelling and creep. Concrete strengths based
on cube tests were reported up to 13,620 psi.
Ke_vword tabl¢ (keyword table for Conclusion database)
Art_ID
A2012
A2012
A2012
A2012
A2012
A2009
A2009
A2009
Concl#
1
1
1
1
1
1
1
1
Keyword
COPRESSIVE STRENGTH
CREEP
MODULUS OF ELASTICITY
SHRINKAGE
SUPERPLASTICIZERS
HIGH STRENGTH
MODULUS OF ELASTICITY
TESTING
57
Table A
(1)
Article
ID #
table
(2)
Specimen
ID #
A2012
A2012
A2012
A2012
A2012
A2012
1
2
3
4
5
6
(1)
Article
ID #
(2)
Specimen
ID #
(3)
(4)
Mix ID Cement
Type
500P
500P
500P
500P
500A
500A
I
I
I
I
I
I
(3)
(16)
Mix ]]9 Chem 1
Type
(5)
(9)
Cement
F. Agg
Qty
Qty
(pcy)
(pcy)
(13)
C. Agg
Qty
(pcy)
876
876
876
876
902
902
2083
2083
2083
2083
2142
2142
809
809
809
809
833
833
(17)
(25)
Chem 1 W/(C+F)
Qty
(31)
Work'ty
Test Mthd
(oz/cwt)
A2012
A2012
A2012
A2012
A2012
A2012
1
2
3
4
5
6
(1)
Article
ID #
(2)
Specimen
ID #
500P
500P
500P
500P
500A
500A
SUPERPLASTICIZER
SUPERPLASTICIZER
(3)
Mix ID
(32)
Work'ty
Value
(in)
A2012
A2012
A2012
A2012
A2012
A2012
58
1 500P
2 500P
3 500P
4 500P
5 500A
6 500A
8
8
(41)
Curing
Mthd
0.36
0.36
0.36
0.36
0.27
0.27
SLUMP
SLUMP
SLUMP
SLUMP
SLUMP
SLUMP
(42)
Curing
Time
(days)
1.5WATER
1.5 WATER
1.5 WATER
1.5 WATER
1.375 WATER
1.375 WATER
i
28
365
28
1
28
Table B table
(48)
Article
ID #
A2012
A2012
A2012
A2012
A2012
A2012
A2012
(49)
Specimen
ID #
1
1
1
1
2
2
2
(50)
(51)
Mix ID Specimen
Type
500P
500P
500P
500P
500P
500P
500P
(48)
(49)
Article Specimen
ID #
ID #
A2012
A2012
A2012
A2012
A2012
A2012
A2012
A2012
1
1
1
1
2
2
2
2
CUBE
PRISM
PRISM
CYL
CUBE
PRISM
PRISM
(50)
Mix ID
500P
500P
500P
500P
500P
500P
500P
500P
(78)
Modulus
Type
(52)
Specimen
Size
(60)
(62)
Age at Strength
Testing Test
(66)
Ult
Stress 1
4"
4"x4"x20"
4"x4"x20"
6"x12 "
4"
4"x4"x20"
4"x4"x20"
1
1
1
1
28
28
28
FC
5293
FR
FC
421
11310
(79)
Modulus
Value
(81)
(82)
Creep Sp Creep
Stress
SEC E
DYN E
4.34
5.7
SEC E
DYN E
5.52
6.86
m
(83)
Age at
Loading,
Table F table (Formula/Graph database)
Art_ID
FIG ID Dep Var
.......
A2009
Ind Var4
. ....
G4
Ind Vat5
o .......
Ec
Ind Varl
Ind Var2
. .................
o.
f'c (Comell, f'c
Present Study)
Relation
Ind Var3
.................
(PCA)
f'c(Pauw)
Note
Fig. 5 Static modulus of
elasticity versus sqrt(f'c)
59
FKW table (keyword table for Formula/Graph database)
Art ID
FIG ID
Keyword
A2009
A2009
1
1
HIGH-STRENGTH
MODULUS OF ELASTICITY
60
Appendix
Field
C
Names
and
Definitions
61
FIELD NAMES AND EXPLANATIONS
(TABLES A AND B)
TABLE
NAME
COL
NO. FIELD NAME
EXPLANATION
BASE
0 ART
0 AUTH
0 TITLE
0 YEAR
1 AART
2 ASPE
3AMIX
4 CMT
article ID #
author's name
article title
year of publication
article id #
specimen id #
mix id #
cement type
TABLEA
ID
ID
ID
TP
5 CMT_QTY
6 MIN ADM TP
7 MIN-_ADM-QTY
8 F_AGG_TP
9 F_AGG_QTY
10 F AGG MOIST
11 C_AGG_TP
12 C AGG NMSA
13 C_AGG_QTY
14 C AGG MOIST
15 AGG_GILADN
16 CHEMI_TP
17 CHEM1 QTY
18 CHEM2_TP
19 CHEM2 QTY
20 CHEM3_TP
21 CHEM3_QTY
22 PLYMR_TP
23 PLYMR_QTY
24 WATER_QTY
25 W C RATIO
26 BA-TCH_LOC
27 QTY_PRD
28 MIX TM
29 TM_N_DRUM
30 PLASTTST
31 WRK TSTMD
32 WRK-_VAL
33 AIR TSTMD
34 AIR-TST VAL
m
D
62
cement quantity (pcy)
mineral admixture type
mineral admixture quantity (pcy)
fine aggregate type
fine aggregate quantity (pcy)
fine aggregate moisture condition
coarse aggregate type
coarse aggregate NMSA (in)
coarse aggregate quantity (pcy)
coarse aggregate moisture condition
aggregate gradation curve (Lotus filename)
chemical admixture type 1
chemical admixture 1 quantity (oz/cwt)
chemical admixture type 2
chemical admixture 2 quantity (oz/cwt)
chemical admixture type 3
chemical admixture 3 quantity (oz/cwt)
polymer type
polymer quantity (oz/cy)
water quantity (pcy)
water/cement ratio
batch location
quantity produced (cy)
mixing time (rain)
time in drum (rain)
plastic test location
workability test method
work'ty value (in or see based on work'ty type)
air test method
air test value (%)
35
36
37
38
39
40
UWT_PLAST
UWT_AIRDRY
CON_TEMP
MEMBER_TP
PLACE_MD
FNH_MD
plastic unit weight (pcf)
air dry unit weight (Ix:f)
concrete temperture (deg F)
member type
placement method
finishing method
63
FIELD NAMES AND EXPLANATIONS
(TABLES A AND B)
COL
NO. FI'FJ.D NAME
EXPLANATION
41
42
43
44
CUR_MD
CUR_TM
TREAT MD
SERV COND
curing method
curing time (min)
treatment method
service condition
45
46
47
48
INIT_SET
FIN SET
MIX NOTE
BART ID
initial set (min)
final set (min)
mix note
article ID #
49
50
51
52
53
54
55
56
57
58
59
BSPE_ID
BMIX ID
SPE_TP
SPE_SZ
MOLD TP
CAPGRIP_TP
PLATN_TP
GAGE_LENG
STRS_APPLN
LD DIS STRN
MOIST COND
specimen ID #
mix ID #
specimen type
specimen size
mold type
cap or grip type
planten type
gage length (in)
stress application method
load/stress/strain rate
moisture condition at test
60
61
62
63
64
65
66
67
68
69
70
71
72
73
74
75
76
AGETST
STRGTH_TSTM
STRGTH_TSTrP
PK_STR
PK_STRS2
PK_STRS3
ULT_STRS 1
ULT_STRS2
ULT_STRS3
PK_STRN1
PK_STRN2
PK_STRN3
ULT_STRN1
ULT_STRN2
LILT STRN3
POISN 1
POISN MULT
concrete age at test (days)
strength test method
strength test type
peak stress in principal dir (psi)
peak stress in y dir in biaxial test (psi)
peak stress in z dir in triaxial test (psi)
ult. stress in principal dir. (psi)
ult. stress in y dir in biaxial test (psi)
ult. stress in z dir in triaxial test (psi)
peak strain in principal dir. (10"-6)
peak strain in y dir in biaxial test (10"-6)
peak strain in z dir in triaxial test(10"-6)
ult. strain in principal dir.(10"-6)
ult. strain in y dir in biaxial test (10"-6)
ult. strain in z dir in triaxial test(10^-6)
uniaxial Possion's ratio
multiaxial Possion's ratio
m
n
77 PRMRY_FAIL
78 MOD_TP
primary failure mode
modulus type
79 MOD_VAL
80 THERM_COEFF
81 CRP_STRS
modulusvalue (10^6 psi)
thermal coefficient (millions/deg F)
creep stress level (% of f'c)
65
FIELD NAMES AND EXPLANATIONS
(TABLES A AND B)
COL
NO. FIELD NAME
EXPLANATION
82 SP_CRP
83 AGE_LOAD
84 CRP_TM
85 SHRK_TSTMD
86 SHRK_VAL
87 SHRK_TM
88 CYCL_FATG
89 MAX_CYCL_STRS
90 MIN_CYCL_STRS
91 LD CYCLNO
92 MOD_N
93 STRGTH_N
94 PK_STRN_N
95 PERM_TSTMD
96 PERM_VAL
97 PORO_TSTMD
98 PORO_VAL
99 PORO_DISTR
100 ABRSN TSTMD
101 ABRSN RSIST
102 FREZ TSTMD
103 FREZ RATE
104 AGE__STFREZ
105 DUR_FACT
106 LD RESP NOTE
specific creep (ustrain/psi)
concrete age at 1st creep load(days)
creep time (days)
shrinkage test method
shrinkage strain (10"-6)
shrinkage time (days)
cyclic frequency(fatigue) (cycl/sec)
maximum cyclic stress (psi)
minimum cyclic stress (psi)
number of load cycle(N')
modulus at N cycles
strength at N cycles
peak strain at N cycles
permeability test method
permeability value (cm/sec)
porosity test method
porosity value (%)
porosity distribution (Lotus file name)
abrasion test method
abrasion resistance (% mass loss)
freezing test method
freezing rate (deg F/hr)
age at first freeze (days)
durability factor
load response note
m
Appendix D
Table Joins
67
FKW table
• .+
TABLEF
_lble
art_id_g_+_r_/weed
BASE
table
a__id,fLid ' ...
m_id, ...
TABLE
• 68
+lOINS
FOR
NC_gU
DATARANg
Appendix E
Complex Query
69
While NCSU Database Program provides extensive query capabilities, to fully utilize its
potential, you may want to perform queries that axe beyond what is provided. NCSU Database
Program provides a means to access Oracle RDBM directly where complex query commands
can be executed. In this appendix the situation that warrant complex queries will be described
and corresponding query command will be suggested.
Warning
To perform correct query operations, you need to be familiar with SQL language as well as the
Table A and Table B Database structure. Otherwise, it is easy to extract erroneous information.
It is assumed here that you understand the SQL language fairly well. If you are not, you
definitely want to study SQL*Plus User's Guide before you attempt to perform complex queries.
Chapter 6 and Chapter 7 of SQL*Plus User's Guide axe especially important.
Situation That Warrant Complex Query
The numeric part of NCSU Database Program, Table A and Table B Database, is structured so
that individual specimen's test results axe stored as one row of data in a table. Thus, different
specimens that are made of same mix but are tested for different mechanical properties would
have the test results stored in different rows. Consequently, a query that involves different
mechanical properties may leave out some essential information. For example, examine the
following sample data:
BART ID
A2000
A2000
BSPE ID
1
I
2
I
BMIX ID
6000
40
ULT STRS1 CRP STRS
Both specimen 1 and 2 axe made of same mix, Specimen 1 is tested for compressive
strength(6000 psi) and Specimen 2 is tested for creep stress(40 % of compressive strength).
A user who wants to do a comparison of compressive
tempted to write the where clause such as :
strength and creep strength would be
tILT STRS1 > =5000 AND CRP STRS > =40
m
However, this where clause would not select these two records because neither record satisfy
the search criteria.
70
Recommended Query Command
•
It is possible to extract such information described above. Since in SQL a table can be treated
as two different tables, consequently, a table can be joined by itself. In the example above all
mechanical properties are stored in Table B, then you can write a SQL commands in the
following form:
SELECT [TAB1.ULT_STRS1, TAB2.CRP_STRS,...]
FROM TABLEB TABI, TABLEB TAB2
WHERE TAB1.BART ID=TAB2.BART ID AND TAB1.BMIX=TAB2.BMIX
AND (ULT_STRS1 > =5000 AND CRP_STRS> =40)
m
I
Such SQL statement extracts the correct information. Notice that TAB1 and TAB2 are
synonyms of Table B and are joined together based on article ID numbers and mix ID numbers.
Notice also that the specimen 1D numbers are not joined.
Table B is a big table, and a join operation combining two big tables involves a lot of data and
will require a lot more processing time. Unless your system is fast, be prepared to accept
slower performance.
Above query command introduces the concept of joining table by itself. Depending on your
needs, some variations of query commands may be required.
Recommendation
Complex queries need time to formulate and refine. Since SQL*Plus provides the means to save
query commands in batch files, you can build a library of batch fries. So if similar queries are
needed, you do not need to start from scratch.
71
Concrete
and
Structures
Advisory
Committee
Chairman
Liaisons
James J. Murphy
New York Department
of Transportation
(retired)
Theodore R. Ferragut
Federal Highway Administration
Vice Chairman
Howard H. Newlon, Jr.
Crawford F. Jencks
Virginia Transportation
Research Council (retired)
Members
Transportation
Research Board
Bryant Mather
USAE Waterways Experiment
Station
Charles J. Arnold
Michigan Department
of Transportation
Thomas J. Pasko, Jr.
Federal Highway Administration
Donald E. Beuerlein
Koss Construction
Co.
John L. Rice
Federal Aviation Administration
Bernard C. Brown
Iowa Department
of Transportation
Richard D. Gaynor
National Aggregates
Suneel Vanikar
Federal Highway Administration
AssociationNational
Ready Mixed Concrete
Association
Expert
Robert J. Girard
Group
Amir Hanna
Missouri Highway and Transportation
Department
Transportation
Research Board
David L. Gress
Richard H. Howe
University of New Hampshire
Pennsylvania
Gary Lee Hoffman
Pennsylvania Department
Stephen Forster
Federal Highway Administration
of Transportation
Department
of Transportation
(retired)
Brian B. Hope
Rebecca S. McDaniel
Queens University
Indiana Department
Carl E. Locke, Jr.
University of Kansas
Howard H. Newlon, Jr.
Virginia Transportation Research
Council (retired)
Celik H. Ozyildirim
Virginia Transportation
Council
Clellon L. Loveall
Tennessee Department
of Transportation
of Transportation
Research
David G. Manning
Ontario Ministry of Transportation
Jan P. Skalny
W.R Grace and Company (retired)
Robert G. Packard
A. Haleem Tahir
Portland Cement Association
American
James E. Roberts
Officials
California Department
of Transportation
USAE Waterways
Charles F. Scholer
Purdue University
Lawrence
L. Smith
Florida Department
of Transportation
John R. Strada
Washington Department
of Transportation
Association
of State Highway
Lillian Wakeley
John M. Scanlon, Jr.
Wiss Janney Elstner Associates
V
Task
(retired)
Experiment
Station
and
Transportation