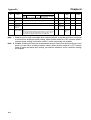
1
Cat. No. I534-E1-02 OPERATION MANUAL SMARTSTEP A SERIES MODELS R7M-A@ (Servomotors) R7D-AP@ (Servo Drivers) Servomotors/Servo Drivers Thank you for choosing this SMARTSTEP A-series product. Proper use and handling of the product will ensure proper product performance, will length product life, and may prevent possible accidents. Please read this manual thoroughly and handle and operate the product with care. Please keep this manual handy for reference after reading it. 1. To ensure safe and proper use of the OMRON Inverters, please read this OPERATION MANUAL (Cat. No. I534E1) to gain sufficient knowledge of the devices, safety information, and precautions before actual use. 2. The products are illustrated without covers and shieldings for closer look in this OPERATION MANUAL. For actual use of the products, make sure to use the covers and shieldings as specified. 3. This OPERATION MANUAL and other related user's manuals are to be delivered to the actual end users of the products. 4. Please keep this manual close at hand for future reference. 5. If the product has been left unused for a long time, please inquire at our sales representative. NOTICE 1. This manual describes operation procedures of the SMARTSTEP A-series Parameter Unit (R7A-PR02A). For information about installation, wiring, switch setting, and troubleshooting of the SMARTSTEP A Series, refer to the SMARTSTEP A Series User’s Manual (I533). 2. Be sure that this manual accompanies the product to its final user. 3. Although care has been given in documenting the product, please contact your OMRON representative if you have any suggestions on improving this manual. 4. Assume that anything not specifically described in this manual is not possible. 5. Do not allow the Servomotor or Servo Driver to be wired, set, or operated (from a Parameter Unit) by anyone that is not a profession electrical engineer or the equivalent. 6. We recommend that you add the following precautions to any instruction manuals you prepare for the system into which the product is being installed. • Precautions on the dangers of high-voltage equipment. • Precautions on touching the terminals of the product even after power has been turned OFF. (These terminals are live even with the power turned OFF.) 7. Specifications and functions may be changed without notice in order to improve product performance. 8. Positive and negative rotation of AC Servomotors described in this manual are defined as looking at the end of the output shaft of the motor as follows: Counterclockwise rotation is positive and clockwise rotation is negative. 9. Do not perform withstand-voltage or other megameter tests on the product. Doing so may damage internal components. 10. Servomotors and Servo Drivers have a finite service life. Be sure to keep replacement products on hand and to consider the operating environment and other conditions affecting the service life. 11. Do not set values for any parameters not described in this manual. Operating errors may result. Consult your OMRON representative if you have questions. 12. Before using the product under conditions which are not described in the manual or applying the product to nuclear control systems, railroad systems, aviation systems, vehicles, combustion systems, medical equipment, amusement machines, safety equipment, and other systems, machines, and equipment that may have a serious influence on lives and property if used improperly, consult your OMRON representative. Items to Check Before Unpacking 1. Check the following items before removing the product from the package: • Has the correct product been delivered (i.e., the correct model number and specifications)? • Has the product been damaged in shipping? 2. Check that the following accessories have been delivered. • Safety Precautions No connectors or mounting screws are provided. Obtain these separately. OPERATION MANUAL SMARTSTEP A SERIES MODELS R7M-A@ (Servomotors) R7D-AP@ (Servo Drivers) Servomotors/Servo Drivers Notice: OMRON products are manufactured for use according to proper procedures by a qualified operator and only for the purposes described in this manual. The following conventions are used to indicate and classify precautions in this manual. Always heed the information provided with them. Failure to heed precautions can result in injury to people or damage to property. !DANGER Indicates an imminently hazardous situation which, if not avoided, will result in death or serious injury. Additionally, there may be severe property damage. !WARNING Indicates a potentially hazardous situation which, if not avoided, could result in death or serious injury. Additionally, there may be severe property damage. !Caution Indicates a potentially hazardous situation which, if not avoided, may result in minor or moderate injury, or property damage. OMRON Product References All OMRON products are capitalized in this manual. The word “Unit” is also capitalized when it refers to an OMRON product, regardless of whether or not it appears in the proper name of the product. The abbreviation “Ch,” which appears in some displays and on some OMRON products, often means “word” and is abbreviated “Wd” in documentation in this sense. The abbreviation “PC” means Programmable Controller and is not used as an abbreviation for anything else. Visual Aids The following headings appear in the left column of the manual to help you locate different types of information. Note Indicates information of particular interest for efficient and convenient operation of the product. OMRON, 2001 All rights reserved. No part of this publication may be reproduced, stored in a retrieval system, or transmitted, in any form, or by any means, mechanical, electronic, photocopying, recording, or otherwise, without the prior written permission of OMRON. No patent liability is assumed with respect to the use of the information contained herein. Moreover, because OMRON is constantly striving to improve its high-quality products, the information contained in this manual is subject to change without notice. Every precaution has been taken in the preparation of this manual. Nevertheless, OMRON assumes no responsibility for errors or omissions. Neither is any liability assumed for damages resulting from the use of the information contained in this publication. General Warnings Observe the following warnings when using the SMARTSTEP Servomotor and Servo Driver and all connected or peripheral devices. This manual may include illustrations of the product with protective covers removed in order to describe the components of the product in detail. Make sure that these protective covers are on the product before use. Consult your OMRON representative when using the product after a long period of storage. !WARNING Always connect the frame ground terminals of the Servo Driver and the Servomotor to a class-3 ground (to 100 Ω or less). Not connecting to a class-3 ground may result in electric shock. !WARNING Do not touch the inside of the Servo Driver. Doing so may result in electric shock. !WARNING Do not remove the front cover, terminal covers, cables, or optional items while the power is being supplied. Doing so may result in electric shock. !WARNING Installation, operation, maintenance, or inspection must be performed by authorized personnel. Not doing so may result in electric shock or injury. !WARNING Wiring or inspection must not be performed for at least five minutes after turning OFF the power supply. Doing so may result in electric shock. !WARNING Do not damage, pull on, apply excessive stress to, or place heavy objects on the cables. Doing so may result in electric shock, product failure, or burning. !WARNING Do not touch the rotating parts of the Servomotor in operation. Doing so may result in injury. !WARNING Do not modify the product. Doing so may result in injury or damage to the product. !WARNING Provide a stopping mechanism on the machine to ensure safety. The holding brake is not designed as a stopping mechanism for safety purposes. !WARNING Provide an external emergency stopping mechanism that can stop operation and shutting off the power supply immediately. Not doing so may result in injury. !WARNING Do not come close to the machine immediately after resetting momentary power interruption to avoid an unexpected restart. (Take appropriate measures to secure safety against an unexpected restart.) Doing so may result in injury. !Caution Use the Servomotors and Servo Drivers in a specified combination. Using them incorrectly may result in fire or damage to the products. !Caution Do not store or install the product in the following places. Doing so may result in fire, electric shock, or damage to the product. • Locations subject to direct sunlight. • Locations subject to temperatures or humidity outside the range specified in the specifications. • Locations subject to condensation as the result of severe changes in temperature. • Locations subject to corrosive or flammable gases. • Locations subject to dust (especially iron dust) or salts. • Locations subject to shock or vibration. • Locations subject to exposure to water, oil, or chemicals. !Caution Do not touch the Servo Driver radiator, Servo Driver regeneration resistor, or Servomotor while the power is being supplied or soon after the power is turned OFF. Doing so may result in a skin burn due to the hot surface. Storage and Transportation Precautions !Caution Do not hold the product by the cables or motor shaft while transporting it. Doing so may result in injury or malfunction. !Caution Do not place any load exceeding the figure indicated on the product. Doing so may result in injury or malfunction. Installation and Wiring Precautions !Caution Do not step on or place a heavy object on the product. Doing so may result in injury. !Caution Do not cover the inlet or outlet ports and prevent any foreign objects from entering the product. Doing so may result in fire. !Caution Be sure to install the product in the correct direction. Not doing so may result in malfunction. !Caution Provide the specified clearances between the Servo Driver and the control panel or with other devices. Not doing so may result in fire or malfunction. !Caution Do not apply any strong impact. Doing so may result in malfunction. !Caution Be sure to wire correctly and securely. Not doing so may result in motor runaway, injury, or malfunction. !Caution Be sure that all the mounting screws, terminal screws, and cable connector screws are tightened to the torque specified in the relevant manuals. Incorrect tightening torque may result in malfunction. !Caution Use crimp terminals for wiring. Do not connect bare stranded wires directly to terminals. Connection of bare stranded wires may result in burning. !Caution Always use the power supply voltage specified in the User’s Manual. An incorrect voltage may result in malfunction or burning. !Caution Take appropriate measures to ensure that the specified power with the rated voltage and frequency is supplied. Be particularly careful in places where the power supply is unstable. An incorrect power supply may result in malfunction. !Caution Install external breakers and take other safety measures against short-circuiting in external wiring. Insufficient safety measures against short-circuiting may result in burning. !Caution Take appropriate and sufficient countermeasures when installing systems in the following locations. Failure to do so may result in damage to the product. • Locations subject to static electricity or other forms of noise. • Locations subject to strong electromagnetic fields and magnetic fields. • Locations subject to possible exposure to radioactivity. • Locations close to power supplies. Operation and Adjustment Precautions !Caution Confirm that no adverse effects will occur in the system before performing the test operation. Not doing so may result in equipment damage. !Caution Check the newly set parameters and software switches for proper execution before actually running them. Not doing so may result in equipment damage. !Caution Do not make any extreme adjustments or setting changes. Doing so may result in unstable operation and injury. !Caution Separate the Servomotor from the machine, check for proper operation, and then connect to the machine. Not doing so may cause injury. !Caution When an alarm occurs, remove the cause, reset the alarm after confirming safety, and then resume operation. Not doing so may result in injury. !Caution Do not use the built-in brake of the Servomotor for ordinary braking. Doing so may result in malfunction. Maintenance and Inspection Precautions !WARNING Do not attempt to disassemble, repair, or modify any Units. Any attempt to do so may result in electric shock or injury. !Caution Resume operation only after transferring to the new Unit the contents of the data required for operation. Not doing so may result in an unexpected operation. Warning Labels Warning labels are pasted on the product as shown in the following illustration. Be sure to follow the instructions given there. Warning label Example from R7D-AP01L Example from R7D-AP01L Read and Understand this Manual Please read and understand this manual before using the product. Please consult your OMRON representative if you have any questions or comments. Warranty and Limitations of Liability WARRANTY OMRON's exclusive warranty is that the products are free from defects in materials and workmanship for a period of one year (or other period if specified) from date of sale by OMRON. OMRON MAKES NO WARRANTY OR REPRESENTATION, EXPRESS OR IMPLIED, REGARDING NONINFRINGEMENT, MERCHANTABILITY, OR FITNESS FOR PARTICULAR PURPOSE OF THE PRODUCTS. ANY BUYER OR USER ACKNOWLEDGES THAT THE BUYER OR USER ALONE HAS DETERMINED THAT THE PRODUCTS WILL SUITABLY MEET THE REQUIREMENTS OF THEIR INTENDED USE. OMRON DISCLAIMS ALL OTHER WARRANTIES, EXPRESS OR IMPLIED. LIMITATIONS OF LIABILITY OMRON SHALL NOT BE RESPONSIBLE FOR SPECIAL, INDIRECT, OR CONSEQUENTIAL DAMAGES, LOSS OF PROFITS OR COMMERCIAL LOSS IN ANY WAY CONNECTED WITH THE PRODUCTS, WHETHER SUCH CLAIM IS BASED ON CONTRACT, WARRANTY, NEGLIGENCE, OR STRICT LIABILITY. In no event shall the responsibility of OMRON for any act exceed the individual price of the product on which liability is asserted. IN NO EVENT SHALL OMRON BE RESPONSIBLE FOR WARRANTY, REPAIR, OR OTHER CLAIMS REGARDING THE PRODUCTS UNLESS OMRON'S ANALYSIS CONFIRMS THAT THE PRODUCTS WERE PROPERLY HANDLED, STORED, INSTALLED, AND MAINTAINED AND NOT SUBJECT TO CONTAMINATION, ABUSE, MISUSE, OR INAPPROPRIATE MODIFICATION OR REPAIR. Application Considerations SUITABILITY FOR USE OMRON shall not be responsible for conformity with any standards, codes, or regulations that apply to the combination of products in the customer's application or use of the products. At the customer's request, OMRON will provide applicable third party certification documents identifying ratings and limitations of use that apply to the products. This information by itself is not sufficient for a complete determination of the suitability of the products in combination with the end product, machine, system, or other application or use. The following are some examples of applications for which particular attention must be given. This is not intended to be an exhaustive list of all possible uses of the products, nor is it intended to imply that the uses listed may be suitable for the products: • Outdoor use, uses involving potential chemical contamination or electrical interference, or conditions or uses not described in this manual. • Nuclear energy control systems, combustion systems, railroad systems, aviation systems, medical equipment, amusement machines, vehicles, safety equipment, and installations subject to separate industry or government regulations. • Systems, machines, and equipment that could present a risk to life or property. Please know and observe all prohibitions of use applicable to the products. NEVER USE THE PRODUCTS FOR AN APPLICATION INVOLVING SERIOUS RISK TO LIFE OR PROPERTY WITHOUT ENSURING THAT THE SYSTEM AS A WHOLE HAS BEEN DESIGNED TO ADDRESS THE RISKS, AND THAT THE OMRON PRODUCTS ARE PROPERLY RATED AND INSTALLED FOR THE INTENDED USE WITHIN THE OVERALL EQUIPMENT OR SYSTEM. PROGRAMMABLE PRODUCTS OMRON shall not be responsible for the user's programming of a programmable product, or any consequence thereof. Disclaimers CHANGE IN SPECIFICATIONS Product specifications and accessories may be changed at any time based on improvements and other reasons. It is our practice to change model numbers when published ratings or features are changed, or when significant construction changes are made. However, some specifications of the products may be changed without any notice. When in doubt, special model numbers may be assigned to fix or establish key specifications for your application on your request. Please consult with your OMRON representative at any time to confirm actual specifications of purchased products. DIMENSIONS AND WEIGHTS Dimensions and weights are nominal and are not to be used for manufacturing purposes, even when tolerances are shown. PERFORMANCE DATA Performance data given in this manual is provided as a guide for the user in determining suitability and does not constitute a warranty. It may represent the result of OMRON's test conditions, and the users must correlate it to actual application requirements. Actual performance is subject to the OMRON Warranty and Limitations of Liability. ERRORS AND OMISSIONS The information in this manual has been carefully checked and is believed to be accurate; however, no responsibility is assumed for clerical, typographical, or proofreading errors, or omissions. Table of Contents Chapter 1. Introduction. . . . . . . . . . . . . . . . . . . . . . . . . . . . . . . . . . . . 1-1 1-2 1-3 1-4 1-1 Parameter Unit Functions . . . . . . . . . . . . . . . . . . . . . . . . . . . . . . . . . . . . . . . . . . . . . . . . . . . . Connecting the Parameter Unit. . . . . . . . . . . . . . . . . . . . . . . . . . . . . . . . . . . . . . . . . . . . . . . . Nomenclature and Functions . . . . . . . . . . . . . . . . . . . . . . . . . . . . . . . . . . . . . . . . . . . . . . . . . Modes and Switching Methods . . . . . . . . . . . . . . . . . . . . . . . . . . . . . . . . . . . . . . . . . . . . . . . 1-2 1-3 1-4 1-5 Chapter 2. Parameter/Monitor Mode . . . . . . . . . . . . . . . . . . . . . . . . 2-1 2-1 Monitoring Items in Parameter/Monitor Mode . . . . . . . . . . . . . . . . . . . . . . . . . . . . . . . . . . . 2-2 Setting Parameters in Parameter/Monitor Mode . . . . . . . . . . . . . . . . . . . . . . . . . . . . . . . . . . 2-2 2-10 Chapter 3. Function Mode . . . . . . . . . . . . . . . . . . . . . . . . . . . . . . . . . 3-1 3-1 Functions . . . . . . . . . . . . . . . . . . . . . . . . . . . . . . . . . . . . . . . . . . . . . . . . . . . . . . . . . . . . . . . . 3-2 Function Mode Operations . . . . . . . . . . . . . . . . . . . . . . . . . . . . . . . . . . . . . . . . . . . . . . . . . . . 3-3 Function Details and Operation . . . . . . . . . . . . . . . . . . . . . . . . . . . . . . . . . . . . . . . . . . . . . . . 3-2 3-3 3-5 Chapter 4. Parameter Copy Mode . . . . . . . . . . . . . . . . . . . . . . . . . . . 4-1 4-1 4-2 4-3 4-4 4-5 Operations in Parameter Copy Mode . . . . . . . . . . . . . . . . . . . . . . . . . . . . . . . . . . . . . . . . . . . Parameter Reading (DRIVER to PR) . . . . . . . . . . . . . . . . . . . . . . . . . . . . . . . . . . . . . . . . . . . Parameter Writing (PR to DRIVER) . . . . . . . . . . . . . . . . . . . . . . . . . . . . . . . . . . . . . . . . . . . Parameter Verification (Verify). . . . . . . . . . . . . . . . . . . . . . . . . . . . . . . . . . . . . . . . . . . . . . . . Parameter Block Delete (LIST) . . . . . . . . . . . . . . . . . . . . . . . . . . . . . . . . . . . . . . . . . . . . . . . 4-2 4-4 4-7 4-10 4-13 Chapter 5. Alarm Display Mode. . . . . . . . . . . . . . . . . . . . . . . . . . . . . 5-1 5-1 Operations in Alarm Display Mode . . . . . . . . . . . . . . . . . . . . . . . . . . . . . . . . . . . . . . . . . . . . 5-2 Alarms . . . . . . . . . . . . . . . . . . . . . . . . . . . . . . . . . . . . . . . . . . . . . . . . . . . . . . . . . . . . . . . . . . 5-3 Error Diagnosis Using Alarm Display . . . . . . . . . . . . . . . . . . . . . . . . . . . . . . . . . . . . . . . . . . 5-2 5-4 5-6 Chapter 6. Appendix . . . . . . . . . . . . . . . . . . . . . . . . . . . . . . . . . . . . . . 6-1 6-1 Parameter Setting Tables . . . . . . . . . . . . . . . . . . . . . . . . . . . . . . . . . . . . . . . . . . . . . . . . . . . . 6-2 Revision History . . . . . . . . . . . . . . . . . . . . . . . . . . . . . . . . . . . . . . . . . . R-1 Chapter 1 Introduction 1-1 1-2 1-3 1-4 Parameter Unit Functions Connecting the Parameter Unit Nomenclature and Functions Modes and Switching Methods Introduction 1-1 Chapter 1 Parameter Unit Functions The SMARTSTEP A-series R7A-PR02A Parameter Unit displays and sets the user parameters stored inside the Servo Driver. The Parameter Unit and Servo Driver are connected through the CN3 communications connector. ■ Display Area The Parameter Unit has a 17-character × 5-line LCD display area. There are also 5 indicators, showing the base block status, positioning completion status, and other information. ■ Editing User Parameters The user parameters (Pn@@@) inside the Servo Driver can be displayed and set. ■ Copying Parameters between Servo Drivers The Parameter Unit enables the following operations: Reading parameters from the Servo Driver to the Parameter Unit, writing parameters from the Parameter Unit to the Servo Driver, comparing parameters between the Servo Driver and the Parameter Unit, and deleting blocks of parameters from the Parameter Unit. Up to 7 blocks of user parameters can be saved to the EEPROM inside the Parameter Unit. With these functions, parameters can be copied between Servo Drivers. ■ Monitoring (Un@@@) The following items can be monitored: Speed feedback, torque commands, number of pulses from phase Z, electrical angle, I/O signal status, command pulse speed, position deviation (deviation counter), cumulative load rate, regenerative load rate, dynamic braking resistance load rate, input pulse counter, and feedback pulse counter. ■ Function Execution (Fn@@@) The following functions can be executed: Displaying the alarm history, clearing alarm history data, jogging, Servomotor origin searches, analog monitor output adjustment, and adjustment of the Servomotor current detection offset. ■ Displaying/Resetting Alarms If an alarm occurs, an alarm history (containing up to the 10 most recent alarms) will be displayed. The alarm can be reset by pressing the RESET Key (there are also alarms which can only be reset by turning OFF and ON the power supply). ■ Saving the Current Screen The Parameter/Monitor Mode, jog operation, or origin search screen can be saved by pressing the WRITE Key while the desired screen is being displayed. The screen will be displayed the next time the power supply is turned ON. 1-2 Chapter 1 Introduction 1-2 ■ Connecting the Parameter Unit Connecting the Parameter Unit Make sure the power supply is turned OFF and then connect the Parameter Unit to the CN3 communications connector on the Servo Driver. Do not connect or disconnect the Parameter Unit while the power supply is ON. R7A-PR02A Parameter Unit B.B R7D-AP@ Servo Driver INP VCMP TGON REF POWER R7A–PR02A PARAMETER UNIT RESET SCROLL J OG OG DATA RUN READ DRIVER MODE/SET WRITE PR PR DRIVER Connect the Parameter Unit securely to the Servo Driver’s communications connector. 1-3 Chapter 1 Introduction 1-3 Nomenclature and Functions B.B INP VCMP TGON REF POWER Indicators (red LEDs × 5) Display area (LCD display: 17 characters × 5 lines) Operation keys ■ R7A–PR02A PARAMETER UNIT RESET SCROLL MODE/SET JOG JOG DATA RUN Indicators Indicator name B.B INP/VCMP TGON READ DRIVER ■ WRITE PR PR Function Lit during baseblock status (no current supplied to the Servomotor). Not lit when baseblock is released. Lit when positioning has been completed. Not lit when positioning has not been completed. Lit during Servomotor rotation. Not lit when the Servomotor is stopped. REF Lit when command pulses have been input. Not lit when no command pulse has been input. POWER Lit when the main circuit power supply is ON. Not lit when the main circuit power supply is OFF. DRIVER Operation Keys Appearance RESET Name RESET Key Main Function Resets the alarm. (If the cause of the alarm has not been removed, the alarm cannot be reset.) MODE/SET Key Changes the Parameter Unit Display Mode. MODE/SET DATA Key SCROLL Key Changes the cursor position during parameter setting (between the parameter number and setting), moves to the selected function’s execution screen in Function Mode, and moves to the selected menu’s execution screen in Parameter Copy Mode. Moves the cursor up in Parameter/Monitor Mode. JOG/RUN Key Turns the servo ON and OFF during jog operation. Left and Right Cursor Keys Moves the cursor left or right during Parameter/Monitor Mode. Up and Down Cursor Keys Increments or decrements the parameter number, setting data, monitor number, and function number; puts the Servomotor in forward run or reverse run during jog operation; and is used for selecting from menus during Copy Mode. In Parameter Copy Mode, reads parameters if parameter reading from the Servo Driver has been selected, or releases the lock if parameter lock releasing has been selected. DATA SCROLL JOG RUN READ DRIVER PR WRITE PR 1-4 DRIVER READ Key or DRIVER → PR Key WRITE Key or PR → DRIVER Key In Parameter Copy Mode, writes parameters if parameter writing to the Servo Driver has been selected, or compares parameters if parameter verifying has been selected. In Parameter/Monitor Mode, saves the display screen when a jog operation screen or origin search screen is displayed. Chapter 1 Introduction 1-4 ■ Modes and Switching Methods Modes The Parameter Unit has the following four display modes. Mode Parameter/ Monitor Mode Function Mode Parameter Copy Mode Alarm Display Mode Display example BB -PRM/MONUn000= 00000r/min Un002= 00000% Un008= 00000pulse Un00D=00000000 BB Fn012 Fn000 Fn001 Fn002 -FUNCTION- BB 1:DRIVER~PR 2:PR~DRIVER 3:Verify 4:LIST A.C3 0:A.C3 1:A.51 2:A.-3:A.-- -COPY- -ALARM- Function Displays monitor items (Un@@@), and displays and sets user parameters (Pn@@@). Executes functions (Fn@@@). (Functions are as follows: Alarm history display, rigidity selection, jog operation, Servomotor origin search, user parameter initialization, alarm history clear, online autotune storage, manual monitor output offset adjustment, analog monitor output scaling, automatic Servomotor current detection offset adjustment, password setting, and version check). Reads parameters (Servo Driver → Parameter Unit), writes parameters (Parameter Unit → Servo Driver), compares parameters (Parameter Unit ↔ Servo Driver), and releases parameter lock. Displays an alarm history (up to the 10 most recent alarms). Note Abbreviations for each mode are displayed in the upper right corner of the display screen. The Servo Driver status is also displayed in the upper left corner. BB -PRM/MONUn000= 00000r/min Un002= 00000% Un008= 00000pulse Un00D=00000000 Mode -PRM/MON-: Parameter/Monitor Mode -FUNCTION-: Function Mode -COPY-: Parameter Copy Mode -ALARM-: Alarm Display Mode Status BB: Baseblock status RUN: Current supplied to the Servomotor A.**: Alarm has occurred. (** is the alarm code) NO_OP: Operating error 1-5 Chapter 1 Introduction ■ Changing the Mode When the Parameter Unit is connected to the Servo Driver and the Servo Driver’s power supply is turned ON, the initializing screen and then the Parameter/Monitor Mode will be displayed. The mode can be switched by pressing the MODE/SET Key. If an alarm occurs, the mode will automatically change to the Alarm Display Mode. Power supply ON Initializing Screen Displayed for approx. 2 seconds. ▲ File list loading Please wait.... ▲ Parameter/Monitor Mode ▲ BB -PRM/MONUn000= 00000r/min Un002= 00000% Un008= 00000pulse Un00D=00000000 MODE/SET Function Mode ▲ BB Fn012 Fn000 Fn001 Fn002 -FUNCTION- MODE/SET Parameter Copy Mode ▲ BB 1:DRIVER~PR 2:PR~DRIVER 3:Verify 4:LIST -COPY- MODE/SET ▲ A.C3 0:A.C3 1:A.51 2:A.-3:A.-- 1-6 -ALARM- Alarm Display Mode If an alarm occurs, the mode will automatically change to the Alarm Display Mode. Chapter 1 Introduction Other Alarm Displays The following communications errors will be displayed if an error occurs in communications between the Servo Driver and the Parameter Unit. If one of these is displayed, turn the power supply OFF and ON. If communications still do not return to normal, replace the Parameter Unit or the Servo Driver. CPF00 CPF01 COM-ERR (OP&SV) COM-ERR (OP&SV) 1-7 Chapter 2 Parameter/Monitor Mode 2-1 2-2 Monitoring Items in Parameter/Monitor Mode Setting Parameters in Parameter/Monitor Mode Chapter 2 Parameter/Monitor Mode 2-1 Monitoring Items in Parameter/Monitor Mode This section lists monitor items and describes monitor item display operations in Parameter/Monitor Mode. 2-1-1 Monitor Items Monitor No. Un000 Un002 Monitor item Speed feedback Torque command Un003 Un004 Un005 Number of pulses from phase Z Electrical angle Input signal monitor Un006 Output signal monitor Un007 Un008 Command pulse speed display Position deviation Un009 Cumulative load ratio Un00A Regeneration load ratio Un00B Dynamic brake resistance load ratio Un00C Input pulse counter Un00D Feedback pulse counter Unit r/min. % Explanation Displays actual rotation speed of Servomotor. Displays command values to current loop (rated torque = 100%). Pulses Displays rotation position from phase Z (4× calculation). Degrees Displays the electrical angle of the Servomotor. --Displays the input status of the control input signal (CN1) (See note 1). --Displays the output status of the control output signal (CN1) (See note 2). r/min. Calculates and displays command pulse frequency in r/min. Command Displays number of residual pulses in deviation units counter in “command” units (input pulse standard). Note: Displayed in “pulse” units on the Parameter Unit. % Displays effective torque (rated torque = 100%, 10-s cycle). % Displays regeneration absorption current due to regeneration resistance (calculates internal resistance capacity or Pn600 setting as 100% in 10-s cycles). % Displays current consumption during dynamic brake operation (calculates tolerance current consumption as 100% in 10-s cycles). Command Counts and displays input pulses (hexadecimal 8units digit display). Counts and displays feedback pulse (4× calculaPulses tion, hexadecimal 8-digit display). Note 1. The input signal monitor (Un005) display is shown below. The upper level indicates OFF status, and the lower level indicates ON status. All undefined digits are displayed on the upper level (OFF). Un 005 = RUN (operation command) input Undefined RESET (alarm cancel) input Undefined 2-2 Chapter 2 Parameter/Monitor Mode Note 2. The output signal monitor (Un006) display is shown below. The upper level indicates OFF status, and the lower level indicates ON status. All undefined digits are displayed on the upper level (OFF). Un 006 = INP (positioning completed) output BKIR (brake interlock) output Undefined 2-1-2 Monitor Item Display Operations ■ Display Example BB -PRM/MONUn000= 00000r/min Un002= 00000% Un008= 00000pulse Un00D=00000000 Shows that the Un000 (speed feedback) is 0 r/min. • Four items (consisting of monitor items and parameters) can be displayed on the Parameter/Monitor Mode display. • The four items in the display example above are the default display items. To change the default display items, select the items for default display, and press the WRITE Key to save the currently displayed screen as the default. This will enable default display of the selected items the next time the power supply is turned ON. Note In this manual, the underlines in the display examples, e.g., under the last digit of Un000 above, indicate flashing digits or letters. There are no underlines on the real screen. The flashing position is called the cursor position. 2-3 Parameter/Monitor Mode ■ ● Chapter 2 Operation Key Functions Overview Resets the alarm. (If the cause of the alarm has not been removed, the alarm cannot be reset.) Changes to the Function Mode. RESET MODE/SET Not used during monitor displays. This key is used to change parameter settings. Moves the cursor up. DATA SCROLL Not used. JOG RUN Moves the cursor left or right. Increments or decrements the monitor number. Not used. READ DRIVER PR WRITE PR ● Saves the current display screen. DRIVER Details Keys • Pressing the Up and Down Keys changes the monitor number the accompanying data values. Speed feedback Un000= 00000r/min Torque command Un002= 00000% Number of pulses from phase Z Un003=00000 pulse Electrical angle Un004=00090 deg Input signal monitor Un005= Feedback pulse counter Un00D=00000000 2-4 Chapter 2 Parameter/Monitor Mode Keys • Pressing the Left and Right Keys moves the cursor as follows: Un000= Un000= Un000= Un000= Un000= Note Generally speaking, only the rightmost digit of the monitor number changes, so these keys are not often used for monitor number operations. (They are used for displaying and setting parameters.) 2-5 Parameter/Monitor Mode SCROLL Chapter 2 Key • Pressing the SCROLL Key moves the cursor as follows: BB -PRM/MONUn000= 00000r/min Un002= 00000% Un008= 00000pulse Un00D=00000000 SCROLL BB -PRM/MONUn000= 00000r/min Un002= 00000% Un008= 00000pulse Un00D=00000000 SCROLL BB -PRM/MONUn000= 00000r/min Un002= 00000% Un008= 00000pulse Un00D=00000000 SCROLL BB -PRM/MONUn000= 00000r/min Un002= 00000% Un008= 00000pulse Un00D=00000000 SCROLL BB -PRM/MONUn000= 00000r/min Un002= 00000% Un008= 00000pulse Un00D=00000000 Note 1. Pressing the SCROLL Key moves the cursor to the line above. If the SCROLL Key is pressed when the cursor is on the top line, the cursor moves to the bottom line. Note 2. The SCROLL Key is also used to select the display position of the Monitor Items and Parameters for default display and other settings. 2-6 Parameter/Monitor Mode WRITE PR DRIVER Chapter 2 Key • Pressing the WRITE Key enables saving the current screen. • The saved screen will be displayed the next time the power supply is turned ON. BB -PRM/MONUn000= 00000r/min Un002= 00000% Un005= Un006= WRITE PR DRIVER During saving, the Key’s red indicator will flash. BB -PRM/MONUn000= 00000r/min Un002= 00000% Un005= Un006= Note Do not turn OFF the Servo Driver control power supply during the saving process. Doing so will prevent the screen from being saved. If the screen has not been saved successfully, the previous default setting will be used, but no alarm will occur. 2-7 Chapter 2 Parameter/Monitor Mode ■ Operating Example The following example describes how to first display and then save a screen with the first line = Un000 (speed feedback), the second line = Un002 (torque command), the third line = Un005 (input signal monitor), and the fourth line = Un006 (output signal monitor). BB -PRM/MONUn000= 00000r/min Un002= 00000% Un005= Un006= Operation keys MODE/SET SCROLL Speed feedback Torque command Input signal monitor Output signal monitor Display example BB -PRM/MONUn000= 00000r/min Un002= 00000% Un008= 00000pulse Un00D=00000000 BB -PRM/MONUn000= 00000r/min Un002= 00000% Un008= 00000pulse Un00D=00000000 BB -PRM/MONUn000= 00000r/min Un002= 00000% Un008= 00000pulse Un006= SCROLL 2-8 BB -PRM/MONUn000= 00000r/min Un002= 00000% Un008= 00000pulse Un006= Explanation Press the MODE/SET Key to display Parameter/Monitor Mode. Press the SCROLL Key once to move the cursor to the bottom line. Press the Up and Down Keys until Un006 (output signal monitor) is displayed. Press the SCROLL Key once to move the cursor up one line. Chapter 2 Parameter/Monitor Mode Operation keys Display example BB -PRM/MONUn000= 00000r/min Un002= 00000% Un005= Un006= WRITE PR DRIVER BB -PRM/MONUn000= 00000r/min Un002= 00000% Un005= Un006= Explanation Press the Up and Down Keys until Un005 (input signal monitor) is displayed. The desired screen is now displayed. Press the WRITE Key. The key’s indicator will flash while the screen is being saved. Note: Do not turn OFF the Servo Driver control power supply during the saving process. 2-9 Chapter 2 Parameter/Monitor Mode 2-2 Setting Parameters in Parameter/Monitor Mode This section describes parameter display and setting methods in Parameter/Monitor Mode. Note: For parameter details, refer to the User’s Manual (Cat. No. I533). 2-2-1 Parameter Items • The parameters for which each digit number must be set separately are given with the digit number added to the parameter number. For example, Pn001.0 (i.e., digit 0 of parameter Pn001). • The default setting for parameters set using 5 digits are given in the table without leading zeros (e.g., if the default setting is 00080, 80 is given in the table). Parameter No. Parameter name Pn000 Basic switches 1 Pn001 (See note 1.) Description for parameters set with 5 digits Digit No. Basic switches 2 0 Name Reverse rotation mode Setting Default Unit Setting range Description for parameters with individually set digits 0 CCW direction is taken for positive command. 1 CW direction is taken for positive command. 1 Control mode selection 1 Position control by pulse train command 2 Not used. 0 --- 3 Not used. 0 --- 0 Stop selection if an alarm occurs when servo is OFF 0 Servomotor stopped by dynamic brake. 1 Servomotor stopped by dynamic brake. Dynamic brake released after Servomotor stops. 2 Servomotor stopped with free run. 1 Not used. 0 --- 2 Not used. 0 --- 3 Not used. 1 --- Speed loop response adjustment Restart? 0010 – – Yes 1002 – – Yes – Pn100 Speed loop gain 80 Hz 1 to 2000 Pn101 Speed loop inte- Speed loop integral time constant gral time constant 2000 ×0.01 ms 15 to 51200 – Pn102 Position loop gain Adjusts position loop responsiveness. 40 1/s 1 to 2000 – Pn103 Inertia ratio The ratio between the machine system inertia and the Servomotor rotor inertia 300 % 0 to 10000 – Pn109 Feed-forward amount Position control feed-forward compensation 0 % 0 to 100 – Pn10A Feed-forward command filter The position control feed-forward command filter 0 ×0.01 ms 0 to 6400 – Pn110 (See note 1.) Online autotuning 0 setting 0012 – – Yes (The power supply does not need to be restarted. for Pn110.2.) 0 Autotunes initial operations only after power is turned ON. 1 Always autotunes. 2 No autotuning 1 Not used. 1 --- 2 Adhesive friction compensation selection 0 Friction compensation: OFF 1 Friction compensation: Rated torque ratio small 2 Friction compensation: Rated torque ratio large 0 --- 3 2-10 Online autotuning selection Not used. Chapter 2 Parameter/Monitor Mode Parameter Parameter name No. Pn200 (See note 2.) Position control setting 1 Description for parameters set with 5 digits Digit No. 0 Name Default Unit Setting range Description for parameters with individually set digits – Yes Electronic gear The pulse rate for the command pulses and Servo Servomotor travel dis- 4 ratio G1 (numera- tance tor) 0.01 ≤ G1/G2 ≤ 100 Electronic gear 1 ratio G2 (denominator) – 1 to 65535 Yes – 1 to 65535 Yes Pn204 Position command filter time constant 1 (primary filter) Soft start setting for command pulses (Soft start characteristics are for the primary filter.) 0 ×0.01 ms 0 to 6400 – Pn207 Position control setting 2 0 0000 – – Yes 0 ×0.01 ms 0 to 6400 Yes 2 3 Pn202 (See note 2.) Pn203 (See note 2.) 1 to 3 Pn208 Deviation counter reset Deviation counter reset for alarms and when servo is turned OFF Not used. 0 Feed pulse forward and reverse signal, positive logic 1 Forward pulse and reverse pulse, positive logic 2 90° phase difference (phase A/ B) signal (x1), positive logic 3 90° phase difference (phase A/ B) signal (x2), positive logic 4 90° phase difference (phase A/ B) signal (x4), positive logic 5 Feed pulse forward and reverse signal, negative logic 6 Forward pulse and reverse pulse, negative logic 7 90° phase difference (phase A/ B) signal (x1), negative logic 8 90° phase difference (phase A/ B) signal (x2), negative logic 9 90° phase difference (phase A/ B) signal (x4), negative logic 0 Signal high level 1 Rising edge (low to high) 2 Signal low level 3 Falling signal (high to low) 0 Deviation counter reset when an alarm occurs and when Servomotor is OFF. 1 Deviation counter not reset when an alarm occurs nor when Servomotor is OFF. 2 Deviation counter reset only when an alarm occurs. 1 --- Selects position command filter. 0 Primary filter (Pn204) 1 Linear acceleration and deceleration (Pn208) Not used. 0 --- 1011 Restart? – 1 Command pulse mode Setting Position command filter time constant 2 (Linear acceleration and deceleration) Soft start setting for command pulses (Soft start characteristics are for the linear acceleration and deceleration.) Pn304 Jog speed Rotation speed during jog operation 500 r/min 0 to 10000 – Pn401 Torque command filter time constant The constant when filtering the internal torque command 40 ×0.01 ms 0 to 65535 – Pn402 Forward torque limit Forward rotation output torque limit (rated torque ratio) 350 % 0 to 800 – Pn403 Reverse torque limit Reverse rotation output torque limit (rated torque ratio) 350 % 0 to 800 – Pn500 Positioning completed range The range of positioning completed output (INP) 3 Command units 0 to 250 – Pn505 Deviation counter overflow level The detection level for a deviation counter overflow alarm 1024 ×256 command units 1 to 32767 – Pn600 Regeneration resistor capacity Setting for regeneration resistance load ratio monitoring calculations Note: If using an External Regeneration Resistor, set the regeneration capacity for when the temperature rises above 120°C. If not using an External Regeneration Resistor, set Pn600 to 0. 0 ×10 W From 0 (Varies by Unit.) – 2-11 Chapter 2 Parameter/Monitor Mode Note 1. Pn001.0 and Pn110.0 are enabled when function switch 6 on the Servo Driver’s front panel is turned ON to enable parameter setting. When function switch 6 is OFF, function switch 2 (dynamic brake setting) and function switch 1 (online autotuning) are enabled. Note 2. Pn200.0, Pn202 and Pn203 are enabled when function switch 6 on the Servo Driver’s front panel is turned ON to enable parameter setting. When function switch 6 is OFF, function switch is OFF, function switch 3 (command pulse input setting) and function switches 4 and 5 (resolution setting) are enabled. 2-2-2 Parameter Display and Setting ■ Display Example • In Parameter/Monitor Mode, pressing the Left or Right Key will move the cursor to Un, and pressing the Up or Down Key will switch “Un” to “Pn” and display the parameter. BB -PRM/MONUn000= 00000r/min Un002= 00000% Un008= 00000pulse Un00D=00000000 , BB -PRM/MONUn000= 00000r/min Un002= 00000% Un008= 00000pulse Un00D=00000000 ( or ) BB -PRM/MONPn000=0010 Un002= 00000% Un008= 00000pulse Un00D=00000000 This shows that the parameter number Pn000 (Basic switches 1) is set to 0010. • Four items (made up of monitor items and parameters) can be displayed on the Parameter/Monitor Mode display. • The four items in the display example above are the default display items. To change the default display items, select the items for default display, and press the WRITE Key to save the current screen to enable default display of the selected items the next time the power supply is turned ON. 2-12 Chapter 2 Parameter/Monitor Mode ■ ● Operation Key Functions Overview Resets the alarm. (If the cause of the alarm has not been removed, the alarm cannot be reset.) Changes to the Function Mode. RESET MODE/SET Changes the cursor between the parameter number and the setting data. Writes the setting data to the EEPROM inside the Servo Driver. Moves the cursor up. If the cursor is at the setting data, it will move on the setting data side. Not used. DATA SCROLL JOG RUN Moves the cursor left or right. Switches between Un and Pn. Increments or decrements the parameter number or the setting data. Not used. READ DRIVER PR WRITE PR ● Saves the current display screen. DRIVER Details Keys • When the cursor is on the left side (the number side), pressing the Left and Right Keys moves the cursor as follows: Pn000= Pn000= Pn000= Pn000= Pn000= • When the cursor is on the right side (the setting data side), pressing the Left and Right Keys moves the cursor as follows: Pn000=0010 =0010 =0010 =0010 =0010 Keys • When the cursor is at Un or Pn on the left side (the number side), pressing the Up and Down Keys switches between monitor number and parameter number. , Un000= 00000r/min Pn000=0010 2-13 Parameter/Monitor Mode Chapter 2 • When the cursor is at a digit on the left side (the number side), pressing the Up and Down Keys changes the parameter number and the accompanying setting data. Basic switch 1 Pn000=0010 Basic switch 2 Pn001=1002 Speed loop gain Pn100=00015 Pn101=04000 Regeneration resistor capacity Pn600=00000 ... Speed loop integral time constant • When the cursor is on the right side (the setting data side), pressing the Up and Down Keys increments or decrements the numeric value of the digit at the cursor. Pn000=0010 DATA Pn000=0011 Key • Pressing the DATA Key switches the cursor between the parameter number and the setting data. DATA Pn000=0010 Pn000=0010 DATA • By pressing the DATA Key once more after changing the setting data, the setting data will be written to the EEPROM inside the Servo Driver. 2-14 Parameter/Monitor Mode SCROLL Chapter 2 Key • Pressing the SCROLL Key moves the cursor as follows: BB -PRM/MONPn000=0010 Un002= 00000% Un008= 00000pulse Un00D=00000000 SCROLL BB -PRM/MONPn000=0010 Un002= 00000% Un008= 00000pulse Un00D=00000000 SCROLL BB -PRM/MONPn000=0010 Un002= 00000% Un008= 00000pulse Un00D=00000000 SCROLL BB -PRM/MONPn000=0010 Un002= 00000% Un008= 00000pulse Un00D=00000000 SCROLL BB -PRM/MONPn000=0010 Un002= 00000% Un008= 00000pulse Un00D=00000000 Note 1. Pressing the SCROLL Key moves the cursor up one line. If the SCROLL Key is pressed when the cursor is on the top line, the cursor moves to the bottom line. Note 2. The SCROLL Key is used to select the display position of the Monitor Items and Parameters for default display and other settings. 2-15 Chapter 2 Parameter/Monitor Mode WRITE PR DRIVER Key • Pressing the WRITE Key enables saving the current screen. • The saved screen will be displayed the next time the power supply is turned ON. Note Do not turn OFF the Servo Driver control power supply during the saving process. Doing so will prevent the screen from being saved. If the screen has not been saved successfully, the previous default setting will be used, but no alarm will occur. ■ Operation Example 1: Setting a Parameter Requiring Individual Digit Settings Basic switches 1 and 2 (Pn000 and Pn001), online autotuning settings (Pn110), and position control settings 1 and 2 (Pn200 and Pn207) require individual digits to be set. The following example describes how to set the deviation counter reset (Pn200.1) in position control settings 1 (Pn200) to 0 (resetting on signal high level). Operation keys MODE/SET Display example BB -PRM/MONUn000= 00000r/min Un002= 00000% Un008= 00000pulse Un00D=00000000 BB -PRM/MONUn000= 00000r/min Un002= 00000% Un008= 00000pulse Un00D=00000000 BB -PRM/MONPn000=0010 Un002= 00000% Un008= 00000pulse Un00D=00000000 BB -PRM/MONPn000=1011 Un002= 00000% Un008= 00000pulse Un00D=00000000 2-16 Explanation Press the MODE/SET Key to display Parameter/Monitor Mode. Press the Left or Right Key until the cursor is at Un. Press either the Up or Down Key to switch Un to Pn. Press the Right Key once to move the cursor to the right side of Pn. Chapter 2 Parameter/Monitor Mode Operation keys Display example BB -PRM/MONPn200=1011 Un002= 00000% Un008= 00000pulse Un00D=00000000 DATA BB -PRM/MONPn200=1011 Un002= 00000% Un008= 00000pulse Un00D=00000000 BB -PRM/MONPn200=1011 Un002= 00000% Un008= 00000pulse Un00D=00000000 BB -PRM/MONPn200=1001 Un002= 00000% Un008= 00000pulse Un00D=00000000 DATA BB -PRM/MONPn200=1001 Un002= 00000% Un008= 00000pulse Un00D=00000000 Explanation Press the Up Key twice to display Pn200. Press the DATA Key. The cursor will move from the parameter number side to the setting data side (to Pn200.0). Press the Left Key once to move the cursor to Pn200.1. Press the Down Key once to change the set value of Pn200.1 to 0. Press the DATA Key to write the parameter set value to the EEPROM inside the Servo Driver and move the cursor to the parameter number side. Note All parameters requiring individual digit settings are enabled the next time the power supply is turned ON. Even though the new setting data is written to the EEPROM inside the Servo Driver by pressing the DATA Key after the setting data is changed, the set values will be enabled only after the power supply is turned OFF, then ON again. For Pn110.2 (adhesive friction compensation selection in online autotuning settings), however, the power supply does not need to be cycled. The setting will be enabled as soon as the setting data is changed. 2-17 Chapter 2 Parameter/Monitor Mode ■ Operation Example 2: Setting a Parameter to 5 Digit Places The following example describes how to set the jog speed (Pn304) to 1000 (r/min). Operation keys MODE/SET Display example BB -PRM/MONUn000= 00000r/min Un002= 00000% Un008= 00000pulse Un00D=00000000 BB -PRM/MONUn000= 00000r/min Un002= 00000% Un008= 00000pulse Un00D=00000000 BB -PRM/MONPn000=0010 Un002= 00000% Un008= 00000pulse Un00D=00000000 BB -PRM/MONPn000=1011 Un002= 00000% Un008= 00000pulse Un00D=00000000 BB -PRM/MONPn304=00500 Un002= 00000% Un008= 00000pulse Un00D=00000000 DATA 2-18 BB -PRM/MONPn304=00500 Un002= 00000% Un008= 00000pulse Un00D=00000000 Explanation Press the MODE/SET Key to display Parameter/Monitor Mode. Press the Left or Right Key until the cursor is at Un. Press either the Up or Down Key to change Un to Pn. Press the Right Key once to move the cursor to Pn on the right side. Press the Up Key three times to display Pn304. Note In this example, Pn304 can be displayed by pressing the Up Key three times. In general, however, the Left and Right Keys are used to specify the operation line, and the Up and Down Keys are used to set the digit value. Press the DATA Key. The cursor will move from the parameter number to the setting data (to the “1st digit” of Pn304). Chapter 2 Parameter/Monitor Mode Operation keys Display example BB -PRM/MONPn304=00500 Un002= 00000% Un008= 00000pulse Un00D=00000000 BB -PRM/MONPn304=01000 Un002= 00000% Un008= 00000pulse Un00D=00000000 DATA BB -PRM/MONPn304=01000 Un002= 00000% Un008= 00000pulse Un00D=00000000 Explanation Press the Left Key twice to move the cursor to the hundreds column of Pn304. Press the Up Key five times to change the setting data to 1000. Press the DATA Key to write the parameter set value to the EEPROM inside the Servo Driver and move the cursor to the parameter number. Note Of the parameters set to 5 digits, Pn202 (electronic gear ratio G1), Pn203 (electronic gear ratio G2), and Pn208 (Position command filter time constant 2) are enabled only after the power supply is cycled. Their settings will be enabled the next time the power supply is turned ON. ■ Timing of Parameter Enabling Except for user parameters requiring the power supply to be cycled, parameters are enabled as soon as the settings are changed. For example, even while changing the gain using the Up and Down Keys, the results of this change are reflected during the setting operation in real-time. Changes are not, however, written to the EEPROM inside the Servo Driver until the DATA Key is pressed after changing the settings. Data will not be written to EEPROM if the DATA Key is not pressed before performing other operations. For example, data will not be written to EEPROM if the DATA Key is not pressed before pressing the MODE/SET Key to move to another screen (e.g., Function Mode), before pressing the SCROLL Key to move the cursor to the setting data, or before performing other operations. 2-19 Chapter 2 Parameter/Monitor Mode ■ Gain-related Parameters If the gain adjustment rotary switch on the Servo Driver’s front panel is set to other than 0, the gain set by the rotary switch’s position (refer to the following table) will be used in the Parameter Unit. Gain adjustment rotary switch position 0 1 2 3 4 5 6 7 8 9 A to F Position loop gain (s-1) (Pn102) Speed loop gain (Hz) (Pn100) Speed loop integral time constant (× 0.01 ms) (Pn101) The values set in the parameter area are used. 15 15 4000 20 20 3500 30 30 3000 40 40 2000 60 60 1500 85 85 1000 120 120 800 160 160 600 200 200 500 250 250 400 Torque command filter time constant (× 0.01 ms) (Pn401) 250 200 150 100 70 50 30 20 15 10 If the position of the gain adjustment rotary switch is changed, the values in the above table will be used in the Parameter Unit. These values cannot be changed from the Parameter Unit. To set these values from the Parameter Unit, set the gain adjustment rotary switch to 0 and then set the values in the parameter area. 2-20 Chapter 3 Function Mode 3-1 3-2 3-3 Functions Function Mode Operations Function Details and Operation Chapter 3 Function Mode 3-1 Functions Function Mode is used to execute various functions (Fn@@@). ■ Functions Function No. Name Fn000 Alarm history display Fn001 Rigidity selection Fn002 Jog operation Fn003 Servomotor origin search Fn005 User parameter initialization Fn006 Fn007 Alarm history data clear Online autotuning results save Fn00C Manual analog monitor output offset adjustment Analog monitor output scaling Fn00D Fn00E Fn010 Automatic Servomotor current detection offset adjustment Manual Servomotor current detection offset adjustment Password setting Fn012 Version check Fn00F Function Remarks Displays an alarm history of up to the 10 most --recent alarms. Sets the machine rigidity. Protected. Note Only enabled if the gain adjustment rotary switch is set to 0. Rotates the Servomotor using the Parameter Protected. Unit keys. Disabled during RUN. Rotates the Servomotor using the Parameter Protected. Unit keys, detects phase Z, and stops the Ser- Disabled vomotor on phase Z. during RUN. Initializes the user parameters to their default Protected. values. Clears alarm history data. Protected. Writes the load inertia ratio determined by Protected. autotuning to Pn103 (inertia ratio). Adjusts each analog monitor output offset Protected. manually. Scales (i.e., adjusts the output voltage) of the Protected. analog monitor output. Adjusts the Servomotor current detection off- Protected. set automatically. Adjusts the Servomotor current detection off- Protected. set manually. Enables or disables changes to user parameters. Displays the Servo Driver version. Note 1. Functions indicates as “Protected” in the Remarks column cannot be executed if the password in Fn010 has been set to write-protect the system. NO_OP will be displayed if attempting to switch from the Function Mode Main Menu to a function screen. Note 2. Functions indicates as “Disabled during RUN” in the Remarks column cannot be executed if the RUN input (RUN command) is ON. NO_OP will be displayed if an attempt is made to switch from the Function Mode Main Menu to one of these function screens while the RUN input is ON. 3-2 Chapter 3 Function Mode 3-2 Function Mode Operations Pressing the MODE/SET Key in Parameter/Monitor Mode will display the Function Mode Main Menu. Select the function to be executed using the Up and Down Keys, then press the DATA Key to switch to the function screen. ■ Function Mode Main Menu Screen BB Fn012 Fn000 Fn001 Fn002 ■ ● -FUNCTIONSelected function (flashes) Operation Key Functions Overview Resets the alarm. (If the cause of the alarm has not been removed, the alarm cannot be reset.) Switches to Parameter Copy Mode. RESET MODE/SET Switches to the execution screen of the selected function. DATA Not used. SCROLL Not used. JOG RUN Not used. Selects the function. Not used. READ DRIVER PR WRITE PR Not used. DRIVER 3-3 Chapter 3 Function Mode ● Details Keys • Pressing the Up and Down Keys enables function number selection. BB Fn012 Fn000 Fn001 Fn002 -FUNCTION- BB Fn000 Fn001 Fn002 Fn003 -FUNCTION- BB Fn001 Fn002 Fn003 Fn005 -FUNCTION- ... DATA Key • Pressing the DATA Key switches to the execution screen of the selected (flashing) function. BB Fn012 Fn000 Fn001 Fn002 -FUNCTIONDATA MODE/SET BB 0:A.C3 1:A.51 2:A.-3:A.-- -ALARM- • Selecting a function that cannot be executed and pressing the DATA Key will display NO_OP. BB Fn001 Fn002 Fn003 Fn005 -FUNCTIONDATA After approx. 1 s NO_OP Fn001 Fn002 Fn003 Fn005 -FUNCTION- Note The previous screen will be displayed if an attempt is made to execute Fn002 (jog operation) when password has been set in Fn010 to write-protect the system. 3-4 Chapter 3 Function Mode 3-3 Function Details and Operation This section describes the operating methods for the execution screens of each function selected from the Function Mode Main Menu. 3-3-1 Alarm History Display (Fn000) The Servo Driver records up to the 10 most recent alarms. Their details can be checked using the alarm history display. ■ Display Example BB Fn012 Fn000 Fn001 Fn002 ■ -FUNCTIONDATA MODE/SET BB 0:A.C3 1:A.51 2:A.-3:A.-- -ALARM- Operation Key Functions ● Overview (Applicable Keys Only) RESET MODE/SET Resets the alarm. (If the cause of the alarm has not been removed, the alarm cannot be reset.) Returns to the Function Mode Main Menu. Displays past alarm details. 3-5 Chapter 3 Function Mode ● Details Key • Pressing the Up and Down Keys displays past alarm details. BB 0:A.C3 1:A.51 2:A.-3:A.-- -ALARM- BB 1:A.51 2:A.-3:A.-4:A.-- -ALARM- BB 2:A.-3:A.-4:A.-5:A.-- -ALARM- Note Note Note Note 1. “0” is the most recent alarm and “9” is the least recent. 2. Alarms CPF00 and CPF01 are Parameter Unit alarms, and are not stored in the alarm history. 3. Warnings are not stored in the alarm history. 4. Even if the same alarm occurs repeatedly, it is entered in the alarm history only as a single alarm. ... 3-3-2 Rigidity Selection (Fn001) This function manipulates the same settings as the gain adjustment rotary switch. Note Note ■ 1. Fn001 cannot be executed if the gain adjustment rotary switch is set to other than 0. 2. Fn001 cannot be executed if the password in Fn010 has been set to write-protect the system. Display Example BB Fn000 Fn001 Fn002 Fn003 3-6 -FUNCTIONDATA MODE/SET BB Machine Rigidity Settings for Online Autotuning 04 Chapter 3 Function Mode ■ ● Operation Key Functions Overview (Applicable Keys Only) RESET MODE/SET DATA ● Resets the alarm. (If the cause of the alarm has not been removed, the alarm cannot be reset.) Returns to the Function Mode Main Menu. If settings have been changed using the Up and Down Keys, pressing MODE/SET Key once will have the same effect as the DATA Key (i.e., writing the data to EEPROM). Pressing it a second time will return to the main menu. Writes the selected rigidity to EEPROM. During writing, done will be displayed in the upper right corner of the display screen (status display area). Selects the rigidity from a range of 01 to 10, as shown in the following table. The rigidity will be enabled as soon as it is changed. (However, writing to EEPROM occurs when the DATA Key or MODE/SET Key is pressed.) Details Key • Pressing the Up and Down Keys selects the rigidity, from the following 10 levels. Level Low Medium High Set value Position loop gain (s-1) (Pn102) Speed loop gain (Hz) (Pn100) Speed loop integral time constant (× 0.01 ms) (Pn101) Torque command filter time constant (× 0.01 ms) (Pn401) 01 02 03 04 15 20 30 40 15 20 30 40 4000 3500 3000 2000 250 200 150 100 05 06 07 08 09 10 60 85 120 160 200 250 60 85 120 160 200 250 1500 1000 800 600 500 400 70 50 30 20 15 10 Typical applications (mechanical systems) Articulated robots, harmonic drives, chain drives, belt drives, rack and pinion drives, etc. XY tables, orthogonal robots, general-purpose mechanical systems, etc. Ball screws (direct couplings), feeders, etc. Note 1. The servo system loop gain will increase in response to a higher switch set value, shortening positioning time. If the setting is too large, however, the machinery may vibrate. Reduce the setting if vibration is a problem. Note Note 2. When the rigidity is set, the user parameters given in the above table will change automatically. 3. If autotuning is enabled without setting the rigidity, tuning is performed using the user parameter settings (Pn102, Pn100, Pn101, and Pn401) as the target values. 3-7 Chapter 3 Function Mode BB Machine Rigidity Settings for Online Autotuning 04 BB Machine Rigidity Settings for Online Autotuning 05 BB Machine Rigidity Settings for Online Autotuning 06 ... DATA Key • Pressing the DATA Key writes the selected rigidity to EEPROM. BB Machine Rigidity Settings for Online Autotuning 06 DATA done Machine Rigidity Settings for Online Autotuning 06 After approx. 1 s BB Machine Rigidity Settings for Online Autotuning 06 3-8 Note During writing, done will be displayed in the status display area. Chapter 3 Function Mode 3-3-3 Jog Operation (Fn002) The Servomotor can be operated in forward or reverse by using the keys on the Parameter Unit. For safety reasons, only use the jog operation when the Servomotor is not loaded (i.e., when the shaft is not connected to the mechanical system). Also, to prevent the Servomotor from turning sideways, fasten the Servomotor mounting surface firmly to the machinery. Use the job operation only when the host controller’s power supply is OFF or when the host controller is not connected. Note Note ■ 1. Fn002 cannot be executed if the password in Fn010 has been set to write-protect the system. 2. Switching to the jog operation execution screen will not be possible if the RUN input (RUN command) is ON. Display Example BB Fn001 Fn002 Fn003 Fn005 -FUNCTIONDATA MODE/SET BB -JOGPn304=00500 Un000= 00000r/min Un002= 00000% Un00D=00000000 Four user parameters and monitor items can be displayed on the jog operation screen, the same as in Parameter/Monitor Mode. These user parameters can be changed if the servo is OFF. By setting the parameter or monitor numbers to be displayed and then pressing the WRITE Key, the current screen can be saved as the default screen. 3-9 Chapter 3 Function Mode ■ ● Operation Key Functions Overview (Applicable Keys Only) RESET MODE/SET SCROLL JOG RUN DATA Resets the alarm. (If the cause of the alarm has not been removed, the alarm cannot be reset.) Returns to the Function Mode Main Menu. Pressing the MODE/SET Key when the servo has been turned ON (by pressing the JOG-RUN Key) will turn OFF the servo and return to the Function Mode Main Menu. When the servo is OFF (during baseblock): Switches the editing line (in the same way as in Parameter/Monitor Mode). When the servo is ON (during RUN): No operation. Switches between servo OFF and servo ON status. “BB” is displayed in the status area when the servo is OFF; “RUN” is displayed when the servo is ON. When the servo is OFF (during baseblock): Edits the user parameters (in the same way as in Parameter/Monitor Mode). When the servo is ON (during RUN): No operation. When the servo is OFF (during baseblock): Changes the parameter number, the monitor number, or the parameter set value (in the same way as in Parameter/Monitor Mode). When the servo is ON (during RUN): Rotates the Servomotor at jog speed (Pn304) either counterclockwise (Up Key) or clockwise (Down Key). Note WRITE PR ■ 1. If Pn000.0 (reverse rotation mode) is set to 1, the rotation direction will be reverse. Note 2. If the shaft is rotating while the Up or Down Key is being pressed, and then the Key is released, the shaft will stop. When the servo is OFF (during baseblock): Moves the cursor position to the left or right (in the same way as in Parameter/Monitor Mode). When the servo is ON (during RUN): No operation. Saves the display screen. DRIVER Operation Example The following example shows how to set the Servomotor to rotate at a jog speed of 1,000 r/min. The default setting 500 r/min. Operation keys MODE/SET 3-10 Display example BB Fn012 Fn000 Fn001 Fn002 -FUNCTION- BB Fn001 Fn002 Fn003 Fn005 -FUNCTION- Explanation Press the MODE/SET Key to display the Function Mode Main Menu. Press the Down Key twice to select Fn002. Chapter 3 Function Mode Operation keys DATA DATA Display example BB -JOGPn304=00500 Un000= 00000r/min Un002= 00000% Un00D=00000000 BB -JOGPn304=00500 Un000= 00000r/min Un002= 00000% Un00D=00000000 BB -JOGPn304=01000 Un000= 00000r/min Un002= 00000% Un00D=00000000 DATA JOG RUN BB -JOGPn304=01000 Un000= 00000r/min Un002= 00000% Un00D=00000000 RUN -JOGPn304=01000 Un000= 00000r/min Un002= 00000% Un00D=00000000 RUN -JOGPn304=01000 Un000= 00000r/min Un002= 00000% Un00D=00000000 Explanation Press the DATA Key to switch the screen to the Fn002 (jog operation) execution screen. Note If, after pressing the DATA Key, the screen does not switch and NO_OP is displayed in the status display area, either the RUN input (RUN command) is ON or the password in Fn010 has been set to write-protect the system. Check and reset. Press the DATA Key to move the cursor to the setting data for Pn304 (jog speed). Using the Left, Right, Up, and Down Keys, set the jog speed to 1,000 (r/min). Press the DATA Key to fix the set value and to move the cursor to the parameter number. Press the JOG-RUN Key to change the status display to RUN and to change the Servomotor to servo ON status. Press the Up Key to rotate the Servomotor counterclockwise at a speed of 1,000 r/min. Press the Down Key to rotate the Servomotor clockwise at a speed of 1,000 r/min. 3-11 Chapter 3 Function Mode Operation keys Display example Explanation Press the JOG-RUN Key after Servomotor operation confirmation has finished to change the status display to BB and change the Servomotor to servo OFF status. BB -JOGPn304=01000 Un000= 00000r/min Un002= 00000% Un00D=00000000 JOG RUN BB Fn001 Fn002 Fn003 Fn005 MODE/SET Press the MODE/SET Key to return to the Function Mode Main Menu. -FUNCTION- 3-3-4 Servomotor Origin Search (Fn003) Parameter Unit keys can be used to rotate the Servomotor, detect phase Z, and then stop the Servomotor on phase Z. Use this function to adjust the origin position of the Servomotor shaft and mechanical system. Note Note Note ■ 1. Fn003 cannot be executed if the password in Fn010 has been set to write-protect the system. 2. Fn003 cannot be executed if the RUN input (RUN command) is ON. Turn OFF the RUN command. 3. Execute the Servomotor origin search before connecting the Servomotor shaft and mechanical system. Display Example BB Fn002 Fn003 Fn005 Fn006 -FUNCTIONDATA MODE/SET BB -Z-SearchUn000= 00000r/min Un002= 00000% Un003=00000 pulse Un00D=00000000 Four user parameters and monitor items can be displayed on the Servomotor origin search screen, the same as in Parameter/Monitor Mode. The user parameters can be changed if the servo is OFF. By setting the parameter or monitor numbers to be displayed and then pressing the WRITE Key, the current screen can be saved. ■ Operation Key Functions ● Overview (Applicable Keys Only) RESET MODE/SET 3-12 Resets the alarm. (If the cause of the alarm has not been removed, the alarm cannot be reset.) Returns to the Function Mode Main Menu. When the servo has been turned ON by pressing the JOG-RUN Key, pressing the MODE/SET Key will turn OFF the servo and return to the Function Mode Main Menu. Chapter 3 Function Mode SCROLL JOG RUN DATA When the servo is OFF (during baseblock): Switches the editing line (in the same way as in Parameter/Monitor Mode). When the servo is ON (during RUN): No operation. Switches between servo OFF and servo ON status. “BB” is displayed in the status area when the servo is OFF; “RUN” is displayed when the servo is ON. When the servo is OFF (during baseblock): Edits the user parameters (in the same way as in Parameter/Monitor Mode). When the servo is ON (during RUN): No operation. When the servo is OFF (during baseblock): Changes the parameter number, the monitor number, or the parameter set value (in the same way as in Parameter/Monitor Mode). When the servo is ON (during RUN): Rotates the Servomotor at 60 r/min either counterclockwise (Up Key) or clockwise (Down Key) and positions it on phase Z. Note WRITE PR ■ 1. If Pn000.0 (reverse rotation mode) is set to 1, the rotation direction will be reversed. Note 2. Rotates while the key is pressed, and stops when the key is released. (To stop at the phase-Z position, keep pressing the key until the motor stops.) When the servo is OFF (during baseblock): Moves the cursor position to the left or right (in the same way as in Parameter/Monitor Mode). When the servo is ON (during RUN): No operation. Saves the display screen. DRIVER Operation Example The following example shows how to set the Servomotor to rotate counterclockwise and stop it on phase Z. Operation keys MODE/SET DATA JOG RUN Display example BB Fn002 Fn003 Fn005 Fn006 -FUNCTION- BB -Z-SearchUn000= 00000r/min Un002= 00000% Un003=00774 pulse Un00D=00000000 RUN -Z-SearchUn000= 00000r/min Un002= 00000% Un003=00774 pulse Un00D=00000000 Explanation Press the MODE/SET Key to display the Function Mode Main Menu, and then press the Up and Down Keys to select Fn003. Press the DATA Key. The screen will switch to the Fn003 (jog operation) execution screen. Note If, after pressing the DATA Key, the screen does not switch and NO_OP is displayed in the status display area, either the RUN input (RUN command) is ON or the password in Fn010 has been set to write-protect the system. Check and reset. Press the JOG-RUN Key. The status display will change to RUN and the Servomotor status will change to servo ON. 3-13 Chapter 3 Function Mode Operation keys Display example Explanation Press the Up Key to rotate the Servomotor counterclockwise and stop it on phase Z. RUN -CompleteUn000= 00000r/min Un002= 00000% Un003=00000 pulse Un00D=00001D58 JOG RUN MODE/SET Note 1. Press and hold the Key until the Servomotor stops. Note 2. If the origin search is completed successfully, Complete will be displayed in the upper left corner of the screen, and the number of pulses from phase Z (Un003) will change to 0. Press the JOG-RUN Key after the Servomotor origin search has been completed. The status display will change to BB and the Servomotor status will change to servo OFF. BB -Z-SearchUn000= 00000r/min Un002= 00000% Un003=00000 pulse Un00D=00001D58 BB Fn002 Fn003 Fn005 Fn006 Press the MODE/SET Key to return to the Function Mode Main Menu. -FUNCTION- 3-3-5 User Parameter Initialization (Fn005) The user parameters can be initialized to the default settings. Note Fn005 cannot be executed if the password in Fn010 has been set to write-protect the system, or if the Servomotor is ON. ■ Display Example BB Fn003 Fn005 Fn006 Fn007 3-14 -FUNCTIONDATA MODE/SET BB Parameter Init Start :[DATA] Return:[SET] Chapter 3 Function Mode ■ Operation Key Functions ● Overview (Applicable Keys Only) RESET MODE/SET DATA ■ Resets the alarm (if the cause of the alarm has not been removed, the alarm cannot be reset). Returns to the Function Mode Main Menu. Initializes user parameters. During initialization, Parameter Init will flash, and once initialization has been completed, done will be displayed in the status display area. Operation Example Operation keys MODE/SET DATA DATA Display example BB Fn003 Fn005 Fn006 Fn007 -FUNCTION- BB Parameter Init Start :[DATA] Return:[SET] BB Parameter Init Start :[DATA] Return:[SET] Explanation Press the MODE/SET Key to display the Function Mode Main Menu, and then press the Up and Down Keys to select Fn005. Press the DATA Key. The screen will switch to the Fn005 (user parameter initialization) execution screen. Note If, after pressing the DATA Key, the screen does not switch and NO_OP is displayed in the status display area, the password in Fn010 has been set to write-protect the system. Check and reset. Press the DATA Key to initialize user parameters. During initialization, Parameter Init will flash. Once initialization has been completed the flashing will stop, and the status display changes from BB to done and then back to BB again. Note If initialization is not desired, press the MODE/ SET Key to return to the Function Mode Main Menu. Note User parameter settings will be initialized. Some user parameters, however, require the power supply to be turned OFF then turned ON again to enable their settings. 3-15 Chapter 3 Function Mode 3-3-6 Alarm History Data Clearing (Fn006) Fn006 clears the alarm history data. Note Fn006 cannot be executed if the password in Fn010 has been set to write-protect the system. ■ Display Example BB Fn005 Fn006 Fn007 Fn00C ■ ● DATA MODE/SET BB Alarm History Data Clear Start :[DATA] Return:[SET] Operation Key Functions Overview (Applicable Keys Only) RESET MODE/SET DATA ■ -FUNCTION- Resets the alarm. (If the cause of the alarm has not been removed, the alarm cannot be reset.) Returns to the Function Mode Main Menu. Clears alarm history data. During clearing, done will be displayed in the status display area. Operation Example Operation keys MODE/SET DATA DATA 3-16 Display example BB Fn005 Fn006 Fn007 Fn00C -FUNCTION- BB Alarm History Data Clear Start :[DATA] Return:[SET] done Alarm History Data Clear Start :[DATA] Return:[SET] Explanation Press the MODE/SET Key to display the Function Mode Main Menu, and then press the Up and Down Keys to select Fn006. Press the DATA Key. The screen will switch to the Fn006 (alarm history data clearing) execution screen. Note If, after pressing the DATA Key, the screen does not switch and NO_OP is displayed in the status display area, the password in Fn010 has been set to write-protect the system. Check and reset. Press the DATA Key to clear the alarm history data. During clearing, done will be displayed in the status display area. Once clearing has been completed, the status display will return to BB. Note If alarm history data clearing is not desired, press the MODE/SET Key to return to the Function Mode Main Menu. Chapter 3 Function Mode 3-3-7 Online Autotuning Results Save (Fn007) Fn007 writes to EEPROM the load inertia ratio determined with autotuning to Pn103 (inertia ratio). Note Note ■ 1. Fn007 cannot be executed if the password in Fn010 has been set to write-protect the system. 2. The load inertia will be used as the inertia ratio calculation default value once the power supply has been turned OFF, then ON again. Display Example BB Fn006 Fn007 Fn00C Fn00D ■ -FUNCTIONDATA MODE/SET BB Storing Results of Autotuning <Inertia ratio> d.0300 Operation Key Functions ● Overview (Applicable Keys Only) RESET MODE/SET DATA ■ Resets the alarm. (If the cause of the alarm has not been removed, the alarm cannot be reset.) Returns to the Function Mode Main Menu. Writes the inertia ratio displayed on the screen (in the example above, this is 300%) to EEPROM. During writing, done will be displayed in the status display area. Operation Example Operation keys MODE/SET Display example BB Fn006 Fn007 Fn00C Fn00D -FUNCTION- Explanation Press the MODE/SET Key to display the Function Mode Main Menu, and then press the Up and Down Keys to select Fn007. 3-17 Chapter 3 Function Mode Operation keys DATA DATA Display example Explanation Press the DATA Key. The screen will switch to the Fn007 (online autotuning results storage) execution screen. BB Storing Results of Autotuning <Inertia ratio> d.0300 Note If, after pressing the DATA Key, the screen does not switch and NO_OP is displayed in the status display area, the password in Fn010 has been set to write-protect the system. Check and reset. Press the DATA Key to write the identified inertia ratio to EEPROM. During writing, done will be displayed in the status display area. Once writing has been completed, the status display will return to BB. done Storing Results of Autotuning <Inertia ratio> d.0300 Note If inertia ratio writing is not desired, press the MODE/SET Key to return to the Function Mode Main Menu. 3-3-8 Manual Analog Monitor Output Offset Adjustment (Fn00C) Fn00C adjusts the offsets of the analog monitor outputs (current monitor and speed monitor) manually. Note Note Note ■ 1. Fn00C cannot be executed if the password in Fn010 has been set to write-protect the system. 2. Even if user parameter initialization (Fn005) is executed, the adjustment values will not be initialized. 3. Before adjusting the analog monitor output offsets, confirm that the output voltage is 0 (e.g., if outputting the Servomotor rotation speed, confirm that the status is servo OFF, and the Servomotor shaft is not moving) and connect the measurement instrument that will actually be used. Display Example BB Fn007 Fn00C Fn00D Fn00E 3-18 -FUNCTIONDATA MODE/SET BB -Zero ADJCH1=-00002 CH2= 00001 Un002= 00000% Un000= 00000r/min Chapter 3 Function Mode ■ ● Operation Key Functions Overview (Applicable Keys Only) RESET MODE/SET SCROLL Cancels the alarm (if the cause of the alarm is unknown, the alarm cannot be reset). Returns to the Function Mode Main Menu. Switches the channel for offset adjustment (CH1 or CH2). Increments (Up Key) or decrements (Down Key) by 1 the set value of the channel being adjusted. DATA Note 1. The digit being manipulated cannot be changed using the Left and Right Keys. The rightmost digit is always manipulated. 2. CH1 is the current monitor, and CH2 is the speed monitor. 3. If the set value is incremented or decremented by 1, the voltage will change by approximately 17 mV. The setting range is from –128 to 127. Note Note ■ Note The setting will be enabled as soon as it is changed. The setting will not be written to EEPROM, however, unless the DATA Key is pressed. Writes the settings (both CH1 and CH2) to EEPROM. During writing, done will be displayed in the status display area. Operation Example Operation keys MODE/SET DATA Display example BB Fn007 Fn00C Fn00D Fn00E -FUNCTION- BB -Zero ADJCH1=-00002 CH2= 00001 Un002= 00000% Un000= 00000r/min BB -Zero ADJCH1=-00005 CH2= 00001 Un002= 00000% Un000= 00000r/min Explanation Press the MODE/SET Key to display the Function Mode Main Menu, and then press the Up and Down Keys to select Fn00C. Press the DATA Key. The screen will switch to the Fn00C (manual analog monitor output offset adjustment) execution screen. Note If, after pressing the DATA Key, the screen does not switch and NO_OP is displayed in the status display area, the password in Fn010 has been set to write-protect the system. Check and reset. First of all, adjust the CH1 (current monitor) offset by pressing the Up and Down Keys. Adjust so that the measured value of the measurement device is 0 V. 3-19 Chapter 3 Function Mode Operation keys SCROLL Display example Explanation Once the CH1 offset adjustment has been completed, adjust the CH2 (speed monitor) offset. Press the SCROLL Key to move the cursor to the CH2 line. BB -Zero ADJCH1=-00005 CH2= 00001 Un002= 00000% Un000= 00000r/min Adjust the CH2 offset in the same way as for CH1: Pressing the Up and Down Keys, adjust so that the measured value of the measurement device is 0 V. BB -Zero ADJCH1=-00005 CH2= 00006 Un002= 00000% Un000= 00000r/min Once the CH1 and CH2 offset adjustments have been completed, press the DATA Key to write the adjustment results to EEPROM. During writing, done will be displayed in the status display area. Once writing has been completed, the status display will return to BB. done -Zero ADJCH1=-00005 CH2= 00006 Un002= 00000% Un000= 00000r/min DATA MODE/SET BB Fn007 Fn00C Fn00D Fn00E Press the MODE/SET Key to return to the Function Mode Main Menu. -FUNCTION- 3-3-9 Analog Monitor Output Scaling (Fn00D) Fn00D executes analog monitor output (current monitor and speed monitor) scaling. The two monitor outputs can be set separately. The analog monitor output scale setting range is –128 to 127 (× 0.4%). Set the scale that is centered on 100%. For example, if you set –125, 100% – (125 × 0.4%) = 50%, so the monitor output voltage = 1/2. Alternatively, if you set 125, 100% + (125 × 0.4%) = 150%, so the monitor output voltage = × 1.5. Note Note ■ 1. Fn00D cannot be executed if the password in Fn010 has been set to write-protect the system. 2. Even if user parameter initialization (Fn005) is executed, the setting will not be initialized. Display Example BB Fn00C Fn00D Fn00E Fn00F 3-20 -FUNCTIONDATA MODE/SET BB -Gain ADJCH1=-00001 CH2=-00001 Un002= 00000% Un000= 00000r/min Chapter 3 Function Mode ■ ● Operation Key Functions Overview (Applicable Keys Only) RESET MODE/SET SCROLL Resets the alarm. (If the cause of the alarm has not been removed, the alarm cannot be reset.) Returns to the Function Mode Main Menu. Switches the channel for offset adjustment (CH1 or CH2). Increments (Up Key) or decrements (Down Key) the set value of the channel being adjusted. DATA Note 1. The digit being manipulated cannot be changed using the Left and Right Keys. The rightmost digit is always manipulated. 2. CH1 is the current monitor, and CH2 is the speed monitor. Note ■ Note The setting will be enabled as soon as it is changed. The setting will not be written to EEPROM, however, unless the DATA Key is pressed. Writes the set values (both CH1 and CH2) to EEPROM. During writing, done will be displayed in the status display area. Operation Example Operation keys MODE/SET DATA Display example BB Fn00C Fn00D Fn00E Fn00F -FUNCTION- BB -Gain ADJCH1=-00001 CH2=-00001 Un002= 00000% Un000= 00000r/min BB -Gain ADJCH1= 00125 CH2=-00001 Un002= 00000% Un000= 00000r/min Explanation Press the MODE/SET Key to display the Function Mode Main Menu, and then press the Up and Down Keys to select Fn00D. Press the DATA Key. The screen will switch to the Fn00D (analog monitor output scaling) execution screen. Note If, after pressing the DATA Key, the screen does not switch and NO_OP is displayed in the status display area, the password in Fn010 has been set to write-protect the system. Check and reset. First of all, scale CH1 (current monitor) by pressing the Up and Down Keys to change the scale. Note The scale unit is × 0.4%. 3-21 Chapter 3 Function Mode Operation keys SCROLL Display example BB -Gain ADJCH1= 00125 CH2=-00001 Un002= 00000% Un000= 00000r/min BB -Gain ADJCH1= 00125 CH2=-00125 Un002= 00000% Un000= 00000r/min done -Gain ADJCH1= 00125 CH2=-00125 Un002= 00000% Un000= 00000r/min DATA MODE/SET BB Fn00C Fn00D Fn00E Fn00F -FUNCTION- Explanation Once CH1 scaling has been completed, adjust the CH2 (speed monitor) scale. Press the SCROLL Key to move the cursor to the CH2 line. Adjust the CH2 scale in the same way as for CH1: Pressing the Up and Down Keys, change the scale. Note The scale unit is × 0.4%. Once the CH1 and CH2 scale settings have been completed, press the DATA Key to write the setting results to EEPROM. During writing, done will be displayed in the status display area. Once writing has been completed, the status display will return to BB. Press the MODE/SET Key to return to the Function Mode Main Menu. 3-3-10 Automatic Servomotor Current Detection Offset Adjustment (Fn00E) Servomotor current detection offset adjustment has already been completed at the factory. Consequently, there is normally no need to perform this adjustment. If the torque ripple caused by current detection offset is considered abnormally large, perform automatic Servomotor current detection offset adjustment (Fn00E). After performing automatic adjustment, perform manual adjustment (Fn00F) if further lowering of the torque ripple is required. If manual adjustment is performed badly, however, there is a risk of worsening the characteristics. Note Note Note Note 3-22 1. Automatic Servomotor current detection offset adjustment can be performed only when the power supply to the main circuit is turned ON and the power supply to the servo is OFF. 2. Do not execute during command pulse input. 3. Fn00E cannot be executed if the password in Fn010 has been set to write-protect the system. 4. Even if user parameter initialization (Fn005) is executed, the setting will not be initialized. Chapter 3 Function Mode ■ Display Example BB Fn00D Fn00E Fn00F Fn010 ■ ● DATA MODE/SET BB Auto Offset-ADJ of Motor Current Start :[DATA] Return:[SET] Operation Key Functions Overview (Applicable Keys Only) RESET MODE/SET DATA ■ -FUNCTION- Resets the alarm. (If the cause of the alarm has not been removed, the alarm cannot be reset.) Returns to the Function Mode Main Menu. Executes automatic adjustment. During adjusting operations, done will be displayed in the status display area. Operation Example Operation keys MODE/SET DATA DATA Display example BB Fn00D Fn00E Fn00F Fn010 -FUNCTION- BB Auto Offset-ADJ of Motor Current Start :[DATA] Return:[SET] done Auto Offset-ADJ of Motor Current Start :[DATA] Return:[SET] Explanation Press the MODE/SET Key to display the Function Mode Main Menu, and then press the Up and Down Keys to select Fn00E. Press the DATA Key. The screen will switch to the Fn00E (automatic Servomotor current detection offset adjustment) execution screen. Press the DATA Key to execute automatic Servomotor current detection offset adjustment. During adjusting, done will be displayed in the status display area. Once adjusting has been completed, the status display will return to BB. Note If automatic adjustment is not desired, press the MODE/SET Key to return to the Function Mode Main Menu. 3-23 Chapter 3 Function Mode 3-3-11 Manual Servomotor Current Detection Offset Adjustment (Fn00F) Fn00F manually adjusts the Servomotor current detection offset. Adjust the phase-U and phase-V offsets alternately while balancing each separately. When performing adjustments, rotate the Servomotor at 100 r/min. without connecting the mechanical system to the Servomotor shaft (i.e., make sure there is no load), and perform the adjustments while monitoring the waveform of the analog monitor output’s current monitor. The Servomotor current detection offset setting range is –512 to 511. Note Note Note ■ 1. If adjusting the Servomotor current detection offset, first try performing the automatic adjustment (Fn00E). Only attempt manual adjustment if the torque ripple is still too large after performing automatic adjustment. 2. Fn00F cannot be executed if the password in Fn010 has been set to write-protect the system. 3. Even if user parameter initialization (Fn005) is executed, the setting will not be initialized. Display Example BB Fn00E Fn00F Fn010 Fn012 ■ ● -FUNCTIONDATA MODE/SET BB Manual Offset-ADJ of Motor Current ZADJIU= 00009 ZADJIV= 00006 Operation Key Functions Overview (Applicable Keys Only) RESET MODE/SET SCROLL Resets the alarm. (If the cause of the alarm has not been removed, the alarm cannot be reset.) Returns to the Function Mode Main Menu. Switches the phase for offset adjustment (phase U or phase V). Increments (Up Key) or decrements (Down Key) the set value of the phase being adjusted. DATA 3-24 Note The setting will be enabled as soon as it is changed. The setting will not be written to EEPROM, however, unless the DATA Key is pressed. Writes the set values (both phase U and phase V) to EEPROM. During writing, done will be displayed in the status display area. Chapter 3 Function Mode ■ Flowchart for Manual Servomotor Current Detection Offset Adjustment Rotate Servomotor at approx. 100 r/min. (with no load). Adjust phase-U offset 10° in the best direction for torque ripple. Adjust phase-V offset 10° in the best direction for torque ripple. N Note Torque ripple does not improve even if adjusted in both + and – directions? Note Y Adjust phase-U offset 1° in the best direction for torque ripple. Adjust phase-V offset 1° in the best direction for torque ripple. N Note 1. Adjust the offset while monitoring the current monitor’s waveform. 2. Perform rough adjustments in units of 10°, and fine adjustments in units of 1°. (You can also perform intermediate adjustments in units of 5°.) 3. Do not greatly adjust either U phase or V phase alone. Characteristics OK? Y End ■ Operation Example Operation keys MODE/SET DATA Display example BB Fn00E Fn00F Fn010 Fn012 -FUNCTION- BB Manual Offset-ADJ of Motor Current ZADJIU= 00009 ZADJIV= 00006 BB Manual Offset-ADJ of Motor Current ZADJIU= 00019 ZADJIV= 00006 SCROLL BB Manual Offset-ADJ of Motor Current ZADJIU= 00019 ZADJIV= 00006 Explanation Press the MODE/SET Key to display the Function Mode Main Menu, and then press the Up and Down Keys to select Fn00F. Press the DATA Key. The screen will switch to the Fn00F (manual Servomotor current detection offset adjustment) execution screen. First of all, adjust the phase-U offset by pressing the Up and Down Keys to change the offset unit. Adjust 10° in the best direction for torque ripple reduction. (ZADJIU = Zero ADJust phase-U current.) Next, adjust the phase-V offset. Press the SCROLL Key to move the cursor to the phase-V line. 3-25 Chapter 3 Function Mode Operation keys Display example BB Manual Offset-ADJ of Motor Current ZADJIU= 00019 ZADJIV= 00016 Explanation Adjust the phase-U offset by pressing the Up and Down Keys to change the offset volume. Adjust 10° in the best direction for torque ripple reduction. (ZADJIV = Zero ADJust phase-V current.) Repeat the above operation (phase-U adjustment to phase-V adjustment) until the torque ripple improves no further even by changing the offset in both the + and - directions. Next, finely adjust phase U and phase V in the same way. Once the offset adjustments have been completed, done press the DATA Key to write the adjustment results to EEPROM. Manual Offset-ADJ During writing, done will be displayed in the status disof Motor Current play area. Once writing has been completed, the staZADJIU= 00019 tus display will return to BB. ZADJIV= 00016 DATA MODE/SET BB Fn00E Fn00F Fn010 Fn012 -FUNCTION- Press the MODE/SET Key to return to the Function Mode Main Menu. 3-3-12 Password Setting (Fn010) Fn010 prevents the user parameter settings, Function Mode settings, Function Mode adjustments, and other settings from being overwritten unintentionally. From the next time the power supply is turned ON after the write-protect password is set, it will be impossible to change parameter settings in Function Mode. It still remains possible, however, to refer to the user parameters and perform some functions in Function Mode. The functions that can be performed in System Check Mode while write-protect is enabled are as follows: Alarm history display (Fn000), password setting (Fn010), and version check (Fn012) If attempts are made to perform any functions other than these, NO_OP will be displayed for approximately 1 second, and then the display will return to the Function Mode Main Menu. If the write-enable password is set, the write-protect status will be canceled (i.e., writing to the user parameters, etc., will be enabled when the power is next turned ON). Note Even when the write-protect password is set, Pn103 (inertia ratio) will still be changed to the load inertia ratio determined by autotuning if the online autotuning switch (function setting switch 1) is turned OFF. 3-26 Chapter 3 Function Mode ■ Display Example BB Fn00F Fn010 Fn012 Fn000 ■ ● -FUNCTIONDATA BB Password setting MODE/SET P.0000 Operation Key Functions Overview (Applicable Keys Only) RESET MODE/SET DATA Resets the alarm. (If the cause of the alarm has not been removed, the alarm cannot be reset.) Returns to the Function Mode Main Menu. Writes the input set values to EEPROM. During writing, done will be displayed in the status display area. If an invalid password has been set, NO_OP is displayed. Moves the cursor position to the left and right. Increments (Up Key) or decrements (Down Key) the set value. Note Valid set values are the following: 0000: User parameter write-enabled 0001: User parameter write-protected ■ Write Prohibit Operation Example Operation keys MODE/SET Display example BB Fn00F Fn010 Fn012 Fn000 -FUNCTION- BB Password setting Explanation Press the MODE/SET Key to display the Function Mode Main Menu, and then press the Up and Down Keys to select Fn010. Press the DATA Key. The screen will switch to the Fn010 (password setting) execution screen. DATA P.0000 BB Password setting Press the Up Key to set the password setting to 0001. P.0001 3-27 Chapter 3 Function Mode Operation keys Display example Explanation Press the DATA Key to write the password setting to EEPROM. During writing, done will be displayed in the status display area. Once writing has been completed, the status display will return to BB. done Password setting DATA P.0001 BB Fn00F Fn010 Fn012 Fn000 MODE/SET Note The password that has been set (in this case, “write-protect”) will be enabled from the next time the power supply is turned ON. Press the MODE/SET Key to return to the Function Mode Main Menu. -FUNCTION- 3-3-13 Version Check (Fn012) Fn012 displays the Servo Driver model, the Servo Driver system software version, and the Servomotor model connected. ■ Display Example BB Fn010 Fn012 Fn000 Fn001 -FUNCTIONDATA MODE/SET BB -VersionDRIVER=R7D-APA3L SOFT =0001 MOTOR=R7M-A03030 DRIVER: Servo Driver model SOFT: Servo Driver system software version MOTOR: Servomotor model connected Note If a Servomotor is not connected, Not connect will be displayed on the MOTOR line. If a Servomotor with an incorrect capacity is connected, it will not normally be displayed. ■ ● Operation Key Functions Overview (Applicable Keys Only) RESET MODE/SET 3-28 Resets the alarm. (If the cause of the alarm has not been removed, the alarm cannot be reset.) Returns to the Function Mode Main Menu. Chapter 4 Parameter Copy Mode 4-1 4-2 4-3 4-4 4-5 Operations in Parameter Copy Mode Parameter Reading (DRIVER to PR) Parameter Writing (PR to DRIVER) Parameter Verification (Verify) Parameter Block Delete (LIST) Chapter 4 Parameter Copy Mode 4-1 Operations in Parameter Copy Mode The R7A-PR02A Parameter Unit for the SMARTSTEP A Series contains an EEPROM capable of storing seven blocks of user parameters. Parameter Copy Mode manipulates these user parameter blocks. Pressing the MODE/SET Key in Function Mode will display the Parameter Copy Mode menu screen. Select the menu to be executed using the Up and Down Keys, and then press the DATA Key to switch to the selected menu’s execution screen. ■ Parameter Copy Mode Menu Screen BB 1:DRIVER~PR 2:PR~DRIVER 3:Verify 4:LIST ■ -COPYSelected menu (flashes) Parameter Copy Mode Functions In Parameter Copy Mode, the following four functions can be executed. Display 1: DRIVER → PR 2: PR → DRIVER 3: Verify 4: LIST ■ ● Function Parameter reading from the Servo Driver to the Parameter Unit. Parameter writing from the Parameter Unit to the Servo Driver. Parameter comparison between the Servo Driver and the Parameter Unit. Deleting a parameter block. Operation Key Functions Overview RESET MODE/SET Resets the alarm. (If the cause of the alarm has not been removed, the alarm cannot be reset.) Switches to Parameter/Monitor Mode. Switches to the execution screen of the selected menu. DATA SCROLL Not used. JOG Not used. RUN Not used. Selects the menu item. Not used. READ DRIVER PR Not used. 4-2 Chapter 4 Parameter Copy Mode ● Details Keys • Pressing the Up and Down Keys enables menu selection. DATA BB 1:DRIVER~PR 2:PR~DRIVER 3:Verify 4:LIST -COPY- BB 1:DRIVER~PR 2:PR~DRIVER 3:Verify 4:LIST -COPY- BB 1:DRIVER~PR 2:PR~DRIVER 3:Verify 4:LIST -COPY- BB 1:DRIVER~PR 2:PR~DRIVER 3:Verify 4:LIST -COPY- Key • Pressing the DATA Key switches to the execution screen of the selected (flashing) menu item. BB 1:DRIVER~PR 2:PR~DRIVER 3:Verify 4:LIST -COPYDATA DATA BB -DRIVER~PR00:**** 01:**** 02:**** 03:**** 4-3 Chapter 4 Parameter Copy Mode 4-2 Parameter Reading (DRIVER to PR) The parameter read operation reads the user parameters saved in the Servo Driver’s EEPROM and stores them in one of the seven blocks of user parameters stored in the Parameter Unit’s memory. ■ Display Example BB 1:DRIVER~PR 2:PR~DRIVER 3:Verify 4:LIST ■ -COPYDATA DATA BB -DRIVER~PR00:**** 01:**** 02:**** 03:**** Parameter Reading Procedure Operation keys MODE/SET DATA Display example BB 1:DRIVER~PR 2:PR~DRIVER 3:Verify 4:LIST -COPY- BB -DRIVER~PR00:**** 01:**** 02:**** 03:**** BB -DRIVER~PR00:**** 01:**** 02:**** 03:**** MODE/SET 4-4 BB -DRIVER~PR00:**** Start :[Read] Return:[DATA] Explanation Menu Selection Use the MODE/SET and Up and Down Keys to display the Parameter Copy Mode Main Menu, and select DRIVER → PR. The menu flashing is the menu that is currently selected. Menu Execution Press the DATA Key to switch to the Parameter Block Selection Screen. Parameter Block Selection Using the Up and Down Keys, select to which parameter block (00 to 06) in the Parameter Unit the parameters read from the Servo Driver are to be stored. Switching to the Parameter Reading Execution Screen Press the MODE/SET Key to switch to the parameter reading execution screen. Chapter 4 Parameter Copy Mode Operation keys READ DRIVER PR Display example BB -DRIVER~PR00:**** Parameter reading%% <<DRIVER>> BB -PR~DRIVER00:R7D-APA3L Complete BB -PR~DRIVER00:R7D-APA3L 01:**** 02:**** 03:**** DATA ■ BB 1:DRIVER~PR 2:PR~DRIVER 3:Verify 4:LIST -COPY- Explanation Parameter Reading Execution Press the READ (DRIVER → PR) Key to start parameter reading from the Servo Driver. Note If read execution is not desired, press the DATA Key to return to the Parameter Block Selection Screen. Parameter Reading Completion When parameter reading from the Servo Driver and storing to the designated block inside the Parameter Unit are complete, Complete will be displayed. Switching to the Parameter Block Selection Screen When parameter reading has been completed (after Complete has been displayed), the screen will switch to the Parameter Block Selection Screen. The Servo Driver model (in this example: R7D-APA3L) will be displayed in the designated block. Switching to the Menu Screen Press the DATA Key to return to the Parameter Copy Mode menu screen. Supplementary Information on Reading Parameters • While reading parameters, do not disconnect the Parameter Unit from the Servo Driver. If the Parameter Unit is disconnected during parameter reading, the Servo Driver and Parameter Unit data may be damaged. If the Servo Driver’s EEPROM data is damaged, an A.BF (system error) alarm will occur at the next startup, and the user parameters will need to be initialized (Fn005). • If parameter reading is performed for a parameter block that has already had parameters written to it, the parameter block will be overwritten. • Pressing the DATA Key during parameter reading will interrupt reading, and the parameter block will be deleted (****). • During parameter reading, the following sequence operation information will be displayed in the display area of the Parameter Unit. The reading operation will end within 10 seconds. 4-5 Parameter Copy Mode During parameter reading from the Servo Driver BB -DRIVER~PR00:**** Parameter reading%% <<DRIVER>> During parameter writing to the Parameter Unit BB -DRIVER~PR00:**** Parameter writing%% <<PR>> 4-6 Chapter 4 During Servo Driver model information writing to the Parameter Unit BB -DRIVER~PR00:**** File_info saving%% <<PR>> When the operation has ended BB -DRIVER~PR00:R7D-APA3L Complete Chapter 4 Parameter Copy Mode 4-3 Parameter Writing (PR to DRIVER) The parameter write operation writes one of the seven blocks of user parameters stored in the Parameter Unit’s EEPROM to the Servo Driver’s EEPROM. ■ Display Example BB 1:DRIVER~PR 2:PR~DRIVER 3:Verify 4:LIST ■ -COPYDATA DATA BB -PR~DRIVER00:R7D-APA3L 01:**** 02:**** 03:**** Parameter Writing Procedure Operation keys MODE/SET DATA Display example BB 1:DRIVER~PR 2:PR~DRIVER 3:Verify 4:LIST -COPY- BB -PR~DRIVER00:R7D-APA3L 01:**** 02:**** 03:**** BB -PR~DRIVER00:R7D-APA3L 01:**** 02:**** 03:**** MODE/SET BB -PR~DRIVER00:R7D-APA3L Start :[Write] Return:[DATA] Explanation Menu selection. Use the MODE/SET and Up and Down Keys to display the Parameter Copy Mode Main Menu, and select PR → DRIVER. The menu flashing is the menu that is currently selected. Menu execution. Press the DATA Key to switch to the Parameter Block Selection Screen. Parameter block selection. Using the Up and Down Keys, select the parameter block (from 00 to 06) in the Parameter Unit that contains the parameters to be written to the Servo Driver. Switching to the parameter writing execution screen. Press the MODE/SET Key to switch to the parameter writing execution screen. 4-7 Chapter 4 Parameter Copy Mode Operation keys WRITE PR DRIVER Display example BB -PR~DRIVER00:R7D-APA3L Parameter reading%% << PR >> BB -PR~DRIVER00:R7D-APA3L Complete BB -PR~DRIVER00:R7D-APA3L 01:**** 02:**** 03:**** DATA ■ BB 1:DRIVER~PR 2:PR~DRIVER 3:Verify 4:LIST -COPY- Explanation Parameter Writing Execution Press the WRITE (PR → DRIVER) Key to start parameter writing to the Servo Driver. Note If write execution is not desired, press the DATA Key to return to the Parameter Block Selection Screen. Parameter Writing Completion When parameter reading from the designated block inside the Parameter Unit and storage to the Servo Driver are complete, Complete will be displayed. Switching to the Parameter Block Selection Screen When parameter writing has been completes (after Complete has been displayed), the screen will switch to the Parameter Block Selection Screen. Switching to the Menu Screen Press the DATA Key to return to the Parameter Copy Mode menu screen. Supplementary Information on Writing Parameters • While writing parameters, do not disconnect the Parameter Unit from the Servo Driver. If the Parameter Unit is disconnected during parameter writing, the Servo Driver and Parameter Unit data may be damaged. If the Servo Driver’s EEPROM data is damaged, an A.BF (system error) alarm will occur at the next startup, and the user parameters will need to be initialized (Fn005). • If parameter writing is attempted to a parameter block with a Servo Driver with different voltage or capacity, or to an empty (****) parameter block, Parameter File Unmatched will be displayed and writing will not occur. • During parameter writing, the following sequence operation information will be displayed in the display area of the Parameter Unit. The writing operation will end within 10 seconds. 4-8 Parameter Copy Mode Chapter 4 During parameter reading from the Parameter Unit BB -PR~DRIVER00:R7D-APA3L Parameter reading%% << PR >> Note Pressing the DATA Key while these screens are displayed will interrupt writing, and the display will return to the Parameter Block Selection Screen. During parameter writing to the Servo Driver BB -PR~DRIVER00:R7D-APA3L Parameter writing%% <<DRIVER>> When the operation has ended BB -PR~DRIVER00:R7D-APA3L Complete 4-9 Chapter 4 Parameter Copy Mode 4-4 Parameter Verification (Verify) The parameter verification operation compares one of the seven blocks of user parameters stored in the Parameter Unit’s EEPROM and the user parameters stored in the Servo Driver’s EEPROM, and displays the results. ■ Display Example BB 1:DRIVER~PR 2:PR~DRIVER 3:Verify 4:LIST ■ -COPYDATA DATA BB -Verify00:R7D-APA3L 01:**** 02:**** 03:**** Parameter Verifying Procedure Operation keys MODE/SET DATA Display example BB 1:DRIVER~PR 2:PR~DRIVER 3:Verify 4:LIST -COPY- BB -LIST00:R7D-APA3L 01:**** 02:**** 03:**** BB -LIST00:R7D-APA3L 01:**** 02:**** 03:**** MODE/SET 4-10 BB -Verify00:R7D-APA3L Start :[Write] Return:[DATA] Explanation Menu Selection Use the MODE/SET and Up and Down Keys to display the Parameter Copy Mode Main Menu, and select Verify. The menu flashing is the menu that is currently selected. Menu Execution Press the DATA Key to switch to the Parameter Block Selection Screen. Parameter Block Selection Using the Up and Down Keys, select the parameter block (from 00 to 06) in the Parameter Unit that contains the parameters to be compared with the Servo Driver parameters. Switching to the Parameter Verifying Execution Screen Press the MODE/SET Key to switch to the parameter verifying execution screen. Chapter 4 Parameter Copy Mode Operation keys WRITE PR DRIVER Display example BB -PR~DRIVER00:R7D-APA3L Parameter reading%% << PR >> BB -Verify00:R7D-APA3L Complete Data Matches BB -ResultSame files%% Data Does Not Match BB Pn001 Pn100 Pn101 Pn202 Explanation Parameter Verifying Execution Press the WRITE (PR → DRIVER) Key to start parameter verifying. Note If verify execution is not desired, press the DATA Key to return to the Parameter Block Selection Screen. Parameter Verifying Completion When parameter reading from the designated block inside the Parameter Unit, parameter reading from the Servo Driver, and comparison have been completed, Complete will be displayed. Displaying Parameter Verification Results After parameter comparison has ended (after Complete has been displayed), the comparison results will be displayed. If the comparison shows data that does not match, a list of non-matching parameter numbers will be displayed. If 5 or more parameters do not match, use the Up and Down Keys to scroll through and check the parameter numbers. -ResultFILE Unmatched DATA BB -LIST00:R7D-APA3L 01:**** 02:**** 03:**** DATA BB 1:DRIVER~PR 2:PR~DRIVER 3:Verify 4:LIST -COPY- Switching to the Parameter Block Selection Screen Press the DATA Key to switch to the Parameter Block Selection Screen. Switching to the Menu Screen Press the DATA Key to return to the Parameter Copy Mode menu screen. 4-11 Parameter Copy Mode ■ Chapter 4 Supplementary Information on Comparing Parameters • While comparing parameters, do not disconnect the Parameter Unit from the Servo Driver. If the Parameter Unit is disconnected during parameter comparison, the Servo Driver and Parameter Unit data may be damaged. If the Servo Driver’s EEPROM data is damaged, an A.BF (system error) alarm will occur at the next startup, and the user parameters will need to be initialized (Fn005). • Pressing the DATA Key during parameter comparison will interrupt comparison, and the display will return to the Parameter Block Selection Screen. • During parameter comparison, the following sequence operation information will be displayed in the display area of the Parameter Unit. The comparison operation will end within 15 seconds. During parameter reading from the Parameter Unit BB -Verify00:R7D-APA3L Parameter reading%% << PR >> During parameter reading from the Servo Driver BB -Verify00:R7D-APA3L Parameter reading%% <<DRIVER>> During parameter verifying BB -Verify00:R7D-APA3L Parameter verify <<DRV - PR>> When the operation has ended BB -Verify00:R7D-APA3L Complete 4-12 Chapter 4 Parameter Copy Mode 4-5 Parameter Block Delete (LIST) The parameter block delete operation deletes one of the seven blocks of user parameters stored in the Parameter Unit’s EEPROM. ■ Display Example BB 1:DRIVER~PR 2:PR~DRIVER 3:Verify 4:LIST ■ -COPYDATA DATA BB -LIST00:R7D-APA3L 01:**** 02:**** 03:**** Parameter Block Delete Procedure Operation keys MODE/SET DATA Display example BB 1:DRIVER~PR 2:PR~DRIVER 3:Verify 4:LIST -COPY- BB -LIST00:R7D-APA3L 01:**** 02:**** 03:**** BB -LIST00:R7D-APA3L 01:**** 02:**** 03:**** BB -LIST00:R7D-APA3L MODE/SET FILE DELETE Start :[Read] Return:[DATA] Explanation Menu Selection Use the MODE/SET and Up and Down Keys to display the Parameter Copy Mode Main Menu, and select LIST. The flashing menu is the menu that is currently selected. Menu Execution Press the DATA Key to switch to the Parameter Block Selection Screen. Parameter Block Selection Using the Up and Down Keys, select the parameter block (from 00 to 06) in the Parameter Unit to be deleted. Switching to the Parameter Block Delete Execution Screen Press the MODE/SET Key to switch to the parameter block delete execution screen. 4-13 Chapter 4 Parameter Copy Mode Operation keys READ DRIVER PR Display example BB -LIST00:R7D-APA3L Parameter delete << PR >> BB -LIST00:R7D-APA3L Complete DATA 4-14 BB 00:**** 01:**** 02:**** 03:**** -LIST- BB 1:DRIVER~PR 2:PR~DRIVER 3:Verify 4:LIST -COPY- Explanation Parameter Block Delete Execution Press the READ (DRIVER → PR) Key to start parameter block delete. Note If delete execution is not desired, press the DATA Key to return to the Parameter Block Selection Screen. Parameter Block Delete Completion When deleting the designated block inside the Parameter Unit has been completed Complete will be displayed. Switching to the Parameter Block Selection Screen After parameter deletion has ended (after Complete has been displayed), the display switches to the Parameter Block Selection Screen. The designated block will change to a deleted block display (****). Switching to the Menu Screen Press the DATA Key to return to the Parameter Copy Mode Main Menu Screen. Parameter Copy Mode ■ Chapter 4 Supplementary Information on Deleting Parameters • While deleting parameters, do not disconnect the Parameter Unit from the Servo Driver. If the Parameter Unit is disconnected during parameter deletion, the Servo Driver and Parameter Unit data may be damaged. • During parameter block deletion, the following sequence operation information will be displayed in the display area of the Parameter Unit. The deletion operation will end within 5 seconds. During parameter block deleting BB -LIST00:R7D-APA3L Parameter delete << PR >> During Servo Driver model deleting BB -LIST00:R7D-APA3L File_Info saving%% << PR >> When the operation has ended BB -LIST00:R7D-APA3L Complete 4-15 Chapter 5 Alarm Display Mode 5-1 5-2 5-3 Operations in Alarm Display Mode Alarms Error Diagnosis Using Alarm Display Alarm Display Mode 5-1 Chapter 5 Operations in Alarm Display Mode When an alarm occurs in the Servo Driver, the Parameter Unit automatically changes to Alarm Display Mode. The Alarm Display Mode Screen here is the same as the Function Mode Alarm History Display Screen (Fn000). If the RESET Key is pressed in Alarm Display Mode and the alarm reset, the screen prior to canceling the alarm will be displayed. If switching to another screen is desired while an alarm is being registered, press the MODE/SET Key. The screen will switch back to the screen before the alarm occurred. Note: If an alarm is reset while RUN is turned ON, the Servo Driver will start as soon as the alarm is reset, which is dangerous. Be sure to turn OFF the RUN command before resetting the alarm. ■ Screen Switching when an Alarm Occurs The procedure for switching screens while an alarm has occurred is shown in the following diagram, an example of an alarm occurring during jog operation (Fn002). 5-2 Chapter 5 Alarm Display Mode RUN -JOGPn304=00500 Un000= 00000r/min Un002= 00000% Un00D=00000000 A.70 0:A.70 (See 1:A.-note 1.) 2:A.-3:A.-- -ALARM- Alarm occurs RESET MODE/SET RESET (See note 2.) Switch the screen by following the same key operations as for when there is no alarm. A.70 -JOGPn304=00500 Un000= 00000r/min Un002= 00000% Un00D=00000000 MODE/SET A.70 Fn001 Fn002 Fn003 Fn005 -FUNCTION- MODE/SET Note Note 1. If the alarm is successfully reset, the screen prior to the alarm occurring will return. (If the alarm occurred during jog operations, the servo will turn OFF and BB will be displayed in the status display area.) 2. If the alarm cannot be reset, the alarm history display will stay. A.70 1:DRIVER~PR 2:PR~DRIVER 3:Verify 4:LIST -COPY- MODE/SET MODE/SET A.70 -PRM/MONUn000= 00000r/min Un002= 00000% Un008= 00000pulse Un00D=00000000 5-3 Chapter 5 Alarm Display Mode 5-2 ■ Alarms Alarms Code A.04 A.10 A.30 A.32 A.40 A.51 A.70 A.73 A.74 A.7A A.BF A.C1 A.C2 A.C3 A.D0 CPF00 CPF01 Error detection function Parameter setting error Overcurrent Regeneration error Cause of error Incorrect parameter setting. Overcurrent detected. Regeneration circuit damaged due to large amount of regenerative energy. Regeneration overload Regenerative energy exceeded the regeneration resistance. Overvoltage/undervoltage Main circuit DC voltage above the allowable range, or Main circuit DC voltage below the allowable range Overspeed Servomotor rotation speed exceeded the maximum speed. Overload Output torque exceeded 120% of rated torque. Dynamic brake overload Regenerative energy exceeded the dynamic brake resistance during dynamic brake operation. Inrush resistance overload Inrush current exceeded the inrush resistance during power supply inrush. Overheat Abnormal temperature rise detected in radiation shield. System error A control circuit system error was detected. Runaway detected The Servomotor rotated in the opposite direction from the command. Phase error detected The Servomotor’s electrical angle was incorrectly detected. Encoder disconnection The encoder’s phase A, B, or S is disconnected or detected short-circuited. Deviation counter overflow Deviation counter’s residual pulses exceeded the deviation counter overflow level set in Pn505. Parameter Unit transmisData could not be transmitted after the power supsion error 1 ply was turned ON. Parameter Unit transmisTransmission timeout error sion error 2 RESET Key effective? No No Yes Yes Yes Yes Yes Yes Yes Yes No Yes No No Yes Note 1. “Yes” in the RESET Key effective? column indicates that the alarm can be reset and “No” indicates that the alarm cannot be reset (i.e., the power supply must be cycled). The CPF00 and CPF01 alarms cannot be reset using the RESET Key, but if transmission is successful, these alarms will be reset automatically. Note 2. Alarms CPF00 and CPF01 are not stored in the alarm history. 5-4 Chapter 5 Alarm Display Mode ■ Warnings Code A.91 A.92 Error Overload warning Regeneration overload warning Cause of error A warning occurs before the overload alarm (A.70) is reached. An alarm may be generated if the Servomotor continues to operate. A warning occurs before the regeneration overload alarm (A.32) is reached. An alarm may be generated if the Servomotor continues to operate. Note Warnings are not stored in the alarm history. 5-5 Chapter 5 Alarm Display Mode 5-3 Error Diagnosis Using Alarm Display Display A.04 A.10 Error Parameter setting error Overcurrent Status when error occurs Occurs when control circuit power supply is turned ON. Occurs when power supply is turned ON. Occurs when servo is turned ON. Cause of error A value outside of the setting range was previously set in the parameters. Control panel error Control panel error Main circuit transistor module error Current feedback circuit error Main circuit transistor module error Servomotor power line is short-circuited or grounded between phases. Miswiring between Uphase, V-phase, W-phase, and ground. Servomotor winding is burned out. A.30 Regeneration error Occurs during operation. A.32 Regeneration overload Occurs during operation. 5-6 Countermeasures Reset the parameters within the setting range. Replace the Servo Driver. Replace the Servo Driver. Replace the Servo Driver. Repair the short-circuited or grounded wire. Measure the insulation resistance at the Servomotor and, if there is a short-circuit, replace the Servomotor. Correct the wiring. Measure the winding resistance, and if the winding is burned out, replace the Servomotor. Operating above rated out- Lighten the load. put. Error in the regenerative Replace the Servo Driver. circuit parts. External Regeneration Replace the External RegenerResistor is disconnected. ation Resistor. There is a short-circuit Correctly connect the external missing between B2 and circuit resistor (between B1 B3, but the external circuit and B2). resistor is not connected. Setting error in Pn600 Set Pn600 correctly. (regeneration resistor capacity). Regenerative energy Calculate the regenerative exceeds tolerance. energy, and connect an external Regeneration Resistor with the required regeneration absorption capacity. Setting error in Pn600 Set Pn600 correctly. (regeneration resistor capacity) Main-circuit power supply Change the main-circuit power voltage is outside tolersupply voltage to within tolerance range. ance range. Chapter 5 Alarm Display Mode Display A.40 Error Overvoltage Status when error occurs Occurs when power supply is turned ON. Main circuit power supply voltage is outside tolerance range. Main-circuit power supply is damaged. Occurs when Ser- Load inertia is too great. vomotor is decelerating. Occurs during descent (vertical axis) Low voltage A.51 Overspeed Cause of error Occurs when the control circuit power supply only is turned ON. Occurs when the main circuit power supply is turned ON. Main circuit power supply voltage exceeds tolerance range. Gravitational torque is too large. Control panel error Main circuit power supply voltage is outside tolerance range. Main circuit power supply is damaged. Occurs when the Encoder signal between servo is ON. controllers is wired incorrectly. Servomotor power line is wired incorrectly. Occurs along with Position command input high-speed rota- exceeds 4,500 r/min. tion when a com- Pn202 and Pn203 (elecmand is input. tronic gear ratio) setting is too large. Resolution setting switch (switches 4 and 5) setting is too low. Rotation limit has been exceeded due to overshooting. Countermeasures Change the main circuit power supply voltage to within tolerance range. Replace the Servo Driver. Deceleration time is too long. Calculate the regenerative energy, and connect an external Regeneration Resistor with the required regeneration absorption capacity. Reduce main circuit power supply voltage to within tolerance range. Add a counterbalance to the machinery to lower gravitational torque. Slow the descent speed. Calculate the regenerative energy, and connect and external Regeneration Resistor with the required regeneration absorption capacity. Replace the Servo Driver. Change the main circuit power supply voltage to within tolerance range. Replace the Servo Driver. Rewire correctly. Rewire correctly. Input command values correctly. Set the parameters correctly. Reset the switches correctly. Adjust the gain. Lower the maximum specified speed. 5-7 Chapter 5 Alarm Display Mode Display A.70 A.73 A.74 A.7A 5-8 Error Overload Status when error occurs Occurs during operation. Cause of error Running at over 120% of rated torque (effective torque). Countermeasures Repair the Servomotor shaft if it is locked. If the Servomotor power line is wired incorrectly, rewire it correctly. Lighten the load. Lengthen the acceleration and deceleration times. Adjust the gain. Power supply voltage has Check the power supply voltfallen. age, and lower to within tolerance range. Servomotor winding is Check the winding resistance. burned out. Replace the Servomotor if the winding is burned out. Servo Driver is burned out. Replace the Servo Driver. Dynamic Occurs when the Energy required for stopLower the rotation speed. brake overservo is turned ping exceeds the dynamic Reduce the load inertia. load OFF after operat- brake resistor tolerance. Reduce the frequency of ing. dynamic brake use. Occurs when the Control panel error Replace the Servo Driver. power supply is turned ON. Inrush resisOccurs when the The frequency by which Reduce the frequency by which tance overload main circuit power main-circuit power supply is the main circuit power supply is supply is turned turned ON and OFF turned ON and OFF. ON. exceeds 5 times/min. Occurs when the Control panel error Replace the Servo Driver. control circuit power supply only is turned ON. Overheat Occurs when the Control panel error Replace the Servo Driver. control circuit power supply only is turned ON. Occurs during Ambient Servo Driver tem- Lower the Servo Driver’s ambioperation perature exceeds 55°C. ent temperature to 55°C or less. Radiation shield sink air Mount according to mounting convection is poor. conditions. The fan has stopped. Replace the Servo Driver. Operating above rated out- Lighten the load. put. Chapter 5 Alarm Display Mode Display A.bF A.C1 A.C2 A.C3 Error System error Runaway detected Phase error detected. Encoder disconnection detected. Status when error occurs Occurs during operation. Occurs when there is a slight movement upon startup. Occurs when there is a slight movement upon startup. Occurs when the power supply is turned ON. Occurs when there is a slight movement upon startup. Cause of error Control panel error Power supply was turned OFF during parameter operations or the Parameter Unit was disconnected. Automatic Servomotor current detection offset was adjusted (Fn00E) during pulse input. Internal memory error Encoder is wired incorrectly. Servomotor power line is wired incorrectly. Servo turned ON when the Servomotor was rotated from the outside. Servo Driver is burned out. Encoder is wired incorrectly. Faulty Connector contact Countermeasures Replace the Servo Driver. Initialize user parameters (Fn005) to reset the parameters. Turn OFF the power supply, then ON again. Replace the Servo Driver. Correct the wiring. Adjust servo ON timing. Replace the Servo Driver. Rewire correctly. Plug the Connector in securely. Encoder is burned out. Replace the Servomotor. Servo Driver is burned out. Replace the Servo Driver. Encoder wiring is disconnected or shorted. Faulty Connector contact. Encoder is wired incorrectly. Encoder is burned out. Servo Driver is burned out. Locked mechanically. Correct the disconnected or shorted part. Plug the Connector in securely. Rewire correctly. Replace the Servomotor. Replace the Servo Driver. Repair the Servomotor shaft if it is locked. 5-9 Chapter 5 Alarm Display Mode Display A.d0 CPF00 CPF01 5-10 Error Deviation counter overflow Status when error occurs Servomotor will not rotate even when command pulses are input. Cause of error Countermeasures Servomotor power or Rewire correctly. encoder line is wired incorrectly. Locked mechanically Repair if the Servomotor shaft is locked Control panel error Replace the Servo Driver. Servomotor power or Rewire correctly. encoder line is miswired. Occurs when rotating at high speed Occurs when long Gain adjustment is insuffi- Adjust the gain. command pulses cient. are sent Acceleration and decelera- Lengthen acceleration and tion is too violent. deceleration time. Use position command filter (Pn207.0, Pn204, and Pn208). Load is too large. Lighten the load. Reselect the Servomotor. Pn505 (deviation counter Reset the parameter correctly. overflow level) setting is too large. Resolution setting switch Reset the switches correctly. (switches 4 and 5) setting is too low. Pn202 and Pn203 (elecReset the parameters correctly. tronic gear ratio) setting is too large. Parameter Occurs when Faulty Connector contact. Plug the Connector in securely. Unit transmis- power supply is Internal element malfuncTurn OFF the power supply, sion error 1 turned ON. tion. then ON again. Internal element is faulty. Replace the Servo Driver. Replace the Parameter Unit. Parameter Occurs when Faulty Connector contact. Plug the Connector in securely. Unit transmis- Parameter Unit is Internal element malfuncTurn OFF the power supply, sion error 2 in use. then ON again. tion Internal element is faulty Replace the Servo Driver. Replace the Parameter Unit. Alarm Display Mode ■ Chapter 5 Parameter Unit Alarms Display Error Status when error Cause of error occurs OPERATOR ERR ROM error Occurs when power Internal element malROM CHECK ERR supply is turned function. ON. Internal element is faulty. OPERATOR ERR RAM error Occurs during Internal element malRAM CHECK ERR Parameter Unit use. function. Internal element is faulty. OPERATOR ERR Send oper- Occurs during Internal element malDATA SEND ERR ation error Parameter Unit use. function. Internal element is faulty. Countermeasures Turn OFF the power supply, then ON again. Replace the Parameter Unit. Turn OFF the power supply, then ON again. Replace the Parameter Unit. Turn OFF the power supply, then ON again. Replace the Parameter Unit. 5-11 Chapter 6 Appendix 6-1 Parameter Setting Tables Chapter 6 Appendix 6-1 Parameter No. Pn000 Pn001 (See note 1.) Parameter Setting Tables Parameter name Description for parameters set with 5 digits Digit No. Basic switches 1 0 Name Setting Reverse rotation 0 mode CCW direction is taken for positive command. 1 CW direction is taken for positive command. 1 Control mode selection 1 Position control by pulse train command 2 Not used. 0 --- 3 Not used. 0 --- Stop selection if an alarm occurs when servo is OFF 0 Servomotor stopped by dynamic brake. 1 Servomotor stopped by dynamic brake. Dynamic brake released after Servomotor stops. 2 Servomotor stopped with free run. Basic switches 2 0 Default Unit Setting range Description for parameters with individually set digits 1 Not used. 0 --- 2 Not used. 0 --- 3 Not used. 1 --- Restart? Parameter setting 0010 – – Yes 001@ 1002 – – Yes 100@ Pn100 Speed loop gain Speed loop response adjustment 80 Hz 1 to 2000 – Pn101 Speed loop inte- Speed loop integral time constant gral time constant 2000 ×0.01 ms 15 to 51200 – Pn102 Position loop gain Adjusts position loop responsiveness. 40 1/s 1 to 2000 – Pn103 Inertia ratio The ratio between the machine system inertia and the Servomotor 300 rotor inertia % 0 to 10000 – Pn109 Feed-forward amount Position control feed-forward compensation 0 % 0 to 100 – Pn10A Feed-forward command filter The position control feed-forward command filter 0 ×0.01 ms 0 to 6400 – Pn110 (See note 1.) Online autotuning setting 0 – – Yes 0@1@ The power supply does not need to be restarted. for Pn110.2. 0 Autotunes initial operations 0012 only after power is turned ON. 1 Always autotunes. 2 No autotuning 1 --- 1 Not used. 2 Adhesive friction 0 compensation 1 selection 3 6-2 Online autotuning selection Not used. Friction compensation: OFF Friction compensation: Rated torque ratio small 2 Friction compensation: Rated torque ratio large 0 --- Chapter 6 Appendix Parameter No. Pn200 (See note 2.) Parameter name Position control setting 1 Description for parameters set with 5 digits Digit No. 0 1 2 3 Pn202 (See note 2.) Pn203 (See note 2.) Name Setting Command pulse 0 mode Deviation counter reset Not used. Feed pulse forward and reverse signal, positive logic 1 Forward pulse and reverse pulse, positive logic 2 90° phase difference (phase A/B) signal (x1), positive logic 3 90° phase difference (phase A/B) signal (x2), positive logic 4 90° phase difference (phase A/B) signal (x4), positive logic 5 Feed pulse forward and reverse signal, negative logic 6 Forward pulse and reverse pulse, negative logic 7 90° phase difference (phase A/B) signal (x1), negative logic 8 90° phase difference (phase A/B) signal (x2), negative logic 9 90° phase difference (phase A/B) signal (x4), negative logic 0 Signal high level 1 Rising edge (low to high) 2 Signal low level 3 Falling signal (high to low) Deviation 0 counter reset for alarms and when servo is 1 turned OFF Default – – Yes 4 – 1 to 65535 Yes 1 – 1 to 65535 Yes ×0.01 ms 0 to 6400 – – – Yes ×0.01 ms 0 to 6400 Yes 1@@@ Deviation counter not reset when an alarm occurs nor when Servomotor is OFF. 2 Deviation counter reset only when an alarm occurs. 1 --- Position command filter time constant 1 (primary filter) Soft start setting for command pulses (Soft start characteristics are 0 for the primary filter.) Pn207 Position control setting 2 0 1 to 3 Restart? Parameter setting 1011 Pn204 Pn208 Setting range Deviation counter reset when an alarm occurs and when Servomotor is OFF. Electronic gear The pulse rate for the command pulses and Servo Servomotor ratio G1 (numer- travel distance ator) 0.01 ≤ G1/G2 ≤ 100 Electronic gear ratio G2 (denominator) Note Unit Description for parameters with individually set digits Enabled when Pn207.0 = 0. Selects position command filter. 0 Primary filter (Pn204) 1 Linear acceleration and deceleration (Pn208) Not used. 0 --- 0000 Position comSoft start setting for command pulses (Soft start characteristics are 0 mand filter time for the linear acceleration and deceleration.) constant 2 Enabled when Pn207.0 = 1. (Linear acceler- Note ation and deceleration) Pn304 Jog speed Rotation speed during jog operation 500 r/min 0 to 10000 – Pn401 Torque command filter time constant The constant when filtering the internal torque command 40 ×0.01 ms 0 to 65535 – 000@ 6-3 Chapter 6 Appendix Parameter No. Parameter name Description for parameters set with 5 digits Digit No. Name Setting Default Unit Description for parameters with individually set digits Setting range Restart? Parameter setting Pn402 Forward torque limit Forward rotation output torque limit (rated torque ratio) 350 % 0 to 800 – Pn403 Reverse torque limit Reverse rotation output torque limit (rated torque ratio) 350 % 0 to 800 – Pn500 Positioning com- The range of positioning completed output (INP) pleted range 3 Command 0 to 250 units – Pn505 Deviation counter overflow level 1024 ×256 com- 1 to 32767 – mand units Pn600 Regeneration Setting for regeneration resistance load ratio monitoring calcula0 resistor capacity tions Note: If using an External Regeneration Resistor, set the regeneration capacity for when the temperature rises above 120°C. If not using an External Regeneration Resistor, set Pn600 to 0. The detection level for a deviation counter overflow alarm ×10 W From 0 (Varies by Unit.) – Note 1. Pn001.0 and Pn110.0 are enabled when function switch 6 on the Servo Driver’s front panel is turned ON to enable parameter setting. When function switch 6 is OFF, function switch 2 (dynamic brake setting) and function switch 1 (online autotuning) are enabled. Note 2. Pn200.0, Pn202 and Pn203 are enabled when function switch 6 on the Servo Driver’s front panel is turned ON to enable parameter setting. When function switch 6 is OFF, function switch 3 (command pulse input setting) and function switches 4 and 5 (resolution setting) are enabled. 6-4 Revision History A manual revision code appears as a suffix to the catalog number on the front cover of the manual. Cat. No. I534-E1-02 Revision code The following table outlines the changes made to the manual during each revision. Page numbers refer to the previous version. Revision code Date 01 November 2001 02 July 2005 Revised content Original production Following changes made to front matter. General precautionary notes added to the first page. Items to Check Before Unpacking: Moved to the first page. Notice: Information on general precautions notation added. Read and Understand this Manual: Information on liability and warranty added. R-1 OMRON Corporation Control Devices Division H.Q. Shiokoji Horikawa, Shimogyo-ku, Kyoto, 600-8530 Japan Tel: (81)75-344-7109/Fax: (81)75-344-7149 Regional Headquarters OMRON EUROPE B.V. Wegalaan 67-69, NL-2132 JD Hoofddorp The Netherlands Tel: (31)2356-81-300/Fax: (31)2356-81-388 OMRON ELECTRONICS LLC 1 East Commerce Drive, Schaumburg, IL 60173 U.S.A. Tel: (1)847-843-7900/Fax: (1)847-843-8568 OMRON ASIA PACIFIC PTE. LTD. 83 Clemenceau Avenue, #11-01, UE Square, Singapore 239920 Tel: (65)6835-3011/Fax: (65)6835-2711 OMRON (CHINA) CO., LTD. Room 2211, Bank of China Tower, 200 Yin Cheng Zhong Road, PuDong New Area, Shanghai, 200120 China Tel: (86)21-5037-2222/Fax: (86)21-5037-2200 Authorized Distributor: Cat. No. I534-E1-02 Note: Specifications subject to change without notice. This manual is printed on 100% recycled paper. Printed in Japan