1
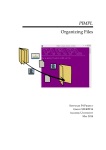
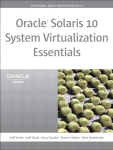
1
Implementation of a Static Cluster (April 2009)
Vernon Brown Jr., Michael Jefferson Jr., and Chelsea Vick, Students
Abstract- The 2008 – 2009 Polar Grid team focused on the
permanent installation of a Condor-based test cluster.
Network topography, naming schemes, user management,
and compatibility concerns were the primary foci of the
implementation. The machines targeted were the SunFire
V480 management server and several SunBlade 150
workstations as workers all running Solaris 10 as the
primary operating system. The Condor High Throughput
Computing software was utilized as a scheduler for jobs
submitted to the server and then distributed to the workers.
I. INTRODUCTION
A
cluster can be described as a group of interconnected
systems working on a job. The 2008-2009 Polar Grid
Team goal was to establish a cluster on the campus of Elizabeth
City State University, to keep up with the massive amount of
data collected. This was initially done to eleven, gently used
Sun Microsystems from the University Computer Lab. By
adding this cluster, the University will have access to a
conveniently placed cluster that will assist in future educational
endeavors. It will be tailored to suit the needs of different
research teams. In the future, an additional nine computers will
be added to this cluster.
Index Terms— Cluster, Ubuntu, Condor, Cat 6e
V480 we used a closet in Lane Hall. The team was also given
the materials to assemble 6e cable. The planning stage was
crucial to the project because of time restraints. Therefore, it
was necessary to make sure systems were properly labeled to
avoid later mix-ups.
B. Hardware Issues
Once the PCs had been properly connected to the electrical
outlet and network connections, the video cards were removed
from the Sunsystems. This was done because the video card
was not compatible with Ubuntu. First, screwdrivers were used
to remove the cover from the CPU followed by the removal of
the card. Then the cover was replaced. Once this stage was
reached, documentation became essential. We recorded all the
steps needed in order to replicate our setup.
C. Naming Scheme
Every satellite was given a title based upon which IP
Address it was assigned. The Sun Systems IP Addresses were
numbered from 10.25.4.231-250, as pictured in Figure 1. The
PC that had the first IP Address, 10.24.5.231, was given the title
of “satellite 1” and so on. Since each user was given
administrative rights, the user account was named condoradmin
and a unique password was created,sun@122. The hostname
was chosen as “Antarctica” for the Sunfire V480. The IP
address was 10.40.20.37
II. ROOM SETUP
A. Topography
First, the cluster size had to be taken into account. There
were eleven SunBlade 150s, workers, and one SunFire V480,
the managaement server. Additional satellites will be added, so
the team allocated space for future expansions as well. Once
this observation was made, a space was allocated for where
members of the team would perform changes to the systems.
Also the area where the cluster would be placed was taken into
consideration. The cluster was to be placed in a classroom in
Dixon Hall. The room had to two power outlets and five
network connections. To optimize the server room, various
resources was researched for tips on how to keep the server
room secure and effective. For the main server, the sunfire
Fig. 1. Three Sun Microsystems labeled with IP Address and names of the
satellite.
2
caused by crosstalk and system interference when several wires
are transmitting at the same time.
E. Cooling
The team decided to use the cooling already built into the
Microsystem. No additional cooling devices were added. Such
devices are known as Computer room air conditionings or
CRAC units. CRAC units are used to eliminate downtime of the
server room in order for them run proficiently and efficiently.
They also are able to protect and extend their investment in
information technology systems. With CRAC units, in future
expansions upon the project, will be able to reduce capital and
operating costs that would, in return, benefit the University.
Fig. 2. Members of the team, Michael Jefferson Jr. and Chelsea Vick, assembled
Cat 6e networking cables.
D. Wiring
Using cat 6e cable for the installation, the Polar Grid team
developed a test cluster in Dixon Hall, as pictured in Figure 2.
Each of the cables had four sets of two wires. Each color set has
a transmitting and receiving wire. The team developed a
uniform color code. This was to help avoid accidental wiring
errors. It was implemented as follows: white orange, orange,
white green, blue, white blue, green, white brown, brown.
Testing was also vital to making sure it performed as desired.
Once arranging the wires, and placing the plastic attachment on
the ends, the plastic cover on the wires were crimped. The ends
of the cable were inserted into a Multimeter, to make sure the
current was flowing properly through the cable. To cut down on
accidental wiring we also organized the computers according to
their Internet Protocol address.
Category 6e cable, commonly referred to as Cat 6e, is a cable
standard for Gigabit Ethernet and other network protocols that
is backward compatible with the Category 5/5e and Category 3
cable standards. Members of the team used Cat 6e because of
the speed of this wire.
The cable standard provided
performance of up to 250 MHz and was suitable for
1000BASE-T (Gigabit Ethernet). It is expected to suit the
10GBASE-T (10Gigabit Ethernet) standard, although with
limitations on length if unshielded Cat 6e cable is used. The
printing on the side of the cable housing can easily identify
category 6e cable. The cable contains four twisted copper wire
pairs, just like earlier copper cable standards. Although Cat 6e
is sometimes made with 23 gauge wire, this was not a
requirement; the ANSI/TIA-568-B.2-1 specification stated the
cable may be made with 22 to 24 American Wire Gauge wire,
so long as the cable meets the specified testing standards. Cat 6
connectors are made to higher standards that help reduce noise
III. WORKSTATION SET UP
A. Install and Configuration
Ubuntu is a version of Linux that boasts an open sourcecoding standard that makes it both tailorable to the users
specific needs as well as free licensing. In this clustering
application of Ubuntu, four packages were installed, the first
being OpenSSH. SSh, standing for secure shell, allowed for
computers to be remotely accessed. In this cluster, it was
commonly used to add and update existing programs over a
secure encrypted link. The second package was GNU G++, a
compiler that is used to build object code directly from a C
programming language program source. The third package
was javacc. Javacc was installed to make the programs could
be multiplatform. It was imperative this package would be
installed since other students and faculty needed it for their
project. More importantly, it had the ability to work on
multiple platforms. The combination of these three packages
were needed for the server to communicate with remote
hosts, understand inputted programs and compile source code
from the C++ language. However, a number of preexisting
programs needed to be updated as well. The apt-get update
command was used to assist with searching for sources in
which
packages
can
be
downloaded.
B. Initial Condor Install
The installation process began with scrubbing the original
inaccessible operating system off of the SunBlade 150’s. We
achieved this feat by booting to a command prompt by
pressing Stop-A. After getting to the command prompt we
then used the “setenv boot-device CDROM dick net”
configuring each computer to boot from the Ubuntu cd-rom.
3
The installation process was text based and required little
used intervention other than the network configuration
settings, the package selection, and partition information.
Upon the completion of the installation, a password protected
user accounts and began the package installation. Wget was
used to download the condor software from the internet. Of
the packages installed open ssh if it wasn’t successfully
installed during the operating system installation followed by
g++, java cc, and lastly we updated everything. This
completed the operating system configuration. The most
widely used was the sudo command. This was a way to
execute commands as an administrator that the average end
user could not. Another example of this was nano command.
This was a text editor that allowed changes to the hostname
of the computer by editing the interfaces.
C.
Condor Installation Errors
Installing condor proved to be a daunting and later
impossible task on Ubuntu. There was an incompatibility issue
that ran down to machine language. This problem upon further
research was one that had been unsolvable so the team resorted
to the native operating system installed, Solaris 10. Solaris is a
GUI based operating system created by sun systems used to
maximize performance in all networking implementations. The
installation of Solaris was a simple procedure that involved
following several prompts. Once installed, the Solaris10 was
not showing up in the pool so the condor_startd process was
manually started. To solve this error, the user typed
condor_status and the system was added to the pool.This
platform has been proven to be fully operational with the
condor clustering application
D.
Final Condor Install and Testing
The final step of the cluster installation was to install condor.
Condor is a system that enabled computer intensive jobs to be
managed and submitted to an idle machine, computer without
keyboard activity. This allowed massive amounts of
computational information to be analyzed and computed using
the available resources of idle computers with user intervention.
This technology is called a cluster. A cluster is made up of
computers playing one or more of four basic roles; central
manager, execute machine, submit machine, and or checkpoint
server. The central manager collected information about the
computers and directed the negotiation between the submitting
computer and the executing computer, this role can only be held
by one computer. The execute computer role can be held by any
machine and is configured to execute jobs assigned to the
computer pool. The submit machine role can also be held by
any machine. It is used to forward jobs to the pool. Lastly, the
checkpoint server can be set up as any one machine, essentially
functioning as a backup.
IV. CONCLUSION
In summary, the team concluded that the permanent installation
of a Condor-based test cluster was a success. But, the
implementation must be done on the native Operating System,
Solaris. It was found that Ubuntu on a Sun Microsystem with
Condor is not compatible. This was evident when the source
code compiler produced the error message ”incompatible
platform.” This was because the Linux sparc processor was not
supported. Solaris, the Java based Graphical User Interface,
supported Sparc and X86/64 processors. Moreover, it was
compatible with Condor. The network topography was the
initial step in this project because space had to be allocated for
the members to work in. The naming scheme assisted with
proper setup and prevented unnecessary mix-ups.
Understanding the user’s needs was part of the user
management portion of the project. What proved to be most
exigent was the compatibility issues the team faced. This
involved the transitioning between the Ubuntu and Solaris
platforms.
VI. Future Work
In future work, the cluster will be significantly expanded once
proper configurations are made. Also the team will create a
cluster training guide that will aide others in the installation
process as well as problems that may be encountered.
Furthermore, additional cluster management applications will
be added. This will allow more flexibility for other research
teams in their projects. The Hub will be substituted for a Switch
in the near future as well. The Intranet web status will also be
enabled.
The team also plans on using a script to start Condor upon start
up. As it is now Condor has to be started manually.
REFERENCES
[1]
[2]
[3]
[4]
Parkinson, David. “Protect Equipment and reduce downtime by setting up
your server room the right way”. 25 January 2000. 7 April 2009.
<http://articles.techrepublic.com.com/5100-10878_111028938.html?tag=hdi>
Server Room Cooling Basics. 26 February 2007. 7 April 2009.
http://honolulu.hawaii.edu/legacylib/mlahcc.html#internet
SunBlade 150 User Manual. Santa Clara, Ca.: Sun Microsystems, Inc.:
June 2002.
BoilerGrid-Complete User Guide. West Lafayette, In.: Purdue University.:
2008.