1
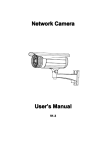
Webcam 1.3M Pixels USB 2.0 / 1.1
Manuel d’utilisation
Modèle : CB130
Webcam CB-130 1.3M Pixels
Attention
Ne branchez en aucun la webcam avant d’avoir finalisé l’installation du driver
I. Configuration minimale requise:
- Pentium III (Pentium IV conseillé)
- Un port USB 1.1 (USB 2.0 conseillé)
- Système : Windows 98se / 2000 / Me / XP
- Mémoire: 128 MB
- 12MB of free hard driver space
- Lecteur CD
- Modem ou carte réseau pour faire de la visiophonie
- Affichage : 640 x 480 VGA
II. Spécificités;
- Webcam 1.3 M Pixels
USB2.0 : 160x 120 / 30fps ~ 1280 x 1024 / 25 fps
USB1.1 : 160x120 / 30fps ~ 1280 x 1024 / 20 fps
- Socle en Zinc,
- Câble USB 2.0 1.5M
- Socle transformable en Pied à Clip (pour fixer sur un bureau ou un écran)
- Capteur optique : 1/4" CMOS
- Lentille : 4G1R
- F = 4.5mm / 2.4, Diagonal=53, de 20 cm à l’infini
- Angle de vision libre de 55° à 60°
- Balance automatique des blancs, du gain, de la saturation et de la
luminosité.
- Contrôle automatique d’indication de luminosité faible
- Logiciel permettant l’ajout d’effet et de retouche
III. Placement de la webcam
1. Installez le driver avant toute utilisation
2. Utilisable avec;
a. Ordinateur portable / Ecran LCD:
Pliez la queue métallique pour fixer la webcam
sur le haut du portable et ajustez la position de
l’objectif
b. Ordinateur fixe :
Pliez la queue métallique pour la mettre sur le
rebord de l’écran
Vous pouvez bien entendu laisser le
socle déplié et poser la webcam sur le bureau
IV. Installation du driver
Attention
- L’installation nécessite le redémarrage du système
- Fermez toutes les applications en cours d’utilisation avant
l’installation
- Vérifiez que le port USB utilisé est fonctionnelle avant de brancher la
webcam.
- Allumez l’ordinateur puis insérez le CD d’installation dans le lecteur
- Si l’installation ne démarre pas d’elle-même, lancez-là manuellement à partir
du lecteur CD
- Choisissez la langue d’installation
- Appuyez sur next jusqu’à la fin
- Cliquez sur Finish pour finaliser l’installation et redémarrer le système.
- Branchez la webcam
- Windows détecte automatiquement le nouveau périphérique et l’installe
V. Ajustement des paramètres.
- Appuyez sur ► Menu Démarrer ►Programme ► USB PC Camera ►
Amcap
- Video Filter – Cliquez sur Options ► Preview : l’écran affiche la vidéo
- Cliquez sur Options ► Video capture filter ► Proc Amp
Vous pouvez modifier les paramètres suivants:
Anti-crénélage : Selon la fréquence utilisée (50 ou 60 Hz)
Auto-exposition / Luminosité / Contraste / Saturation / Gamma / Précision /
Qualité / Paramètres par défaut / Utilisation en intérieur ou extérieur
Sortie Vidéo : Renversement vertical ou latéral
- Clicquez sur "OK" pour revenir à la vidéo
- Réglage du nombre d’images par secondes:
Cliquez sur Options ► Video Capture Pin, Frame Rate Sets 30 fps
Cliquez sur Used Frame Rate
Cliquez sur Options ► Show Frame Rate, le nombre d’image par secondes
s’affiche à l’écran
VI. Capture d’écran (photo);
- Après avoir pointé la webcam dans la direction souhaitée, cliquez sur le
bouton de côté pour faire une capture d’image.
- Vous pouvez aussi cliquez sur poste de travail pour utiliser l’utilitaire de
windows.
V. Enregistrement vidéo en direct
- Capture vidéo : entrée le nom du fichier, choisissez une extension <. avi>,
cliquez sur Open puis sur Ok.
- Cliquez sur capture. Ne vous souciez pas de la fonction ”Master Stream”.
- Cliquez sur ”Set Time Limit” pour entrer le temps d’enregistrement
- Après le paramétrage, cliquez sur ”Use Time Limit”, cliquez sur Ok, vous
pouvez enregistrez la video.
- Cliquez sur ”Capture”, pointez la webcam dans la direction voulue
- Cliquez sur ”Start Capture” pour commencer l’enregistrement.
- Le minuteur et la taille de fichier commencent à défiler, l’enregistrement
s’arrête quand le temps s’est écoulé.
- Cliquez à nouveau ou appuyez sur « ESC » pour arrêter l’enregistrement
- Ouvrez le fichier pour vérifier le résultat.
1.3Mega Pixels USB2.0/1.1 High Speed
Digital Web Camera User Manual
Model : CB130
CB-130 PC Cam1.3Mega Pixel User Manual
CAUTION!!!
DO NOT PLUG IN THE USB CONNECTER
BEFORE INSTALLED DRIVER!!!!
I. Basic Computer inquire:
- A Computer System Equipped with Pentium III 900 / AMD K6 or above
- One available USB2.0 or USB1.1 port
- Operating System: Windows 98se / 2000 / Me / XP
- DRAM: 128 MB or above
- 12MB of free hard driver space
- CD ROM Driver
- Sound Card, Speaker, and microphone are required for Video and Audio
Recording
- A modem or LAN Card is required for applications of Video conference and
Video Mail
- Display Resolution: 640 x 480 VGA
II. PC Camera Feature;
- CB-130 1.3Mega Pixel Web Cam
USB2.0 : 160x 120 / 30fps ~ 1280 x 1024 / 25 fps
USB1.1 : 160x120 / 30fps ~ 1280 x 1024 / 20fps
- Zinc Compound metal tail,
- 1.5M USB2.0 cable
- Microphone build in optional
- Transformable to clamp on any size of Notebook, LCD Monitor
or Desktop
- Image Sensor: 1/4" CMOS Sensor
- Camera Lens: 4G1R High quality Lens
- F = 4.5mm / 2.4, Diagonal=53, distance from 20cm ~ inf
- With 55~60 degree wild view angle
- Auto white balance / Gain / Saturation / brightness control
- Auto brighter low light control
- Multi-picture effect application software included.
III. How to Use the CB-130 Web Cam
1. Install the CDROM driver before insert the USB cable
2. Transformable for;
a. Notebook model:
Bend down the Metal Tail to Clamp on
top of Notebook Panel, adjust Head
aiming angle to the Object.
b. LCD Monitor model:
Bend down the Metal tail and pull
down the Join part to fit your LCD
Monitor thickness, Clamp on top
of LCD Monitor, adjust head
Aiming angle to the object
c. Desktop model:
Bend back all Metal tail and join
part to place on the front edge of
CRT monitor or bend join part out
and lift top part up to place on any
desktop model.
IV. Install Driver
Caution!!!!
- Because Installation require restart windows system
- Close all the application windows before install the Driver
- Make sure USB port is functional before plug in the PC Camera
- Turn on the Computer Power first, Insert CD into CD ROM Driver
- left click it to install the camera driver
- Select your country language to install
- Click " Next " all the way to the end
- Click " Finish " to complete the driver install and restart windows system
- Plug in the PC Camera into Computer USB port
- Windows will auto detect new USB device and configure the device
automatically
V. Adjusting Picture parameter.
- Click ► Start ►Program ► USB PC Camera ► Amcap
- Video Filter - Click Options ► Preview : Screen shall display image on the
Window
- Click Options ► Video capture filter ► Proc Amp
You can adjust the following values:
Anti Flickering: According to your power frequency 50 or 60Hz
Auto Exposure / Brightness / Contrast / Saturation / Gamma /
Sharpening / Quality / Restore Default / Indoor or outdoor
Video Output: Mirror function / Vertical flip
- After configure all the values, click "Apply" to see if accept
- Click "OK" back to video picture.
- Set Frame Rate:
Click Options ► Video Capture Pin, Frame Rate Sets 30 fps
Click Used Frame Rate
Click Options ► Show Frame Rate, Frame Rate will display on the down left
screen FPS digit.
VI. Capture one frame & Snap shot;
- After aiming your target, push snap shot button on the bottom side of PC
Cam, will capture one single frame
- Or click My Computer icon, click take one picture function icon will capture
one single frame picture on screen
V. Recording & Capture the picture;
Live Recording:
- Video Capture : input file name, Select file name <. avi>, click “Open” and
click OK
- Click “Capture”, if select ”Capture Audio”, will capture the
picture with voice. Ignore ”Master Stream” function.
- Click ”Set Time Limit” is to set the record time
- After Setting, Click ”Use Time Limit”, click ”OK “, you may start to record the
video.
- Click ”Capture”, aiming the Camera to the target
- Click ”Start Capture” will start recording.
- Timer and file size start to count, will stop until times out,
- Click again or press "ESC" key to stop, recording, record completed
- Click the recording path and file names to review the result